

Page 1
Ajay16 Motorola Z3 Disassembly Guide v1.0
Page: 1
MOTOROLA Z3 DISASSEMBLY GUIDE
This guide will help you replace housing parts and get to the inner
parts of your phone. I am in no way responsible for any damage
occurred to your phone. If you follow my instructions in this guide you
should be ok. But you need a lot of time and patience when
disassembling your phone.
YOU MUST READ EVERYTHING CAREFULLY!
!ONLY BUY HOUSINGS FROM CNN.CN, AS THEY ARE OEM!
Use the steps below for specific parts replacing, use the whole guide
for full housing replacement.
Contents:
Steps 1~5,61~63 Facia Replacement.
Steps 1~14,19~32,43~49 Screen Replacement.
Steps 1~14,16~18,50~52 Aerial /Lower Front Housing Replacement.
Steps 1~11,57~60,65~67 Main Keypad Replacement.
Steps 62 ~ 64 Lens Replacement.
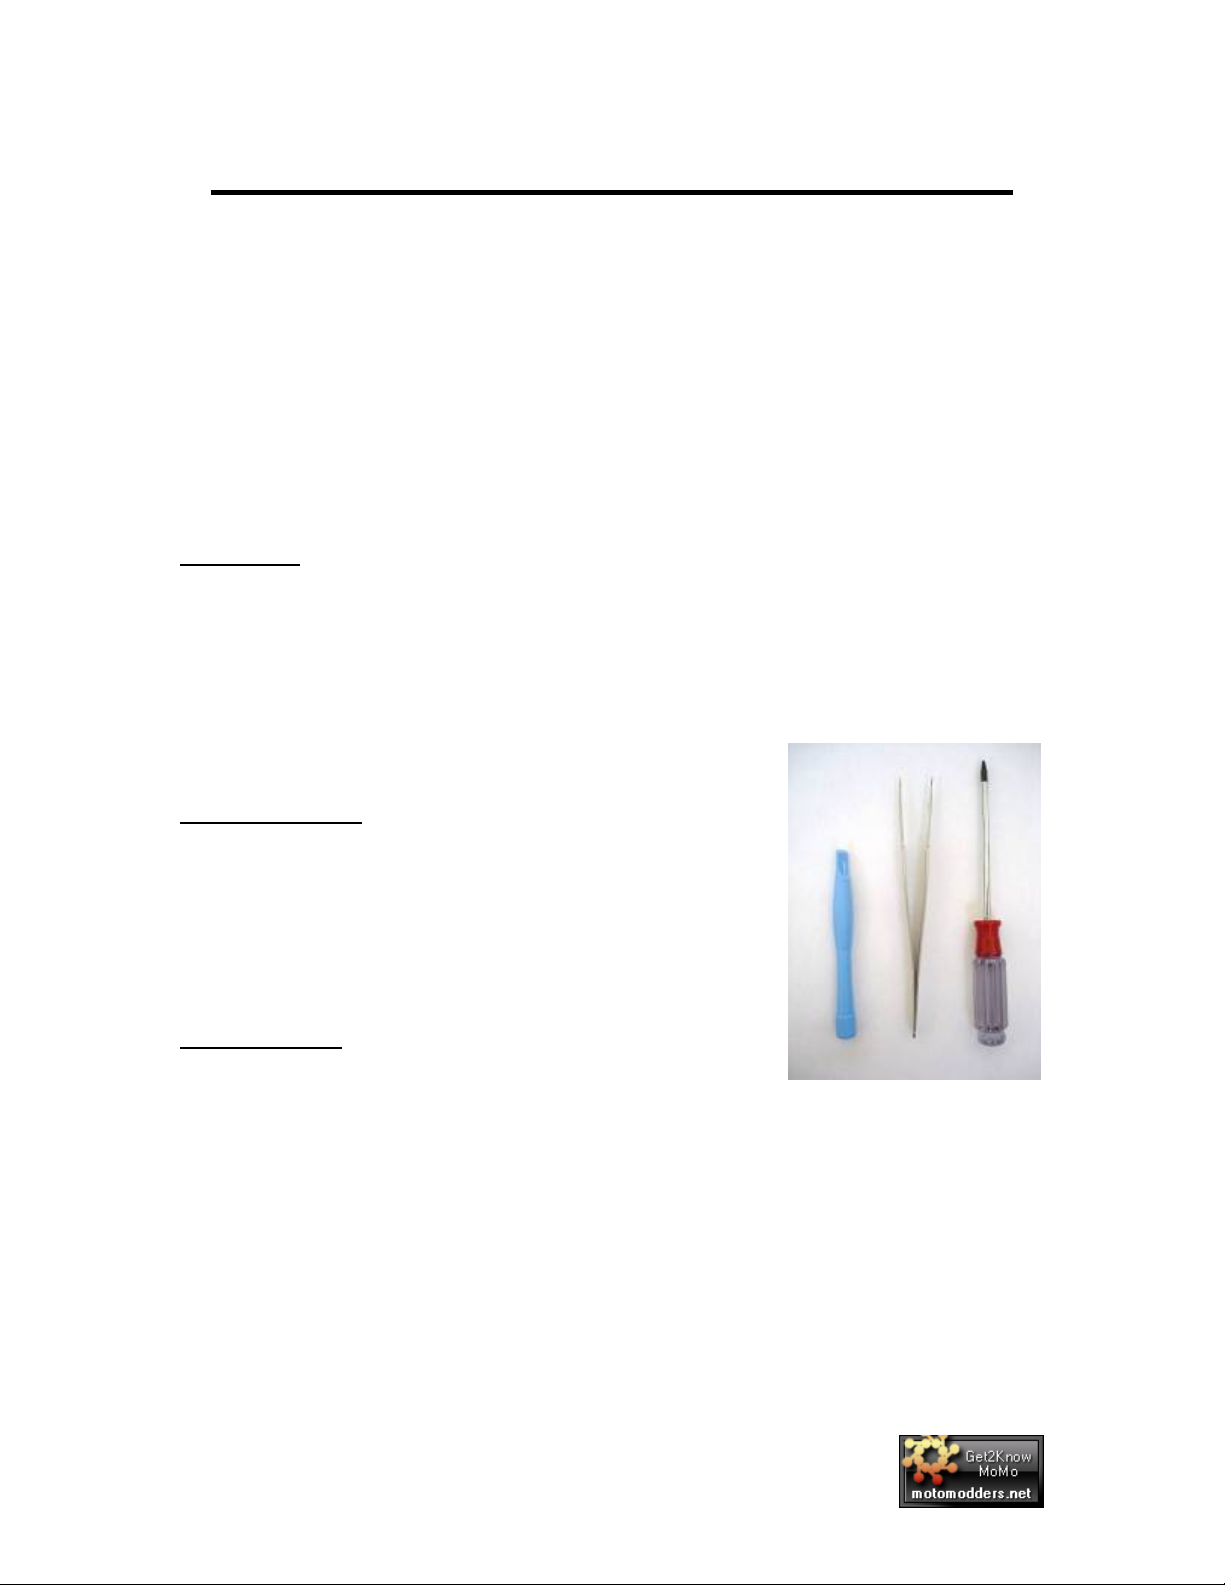
Tools Needed:
Screwdrivers ~ T4
Precision Tweezers
Mobile Phone Opening Tool
Brand new Glasses Cloth
Double Sided Tape
Screw Sizes:
Rear Screws ~ T4 x 6
LCD Rear Screws ~ T4 x 2
LCD Internal Screw ~ T4 x2
BEFORE YOU DO ANYTHING MAKE SURE YOU HAVE ALL OF
THE TOOLS NEEDED.
You can buy these from eBay or any other mobile phone website.
Take your time and don’t rush! Move away any drinks or liquid, and
have good light.
Compiled Exclusively for MotoModders.net
Page 2
Ajay16 Motorola Z3 Disassembly Guide v1.0
Page: 2
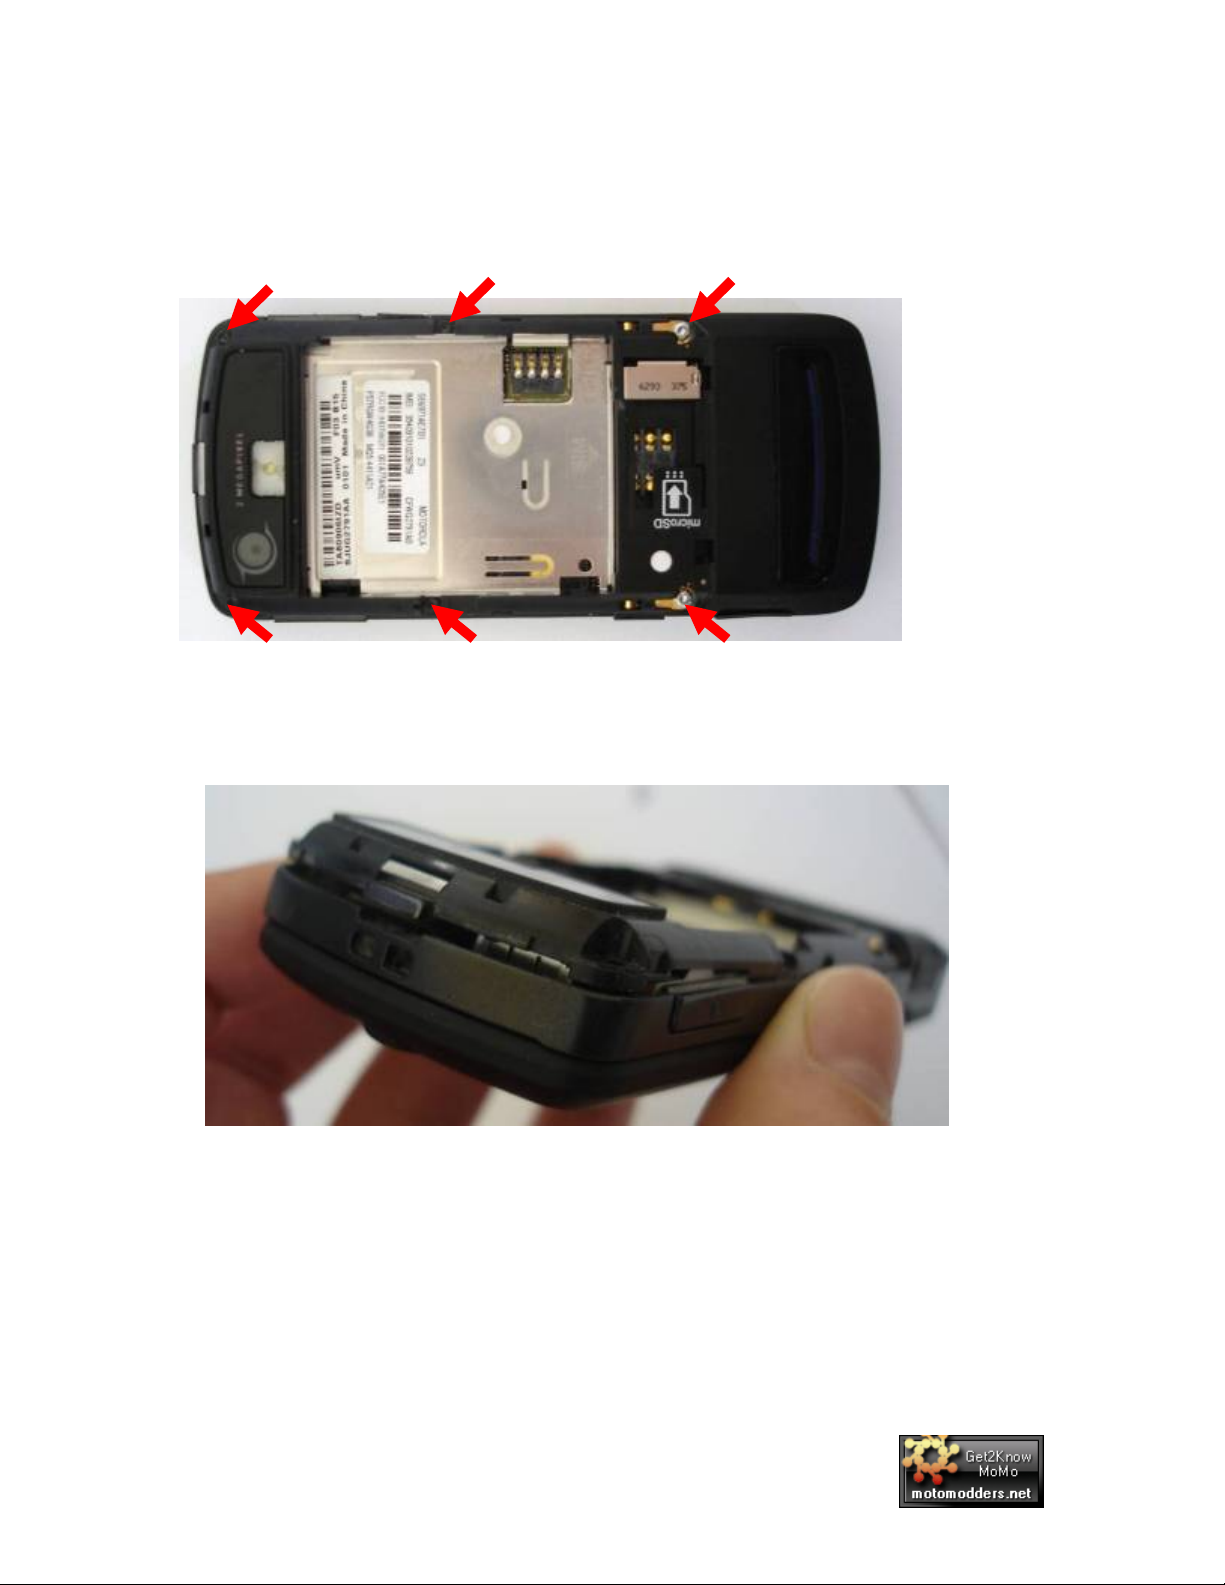
1. Turn off your Z3, remove the back cover memory card and your
SIM card.
2. Unscrew all 6 screws using the T4 screwdriver.
3. Once you have done this you will see the housing has lifted
slightly at the top, push the sides in using the mobile phone
opening tool, the clips should pop out easily.
Compiled Exclusively for MotoModders.net
Page 3
Ajay16 Motorola Z3 Disassembly Guide v1.0
Page: 3
4. Work your way down the edges with the phone opening tool until
you get to the bottom aerial housing. Push the phone opening tool
between the small gap you have, push quite hard to release the
clip, then work your way around the bottom aerial housing to
release all 4 clips in the same way.
5. ow lift off the rear housing, your phone should now look like this.
N
Compiled Exclusively for MotoModders.net
Page 4
Ajay16 Motorola Z3 Disassembly Guide v1.0
Page: 4
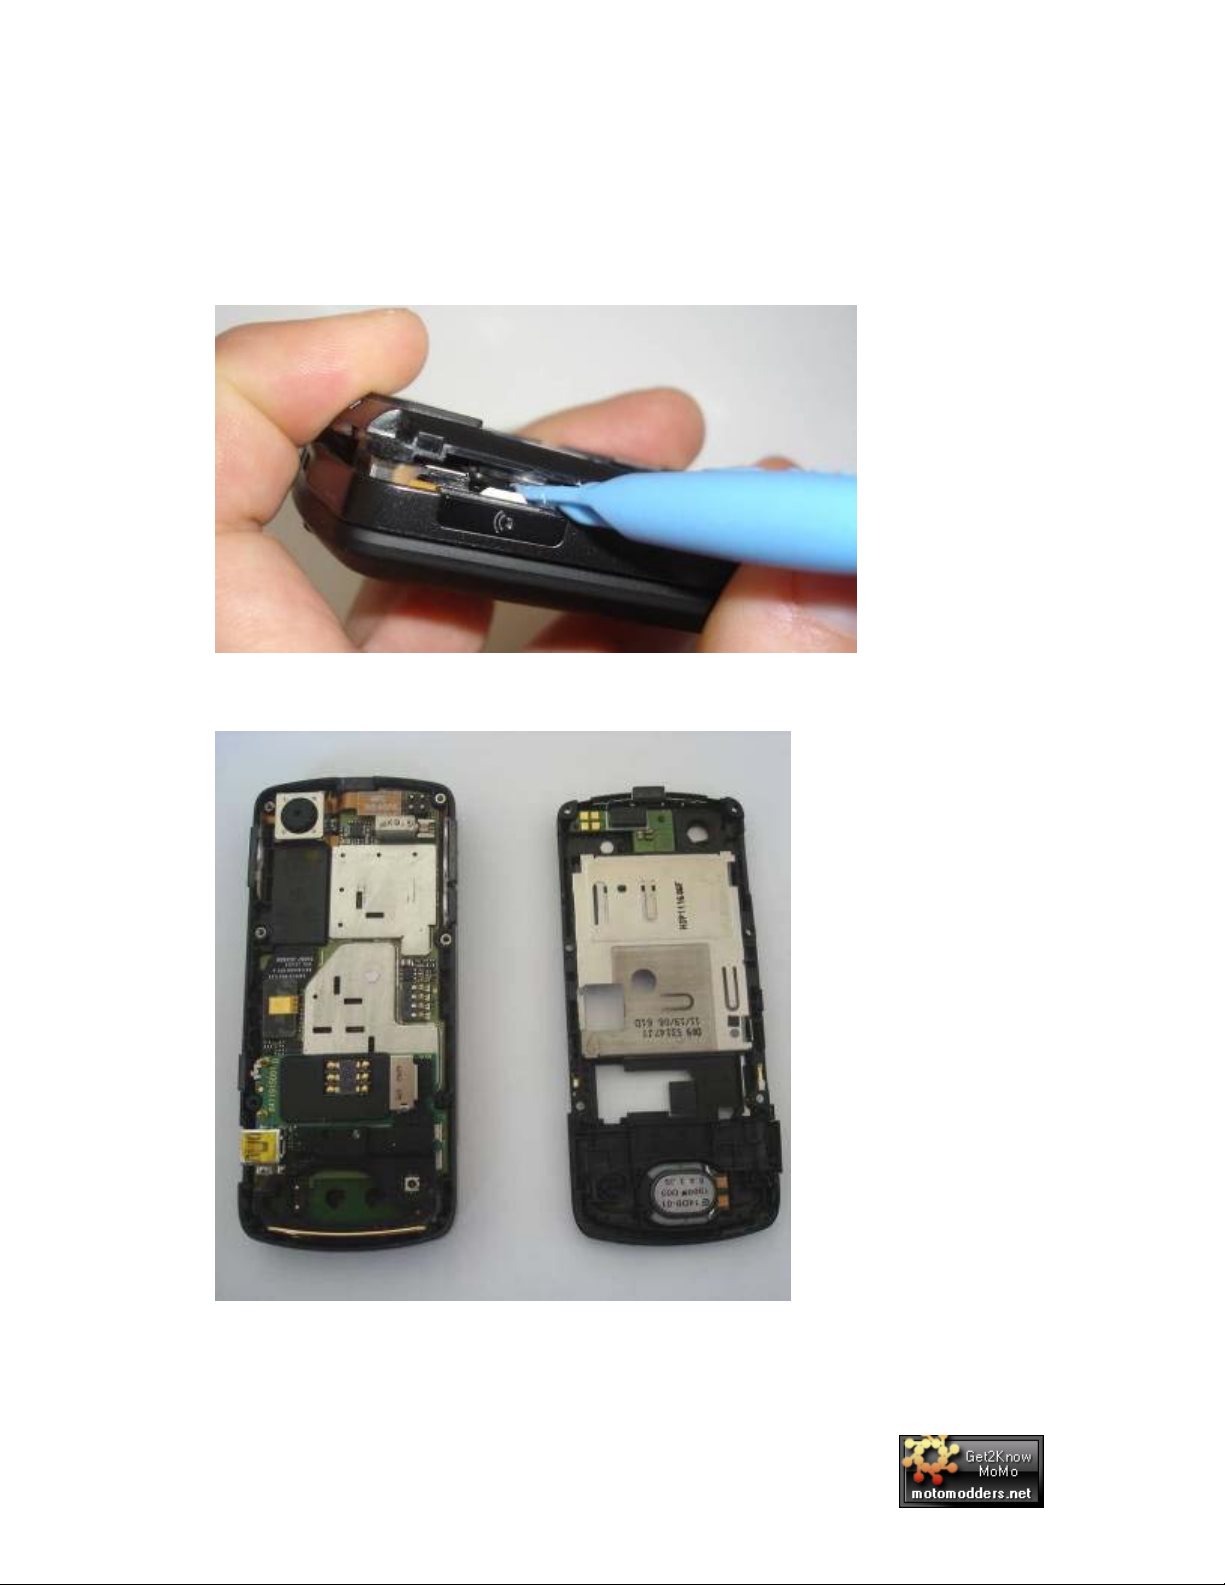
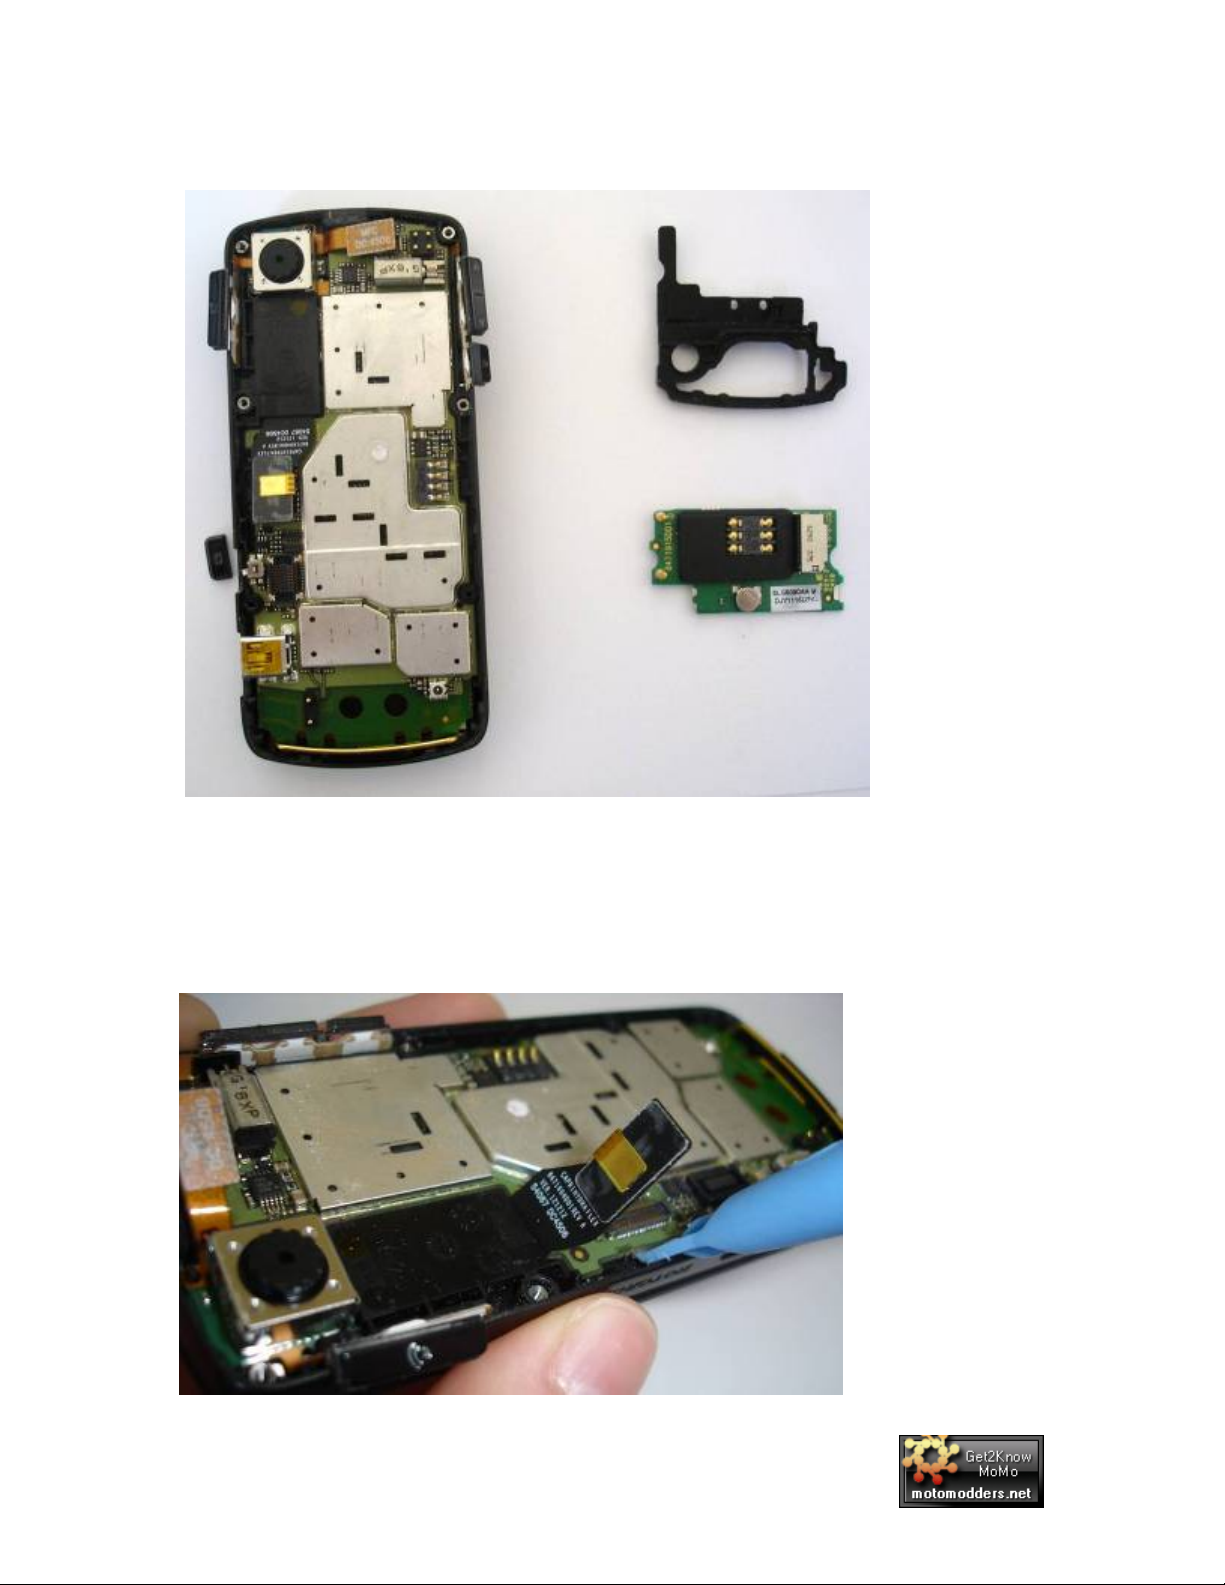
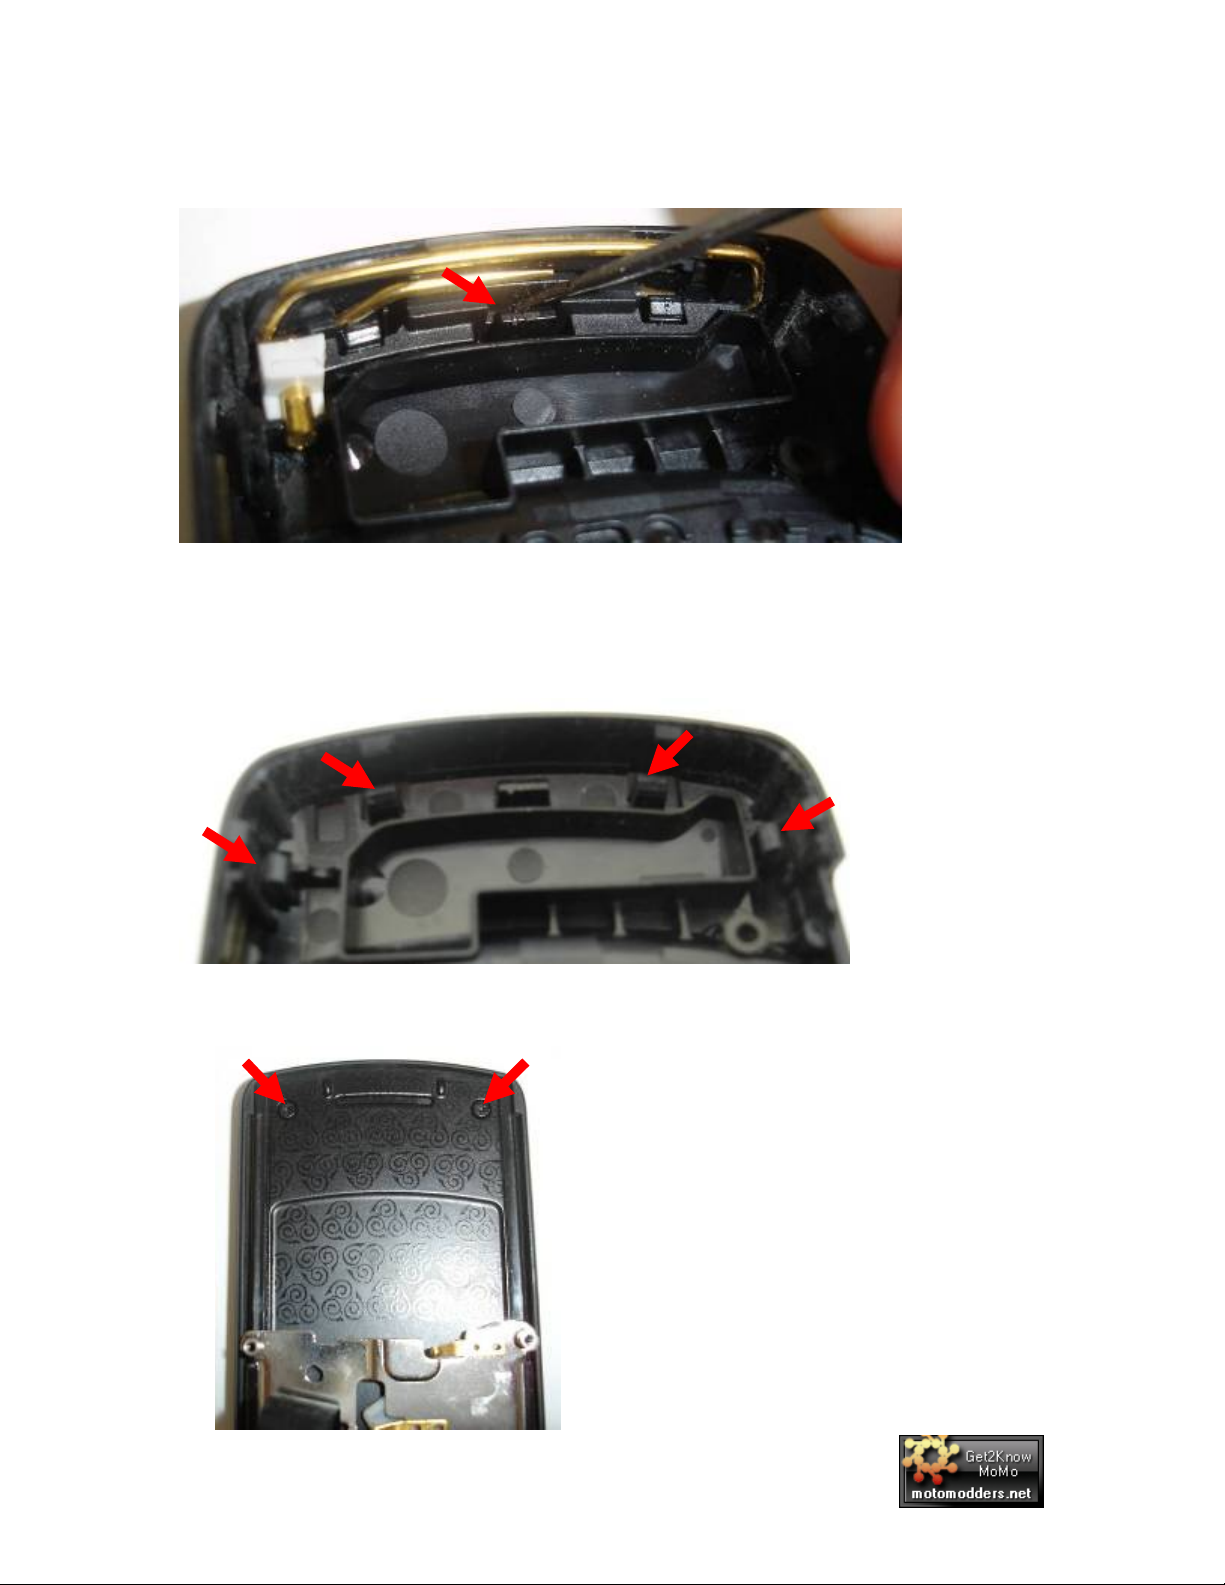
. Remove the rubber loudspeaker housing, this simply lifts up.
6
7.
Now place the opening tool under the corner of the SIM card PCB
and lift gently until you hear it unclip.
Now unclip the 2 ribbons, the top camera ribbon and the LCD
8.
ribbon, and carefully lift the buttons from the housing, they don’t
completely come out so just leave them hanging over the edge.
Compiled Exclusively for MotoModders.net
Page 5
Ajay16 Motorola Z3 Disassembly Guide v1.0
Page: 5
. Your phone should now look like this.
9
10. Lift the PCB board up from next to the LCD ribbon cable, by
inserting the opening tool between the PCB and the housing. Lift
slowly until you can lift it with your fingers. Carefully pull
it toward
you slightly to unhook it from the other side.
Compiled Exclusively for MotoModders.net
Page 6
Ajay16 Motorola Z3 Disassembly Guide v1.0
Page: 6
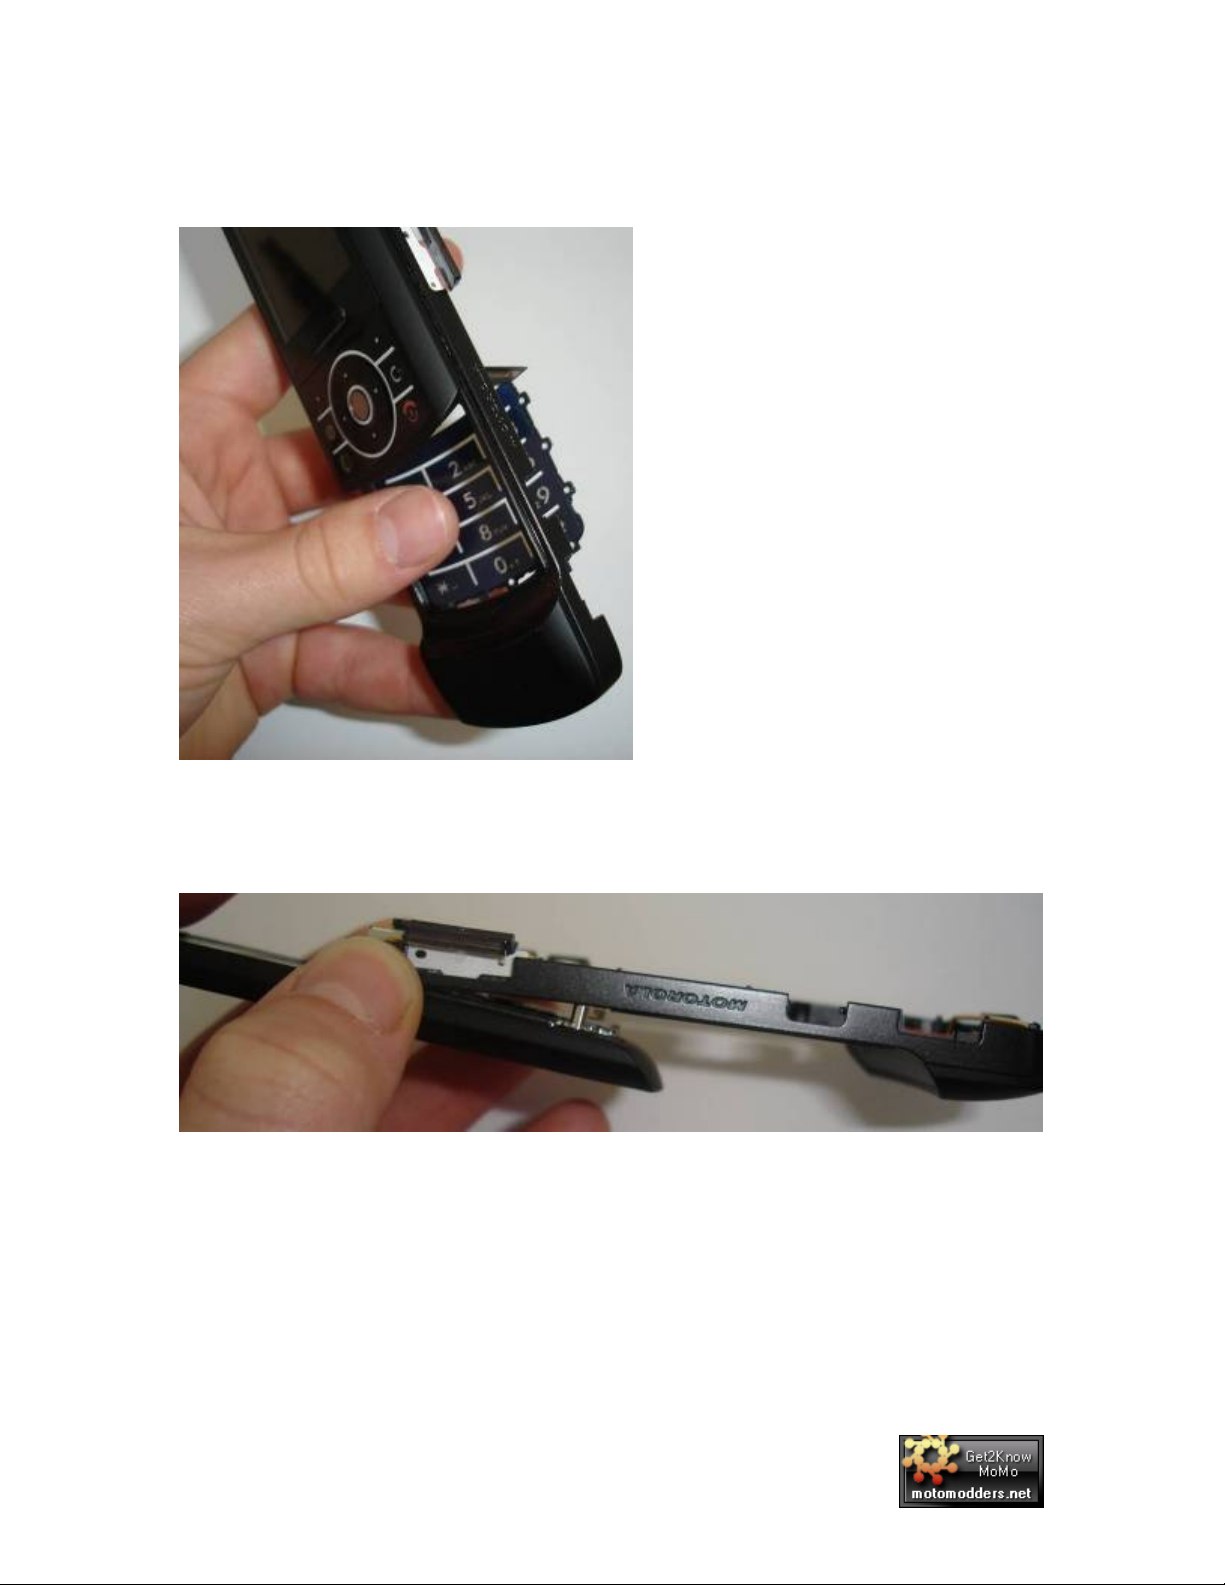
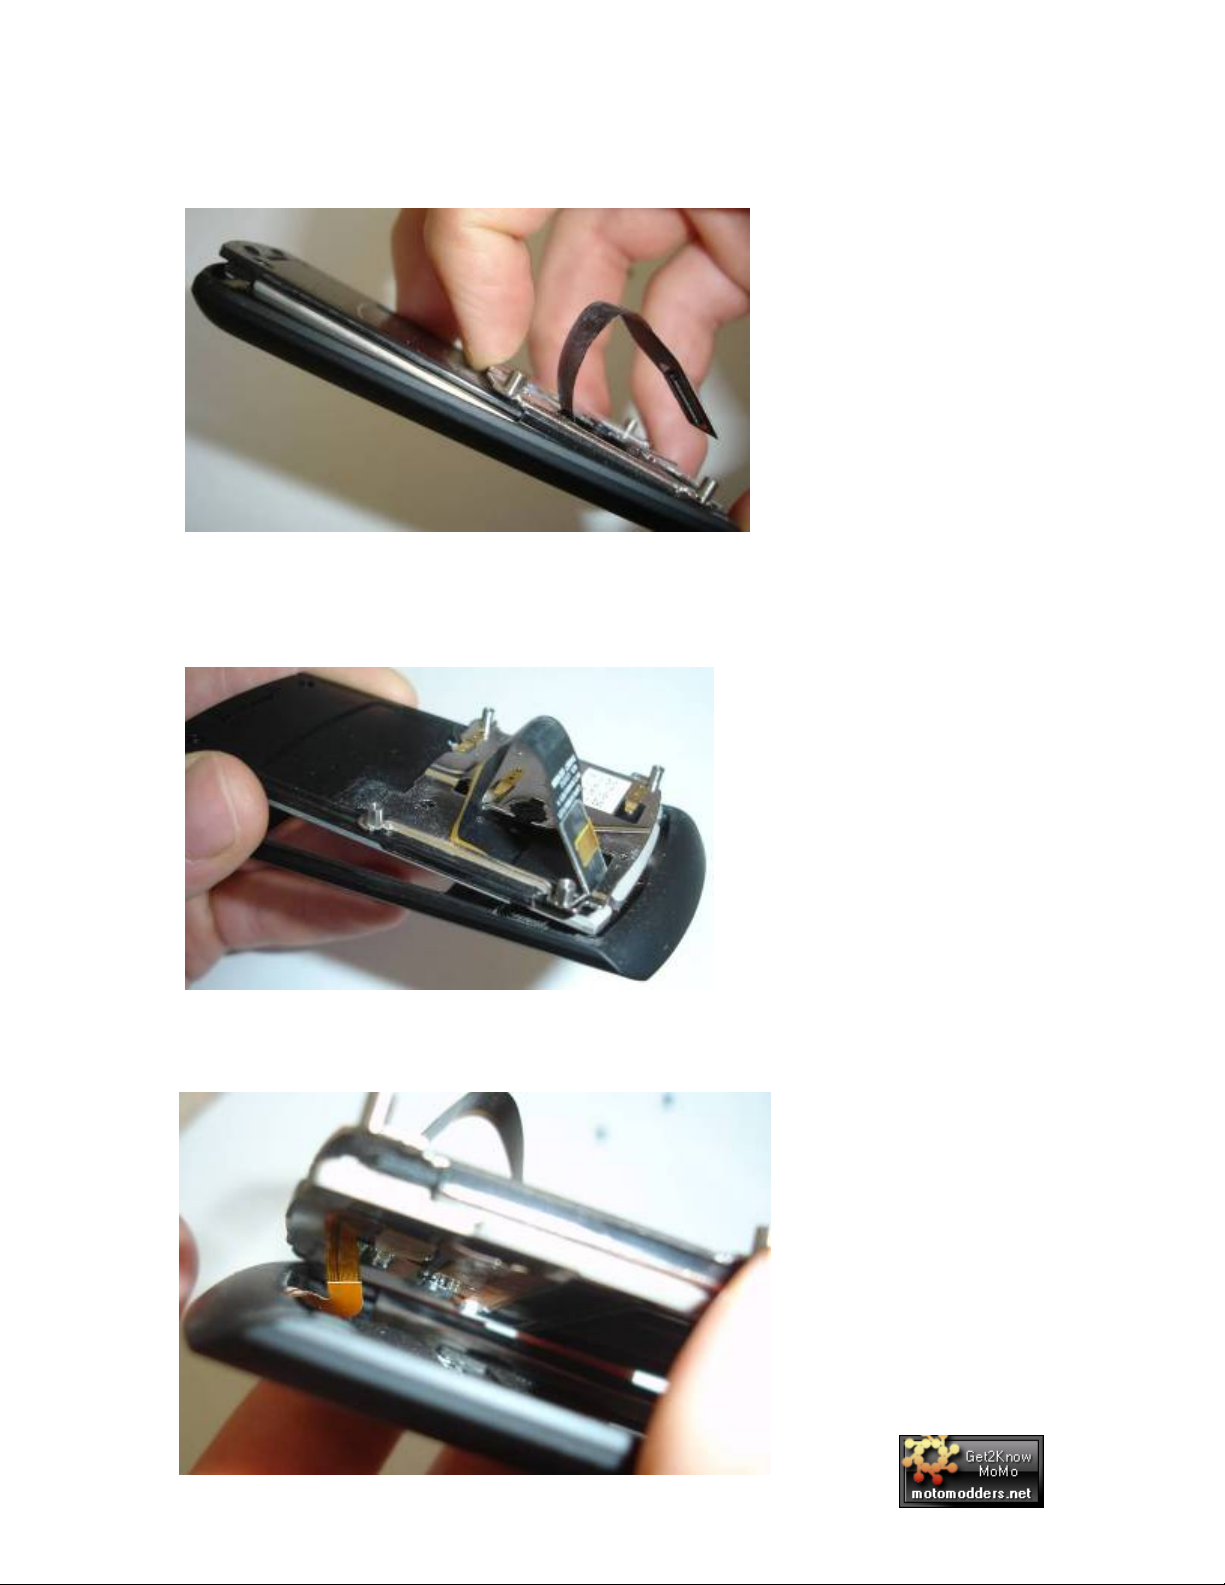
11. Slide the phone open and push the main keypad out from the
opposite side.
12. Turn the phone back over and
housing while holding the top LCD
push up gently on the lower
h
ousing so it partly unclips.
Compiled Exclusively for MotoModders.net
Page 7
Ajay16 Motorola Z3 Disassembly Guide v1.0
Page: 7
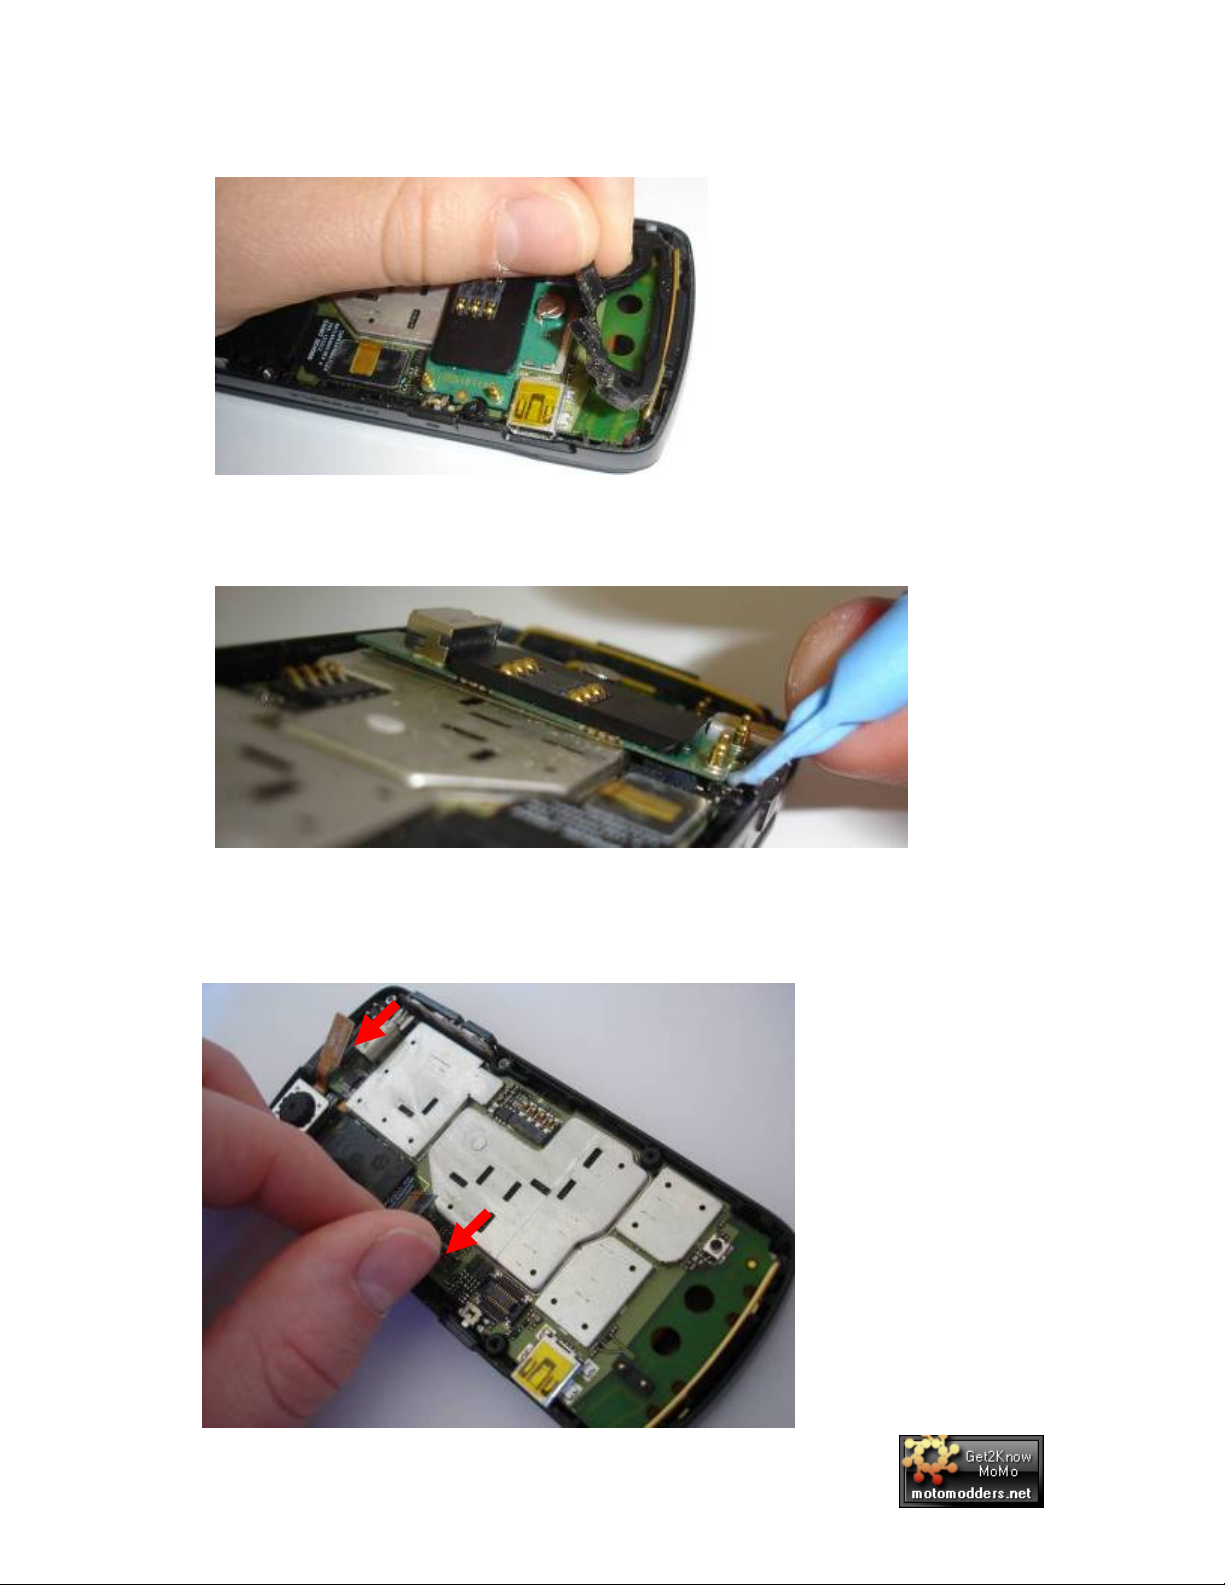
3. Now put one finger in the middle holding the silver plate and lift up
1
the top right hand corner with your nail so it unclips. You have to
use a bit of force to do this. Now unclip the other corner. Carefully
14. Slowly lift and unhook the ribbon from the middle housing.
Compiled Exclusively for MotoModders.net
Page 8
Ajay16 Motorola Z3 Disassembly Guide v1.0
Page: 8
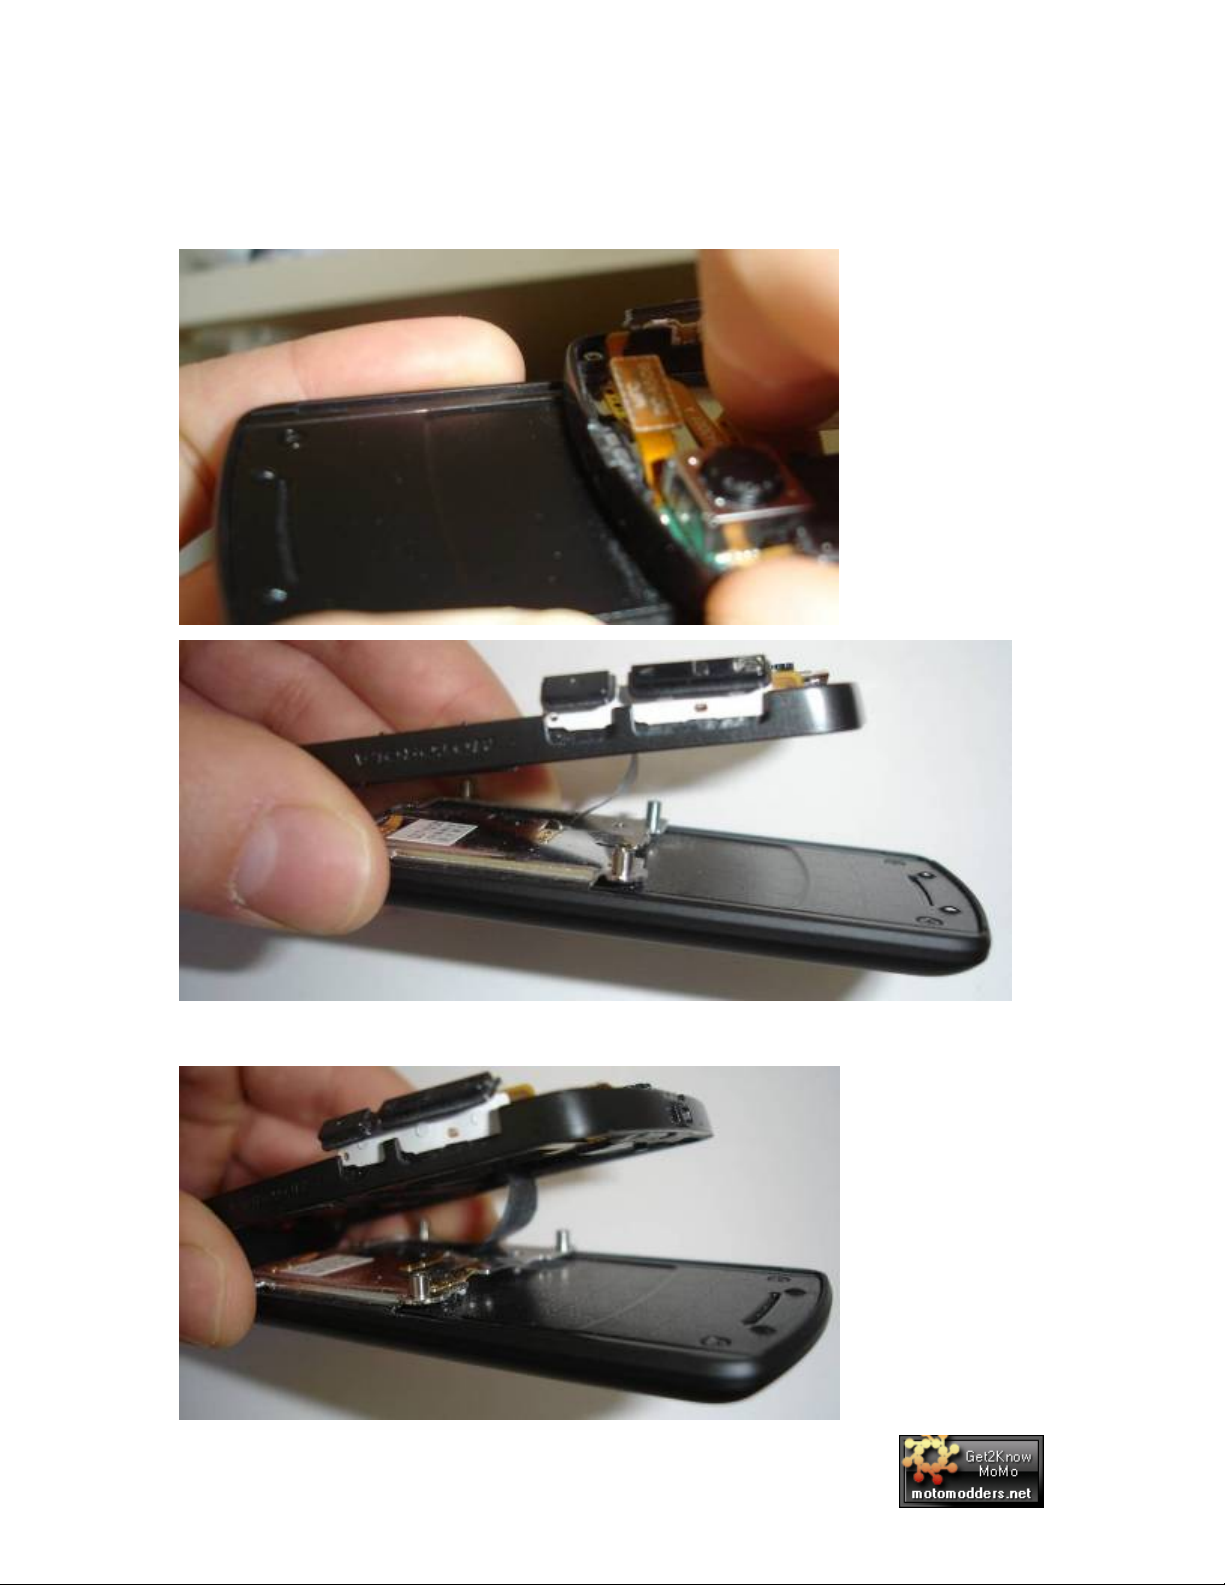
Your phone should now look like this.
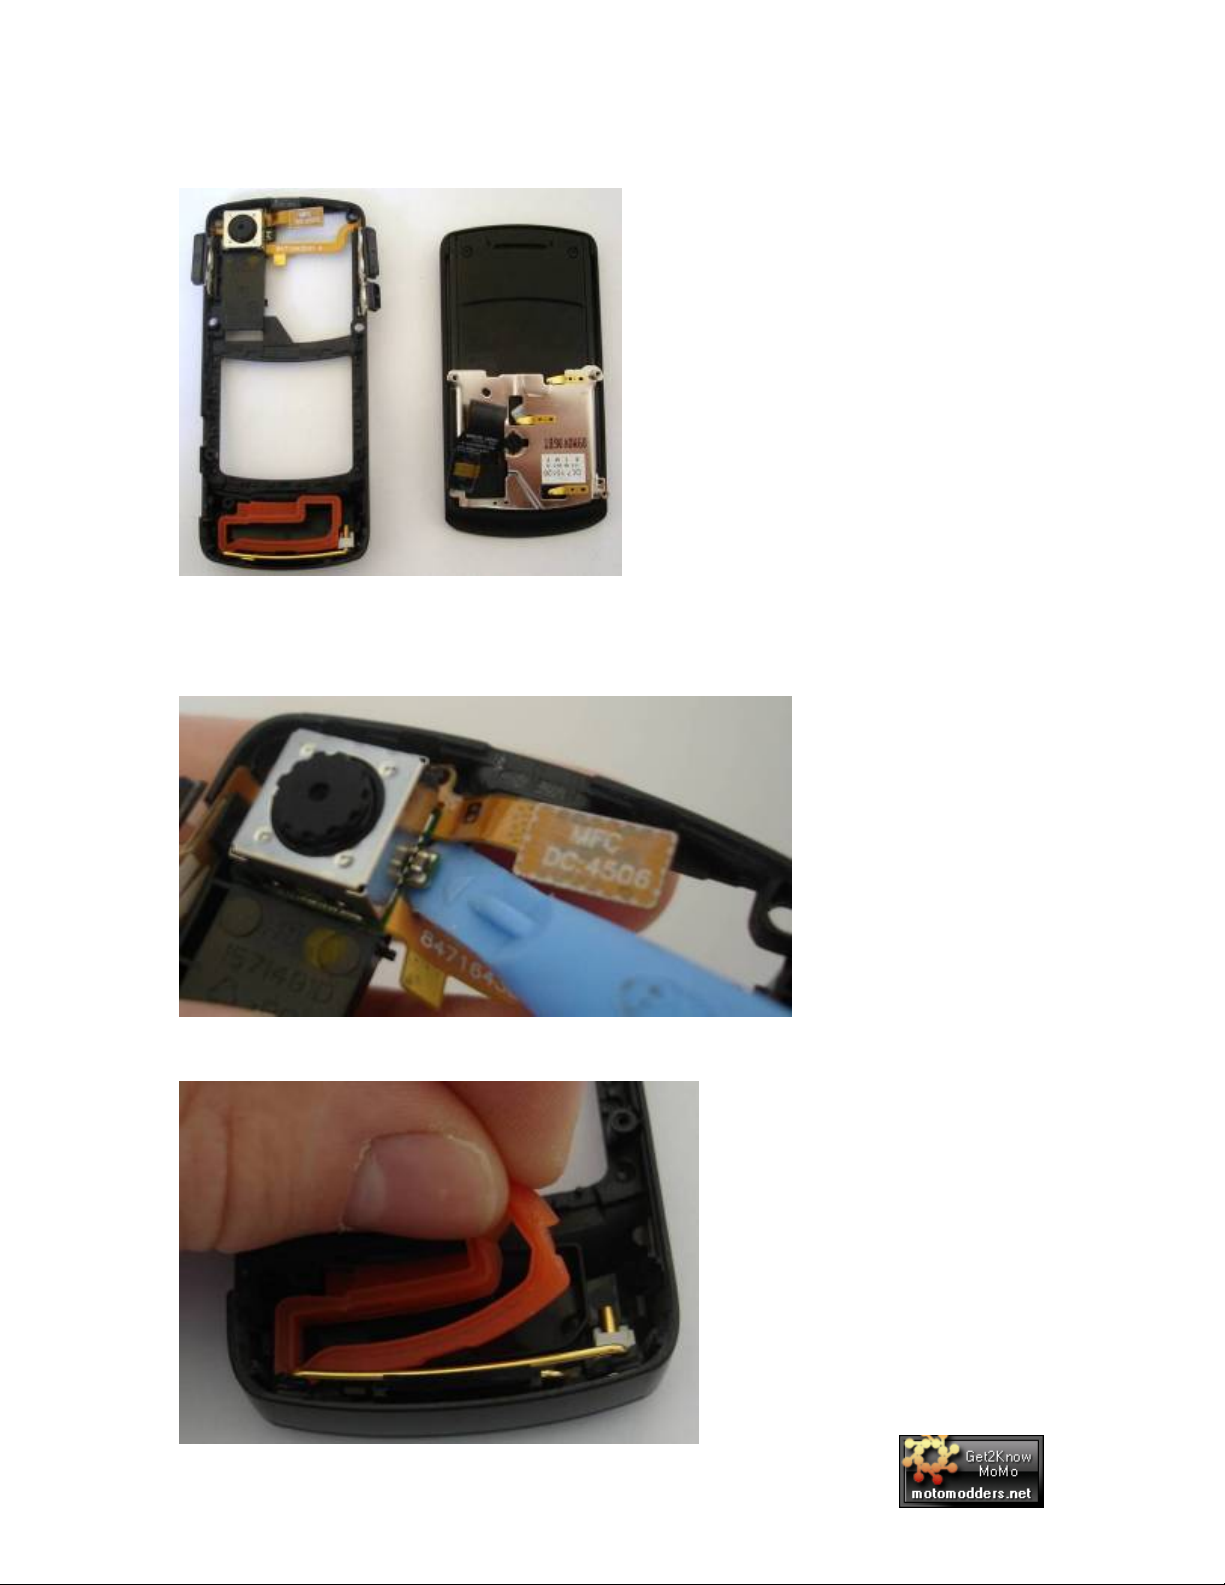
15. Next is to remove the the ca
under the small resistor to the right
mera unit, push the opening tool
of the camera, do this gently
then lift the camera unit out.
Now lift out the orange anten
16. na cover.
Compiled Exclusively for MotoModders.net
Page 9
Ajay16 Motorola Z3 Disassembly Guide v1.0
Page: 9
17. Now lift the antenna out by placing the tw
eezers behind the middle
clip and the gently hinge it up.
18. Unclip the 4 lower housing clips by pushing them with the
tweezers to release them from their catches. It will then simply pull
out of the lower housing.
1
9. Get the top LCD housing and unscrew the two T4 screw at the
top.
Compiled Exclusively for MotoModders.net
Page 10
Ajay16 Motorola Z3 Disassembly Guide v1.0
Page: 10
20. Gently lift the metal sliding plate at the top to create a gap at the
top o
f the housing were you just unscrewed the T4 screws.
Now lightly pull on the rear of t
21. he LCD housing so it lifts clear of
the bottom. But not fully clear as there is a ribbon that needs
unclipping.
2
2. Turn the housing on its side so you can see the ribbon, place the
tweezers in between the gap and lift the corner of the ribbon.
Compiled Exclusively for MotoModders.net
Page 11

Ajay16 Motorola Z3 Disassembly Guide v1.0
Page: 11
2 3. Your phone should now look like this.
24. Unscrew the 2 T4 screws at the bottom of the LCD.
5. Lift the LCD out of the housing from the top left with the tweezers.
2
Compiled Exclusively for MotoModders.net
Page 12

Ajay16 Motorola Z3 Disassembly Guide v1.0
Page: 12
6. Lift the LCD vertical so you can see the ribbon behind it, unclip
2
this unit while holding the left hand corner of the ribbon so it
doesn’t lift up. Place your finger in the left hand corner and then
place your nail under the ribbon clip and unclip it.
2
7. Rest the LCD horizontal and notice the small black round piece of
plastic to the right of the housing. This is the part for the slide
mechanism push this with the tweezers across so it unclips.
Compiled Exclusively for MotoModders.net
Page 13

Ajay16 Motorola Z3 Disassembly Guide v1.0
Page: 13
28. Turn the housing over and place
arm and lift it out of the cut through.
29. Now carefully pull the metal sli
housing, not catching the
der away from the back of the
ribbon as you do this.
the tweezers between the black
Compiled Exclusively for MotoModders.net
Page 14

Ajay16 Motorola Z3 Disassembly Guide v1.0
Page: 14
30. g it away from the housing.
Unstick the ribbon by carefully liftin
3
1. Turn the phone over and gently pull the LCD so the bottom ribbon
that is attached lifts up.
Compiled Exclusively for MotoModders.net
Page 15

Ajay16 Motorola Z3 Disassembly Guide v1.0
Page: 15
32. Keep lifting so that the slider ribbon comes through the cut out,
keep lifting and the earpiece will come out
too.
Your phone should now look like this
33. Get the outer LCD housing and turn it
over, locate the small metal
fold over parts of the outer keypad.
Compiled Exclusively for MotoModders.net
Page 16

Ajay16 Motorola Z3 Disassembly Guide v1.0
Page: 16
4. Bend up the two arms that cover the top 2 keypad holders, then
3
push the metal keypad holders down s
o the keypad falls out.
35. Place the opening tool under the glass LCD lens
and lift slightly,
do this both sides.
Compiled Exclusively for MotoModders.net
Page 17

Ajay16 Motorola Z3 Disassembly Guide v1.0
Page: 17
36. Turn the phone over and push the opening tool under the glass
and between the housing were it is
stuck, now run the tool all the
way along, do this all round the inside.
7. The top should pop out quite easily, once the top has come out
3
push the bottom gently in one corner until it starts lifting free then
lift gently all the way
along.
Compiled Exclusively for MotoModders.net
Page 18

Ajay16 Motorola Z3 Disassembly Guide v1.0
Page: 18
8. To lift the top keypad membrane out place the tweezers under the
3
bottom right hand corner and lift it out, gently unhook the ribbon
through the hole at the bottom. (I wouldn’t recommend trying to
salvage this part if you are changing housing as its very difficult to
get out in one piece, I would just buy a new one).
39. Lift out the earpiece mesh and transf
lift out the Motorola logo that
tweezers under and lift up
covers the earpiece, place the
, transfer this to the new housing too.
er it to the new housing, also
Compiled Exclusively for MotoModders.net
Page 19

Ajay16 Motorola Z3 Disassembly Guide v1.0
Page: 19
40. Get the top keypad housing and push
in the bottom of the keypad
first then push through the 2 side lugs.
T
41. urn the phone over and bend the lugs back down, and bend
down the arms at the top.
42. Get the black rear LCD housing and place the slider ribbon
through the gap.
Compiled Exclusively for MotoModders.net
Page 20

Ajay16 Motorola Z3 Disassembly Guide v1.0
Page: 20
3. Lay the earpiece into the top cut out, and then locate the bottom of
4
the LCD in the housing.
44. Now clip the ribbon back into place.
Your phone should now look like this.
Compiled Exclusively for MotoModders.net
Page 21

Ajay16 Motorola Z3 Disassembly Guide v1.0
Page: 21
45. Turn the phone over and locate the slider mechanism into place,
push the ribbon through BUT OWN,
slowly push the sli
der mechanism over the ribbon allowing the
ribbon to feed itself backward
DON’T STICK IT BACK D
and stick itself back down.
Compiled Exclusively for MotoModders.net
Page 22

Ajay16 Motorola Z3 Disassembly Guide v1.0
Page: 22
46. Push the black slider arm back into the circle with your finger,
making sure it locates back into the top left of the cut out, then
push the slider mechanism up to the top to make sure it is work
ok.
47. Turn the LCD housing over and screw
in the two T4 screws at the
bottom.
ing
Compiled Exclusively for MotoModders.net
Page 23

Ajay16 Motorola Z3 Disassembly Guide v1.0
Page: 23
8. Get the front LCD housing and place the Back LCD housing next
4
to it, place your finger between the two and attach the ribbon from
the front housing to the back.
49. Pull the rear housing back slightly to locate it into the front
housing, then push it into the bottom. Make sure the LC
getting trapped between the two parts.
Then screw the 2 T4 screw
D isn’t
back in.
5 ower bottom antenna cover,
0. Get the new middle housing and the l
hook both left and right clips
into place, then push down
Compiled Exclusively for MotoModders.net
Page 24

Ajay16 Motorola Z3 Disassembly Guide v1.0
Page: 24
51. Install the antenna by putting it in
to place and pushing down so it
clips in.
52. it
Replace the orange rubber aerial housing, and put the camera un
back into place.
53. Place the buttons back into place, the button pad goes one side
and the buttons slide into the side of the housing.
Compiled Exclusively for MotoModders.net
Page 25

Ajay16 Motorola Z3 Disassembly Guide v1.0
Page: 25
54. ut the ribbon back through the middle housing.
P
55. Locate the top two metal fixings
on the sliding mechanism and
push into place.
56. Locate and push the second two in.
Compiled Exclusively for MotoModders.net
Page 26

Ajay16 Motorola Z3 Disassembly Guide v1.0
Page: 26
57.
Hold the ribbon away and put the keypad into place.
58. Now get the main PCB, lift both ri
place first, it should now just fall into position
bbons up and put the bottom into
.
59. Push both the ribbons back into pl
ace.
Compiled Exclusively for MotoModders.net
Page 27

Ajay16 Motorola Z3 Disassembly Guide v1.0
Page: 27
60. Locate the SIM card reader and push it into place until it clicks, put
back the rubber loudspeaker housing.
N
61. ow get the old rear housing and remove the USB port cover, just
p
ull this carefully away from the slip it sits in. Push this into the
new housing.
Compiled Exclusively for MotoModders.net
Page 28

Ajay16 Motorola Z3 Disassembly Guide v1.0
Page: 28
2. To remove the loudspeaker place your tweezers into the corner of
6
were the contacts are and lift up slowly, transfer this to the new
housing.
63. There are 2 small clips that keep the rear ex
on, unclip these with tweezers. Transfer thi
ternal antenna cover
s as well to the new
housing.
64. Put the camera button back into place.
Compiled Exclusively for MotoModders.net
Page 29

Ajay16 Motorola Z3 Disassembly Guide v1.0
Page: 29
65. ocate the rear housing with the middle housing.
L
66. Press the bottom into place then work your way up the sides to the
top.
67. Screw in the top 2 T4 screw
s first then screw in the rest.
Compiled Exclusively for MotoModders.net
Page 30

Ajay16 Motorola Z3 Disassembly Guide v1.0
Page: 30
68. urn the phone over and clean the screen with a screen cloth,
T
ake sure it is perfect no dust or smears.
m
69. Clean the glass LCD lens too, spend as
don’t want to have to take your phone a
much time on this as you
npart to cle
a it again.
70. Place the lens over the LCD and press into place firml
y around the
edges.
Compiled Exclusively for MotoModders.net
Page 31

Ajay16 Motorola Z3 Disassembly Guide v1.0
Page: 31
71. urn your phone over, install your SIM card/memory card, and the
T
attery.
b
T
72. urn your phone on and voila!
Compiled Exclusively for MotoModders.net
Page 32

Ajay16 Motorola Z3 Disassembly Guide v1.0
Page: 32
This guide is FREEWARE to MOTOMODDERS MEMBERS.
Selling of this guide is prohibited.
All images and text is © to Ajay16, Adam Tudor-Lane.
If you would like to send me any comments on the guide, or request
for custom guides by companies please send them to:
moto.v3.blk@gmail.com
Version:
This is Version 1.0.
Many thanks to MotoX for the softw
phones. The guys that find out the
are that allows us to Mod our
seem edits, file developers and
decompilers.
Also thanks to everyone at Moto
modders.net who make all the
modding possible!
Keep it up guys!
l and di
And thanks to Motorola for releasing such co
o fferent phones!
Compiled Exclusively for MotoModders.net
 Loading...