


Contents
Safety and General Information 1
Exposure to Radio Frequency Energy 1
Portable Radio Operations and EME Exposure 1
Antenna Care 1
Two-Way Radio Operation 1
Body-Worn Operation 2
Approved Accessories 2
Electromagnetic Interference/Compatibility 2
Medical Devices 2
Safety and General Use While Driving 3
Operational Warnings 3
Operational Cautions 3
Save these Instructions 4
Let’s Talk About Your New Radio 5
Batteries 5
To Install NiMH Battery 5
To Charge NiMH Battery 5
Using The Charging Dock 5
To Install AA Batteries 6
To Turn Radio On and Off 6
Battery Meter 6
Battery Type Selection 6
Belt Clip 6
Before You Can Talk 7
Change The Channel 7
Change The Code 7
To Communicate 7
Other Features 8
Talk Confirmation Tone 8
Ring Mode 8
Short Menu 8
Lock 8
Light 8
Alert Tones 8
Microphone Gain Edit 9
Call Tones 9
Auto Power Off (APO) 9
Reset 9
Time-out Timer 9
Hands-Free Use 10
Internal VOX 10
Scan 11
Selecting the Scan List 12
VibraCall
®
12
Voice Scrambler 12
Radio Etiquette 12
Talk Range 13
Troubleshooting 14
Specifications 15
Warranty Information 15
Copyright Information 17
English

Safety and General Information
Important Information on Safe and Efficient Operation
Read This Information Before Using Your Radio
The information provided in this document supersedes the
general safety information contained in user guides published
prior to July 2000. For information regarding radio use in a
hazardous atmosphere please refer to the Factory Mutual (FM)
Approval Manual Supplement or Instruction Card, which is
included with radio models that offer this capability.
RF Operational Characteristics
Your radio contains a transmitter and a receiver. When it is
ON, it receives and transmits radio frequency (RF) energy.
The radio operates in the frequency range of 446.00625 MHz
to 446.09375 MHz.
Exposure To Radio Frequency Energy
Your Motorola radio is designed to comply with the following
national and international standards and guidelines regarding
exposure of human beings to radio frequency electromagnetic
energy:
• United States Federal Communications Commission,
Code of Federal Regulations; 47 CFR part 2 sub-part J
• American National Standards Institute (ANSI) / Institute of
Electrical and Electronic Engineers (IEEE) C95. 1-1992
• Institute of Electrical and Electronic Engineers (IEEE)
C95. 1-1999 Edition
• National Council on Radiation Protection and Measurements
(NCRP) of the United States, Report 86, 1986
• International Commission on Non-Ionizing Radiation
Protection (ICNIRP) 1998
• National Radiological Protection Board of the United Kingdom 1995
• Ministry of Health (Canada) Safety Code 6. Limits of Human
Exposure to Radio Frequency Electromagnetic Fields in the
Frequency Range form 3 kHz to 300 GHz, 1999.
To assure optimal radio performance and make sure human
exposure to radio frequency electromagnetic energy is within the
guidelines set forth in the above standards, always adhere to the
following procedures:
Portable Radio Operation and EME Exposure
Antenna Care
Use only the supplied or an approved replacement antenna.
Unauthorized antennas, modifications, or attachments could
damage the phone and may violate FCC regulations.
DO NOT hold the antenna when the radio is "IN USE". Holding
the antenna affects the effective range.
Two-Way Radio Operation
When using your radio as a traditional two-way radio, hold the
radio in a vertical position with the microphone two to three
inches (5.0 to 7.5 cm) away from the lips.
1 English

Body-Worn Operation
To maintain compliance with FCC RF exposure guidelines, if you
wear a radio on your body when transmitting, always place the
radio in a Motorola supplied or approved clip, holder, holster, case,
or body harness. Use of non-Motorola-approved accessories may
exceed FCC RF exposure guidelines. If you do not use a body-worn
accessory, ensure the antenna is at least one inch (2.5 cm) from
your body when transmitting.
Approved Accessories
For a list of approved Motorola accessories please refer to the
Motorola Original Accessories brochure for further details.
Electromagnetic Interference/Compatibility
Note: Nearly every electronic device is susceptible to electromagnetic
interference (EMI) if inadequately shielded, designed or
otherwise configured for electromagnetic compatibility.
Facilities
To avoid electromagnetic interference and/or compatibility
conflicts, turn off your radio in any facility where posted notices
instruct you to do so. Hospitals or health care facilities may be
using equipment that is sensitive to external RF energy.
Aircraft
When instructed to do so, turn off your radio when on board
an aircraft. Any use of a radio must be in accordance with
applicable regulations per airlines crew instructions.
Medical Devices
Pacemakers
The Health Industry Manufacturers Association recommends
that a minimum separation of 6 inches (15 centimeters) be
maintained between a handheld wireless radio and a pacemaker.
These recommendations are consistent with the independent
research by, and recommendations of, Wireless Technology Research.
Persons with pacemakers should:
• ALWAYS keep the radio more than six inches (15 centimeters)
from their pacemaker when the radio is turned ON.
• Not carry the radio in the breast pocket.
• Use the ear opposite the pacemaker to minimize the potential
for interference.
• Turn the radio OFF immediately if you have any reason to
suspect that interference is taking place.
Hearing Aids
Some digital wireless radios may interfere with some hearing
aids. In the event of such interference, you may want to consult
your hearing aid manufacturer to discuss alternatives.
Other Medical Devices
If you use any other personal medical device, consult the
manufacturer of your device to determine if it is adequately
shielded from RF energy. Your physician may be able to assist
you in obtaining this information.
2 English

3 English
Safety and General Use While Driving
Check the laws and regulations on the use of radios in the area
where you drive. Always obey them.
When using your radio while driving, please:
• Give full attention to driving and to the road.
• Hands-free operation must be used if the radio is to be
operated whilst driving.
• Pull off the road and park before making or answering a call
if driving conditions so require.
Operational Warnings
For Vehicles With and Air Bag
Do not place a portable radio in the area over an air bag or in the
air bag deployment area. Air bags inflate with great force. If a
portable radio is placed in the air bag deployment area and the
air bag inflates, the radio may be propelled with great force and
cause serious injury to occupants of the vehicle.
Potentially Explosive Atmospheres
Turn off your radio prior to entering any area with a potentially
explosive atmosphere, unless it is a radio type especially qualified
for use in such areas as "Intrinsically Safe" (for example, Factory
Mutual, CSA, or UL Approved). Do not remove, install, or charge
batteries in such areas. Sparks in a potentially explosive
atmosphere can cause an explosion or fire resulting in bodily
injury or even death.
Note: The areas with potentially explosive atmospheres referred
to above include fueling areas such as below decks on
boats, fuel or chemical transfer or storage facilities, areas
where the air contains chemicals or particles, such as
grain, dust or metal powders, and any other area where
you would normally be advised to turn off your vehicle
engine. Areas with potentially explosive atmospheres are
often but not always posted.
Blasting Caps and Areas
To avoid possible interference with blasting operations, turn
off your radio when you are near electrical blasting caps, in a
blasting area, or in areas posted: "Turn off two-way radio".
Obey all signs and instructions.
Operational Cautions
Antennas
Do not use any portable radio that has a damaged antenna. If
a damaged antenna comes into contact with your skin, a minor
burn can result.
Batteries
All batteries can cause property damage and/or bodily injury
such as burns if a conductive material such as jewelry, keys, or
beaded chains touch exposed terminals. The conductive material
may complete an electrical circuit (short circuit) and become
quite hot. Exercise care in handling any charged battery,
particularly when placing it inside a pocket, purse, or other
container with metal objects.

SAVE THESE INSTRUCTIONS
Before using the battery charger, read all instructions and
cautionary markings on, (1) the battery, (2) the battery charger,
and (3) the radio using the battery.
To reduce the risk of injury, only charge (E)NTN9395 rechargeable
batteries. Other types of batteries may burst, causing personal
injury and damage.
1. Do not expose the charger to rain or snow.
2. Do not operate the charger if it has received a sharp blow, or
has been dropped or damaged in any way.
3. Do not disassemble the charger. If it does not work properly
return it to the point of purchase if within 90 days of purchase.
Incorrect re-assembly may result in a risk of electric shock or fire.
4. Never alter the AC cord and plug provided with the unit. If
the plug will not fit the outlet, have proper outlet installed by
a qualified electrician. An improper condition can result in a
risk of electric shock.
5. To reduce the risk of damage to the cord or plug, pull by the
plug rather than the cord when disconnecting the charger from
the AC receptacle.
6. To reduce the risk of electric shock, unplug the charger from
the outlet before attempting any maintenance or cleaning.
7. Use of an attachment not recommended or sold by Motorola
TM
may result in a risk of fire, electric shock, or personal injury.
4 English

Let’s Talk About Your New Radio
MotorolaTMTalkaboutTMT6202, T6212 or T6222 two-way radios
allow you to stay in touch with your family and friends. They
operate on PMR446 frequencies. They can be used in any
country where PMR446 frequencies are authorized, subject to
applicable regulations.
Batteries
TalkaboutTMT6202, T6212 and T6222 radios operate with either
three AA batteries or a Nickel-Metal Hydride (NiMH)
rechargeable battery.
The NiMH rechargeable battery, charger adapter cover, charger
and Charging Dock can be purchased separately.
To Install NiMH Battery:
1. Push clip upwards to remove battery cover.
2. Insert NiMH battery pack with charging contacts facing out.
3. Replace the battery cover by inserting the battery cover pegs
into the slots in the back of the radio, then press firmly until
battery cover clicks into place.
To Charge NiMH Battery:
The NiMH battery can be charged while in the radio or on its own
in the charger adapter cover. To get maximum use from the
battery, charge overnight (16 hours) before you use it for the first
time. Subsequent charges will only require four hours of
charging time.
1. Ensure the radio is off or place the NiMH battery in the
charger adapter cover.
2. Plug the charger into an AC wall socket.
3. Position the charger connector with the large hook over the
large slot to the right of the three battery contacts.
4. Push the large hook into the large slot, then snap the small
hook into the small slot.
5. The light on the charger will be red while the battery is charging
and will flash green when the battery is approximately 90%
charged. The green light will be on constantly when the battery
is fully charged.
6. To remove the charger pull gently out and up until the small
hook disengages and carefully remove the larger hook.
Note: If you notice the LED flashing red for more than a minute,
the battery is faulty and should be replaced.
Using The Charging Dock
The Charging Dock can be mounted or placed on any flat surface
(such as a wall or table). To mount the Charging Dock:
1. Wrap the power cord under the Charging Dock. Use the cutouts
to hold the cord in place.
2. Attach using two number 6 x
3
⁄4 screws appropriate for the
mounting surface.
To charge the NiMH battery using the Charging Dock:
1. Position the charger with the hook on the LED end over the left slot.
2. Snap the hook on the cord end into the right slot, clamping the
charger onto the Charging Dock contacts.
3. Plug the charger into an AC wall socket.
5 English
A
B
C
F
G
D/E

4. Place the radio, or the NiMH battery in the charger adapter
cover, into the Charging Dock until you hear a click.
5. When the LED turns green, the battery is fully charged.
To Install AA Batteries:
1. Push clip upwards to remove battery cover.
2. Insert 3 AA batteries into the AA battery tray so the + and –
markings match the ones in the compartment.
3. Replace the battery cover by inserting the battery cover pegs into
the slots in the back of the radio, then press firmly until battery
cover clicks into place.
To Turn Radio On and Off:
1. Press and hold down the P button until the radio is on. The
LED will be solid red, the display will turn on and an audible
alert will be heard (unless the Alert tones are disabled).
2. To turn the radio off, press and hold down the Pbutton, the
radio will beep to confirm (when the Alert tones are enabled)
and the display will disappear.
Battery Meter:
The d icon, located on the LCD, is divided into three bars.
It shows d(full), b (two-thirds full), c(one-third full)
and a (almost empty). When it’s c, the radio beeps
every ten minutes.
Battery Type Selection:
To ensure that the Battery Meter icon is showing accurate battery
usage, the type of battery being used in your radio should be set,
in the Battery Type Selection Menu.
1. To enter the Battery Type Selection Menu, press the \button
until the d icon appears in the display. The channel number
will be replaced by a flashing A or n.
2. Use the up ] or down [ button to choose either A, if Alkaline
batteries are being used on or n, if NiMH or NiCd rechargeable
batteries are being used.
3. The radio will return to the normal operating mode after ten
seconds or when you quick-press M or R.
Note: Remove batteries before storing your radio for extended
periods. Batteries corrode over time and may cause
permanent damage to your radio.
Belt Clip:
TalkaboutTMT6202, T6212 and T6222 radios come as standard
with a belt clip.
To Attach:
1. Holding the belt clip at the top and bottom, squeeze to retract
the hook.
2. Insert belt clip into slot on back of radio and release hold.
3. To remove, hold the belt clip at the top and bottom, squeeze
again to retract the hook and remove.
6 English
3
7
I
H
A
B
C
2
1
5/
6

Before You Can Talk
Read this manual carefully.
Talkabout
TM
T6202, T6212 and T6222 radios have 8 channels and
38 Interference Eliminator Codes. To talk to others, all radios in
your group must be set to the same channel and code.
Interference Eliminator Codes filter out static, noise and
unwanted messages on radio channels. You can only
communicate with radios using the same channel and code.
However, since radio channels can be monitored, conversations
are not private. To avoid congested channels, change the radio’s
channel/code setting. (Ensure all other radios in your group are
also changed to the same setting).
Select code 0 (carrier squelch) to monitor all activity on the channel.
Change The Channel:
1. Press the \ button once to enter the Channel Selection
Menu. The channel number will begin to flash.
2. Use the up ] or down [ buttons to select a new channel while
the channel number is flashing.
3. The radio will return to the normal operating mode after ten
seconds or when you quick-press M or R.
Change The Code:
1. Press the \ button twice to enter the Code Selection Menu.
2. The radio’s current code (small number) will begin to flash.
3. Use the up ] or down [ buttons to select a new code while
the number is flashing.
4. The radio will return to the normal operating mode after ten
seconds or when you quick-press M or R.
To Communicate
Adjust The Volume:
1. Press the up ] or down [ button to change the radio’s volume.
2. The V icon will appear and the display will show the current
volume level (from 1 to 20). The radio will beep to indicate
the volume level (when the Alert tones are enabled).
3.
The radio will return to normal operating mode after three seconds.
Caution:
Do not hold the radio too close to your ear when the volume
is at a high setting. This could cause hearing damage.
The Monitor/Signal Strength Indicator and Scan Button:
This button has three features, Monitor, Signal Strength Indicator
and Scan (Scan available on T6212 and T6222 radios only).
The Monitor feature is used to check activity on the current
channel before transmitting. When receiving, or if the channel is
busy, the radio LED will flash more frequently than normal.
The Signal Strength Indicator shows the level of any incoming
signal from 1 (weakest) to 6 (strongest).
Send Messages:
1. Check channel activity by a long press of the ) button. You’ll hear
static if the channel is clear to use. Don’t transmit if someone’s
talking on the channel.
2. The display will show the w icon and the channel number will
be replaced by a number showing the level of any incoming
signal from 1 (weakest) to 6 (strongest).
3. To maximize clarity, hold radio 5.0 to 7.5cms from your mouth.
4. Press the M button and speak into the radio. The LED glows
continuously when transmitting.
5. To receive message, release the Mbutton.
8
7 English

Other Features
Talk Confirmation Tone:
Whenever you turn on the talk confirmation tone feature, your radio
transmits a unique tone when you finish transmitting, and sounds
the tone locally on your radio.
To enable or disable this feature press and hold the up ] button
as you turn on your radio.
Ring Mode:
Talkabout
TM
T6202 and T6212 radios allow you to select Ring alert
when receiving the first incoming transmission. Ring is then
suspended until 30 seconds after channel activity has finished.
To Select Ring:
1. Press the
\
button until the B icon appears
in the display.
2. The large channel number is replaced with a Y for enabled or
n for disabled.
3. Use the up ] or down [ button to select Y for enable.
4. The radio will return to the normal operating mode after ten
seconds or when you quick-press M or R.
Short Menu:
Talkabout
TM
T6202, T6212 and T6222 radios have a Short Menu
feature which allows you to limit the number of menus displayed
to Channel, Interference Eliminator Code and Call Tones. The
Channel Scan function is also disabled, to prevent accidentally
changing the radio’s mode of operation. When short menu is
enabled the only radio turn on sequence available is short menu
disable. The menu time-out time is increased to 60 seconds.
1. To activate the Short Menu, press and hold the \ button,
while turning the radio on.
2. To disable the Short Menu, turn the radio off, then press and
hold the \ button, while turning the radio on.
Lock:
Talkabout
TM
T6202, T6212 and T6222 radios have a Lock feature
which allows you to disable Menu, Scan and volume control (up
] and down [ buttons) so that the radio settings cannot be
changed accidentally.
1. To activate the Lock feature, press and hold the \ button, until
the lock enable alert sounds and the f icon appears on the display.
2. Disabled buttons will beep if pressed (when the Alert tones are enabled).
3. To disable the Lock feature, press and hold the \ button again
until the lock disable alert sounds and the f icon disappears.
Light:
Talkabout
TM
T6202, T6212 and T6222 radios have a backlit display for
use in low-light conditions. Press the R button briefly to illuminate the
display. The light will turn on for four seconds. Pressing any button will
start or extend the period of time for which the display is illuminated.
Alert Tones:
The Alert tones can be disabled by turning on the radio while
pressing the down [ button. Transmit Time-out Timer and low
battery alert tones are not disabled.
To re-activate the Alert tones, turn the radio off and then on again
while holding the down [ button.
8 English
6

Microphone Gain Edit:
Microphone Gain Edit allows you to select one of three
Microphone Gain settings (if VOX not enabled): low setting (1),
medium setting (2) and high setting (3). If you speak loudly, the
low setting should be selected, and if you speak softly, the high
setting should be selected.
1. Press the \ button until the g icon appears in the display
along with a flashing number 1,2 or 3.
2. Use the up ] and down [ buttons to switch between the levels.
3. The radios will return to the normal operating mode after ten
seconds or when you quick-press M or R.
Call Tones:
Talkabout
TM
T6202 and T6212 radios have five unique call tones
to identify each user and alert the others that you intend to
transmit. Talkabout
TM
T6222 radios has ten unique call tones.
Press the ^ button and all users on your channel and code will
be alerted with your Call Tone.
To Change and hear a Call Tone:
1. To enter the Call Tone Menu, press the \ button until the ^
icon appears in the display. The channel number will be
replaced by the call tone number.
2. Use the up ] or down [ buttons to change the Call Tone.
3. The radio will return to the normal operating mode after ten
seconds or when you quick-press M or R.
Auto Power Off (APO):
Talkabout
TM
T6202, T6212 and T6222 radios can be programmed to
turn themselves off after a certain period of inactivity (no button
presses or VOX transmissions). This feature is used to prevent
unwanted battery usage.
1. To enter the Auto Power Off Menu, press the \ button until
the APO icon appears in the display. The channel number will
be replaced by a flashing horizontal bar which means Auto
Power Off is disabled.
2. Use the up ] or down [ button to change the Auto Power Off
time setting (from 1 to 8 hours).
3. The radio will return to the normal operating mode after ten
seconds or when you quick-press M or R.
4. If APO is enabled the APO icon will be shown in the display. For
five minutes before the radio turns off, the radio will periodically
emit a tone warning and the APO icon will flash. Any button
press activity or VOX transmission will reset the APO timer.
Reset:
Holding down the \ and M button,or h and M button,
while turning the radio on will reset the user programmable
features back to the factory settings.
Time-out Timer:
The Time-out Timer feature helps extend battery life. The radio
will emit a warning tone and will stop transmitting if:
1. The M button is pressed for more than 60 continuous
seconds.
2. VOX transmission is active for more than 60 continuous seconds.
4
9 English

Hands-Free Use:
TalkaboutTMT6202, T6212 and T6222 radios have built-in Voice
Activated Transmission (VOX) capability. This means the sound
of your voice activates transmission when the radio is used with
a VOX audio accessory.
Note: When using optional audio accessories with your radio, we
recommend that the volume level be kept at a comfortable
listening level. Before you place the accessory on your
head or in your ear, turn the volume down.
To Use VOX Feature:
1. Ensure radio is turned off.
2. Plug the audio accessory’s connector into the jack on the left
hand side of the radio.
3. Turn the radio on and lower volume before placing accessory
on head or in ear. The flashing g icon will appear on the
display to indicate that the VOX feature is active.
4. Use the up ] or down [ button to adjust volume to a
comfortable level.
5. To transmit, speak into the accessory microphone. To receive,
stop talking.
Note: There will be a brief delay between when you start talking
and the radio transmitting, and a longer delay between
when you stop talking and the radio going back to receive,
to allow for speech pauses.
Reset to Push-To-Talk Mode:
1. Press Mbutton once. The g icon will disappear.
2. To transmit, press the M button on the radio. To receive,
release the M button.
3. To return to VOX mode, turn the radio off, then on again with
the accessory in place.
To Select VOX Sensitivity:
Talkabout
TM
T6202, T6212 and T6222 radios allow you to adjust
the VOX sensitivity of the radio to compensate for varying levels
of background noise and speech. The VOX edit mode allows you
to choose between high, medium and low settings. For example
if you speak loudly, or are in a noisy environment, the low setting
(1) should be selected and if you speak softly, or are in a quiet
environment, the high setting (3) should be selected. The
middle setting (2) is suitable for most applications.
1. To enter the VOX sensitivity menu, ensuring the audio
accessory is in place, press the \ button until the g icon
appears on the display. The channel number will be replaced
with VOX setting 1, 2, or 3.
2. Use the up ] or down [ button to change the VOX setting, if
required.
3. The radio will return to the normal operating mode after ten
seconds or when you quick-press M or R.
Internal VOX
Talkabout
TM
T6212 and T6222 radios also have built in Internal
Voice Operated Transmission capability. This is a similar
function to the VOX because the sound of your voice activates
transmission, but no external accessories are needed.
10 English

To Select The Internal VOX Feature:
Either
1. Press the \ button until the flashing g icon appears in the
display and the channel number is replaced with Y (enabled) or n
(disabled). Use the up ] or down [ button to select Y for enable.
2. The radio will return to the normal operating mode after ten
seconds or when you quick-press M or R. The g icon remains
in the display.
OR
1. Ensure radio is turned off.
2. Press and hold down the M button and switch on the radio
using the Power button. The g icon will be shown on the display.
To Use The Internal VOX Feature:
1. Quickly press and release the M button and the g icon will
begin to flash. Your radio will now transmit every time you talk.
2. Quick press M switches radio between muted and active
VOX modes.
3. To disable the Internal VOX feature, go into Internal VOX
Selection Menu and use the up ] or down [ button to select
n for disable. Or switch the radio off and then back on again.
To Select Internal VOX Sensitivity:
Talkabout
TM
T6212 and T6222 radios allow you to adjust the
Internal VOX sensitivity of the radio to compensate for varying
levels of background noise and speech. The Internal VOX edit
mode allows you to choose between high, and low settings. For
example if you speak loudly, or are in a noisy environment, the
low setting (1) should be selected and if you speak softly, or are
in a quiet environment, the high setting (3) should be selected.
The middle setting (2) is suitable for most applications.
1. To enter the Internal VOX sensitivity menu, ensuring the g icon
is showing on the display, press the \ button until the channel
number is replaced with an Internal VOX setting of 1, 2 or 3.
2. Use the up ] or down [ button to change the Internal VOX
setting, if required.
3. The radio will return to the normal operating mode after ten
seconds or when you quick-press M or R.
Scan:
Talkabout
TM
T6212 and T6222 radios have Scan feature which allows
you to monitor other transmitting radios. It allows you to listen and
talk back to the person(s) without having to switch channels.
Normal scan will only “land” on a channel if the Interference
Eliminator Code matches the one you set for that channel.
Carrier Squelch scan will “land” on a channel if any activity is
detected. The radio will do the Carrier Squelch scan if you set the
Interference Eliminator Code to 0 for the original channel (the
channel being used before going to Scan mode).
1. To begin scanning, quick-press the ) button. The h icon
will appear in the display and the channel numbers are
scrolled through.
2. When the radio detects channel activity, the display will indicate
the channel and code on which the activity is taking place (code
will show 0 if the radio is in Carrier Squelch Scan and “lands”
on a channel where the incoming signal does not contain an
Interference Eliminator Code).
3. Pressing the M or ) button while the radio is scanning will
result in transmit/monitor operation on the original channel.
4. To exit Scan, short press the ) button again, the display will
show the original Channel and Code number and the h icon
will disappear.
11 English

Selecting The Scan List:
Talkabout
TM
T6212 and T6222 radios allow you to select which
channels are to be scanned. The radio can be programmed to scan
specific channels by turning them on or off in the Scan List Menu.
1. To enter the Scan List Menu, press the \ button until the h
icon appears on the display. The current code number will be
replaced with a flashing Y for yes or n for no.
2. Press the ) button to select whether or not a channel will be
scanned. Select Y for yes and n for no.
3. Press the up ] or down [ button to change channels.
4. The radio will return to the normal operating mode after ten
seconds or when you quick-press M or R.
VibraCall
®
Mode:
Talkabout
TM
T6222 radios allow you to choose between Ring
and/or VibraCall
®
alert when receiving the first incoming
transmission. Ring and/or VibraCall
®
are then suspended until
30 seconds after channel activity has finished.
To Select Ring and/or VibraCall
®
Mode:
1. Press \button until the B and/or i icons appear in the
display (depending on the current setting).
2. The large channel number is replaced with a – or number 1, 2 or 3.
3. Use the up ] or down [ button to switch between the
following settings.
– = Neither Ring or VibraCall
®
Mode (both icons flashing)
1 = VibraCall Mode
®
2 = Ring Mode
3 = Both Ring and VibraCall
®
Mode
4. The radio will return to the normal operating mode after ten
seconds or when you quick-press M or R.
Voice Scrambler:
Talkabout
TM
T6222 radios have a Voice Scrambler feature. This
feature allows additional privacy for user’s transmission. To
receive a scrambled transmission, radios must have matching
channels, codes and scramble codes. We recommend that you
check and follow any applicable regulations in your country
before using this feature.
To Select Scrambler:
1. Press \ button until the e icon appears in the display and
the channel number is replaced by a horizontal bar.
2. To choose Scrambler, press the up ] or down [ button until
1 appears in the channel position.
3. To disable Scrambler, press the up ] or down [ button until
the horizontal bar appears.
4. The radio will return to the normal operating mode after ten
seconds or when you quick-press M or R.
Radio Etiquette
Your radio’s 8 channels are shared on a "take turn" basis. This
means other groups may be talking on the channels. For
uninterrupted communications, follow the steps below:
1. Use the ) button to check activity on the channel before talking.
2. Don’t talk over someone who is already using the channel - your
message may not be completely heard. Try changing the Channel
and Interference Eliminator Code to avoid channel congestion.
Note: Since the channels are shared, your conversations will not be
private and you may hear others talking.
12 English
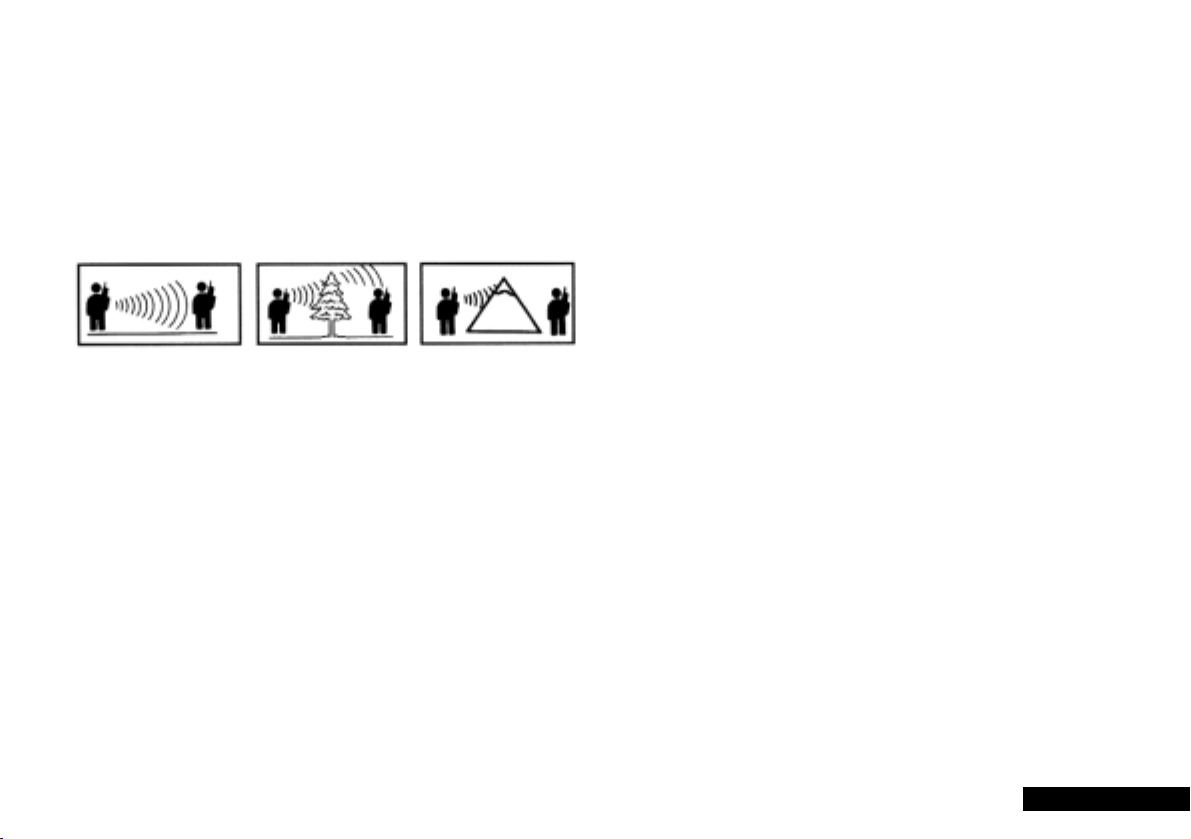
Talk Range
TalkaboutTMT6202, T6212 and T6222 radios have been designed
to maximize performance and improve transmission range in
the field. It is recommended that you do not use the radios
closer than 1.5 meters apart because of heavy interference.
Talk range depends on the terrain. These are line of sight
radios and talk range will be affected by concrete structures,
heavy foliage and operating radios indoors and in vehicles.
Optimal Range Medium Range Minimal Range
Optimal range occurs in flat, open areas with up to 3 kilometres of
coverage. Medium range occurs when buildings and trees are in
the way. Minimal range occurs when dense foliage and mountains
obstruct the communication path.
13 English

Troubleshooting
Problem Solution
No Power Reposition or replace AA batteries.
Recharge or replace NiMH battery pack.
Message Not Transmitted Make sure the Push-To-Talk button is completely pressed as you transmit. Reposition or replace batteries
Message Not Received Confirm radios have the same Channel and Interference Eliminator Code settings. Make sure Push-To-Talk
button is not inadvertently being pressed. Reposition or replace batteries. Obstructions, operating
indoors, or in vehicles may interfere with communication. Change your location. Check to make sure
volume is turned up.
Message scrambled Scramble code is on or setting doesn’t match other radios; all radios must use the same scramble code.
Hearing Other Conversation or Confirm Interference Eliminator Code is set, (active settings are 1-38).
Noise on a Channel Shared Channel or Interference Eliminator Code may be in use, try another.
Limited Talk Range Steel/concrete structures, heavy foliage, and use in buildings and in vehicles will decrease range, check for
clear line of sight to improve transmission. Wearing radio close to body such as in a pocket or on a belt
will decrease range, change location of radio.
Heavy Static or Interference Radios too close together. Radios must be at least 1.5 metres apart, increase your distance. Radios too far
apart. Obstacles interfere with transmission. Talk range is up to 3 kilometres in clear, unobstructed
conditions.
Cannot change channel/ Make sure radio is unlocked.
code settings
Cannot access all menus Verify whether short menu is activated. Disable short menu by pressing \ while turning on the radio
Low batteries Recharge NiMH battery pack or replace AA batteries. Extreme operating temperatures will affect the life of
the battery.
Charger LED double flashing Charger not properly positioned. Reposition charger and ensure it is firmly clamped to the radio, battery,
or charging dock. Battery power is very low; battery is charging up slowly before it starts to quick charge.
Motorola Product Services: If the radio still doesn’t work properly, contact your place of purchase.
14 English

Specifications:
Description Specs
Channels 8
Codes 38
Operating Frequency 446.00625-446.09375 MHz
Talk Range Up to 3 kilometres
Power Source 3 AA Batteries or NiMH Battery pack.
Battery Life*: AA** NiMH
Continuous Talk Time 8.2 Hours 2.4 Hour
Standby Time 130 Hours 39 Hours
* Typical
** With premium quality alkaline cells. Battery life with third party
AA NiMH/NiCd cells can vary.
Warranty Information
Motorola guarantees to you, the original purchaser, the Personal
Communicator and accessories which you have purchased from
an authorised Motorola dealer. Retailer or distributor (the
"Products"), to be in conformance with the applicable Motorola
specifications current at the time of manufacture for a term of [1]
year from date of purchase of the Product(s) (Warranty Term).
You must inform Motorola of the lack of conformity to the applicable
specifications of any of the Products within a period of two (2)
months from the date on which you detect a defect in material,
workmanship or lack of conformity and in any event within a term
not to exceed the Warranty Term, by submitting the Product for
service to Motorola or the distributor. Motorola shall not be bound
by Product related statements not directly made by Motorola.
A list of the Motorola Call Centre numbers is enclosed with this Product.
During the Warranty term, Motorola will, at its discretion and
without extra charge, as your exclusive remedy, repair or replace
your Product which does not comply with this warranty; or failing
this, to reimburse the price of the Product but reduced to take into
account the use you have had of the Product since it was delivered.
This warranty will expire at the end of the Warranty Term.
This is the complete and exclusive warranty for a Motorola
Personal Communicator and accessories and in lieu of all other
warranties, terms and conditions, whether express or implied.
Where you purchase the product other than as a consumer, Motorola
disclaims all other warranties, terms and conditions express or
implied, such as fitness for purpose and satisfactory quality.
In no event shall Motorola be liable for damages in excess of the
purchase price nor for any incidental special or consequential
damages* arising out of the use or inability to use the Product,
to the full extent such may be disclaimed by law.
This Warranty does not affect any statutory rights that you may
have if you are a consumer, such as a warranty of satisfactory
quality and fit for the purpose for which products of the same
type are normally used under normal use and service, nor any
rights against the seller of the Products arising from your
purchase and sales contract.
(*) including without limitation loss of use, loss of time,
inconvenience, commercial loss, lost profits or savings.
15 English

How to Get Warranty Service?
In most cases the authorised Motorola retailer which sold your
Motorola Personal Communicator and original accessories will
honour a warranty claim and/or provide warranty service.
Alternatively, for further information on how to get warranty
service please contact Motorola’s call centre at the telephone
numbers below for your country.
In order to claim the warranty service you must return the
Personal Communicator to Motorola or the distributor. The
Product should also be accompanied by a label with your name,
address, telephone number; and a description of the problem.
In order to be eligible to receive warranty service, you must
present your receipt of purchase or a comparable substitute
proof of purchase bearing the date of purchase. The Personal
Communicator should also clearly display the serial number.
Such information is contained with the Product.
Conditions
This warranty will not apply if the type or serial numbers on the
Product has been altered, deleted, removed, or made illegible.
Motorola reserves the right to refuse free-of-charge warranty
service if the requested documentation can not be presented or
if the information is incomplete, illegible or incompatible with
the factory records.
Repair, at Motorola's option, may include the replacement of parts
or boards with functionally equivalent, reconditioned or new parts
or boards. Replaced parts, accessories, batteries, or boards are
guaranteed for the balance of the original warranty time period.
The Warranty Term will not be extended. All original accessories,
batteries, parts, and Personal Communicator equipment that have
been replaced shall become the property of Motorola. Motorola
does not warrant the installation, maintenance or service of the
products, accessories, batteries or parts.
Motorola will not be responsible in any way for problems or
damage caused by any ancillary equipment not furnished by
Motorola, which is attached to or used in connection with the
Products, or for operation of Motorola equipment with any
ancillary equipment and all such equipment is expressly excluded
from this warranty.
When the Product is used in conjunction with ancillary or
peripheral equipment not supplied by Motorola, Motorola does
not warrant the operation of the Product/peripheral combination
and Motorola will not honor any warranty claim where the
Product is used in such a combination and it is determined by
Motorola that there is no fault with the Product. Motorola
specifically disclaims any responsibility for any damage, whether
or not to Motorola equipment, caused in any way by the use of
the Personal Communicator, accessories and peripherals
(specific examples include, but are not limited to: batteries,
chargers, adapters, and power supplies) when such accessories
and peripherals are not manufactured and supplied by Motorola.
What Is Not Covered By The Warranty
This warranty is not valid if the defects are due to damage,
misuse, tampering, neglect or lack of care and in case of
alterations or repair carried out by unauthorised persons.
1. Defects or damage resulting from use of the Product in
other than its normal and customary manner.
2. Defects or damage from misuse, accident or neglect.
16 English

3. Defects of damage from improper testing, operation,
maintenance, adjustment, or any alteration or modification
of any kind.
4. Breakage or damage to aerials unless caused directly by
defects in material or workmanship.
5. Products disassembled or repaired in such a manner as to
adversely affect performance or prevent adequate inspection
and testing to verify any warranty claim.
6. Defects or damage due to range.
7. Defects or damage due to moist, liquid or spills of food.
8. All plastic surfaces and all other externally exposed parts that
are scratched or damaged due to customer normal use.
9. Products rented on a temporary basis.
10.Periodic maintenance and repair or replacement of parts due
to normal wear and tear;
Note: The talk-time, stand-by time and total life cycle of
a Motorola rechargeable battery for your Personal
Communicator will depend on usage conditions. As a
consumable product, the specifications indicate that you
should be able to obtain optimum performance for your
Motorola Personal Communicator within the first six
months from date of purchase and up-to (200) charges.
The warranty for Motorola rechargeable batteries becomes
void if (i) the batteries are charged other than by Motorola
approved battery chargers specified for the charging of the
battery, (ii) any of the seals on the battery are broken or
show evidence of tampering, (iii) the battery is used in
equipment or service other than the equipment for which
it is specified.
Copyright Information
The Motorola products described in this manual may
include copyrighted Motorola programs, stored semiconductor
memories or other media. Laws in the United States and other
countries preserve for Motorola, certain exclusive rights for
copyrighted computer programs, including the exclusive right
to copy or reproduce in any form, the copyrighted Motorola
programs. Accordingly, any copyrighted Motorola computer
programs contained in the Motorola products described in this
manual may not be copied or reproduced in any manner without
express written permission of Motorola. Furthermore, the
purchase of Motorola products shall not be deemed to grant
either directly or by implication, estoppel, or otherwise, any
license under the copyrights, patents or patent applications of
Motorola, except for the normal non-exclusive royalty free license
to use that arises by operation of law in the sale of a product.
For more information call:
Within the UK: 01256 484100
Outside the UK: +44 1256 484100
, MOTOROLA are trademarks of Motorola Inc.
Talkabout is a trademark of Motorola Inc.
© 2001 Motorola Inc.
17 English

Sommaire
Informations de securité generales 1
Exposition à l'énergie électromagnétique 1
Fonctionnement du portatif et exposition
À L'énergie electromagnétique 1
Précautions liées à l’antenne 1
Fonctionnement en émission-réception 1
Fonctionnement sur soi 2
Accessoires agréés 2
Interférences électromagnétiques et compatibilité 2
Appareils médicaux 2
Sécurité et règles d’utilisation en conduisant 2
Avertissements d'utilisation 3
Veuillez conserver ces instructions 4
Parlons de votre nouvelle radio 5
Piles 5
Pour installer la batterie NiMH 5
Pour charger la batterie NiMH 5
Utilisation du chargeur 5
Pour installer des batteries AA 6
Pour mettre la radio sur marche et sur arrêt 6
Indicateur de charge de la batterie 6
Sélection du type de batterie 6
Clip de ceinture 7
Avant de pouvoir parler 7
Changez de canal 7
Changez de code 7
Pour communiquer 7
Autres fonctions 8
Tonalité de confirmation d’émission 8
Mode de sonnerie 8
Menu restreint 9
Verrouillage 9
Rétro-éclairage 9
Tonalités d’alerte 9
Édition du gain du microphone 9
Tonalités d’appel 10
Arrêt automatique 10
Réinitialisation 10
Limiteur de temps d’émission 10
Utilisation mains-libres 10
VOX interne 11
Scanning 12
Sélection de la liste a scanner 13
Mode vibreur 13
Brouilleur de voix 13
Étiquette radio 14
Portée des radios 14
Dépistage de pannes 15
Spécifications 16
Garantie 16
Informations sur le copyright
19
Français
Attention : L’utilisation des canaux 1 et 2 est interdite et illégale
avant le 1 février 2002. Elle pourrait entraîner des
pertubations sur le réseau de la SNCF.
INFORMATIONS DE SECURITE GENERALES
Pour une utilisation sûre et efficace, veuillez lire ces informations
avant d'utiliser votre poste.
Les informations fournies dans ce document remplacent les
instructions de sécurité générale présentées dans les guides
d'utilisation publiés avant le mois de juillet 2000.
Pour tout renseignement concernant l'utilisation d'un poste dans
une zone à risque, veuillez consulter le supplément du manuel
d'homologation Factory Mutual (FM) ou la carte d'instructions
qui accompagne les modèles offrant cette fonctionnalité.
Caractéristiques opérationnelles RF
Votre poste contient un émetteur et un récepteur. Lorsqu'il
est allumé, il reçoit et émet de l'énergie électromagnétique sous
forme de fréquences radio. Ce poste utilise la gamme de
fréquences 446.00625 MHz à 446.09375 MHz.
Exposition à l'énergie électromagnétique
Votre émetteur-récepteur Motorola a été conçu conformément
aux normes et aux directives nationales et internationales
mentionnées ci-dessous, concernant l'exposition des personnes
à l'énergie électromagnétique RF :
• United States Federal Communications Commission, Code de
réglementation fédéral ; 47 CFR section 2 sous-section J
• American National Standards Institute (ANSI) / Institute of
Electrical & Electronic Engineers (IEEE) C95. 1- 1992
• Institute of Electrical & Electronic Engineers (IEEE) C95.1- 1999 Edition
• National Council on Radiation Protection et Measurements
(NCRP) of the United States, Rapport 86, 1986
• International Commission on Non-Ionizing Radiation
Protection (ICNIRP) 1998
• National Radiological Protection Board of the United Kingdom 1995
• Ministère de la Santé (Canada) Code de sécurité 6. Limites de
l'exposition des personnes aux champs électromagnétiques
dans la gamme de fréquences 3 kHz à 300 GHz, 1999
Pour garantir les performances optimales de votre poste, tout en
maintenant le risque d’exposition à l'énergie électromagnétique
RF dans les limites des normes mentionnées plus haut, veuillez
toujours respecter les procédures suivantes :
Fonctionnement du portatif et exposition
à l'énergie électromagnétique
Précautions liées à l’antenne
Utilisez uniquement l'antenne fournie ou une antenne agréée. Les
antennes non agréées, toute modification ou tout accessoire,
peuvent endommager le poste ou enfreindre la réglementation FCC.
NE TOUCHEZ PAS l'antenne lorsque le poste fonctionne. Tout
contact avec l'antenne peut affecter la qualité de la communication et
forcer le poste à utiliser une puissance d'émission inutilement élevée.
Fonctionnement en émission-réception
Lorsque vous utilisez votre poste comme un talkie-walkie, tenez celui
ci en position verticale, avec le microphone éloigné de 5 à 7.5 cm de
votre bouche.
1 Français

Fonctionnement sur soi
Pour respecter les directives de l'exposition à l'énergie
électromagnétique RF FCC, lorsque vous portez votre poste sur
vous pendant qu'il émet, vous devez toujours le placer dans un
étui, boîtier, pince, support, ceinture fourni et homologué par
Motorola. L'utilisation d'accessoires non agréés par Motorola
peut entraîner une infraction des directives RF FCC. Si vous
souhaitez utiliser le Talkie-Walkie en mode mains libres, afin
d’assurer une bonne transmission, assurez vous que l’antenne
soit en position écartée de votre corps d’au moins 2.5cm.
Accessoires agréés
Pour de plus amples renseignements concernant la liste des
accessoires Motorola, veuillez vous référer à la brochure
d’Accessoires d’Origine Motorola.
Interférences électromagnétiques et Compatibilité
Note : Presque tous les dispositifs électroniques peuvent
provoquer des interférences électromagnétiques, s'ils ne
sont pas convenablement blindés, conçus ou configurés
pour la compatibilité électromagnétique.
Lieux publics
Pour éviter les interférences électromagnétiques et/ou les
problèmes de compatibilité, éteignez votre poste dans les locaux
où des panneaux vous demandent de le faire. Les hôpitaux ou les
centres médicaux utilisent certains équipements sensibles aux
fréquences externes.
Avions
Si on vous demande de le faire, éteignez votre poste à bord d'un
avion. L'utilisation des portatifs est soumise aux règles de la
compagnie aérienne ou aux consignes de l'équipage.
Appareils médicaux
Pacemakers
La Health Industry Manufacturers Association recommande
une distance minimale de 6 pouces (15 centimètres) entre un
portatif et un stimulateur. Cette recommandation est conforme
aux recherches et aux conseils indépendants de la Wireless
Technology Research.
Les porteurs d'un stimulateur doivent :
• TOUJOURS tenir leur poste à plus de 6 pounces (15 centimètres)
de leur stimulateur lorsque leur poste est allumé.
• Ne jamais mettre un poste dans une poche de poitrine.
• Ecouter avec l'oreille du côté opposé à la position du
stimulateur pour réduire le risque d'interférence.
• Eteindre le poste immédiatement lorsqu'il y a la moindre
raison de soupçonner des interférences.
Prothèses auditives
Certains postes portables numériques peuvent provoquer des
interférences avec le fonctionnement de certaines prothèses
auditives. Dans ce cas, veuillez consulter le fabricant de la
prothèse pour envisager d'utiliser un autre modèle.
Autres appareils médicaux
Si vous utilisez tout autre type d'appareil médical, consultez son
fabricant pour déterminer s'il est correctement blindé pour ne
pas émettre d'énergie électromagnétique hors normes. Votre
médecin peut vous aider à obtenir les informations nécessaires.
Sécurité et Règles d’utilisation lors d’une utilisation en voiture.
Vérifiez les lois et les réglementations en vigueur concernant les
postes portatifs dans les régions que vous traversez. Respectez
toutes les instructions.
2 Français

En voiture, lorsque vous utilisez votre poste et que vous
conduisez, veuillez :
• Vous concentrer sur la route et la conduite du véhicule.
• L’usage d’un kit mains libres est recommandé lors d’une
utilisation en voiture.
• Arrêter le véhicule dans un endroit sûr avant de faire un appel
ou de répondre à un appel, lorsque les conditions de
circulation le nécessitent.
Avertissements d'utilisation
Véhicules équipés d'un air-bag ou coussin gonflable de sécurité
Ne placez aucun objet ou équipement de communication dans la
zone de déploiement d'un air-bag, ni au-dessus de celle-ci. Un
air-bag se gonfle avec une force considérable. Si votre
équipement de communication n'est pas dans une zone hors
d'atteinte de l'air-bag, il peut être projeté au moment de son
déploiement et provoquer des blessures graves.
Atmosphères potentiellement explosives
Eteignez votre émetteur-récepteur lorsque vous entrez dans une
zone où l'atmosphère est potentiellement explosive, sauf si votre
poste est spécialement agréé "sécurité intrinsèque" par exemple
Factory Mutual, CSA ou UL.
Ne retirez pas, n'installez pas ou ne chargez pas de batteries
dans une zone potentiellement explosive. Toute étincelle dans ce
type de zone peut provoquer une explosion ou un incendie
pouvant engendrer des blessures graves, voire mortelles.
Note : Les zones mentionnées plus haut, dont l'atmosphère
présente des risques d’explosion, incluent les zones de
ravitaillement en carburant telles que les entreponts de
navires ; les installations de transfert ou de stockage de
combustibles ou de produits chimiques ; les zones où l'air
contient des produits chimiques ou des particules comme
la limaille, la poussière ou les poudres métalliques ; ainsi
que toute zone où l’on vous conseille habituellement de
couper le moteur de votre véhicule. Les zones dont
l'atmosphère est potentiellement explosive sont en général mais pas toujours - signalées par un ou plusieurs panneaux.
Détonateurs et zones de tir
Pour éviter toute interférence avec des opérations de tir, éteignez
votre poste lorsque vous vous trouvez à proximité de détonateurs
électriques, dans une "zone de tir", ou toute zone signalée par des
panneaux portant la mention "Eteignez vos émetteurs-récepteurs"
ou équivalente. Suivez toutes les indications et consignes fournies.
Avertissements d'utilisation
Antennes
N'utilisez jamais un portatif dont l'antenne est endommagée.
Tout contact d'une antenne endommagée avec la peau peut
provoquer une brûlure mineure.
Piles
Tout contact d'un matériau conducteur (bijoux, clés, colliers, etc.)
avec les bornes d'une batterie peut provoquer des dégâts
matériels ou des brûlures. Tout matériau conducteur peut
provoquer un court-circuit et devenir relativement chaud. Toute
manipulation de batterie chargée doit se faire avec précaution, en
particulier si vous la placez dans une poche, un sac ou tout autre
contenant pouvant inclure un ou plusieurs objets métalliques.
3 Français

VEUILLEZ CONSERVER CES INSTRUCTIONS
Avant d’utiliser le chargeur, veuillez lire toutes les instructions et
les notices de sécurité qui se trouvent sur (1) la pile, (2) le
chargeur et (3) la radio dans laquelle est utilisée la pile.
ATTENTION
Pour réduire le risque de blessures, ne rechargez que les piles
rechargeables (batteries) (E)NTN9395. Les autres types de piles
(alcalines) risquent d’exploser et d’entraîner des blessures et
des détériorations.
1 N’exposez pas le chargeur à la pluie ou à la neige.
2 N’utilisez pas le chargeur s’il a reçu un coup brutal ou s’il
est tombé ou qu’il s’est détérioré d’une façon quelconque.
3 Ne démontez pas le chargeur. S’il ne fonctionne pas
correctement, renvoyez-le au magasin où vous l’avez achetez,
dans un délai de 90 jours à compter de la date d’achat. Si la
radio est remontée incorrectement, elle peut provoquer des
chocs électriques ou des incendies.
4 Ne modifiez jamais le cordon secteur AC et la fiche qui
accompagnent l’appareil. Si la fiche ne convient pas pour la
prise, faites installer une prise adéquate par un électricien
compétent, pour éviter les risques de chocs électriques.
5 Pour réduire le risque de détérioration du cordon ou de la
fiche, tirez la fiche plutôt que le cordon pour débrancher le
chargeur du réceptacle AC.
6 Pour réduire le risque de chocs électriques, débranchez le
chargeur de la prise avant de procéder à tout entretien ou
nettoyage de l’appareil.
7 L’utilisation d’un accessoire qui n’est pas recommandé ou
vendu par Motorola peut entraîner un risque d’incendie, de
choc électrique ou de blessure.
4 Français

Parlons de votre nouvelle radio
Les radios Motorola™ Talkabout™ T6202, T6212 ou T6222 vous
permettent de rester en contact avec votre famille et vos amis.
Elles fonctionnent sur les fréquences PMR446. Elles peuvent être
utilisées dans tout pays où des fréquences PMR446 sont
autorisées, sous réserve toutefois des réglementations applicables.
Piles
Les radios Talkabout™ T6202, T6212 et T6222 fonctionnent soit
avec trois piles AA, soit avec une batterie rechargeable au nickel
métal hydride (NiMH).
La batterie rechargeable NiMH, le cache batterie, le chargeur et
la console de bureau peuvent être achetés séparément.
Pour installer la batterie NiMH :
1. Poussez le clip vers le haut pour retirer le cache batterie.
2. Insérez la batterie au nickel métal hybride avec les contacts de
charge tournés vers l’extérieur.
3. Remettez le cache batterie en place en insérant les chevilles
dans les fentes situées à l’arrière de la radio, appuyez ensuite
fermement jusqu’à ce que le clic d’enclenchement du cache
batterie se fasse entendre.
Pour charger la batterie NiMH :
La batterie NiMH peut être chargée tandis qu’elle se trouve
dans la radio ou séparément alors qu’elle se trouve dans
l’adapteur de chargeur de batterie. Pour obtenir une durée
d’utilisation maximale de la batterie, chargez-la la nuit (16 heures)
avant de l’utiliser pour la première fois. Les charges suivantes ne
nécessiteront qu’un temps de charge de quatre heures.
1. Assurez-vous que la radio est éteinte ou placez la batterie
NiMH dans l’adapteur de chargeur de batterie.
2. Branchez le chargeur sur une prise murale d’alimentation
secteur.
3. Positionnez le connecteur du chargeur doté d’un grand crochet
par-dessus la large fente située à droite des trois contacts de la
batterie.
4. Poussez le grand crochet dans la grande fente puis enclenchez
le petit crochet dans la petite fente.
5. Le témoin indicateur du chargeur sera rouge lorsque la batterie
se charge et il clignotera en vert lorsque la batterie sera
chargée (à 90% environ). L’indicateur vert sera allumé en
permanence une fois la batterie complètement chargée.
6. Pour retirer le connecteur du chargeur, tirez délicatement sur
celui-ci pour le dégager, puis soulevez-le vers le haut jusqu’à
ce que le petit crochet se libère et retirez délicatement le plus
grand crochet.
Nota : Si vous remarquez que le voyant clignote en rouge
pendant plus d’une minute, c’est que la batterie est défectueuse
et qu’elle doit être remplacée.
Utilisation de la console de bureau
La console de bureau peut être montée ou placée sur n’importe
quelle surface plane (telle qu’un mur ou une table). Pour monter
la console de bureau :
1. Enroulez le cordon d’alimentation sous le poste de charge.
Utilisez les découpages pour maintenir le cordon en place.
2. Fixez la console de bureau en utilisant deux vis numéro 6 x 3⁄4
appropriées à la surface de montage.
5 Français
A
B
C
F
D/E

Pour charger la batterie NiMH en utilisant la console de bureau :
1. Positionnez le chargeur avec le crochet situé à l’extrémité
portant le voyant placé par-dessus la fente de gauche.
2. Enclenchez le crochet situé à l’extrémité du cordon dans la
fente de droite en branchant le chargeur sur les contacts de la
console de bureau.
3. Branchez le chargeur sur une prise murale d’alimentation
secteur.
4. Placez la radio ou la batterie NiMH se trouvant dans l’adapteur
de chargeur de batterie dans la console de bureau jusqu’à ce
que vous entendiez un clic.
5. Une fois que le voyant est passé au vert, la batterie est
complètement chargée.
Pour installer des piles AA :
1. Poussez le clip vers le haut pour déposer le cache batteries.
2. Insérez trois piles AA sur le plateau pour piles AA de telle sorte
que les marquages + et – correspondent à ceux du compartiment.
3. Remettez le cache batterie en place en insérant les languettes
dans les fentes situées à l’arrière de la radio, appuyez ensuite
fermement jusqu’à ce que le cache batterie s’enclenche en place.
Pour mettre la radio sur marche et sur arrêt :
1. Appuyez sur le bouton P et maintenez-le enfoncé jusqu’à ce que
la radio soit en service. La DEL rouge s’allumera en permanence,
l’affichage deviendra actif et une alerte sonore se fera entendre (à
moins que les tonalités d’alerte soient invalidées).
2. Pour mettre la radio hors service, appuyez sur le bouton P et
maintenez-le enfoncé. La radio émettra un bip à titre de
confirmation (une fois les tonalités d’alerte validées) et
l’affichage disparaîtra.
Indicateur de charge de la batterie :
L’icône d , située sur l’écran à cristaux liquides, est divisée en
trois barres. Elle affiche un d (batterie pleine), b (batterie
pleine aux deux-tiers), c (batterie pleine au tiers) et a
(batterie presque vide). Lorsque c’est un c qui s’affiche, la
radio émet un bip toutes les dix minutes.
Sélection du type de batterie :
Pour garantir que l’icône d’indication de charge de la batterie
affiche une indication de charge correcte, le type de batterie
utilisé dans la radio devra être sélectionné dans le Menu
Sélection du type de batterie.
1. Pour entrer dans le Menu Sélection du type de batterie,
appuyez sur le bouton \ jusqu’à ce que l’icône d
apparaisse sur l’affichage. Le numéro du canal sera remplacé
par un A ou un n clignotant.
2. Utilisez le bouton haut ] ou bas [ pour choisir soit A, si des
piles alcalines sont utilisées, soit n si des batteries NiMH ou
NiCd rechargeables sont utilisées.
3. La radio reviendra à un mode de fonctionnement normal après
dix secondes ou lorsque vous appuyez brièvement sur M ou R.
Nota : Enlevez les batteries avant de ranger votre radio pendant
de longues périodes. Les batteries se corrodent avec le
temps et peuvent endommager votre radio.
6 Français
G
3
7
H
A
B
C
2
1
5/
6

Clip de ceinture:
Les radios Talkabout™ T6202, T6212 et T6222 sont fournies en
standard avec un clip de ceinture.
Pour l’attacher :
1. En maintenant le clip de ceinture par le haut et le bas, pressez
pour rentrer le crochet.
2. Insérez le clip ceinture dans la fente située à l’arrière de la
radio et relâchez la prise.
3. Pour sortir le clip ceinture, saisissez-le par le haut et le bas, pressez
de nouveau pour rentrer le crochet et sortez-le de son logement.
Avant de pouvoir parler
Lisez ce manuel attentivement.
Les radios Talkabout™ T6202, T6212 et T6222 ont 8 canaux et 38
codes d’élimination d’interférences. Pour parler à d’autres personnes,
toutes les radios de votre groupe doivent être réglées sur le même
canal et le même code.
Les codes d’élimination d’interférences filtrent les bruits et
les messages indésirables des canaux radio. Vous ne pouvez
communiquer qu’avec des radios utilisant le même canal et le
même code. Étant donné toutefois que les canaux radio peuvent
être surveillés, les conversations ne sont pas privées. Pour éviter
des canaux encombrés, changez le réglage du code/du canal
radio. (Prenez soin de régler les autres radios de votre groupe
sur le même canal/code que le vôtre).
Sélectionnez le code 0 pour surveiller toutes les activités du canal.
Changez de canal :
1. Appuyez sur le bouton \ une fois pour entrer dans le Menu
Sélection du canal. Le numéro du canal commencera à clignoter.
2. Utilisez les boutons haut ] ou bas [ pour sélectionner un
nouveau canal tandis que le numéro du canal clignote.
3. La radio revient au mode de fonctionnement normal après dix
secondes ou lorsque vous appuyez brièvement sur M ou sur R.
Changez de code :
1. Appuyez sur le bouton \ deux fois pour entrer dans le Menu
Sélection de code.
2. Le code courant de la radio (nombre écrit en petit)
commencera à clignoter.
3. Utilisez les boutons haut ] ou bas [ pour sélectionner un
nouveau code tandis que le nombre clignote.
4. La radio reviendra au mode de fonctionnement normal après dix
secondes ou lorsque vous appuyez brièvement sur M ou sur R.
Pour communiquer
Réglez le volume :
1. Appuyez sur le bouton haut ] ou bas [ pour changer le
volume de la radio.
2. L’icône V apparaîtra et le niveau du volume courant
apparaîtra sur l’affichage (de 1 à 20). La radio émettra un bip
pour indiquer le niveau du volume (lorsque les tonalités
d’alerte sont validées).
3. La radio reviendra à un mode de fonctionnement normal après
trois secondes.
Attention : Ne tenez pas la radio trop près de votre oreille
lorsque le volume est réglé sur une valeur élevée.
Ceci pourrait endommager votre ouïe.
7 Français
I

Le bouton moniteur/indicateur de puissance du signal et
de Scanning :
Ce bouton a trois fonctions, Moniteur, Indicateur de puissance
du signal et Scanning (La fonction de Scanning est uniquement
disponible sur les radios T6212 et T6222).
La fonction Moniteur est utilisée pour vérifier l’activité du canal
courant avant la transmission. Lors d’une réception ou si le canal
est occupé. Le voyant de la radio clignotera alors plus fréquemment
que la normale.
L’indicateur de puissance du signal montre le niveau de tout
signal éventuellement entrant comme étant de 1 (le plus faible)
à 6 (le plus fort).
Envoyez des messages :
1. Vérifiez l’activité du canal en appuyant longuement sur le
bouton ). Vous entendrez un bruit de porteuse si le canal
est libre. Ne transmettez pas de message si quelqu’un parle
sur le canal.
2. L’icône w apparaîtra sur l’affichage et le numéro du canal
sera remplacé par un chiffre montrant le niveau de tout signal
éventuellement entrant comme allant de 1 (le plus faible) à 6
(le plus fort).
3. Pour maximiser la clarté, tenez la radio à une distance
comprise entre 5,0 et 7,5 cm de votre bouche.
4. Appuyez sur le bouton M et parlez dans la radio. La DEL est
allumée en permanence lors d’une transmission.
5. Pour recevoir un message, relâchez le bouton M.
Autres fonctions
Tonalité de confirmation d’émission :
Chaque fois que vous activez la fonction de tonalité de
confirmation d’émission, votre radio transmet une tonalité
unique lorsque vous mettez fin à la transmission et cette tonalité
se fait entendre localement sur votre radio.
Pour valider ou invalider cette fonction, appuyez sur le bouton
haut ] et maintenez-le enfoncé alors que vous mettez votre
radio en marche.
Mode de sonnerie :
Les radios Talkabout™ T6202 et T6212 vous permettent de
sélectionner une alerte de sonnerie lors de la première réception.
La sonnerie est ensuite interrompue provisoirement jusqu’à 30
secondes après que toute activité soit terminée sur le canal.
Pour sélectionner la sonnerie :
1. Appuyez sur le bouton \ jusqu’à ce que l’icône B
apparaisse sur l’affichage.
2. Le grand numéro de canal est remplacé par un Y pour « activé
» ou par n pour « désactivé ».
3. Utilisez le bouton haut ]ou bas [ pour sélectionner Y pour «
activé ».
4. La radio revient au mode de fonctionnement normal après dix
secondes ou lorsque vous appuyez brièvement sur M ou R.
8 Français

Menu restreint :
Les radios Talkabout™ T6202, T6212 et T6222 sont dotées d’une
fonction Menu restreint qui vous permet de limiter le nombre de
menus affichés à Canal, Code d’élimination d’interférences et
Tonalités d’appel . La fonction scanning de canaux est également
invalidée pour empêcher le changement accidentel du mode de
fonctionnement de la radio. Lorsque le Menu restreint est validé,
la seule séquence de mise en route de la radio disponible est
celle d’invalidation du Menu restreint. La durée de temporisation
du menu est augmentée à 60 secondes.
1. Pour activer le Menu restreint, appuyez sur le bouton \
et maintenez-le enfoncé tout en mettant la radio en marche.
2. Pour invalider le Menu restreint, arrêtez la radio et appuyez
ensuite sur le bouton \ tout en mettant la radio en marche.
Verrouillage :
Les radios Talkabout™ T6202, T6212 et T6222 sont dotées d’une
fonction de verrouillage qui vous permet de désactiver les
boutons Menu, Scanning et de Contrôle du volume ( haut ] et
bas [ pour que les réglages de la radio ne puissent pas être
changés accidentellement.
1. Pour activer la fonction de verrouillage, appuyez sur le bouton
\ et maintenez-le enfoncé jusqu’à ce que l’alerte de
validation de verrouillage retentisse et que l’icône f apparaisse
sur l’affichage.
2. Les boutons inutilisables émettront un bip s’ils sont pressés
(lorsque les tonalités d’alerte sont validées).
3. Pour invalider la fonction de verrouillage, appuyez sur le
bouton \ une fois de plus et maintenez-le enfoncé jusqu’à
ce que l’alerte d’invalidation de verrouillage retentisse et que
l’icône f disparaisse.
Rétro-éclairage :
Les radios Talkabout™ T6202, T6212 et T6222 sont dotées d’un
affichage rétro-éclairé à utiliser dans des conditions de faible
lumière. Appuyez brièvement sur le bouton R pour illuminer
l’affichage. Le rétro-éclairage s’allumera pendant quatre secondes.
Un appui sur un bouton quelconque démarrera ou prolongera la
période de temps durant laquelle l’affichage sera allumé.
Tonalités d’alerte :
Les tonalités d’alerte peuvent être désactivées en mettant la radio
en route tout en appuyant sur le bouton bas [. Les tonalités
d’alerte du limiteur de temps d’émission et de batterie faible ne
sont pas invalidés.
Pour réactiver les tonalités d’alerte, arrêtez la radio et remettez-la
en marche tout en maintenant le bouton bas [ enfoncé.
Édition du gain du microphone :
La fonction Édition du gain du microphone vous permet de
sélectionner l’un de trois réglages de gain du microphone (si la
commande vocale VOX n’est pas validée) : bas réglage (1),
réglage moyen (2) et réglage haut (3). Si vous parlez à haute
voix, c’est le réglage bas qui devra être sélectionné et si vous
parlez à voix basse, il vous faudra sélectionner le réglage haut.
1. Appuyez sur le bouton \ jusqu’à ce que l’icône g apparaisse
sur l’affichage avec un numéro clignotant 1, 2 ou 3.
2. Utilisez les boutons haut ] et bas [ pour alterner entre les
niveaux.
3. Les radios reviennent à un mode de fonctionnement normal
après dix secondes ou lorsque vous appuyez brièvement sur
M
ou R.
9 Français
6

Tonalités d’appel :
Les radios Talkabout™ T6202 et T6212 ont cinq tonalités d’appel
uniques pour identifier chaque utilisateur et alerter les autres que
vous avez l’intention de transmettre. Les radios Talkabout™
T6222 ont dix tonalités d’appel uniques. Appuyez sur le bouton
^ et tous les utilisateurs de votre canal et ayant votre code
seront alertés avec votre tonalité d’appel.
Pour changer et entendre une tonalité d’appel :
1. Pour entrer dans le Menu Tonalités d’appel, appuyez sur le bouton
\ jusqu’à ce que l’icône ^ apparaisse sur l’affichage. Le numéro
du canal sera remplacé par le numéro de la tonalité d’appel.
2. Utilisez les boutons haut ] ou bas [ pour changer la
tonalité d’appel.
3. La radio reviendra au mode de fonctionnement normal après dix
secondes ou lorsque vous appuyez brièvement sur M ou sur R.
Arrêt automatique :
Les radios Talkabout™ T6202, T6212 et T6222 peuvent être
programmées pour s’arrêter après une certaine période
d’inactivité (à savoir aucun appui de bouton ou de transmission
vocale VOX). Cette fonction est utilisée pour éviter que la batterie
ne soit utilisée inutilement.
1. Pour entrer dans le Menu Arrêt auto, automatique appuyez sur
le bouton \ jusqu’à ce que l’icône Arrêt automatique
apparaisse sur l’affichage. Le numéro du canal sera remplacé
par une barre horizontale clignotante qui signifie que la
fonction Arrêt automatique est invalidée.
2. Utilisez le bouton haut ] ou bas [ pour changer le réglage du
temps d’arrêt automatique (de 1 à 8 heures).
3. La radio reviendra au mode de fonctionnement normal après
dix secondes ou après un bref appui sur M ou sur R.
4. Si la fonction Arrêt automatique est validée, l’icône Arrêt
automatique apparaîtra sur l’affichage. Pendant cinq minutes
avant de s’arrêter, la radio émettra périodiquement une tonalité
d’avertissement et l’icône Arrêt automatique clignotera. Toute
activité d’appui sur un bouton ou de transmission VOX
réinitialisera le temporisateur Arrêt automatique.
Réinitialisation :
Si vous maintenez les boutons \ et M ou les boutons h et
M enfoncés tout en mettant la radio en route, vous réinitialiserez
les fonctions programmables à leurs réglages en usine.
Limiteur de temps d’émission :
La fonction Minuteur permet de prolonger la durée de vie de la
batterie. La radio émettra une tonalité d’avertissement et
s’arrêtera de transmettre si :
1. Le bouton M est pressé continuellement pendant plus de 60
secondes.
2. La transmission vocale VOX est continuellement active
pendant plus de 60 secondes.
Utilisation mains-libres :
Les radios Talkabout™ T6202, T6212 et T6222 sont dotées d’une
fonction de transmission commandée par la voix (VOX). Ceci
signifie que le son de votre voix active une transmission lorsque
la radio est utilisée avec un accessoire audio VOX.
Nota : Lors de l’utilisation d’accessoires audio en option avec
votre radio, nous recommandons que le niveau du volume
soit maintenu à un niveau d’écoute confortable. Diminuez
le volume avant de placer l’accessoire sur votre tête ou
dans votre oreille.
10 Français
4

Pour utiliser la fonction VOX :
1. Assurez-vous que la radio est éteinte.
2. Branchez le connecteur de l’accessoire audio dans la prise jack
située du côté gauche de la radio.
3. Mettez la radio en route et baissez le volume avant de placer
l’accessoire sur la tête ou dans l’oreille. L’icône clignotante g
apparaîtra sur l’affichage pour indiquer que la fonction VOX
est active.
4. Utilisez le bouton haut ] ou bas [ pour ajuster le volume sur
un niveau confortable.
5. Pour transmettre, parlez dans le microphone de l’accessoire.
Pour recevoir, arrêtez de parler.
Nota : Il y aura un bref temps d’attente entre le moment où
vous commencez à parler et le moment où la radio se
met à transmettre et un temps d’attente plus long entre
le moment où vous cessez de parler et le moment où la
radio se prépare à recevoir pour prendre en compte les
pauses de la conversation.
Mode Réinitialisation en Push-To-Talk (alternat) :
1. Appuyez sur le bouton M une fois. L’icône g disparaîtra.
2. Pour transmettre, appuyez sur le bouton M de la radio. Pour
recevoir, relâchez le bouton M.
3. Pour revenir au mode VOX, arrêtez la radio puis remettez-la en
route avec l’accessoire en place.
Pour sélectionner une sensibilité vocale VOX :
Les radios Talkabout™ T6202, T6212 et T6222 vous permettent
de régler la sensibilité vocale VOX de la radio pour compenser
les divers niveaux de conversation et bruit de fond. Le mode
d’édition VOX vous permet de choisir entre des réglages de
haute, moyenne et basse sensibilité. Si, par exemple, vous parlez
à haute voix ou que vous vous trouvez dans un environnement
bruyant, le réglage basse sensibilité (1) devra être sélectionné et
si vous parlez à voix basse ou que vous vous trouvez dans un
environnement calme, le réglage haute sensibilité (3) devra être
sélectionné. Le réglage moyenne sensibilité (2) convient à la
plupart des applications.
1. Pour entrer dans le Menu Sensibilité vocale VOX, assurez-vous
d’abord que l’accessoire audio est en place et appuyez sur le
bouton \jusqu’à ce que l’icône g apparaisse sur l’affichage.
Le numéro du canal sera remplacé par le réglage VOX 1, 2 ou 3.
2. Utilisez le bouton haut ] ou bas [ pour changer, si besoin
est, le réglage de la commande vocale VOX.
3. La radio reviendra à un mode de fonctionnement normal après dix
secondes ou lorsque vous appuyez brièvement sur M ou sur R.
VOX interne
Les radios Talkabout™ T6212 et T6222 sont également dotées de
possibilités de transmission interne déclenchée par la voix. Il
s’agit d’une fonction similaire à la fonction VOX car le son de
votre voix active la transmission, mais aucun accessoire externe
n’est nécessaire.
11 Français

Pour sélectionner la fonction VOX interne :
Soit
1. Appuyez sur le bouton \ jusqu’à ce que l’icône clignotante g
apparaisse sur l’affichage et que le numéro du canal soit remplacé
par un Y (validé) ou par un n (invalidé). Utilisez le bouton haut ]
ou bas [ pour sélectionner Y en vue d’une validation.
2. La radio reviendra à un mode de fonctionnement normal après
dix secondes ou lorsque vous appuyez brièvement sur M ou
sur R. L’icône g reste sur l’affichage.
SOIT
1. Assurez-vous que la radio est éteinte.
2. Appuyez sur le bouton M et maintenez-le enfoncé et mettez
la radio en marche à l’aide du bouton Power (Alimentation).
L’icône g apparaîtra sur l’affichage.
Pour utiliser la fonction VOX interne :
1. Appuyez rapidement sur le bouton M et maintenez-le enfoncé
et l’icône g commencera à clignoter. Votre radio transmettra
maintenant chaque fois que vous parlerez.
2. Un appui rapide sur M fait alterner la radio entre les modes
VOX imactif et actif.
3. Pour invalider la fonction VOX interne, passez au Menu
Sélection de la fonction VOX interne et utilisez le bouton haut
] ou bas [ pour sélectionner n afin d’invalider la fonction.
Ou encore arrêtez la radio et remettez-la en route.
Pour sélectionner la sensibilité de la fonction VOX interne :
Les radios Talkabout™ T6212 et T6222 vous permettent de
régler la sensibilité de la fonction VOX interne de la radio afin
de compenser les divers niveaux de conversation et bruit de
fond. Le mode d’édition de la fonction VOX interne vous permet
de choisir entre les réglages de haute et de basse sensibilité. Si,
par exemple, vous parlez à haute voix ou que vous vous trouvez
dans un environnement bruyant, il vous faudra sélectionner le
réglage de basse sensibilité (1) et si vous parlez à voix basse ou
que vous vous trouvez dans un environnement calme, le réglage
de haute sensibilité (3) devra être sélectionné. Le réglage de
sensibilité moyenne (2) est adéquat à la plupart des applications.
1. Pour entrer dans le Menu Sensibilité de la fonction VOX interne,
appuyez sur le bouton \ jusqu’à ce que le numéro du canal
soit remplacé par un réglage de VOX interne de 1, 2 ou 3 après
vous être assuré que l’icône g apparaît sur l’affichage.
2. Utilisez le bouton haut ] ou bas [ pour changer, si
nécessaire, le réglage de la commande vocale VOX interne.
3. La radio revient à un mode de fonctionnement normal après dix
secondes ou lorsque vous appuyez brièvement sur M ou sur R.
Scanning :
Les radios Talkabout™ T6212 et T6222 sont dotées d’une fonction
de Scanning qui vous permet de surveiller d’autres radios émettrices.
Cette fonction vous permet d’écouter et de répondre à une ou à
plusieurs personnes sans avoir à changer de canai.
Un scanning normal ne s’arrêtera sur un canal que si le code
d’élimination d’interférences correspond à celui que vous avez
sélectionné pour ce canai.
Un scanning des canaux sans tenir compte du code d’élimination
s’arrêtera sur un canal si une activité est détectée. La radio
effectuera une vérification du canal sans son code si vous réglez
le code d’élimination d’interférences sur 0 pour le canal d’origine
(le canal utilisé avant de passer au mode de scanning).
1. Pour commencer une vérification, appuyez brièvement sur le
bouton ). L’icône h apparaîtra sur l’affichage et les numéros
de canaux y défileront.
12 Français

2. Dès que la radio détecte une activité sur le canal, l’affichage
indiquera le canal et le code sur lequel a lieu l’activité (le code
sera 0 si la radio est en mode de vérification du canal sans son
code et s’arrêtera sur un canal dont le signal ne contient pas
de code d’élimination d’interférences).
3. Un appui sur le bouton M ou ) tandis que la radio
est en mode de vérification entraînera une opération de
transmission/surveillance du canal d’origine.
4. Pour quitter le scanning, appuyez brièvement sur le bouton )
une fois de plus. Sur l’affichage apparaîtra le numéro de code
et le canal d’origine et l’icône h disparaîtra.
Sélection de la liste de des canaux á vérifier :
Les radios TalkaboutTM T6212 et T6222 vous permettent de
sélectionner les canaux à scanner. La radio peut être
programmée sur le scanning de canaux spécifiques en les
activant et en les désactivant dans le Menu Liste de scanning.
1. Pour entrer dans le Menu Liste de scanning, appuyez sur le
bouton \ jusqu’à ce que l’icône h apparaisse sur
l’affichage. Le numéro de code courant sera remplacé par un Y
clignotant pour oui ou par un n pour non.
2. Appuyez sur le bouton ) pour choisir de scanner ou non un
canal. Sélectionnez Y pour oui et n pour non.
3. Appuyez sur le bouton haut ] ou bas [ pour changer de canal.
4. La radio revient au mode de fonctionnement normal après dix
secondes ou lorsque vous appuyez brièvement sur M ou sur R.
Mode vibreur :
Les radios Talkabout™ T6222 vous permettent de choisir entre une
alerte de sonnerie et/ou un VibraCall
®
lors de la première réception.
La sonnerie et/ou le VibraCall
®
sont alors provisoirement interrompus
jusqu’à ce que 30 secondes se soient écoulées après que toute
activité se soit terminée sur le canal.
Pour sélectionner le mode sonnerie et/ou VibraCall
®
:
1. Appuyez sur le bouton \ jusqu’à ce que les icônes B et/ou
i apparaissent sur l’affichage (en fonction du réglage courant).
2. Le grand numéro de canal est remplacé par un – ou un
numéro 1, 2 ou 3.
3. Utilisez le bouton haut ] ou bas [ a fin de choisir entre les
réglages suivants.
– = Ni le mode sonnerie, ni le mode VibraCall
®
(les deux icônes clignotent)
1 = Mode VibraCall
®
2 = Mode sonnerie
3 = À la fois le mode sonnerie et le mode VibraCall
®
4. La radio revient au mode de fonctionnement normal après dix
secondes ou lorsque vous appuyez sur M ou sur R.
Brouilleur de voix :
Les radios Talkabout™ T6222 sont dotées d’une fonction de
brouillage de voix. Cette fonction protège le secret de la
transmission de l’utilisateur. Pour recevoir une transmission
brouillée, les radios doivent avoir des canaux, des codes et des
codes de brouillage assortis. Nous recommandons une
vérification et un suivi des réglementations éventuellement
applicables à votre pays avant d’utiliser cette fonction.
Pour sélectionner un brouilleur de voix :
1. Appuyez sur le bouton \ jusqu’à ce que l’icône e
apparaisse sur l’affichage et que le numéro du canal soit
remplacé par une barre horizontale.
2. Pour choisir un brouilleur, appuyez sur le bouton haut ] ou
bas [ jusqu’à ce qu’un 1 apparaisse à la position du canal.
3. Pour invalider le brouilleur, appuyez sur le bouton haut ] ou
bas [ jusqu’à ce qu’une barre horizontale apparaisse.
13 Français

4. La radio revient au mode de fonctionnement normal après dix
secondes ou lorsque vous appuyez brièvement sur M ou sur R.
Étiquette radio
Les 8 canaux de votre radio sont partagés sur une base "à tour
de rôle". Ceci signifie que d’autres groupes pourraient très bien
parler sur les même canaux. Pour des communications
ininterrompues, veuillez suivre les étapes ci-dessous :
1. Utilisez le bouton ) pour vérifier l’activité qui a lieu sur le canal
avant de parler.
2. Ne parlez pas par-dessus la voix de quelqu’un qui utilise déjà le
canal – votre message pourrait ne pas être complètement
entendu. Essayez de changer le code du canal et de l’éliminateur
d’interférences pour éviter un encombrement du canal.
Nota : Comme les canaux sont partagés, vos conversations ne
seront pas privées et vous pourrez entendre d’autres
personnes parler.
Portée des conversations
Les radios Talkabout T6202, T6212 et T6222 ont été conçues
pour maximiser la performance et améliorer la plage de
transmission sur le terrain. Il est conseillé de ne pas utiliser les
radios à moins de 1,5 mètre de distance les unes des autres, pour
minimiser les interférences.
La portée des conversations dépend du terrain. Ces radios
sont prévues pour fonctionner en ondes directes et la portée
des conversations sera affectée par les bâtiments en béton, les
feuillages épais et l’utilisation des radios dans des bâtiments
ou des véhicules.
Portée optimale Portée moyenne Portée minimale
La portée optimale est obtenue dans les zones plates et
ouvertes. Elle a une couverture pouvant atteindre 3 kilomètres.
La portée devient moyenne lorsqu’il y a des bâtiments et des
arbres et minimale lorsque des feuillages épais et des
montagnes obstruent la voie de communication.
14 Français

Dépistage de pannes
Problème Solution
Absence d’alimentation Repositionnez ou remplacez les piles AA.
Rechargez ou remplacez la batterie NiMH.
Message non transmis Vérifiez que le bouton Push-To-Talk est complètement enfoncé tandis que vous transmettez. Repositionnez
ou remplacez les batteries
Message non reçu Confirmez que les réglages du canal et du code de l’éliminateur d’interférences sont les mêmes sur les
radios. Vérifiez que le bouton Push-To-Talk n’a pas été pressé par inadvertance. Repositionnez ou
remplacez les batteries. Des obstructions, l’utilisation de la radio dans un bâtiment ou des véhicules
peuvent interférer avec les communications. Changez d’endroit pour transmettre. Vérifiez que vous avez
réglé du volume.
Message brouillé Le code de brouillage est activé ou son réglage ne correspond pas à celui des autres radios; toutes les
radios doivent avoir le même code de brouillage.
Vous entendez d’autres Vérifiez que le code d’élimination d’interférences est réglé, (les réglages actifs sont 1 à 38). Il est possible
conversations ou du bruit que vous utilisiez un canal ou un code d’élimination d’interférences partagé. Essayez-en un autre.
sur un canal
Portée d’émission limitée
Des structures en acier/béton, un feuillage épais et une utilisation dans des bâtiments et dans des véhicules diminueront
la portée. Vérifiez que la ligne de visée est claire pour améliorer la transmission. Le port de la radio à proximité du corps,
dans une poche par exemple ou sur une ceinture diminuera la portée. Changez l’emplacement de la radio.
Fortes perturbations statiques Les radios sont trop proches les unes des autres. Les radios doivent se trouver à au moins 1,5 mètre les unes
ou interférences des autres. Augmentez votre distance. Les radios sont trop loin les unes des autres. Des obstacles interfèrent
avec la transmission. La portée de l’émission est de 3 kilomètres en champ libre, sans obstructions.
Impossible de changer les Assurez-vous que la radio est déverrouillée.
réglages du canal/du code Vérifiez si le Menu restreint est activé. Invalidez le Menu court en appuyant sur \ tout en mettant la radio en marche.
Impossible d’accéder à tous Rechargez la batterie NiMH ou remplacez les piles AA. Des températures d’utilisation extrêmes affecteront
les menus la durée de vie de la batterie.
Batteries faibles
La DEL du chargeur Le chargeur n’est pas positionné correctement Repositionnez le chargeur et vérifiez qu’il est fermement
émet deux flashs fixé à la radio, à la batterie ou au poste de charge. L’alimentation de la batterie est très basse ; la batterie se
charge lentement avant de passer en mode de charge rapide.
Services des produits Motorola Si la radio ne fonctionne toujours pas correctement, contactez le distributeur qui vous a vendu la radio.
15 Français

Spécifications :
Description Spécs
Canaux 8
Codes 38
Fréquence de service 446,00625–446,09375 MHz
Portée de conversation Jusqu’à 3 kilomètres
Source d’alimentation 3 piles AA ou bloc d’alimentation NiMH.
Durée de vie de la pile* : AA** NiMH
Conversation continuelle 8.2 heures 2.4 heure
Stand-by 130 heures 39 heures
* normale
** Avec pile alcaline de première qualité. La durée de vie de la pile
de type NiMH/NiCd ou AA peut varier selon sa provenance.
Garantie
Motorola garantit à l’acheteur que l’émetteur-récepteur et les
accessoires (ci-après les « Produits ») qu’il a acquis auprès d’un
revendeur agréé Motorola sont conformes aux spécifications
Motorola en vigueur au moment de leur fabrication, pour une
période standard de garantie d’ un an à compter de la date
d’achat des Produits (ci-après « Période de garantie »).
En cas de défaut de conformité de l’un des Produits par rapport
aux spécifications applicables, vous devez en informer Motorola,
en remettant le Produit au Centre de Service Après Vente Agréé
Motorola le plus proche, dans un délai de deux mois à compter
de la découverte du défaut, et en tout état de cause avant
l’expiration de la Période de Garantie. Motorola ne sera pas liée
par des prises de position relatives aux Produits qui ne
proviennent pas directement d’elle-même.
Une liste de numéros « Centres d’Appel de Motorola » est
fournie avec ce Produit.
Pendant la Période de Garantie, Motorola assurera, à ses frais et
à sa seule convenance, la réparation ou le remplacement du
Produit défectueux, l’une ou l’autre de ces deux solutions
constituant l’intégralité de votre dédommagement. A défaut de
réparer ou de remplacer le Produit, Motorola remboursera le prix
d’achat du Produit, déduit d’un montant correspondant à l’usage
du Produit depuis son acquisition. Le présent engagement
expire à la fin de la Période de Garantie.
Le présent engagement constitue l’intégralité de la garantie
portant sur un téléphone cellulaire et ses accessoires, et est
exclusif de toute autre forme de réparation, explicite ou implicite.
Motorola exclut expressément toute autre forme de garantie
légale ou contractuelle et notamment l’aptitude du Produit à
satisfaire les besoins de l’acheteur, sous réserve toutefois des
dispositions applicables aux consommateurs.
La responsabilité de Motorola ne saurait être engagée pour les
dommages indirects, (incluant notamment la perte d’usage, la
perte de temps, la perte de bénéfices ou la perte financière),
résultant du fait du Produit, et sa responsabilité ne saurait en
toute hypothèse excéder le prix d’achat du Produit.
Cette garantie ne saurait priver un acheteur ayant la qualité de
consommateur des recours légaux dont il peut se prévaloir en
cette qualité.
16 Français

Comment Exercer La Garantie
Dans la plupart des cas, le service de garantie sera assuré par
le revendeur agréé Motorola qui aura vendu votre téléphone
cellulaire Motorola et ses accessoires. Le service de garantie
peut également être assuré par un Centre de Service Après
Vente Agréé Motorola proche de chez vous.
Si vous souhaitez des informations complémentaires, vous
pouvez appeler le « Centre d’Appel » Motorola dont le numéro
est indiqué ci-après pour votre pays.
Pour pouvoir prétendre au service de garantie, vous devez
remettre l’émetteur-récepteur. Si vous vous adressez à un
Centre de Service Après Vente Agréé Motorola, le Produit doit
être accompagné des informations suivantes : vos nom, adresse,
numéro de téléphone, et description du problème.
Afin de bénéficier de la garantie, vous devez produire un reçu
ou tout document établissant la date de l’achat du Produit. Le
l’émetteur-récepteur doit également comporter clairement les
informations suivantes, qui sont fournies avec le Produit : numéro
de série (Original compatible electronic serial number, [ESN]).
Conditions
La présente garantie ne sera pas applicable si le type ou les
numéros de série du Produit ont été effacés, enlevés, ou sont
illisibles, ou si le marquage du téléphone a été altéré de toute autre
façon. Motorola se réserve le droit de refuser d’assurer gratuitement
le service de garantie si les documents ou les éléments requis ne
peuvent pas être présentés, ou si les renseignements fournis sont
incomplèts, illisibles, ou incompatibles avec les informations en
provenance de l’usine de fabrication.
La réparation peut comprendre, à la seule convenance de
Motorola, le remplacement de circuits ou de cartes avec des
circuits ou des cartes fonctionnant de façon équivalente, neufs
ou reconditionnés. Les circuits, accessoires, batteries ou cartes
remplacés sont garantis jusqu’à la fin de la Période de Garantie
initiale, étant précisé que cette Période de Garantie ne sera pas
prolongée. Tous les éléments originaux qui ont été remplacés
(accessoires, batteries, circuits, téléphone cellulaire) deviennent
la propriété de Motorola. Motorola ne garantit pas l’installation,
la maintenance ou le service après-vente des produits,
accessoires, batteries ou circuits.
Motorola ne sera en aucun cas responsable de dysfonctionnements
ou de dommages causés par un équipement non fourni par
Motorola attaché au Produit, ou utilisé en connexion avec celui-ci,
ou du dysfonctionnement d’un Produit Motorola connecté à un
équipement non Motorola, tout équipement de ce type étant
expressément exclu de la présente garantie.
Lorsque le produit est utilisé en association avec des
équipements ou des périphériques non Motorola, Motorola
ne garantit pas le bon fonctionnement de l’association
Produit/périphérique, et sa garantie ne pourra dans ce cas être
mise en jeu pour autant que le dysfonctionnement ne provienne
pas du Produit Motorola.
Motorola n’est en aucun cas responsable de dommages, qu’ils
soient ou non causés par un équipement Motorola, en cas
d’utilisation d’un téléphone cellulaire, d’accessoires et de
batteries (incluant de façon non limitative les batteries,
chargeurs, adaptateurs), lorsque ces accessoires et batteries
ne sont pas fabriqués et fournis par Motorola.
17 Français

Exclusions De Garantie
La présente garantie n’est pas valable lorsque le
dysfonctionnement provient d’une mauvaise utilisation,
négligence, manque de soin, mauvaise manipulation, ou dans tous
les cas d’intervention effectuée par des personnes non agréées.
La garantie est exclue dans les cas suivants :
1 Utilisation du Produit autre que dans des conditions normales
et habituelles ;
2 Mauvaise utilisation, accident, négligence ;
3 Mise en oeuvre défectueuse de tests, modes opératoires,
maintenance, ou modification de quelque sorte que ce soit.
4 Dommage aux antennes, sauf si causé directement par un
défaut de fabrication ou de main d’oeuvre ;
5 Produits désassemblés ou réparés de façon à en dégrader le
mode opératoire ou à empêcher l’essai ou l’inspection
nécessaire à la vérification d’une réclamation de garantie ;
6 Toute opération provenant de l’opérateur réseau (couverture,
disponibilité, etc…) ;
7 Dommage dû à l’humidité ou la projection de nourriture ;
8 Egratignure ou dommage aux surfaces plastiques ou tous
éléments exposés à l’extérieur résultant de l’usage normal par
le client ;
9 Produits loués de façon temporaire ;
10 Maintenance périodique, réparation ou remplacement qui
sont la conséquence d’un usage normal.
NOTE : La durée en temps de parole, en veille, et le cycle de
vie total d’une batterie rechargeable Motorola pour
téléphone cellulaire dépendra des conditions d’usage.
S’agissant d’un consommable, les spécifications
indiquent que vous devriez obtenir une performance
optimale pour votre téléphone cellulaire Motorola
pendant les six premiers mois de l’achat et pour environ
200 charges.
La garantie des batteries rechargeables Motorola est nulle de
plein droit si (i) la batterie est chargée au moyen d’un chargeur
non approuvé par Motorola, (ii) l’un quelconque des sceaux de la
batterie est cassé ou a été manifestement manipulé, (iii) la
batterie est utilisée avec tout autre élément que le téléphone
cellulaire pour lequel elle a été spécifiée.
18 Français

Informations sur le copyright
Les produits Motorola décrits dans ce manuel peuvent
incorporer des programmes exclusifs à Motorola enregistrés sur
semi-conducteurs, mémoires ou autres supports. La loi des
Etats-Unis et d’autres pays maintient certains droits exclusifs à
Motorola pour les programmes informatiques dont Motorola
détient les droits d’auteur, y compris le droit exclusif de copier ou
de reproduire ces programmes Motorola sous une forme
quelconque. Conformément, tous les programmes informatiques
exclusifs à Motorola qui sont incorporés aux produits Motorola
décrits dans ce manuel ne peuvent pas être copiés ou reproduits
de façon quelconque sans l’autorisation écrite expresse de
Motorola. En outre, l’achat de produits Motorola ne confère
aucunement, que ce soit directement, par implication, par force
obligatoire ou autre, de licence en vertu des droits d’auteurs,
brevets et brevets déposés de Motorola, à l’exception de la
licence gratuite non exclusive normale d’utilisation qui découle
de l’opération de la loi sur la vente d’un produit.
, Motorola sont des marques commerciales de Motorola, Inc.
Talkabout est une marque commerciale de Motorola, Inc.
© 2001 Motorola, Inc.
Pour tous renseignements complémentaires, veuillez contacter le
01 49 46 85 97 (depuis la France)
+33 1 49 46 85 97 (depuis l’étranger)
19 Français

Deutsch
Inhalt
Allgemeine Informationen und Sicherheitshinweise 1
Hochfrequenzstrahlung 1
Handsprechfunkgeräte und
Elektromagnetische Strahlung (EME) 1
Antennen 1
Funkbetrieb 1
Betrieb eines am Körper getragenen Funkgeräts 2
Motorola Original Zubehör 2
Zugelassenes Zubehör 2
Elektromagnetische Störungen / Verträglichkeit 2
Medizinische Geräte 2
Sicherheitsbestimmungen bei Verwendung im Auto 3
Warnhinweise für den Betrieb 3
Sicherheitshinweise für den Betrieb 3
Diese Anweisungen aufheben 4
Anleitung zur Bedienung Ihres Sprechfunkgerätes 5
Batterien 5
Installieren des NiMH-Akkus 5
Laden des NiMH-Akkus 5
Verwenden der Ladestation 6
Einlegen von AA-Batterien 6
Ein- und Ausschalten des Sprechfunkgeräts 6
Batterieladungsanzeige 6
Wahl der Batterieart 6
Gürtel-Clip 7
Bevor Sie sprechen können 7
Ändern des Kanals 7
Ändern des Codes 7
Kommunizieren 8
Andere Funktionen 8
Bestätigungston 8
Rufmodus 8
Kurzmenü-Funktion 9
Sperrfunktion 9
Beleuchtung 9
Signaltöne 9
Mikrofonverstärkungsänderung 9
Ruftöne 10
Automatisches Ausschalten (APO) 10
Einstellungen zurücksetzen 10
Sendezeit-Timer 10
Freisprechbetrieb 11
Interne VOX-Funktion 12
Scan 12
Wählen der Scan-Liste 13
VibraCall
®
Modus 13
Sprachverschleierung 14
Professionalität beim Sprechfunk 14
Übertragungsreichweite 14
Störungsbeseitigung 15
Technische Daten 17
Garantieleistugen 17
Copyrightinformationen 19

Allgemeine Informationen und Sicherheitshinweise
Wichtige Hinweise für einen sicheren und effizienten Betrieb –
Bitte vor der Benutzung Ihres Funkgeräts lesen!
Die im vorliegenden Dokument enthaltenen Informationen
ersetzen die bisherigen allgemeinen Sicherheitshinweise.
Informationen hinsichtlich des Funkgeräteeinsatzes in
explosions-gefährdeten Umgebungen erhalten Sie im
Handbuchzusatz FM (Factory Mutual) oder auf der Hinweiskarte,
die zusammen mit solchen Funkgeräten ausgeliefert wird, die für
diese Einsatzbedingungen zugelassen sind.
Hochfrequenz-Betriebscharakteristiken
Ihr Funkgerät enthält einen Sender und einen Empfänger, d.h.
im eingeschalteten Zustand sendet und empfängt es
Hochfrequenzenergie. Das Funkgerät arbeitet, je nach Modell,
im Frequenzbereich von 446.00625 MHz bis 446.09375 MHz.
Hochfrequenzstrahlung
Aufgrund seiner Bauart entspricht Ihr Motorola-Sprechfunkgerät
den folgenden nationalen und internationalen Normen und
Richtlinien zum Schutz von Personen vor elektromagnetischer
Strahlungsenergie:
• Federal Communications Commission (FCC), Amerika, Code of
Federal Regulations; 47 CFR Abschnitt 2, Unterabschnitt J
• American National Standards Institute (ANSI) / Institute of
Electrical and Electronic Engineers (IEEE) C95. 1- 1992
• Institute of Electrical and Electronic Engineers (IEEE) Ausgabe
C95.1- 1999
• National Council on Radiation Protection and Measurements
(NCRP), Amerika, Bericht 86, 1986
• International Commission on Non- Ionizing Radiation
Protection (ICNIRP) 1998
• National Radiological Protection Board, Großbritannien 1995
• Ministry of Health, Kanada - Schutzcode 6. Grenzwerte
für den Schutz von Personen vor elektromagnetischer
Hochfrequenzstrahlung im Frequenzbereich von 3 kHz
bis 300 GHz, 1999
Um eine optimale Geräteleistung sicherzustellen und zu
gewährleisten, dass die Gefährdung von Personen durch
hochfrequente elektromagnetische Energie innerhalb der
in den vorstehenden Standards aufgeführten Richtlinien bleibt,
verfahren Sie bitte immer wie nachfolgend beschrieben:
Handsprechfunkgeräte und elektromagnetische Strahlung
Antennen
Benutzen Sie nur die zum Lieferumfang des Funkgeräts
gehörende Antennen oder zugelassene Ersatzantennen. Nicht
zugelassene Antennen, Veränderungen oder nicht zugelassenes
Zubehör können das Funkgerät beschädigen und die FCCVorschriften verletzen.
Halten Sie die Antenne nicht fest, wenn Sie das Funkgerät
benutzen. Durch Festhalten der Antenne wird die Gesprächsqualität
beeinträchtigt, u. U. arbeitet das Funkgerät unnötig mit einer
höheren Sendeleistung.
Funkbetrieb
Bei Verwendung des Funkgeräts als traditionelles Walkie-Talkie
halten Sie das Gerät in einer aufrechten Position, mit einem
Mikrofonabstand zu Ihren Lippen von ca. 5 bis 7,5cm.
1 Deutsch

Betrieb eines am Körper getragenen Funkgeräts
Um den FCC-Richtlinien für Hochfrequenzstrahlung zu entsprechen,
sollten Sie, wenn Sie beim Senden ein Handsprechfunkgerät am
Körper tragen, ausschließlich von Motorola gelieferte oder
zugelassene Gürtelclips, Halterungen, Holster, Tragetaschen oder
Tragegurte benutzen. Zubehör, das nicht von Motorola zugelassen
ist, verstößt möglicherweise gegen FCC-Richtlinien. Wenn Sie kein
Tragezubehör verwenden stellen Sie im Sendebetrieb sicher, dass die
Antenne min. 2,5cm vom Körper entfernt ist.
Motorola Original Zubehör
Eine Liste der Motorola Zubehörartikel finden Sie in der
Broschüre über Motorola Original Zubehör.
Elektromagnetische Störungen / Verträglichkeit
HINWEIS: Fast jedes elektronische Gerät ist empfänglich für
elektromagnetische Störungen (EMI), wenn es nicht
adäquat abgeschirmt oder für elektromagnetische
Kompatibilität konstruiert bzw. konfiguriert wurde.
Medizinische Bereiche
Um elektromagnetische Störungen und/oder Verträglichkeitskonflikte
zu vermeiden, schalten Sie Ihr Gerät überall dort aus, wo Sie durch
Hinweisschilder dazu aufgefordert werden. Krankenhäuser oder
Pflegeheime können Geräte haben, die auf externe HF-Energie
störend reagieren.
Flugzeuge
Wenn Sie die entsprechenden Anweisungen erhalten, schalten
Sie Ihr Funkgerät an Bord eines Flugzeuges aus. Der Betrieb von
Funkgeräten in Flugzeugen unterliegt den Bestimmungen der
jeweiligen Fluggesellschaft. Den Anweisungen des Bordpersonals
ist unbedingt Folge zu leisten.
Medizinische Geräte
Herzschrittmacher
Der Herstellerverband der Gesundheitsindustrie empfiehlt
Trägern von Herzschrittmachern, Handsprechfunkgeräte
mindestens 15 cm vom Herzschrittmacher entfernt zu halten.
Diese Empfehlungen entsprechen unabhängigen
Forschungsergebnissen und Empfehlungen von Wireless
Technology Research.
Personen mit Herzschrittmacher sollten stets auf folgendes achten:
• das eingeschaltete Funkgerät IMMER in einem Abstand von
mindestens 15 cm von ihrem Herzschrittmacher halten;
• das Funkgerät nicht in der Brusttasche tragen;
• das Ohr auf der dem Herzschrittmacher gegenüberliegenden
Seite benutzen, um das Störungsrisiko minimal zu halten;
• das Funkgerät sofort ausschalten, wenn Grund zu der
Annahme besteht, dass eine Störung stattfindet.
Hörgeräte
Einige digitale Funkgeräte können bestimmte Hörgeräte störend
beeinflussen. Im Falle einer solchen Störung setzen Sie sich bitte
mit dem Hersteller des Hörgeräts zur Besprechung von
Alternativen in Verbindung.
Sonstige medizinische Geräte
Wenn Sie irgendein anderes persönliches medizinisches Gerät
benutzen, erkundigen Sie sich bitte beim Hersteller Ihres Geräts,
ob es hinreichend gegen HF-Energie abgeschirmt ist. Ihr Arzt ist
Ihnen beim Einholen dieser Informationen sicherlich behilflich.
2 Deutsch

Sicherheitsbestimmungen bei Verwendung im Auto.
Befolgen Sie bitte stets die im jeweiligen Einsatzbereich
geltenden Gesetze und Bestimmungen zur Benutzung von
Handsprechfunkgeräten während der Fahrt.
Wenn Sie das Gerät während der Fahrt benutzen, müssen Sie
folgendes beachten:
• Lassen Sie sich beim Fahren nicht ablenken und schenken Sie
den Vorgängen auf der Straße Ihre volle Aufmerksamkeit.
• Verwenden Sie eine Freisprecheinrichtung, wenn Sie das Gerät
während der Fahrt benutzen.
• Halten Sie, wenn es die Verkehrsbedingungen erfordern, am
Straßenrand an, bevor Sie einen Anruf tätigen oder
entgegennehmen.
Warnhinweise für den Betrieb
Fahrzeuge mit Airbag
Im Aktionsbereich des Airbags dürfen keine Objekte angebracht
oder abgelegt werden. Dies gilt auch für Handsprech- oder
Mobilfunkgeräte und Zubehör. Airbags werden bei einem Aufprall
explosionsartig aufgeblasen. Hierbei geht von unsachgemäß
angebrachten oder abgelegten Geräten/Zubehör, die sich im
Aktionsbereich des Airbags befinden, eine nicht zu
unterschätzende Verletzungsgefahr aus.
Explosionsgefährdete Umgebungen
Schalten Sie Ihr Handsprechfunkgerät ab, wenn Sie sich in
einem Bereich mit einer explosionsgefährdeten Umgebung
befinden; es sei denn, Ihr Funkgerät ist speziell für den
Gebrauch in derartigen Bereichen geeignet (zum Beispiel FM-,
Cenelec, CSA- oder UL-zugelassen).
Sie dürfen in solchen Bereichen auf keinen Fall Akkus dem
Funkgerät entnehmen, Akkus einsetzen oder aufladen. Funken in
explosionsgefährdeten Umgebungen können Explosionen oder
Brände verursachen, die unter Umständen zu
Körperverletzungen/Todesfällen führen.
HINWEIS: Explosionsgefahr im Sinne der obenstehenden
Ausführungen besteht beispielsweise im Umkreis von
Abfüllanlagen, wie etwa in Schiffsräumen unter Deck,
Anlagen zur Förderung und Lagerung von Brennstoffen
oder Chemikalien, in Bereichen mit erhöhtem
Chemikalien- oder Partikelgehalt der Luft (z.B. Fasern,
Staub oder Metallabrieb) sowie in allen sonstigen
Bereichen, in denen Sie üblicherweise aufgefordert
werden, den Motor Ihres Fahrzeugs auszuschalten.
Explosionsgefährdete Bereiche sind zwar in der Regel,
nicht jedoch in allen Fällen entsprechend gekennzeichnet.
Sprengkapseln und Sprengbereiche
Um mögliche Störungen des Sprengbetriebs zu vermeiden,
sollten Sie Ihr Funkgerät in der Nähe von elektrischen
Sprengkapseln, in einem Sprenggebiet oder in Umgebungen mit
dem angebrachten Hinweis "Sende-/Empfangsgeräte
ausschalten" außer Betrieb nehmen. Befolgen Sie alle Warnungen
und Hinweise.
Sicherheitshinweise für den Betrieb
Antennen
Verwenden Sie kein Handsprechfunkgerät, dessen Antenne
beschädigt ist. Bei Hautkontakt mit einer beschädigten Antenne
können leichte Verbrennungen auftreten.
3 Deutsch

Akkus
Wenn Objekte aus leitendem Material, z.B. Schmuck, Schlüssel
oder Ketten, mit freiliegenden Akkukontakten in Berührung
kommen, besteht die Gefahr, dass diese Objekte beschädigt
werden. Da sich derartige Objekte bei einem von ihnen
verursachten Kurzschluss möglicherweise auch stark aufheizen,
besteht bei Personen Verbrennungsgefahr. Seien Sie beim
Umgang mit aufgeladenen Akkus daher bitte vorsichtig, und
vermeiden Sie jeden Kontakt mit metallenen Objekten. Dies gilt
insbesondere, wenn Sie einen Akku in eine Tasche, ein Etui oder
einen anderen Behälter mit Metallobjekten legen.
DIESE ANWEISUNGEN AUFHEBEN
Bevor Sie das Batterieladegerät verwenden, lesen Sie alle
Anweisungen und Vorsichtshinweise auf (1) der Batterie, (2) dem
Batterieladegerät und (3) dem Funkgerät in dem die Batterie
verwendet wird.
VORSICHT
Um die Unfallgefahr zu vermeiden, bitte nur die angeführten,
wiederaufladbaren Akkus (E)NTN9395 aufladen. Andere Akkutypen
könnten platzen und Personen- und Sachschaden verursachen.
1 Das Ladegerät nicht Regen oder Schnee aussetzen.
2 Das Ladegerät nicht benutzen wenn es einen scharfen Stoß
erlitten hat bzw. fallengelassen oder auf eine andere Weise
beschädigt wurde.
3 Das Ladegerät nicht zerlegen. Funktioniert es nicht
ordnungsgemäß, bringen Sie es innerhalb von 90 Tagen zum,
Händler zurück. Ein unsachgemäßer Wiederzusammenbau
kann elektrische Schläge und Brandgefahren zur Folge haben.
4 Das mit dem Gerät gelieferte Netzstromkabel und den Stecker
nie verändern. Passt der Stecker nicht in die Steckdose, lassen
Sie durch einen qualifizierten Elektriker eine standardmäßige
Steckdose installieren. Unsachgemäße Installation kann zu
einen elektrischen Schlag führen.
5 Um die Gefahr eines Beschädigens des Kabels oder Steckers
zu reduzieren, ziehen Sie beim Abtrennen des Ladegeräts von
der Stromversorgung am Stecker, nicht am Kabel.
6 Um die Gefahr eines elektrischen Schlags zu vermeiden,
trennen Sie das Ladegerät vor allen Reinigungs- und
Wartungsarbeiten von der Stromversorgung.
7 Die Verwendung von einem Netzteil, das nicht von Motorola
empfohlen oder verkauft wurde, kann einen elektrischen Schlag,
Feuer - oder Verletzungsgefahr verursachen.
4 Deutsch

Anleitung zur Bedienung Ihres Sprechfunkgerätes
Mit den Motorola™ Talkabout™ T6202, T6212 oder T6222
Sprechfunkgeräten können Sie jederzeit mit Familie, Freunden
oder Bekannten in Kontakt bleiben. Die Geräte nutzen PMR446
Frequenzen. Sie können in Ländern verwendet werden, wo
PMR446 Frequenzen je nach geltenden Bestimmungen
zugelassen sind.
Batterien
Die Talkabout™ T6202, T6212 und T6222 Sprechfunkgeräte
werden entweder mit drei AA-Batterien oder einem aufladbaren
Nickel-Metall-Hydrid-Akku (NiMH) betrieben.
Aufladbarer NiMH-Akku, Ladeadapter, Ladegerät und Ladestation
sind als Zubehör erhältlich.
Installieren des NiMH-Akkus:
1. Um den Batteriedeckel zu entfernen, die Klemme nach
oben schieben.
2. Den NiMH-Akkupack mit den Ladekontakten nach außen
weisend einsetzen.
3. Den Batteriedeckel wieder anbringen, indem die Stifte
am Batteriedeckel in die Schlitze an der Rückseite des
Sprechfunkgerätes eingesteckt werden und der Deckel
fest angedrückt wird, bis dieser einrastet.
Laden des NiMH-Akkus:
Der NiMH-Akku kann aufgeladen werden, während er sich im
Sprechfunkgerät befindet oder gesondert im Ladeadapter. Um
eine maximale Akkuleistung zu gewährleisten, sollte dieser vor
dem ersten Einsatz über Nacht (16 Stunden) geladen werden. Alle
folgenden Ladevorgänge erfordern nur ca. vier Stunden Ladezeit.
1. Sicherstellen, dass das Sprechfunkgerät ausgeschaltet ist, oder
den NiMH-Akku in den Ladeadapter stecken.
2. Den Netzstecker des Ladegeräts in eine Steckdose stecken.
3. Den Ladestecker mit dem großen Haken über den großen
Schlitz rechts neben den drei Akkukontakten positionieren.
4. Den großen Haken in den großen Schlitz drücken und dann
den kleinen Haken in den kleinen Schlitz einrasten.
5. Solange der Akku aufgeladen wird, leuchtet die Lampe am
Ladegerät rot und fängt an grün zu blinken, wenn der Akku
90% Ladekapazität erreicht hat. Die grüne Lampe leuchtet
konstant, wenn der Akku voll aufgeladen ist.
6. Zum Entfernen des Ladegerätes den Stecker vorsichtig heraus
und nach oben ziehen, bis der kleine Haken gelöst ist, und
anschließend den größeren Haken vorsichtig entfernen.
Hinweis: Wenn die LED länger als eine Minute rot blinkt, dann ist
der Akku defekt und muss ersetzt werden.
5 Deutsch
A
B
C
D/E

Verwenden der Ladestation
Die Ladestation kann auf einer beliebigen flachen Oberfläche
platziert oder befestigt werden (z. B. Wand oder Tisch). Um die
Ladestation zu befestigen:
1. Das Netzkabel unter der Ladestation plazieren. Die
Aussparungen verwenden, um das Kabel in Position zu halten.
2. Die Ladestation kann mit zwei Schrauben (6 x
3
⁄4 Zoll) an der
Montageoberfläche befestigt werden.
Laden des NiMH-Akkus mit der Ladestation:
1. Das Ladegerät mit dem Haken an der LED-Seite über dem
linken Schlitz positionieren.
2. Den Haken an der Kabelseite in den rechten
Schlitz einrasten, wodurch das Ladegerät an die
Ladestationskontakte geklemmt wird.
3. Den Netzstecker des Ladegeräts in eine Steckdose stecken.
4. Das Sprechfunkgerät oder den im Ladeadapter befindlichen
NiMH-Akku in die Ladestation einstecken, bis ein Klick zu
hören ist.
5. Wenn die LED konstant grün leuchtet, ist der Akku voll
aufgeladen.
Einlegen von AA-Batterien:
1. Um den Batteriedeckel zu entfernen, die Klemme nach
oben schieben.
2. Entsprechend der + und - Kennzeichnungen 3 AA-Batterien
in das AA-Batteriefach einlegen.
3. Den Batteriedeckel wieder anbringen, indem die Stifte
am Batteriedeckel in die Schlitze an der Rückseite des
Sprechfunkgerätes eingesteckt werden und der Deckel
fest angedrückt wird, bis dieser einrastet.
Ein- und Ausschalten des Sprechfunkgeräts:
1. Die Taste Pgedrückt halten, bis sich das Sprechfunkgerät
einschaltet. Die LED leuchtet konstant rot, das Display schaltet
sich ein und ein Signalton ist zu hören (es sei denn, die
Signaltöne sind deaktiviert).
2. Um das Sprechfunkgerät auszuschalten, die Taste Pgedrückt
halten, bis ein Piepton zur Bestätigung zu hören ist (falls die
Warntöne aktiviert sind) und die Anzeige verlischt.
Batterieladungsanzeige:
Das auf der LCD-Anzeige befindliche Symbol d ist in drei
Balken unterteilt. Es zeigt d (voll), b (zwei Drittel), c
(ein Drittel) und a (fast leer). Bei c piept das
Sprechfunkgerät alle 10 Minuten.
Wahl der Batterieart:
Um sicherzustellen, dass die Batterieladungsanzeige den
korrekten Ladezustand der verwendeten Batterien anzeigt, muss
die in Ihrem Sprechfunkgerät verwendete Batterieart im
Batterieart-Wahlmenü eingestellt werden.
1. Um das Batterieart-Wahlmenü aufzurufen, die Taste \
drücken, bis das Symbol d am Display erscheint. Die
Kanalnummer wird durch ein blinkendes A oder n ersetzt.
2. Mit den Richtungstasten ] und [ entweder A wählen, wenn
Alkali-Batterien verwendet werden oder n wählen, wenn
aufladbare NiMH- bzw. NiCd-Batterien verwendet werden.
3. Das Sprechfunkgerät kehrt nach 10 Sekunden oder durch ein
schnelles Drücken von M oder R in den normalen
Betriebsmodus zurück.
6 Deutsch
F
G
3
7
H
A
B
C
2
1
5/
6

Hinweis: Entfernen Sie bitte die Batterien, bevor das
Sprechfunkgerät für längere Zeit gelagert wird. Batterien
korrodieren mit der Zeit und können dauerhafte
Schäden an Ihrem Sprechfunkgerät verursachen.
Gürtel-Clip:
Talkabout™ T6202, T6212 und T6222 Sprechfunkgeräte werden
serienmäßig mit einem Gürtel-Clip geliefert.
Anbringen:
1. Den Gürtel-Clip oben und unten festhalten und
zusammendrücken, um den Haken zurückzuziehen.
2. Den Gürtel-Clip in den Schlitz an der Rückseite des
Sprechfunkgerätes einstecken und loslassen.
3. Zum Entfernen des Gürtel-Clips diesen wieder oben
und unten festhalten und zusammendrücken, um den
Haken zurückzuziehen, und den Gürtel-Clip abziehen.
Bevor Sie sprechen können
Bitte lesen Sie diese Anleitung aufmerksam.
Talkabout™ T6202, T6212 und T6222 Sprechfunkgeräte haben 8
Sprachkanäle und 38 Entstörungscodes. Die Entstörungscodes
dienen zum Herausfiltern von Rauschen, Störgeräuschen und
unerwünschten Meldungen in Funkkanälen. Um mit anderen
Sprechfunkgeräten zu kommunizieren, müssen alle Geräte in der
jeweiligen Gruppe auf den gleichen Kanal und Code eingestellt sein.
Da Funkkanäle überwacht werden können, sind die Gespräche
nicht vertraulich.
Sind Kanäle stark genutzt, verändern Sie die Kanal/Codeeinstellung des Sprechfunkgeräts bis Sie einen freien oder
weniger stark genutzten finden. (Stellen Sie sicher, dass alle
Sprechfunkgeräte in Ihrer Gruppe ebenfalls auf die gleiche
Einstellung umgestellt werden.)
Code 0 (trägerabhängige Rauschsperre) wählen, um die
Gesamtaktivität auf dem Kanal zu überwachen.
Ändern des Kanals:
1. Die Taste \ einmal drücken, um das Kanal-Einstellmenü
aufzurufen. Die Kanalnummer beginnt zu blinken.
2. Mit den Richtungstasten ] und [ einen neuen Kanal
einstellen, während die Kanalnummer blinkt.
3. Das Sprechfunkgerät kehrt nach 10 Sekunden oder durch
ein schnelles Drücken von M oder R in den normalen
Betriebsmodus zurück.
Ändern des Codes:
1. Die Taste \ zweimal drücken, um das Code-Einstellmenü
aufzurufen.
2. Der aktuelle Code des Sprechfunkgeräts beginnt zu blinken
(kleine Nummer).
3. Mit den Richtungstasten ] und [ einen neuen Code
einstellen, während die Codenummer blinkt.
4. Das Sprechfunkgerät kehrt nach 10 Sekunden oder durch
ein schnelles Drücken von M oder R in den normalen
Betriebsmodus zurück.
7 Deutsch
I

Kommunizieren
Einstellen der Lautstärke:
1. Die Richtungstasten ] und [ drücken, um die Lautstärke des
Sprechfunkgeräts einzustellen.
2. Das Symbol V erscheint und das Display zeigt die aktuelle
Lautstärke (von 1 bis 20) an. Zur Verdeutlichung des
Lautstärkeniveaus piept das Sprechfunkgerät (wenn Signaltöne
freigegeben sind).
3. Nach 3 Sekunden kehrt das Sprechfunkgerät automatisch in
den normalen Betriebsmodus zurück.
Achtung: Halten Sie das Sprechfunkgerät nicht zu nahe am Ohr,
wenn die Lautstärke hoch eingestellt ist. Das kann zu
Gehörschäden führen.
Die Überwachungs-/Signalstärkeanzeige-/Scan-Taste:
Diese Taste besitzt drei Funktionen: Überwachung,
Signalstärkeanzeige und Scan (die Scan-Funktion ist nur an
T6212 und T6222 Sprechfunkgeräten verfügbar).
Die Überwachungsfunktion dient zur Überprüfung der Aktivität
auf dem aktuellen Kanal, bevor gesendet wird. Beim Empfang
oder bei starker Kanalnutzung blinkt die Leuchtdiode (LED)
öfters als normal.
Die Signalstärkeanzeige gibt das Niveau der Empfangssignale
von 1 (schwach) bis 6 (stark) wieder.
Senden von Funksprüchen:
1. Die Kanalaktivität durch langes Drücken der Taste ) überprüfen.
Sie hören ein Rauschen, wenn der Kanal zur Nutzung frei ist.
Nicht senden, wenn jemand auf dem Kanal spricht.
2. Am Display wird das Symbol w angezeigt und die Kanalnummer
wird durch eine Nummer ersetzt, die das Niveau der
Empfangssignale von 1 (schwach) bis 6 (stark) repräsentiert.
3. Für beste Sprachqualität halten Sie das Sprechfunkgerät ca.5,0
bis 8 cm von Ihren Lippen entfernt.
4. Die Taste M drücken und in das Sprechfunkgerät sprechen.
Beim Senden leuchtet die LED konstant.
5. Um einen Funkspruch zu empfangen, die Taste M loslassen.
Andere Funktionen
Bestätigungston:
Wenn die Funktion „Bestätigungston" eingeschaltet wird, sendet
das Sprechfunkgerät einen Sonderton beim Beenden des
Sendens, dieser ist ebenfalls an Ihrem Sprechfunkgerät zu hören.
Um diese Funktion freizugeben oder zu sperren, ist die Taste ]
beim Einschalten des Sprechfunkgerätes gedrückt zu halten.
Rufmodus:
An Talkabout™ T6202 und T6212 Sprechfunkgeräten können Sie
den Anrufmodus wählen, der Sie auf den Empfang des ersten
eingehenden Funkspruches aufmerksam macht. Die Anruffunktion
bleibt dann bis 30 Sekunden nach Beendigung der Kanalaktivität
außer Betrieb.
Wählen des Anrufmodus:
1. Die Taste \ drücken, bis das Symbol B am Display erscheint.
2. Die große Kanalnummer wird durch ein Y für aktiviert oder n
für deaktiviert ersetzt.
3. Mit den Richtungstasten ] und [ kann dann Y für Aktivierung
oder n für Deaktivierung eingestellt werden.
4.
Das Sprechfunkgerät kehrt nach 10 Sekunden oder durch ein schnelles
Drücken von M oder R in den normalen Betriebsmodus zurück.
8 Deutsch
8

Kurzmenü-Funktion:
Talkabout™ T6202, T6212 und T6222 Sprechfunkgeräte haben eine
Kurzmenü-Funktion, mit der die Anzahl der angezeigten Menüs auf
Kanal, Entstörungscode und Ruftöne reduziert wird. Die
Kanalabfrage-Funktion ist ebenfalls deaktiviert, um ein ungewolltes
Ändern des Sprechfunkgerät-Betriebsmodus auszuschließen. Bei
aktivierter Kurzmenü-Funktion ist die einzige verfügbare
Sprechfunkgerät-Einschaltsequenz die Deaktivierung des
Kurzmenüs. Die Menü-Abschaltzeit ist auf 60 Sekunden erhöht.
1. Zum Aktivieren der Kurzmenü-Funktion die Taste \ beim
Einschalten des Sprechfunkgeräts gedrückt halten.
2. Um die Kurzmenü-Funktion zu deaktivieren, das
Sprechfunkgerät ausschalten und die Taste \ gedrückt halten,
während das Sprechfunkgerät wieder eingeschaltet wird.
Sperrfunktion:
Talkabout™ T6202, T6212 und T6222 Sprechfunkgeräte verfügen
über eine Sperrfunktion. Die Menü- und Scan-Tasten sowie die
Lautstärkeregelung (Tasten ] und [) sind gesperrt, um das
ungewollte Ändern der Sprechfunkgeräteinstellungen zu vermeiden.
1. Um die Sperrfunktion zu aktivieren, die Taste \ gedrückt
halten, bis der Sperrsignalton ertönt und das Symbol f am
Display erscheint.
2. Beim Drücken der gesperrten Tasten ertönt ein Piepton (wenn
die Signaltöne aktiviert sind).
3. Um die Sperrfunktion zu deaktivieren, die Taste \ erneut
gedrückt halten, bis der Sperrsignalton ertönt und das Symbol
f am Display verschwindet.
Beleuchtung:
Talkabout™ T6202, T6212 und T6222 Sprechfunkgeräte sind mit einer
Display-Beleuchtung für schwache Lichtverhältnisse ausgestattet. Nur
kurz die Taste R drücken, um die Display-Beleuchtung einzuschalten.
Die Beleuchtung bleibt 4 Sekunden lang eingeschaltet. Beim Drücken
einer beliebigen Taste wird die Zeitspanne der aktiven DisplayBeleuchtung entsprechend verlängert.
Signaltöne:
Die Signaltöne können deaktiviert werden, indem die Taste [
beim Einschalten des Sprechfunkgeräts gedrückt gehalten wird.
Die Signaltöne für Sendezeit-Timer und schwache Batterieladung
werden nicht deaktiviert.
Um die Signaltöne wieder zu aktivieren, das Sprechfunkgerät
ausschalten und beim Wiedereinschalten, die Taste [ gedrückt
halten.
Mikrofonverstärkung:
Mit der Mikrofonverstärkung können Sie eine der drei
Mikrofonverstärkungseinstellungen wählen (wenn VOX nicht
aktiviert ist): niedrige Einstellung (1), mittlere Einstellung (2) und
hohe Einstellung (3). Wenn Sie laut sprechen, sollte die niedrige
Einstellung gewählt werden, bei einer leisen Stimme ist die hohe
Einstellung vorzuziehen.
1. Die Taste \ drücken, bis das Symbol g am Display
zusammen mit der blinkenden Nummer 1, 2 oder 3 erscheint.
2. Mit den Richtungstasten ] und [ das gewünschte
Verstärkungsniveau einstellen.
3. Das Sprechfunkgerät kehrt nach 10 Sekunden oder durch ein
schnelles Drücken von M oder R in den normalen
Betriebsmodus zurück.
9 Deutsch

Ruftöne:
Talkabout™ T6202 und T6212 Sprechfunkgeräte weisen fünf
Sonderruftöne auf, um jeden Nutzer erkennen zu können und die
anderen in Kenntnis zu setzen, dass Sie beabsichtigen, einen
Funkspruch zu senden. Talkabout™ T6222 Sprechfunkgeräte
weisen zehn Sonderruftöne auf. Drücken Sie die Taste ^, und alle
Nutzer desselben Kanals und Codes werden durch Ihren Rufton
in Kenntnis gesetzt.
Ändern und Anhören eines Ruftones:
1. Um das Rufton-Menü aufzurufen, die Taste \ drücken, bis
das Symbol ^ am Display erscheint. Die Kanalnummer wird
durch die Ruftonnummer ersetzt.
2. Mit den Richtungstasten ] und [ den Rufton ändern.
3. Das Sprechfunkgerät kehrt nach 10 Sekunden oder durch ein
schnelles Drücken von M oder R in den normalen
Betriebsmodus zurück.
Automatisches Ausschalten (APO):
Talkabout™ T6202, T6212 und T6222 Sprechfunkgeräte können
programmiert werden, um sich nach Ablauf einer bestimmten
Zeit ohne Aktivität (keine Tastenbetätigungen und keine VOXÜbertragungen) selber auszuschalten. Mit dieser Funktion wird
unerwünschte Batterienutzung vermieden.
1. Um das Menü für automatisches Ausschalten aufzurufen, die
Taste \ drücken, bis das Symbol APO am Display erscheint.
Die Kanalnummer wird durch einen blinkenden
Horizontalbalken ersetzt, der anzeigt, dass die automatische
Ausschaltung deaktiviert ist.
2. Mit den Richtungstasten ] und [ kann die Zeit bis zur
automatischen Ausschaltung (von 1 bis 8 Stunden) eingestellt
werden.
3. Das Sprechfunkgerät kehrt nach 10 Sekunden oder durch ein
schnelles Drücken von M oder R in den normalen
Betriebsmodus zurück.
4. Bei aktivierter APO wird das Symbol APO am Display
angezeigt. 5 Minuten, bevor sich das Sprechfunkgerät
ausschaltet, ertönt ein periodischer Warnton und das Symbol
APO blinkt. Durch Betätigen einer Taste oder durch eine VOXÜbertragung wird der APO-Timer zurückgesetzt.
Einstellungen zurücksetzen:
Die vom Nutzer programmierten Funktionen können auf die
Werkseinstellungen zurückgesetzt werden, indem die Tasten \
und M oder h and M beim Einschalten des Sprechfunkgeräts
gleichzeitig gedrückt gehalten werden.
Sendezeit-Timer:
Die Sendezeit-Timer-Funktion trägt zur längeren Batterielebensdauer
bei. Das Sprechfunkgerät gibt einen Warnton ab und stoppt das
Senden, wenn:
1. die Taste M länger als 60 Sekunden kontinuierlich gedrückt
wird oder
2. die VOX-Übertragung länger als 60 Sekunden kontinuierlich
aktiv ist.
10 Deutsch

Freisprechbetrieb:
In Talkabout™ T6202, T6212 und T6222 Sprechfunkgeräte ist
eine sprachaktivierte Sendesteuerung (VOX) integriert. Das
bedeutet, bei Verwendung von VOX Audio-Zubehör aktiviert der
Ton Ihrer Stimme die Übertragung des Sprechfunkgeräts.
Hinweis: Wenn optionales Audio-Zubehör mit Ihrem
Sprechfunkgerät verwendet wird, empfehlen wir, die
Lautstärke auf einem komfortablen Hörniveau zu halten.
Bevor Sie das Zubehör an Ihrem Kopf oder im Ohr
anbringen, muss die Lautstärke niedrig eingestellt werden.
Anwenden der VOX-Funktion:
1. Sicherstellen, dass das Sprechfunkgerät ausgeschaltet ist.
2. Den Stecker des Audio-Zubehörs in die Buchse an der linken
Seite des Sprechfunkgeräts einstecken.
3. Das Sprechfunkgerät einschalten und die Lautstärke niedrig
einstellen, bevor das Zubehör am Kopf oder im Ohr
angebracht wird. Das Symbol g erscheint blinkend am
Display, um anzuzeigen, das die VOX-Funktion aktiv ist.
4. Mit den Richtungstasten ] und [ die Lautstärke auf ein
angemessenes Niveau einstellen.
5. Zum Senden eines Funkspruches einfach nur in das
Zubehör-Mikrofon sprechen. Zum Empfangen nur mit
dem Sprechen aufhören.
Hinweis: Um Sprechpausen zu gewährleisten gibt es eine
kurze Verzögerung zwischen Sprechbeginn und
Funkspruchsendung und eine etwas längere Verzögerung
zwischen Sprechbeendigung und automatischer
Umschaltung des Sprechfunkgerätes auf Empfang.
Rücksetzen in den „Push-To-Talk"-Modus (Sprechen auf
Knopfdruck):
1. Die Taste M einmal drücken. Das Symbol g verschwindet.
2. Zum Senden eines Funkspruches die Taste M am
Sprechfunkgerät drücken. Zum Empfangen die Taste M
loslassen.
3. Um den VOX-Modus zu aktivieren, das Sprechfunkgerät
ausschalten und mit angebautem Zubehör wieder einschalten.
Wählen der VOX-Empfindlichkeit:
An Talkabout™ T6202, T6212 und T6222 Sprechfunkgeräten
können Sie die VOX-Empfindlichkeit des Sprechfunkgerätes
einstellen, um ein unbeabsichtigtes Senden durch
Hintergrundgeräusche zu vermeiden. Mit dem VOXEditiermodus können Sie zwischen den Einstellungen hoch,
mittel und niedrig wählen. Wenn Sie beispielsweise laut sprechen
oder sich in einer geräuschvollen Umgebung befinden, sollte die
niedrige Einstellung (1) gewählt werden; wenn Sie eine leise
Stimme haben oder sich in einer ruhigen Umgebung befinden,
sollte die hohe Einstellung (3) eingestellt werden. Die mittlere
Einstellung (2) eignet sich für die meisten Anwendungen.
1. Um das VOX-Empfindlichkeitsmenü aufzurufen (vorausgesetzt,
dass das Audio-Zubehör angebaut ist) die Taste \ drücken,
bis das Symbol g am Display erscheint. Die Kanalnummer
wird durch die VOX-Einstellung 1, 2 oder 3 ersetzt.
2. Mit den Richtungstasten ] und [ die VOX-Einstellung ändern.
3. Das Sprechfunkgerät kehrt nach 10 Sekunden oder durch
ein schnelles Drücken von M oder R in den normalen
Betriebsmodus zurück.
11 Deutsch

Interne VOX-Funktion
Talkabout™ T6212 und T6222 Sprechfunkgeräte besitzen
außerdem eine eingebaute sprachaktivierte Sendesteuerung.
Diese Funktion gleicht der VOX-Funktion dahingehend, dass der
Ton Ihrer Stimme die Funkspruchsendung aktiviert, aber es ist
kein externes Zubehör notwendig.
Aktivieren der internen VOX-Funktion:
Entweder
1. Die Taste \ drücken, bis das Symbol g blinkend am Display
erscheint und die Kanalnummer durch Y (aktiviert) oder n
(deaktiviert) ersetzt ist. Mit den Richtungstasten ] und [ das
Symbol Y zur Aktivierung wählen.
2. Das Sprechfunkgerät kehrt nach 10 Sekunden oder durch ein
schnelles Drücken von M oder R in den normalen
Betriebsmodus zurück. Das Symbol g bleibt am Display
angezeigt.
ODER
1. Sicherstellen, dass das Sprechfunkgerät ausgeschaltet ist.
2. Die Taste M gedrückt halten und das Sprechfunkgerät mit der
Power-Taste einschalten. Das Symbol g wird am Display angezeigt.
Anwenden der internen VOX-Funktion:
1. Die Taste M kurzzeitig drücken und loslassen. Das Symbol g
beginnt zu blinken. Das Sprechfunkgerät sendet jetzt einen
Funkspruch, sobald Sie mit dem Sprechen beginnen.
2. Durch kurzzeitiges Drücken der Taste M wird das
Sprechfunkgerät zwischen stummgeschaltetem und aktivem
VOX-Modus umgeschaltet.
3. Um die interne VOX-Funktion abzuschalten, das interne VOXAuswahlmenü aufrufen und mit den Richtungstasten ] und [
das Symbol n für Abschaltung wählen oder das
Sprechfunkgerät aus- und wieder einschalten.
Wählen der internen VOX-Empfindlichkeit:
An Talkabout™ T6212 und T6222 Sprechfunkgeräten können Sie
die interne VOX-Empfindlichkeit des Sprechfunkgerätes
einstellen, um ein unbeabsichtigtes Senden durch
Hintergrundgeräusche zu vermeiden. Mit dem internen VOXEditiermodus können Sie zwischen den Einstellungen hoch,
mittel und niedrig wählen. Wenn Sie beispielsweise laut sprechen
oder sich in einer geräuschvollen Umgebung befinden, sollte die
niedrige Einstellung (1) gewählt werden; wenn Sie eine leise
Stimme haben oder sich in einer ruhigen Umgebung befinden,
sollte die hohe Einstellung (3) eingestellt werden. Die mittlere
Einstellung (2) eignet sich für die meisten Anwendungen.
1. Um das interne VOX-Empfindlichkeitsmenü aufzurufen
(vorausgesetzt, dass das Audio-Zubehör angebaut ist), die
Taste \ drücken, bis die Kanalnummer durch eine interne
VOX-Einstellung 1, 2 oder 3 ersetzt ist.
2. Mit den Richtungstasten ] und [ die interne VOX-Einstellung
ändern.
3. Das Sprechfunkgerät kehrt nach 10 Sekunden oder durch
ein schnelles Drücken von M oder R in den normalen
Betriebsmodus zurück.
Scan:
Talkabout™ T6212 und T6222 Sprechfunkgeräte besitzen eine
Scan-Funktion, mit der Sie andere sendende Sprechfunkgeräte
überwachen können. Damit können Sie anderen Personen
zuhören und antworten, ohne die Kanäle umschalten zu müssen.
Der normale Scan „landet" nur auf einem Kanal, wenn der
zugehörige Entstörungscode mit dem von Ihnen für diesen Kanal
eingestellten übereinstimmt.
12 Deutsch

Der trägerabhängige Rauschsperren-Scan „landet" auf einem
Kanal, wenn eine Aktivität festgestellt wird. Das Sprechfunkgerät
führt den trägerabhängigen Rauschsperren-Scan durch, wenn Sie
den Entstörungscode für den ursprünglichen Kanal (der
verwendete Kanal vor dem Scan-Modus) auf 0 eingestellt haben.
1. Um den Scan-Zyklus zu starten, die Taste ) kurzzeitig drücken.
Das Symbol h erscheint am Display und die Kanalnummern
werden nacheinander abgearbeitet.
2. Wenn das Sprechfunkgerät eine Kanalaktivität feststellt, wird
der entsprechende Kanal und Code am Display angezeigt (als
Code wird 0 angezeigt, wenn sich das Sprechfunkgerät im
trägerabhängigen Rauschsperren-Scan befindet und auf einem
Kanal „landet", wo das Empfangssignal keinen
Entstörungscode beinhaltet).
3. Durch Drücken der Taste M oder ) während des Scan-Zyklus
wird der Sende- bzw. Überwachungsbetrieb auf dem
ursprünglichen Kanal aktiviert.
4. Um den Scan-Zyklus zu beenden, ist die Taste ) erneut
kurzzeitig zu drücken, und am Display erscheint die
ursprüngliche Kanal- und Codenummer und das Symbol h
verschwindet.
Wählen der Scan-Liste:
An Talkabout™ T6212 und T6222 Sprechfunkgeräten können
Sie festlegen, welche Kanäle gescannt werden sollen. Das
Sprechfunkgerät kann zum Scannen bestimmter Kanäle
programmiert werden, indem diese im Scan-Listen-Menü einoder ausgeschaltet werden.
1. Um das Scan-Listen-Menü aufzurufen, die Taste \ drücken,
bis das Symbol h am Display erscheint. Die aktuelle
Codenummer wird durch ein blinkendes Symbol Y für „Ja"
oder n für „Nein" ersetzt.
2. Mit der Taste ) festlegen, ob ein Kanal gescannt werden soll
oder nicht. Das Symbol Y für „Ja" oder n für „Nein" wählen.
3. Mit den Richtungstasten ] und [ die einzelnen Kanäle aufrufen.
4. Das Sprechfunkgerät kehrt nach 10 Sekunden oder durch
ein schnelles Drücken von M oder R in den normalen
Betriebsmodus zurück.
VibraCall
®
-Modus:
An Talkabout™ T6222 Sprechfunkgeräten können Sie zwischen
Rufton und/oder VibraCall
®
-Meldung wählen, wenn das erste
Sprechsignal empfangen wird. Der Rufton- und/oder VibraCall
®
Modus bleibt dann bis 30 Sekunden nach Beendigung der
Kanalaktivität außer Betrieb.
Wählen des Rufton- und/oder VibraCall
®
-Modus:
1. Die Taste \ drücken, bis das Symbol B und/oder das
Symbol i am Display erscheint (je nach der aktuellen
Einstellung).
2. Die große Kanalnummer wird durch das Symbol - oder eine
der Nummern 1, 2 oder 3 ersetzt.
3. Mit den Richtungstasten ] und [ kann zwischen den folgenden
Einstellungen umgeschaltet werden:
- = Kein Ring- und auch kein VibraCall
®
-Modus (beide
Symbole blinken)
1= VibraCall
®
-Modus
2 = Rufmodus
3= Ruf- und VibraCall
®
-Modus
4. Das Sprechfunkgerät kehrt nach 10 Sekunden oder durch
ein schnelles Drücken von M oder R in den normalen
Betriebsmodus zurück.
13 Deutsch

Sprachverschleierung:
Talkabout™ T6222 Sprechfunkgeräte besitzen eine Funktion zur
Sprachverschleierung. Mit dieser Funktion wird eine zusätzliche
Anonymität für den Sprechfunkverkehr gewährleistet. Um einen
verschleierten Funkspruch zu empfangen, müssen an den
Sprechfunkgeräten übereinstimmende Kanal- und Codenummern
und Verschleierungscodes eingestellt sein. Wir empfehlen, dass Sie
vor der Benutzung dieser Funktion alle relevanten Bestimmungen
des jeweiligen Landes überprüfen und diese einhalten.
Wählen der Verschleierung:
1. Die Taste \ drücken, bis das Symbol e am Display erscheint
und die Kanalnummer durch einen horizontalen Balken ersetzt
ist.
2. Um die Verschleierung zu wählen, die Richtungstaste ] oder
[ drücken, bis die Nummer 1 an der Kanalposition erscheint.
3. Um die Verschleierung abzuschalten, die Richtungstaste ]
oder [ drücken, bis der horizontale Balken verschwindet.
4. Das Sprechfunkgerät kehrt nach 10 Sekunden oder durch
ein schnelles Drücken von M oder R in den normalen
Betriebsmodus zurück.
Professionalität beim Sprechfunk
Die 8 Kanäle Ihres Sprechfunkgerätes werden mit anderen auf
„abwechselnder" Basis gemeinsam genutzt, d. h. andere
Gruppen können auf den Kanälen Sprechfunk betreiben. Für
unterbrechungsfreie Kommunikationen verfahren Sie bitte gemäß
folgenden Schritten:
1. Mit der Taste ) die Aktivität auf dem Kanal prüfen, bevor
gesprochen wird.
2. Nicht über den Funkspruch einer anderen Person sprechen,
die den Kanal bereits nutzt - Ihr Funkspruch kann sonst
unvollständig empfangen werden. Versuchen Sie, den Kanal
oder Entstörungscode zu wechseln, um eine starke
Kanalnutzung zu vermeiden.
Hinweis: Aufgrund der freien Nutzbarkeit der Kanäle sind Ihre
Gespräche nicht vertraulich und es kann sein, dass Sie
fremde Gespräche mithören.
Übertragungsreichweite
Das Funkgerät TalkAbout T6202, T6212 und T6222 wurde für
eine bestmögliche Leistung und Übertragungsreichweite im
Feld konstruiert. Wir empfehlen, dass Sie einen Abstand von
mindestens 1,5 Metern zwischen Geräten aufrechterhalten, da
sich sonst Störgeräusche ergeben können.
Die Übertragungsreichweite hängt ab von der
Umgebungsbeschaffenheit. Sie wird beeinträchtigt durch
Betonbauten, dichte Bewaldung und bei Gebrauch der
Geräte in Gebäuden und Fahrzeugen.
Optimale Reichweite Mäßige Reichweite Geringe Reichweite
Eine optimale Reichweite – bis zu 3 Kilometern – ergibt sich in
ebenen, freien Umgebungen. Gebäude und Bäume auf der
Übertragungsstrecke reduzieren die Reichweite. Sind dichte
Bewaldung oder Berge im Weg, ist die Reichweite stark
eingeschränkt.
14 Deutsch

Störungsbeseitigung
Problem Abhilfe
Keine Stromversorgung AA Batterien umpositionieren oder auswechseln.
NiMH-Akku aufladen oder auswechseln.
Funkspruch nicht gesendet Sicherstellen, dass die Sprechtaste beim Senden fest gedrückt wird.
Batterien umpositionieren oder auswechseln.
Funkspruch nicht empfangen Nachprüfen, dass an den Sprechfunkgeräten dieselben Kanal- und Entstörungscodenummern eingestellt
sind. Darauf achten, dass die Sprechtaste nicht aus Versehen gedrückt wird. Die Batterien umpositionieren
oder auswechseln. Hindernisse und Anwendung in Räumen oder Fahrzeugen kann die Kommunikation
beeinträchtigen. Ändern Sie Ihren Standort. Die Lautstärkeeinstellung überprüfen.
Funkspruch verschleiert Der Verschleierungscode ist aktiviert oder die Einstellung stimmt nicht mit den anderen Sprechfunkgeräten
überein; an den Sprechfunkgeräten muss der gleiche Verschleierungscode verwendet werden.
Hören anderer Gespräche oder Nachprüfen, dass der Entstörungscode eingestellt ist (aktive Einstellungen sind 1 - 38). Es kann sein, dass
Störgeräusche auf einem Kanal gemeinsam genutzter Kanal oder Entstörungscode verwendet wird - einen anderen versuchen.
Begrenzte Reichweite Stahl- und Betonkonstruktionen, dichtes Laubwerk und Anwendung in Gebäuden und Fahrzeugen
verkürzen die Reichweite. Vergewissern Sie sich über die freie Sicht zum Empfänger, um die
Sprechfunkübertragung zu verbessern. Das Tragen des Sprechfunkgerätes nahe am Körper, z. B. in der
Tasche eines Kleidungsstückes, verkürzt die Reichweite - das Sprechfunkgerät umpositionieren.
Starkes Rauschen oder Störsignale
Sprechfunkgeräte zu nahe beieinander. Die Sprechfunkgeräte müssen mindestens 1,5 m voneinander
entfernt sein - den Abstand vergrößern. Sprechfunkgeräte zu weit entfernt. Hindernisse stören die
Übertragung. Die Reichweite beträgt bei klaren, unbeeinträchtigten Bedingungen bis 3 km.
Kanal-/Code-Einstellungen Sicherstellen, dass Sperrfunktion nicht aktiviert ist.
lassen sich nicht ändern
Nicht alle Menüs Kontrollieren, ob das Kurzmenü aktiviert ist. Das Kurzmenü wird abgeschaltet, indem die Taste \ beim
sind zugänglich Einschalten des Sprechfunkgerätes gedrückt gehalten wird.
15 Deutsch

Störungsbeseitigung
Problem Abhilfe
Niedrige Batterieladung Den NiMH-Akku aufladen oder die AA Batterien auswechseln. Extreme Einsatztemperaturen wirken sich
negativ auf die Batterielebensdauer aus.
Ladegerät-LED blinkt doppelt Ladegerät nicht richtig positioniert. Ladegerät neu positionieren und sicherstellen, dass es fest am
Sprechfunkgerät, Akku oder an die Ladestation geklemmt ist. Die Akkuleistung ist sehr niedrig; der Akku
lädt langsam auf, bevor er mit der Schnellladung beginnt.
Motorola Produktservice: Wenn das Sprechfunkgerät immer noch nicht korrekt funktioniert, wenden Sie sich bitte an die Verkaufsstelle.
16 Deutsch

Technische Daten:
Beschreibung Daten
Kanäle 8
Codes 38
Betriebsfrequenz 446,00625-446,09375 MHz
Übertragungsreichweite Bis zu 3 Kilometern
Stromquelle 3 AA-Batterien oder NiMH-Akku
Batterie-Lebensdauer*: AA** NiMH
Ununterbrochener Funkbetrieb 8.2 Stunden 2.4 Stunden
Standby-Zeit 130 Stunden 39 Stunden
* Typisch
** Mit Qualitäts-Alkalibatterien. Die Lebensdauer von nicht von
Motorola gelieferten AA NiMH/NiCd-Batterien kann abweichen.
Garantieleistungen
Während der regulären Garantiezeit von einem (1) Jahr ab
Kaufdatum (Garantiezeit) garantiert Motorola dem Erwerber, daß
der bei einem autorisierten Motorola Händler oder Distributor
erworbene Personal Communicator mit Zubehör ("das Produkt")
den jeweils zur Zeit der Herstellung gültigen Motorola
Spezifikationen entspricht.
Sollte das Produkt diesen Spezifikationen nicht entsprechen, ist der
Erwerber verpflichtet, Motorola innerhalb von 2 Monaten nach
Feststellung des Fehlers im Material, in der Verarbeitung oder der
Nichterfüllung der Spezifikationen und in jedem Fall vor Ablauf der
Garantiezeit zu unterrichten und das defekte Produkt zur Reparatur
zum nächstgelegenen, autorisierten Motorola Reparaturdienst zu
bringen. Motorola ist an keinerlei Produktangaben gebunden, die
nicht direkt von Motorola stammen.
Eine Liste der Telefonnummern des Motorola Kundendienstes,
über die auch der für Sie nächstgelegene, autorisierte Motorola
Reparaturdienst in Erfahrung gebracht werden kann, liegt diesem
Produkt bei.
Während der Garantiezeit besteht der Garantieanspruch
ausschließlich darin, daß das defekte Produkt kostenfrei und
nach der Entscheidung von Motorola entweder repariert oder
ausgetauscht wird oder, falls dies nicht möglich ist, der vom
Erwerber gezahlte Kaufpreis abzüglich einer Gebühr für die
Nutzung des Produktes seit Lieferung zurückerstattet wird.
Diese Garantieleistungen enden mit Ablauf der Garantiezeit.
Dies sind die vollständigen und ausschließlichen
Garantieleistungen für Motorola Personal Communicator mit
Zubehör, die alle sonstigen expliziten oder impliziten
Garantieleistungen, Bedingungen oder Bestimmungen ersetzen.
Falls es sich bei dem Erwerber nicht um einen Endverbraucher
handelt, lehnt Motorola alle sonstigen Garantieleistungen ab.
Motorola haftet unbegrenzt nur für Vorsatz- und grobe
Fahrlässigkeit. In allen anderen Fällen übernimmt Motorola
keinerlei Haftung für Schäden, die den Kaufpreis übersteigen und
haftet auch nicht für mögliche Folgeschäden, wie entgangene
Gewinne, Datenverlust oder Betriebsunterbrechung.
Diese Garantie hat keine Auswirkungen auf Ansprüche, die
Endverbrauchern gesetzlich zustehen, wie beispielsweise die
Gewährleistung zufriedenstellender Qualität und Eignung für
den bestimmungsgemäßen Zweck. Diese Garantie berührt
nicht die Ansprüche des Erwerbers gegen den Verkäufer aus
dem Kaufvertrag.
17 Deutsch

Inanspruchnahme Der Garantieleistungen
In den meisten Fällen wird der autorisierte Motorola Händler,
bei dem Sie den Motorola Personal Communicator mit
Originalzubehör erworben haben, die Garantieansprüche
akzeptieren und/oder entsprechende Garantieleistungen anbieten.
Sie können ebenfalls den Garantieservice des nächstgelegenen
Motorola Reparaturdienstes in Anspruch nehmen.
Sollten Sie zusätzlichen Fragen haben, wenden Sie sich bitte an Ihren
autorisierten Motorola Händler, bei dem Sie den Motorola Personal
Communicator erworben haben, an den Motorola Kundendienst
Ihres Landes unter den unten angegebenen Telefonnummern.
Im Falle der Inanspruchnahme der Garantieleistungen ist der
defekte Personal Communicator Motorola oder dem Distributor
vorzulegen. Bei Zusendung oder Lieferung des defekten Geräts
an einen von Motorola autorisierten Reparaturdienst muß das
Produkt mit Ihrem Namen, Ihrer Adresse, Ihrer Telefonnummer
versehen sein und eine Fehlerbeschreibung beigefügt werden.
Damit Sie unsere Garantieleistungen in Anspruch nehmen
können, müssen Sie die Kaufrechnung oder einen vergleichbaren
Kaufnachweis vorlegen, aus dem das Kaufdatum hervorgeht. Auf
dem Personal Communicator müssen ebenfalls die
Seriennummer als Referenz sichtbar sein. Diese Informationen
sind dem Produkt zu entnehmen.
Bedingungen
Garantieansprüche können nicht berücksichtigt werden, falls die
Typ- oder Seriennummer des Produktes entfernt, verändert oder
unlesbar gemacht worden ist. Motorola behält sich deshalb das
Recht vor, den kostenlosen Garantieservice zu verweigern, falls
die erforderliche Dokumentation nicht oder nur unvollständig
vorgelegt werden kann, unlesbar oder nicht in Übereinstimmung
mit den Daten des Herstellers ist.
Im Falle einer Reparatur des Produktes werden, nach
Entscheidung von Motorola, die defekten Einzelteile oder
Chipkarten mit ihrer Funktionsweise nach gleichwertigen,
reparierten oder neuen Einzelteilen oder Chipkarten
ausgetauscht. Garantie für ausgetauschte Einzelteile,
Zubehörteile, Akkus oder Chipkarten wird nur für die Dauer der
ursprünglichen Garantiezeit übernommen. Die ursprüngliche
Garantiezeit verlängert sich dadurch nicht. Alle ausgetauschten
Originalteile (Zubehörteile, Akkus, Einzelteile oder Personal
Communicator) gehen in das Eigentum von Motorola über.
Motorola übernimmt keine Garantie für Installation, Wartung
und Service im Zusammenhang mit dem Produkt, einschließlich
Akkus, Zubehör- oder Einzelteilen.
Motorola übernimmt keinerlei Haftung für Schäden durch nicht
von Motorola vertriebene Zusatzgeräte (beispielsweise Akkus,
Ladegeräte, Adapter, Netzteile, etc.), die an das Produkt
angeschlossen oder zusammen mit dem Produkt verwendet werden.
Jegliche nicht von Motorola vertriebene Zusatzgeräte werden
ausdrücklich von dieser Garantie ausgeschlossen. Ebenso
übernimmt Motorola keine Garantie für den störungsfreien
Betrieb der Produkte in Verbindung mit derartigen Zusatzgeräten.
Garantieausschluss
Diese Garantie gilt nicht für Fehler durch Beschädigung,
Mißbrauch, unsachgemäße Handhabung, wegen Änderungen
oder Reparaturen am Produkt durch nicht autorisierte Personen.
Die Garantie ist ebenfalls ausgeschlossen bei:
18 Deutsch

1. Fehlern oder Beschädigungen, die durch unsachgemäße oder
unübliche Verwendung des Produktes verursacht worden sind.
2. Fehlern oder Beschädigungen, die auf Mißbrauch, Unfall oder
Versäumnis zurückzuführen sind.
3. Fehlern oder Beschädigungen wegen unsachgemäßen
Betriebs oder Testens, unkorrekter Wartung, Installation,
Anpassung oder Modifikationen.
4. Bruch oder Beschädigung der Antenne, sofern dies nicht direkt
auf Material- oder Verarbeitungsfehler zurückzuführen ist.
5. Produkten, die so zerlegt oder repariert worden sind, daß sie
den Betrieb des Produktes oder eine angemessene
Untersuchung und Fehleranalyse zur Feststellung des
Garantieanspruches unmöglich machen.
6. Fehlern oder Beschädigungen im Zusammenhang mit
Reichweite.
7. Fehlern oder Beschädigungen wegen Feuchtigkeit, Eindringen
von Flüssigkeiten oder verschütteten Lebensmitteln.
8. Plastikgehäusen oder sonstigen Außenflächen, die durch
normale Benutzung verkratzt oder beschädigt sind.
9. Produkten, die über einen beschränkten Zeitraum gemietet sind.
10. Verschleißteilen.
Anmerkung: Die Lebensdauer des Akkus Ihres Personal
Communicatores, sowie Sprech- und Standby-Zeiten
hängen von den örtlichen Empfangsbedingungen ab.
In den Spezifikationen ist angegeben, daß Sie in den
ersten 6 Monaten ab Kaufdatum mit der optimalen
Leistungsfähigkeit Ihres Motorola Personal
Communicators rechnen können und daß der Akku bis
zu zweihundert (200) Mal aufgeladen werden kann.
Die Garantieleistung für wiederaufladbare Motorola Akkus erlischt,
a) wenn die Ladegeräte von Motorola nicht für die Ladung der
betreffenden Akkus als geeignet anerkannt sind, b) die Versiegelungen
der Akkus zerbrochen oder beschädigt sind, c) die Akkus in einem
anderen Gerät oder zu einem anderen Zweck als in einem Personal
Communicator verwendet worden sind.
Copyrightinformationen
Die in dieser Anleitung beschriebenen Produkte von
Motorola enthalten eventuell urheberrechtlich geschützte,
in Halbleiterspeichern oder anderen Medien gespeicherte
Programme. In den Vereinigten Staaten und anderen Ländern
verfügt Motorola über gewisse gesetzliche Rechte bezüglich
urheberrechtlich geschützter Computerprogramme, einschließlich
dem exklusiven Recht, die urheberrechtlich geschützten
Motorola-Programme zu kopieren oder vervielfältigen.
Dementsprechend ist es untersagt, urheberrechtlich geschützte
Motorola-Computerprogramme, die in den in dieser Anleitung
beschriebenen Produkten enthalten sind, auf irgendeine Weise
zu kopieren oder zu vervielfältigen, soweit nicht ausdrücklich
schriftlich zugestanden. Darüber hinaus stellt der Kauf dieses
Motorola-Produkts nicht eine im Rahmen von Motorolas
Urheberrechts oder Motorolas Patente oder Patentanmeldungen
gewährte Lizenz dar, sei diese ausdrücklich oder stillschweigend,
durch Verwirkung oder anderweitig, außer der normalen,
nichtexklusiven, gesetzlich durch den Verkauf eines Produkts
entstehende gebührenfreien Lizenz für den Gebrauch.
und MOTOROLA sind Warenzeichen der Motorola Inc.
Talkabout ist ein Warenzeichen der Motorola, Inc.
© 2001 Motorola, Inc.
Für weitere Informationen wenden Sie sich bitte an:
Service-Hotline
Deutschland: 06128 70 2146
International: +49 6128 70 2146
19 Deutsch

Contenidos
Información General sobre Seguridad 1
Exposición a la energía de radiofrecuencia 1
Manejo del Radioteléfono Portátil y Exposición a la EME 1
Cuidado de la antena 1
Funcionamiento de radioteléfonos Transceptores 1
Funcionamiento con Accessorios Transporte 2
Accesorios Originales 2
Interferencias y Compatibilidades Electromagnéticas 2
Dispositivos médicos 2
Seguridad y Uso durante la Conducción 2
Advertencias sobre el Funcionamiento 3
Precauciones de Funcionamiento 3
Guarde Estas Instrucciones 4
Hablemos de su nueva radio 5
Baterías 5
Para instalar la batería NiMH 5
Para cargar la batería NiMH 5
Para utilizar la Base Cargadora 5
Para instalar las pilas AA 6
Para encender y apagar la radio 6
Medidor de baterías 6
Selección del tipo de batería (pila) 6
Pinza de Cinturón 6
Antes de que pueda hablar 7
Cambie el canal 7
Cambie el código 7
Para comunicarse 7
Otras características 8
Tono de confirmación para hablar 8
Modo de llamada 8
Menú corto 8
Cierre 8
Luz 9
Tonos de Alerta 9
Graduación de la ganancia del micrófono 9
Tonos de llamada 9
Apagado automático (APO) 9
Reposición a cero 10
Reloj de temporización 10
Uso manos libres 10
VOX interna 11
Exploración 11
Para seleccionar la lista de exploración 12
Modo VibraCall
®
12
Encriptación de Voz 13
Comunicación con la radio 13
Alcance de transmisión 13
Resolución de problemas 14
Especificaciones 16
Información de Garantía Limitada 16
Información del Copyright 19
Español

Información General sobre Seguridad
Información de Seguridad Importante para un Funcionamiento
Seguro y Eficiente - No deje de leer esta información antes de
utilizar el radioteléfono.
La información ofrecida en este documento sustituye a la
información general de seguridad incluida en los manuales de
usuario publicados antes de julio de 2000. Para obtener
información sobre el uso de radioteléfonos en áreas peligrosas,
consulte el suplemento del manual de aprobación Factory Mutual
(FM) o la Tarjeta de instrucciones que se incluye con los
modelos de radioteléfono que ofrecen esta característica.
Características de funcionamiento de radiofrecuencia (RF)
El radioteléfono incluye un transmisor y un receptor. Cuando se
encuentra encendido, recibe y transmite energía de
radiofrecuencia (RF).
El radioteléfono funciona en intervalos de frecuencia de
446.00625 MHz a 446.09375 MHz.
Exposición a la energía de radiofrecuencia
El radioteléfono Motorola está diseñado de conformidad con las
siguientes normas y directrices nacionales e internacionales,
referentes a la exposición de los seres humanos a la energía
electromagnética de radiofrecuencia:
• Comisión Federal de Comunicaciones de los Estados Unidos,
Código Federal de Reglamentos; apartado 2 47 CFR, subapartado J
• Instituto Americano de Normas Nacionales (ANSI) / Instituto
de Ingenieros de Dispositivos Eléctricos y Electrónicos (IEEE)
C95. 1- 1992
• Instituto de Ingenieros de Dispositivos Eléctricos y
Electrónicos (IEEE) C95.1- Edición de 1999
• Consejo Nacional sobre Protección y Medidas contra la
Radiación (NCRP) de los Estados Unidos, Informe 86, 1986
• Comisión Internacional sobre Protección contra Radiaciones
No Ionizantes (ICNRP) 1998
• Comisión Nacional de Protección contra Radiaciones de Reino
Unido 1995
• Ministerio de Sanidad (Canadá) Código de seguridad 6.
Límites de exposición humana a campos electromagnéticos
con un intervalo de frecuencia entre 3 kHz y 300 GHz, 1999
Para garantizar un rendimiento óptimo del radioteléfono y que la
exposición humana a la energía electromagnética de
radiofrecuencia esté dentro de las directrices establecidas en las
normas anteriores, respete siempre los siguientes procedimientos:
Manejo del Radioteléfono Portátil y Exposición a la EME
Cuidado de la antena
Utilice exclusivamente la antena que se suministra o una de
repuesto aprobada. Las antenas no autorizadas, las modificaciones
o acoplamientos podrían dañar el radioteléfono e irían en contra
de los reglamentos de la FCC.
NO sujete la antena cuando el radioteléfono está "EN USO". Esto
puede afectar a la calidad de la llamada y podría hacer que el
radioteléfono funcione a un nivel de potencia mayor del necesario.
Funcionamiento de radioteléfonos transceptores
Cuando utilice su radio como walkie - talkie, sujétela en posición
vertical con el micrófono a unos 5 - 7,5 centímetros de los labios.
1 Español

Funcionamiento con Accesorios Transporte
Con el fin de respetar el cumplimiento de los reglamentos de la
FCC referentes a la exposición de radiofrecuencia, si lleva el
radioteléfono consigo durante una transmisión, colóquelo siempre
en una pinza, funda o cualquier otro accesorio de transporte
aprobado por Motorola. El uso de accesorios no aprobados por
Motorola puede violar las directrices de la FCC referentes a la
exposición de radiofrecuencia. Si no utiliza un accesorio protector,
asegúrese de que la antena esté a unos 2,5 cm (1 pulgada) de
distancia cuando transmita.
Accesorios Originales
Para conseguir una lista de los Accesorios Originales Motorola
véase un catálogo de accesorios para más detalles.
Interferencias y Compatibilidades Electromagnéticas
Nota: Casi todos los dispositivos electrónicos son susceptibles de
sufrir interferencias electromagnéticas (EM) si están
inadecuadamente apantallados, diseñados o configurados en
cualquier otra forma para la compatibilidad electromagnética.
Instalaciones
Para evitar interferencias electromagnéticas y conflictos de
compatibilidad, apague su radioteléfono en aquellas
instalaciones en las que existan avisos para que así lo haga. Los
hospitales o instalaciones de cuidados sanitarios utilizan equipos
sensibles a radiaciones de RF externas.
Aviones
Cuando se le indique que lo haga, apague su radioteléfono
cuando esté a bordo de una aeronave. Todo uso de un
radioteléfono debe estar de acuerdo con los reglamentos de las
líneas aéreas o con las instrucciones de la tripulación.
Dispositivos médicos
Marcapasos
La Asociación de fabricantes del sector sanitario recomienda
que se debe mantener una separación mínima de 15 centímetros
(6 pulgadas) entre el radioteléfono inalámbrico portátil, y el
marcapasos. Estas recomendaciones son coherentes con la
investigación independiente y las recomendaciones del estudio
Wireless Technology Research.
Las personas con marcapasos deben:
• Mantener SIEMPRE el radioteléfono alejado más de 15
centímetros (6 pulgadas) del marcapasos cuando éste se
encuentre encendido.
• No llevar el radioteléfono en el bolsillo del pecho.
• Utilizar el oído opuesto al marcapasos para minimizar la
potencia de la interferencia.
• Apagar el radioteléfono inmediatamente si por alguna razón
sospecha que se están produciendo interferencias.
Audífonos
Algunos radioteléfonos inalámbricos digitales pueden interferir
con ciertos audífonos. En el caso de que se produzca dicha
interferencia, puede que quiera consultarlo con el fabricante del
audífono para discutir las alternativas.
Otros dispositivos médicos
Si utiliza cualquier otro dispositivo médico personal, consulte al
fabricante del mismo para determinar si está protegido de forma
adecuada contra energía de radiofrecuencia. Su médico puede
ayudarle a obtener esta información.
Seguridad y Uso durante la Conducción
Compruebe las leyes y normativa sobre el uso de radioteléfonos
en el área en la que conduzca.
2 Español

Respételas siempre. Al utilizar el radioteléfono mientras conduce:
• Preste toda la atención a la conducción y a la carretera.
• Debe utilizar la función Manos Libres si quiere usar la radio
mientras conduce.
• Aparque fuera de la carretera antes de realizar o contestar una
llamada si las condiciones de conducción así lo requieren.
Advertencias sobre el Funcionamiento
Vehículos equipados con airbag
NO coloque radioteléfonos ni radioteléfonos portátiles en el área
situada encima del airbag o en el área de despliegue del mismo.
Los airbag se inflan con gran fuerza. Si se coloca un radioteléfono
o equipo de radio portátil en la zona de despliegue del airbag y
éste se infla, el producto puede ser despedido con gran fuerza y
provocar graves lesiones a los ocupantes del vehículo.
Atmósferas potencialmente explosivas
Apague el radioteléfono cuando esté en un área con una
atmósfera con posibilidad de provocar explosiones, a menos que
sea un tipo de radioteléfono especialmente preparado para
utilizarlo en dichas áreas, "intrínsecamente seguras" (por
ejemplo, con aprobación de Factory Mutual, CSA o UL).
No cambie las baterías ni las cargue en dichas áreas. Las chispas
en una atmósfera potencialmente explosiva pueden provocar una
explosión o incendio, con el consiguiente riesgo de lesiones o
incluso muerte.
Nota: Las zonas con atmósferas potencialmente explosivas a
las que se hace referencia anteriormente incluyen las
zonas de carga de combustible, tales como cubiertas
inferiores de barcos; instalaciones de trasvase o
almacenaje de carburante o productos químicos; zonas
en las que el aire contenga productos químicos o
partículas, como grano, polvo o polvos metálicos; y
cualquier otra zona en la que se le indicaría normalmente
que apagase el motor de su vehículo. Las zonas con
atmósferas potencialmente explosivas están
frecuentemente, pero no siempre, indicadas.
Cebos detonadores y zonas de voladuras
Para evitar posibles interferencias con operaciones de voladura,
apague su radioteléfono cuando esté cerca de cebos de
detonadores eléctricos, en una zona de voladuras, o en zonas
con carteles del tipo:
"Apague su radioteléfono transceptor". Obedezca todas las
señales e instrucciones.
Precauciones de Funcionamiento
Antenas
No use ningún radioteléfono portátil que tenga la antena dañada.
Si una antena dañada entra en contacto con la piel, puede
provocar una ligera quemadura.
Baterías
Todas las baterías pueden provocar daños materiales y lesiones
corporales, como quemaduras, si un material conductor, como
joyas, llaves o collares, entra en contacto con los terminales no
cubiertos. El material conductor puede cerrar un circuito
eléctrico (cortocircuito) y llegar a ponerse muy caliente. Tenga
cuidado al manipular cualquier batería cargada, especialmente
cuando la coloque dentro de un bolsillo, bolsa u otro recipiente
con objetos metálicos.
3 Español

GUARDE ESTAS INSTRUCCIONES
Antes de utilizar el cargador de baterías, lea todas las
instrucciones y notas de precaución en: (1) la batería, (2) el
cargador de baterías, y (3) en la radio que usa la batería.
PRECAUCIÓN
Para reducir el riesgo de sufrir lesiones, cargue solamente
(E)NTN9395 las baterías recargables listadas. Otros tipos de
baterías pueden explotar, provocando lesiones personales y daños.
1. No exponga el cargador a lluvia o nieve.
2. No utilice el cargador si ha recibido un golpe brusco, se ha
caído o se ha dañado en modo alguno.
3. No desarme el cargador. Si no funciona correctamente,
devuélvalo al punto de venta dentro de los 90 días de su
compra. Si se rearma incorrectamente puede presentarse el
peligro de sacudida eléctrica o incendio.
4. No modifique nunca el cable y enchufe de AC provisto con la
unidad. Si el enchufe no encaja en la toma, pida a un electricista
titulado que instale una toma correcta. Una instalación
incorrecta puede presentar el peligro de sacudida eléctrica.
5. Para reducir el riesgo de causar daños al cable o al enchufe,
tire del enchufe en lugar de hacerlo del cable al desconectar el
cargador del receptáculo de AC.
6. Para reducir el riesgo de sufrir una sacudida eléctrica,
desenchufe el cargador de la toma antes de intentar cualquier
mantenimiento o limpieza.
7. El uso de un accesorio no recomendado o vendido por
Motorola podría resultar en un riesgo de incendio, sacudida
eléctrica, o lesión personal.
4 Español

Hablemos de su nueva radio
Los transmisores-receptores de radio T6202, T6212 ó T6222 de
Motorola™ Talkabout™ le permite mantenerse en contacto con
su familia y sus amigos. Las radios operan en frecuencias de
PMR446 y funcionan en cualquier país donde estas frecuencias
están autorizadas, con sujeción a las reglas aplicables.
Baterías
Los transmisores-receptores de radio T6202, T6212 y T6222
Talkabout™ funcionan con tres pilas AA o con una batería
recargable de hidruro metálico de níquel (NiMH).
La batería recargable NiMH, la cubierta del adaptador del
cargador, el cargador y el Muelle de Carga pueden comprarse por
separado.
Para instalar la batería NiMH:
1. Empuje el clip hacia arriba para quitar la cubierta de la batería.
2. Introduzca la batería NiMH con los contactos para cargar
mirando hacia fuera.
3. Reemplace la cubierta de la batería introduciendo los
pasadores de la cubierta de la batería en las ranuras de la parte
trasera de la radio, luego presione con firmeza hasta que la
cubierta de la batería quede fija en su lugar.
Para cargar la batería NiMH:
La batería NiMH puede cargarse mientras está dentro de la
radio, o sola dentro de la cubierta del adaptador del cargador.
Para obtener máximo uso de la batería, cárguela durante la
noche (16 horas) antes de utilizarla por primera vez. Las
siguientes cargas necesitarán solamente cuatro horas.
1. Asegúrese de que la radio está apagada o coloque la batería
NiMH en la cubierta del adaptador del cargador.
2. Enchufe el cargador en un toma de corriente con corriente
alterna (CA).
3. Sitúe el conector del cargador con el pasador grande sobre la
ranura grande, a la derecha de los tres contactos de la batería.
4. Empuje el pasador grande hacia dentro de la ranura, luego
cierre con presión el pasador pequeño en la ranura pequeña.
5. La luz del cargador permanecerá roja mientras se carga la batería
y se tornará verde cuando esté el 90% cargada. La luz verde
permanecerá durante todo el tiempo que la batería esté cargada.
6. Para quitar el cargador tire delicadamente hacia fuera y hacia
arriba hasta que el pasador pequeño se suelte, y quite
cuidadosamente el pasador más grande.
Nota: Si observa que el LED (diodo emisor de luz) se enciende
rojo por más de un minuto, significa fallo de la batería y
deberá cambiarla.
Para utilizar la Base Cargadora
La Base Cargadora se puede montar o colocar en cualquier
superficie plana (como la pared o la mesa). Para montar la Base
Cargadora:
1. Envuelva el cable eléctrico debajo de la Base Cargadora. Utilice los
recortes del molde destinados para sujetar el cable en su lugar.
2. Fije con dos tornillos del número 6 x _ apropiados para la
superficie de montaje.
Para cargar la batería NiMH utilizando la Base Cargadora:
1. Sitúe el cargador con el pasador sobre la parte del LED por
encima de la ranura izquierda.
5 Español
A
B
C
F
G
D/E

2. Cierre con presión el pasador sobre el cable hacia dentro de la
ranura derecha, sujetando con la abrazadera el cargador en los
contactos de la Base Cargadora.
3. Enchufe el cargador en el toma de corriente de CA en la pared.
4. Coloque la radio, o la batería NiMH en la cubierta del adaptador
del cargador, en la Base Cargadora hasta que oiga un clic.
5. Cuando la luz del diodo LED está verde, la batería está
completamente cargada.
Para instalar las pilas AA:
1. Empuje hacia arriba el clip para quitar la cubierta de la batería.
2. Introduzca 3 pilas AA en la bandeja correspondiente de modo
que + y – correspondan con las del compartimento
3. Reemplace la cubierta de baterías insertando las clavijas de la
cubierta en las ranuras de la parte trasera de la radio, luego
presione con firmeza hasta que la cubierta de batería se fije en
su lugar con un clic.
Para encender y apagar la radio:
1. Presione y mantenga presionado el botón P hasta que se
encienda la radio. El LED estará rojo, aparecerá el visor y se
oirá un sonido de alerta (a menos que se desconecten los
tonos de Alerta).
2. Para apagar la radio, presione y mantenga presionado el botón
P, la radio emitirá un pitido para confirmar (cuando están
conectados los tonos de Alerta) y desaparecerá el visor.
Medidor de baterías
El icono d, situado en la Pantalla, está dividido en tres barras.
Si Muestra d (cargada), b (dos tercios cargada), c (un
tercio cargada) y a (casi descargada). Cuando está en c, la
radio emite un pitido cada diez minutos.
Selección del tipo de batería (pila):
Para asegurar que el icono del medidor de baterías muestra con
exactitud el grado de uso de la batería, el tipo de batería que
utiliza en su radio debe quedar establecido en el Menú de
Selección del Tipo de Baterías.
1. Para entrar en el Menú de Selección del Tipo de Baterías,
presione el botón \ hasta que aparezca el icono d en el
visor. El número del canal será reemplazado por una
A
intermitente o n.
2. Utilice el botón [ sube o ] baja para elegir A, si utiliza baterías
alcalinas; o n, si utiliza baterías recargables NiMH o NiCd.
3. La radio volverá a su modo de operación normal tras diez
segundos o cuando usted presione el botón M o R.
Nota: Retire las baterías antes de guardar la radio por períodos
largos. Las baterías se corroen con el tiempo y pueden causar
daño permanente a la radio.
Pinza de Cinturón:
Las radios T6202, T6212 y T6222 Talkabout™ vienen de serie con
pinza de cinturón.
Para instalarlo:
• Sosteniendo la pinza de cinturón de los dos extremos: superior
e inferior, apretarlo para replegar el pasador.
• Introduzca la pinza de cinturón en la ranura en la parte trasera
de la radio y afloje.
• Para quitar, sostenga la pinza de cinturón de los dos extremos:
superior e inferior, apretarlo nuevamente para replegar el
pasador y quitar.
6 Español
3
7
1
H
A
B
C
2
1
5/
6

Antes de que pueda hablar
Lea con atención este manual.
Las radios T6202, T6212 y T6222 Talkabout™ tienen 8 canales y
38 códigos Eliminadores de Interferencias. Para hablar con otros,
todas las radios de su grupo deberán sintonizarse en el mismo
canal y código.
Los Códigos Eliminadores de Interferencia filtran la estática, el
ruido y los mensajes no deseados en los canales de la radio. Sólo
podrá comunicarse con las radios que utilizan el mismo canal y
código. No obstante, en vista de que se pueden monitorizar los
canales de la radio, las conversaciones no son privadas. Para
evitar la congestión de los canales, cambie el canal y el código
existente. (Asegúrese de que todas las otras radios en su grupo
han cambiado al mismo).
Seleccione el código 0 (onda portadora) para monitorizar toda la
actividad del canal.
Cambie el canal:
1. Presione el botón \ una vez para entrar al Menú de
Selección de Canal. El número del canal se iluminará
intermitentemente.
2. Utilice los botones sube ] o baja [ para seleccionar un nuevo
canal mientras esté intermitente el número de canal.
3. La radio volverá al modo de operación normal tras diez
segundos o cuando presione el botón M o R.
Cambie el código:
1. Presione el botón \ dos veces para entrar en el Menú de
Selección de Código.
2. Comenzará a iluminarse intermitentemente el código actual de
la radio (número bajo).
3. Utilice los botones sube ] o baja [ para seleccionar un nuevo
código mientras el número esté intermitente.
4. La radio volverá al modo de operación normal tras diez
segundos o cuando presione el botón M o R.
Para comunicarse
Ajuste el volumen:
1. Presione el botón sube ] o baja [ para cambiar el volumen.
2. El icono V aparecerá y el visor mostrará el nivel de volumen
actual (de 1 a 20). La radio emitirá un pitido para indicar el nivel
de volumen (cuando están conectados los tonos de Alerta).
3. Después de tres segundos la radio volverá a su
funcionamiento normal.
Advertencia: Cuando el volumen es alto no ponga la radio muy cerca
de su oído. Puede causar daños en el oído.
Botón de monitor/de indicador del nivel de señal y de
exploración:
Este botón tiene tres características: Monitor, Indicador del nivel
de señal, y Exploración (La característica de exploración está
disponible solamente en las radios T6212 y T6222).
La característica de Monitor se utiliza para comprobar la
actividad del canal actual antes de transmitir. Cuando se recibe,
o si el canal está ocupado, el diodo LED parpadeará
intermitentemente más rápido de lo normal.
El Indicador de nivel de señal muestra el nivel de cualquier señal
que entra, de 1 (la más débil) a 6 (la más fuerte).
7 Español
8

Envíe mensajes:
1. Compruebe la actividad del canal presionando por unos
segundos el botón ). Escuchará la estática si el canal está
libre. No transmita si hay alguien hablando.
2. El visor mostrará el icono w y el número del canal será
reemplazado por un número que muestra el nivel de cualquier
señal que entra de 1 (más débil) a 6 (más fuerte).
3. Para máxima claridad, sostenga la radio a unos 5 o 7,5cms de
su boca.
4. Presione el botón M y hable en dirección a la radio. El LED se
ilumina continuamente durante la transmisión.
5. Para recibir mensajes, suelte el botón M.
Otras características
Tono de confirmación para hablar:
Cuando quiera conectar la característica de tono de confirmación
para hablar, la radio transmitirá un tono determinado cuando
termine de transmitir, y hará sonoro el tono localmente en su
radio. Para conectar o desconectar esta característica presione y
sostenga el botón “sube” ] al encender su radio.
Modo de llamada:
Las radios T6202 y T6212 Talkabout™ le permiten seleccionar
alerta de Llamada cuando recibe la primera transmisión que
entra. Tras esto, se suspende el tono de llamada hasta 30
segundos después de haber terminado la actividad en el canal.
Para seleccionar la llamada:
1. Presione el botón \ hasta que aparezca el icono B en el visor.
2. El número grande de canal se reemplaza con un Y para
conectar o n para desconectar.
3. Utilice el botón sube ] o baja [ para seleccionar Y para
habilitarlo.
4. La radio volverá al modo de operación normal tras diez
segundos o cuando presione el botón M o R.
Menú corto:
Las radios T6202, T6212 y T6222 Talkabout™ poseen una
característica de Menú Corto, que le permite limitar el número de
menús que se muestran, a los de Canal, Código eliminador de
interferencia y tonos de Llamadas. La función de Exploración de
Canal también se desconecta, para impedir el cambio accidental
del modo de operación de la radio. Cuando está conectado el
menú corto, la única secuencia disponible de encendido de la
radio es desconexión de menú corto. El menú de reloj de
temporización se incrementa a 60 segundos.
1. Para activar el Menú Corto, presione y sostenga el botón \,
mientras enciende la radio.
2. Para desconectar el Menú Corto, apague la radio, y luego
presione y sostenga el botón \ al encender la radio.
Bloqueo:
Las radios T6202, T6212 y T6222 Talkabout™ poseen una
característica de bloqueo que le permite desconectar el Menú, el
Explorador y los botones de control del volumen (sube ] y baja
[ ) de modo que las sintonías de la radio no se puedan cambiar
accidentalmente.
1. Para activar la característica de bloqueo, presione y sostenga el
botón \ hasta que suene la alerta de conexión del bloqueo y
aparenzca el icono f en el visor.
2. Los botones desconectados emitirán un pitido si se presiona
(cuando los tonos de Alerta están conectados).
3. Para desconectar la característica de bloqueo, presione y
sostenga el botón \ nuevamente hasta que suene la alerta
de desconexión del bloqueo y desaparezca el icono f.
8 Español

Luz:
Las radios T6202, T6212 y T6222 Talkabout™ poseen una
característica de visor con luz de fondo para utilizar en
condiciones de poca luz. Presione brevemente el botón R para
iluminar el visor. La luz se encenderá durante cuatro segundos.
Presionando cualquier botón comenzará o extenderá el tiempo
de iluminación del visor.
Tonos de Alerta:
Los tonos de Alerta pueden desconectarse al encender la radio
mientras presiona el botón baja [. El Reloj de Temporización
para la transmisión y los tonos de alerta de batería casi vacía, no
se desconectan.
Para reactivar los tonos de Alerta, apague y encienda
nuevamente la radio mientras presiona el botón baja [.
Graduación de la ganancia del micrófono:
La graduación de la ganancia del micrófono permite seleccionar
una de las tres graduaciones de ganancia de Micrófono (Si VOX
no está conectada): graduación baja (1), graduación media (2) y
graduación alta (3). Si habla fuerte, deberá elegir la graduación
baja, y si habla suave, la alta.
1. Presione el botón \ hasta que aparezca el icono g en el
visor junto con un número de brillo intermitente 1, 2 ó 3.
2. Utilice los botones de sube ] y baja [ para cambiar entre los
niveles.
3. Las radios volverán al modo de funcionamiento normal tras
diez segundos o cuando presione el botón M o R.
Tonos de llamada:
Las radios T6202, T6212 Talkabout™ poseen cinco tonos
distintivos de llamada para identificar a cada usuario y alertar a
los otros de su intención de transmitir. Las radios T6222
Talkabout™ tienen diez tonos distintivos de llamada. Presione el
botón ^ y todos los usuarios en su canal recibirán la alerta de su
Tono de Llamada.
Para cambiar y escuchar el Tono de Llamada:
1. Para entrar en el Menú de Tonos de Llamada, presione el botón
\ hasta que el icono ^ aparezca en el visor. El número del
canal será reemplazado por el número de tono de llamada.
2. Utilice los botones de sube ] y baja [ para cambiar el Tono
de Llamada.
3. La radio volverá al modo de funcionamiento normal tras diez
segundos o cuando presione el botón M o R.
Apagado automático (APO):
Las radios T6202, T6212 y T6222 Talkabout™ pueden
programarse para que se apaguen automáticamente después de
un cierto período de inactividad (sin presionar botones o
transmisiones por VOX). Esta característica se utiliza para
impedir el uso no deseado de las baterías.
1. Para entrar en el Menú de Apagado Automático (APO),
presione el botón \ hasta que el icono de APO aparezca en
el visor. El número del canal será reemplazado por una barra
horizontal intermitente que significa que el Apagado
Automático (APO) está desactivado.
2. Utilice el botón de sube ] o baja [ para cambiar el período de
duración del Apagado Automático (de 1 a 8 horas).
3. La radio volverá a su modo normal de funcionamiento tras
diez segundos o cuando presione el botón M o R.
9 Español
6
4

4. Si se habilita el Apagado Automático se visualizará el icono
de APO en el visor. Durante cinco minutos antes de que la
radio se apague, ésta emitirá periódicamente un tono de
advertencia y el icono de APO brillará intermitente. Cualquier
botón que se presione o transmisión de VOX repondrá el reloj
del APO a cero.
Reinicialización:
Manteniendo la presión en el botón \ y M, o h y M, al
encender la radio reinicializará las características programables
del usuario, es decir, volverá a fijar los parámetros establecidos
por la fábrica.
Reloj de temporización:
La característica de Reloj de Temporización ayuda a extender la
vida de la batería. La radio emitirá un tono de advertencia y
detendrá la transmisión si:
1. Se presiona el botón M por más de 60 segundos
ininterrumpidos.
2. Se activa la transmisión de VOX por más de 60 segundos
ininterrumpidos.
Uso manos libres:
Las radios T6202, T6212 y T6222 Talkabout™ tienen capacidad
de VOX: Transmisión activada por la voz. Eso significa que el
sonido de su voz activa la transmisión cuando la radio se utiliza
con el accesorio de audio VOX.
Nota: Cuando se utiliza los accesorios de audio con la radio,
recomendamos que el volumen se mantenga a un nivel
cómodo al oído. Antes de colocar el accesorio sobre su
cabeza o en su oído, baje el volumen.
Para utilizar la característica VOX:
1. Asegúrese de que la radio esté apagada.
2. Enchufe el conector del accesorio en la clavija de conexión al
lado izquierdo de la radio.
3. Encienda la radio y baje el volumen antes de colocar el
accesorio en la cabeza o en el oído. Aparecerá el icono
iluminado intermitente g en el visor para indicar que la
característica VOX está activada.
4. Con los botones sube ] o baja [ ajuste el volumen a un nivel
cómodo.
5. Para transmitir, dirija la voz al micrófono accesorio. Para
recibir, no hable.
Nota: Habrá una pequeña demora desde que comienza a hablar
hasta que la radio transmita, y una demora más
prolongada desde que deja de hablar y la radio reciba, a fin
de permitir pausas en la conversación.
Reinicializar al modo ‘Push-to-Talk’ (Pulse para hablar):
1. Presione el botón M una vez. El icono g desaparecerá.
2. Para transmitir, presione el botón M en la radio. Para recibir,
suelte el botón M.
3. Para volver al modo VOX, apague la radio, luego enciéndala
otra vez con el accesorio puesto.
Para seleccionar la sensibilidad de VOX:
Las radios T6202, T6212 y T6222 Talkabout™ permiten que ajuste la
sensibilidad de VOX de la radio para compensar los variables niveles
de ruidos de fondo y habla. El modo edición de VOX permite que
elija entre los ajustes de graduación: alto, medio y bajo. Por ejemplo,
si habla fuerte, o se encuentra en un entorno ruidoso, deberá
seleccionar el ajuste bajo (1) y si habla suave, o se encuentra en un
entorno más silencioso, deberá seleccionar el ajuste alto (3). El
ajuste medio (2) es adecuado para la mayoría de las situaciones.
10 Español

1. Para entrar en el menú de sensibilidad de VOX, asegúrese que
el accesorio de audio está en su lugar, presione el botón \
hasta que aparezca el icono g en el visor. El número del canal
será reemplazado por el ajuste de VOX 1, 2, ó 3.
2. Use el botón de sube ] o baja [ para cambiar el ajuste de
VOX, si fuese necesario.
3. La radio volverá al modo de funcionamiento normal tras diez
segundos o cuando presione el botón M o R.
VOX interna
Las radios T6202, T6212 Talkabout™ llevan también la
capacidad de Transmisión Interna de Operación de Voz. Ésta es
una función similar a VOX debido a que el sonido de su voz
activa la transmisión, pero no se necesitan accesorios externos.
Para seleccionar la característica de VOX interna:
Puede:
1. Presionar el botón \ hasta que aparezca intermitente el
icono g en el visor y se reemplace el número del canal con Y
(conectado) o n (desconectado). Use el botón sube ] o baja
[ para seleccionar Y para conectar.
2. La radio volverá al modo de funcionamiento normal tras diez
segundos o cuando presione el botón M o R. El icono g
permanece visualizado en el visor.
ó:
1. Asegúrese de que la radio está apagada.
2. Presione y sostenga el botón M y encienda la radio con el
botón de encendido. Se visualizará el icono g en el visor.
Para utilizar la característica de VOX interna:
1. Presione a intervalos rápidos el botón M y comenzará a
iluminarse intermitente el icono g. Su radio transmitirá ahora
cada vez que habla.
2. Al presionar a intervalos rápidos el botón M, la radio cambia
entre los modos VOX mudo y activo.
3. Para desconectar la característica de VOX interna, vaya al
Menú de Selección de VOX interna y use el botón sube ] o
baja [ para seleccionar n para desconectar. O apague y
encienda la radio.
Para seleccionar la sensibilidad de VOX interna:
Las radios T6212 y T6222 Talkabout™ permiten que ajuste la
sensibilidad de VOX interna de la radio para compensar los
variables niveles de ruidos de fondo y habla. El modo edición de
VOX interna permite que elija entre los ajustes de graduación: alto,
medio y bajo. Por ejemplo, si habla fuerte, o se encuentra en un
entorno ruidoso, deberá seleccionar el ajuste bajo (1) y si habla
suave, o se encuentra en un entorno más silencioso, deberá
seleccionar el ajuste alto (3). El ajuste medio (2) es adecuado para
la mayoría de las situaciones.
1. Para entrar en el menú de sensibilidad de Vox interna,
asegurando que se visualiza el icono g en el visor, presione el
botón \ hasta que el número del canal se reemplace con el
ajuste de VOX interna de 1, 2 ó 3.
2. Use el botón sube ] o baja [ para cambiar el ajuste de VOX
interna, si fuese necesario.
3. La radio volverá al modo de funcionamiento normal tras diez
segundos o cuando presione el botón M o R.
Exploración:
Las radios T6202, T6212 y T6222 Talkabout™ tienen la
característica Exploración, que permite el rastreo de otras radios
que podrían estar transmitiendo. Le permite escuchar y hablarle
a la persona o personas sin tener que cambiar de canal.
11 Español

La exploración normal solamente "aterrizará" en el canal si el
Código Eliminador de Interferencia corresponde con el que usted
fijó para el canal.
El explorador de Onda Portadora "aterrizará" en el canal si
detecta alguna actividad. La radio operará el explorador de Onda
Portadora si fija el Código Eliminador de Interferencia en 0 para
el canal original (el canal que ha utilizado antes de cambiar al
modo Explorador).
1. Para comenzar a explorar, presione el botón ). El icono h
aparecerá en el visor y se rastrean los números del canal .
2. Cuando el canal detecta actividad, el visor indicará el canal y el
código en el cual se desarrolla la actividad (el código mostrará
0 si la radio está en Explorador de Onda Portadora y "aterriza"
en el canal donde la señal de entrada no contiene un Código
Eliminador de Interferencia).
3. Si se presiona el botón Mo ) mientras la radio está
explorando, resultará en operación transmisión/monitor en el
canal original.
4. Para salir del Explorador, presione levemente el botón )
nuevamente, el visor mostrará el número del canal original y
código, y desaparecerá el icono h.
Para seleccionar la lista de exploración:
Las radios T6212 y T6222 Talkabout™ permiten que seleccione
los canales a explorar. La radio se puede programar para explorar
canales específicos, conectándolos o desconectándolos en el
Menú de la Lista de Exploración.
1. Para entrar en el Menú de la Lista de Exploración, presione el
botón \ hasta que aparezca el icono h en el visor. El
número actual de código será reemplazado por Y intermitente
para SÍ y n para NO.
2. Presione el botón ) para seleccionar si se explorará o no un
canal. Seleccione Y para SÍ y n para NO.
3. Presione el botón de sube ] o baja [ para cambiar de canales.
4. La radio volverá al modo de funcionamiento normal tras diez
segundos o cuando presione el botón M o R.
Modo VibraCall
®
:
Las radios T6222 Talkabout™ permiten que elija entre alerta de
Llamada (sonora) y /o VibraCall
®
cuando recibe la primera
transmisión que entra. La Llamada (sonora) y /o VibraCall
®
se
suspenden entonces hasta 30 segundos después que haya
terminado la actividad en el canal.
Para seleccionar el modo de Llamada (sonora) y /o VibraCall
®
:
1. Presione el botón \ hasta que se visualicen los iconos B
y/o i en el visor (dependiendo de los ajustes presentes).
2. Se reemplaza el número del canal grande con un – o número
1, 2 ó 3.
3. Use el botón sube ] o baja [ para cambiar entre los ajustes
siguientes.
- = No hay modo de Llamada (sonora) y tampoco VibraCall
®
(ambos iconos están intermitentes)
1 = Modo VibraCall
®
2 = Modo Llamada (sonora)
3 = Ambos modos de Llamada (sonora) y VibraCall
®
4. La radio volverá al modo de funcionamiento normal tras diez
segundos o cuando presione el botón M o R.
12 Español

Encriptación de Voz:
Las radios T6222 Talkabout™ tienen la característica de
Encriptación de Voz. Esta característica permite mayor privacidad
en las transmisiones de los usuarios. Para recibir una transmisión
indescifrable, las radios deben poseer canales, códigos y códigos
indescifrables comparables. Recomendamos que verifique y siga
toda la legislación aplicable en su país antes de usar esta
característica.
Para seleccionar el Código de Encriptación:
1. Presione el botón \ hasta que se visualice el icono e en el
visor y se reemplace el número del canal por la barra horizontal.
2. Para elegir encriptación, presione el botón sube ] o baja [
hasta que aparezca 1 en la posición del canal.
3. Para desconectar la encriptación, presione el botón sube ] o
baja [ hasta que aparezca la barra horizontal.
4. La radio volverá al modo de funcionamiento normal tras diez
segundos o cuando presione el botón M o R.
Comunicación con la radio:
Los 8 canales de su radio son compartidos sobre la base de
"toma de turnos". Esto significa que otros grupos pueden estar
hablando en los canales. Para que no se interrumpan sus
comunicaciones, siga los pasos siguiente:
1. Use el botón ) para comprobar la actividad en los canales,
antes de hablar.
2. No hable por encima de la voz de alguien que está ya usando
el canal, podría no escucharse su mensaje completo. Trate de
cambiar el Canal y el Código Eliminador de Interferencia para
evitar la congestión del canal.
Nota: Debido a que se comparten los canales, sus conversaciones
no serán privadas y pudiera escuchar a otros hablando.
Alcance de transmisión
Las radios Talkabout T6202, T6212 y T6222 han sido diseñadas
para optimizar el rendimiento y mejorar el alcance de la
transmisión en campo. Se recomienda que no utilice las radios
con una proximidad entre sí inferior a los 1,5 metros debido a
fuertes interferencias.
El alcance de la transmisión depende de la orografía del terreno.
Estas radios funcionan en horizonte óptico y el alcance de
transmisión se verá afectado por las estructuras de hormigón,
follaje espeso y el uso de las radios en el interior de casa y en
los vehículos.
Alcance óptimo Alcance medio Alcance mínimo
El alcance óptimo será posible en zonas llanas, abiertas, con
una cobertura de hasta 3 kilómetros. El alcance medio será
posible cuando existen obstáculos como los edificios y árboles.
El alcance mínimo ocurrirá cuando el follaje espeso y/o las
montañas obstaculicen la vía de comunicación.
13 Español

Resolución de problemas
Problema Solución
No hay energía Vuelva a colocar o cambie las pilas AA
Vuelva a cargar o cambie las baterías NiMH
No se transmitió el mensaje Asegúrese de haber presionado completamente el botón ‘Push-To-Talk’ (presione para hablar) en el
momento de transmitir. Vuelva a colocar o cambie las baterías.
No se recibió el mensaje Confirme que las radios tienen establecidos el mismo Canal y Código Eliminador de Interferencia.
Asegúrese de que no se ha presionado inadvertidamente el botón ‘Push-To-Talk’. Vuelva a colocar o
cambie las baterías.
Los obstáculos, las funciones en el interior de un recinto o vehículos pueden interferir con la comunicación.
Cambie de sitio. Compruebe el volumen de sonido.
Mensaje indescifrable El código de encriptación puede estar conectado y no es igual al de las otras radios; todas las radios deben
utilizar el mismo código de encriptación.
Se escucha otra conversación o Confirme que se ha fijado el Código Eliminador de Interferencia (los ajustes activos son 1 a 38).
ruido en el canal Podría estar en uso el canal compartido o el código eliminador de interferencia. Pruebe otro.
Alcance limitado de habla Las estructuras de acero o cemento, el follaje espeso, y el uso en edificios y en vehículos disminuirá el
y escucha alcance auditivo, verifique la claridad de la línea de visión para mejorar la transmisión. Si lleva la radio junto
al cuerpo, como el bolsillo o en el cinturón, disminuirá el alcance auditivo. Ponga la radio en otro sitio.
Fuerte estática o interferencia Las radios están muy cercanas una de la otra. Las radios deben estar por lo menos a una distancia de 1,5
metros Sepárese, aumente su distancia. Las radios están muy separadas. Los obstáculos interfieren con la
transmisión. El alcance de habla es hasta 3 kilómetros en condiciones despejadas y sin obstáculos.
14 Español

Problema Solución
No se pueden cambiar el canal Asegúrese de que la radio no está bloqueada.
o los ajustes de código
No se puede acceder a Verifique que esté activado el menú corto. Desconecte el menú corto presionando menú \ mientras enciende
todos los menús la radio.
Baterías casi vacías Vuelva a cargar las baterías NiMH o cambie las pilas AA. Las temperaturas extremas afectan la vida de las baterías.
Parpacleo doble del El cargador no está colocado debidamente. Vuelva a colocarlo y asegúrese de que está firmemente sujeto a
LED del cargador la radio, batería, o zócalo de cargador. La energía de la batería está muy baja; la batería se carga
lentamente antes de comenzar a cargar con rapidez.
Mantenimiento y Reparación Si la radio todavía no funciona debidamente, contacte al lugar donde la compró.
de los productos Motorola
15 Español

Especificaciones:
Descripción Especificaciones
Canales 8
Códigos 38
Frecuencia de funcionamiento 446,00625–446,09375 MHz
Alcance de transmisión Hasta 3 kilómetros
Fuente de energía 3 baterías AA o un conjunto de
baterías NiMH
Rendimiento de las baterías*: AA** NiMH
Tiempo de transmisión continua 8.2 horas 2.4 horas
Tiempo de espera 130 horas 39 horas
* Estándar
** Con pilas alcalinas de la mejor calidad. La vida útil de las baterías
con pilas AA NiMH/NiCd de terceras partes puede variar.
Información de Garantía Limitada
Motorola garantiza al comprador original que el Comunicador
Personal y los accesorios que ha comprado a un distribuidor
autorizado Motorola (los "Productos") son conformes con las
especificaciones aplicables de Motorola en vigor en el momento
de su fabricación, por un plazo de garantía estándar de [1] año
desde la fecha de compra del/de los Producto/s (Plazo de
Garantía Limitada).
Deberá informar a Motorola de la falta de conformidad con las
especificaciones aplicables de cualquiera de los Productos en un
plazo de dos (2) meses desde la fecha en que detecte un defecto
en el material, en el acabado o falta de conformidad, y en
cualquier caso en un plazo que no exceda del Plazo de Garantía
Limitada, mediante entrega del Producto para su revisión al
Centro de Reparaciones Autorizado de Motorola más cercano o
al distribuidor autorizado Motorola. Motorola no quedará
obligada por las comunicaciones relacionadas con el Producto
que no hayan sido realizadas directamente por Motorola.
Adjunto a este Producto se incluye una relación de los números
de Centros de Atención Motorola.
Durante el Plazo de Garantía Limitada, Motorola, a su discreción
y sin cargo adicional, como indemnización exclusiva, reparará o
sustituirá el Producto que no se ajuste a la presente garantía; o,
en su defecto, reembolsará hasta el importe del precio de
compra pagado por el Producto por el comprador original, pero
reducido al tener en cuenta el uso que se haya hecho del
Producto desde que fue entregado. Esta garantía expirará al
término del Plazo de Garantía Limitada.
Esta es la garantía completa y exclusiva para el comunicador
personal y los accesorios Motorola, en sustitución de
cualesquiera otras garantías y cualesquiera otros términos y
condiciones, tanto expresos como tácitos.
Siempre que se compre el producto en condición distinta a la de
consumidor, Motorola excluye todas las demás garantías y los
demás términos y condiciones expresos o tácitos tales como
idoneidad y calidad satisfactoria.
En ningún caso Motorola será responsable por daños superiores
al precio de compra, ni de cualesquiera daños* incidentales,
especiales o indirectos derivados del uso del Producto o de la
incapacidad de usar el mismo, en la medida en que ello pueda
ser excluido legalmente.
La presente Garantía Limitada no afecta a ningún derecho
establecido legalmente que pueda tener como consumidor, tal
como la garantía de calidad satisfactoria e idoneidad para el
16 Español

propósito para el cual los productos del mismo tipo se usan
normalmente en condiciones normales de uso y servicio, ni
cualesquiera derechos contra el vendedor de los Productos que
deriven de su contrato de compraventa.
(*) incluyendo, sin limitación, pérdida de uso, pérdida de tiempo,
inconvenientes, pérdida comercial, daños emergentes, lucros
cesantes o pérdida de ahorros.
¿Cómo Obtener Servicio en Garantía?
En la mayoría de los casos, el distribuidor autorizado Motorola
que vendió su comunicador personal y los accesorios originales
Motorola hará frente a las reclamaciones en garantía y/o prestará
el servicio en garantía. También podrá Vd. recibir el servicio en
garantía del Centro de Reparaciones Autorizado de Motorola que
tenga más próximo.
Si necesita información adicional, póngase en contacto con el
distribuidor autorizado Motorola que le vendió su comunicador
personal Motorola o con el Centro de Atención de Motorola, en
los números de teléfonos para su país indicados más abajo.
Para solicitar el servicio en garantía deberá entregar el
comunicador personal. Cuando el Producto se envíe o entregue a
cualquier Centro de Reparaciones Autorizado, deberá ir
acompañado de una etiqueta con su nombre, dirección y número
de teléfono y la descripción del problema.
Para poder tener derecho al servicio en garantía, deberá presentar
su recibo de compra o una prueba sustitutoria comparable de la
compra, donde conste la fecha de la misma. El comunicador ha
de mostrar también claramente el número de serie como número
de referencia. Esta información viene con el Producto.
Condiciones
La presente garantía limitada no será aplicable si el modelo o los
números de serie que aparecen en el Producto han sido
borrados, eliminados, se han hecho ilegibles o si la etiqueta del
comunicador ha sido modificada de cualquier otra forma.
Motorola se reserva el derecho de rechazar un servicio en
garantía gratuito si no se presenta la documentación exigida o si
la información es incompleta, ilegible o incompatible con los
registros de fábrica.
La reparación podrá incluir, a elección de Motorola, la sustitución
de piezas o placas por piezas o placas funcionalmente
equivalentes, reparados o nuevos. Los accesorios, piezas,
baterías o placas sustituidos estarán garantizados durante el
resto del plazo de garantía original. El Plazo de Garantía Limitada
no se ampliará. Todos los accesorios, baterías, piezas y equipo
del comunicador personal originales que hayan sido sustituidos
pasarán a ser propiedad de Motorola. Motorola no garantiza la
instalación, el mantenimiento o la revisión de los productos,
accesorios, baterías o piezas.
Motorola no será responsable, bajo ningún concepto, de los
problemas o daños causados por cualquier equipo auxiliar que no
haya sido suministrado por Motorola y que esté incluido en los
Productos o que se use en relación con los mismos, o del
funcionamiento del equipo Motorola con cualquier equipo auxiliar,
excluyéndose expresamente tal equipo de la presente garantía.
17 Español

Cuando se use el Producto junto con un equipo auxiliar o
periférico que no haya sido suministrado por Motorola, ésta no
garantizará el funcionamiento de la combinación
Producto/periférico, ni hará frente a ninguna reclamación de
garantía si el Producto se usa con tal combinación y Motorola
determina que no existe ningún defecto en el Producto. Motorola
rechaza específicamente toda responsabilidad por daños a
equipos ya sean Motorola o no, causados de cualquier modo por
el uso del comunicador personal, de los accesorios y de los
periféricos (los ejemplos específicos comprenden, sin limitación,
baterías, cargadores, adaptadores y fuentes de alimentación)
cuando tales accesorios y periféricos no sean fabricados y
suministrados por Motorola.
¿Qué No Cubre La Garantía Limitada?
La presente garantía limitada no es válida si los defectos se deben a
daño, mal uso, alteración, negligencia o descuido y en caso de
modificaciones o reparaciones realizadas por personas no autorizadas.
1. Defectos o daños derivados del uso del Producto que no sea el
normal y habitual.
2. Defectos o daños debidos a mal uso, accidente o negligencia.
3. Defectos o daños debidos a verificaciones, utilización,
mantenimiento o ajuste impropios, o a alteraciones o
modificaciones de cualquier clase.
4. Roturas o daños de las antenas a menos que éstos sean causados
directamente por defectos en los materiales o en el acabado.
5. Productos desmontados o reparados de tal forma que
perjudiquen el rendimiento o impidan la adecuada inspección
y realización de pruebas con el objeto de verificar toda
reclamación en garantía.
6. Defectos o daños debidos al alcance.
7. Defectos o daños debidos a humedad, líquidos o alimentos.
8. Todas las superficies de plástico y todas las demás piezas
externas arañadas o dañadas por el uso normal del cliente.
9. Productos alquilados de forma temporal.
Mantenimiento periódico y reparación o sustitución de piezas
debido al uso y desgaste normales.
El tiempo de llamada, el tiempo en espera y el ciclo total de vida
de una batería recargable Motorola para su comunicador
personal dependerán de las condiciones de uso. Como producto
de consumo, las especificaciones indican que se puede obtener
un rendimiento óptimo de su comunicador personal Motorola
dentro de los seis primeros meses a partir de la fecha de compra
y hasta haber realizado (200?) cargas.
La garantía de las baterías recargables Motorola será nula
si (i) las baterías se cargan con cargadores que no sean los
cargadores homologados de Motorola especificados para la
carga de baterías, (ii) alguno de los sellos de la batería está roto
o muestra indicios de violación, y (iii) se utiliza la batería en un
equipo o servicio que no sea el equipo del comunicador personal
para el cual ha sido especificada.
18 Español

Información del Copyright
Los productos Motorola descritos en este manual podrán
incluir programas registrados, almacenados en memorias de
semiconductores u otros medios. Las leyes de los Estados
Unidos y otros países conservan para Motorola, algunos
derechos exclusivos correspondientes a programas
informáticos registrados, incluyendo el derecho exclusivo de
copiar o reproducir en cualquier forma, los programas
registrados de Motorola. Por consiguiente, ningún programa
informático registrado de Motorola contenido en los productos
Motorola descritos en este manual podrá copiarse o
reproducirse de manera alguna sin el consentimiento expreso
escrito de Motorola. Asimismo, la compra de productos
Motorola no se considerará como que otorga directa o
implícitamente, por exclusión, o de otra manera, ninguna
licencia al amparo de los derechos de autor, patentes o
solicitudes de patente de Motorola, salvo en lo que se refiere a
la licencia de uso libre de derechos normal que surge en la
operación legal de la venta de un producto.
, MOTOROLA son marcas comerciales de Motorola, Inc.
Talkabout es una marca comercial de Motorola, Inc.
© 2001 Motorola, Inc.
Para más información llame al:
Desde dentro de España: 91 400 2038
Desde fuera de España: +34 91 400 2038
19 Español
 Loading...