

Motorola TALKABOUT FLEX T10, TALKABOUT T10 User Manual
User’s Guide
Guide de l’utilisateur
NUMERIC PAGER
™
$
#
*
(
Model T10
FLEXTM Technology
Modèle T10
Technologie FLEX
MC


Contents
Introduction .................................................... 1
Effective Use of Your Pager......................... 1
Getting Started .............................................. 2
Battery Information..................................... 2
Installing/Replacing the Battery ................ 2
Control Buttons ........................................... 4
Turning Your Pager On ............................... 5
Turning Your Pager Off............................... 5
Sending a Test Page to Yourself.................. 6
Backlight ...................................................... 7
Using the Main Menu.................................. 8
Status Indicators ......................................... 8
Time and Date ................................................ 9
Setting the Time .......................................... 9
Setting the Date........................................... 9
Displaying the Date................................... 10
Setting the Alarm ...................................... 11
Alerts ............................................................ 12
Setting the Alert Type............................... 12
Reminder Alert .......................................... 13
Low Cell Alert............................................ 13
Messages ..................................................... 15
Reading Messages...................................... 15
Locking/Unlocking Messages .................... 16
Message Information................................. 16
Deleting Messages ..................................... 17
Care & Maintenance .................................... 18
Cleaning Your Pager.................................. 19
Questions ..................................................... 20
FCC Compliance .......................................... 21

Table des matières
Introduction .................................................. 31
Utilisation efficace du Téléavertisseur..... 31
Mise en route ............................................... 32
Renseignements sur la pile ....................... 32
Installation et remplacement de la pile.... 32
Boutons de commande............................... 34
Mise sue tension du Téléavertisseur ........ 35
Mise hors tension du Téléavertisseur....... 35
Comment vous envoyer un message
d’essai .................................................... 36
Rétroéclairage............................................ 37
Utilisation du menu principal................... 38
Indicateurs d'état....................................... 38
Date et heure ................................................ 39
Réglage de l'heure...................................... 39
Réglage de la date...................................... 39
Affichage de la date ................................... 40
Réglage de l'alarme.................................... 41
Avertissements ..... ....................................... 42
Réglage du type d'avertissement .............. 42
Avertissment de rappel ............................. 43
Avertissement de pile faible...................... 43
Messages ..................................................... 45
Lecture des messages ................................ 45
Verrouiller et déverrouiller les messages . 46
Renseignements sur les messages ............ 46
Suppression des messages......................... 47
Entretien approprié ..................................... 49
Nettoyage du téléavertisseur .................... 50
Questions ..................................................... 51
Conformité FCC ........................................... 52

Introduction
Congratulations on your purchase of your
Talkabout
This booklet contains operation
instructions that explain how to use your
new pager and provides helpful
suggestions for first-time as well as
experienced users.
Effective Use of Your Pager
Your pager can help you keep in contact
with everyone important to you. By
™
T10 pager.
giving your pager number to business
associates, family, and friends, you can be
contacted whenever needed.
INTRODUCTION
1

Getting Started
Battery Information
Your pager operates with a single
AAA-size alkaline battery (do not use
carbon zinc batteries). See the diagram
on the following page for the battery
door location.
If lobat displays, the pager’s AAA-size
battery is low. Replace the AAA-size
battery.
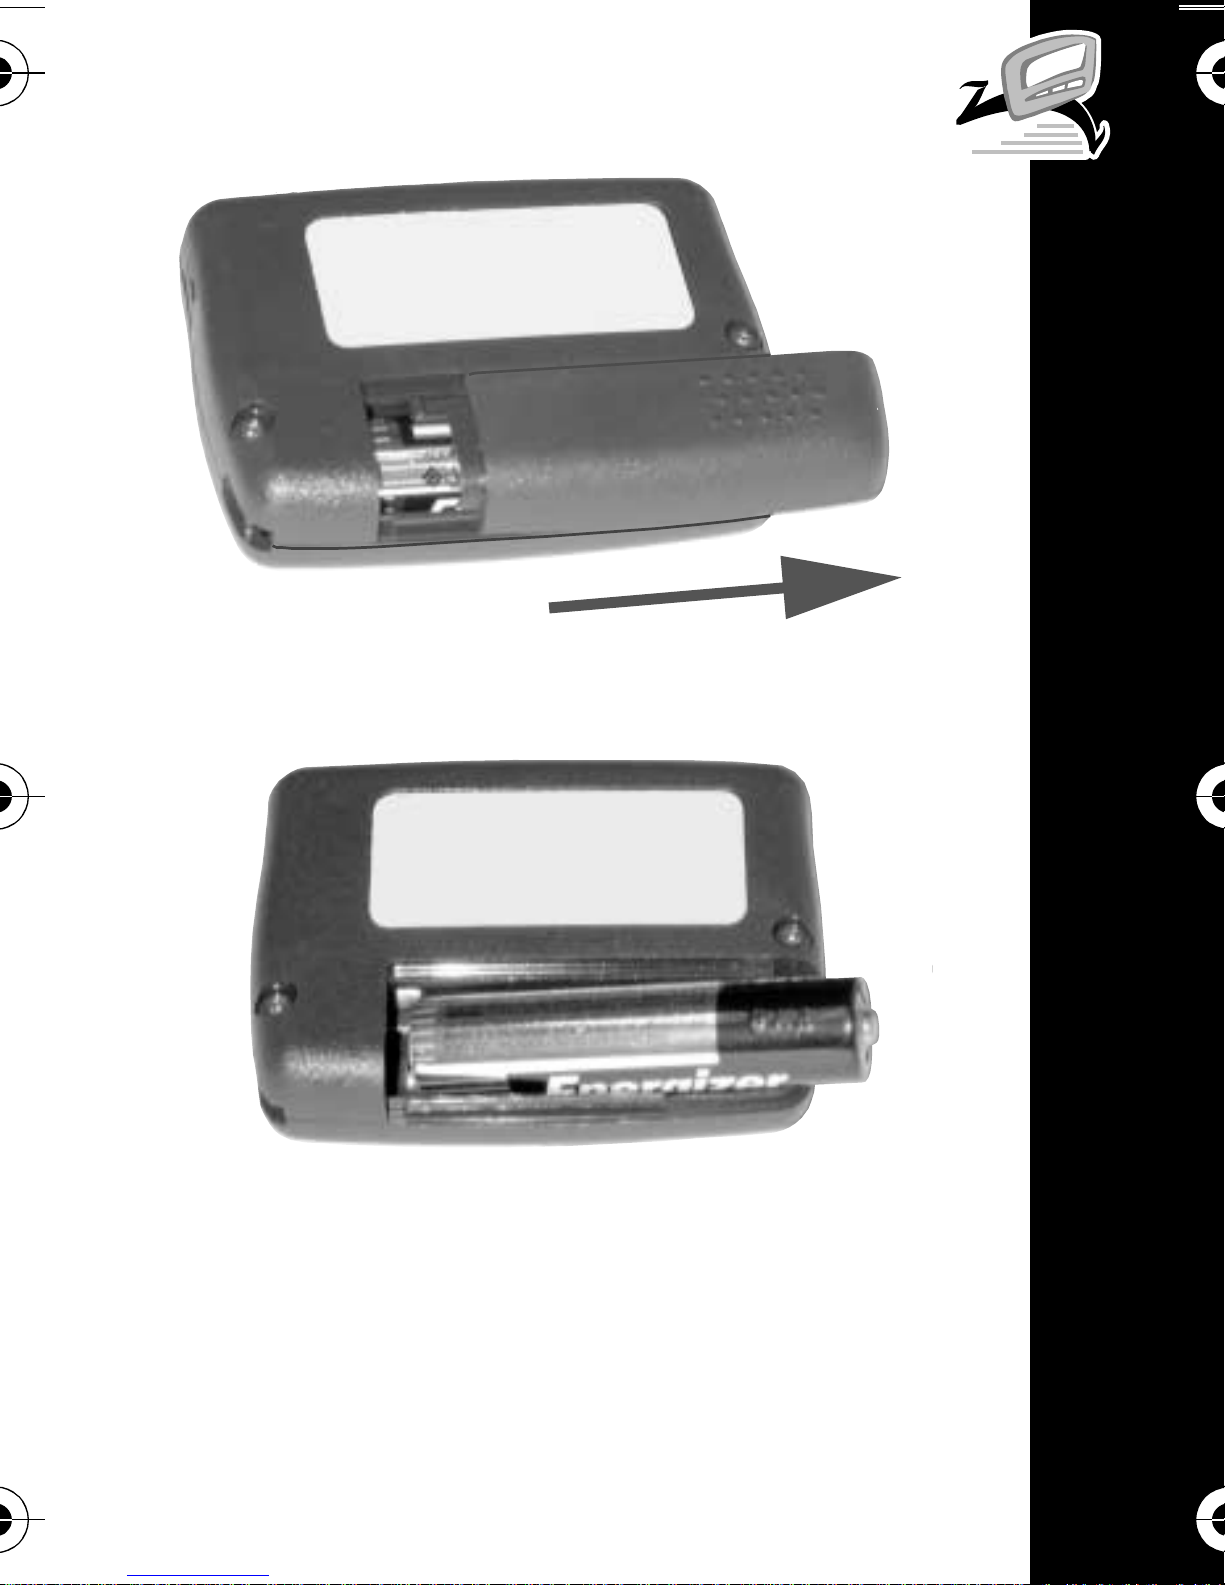
Installing/Replacing the Battery
GETTING STARTED
Holding the pager face down, slide
the battery door in the direction of
the arrow (toward the outer edge).
Lift the battery door away from the
pager’s housing to remove it.
Remove the old battery, noting the
positive (+) and negative (-) polarity
markings.
Insert a new battery so the polarity
markings on the battery match the
polarity diagram in the battery
compartment.
2
Replace the battery door.
Note the (+) and (-) polarity markings.
Do not insert the battery backwards, or
all messages will be erased.
GETTING STARTED
CAUTION!
3
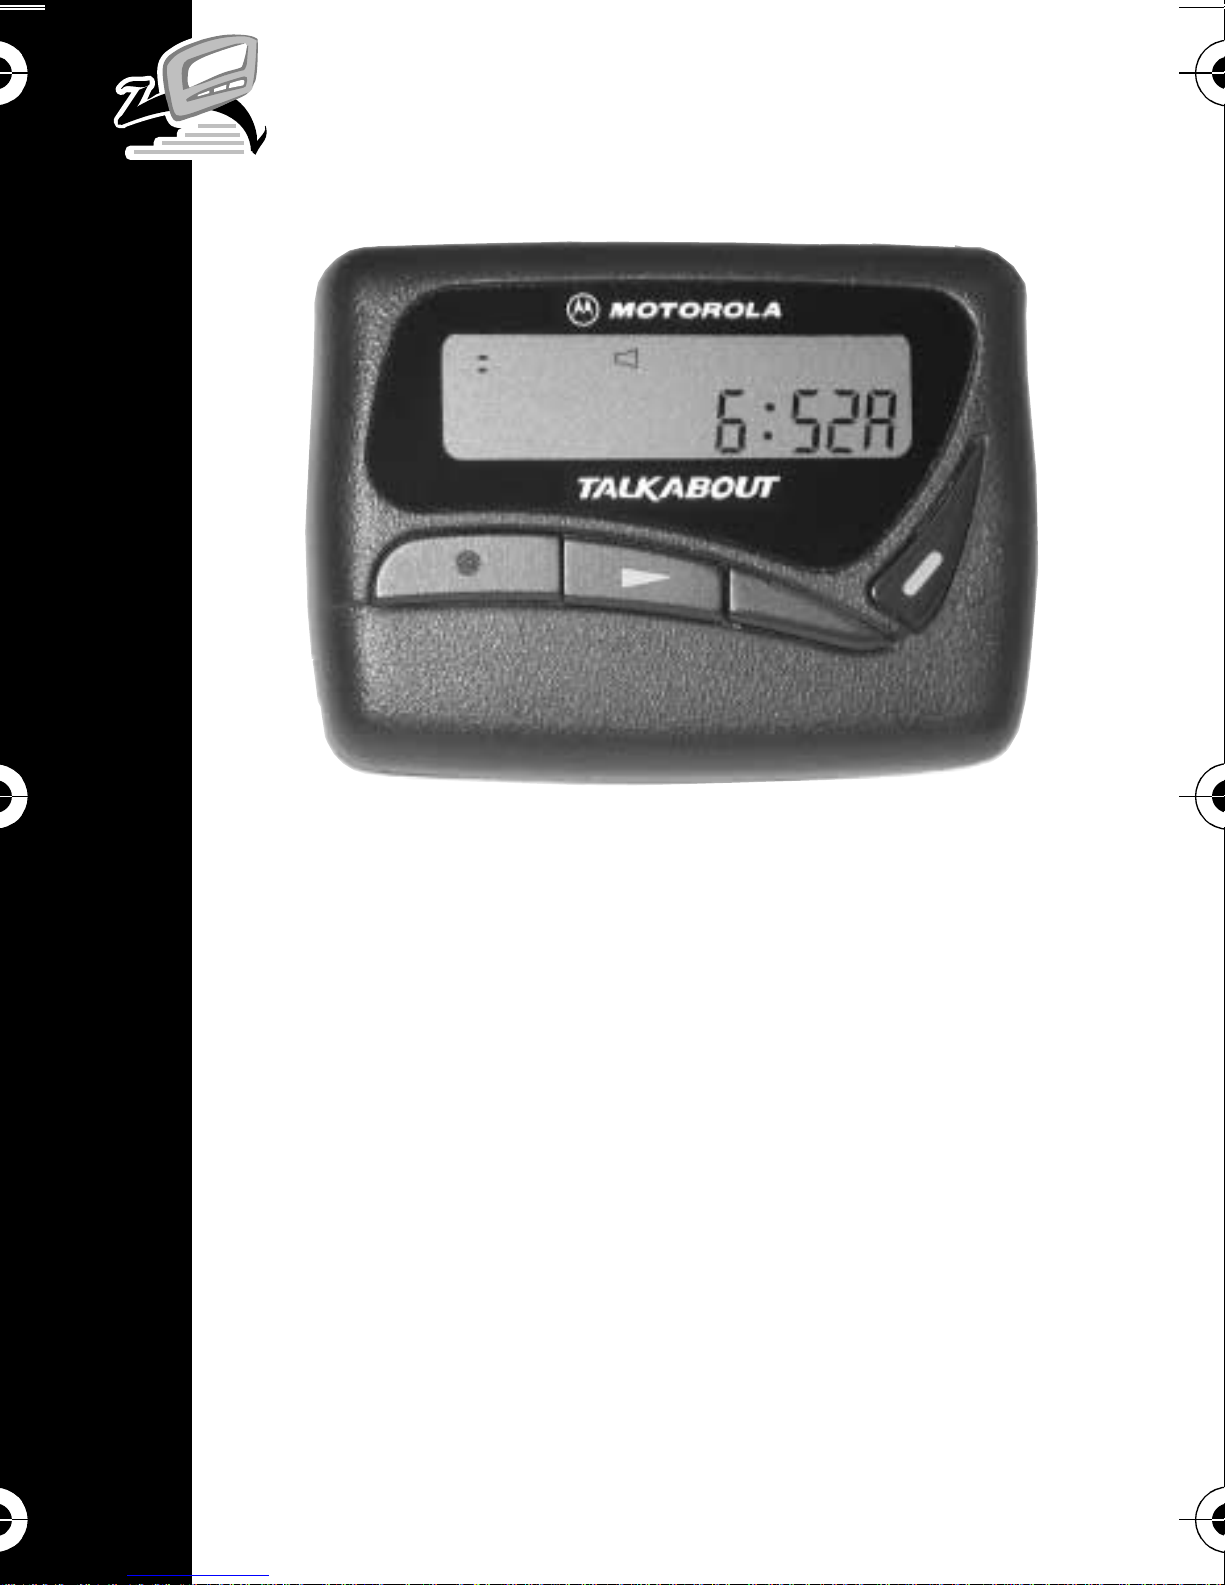
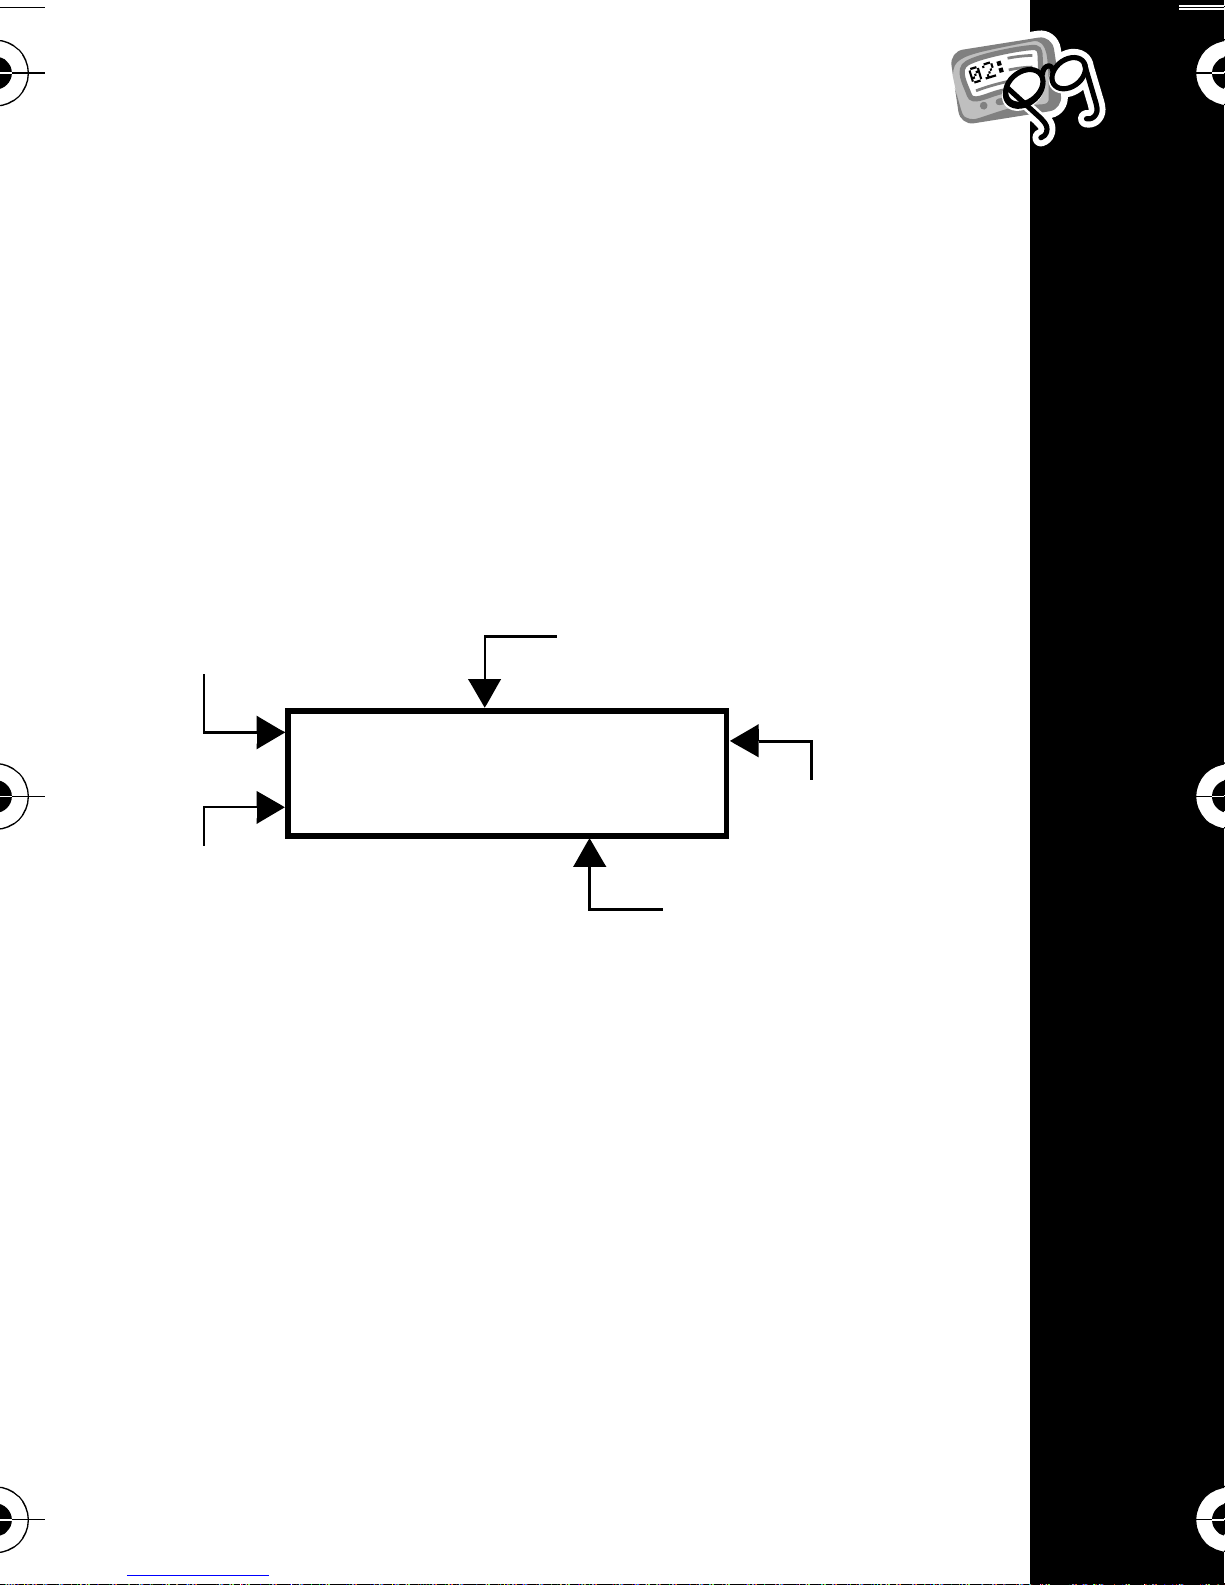
Control Buttons
$
(
*
#
GETTING STARTED
<
>
=
Function: Press to mov e between
features and change values.
Select/Backlight: Press to select
features and turn on/off the
backlight.
Read/Escape: Press to read
messages or return to the Status
screen.
4
Turning Your Pager On
Ensure that a fresh battery is
properly installed as listed in
“Installing/Replacing the Battery” on
page 2.
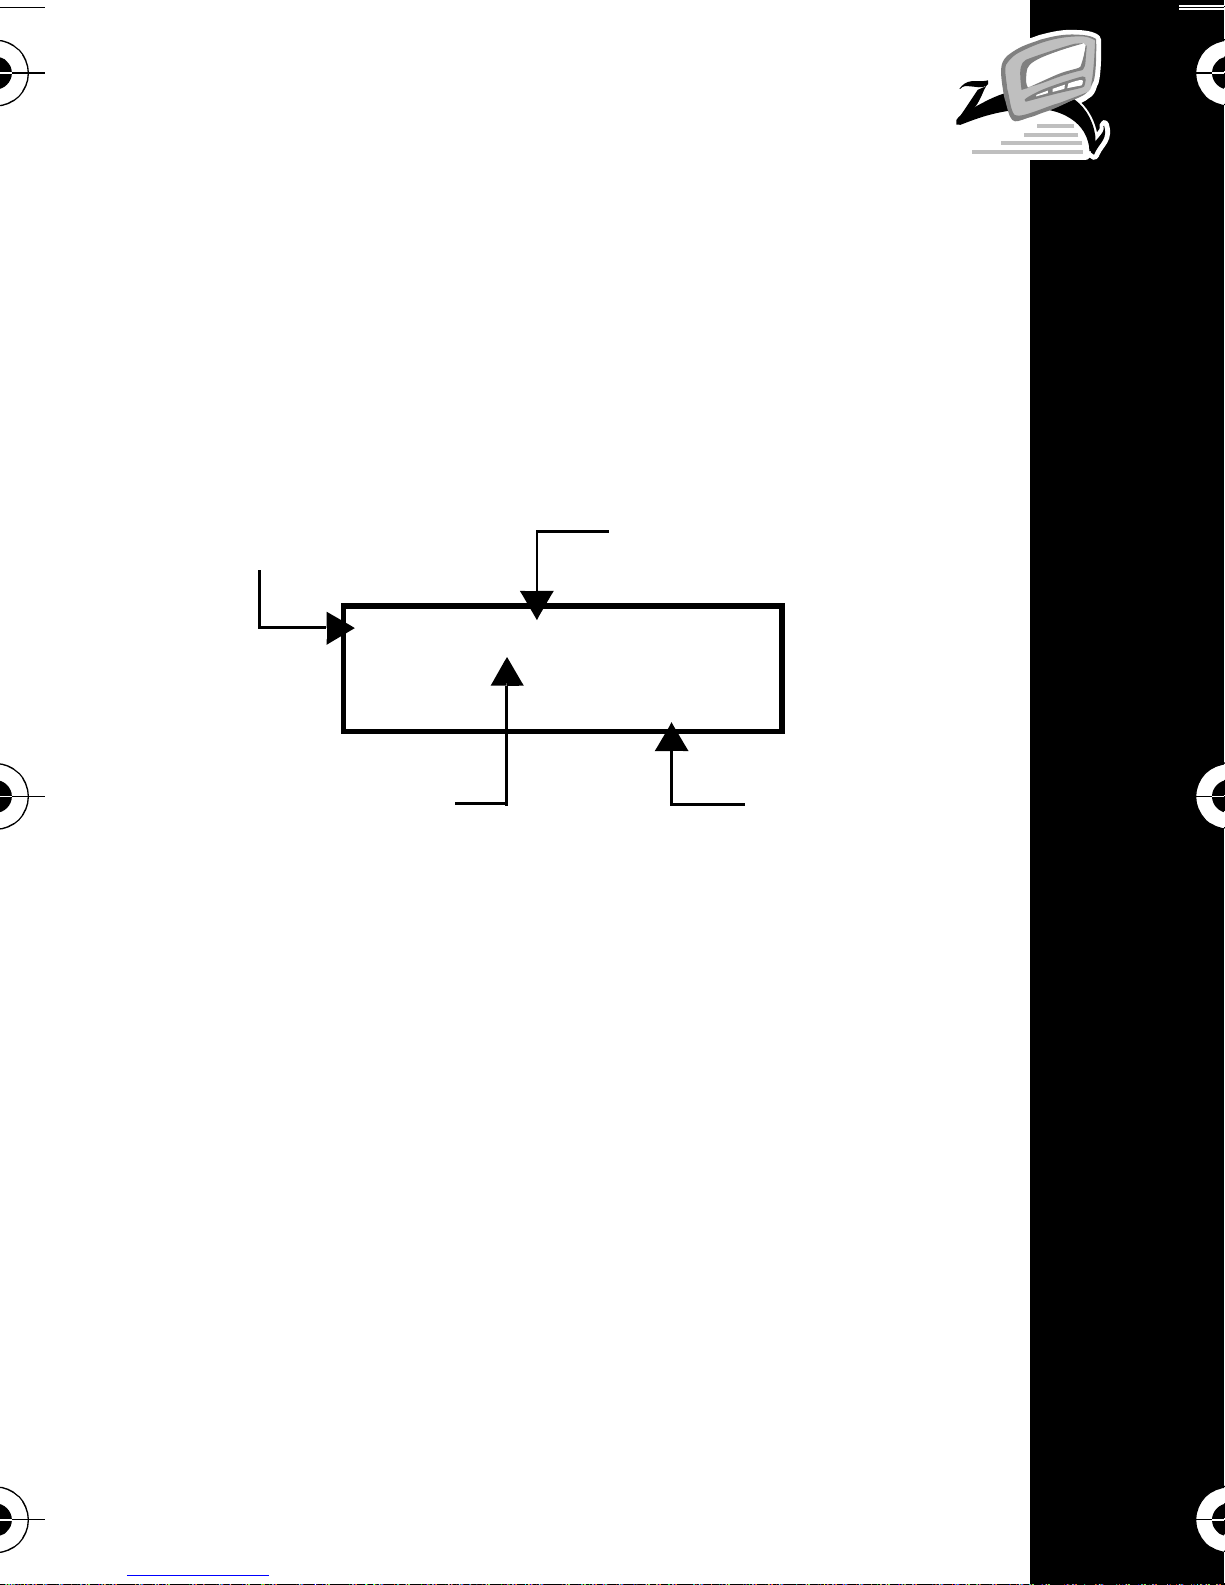
Press and hold = for 3 to 4 seconds to
turn your pager on. The Status screen
displays.
Battery Gau ge
* \ #
Alarm Indicator
4:29p
Alert Indicator
When the pager is on and no activity is
taking place, the Status screen displays.
The Status screen displays the power-on
indicator and may also display other
pager status indicators.
Time Display
Turning Your Pager Off
Press < until PAgEr OFF displays,
and then press >.
GETTING STARTED
5

Sending a Test Page to Yourself
It's a good idea to test your pager and
service by sending a page to yourself.
Start by using the phone number, web
site, or email address (and a PIN, if
required) your service provider gave
you, then enter a short message. If you
are sending a word message from a
phone, an operator will assist you;
otherwise, press the phone buttons to
enter a numeric message or type a
message and send it. While you are
GETTING STARTED
waiting for the message to reach your
pager, refer to page 15 for information
about how to read a message. If your
pager does not receive the message
within a few minutes, contact your
service provider. After you've tested the
pager, read the rest of this guide to learn
about the many useful features of your
new pager.
6

Backlight
In low-light conditions, you can turn on
the pager’s backlight on or off at any
time by pressing and holding > for two
seconds. The backlight automatically
turns off when the pager returns to the
Status screen.
GETTING STARTED
7

Using the Main Menu
The main menu provides access to the
many features of your pager through the
use of symbols and prompts.
To navigate through the main menu,
press <.
Press > to select the displayed
feature.
Press = at any time to return to the
Status screen.
GETTING STARTED
Status Indicators
The list below describes each of the
status indicators that may display on
your pager.
$ New message
( Musical alert
\ Silent alert
# Alarm
% Locked message
+ Duplicate message
! Out-Of-Range alert
& Continuous message (press = to
display the next screen.)
8
Time and Date
Setting the Time
From the Status screen, press <
until Set Time displays, and then
press >.
12:56 pm
Press < to increase the hour. When
the desired hour displays, press > to
advance to the next field.
Repeat Step 2 to set the minutes and
time of day (AM or PM).
When you have finished setting the
time, press = to save your changes and
return to the Status screen.
Setting the Date
From the Status screen, press <
until Set Date displays, and then
press >.
TIME AND DATE
jun 21 00
9
Press < to increase the year.
When the desired year displays,
press >.
Repeat Step 2 to set the month/day.
When you have finished setting the
date, press = to save your changes
and return to the Status screen.
Displaying the Date
To display the current date, proceed as
follows.
TIME AND DATE
From the Status screen, press >.
The current date and day of week
displays in the following format.
jun 21 mon
10
Setting the Alarm
Your new pager allows you to set a
daily alarm.
From the Status screen, press <
until Set alarm displays, and then
press >.
12:34p on
Press < to increase the hour. When
the desired hour displays, press > to
advance to the next field.
Repeat Step 2 to set the minutes and
time of day (A or P).
Press <to toggle between on and
off. When the desired selection
displays, press > to select it.
When you have finished setting the
alarm, press = to save your changes
and return to the Status screen.
TIME AND DATE
11

Alerts
Setting the Alert Type
Your new pager has both audible and
silent alert types. These alert types are:
silent (vibrate), sleep (no alert), vibra
call (vibrate then chirp), chirp, and eight
standard audible alerts.
To specify the alert to play when your
pager receives a message, proceed as
follows:
From the Status screen, press <
ALERTS
until SEt ALErt displays, and
press >.
uibracall
Press < to display the alert type
and hear a sample of the alert.
When the desired alert type displays,
press > to select it.
12

Reminder Alert
This feature allows you to turn on/off
reminder alerts. Reminder alerts repeat
at two-minute intervals until you have
read all new messages. To turn on/off
reminder alerts, proceed as follows:
From the Status screen, press <
until Adu control displays, and then
press >. Rem Alt displays.
Press < to toggle between On and
Off. Press > to make your
selection.
Low Cell Alert
At the onset of a low battery condition,
lobat displays on the Status screen. You
can also program your pager to emit an
alert when your pager’s battery is low.
From the Status screen, press <
until adu control displays, and then
press >.
Press < until L Cell alert
displays, and then press >. The
ALERTS
following screen displays.
13
l c alt on
Press < to toggle between on and
off, and press > to make your
selection.
• The low cell alert repeats hourly
between the hours of 8 a.m. and 8
p.m.
14
ALERTS
Messages
Your new Talkabout™ T10 pager can
store up to 20 personal messages and 2
maildrop messages. If you have
programmed your pager to alert you
when it receives a message, an alert
sounds (see “Setting the Alert Type” on
page 12).
Reading Messages
From the Status screen, press =.
Time Stamp
12:38/ % &
C06]12345678
Message number
(if programmed)
Locked Message
Indicator
Message
Continued
Message
• When your pager receives an error
message, e is appended to the end of
the message when you display it.
• When your pager receives a group
MESSAGES
message, it emits an alert, and
msg
displays.
• When your pager receives a maildrop
message, it emits an alert, and
msg
displays.
group
mail
15

Locking/Unlocking Messages
You can lock up to ten messages to
prevent them from being deleted or
overwritten by new messages when the
pager’s memory is full.
• To lock a message, press < while
the message displays.
• To unlock a message, press <
while the locked message displays.
Message Information
When you receive a message, you can
MESSAGES
program your pager to display
additional message information. To turn
this feature on/off, proceed as follows:
From the Status screen, press <
until adu control displays, and
then press >.
Press > until msg info displays,
and then press >.
Press < to toggle between on and
off, and press > to make your
selection.
16

Deleting Messages
You can delete messages from your pager
at any time. By deleting older messages,
you decide which messages to keep and
which to save before they are overwritten
by new messages. (See also “Locking/
Unlocking Messages” on page 16.)
Deleting an Individual Message
To delete an unlocked message, press
< while the message is displayed.
• To delete a locked message, you
must first unlock the message.
(See “Locking/Unlocking Messages”
on page 16.)
Press > to confirm your decision.
Deleting All Messa ges
This feature allows you to delete all
unlocked messages at once.
From the Status screen, press <
until Delete All displays, and then
press >.
MESSAGES
When Delete All? displays,
press > to confirm your decision.
17

Care & Maintenance
The Talkabout™ T10 pagers are
durable, reliable, and can provide years
of dependable service; however, they are
precision electronic products. Water and
moisture, excessive heat, and extreme
shock may damage the pager. Do not
expose your pager to these conditions. If
repair is required, the Motorola Service
Organization, staffed with specially
trained technicians, offers repair and
maintenance facilities throughout the
world.
For more information about warranties,
please contact either your paging
service provider, retailer, or Motorola,
Inc. at 1-800-548-9954. For repairs, in
the U.S., call Motorola, Inc. at
1-800-548-9954, in Canada, call 1-800323-9685, in the U.K. and Ireland, call
01703-666-333. In the U.S., to contact
Motorola, Inc. on your TTY, call 1-800-
CARE & MAINTENANCE
793-7834.
18
 Loading...