

Motorola Talkabout EM1000, HANDY MOTOROLA MOD. K7GEM1000, EM1000R - FRS/GMRS Radio, Pair User Manual

EM1000 Series
KEM-PK14190-67
Safety and General Information
Important Informationon Safe and EfficientOperation
Read ThisInformation Before Using YourRadio.
The information providedin this documentsupersedes thegeneral
safetyinformation inuser guides publishedprior toDecember 1,2002.
Transmitand Receive Procedure
Yourtwo-way radio containsa transmitterand a receiver.To control
your exposureand ensure compliancewith thegeneral population/
uncontrolled environmentexposure limits, alwaysadhere tothe
following procedure:
• Transmitno more than50% ofthe time.
• Toreceive calls, releasethe PTTbutton.
• Totransmit (talk), pressthe Pushto Talk(PTT) button.
Transmitting50% of thetime, orless, is importantbecause theradio
generates measurableRF energy exposureonly whentransmitting
(in termsof measuring standardscompliance).
Exposure toRadio Frequency Energy
YourMotorola two-way radiocomplies withthe following RFenergy
exposure standardsand guidelines:
• United StatesFederal Communications Commission,Code of
Federal Regulations;47CFR part 2sub-part J.
• American NationalStandards Institute (ANSI)/Instituteof
Electrical andElectronic Engineers (IEEE)C95. 1-1992.
• Institute ofElectrical and ElectronicsEngineers (IEEE)C95.
1-1999 Edition.
• International Commissionon Non-Ionizing RadiationProtection
(ICNIRP) 1998.
• Ministry ofHealth (Canada) SafetyCode 6.Limits of Human
Exposure toRadiofrequency Electromagnetic Fieldsin the
Frequency Rangefrom 3 KHzto 300GHz, 1999.
• Australian CommunicationsAuthority Radiocommunications
(Electromagnetic Radiation—HumanExposure) Standard, 2003.
• ANATELANNEXto ResolutionNo. 303of July2, 2002“Regulationof
limitationof exposure toelectrical,magneticand electromagnetic
fieldsin theradiofrequency rangebetween9 KHzand 300GHz”and
“Attachmentto resolution#303 from July2, 2002”.
Toensure optimal radioperformance andmake sure human
exposure toradio frequency electromagneticenergy iswithin the
guidelines setforth in theabove standards,always adhere tothe
following procedures.
Portable RadioOperation and EME Exposure
Antenna Care
Use onlythe supplied oran approvedreplacement antenna.
Unauthorized antennas,modifications, or attachmentscould
damage theradio and mayviolate FCCregulations.
Do NOThold the antennawhen theradio is “INUSE.” Holdingthe
antenna affectsits effective range.
Body-Worn Operation
Tomaintain compliances withFCC/Health CanadaRF exposure
guidelines ifyou wear aradio onyour body whentransmitting
always placethe radio ina Motorola-suppliedor approved clip
holder,holster, caseor bodyharness for thisproduct. Use ofnonMotorola-approved accessoriesmay exceed FCC/HealthCanada RF
exposure guidelines.
If youdo not useone ofthe Motorola-supplied orapproved bodyworn accessoriesand are notusing theradio held inthe normaluse
position, ensurethe radio and itsantenna are at least1 inch (2.5
cm) fromyour body when transmitting.
Data Operation
If applicable,when using anydata featureof the radiowith or
without anaccessory cable, positionthe radio and itsantenna at
least oneinch (2.5 cm) fromthe body.
Approved Accessories
For alist of approvedMotorola accessories,visit our Website at
www.motorola.com.
Electromagnetic Interference/Compatibility
Note: Nearlyevery electronic deviceis susceptibleto
electromagnetic interference(EMI) if inadequatelyshielded,
designed orotherwise configured forelectromagnetic compatibility.
This devicecomplies with Part15 ofthe FCC Rules.Operation is
subject tothe following twoconditions:
1. This devicemay not causeharmful interference;and
2. This devicemust accept anyinterference received,including
interference thatmay cause undesiredoperation.
Facilities
Toavoid electromagnetic interferenceand/or compatibilityconflicts,
turn offyour radio inany facilitywhere posted noticesinstruct you
to doso. Hospitals orhealth carefacilities may beusing equipment
that issensitive to externalRF energy.
Aircraft
When instructedto do so,turn offyour radio whenonboard an
aircraft. Anyuse of aradio mustbe in accordancewith applicable
regulations perairline crew instructions.
Medical Devices– Pacemakers
The AdvancedMedical TechnologyAssociation recommendsthat a
minimum separationof 6 inches(15 cm)be maintained betweena
handheld wirelessradio and apacemaker. Theserecommendations
are consistentwith the independentresearch byand
recommendations ofthe U.S. Foodand DrugAdministration.
People withpacemakers should:
• ALWAYSkeep theradio more than6 inches(15 cm) fromtheir
pacemaker whenthe radio isturned ON.
• Not carrythe radio inthe breastpocket.
• Use theear opposite thepacemaker tominimize the potential
for interference.
• Turnthe radio OFFimmediately ifthere is anyreason tosuspect
that interferenceis taking place.
Medical Devices– Hearing Aids
Some digitalwireless radios mayinterfere withsome hearing aids.
In theevent of suchinterference, youmay want toconsult your
hearing aidmanufacturer to discussalternatives.
Medical Devices– Other
If youuse any otherpersonal medicaldevice, consult the
manufacturer ofyour device todetermine ifit is adequately
shielded fromRF energy.Your physicianmay beable to assistyou in
obtaining thisinformation.
Safety andGeneral Use While Driving
Check thelaws and regulationsregarding theuse of radiosin the
area whereyou drive, andalways obeythem. If youdo useyour
radio whiledriving, please:
• Give fullattention to drivingand tothe road.
• Use hands-freeoperation, if available.
• Pull offthe road andpark beforemaking or answeringa callif
driving conditionsso require.
The useof a two-wayradio whileengaged in activitiesrequiring
concentration maycause distraction orotherwise impairyour
ability tosafely participate insuch activities.Always use technology
safely.
Do notplace a portableradio inthe area overan airbag or inthe
air bagdeployment area. Airbags inflatewith great force.If a
portable radiois placed inthe airbag deployment areaand theair
bag inflates,the radio maybe propelledwith great forceand cause
serious injuryto occupants ofthe vehicle.
Potentially ExplosiveAtmospheres
Turnoff your radioprior toentering any areawith apotentially
explosive atmosphere.Only radio typesthat areespecially qualified
should beused in suchareas as“Intrinsically Safe.” Donot remove,
install orcharge batteries insuch areas.Sparks in apotentially
explosive atmospherecan cause anexplosion orfire resulting in
bodily injuryor even death.
For MoreInformation
For furtherinformation, you maycall Motorolaat 1-800-638-5119
(U.S. andCanada), or e-mailus atgiantintl@callcenter.com orvisit
us onthe Internet atwww.motorola.com.
Note: Theareas withpotentially explosiveatmospheres referredto
above includefueling areassuch asbelow deckson boats,fuel or
chemical transferor storagefacilities, areas wherethe aircontains
chemicals orparticles (suchas grain,dust ormetal powders)and
any otherarea whereyou wouldnormally beadvised toturn offyour
vehicle engine.Areas withpotentially explosive atmospheresare
often—but notalways—posted.
Blasting Capsand Areas
Toavoid possible interferencewith blastingoperations, turn offyour
radio whenyou are nearelectrical blastingcaps, in ablasting area,
or inareas posted “Turnoff two-wayradios.” Obeyall signsand
instructions.
Operational Cautions
Antennas
Do notuse any portable radiothat has a damagedantenna. If a
damaged antennacomes into contactwith yourskin, a minorburn
can result.
Batteries
Allbatteries cancause property damageand/orbodily injurysuch as
burnsif aconductive material—likejewelry, keysor beadedchains—
touchexposed terminals.The conductivematerial maycompletean
electricalcircuit (shortcircuit)and becomequite hot.Exercise carein
handlingany charged battery,particularly whenplacing itinside a
pocket,purse orother container withmetal objects.
Exercise carewhen removing NiMHor AAbatteries. Do notuse
sharp orconductive tools toremove eitherof these batteries.
Battery ChargerSafety Instructions:
Save theseInstructions
1. Do notexpose the chargerto rainor snow.
2. Do notoperate or disassemblethe chargerif it hasreceived a
sharp blow,or hasbeen dropped ordamaged inany way.
3. Never alterthe AC cordor plugprovided with theunit. Ifthe
plug willnot fit theoutlet, havethe proper outletinstalled bya
qualified electrician.An improper conditioncan resultin a risk
of electricshock.
4. Toreduce the riskof damageto the cordor plug,pull the plug
rather thanthe cord whendisconnecting thecharger from the
AC receptacle.
5. Toreduce the riskof electricshock, unplug thecharger fromthe
outlet beforeattempting any maintenanceor cleaning.
6. Use ofan attachment notrecommended orsold by Motorola
may resultin a riskof fire,electric shock orpersonal injury.
7. Make surethe cord islocated soit will notbe steppedon,
tripped overor subjected todamage orstress.
8. An extensioncord should notbe usedunless absolutely
necessary. Useof animproper extension cordcould resultin a
risk ofa fire and/orelectric shock.If an extensioncord mustbe
used, makesure that:
• The pinson the plugof theextension cord arethe same
number,size and shapeas thoseon the plugof thecharger.
• The extensioncord is properlywired andin good electrical
condition.
• The extensioncord size is18 AWGfor lengthsup to 100feet,
and 16AWG forlengths up to150 feet.
9. The supplycord of theAC adaptorcannot be replaced.If the
cord isdamaged, call customerservice at1-800-638-5119 (U.S.
and Canada)or e-mail usat giantintl@callcenter.com.
FCC Licensing Information
YourMotorola radio operateson GeneralMobile Radio Service
(GMRS) frequenciesand is subjectto theRules and Regulationsof
the FederalCommunications Commission (FCC).The FCCrequires
that alloperators using GMRSfrequencies obtaina radio license
before operatingtheir equipment. To obtainthe FCC forms,please
request Form605 and 159, whichincludes all ofthe formsand
instructions youwill need.
If youwish to havethe documentfaxed or mailed,or ifyou have
questions, pleaseuse the followingcontact information:
Youmay also visitthe FCC’sWeb siteat www.fcc.gov.
Changes ormodifications not expresslyapproved byMotorola may
void theuser’s authoritygranted bythe FCC tooperate thisradio
and shouldnot be made.To complywith FCCrequirements,
transmitter adjustmentsshould be madeonly byor under the
supervision ofa person certifiedas technicallyqualified to perform
transmitter maintenanceand repairs inthe privateland mobile and
fixed servicesas certified byan organizationrepresentative of the
user ofthose services. Replacementof anytransmitter component
(crystal, semiconductor,etc.) notauthorized bythe FCC equipment
authorization forthis radio couldviolate FCCrules.
®
3. Gentlyremove eachbatteryby easingeachbattery outindividually.
4. Reposition thebattery cover andpress downto secure.
Notes
• Exercise carewhen removing NiMHor AAbatteries. Do notuse
sharp orconductive tools toremove eitherof these batteries.
• Remove thebatteries before storingyour radiofor extended
periods oftime. Batteries corrodeover timeand may cause
permanent damageto your radio.
Using theBattery Charger (Optional Accessory)
The batterycharger provides drop-incharging conveniencefor
NiMH batteriesand can beplaced onany flat surface,such asa
desk orworkbench. Charge theNiMH batteryovernight (at least16
hours) beforeusing it forthe firsttime. After theinitial charge,an
empty batteryis fully chargedwithin 14hours.
1. Follow thesteps above toinstall aNiMH Battery Pack.
2. Plug theAC power supplycord intothe jack onthe deskstand.
3. Plug theAC power supplyinto astandard wall outlet.
4. With aradio facing forward,slide itinto one ofthe charging
pockets.
5. When chargingin the batterycharger, thered lighton the
charger basewill glow continuously.
Using themini-USB Charging Connector
The mini-USBcharging connector isa handyport that allowsyou to
conveniently chargeyour NiMH batterypack. Thisis an alternative
to chargingyour NiMH batterypack inthe Battery Chargerdesk
stand usingthe AC walladaptor andespecially useful whenused
while traveling.
Available mini-USBcharging options: (optional accessories)
1. Wall travelcharger
2. Vehicle charger
3. Mini-USB computercable
If usinga computer,the computermust be turnedon.
This andother accessories (soldseparately) areavailable for your
radio. Formore information, visitour Website at
www.motorola.com orshop.giantintl.com.
1. Plug yourmini-USB cable orcharger intoa power sourceas is
appropriate foryour accessory.
2. Plug thecable intothe mini-USBport onthe bottomof yourradio.
3. An emptybattery will befully chargedin 14 hours.
4. The LEDindicator light onthe radiowill glow toindicate thatthe
battery ischarging.
Notes
• The lightwill remain redafter theNiMH batterypack isfully
charged.
• When movingbetween hot andcold temperatures,do not
charge theNiMH battery packuntil thebattery temperature
acclimates (usuallyabout 20 minutes).
• For optimalbattery life, removethe radiofrom the chargerwithin
16 hours.Do not storethe radiowhile connected tothe charger.
• Turnradio off whilecharging.
Attaching andRemoving the Belt Clip
1. Attach beltclip to pocketor beltstrap.
2. Align thebelt clip postwith thehole in theback ofthe radio.
3. Gently pushuntil the clipclicks inplace.
ToRemove
1. Push downon the releasetab atthe top ofthe beltclip to
release thecatch.
2. Pull thebelt clip awayfrom theback of theradio.
TurningYour Radio Onand Off
Turn clockwise toturn the radioon andcounterclockwise to
turn theradio off.
1. In theON position, theradio chirpsand briefly showsall feature
icons availableon the radio.
2. The displayscreen then showsthe currentchannel, code and
all featuresthat are enabled.
Setting theVolume
Press andhold for threeseconds while rotating until you
reach acomfortable listening level.
1. Rotate clockwise toincrease thevolume.
2. Rotate counterclockwise todecrease thevolume.
Do nothold the radioclose toyour ear.If thevolume is setto an
uncomfortable level,it could hurtyour ear.
Talking andListening
Tocommunicate, all radiosin yourgroup must beset tothe same
channel andInterference Eliminator Code.
1. Totalk, pressand hold .
2. Whenyou are finishedtalking, release .
For maximumclarity, holdthe radio twoto threeinches away from
your mouthand speak directlyinto themicrophone. Do notcover
the microphonewhile talking.
TalkRange
Yourradio isdesigned tomaximize performanceand improve
transmissionrange. Donot use theradios closerthan fivefeet apart.
Monitor Button
Pressing andholding for threeseconds allowsyou tolisten to
the volumelevel ofthe radiowhen youare notreceiving. Thisallows
you toadjust thevolume, ifnecessary. Youcan alsopress to
check foractivity onthe currentchannel beforeyou talk.
Push toTalk Timeout Timer
Toprevent accidental transmissionsand savebattery life, theradio
emits acontinuous warning toneand stopstransmitting if you
press for 60continuous seconds.
Menu Options
Selecting theChannel
Yourradio has 22channels. Channels8-14 are FRS0.5 wattonly and
all otherchannels are GMRS(See the"Channels and Frequencies"
table onoverleaf for details).
1. With theradio on, press .When theradio is ona 0.5
watt channel, displays. Whenthe radiois on a1.5 watts
channel, displays. Thecurrent channelflashes.
2. Press or and selectan unusedor quietchannel.
3. Press to savethe channel settingor to continueset up.
Selecting TheInterference Eliminator Code
Interference EliminatorCodes help minimizeinterference by
blocking transmissionsfrom unknown sources.Your radiohas 121
Interference EliminatorCodes. Codes 1– 38are the standardanalog
codes thatappear on otherFRS/GMRS radios.Codes 39 –121 are
additional digitalcodes added forsuperior interferenceprotection.
0 isthe off position,no analogor digital codesare enabled.
Toset the code fora channel:
1. Press until thecode starts toflash.
2. Press or to selectthe code.
3. Press to savethe code settingor to continueset up.
Youcan set adifferent codefor each channelusing thisprocedure.
An extendedpress of or allows youto scrollthrough the
Interference Coderapidly so youcan quicklyreach the codeyou
want.
Note: Youmust setthe InterferenceEliminator Code to0 ona radio
that usesInterference Eliminator Codesto communicatewith radios
that donot have InterferenceEliminator Codes.Select 0 for“no
tone, nocode” and OFFwill flashon your radio’sdisplay.
Setting andTransmitting Call Tones
Yourradio can transmitdifferent calltones to otherradios inyour
group soyou can alertthem thatyou want totalk. Youhave 10call
tones fromwhich to choose.
Toset a call tone:
1. With theradio on, press three timesuntil thecurrent
call tonesetting (0 -10) flashesand appears.
2. Press or to changeand hearthe calltone.
3. Press to setthe new calltone or to continueset up.
Totransmit your calltone toother radios setto thesame channel
and InterferenceEliminator Code asyour radio,press .
Note: Settingthe call to0 disablesthe call tonefeature.
Hands-Free UseWithout Accessories ( )
Youcan use theiVOX featureto transmit hands-freewithout theneed
forany headset accessories.Once iVOXis turnedon, theradiodetects
yourvoice andtransmitswhen youspeak intothe internalmicrophone.
1. Press until appears onthe display.The current
setting On/Offwill flash.
2. Press or to selectOn orOff.
3. Press to setor to continueset up.
Hands-Free UseWith Accessories ( )
Youcan transmit hands-freemore reliablywith the useof optional
headset accessories.Once VOX isturned on,the radio detectsyour
voice andtransmits when youspeak.
Many accessories(sold separately) areavailable foryour radio. For
more information,visit our Website atwww.motorola.com or
shop.giantintl.com.
1. Turnthe radio offand plugthe VOX accessoryinto the
accessory port.
2. Turnthe radio on.VOX showson the display.
3. Adjust thevolume appropriatelyby rotating .Lower the
volume beforeplacing theaccessory onyour heador inyour ear.
4. Toturn off, simplyremove accessory.
Note: Thereis a shortdelay betweenthe time youstart talkingand
when theradio transmits. Thereis ashort delay beforethe
transmission iscompleted.
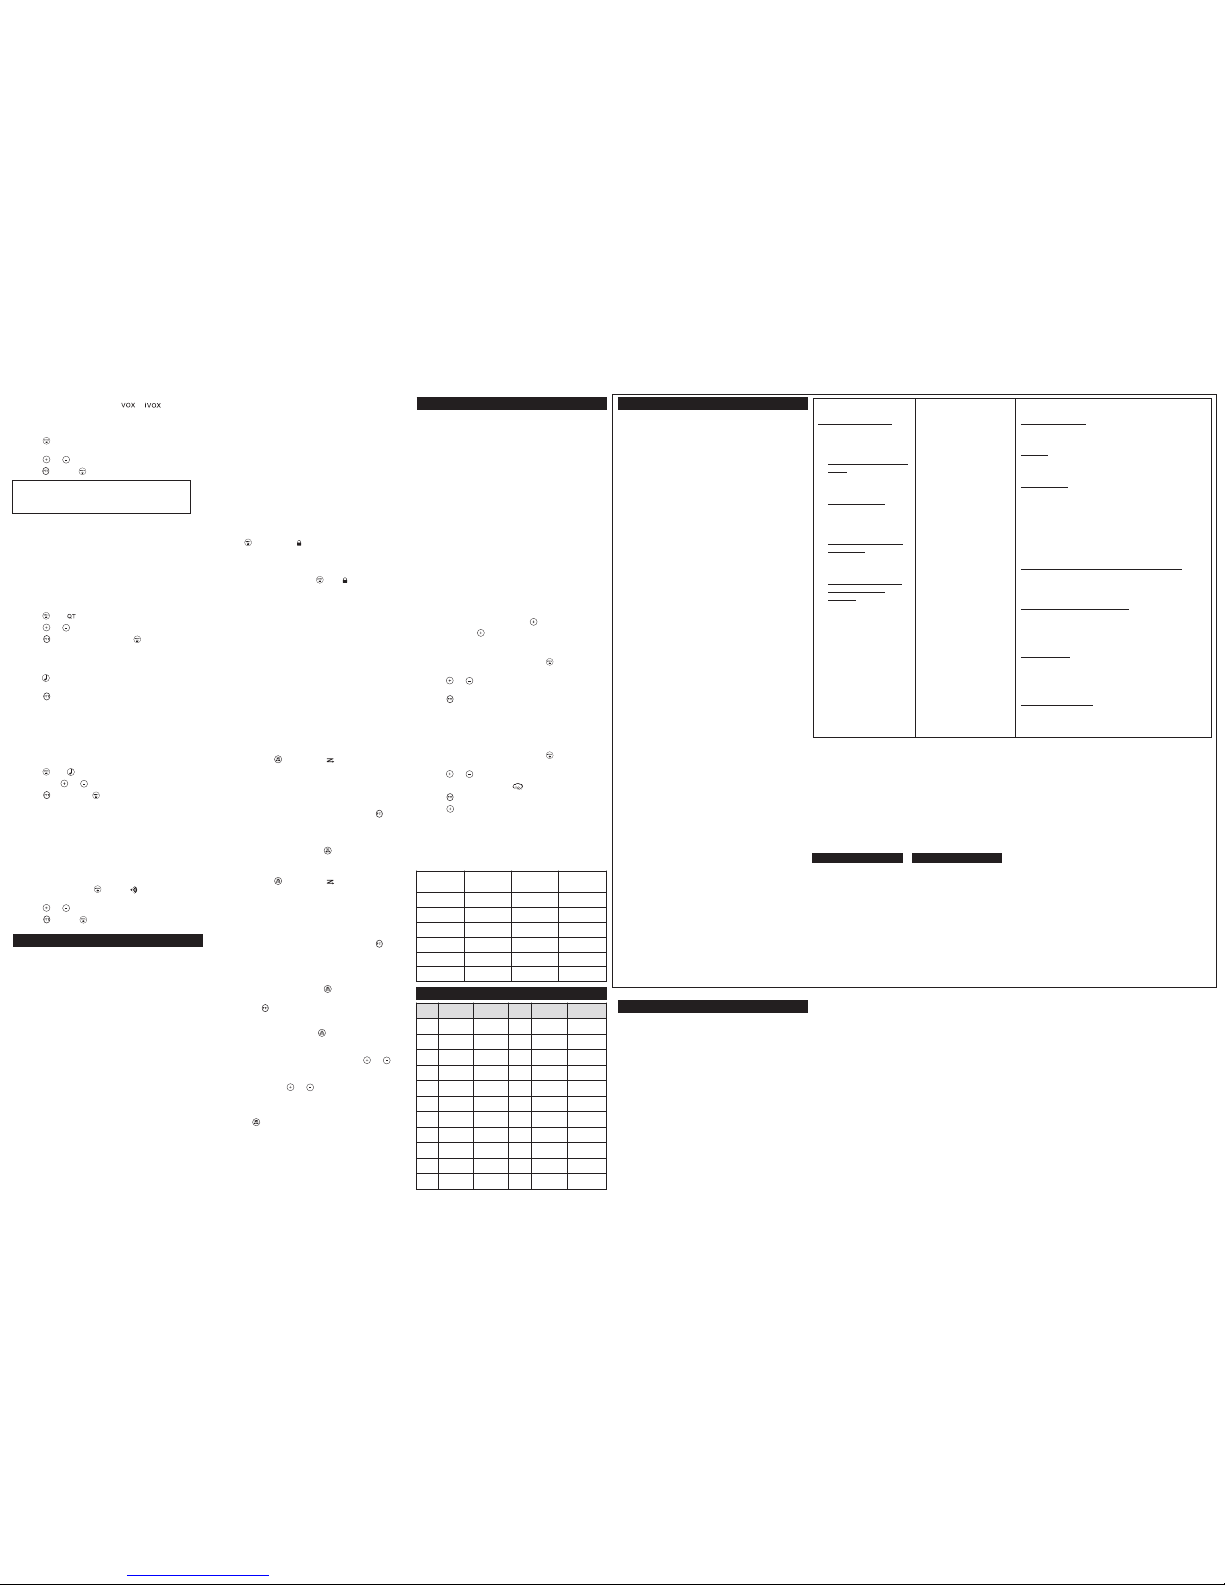
Display Screen Guide
Numbers for Channel,
CallTone
Numbers for Codes
— BatteryMeter
— ChannelPower
Indicator (see Menu
Options)
— Lock
— Talk Confirmation
Tone(Roger Beep)
— NoiseFiltering
— On/Offfor each
feature
— Scan
— CallTone,
KeypadTone
— WeatherAlert
— Hands-FreeUse
Without
Accessories
— Hands-FreeUse
With Accessories
Continued onback
EM1000
Control Buttons
Volume
Push toTalk
Flashlight Button
Microphone
Call Tone
Scroll/Weather
Flashlight LED
Emergency Alert
LED Indicator
Accessory Jack
Menu/Lock
Scan/Monitor
Mini-USB
Charging Port
Getting Started
Installing theBatteries
Each radiocan use either1 NiMHrechargeable battery packor 3
AA alkalinebatteries and beepswhen thebatteries are low.
Installing NiMHRechargeable Battery Pack (OptionalAccessory)
1. Turnthe radio off.
2. With theback of theradio facingyou, lift thebattery coverlatch
up andremove the cover.
3. Remove thebattery pack fromthe clearplastic bag (Donot
disassemble orunwrap the batterypack).
4. Insert theNiMH battery packwith thediagram facing you.
5. Reposition thebattery cover andpress downto secure.
Installing theThree AA Alkaline Batteries
1. Turnthe radio off.
2. With theback of theradio facingyou, lift thebattery coverlatch
up andremove the cover.
3. Insert thethree AA alkalinebatteries with+ and -polarity as
shown inside.
4. Reposition thebattery cover andpress downto secure.
Radio BatteryMeter
The radiobattery icon showsthe batterycharge level, fromfull
to empty . Whenthe radio hasone segmentleft, the
radio chirpsperiodically or afterreleasing (Low BatteryAlert).
Removing theNiMH Battery Pack (OptionalAccessory)
1. Turnthe radio off.
2. With theback of theradio facingyou, lift thebattery latchup to
release thebattery cover andremove thecover.
3. Remove theNiMH battery packby pullingthe ribbon attachedto
the radio.
4. Reposition thebattery cover andpress downto secure.
Removing theThree AA Batteries
1. Turnthe radio off.
2. With theback of theradio facingyou, lift thebattery latchup to
release thebattery cover andremove thecover.
For afax:
Contact the
Fax-0n-Demand
system
For mailservice:
Call theFCC
Forms Hotline
If youhave
questions about
the FCCLicense:
Call theFCC
1-202-418-0177 1-800-418-FORM
(3676)
1-888-CALL-FCC
(225-5322)
Two-Way Radio
User’s Guide
Setting theSensitivity Level When in or Mode
Adjusting theradio’s sensitivitylevel helpsminimize the possibility
of unintendednoises triggering atransmission andhelps the radio
pick upsoft voices.
1. Press until VOX/iVOXand thelevel setting (1-3)appear on
the display.
2. Press or to select thesensitivity level.
3. Press to setor to continueset up.
3 =High Sensitivity for quietenvironments
2 =Medium Sensitivity for mostenvironments
1 =Low Sensitivity for noisyenvironments
Note: Whenyou connect aheadset, theradio is automaticallyset to
the lastchosen sensitivity level.
Q
T
Noise Filtering
The QTnoise-filtering featurehelps to ensureuninterrupted
communication withother Motorola radiosthat havethis feature.
This featurealso filters outunwanted transmissionsfrom other
radios. Thisis useful inplaces wherethere is heavyradio traffic,
such asamusement parks orski resorts.
Note: QTnoise filteringis not availablewhen theradio is scanning.
Toturn Q
T
noise filteringon or off:
1. Press until displays. Thecurrent settingOn/Off will flash.
2. Press or to turn noisefiltering Onor Off.
3. Press to confirmyour selection or to continueset up.
Totransmit to a radiothat has Q
T
noise filteringturned on:
1. Select thesame channel andInterference EliminatorCode as
the otherradio.
2. Press to senda call tone.This allowsyour voice topass
through theQTnoise filteron the receivingradio.
3. Press and speaknormally.
Note: Ifyou skip step2, thebeginning of yourmessage maynot be
heard onthe receiving radio.For a30-second period, startingafter
the lasttransmission, all transmissionsreceived onthe selected
channel andcode will passthrough theQTnoise filter.
Keypad Tones
Youmay enable ordisable thespeaker key tones.You willhear the
key toneeach time abutton ispushed.
1. Press until appears. Thecurrent settingOn/Off will flash.
2. Press either or to turnOn orOff.
3. Press to confirmor to continueset up.
Note:When thekey tonefeature isoff, the followingare not disabled:
• Transmittimeout alert tone
• Call tone
• Low batteryalert tone or
• The transmittedtalk confirmation tone
Transmittinga Talk ConfirmationTone
Youcan set yourradio totransmit a uniquetone whenyou finish
transmitting. Itis like saying“Roger” or“Over” to letothers know
you arefinished talking.
1. With theradio on, press until the appears. Thecurrent
setting On/Offflashes.
2. Press or to turnOn or Off.
3. Press to setor to quitmenu mode.
Special Features
Emergency AlertMode
The EmergencyAlert functioncan beused tosignal othersin your
group ofyour needfor immediatehelp. Allradios inyour groupusing
the samechannel andinterference eliminatorcode canreceive the
message. EM1000series radioswill automatically advancethe
speaker volumeto aloud setting(the maximumrated outputlevel),
regardless ofthe volumecontrol position.A uniquealert tonewill be
emitted fromthe receivingradios andheard byyour group. The
alert toneis alsoemitted fromyour ownradio speakerto attract
attention inyour vicinity.Any spoken wordsor incidentalsounds will
be transmittedto others.EM1000 seriesradios willbe operatingin
an automatic“hands free”emergency transmission controlmode
for atotal of30 seconds.For theduration ofthe emergencyalert,
your radiowill belocked intoa transmittingmode andthe other
EM1000 radiosin yourgroup willbe lockedinto areceiving modeto
help ensurethe receiptof youremergency message.
1. Press andhold the EmergencyAlert buttonfor 3 seconds.
2. An alertsignal will betransmitted for8 seconds toalert other
receivers.
3. Yourvoice or incidentalsounds willbe transmitted for22
seconds. Thereis no needto continueto hold theEmergency
Alert buttonor use thePTT buttonfor your messageto be
transmitted.
4. After 30seconds your radiowill returnto normal two-waymode.
EM1000 seriesradios will automaticallyreturn tothe initial
volume settingas controlled bythe volumeknob. Both the
sender andthe receiver willagain beable to talkto eachother
using thePTT or VOXmethods oftransmission control.
Note: Radiosother than EM1000series canreceive the emergency
alert signalbut will notrespond withadjusted volume settings,
controlled transmissionmode or uniquealert tone.Users of other
radios willhear a steady8 secondtone and the22 secondvoice
transmission.
Warning: TheEmergency Alertfeature should onlybe used inthe
event ofan actual emergency.Motorola isnot responsibleif there
is noresponse to theemergency alertfrom the receivinggroup.
Built-in Flashlight
Press theflashlight button toturn thelight on. Theswitch functions
as amomentary control forthe light.
Note: Turnoff theflashlight whennot in useto conservebattery
power.
Keypad Lock
Toavoid accidentally changing yourradio settings:
1. Press and holduntil displays.
2. When inlock mode, youcan turnthe radio onand off,adjust the
volume, receive,transmit, send acall tone,and monitor
channels. Allother functions arelocked.
Tounlock the radio,press andhold until is nolonger
displayed.
Scanning Channels
Use scanto search the22 channelsfor transmissions from
unknown parties,to find someonein yourgroup who has
accidentally changedchannels, or toquickly findunused channels
for yourown use.
There isa priority featureand 2modes of scanning( basicand
advanced )to make yoursearch moreeffective. The basicscan
mode usesthe channel andcode combinationsfor each ofthe 22
channels asyou have setthem (or with thedefault codevalue of
1). The“Advanced Scan” modewill scanall channels forany and
all codes,detect any codein use,and use thatcode value
temporarily forthat channel.
Priorityis givento the“home channel,”that is,the channel(and
InterferenceEliminatorCode) yourradio wasset towhen youstart
thescan. Thismeans theinitial channel(and codesetting)is scanned
moreoften thanthe other21 channels,and yourradio willrespond
quicklyto anyactivity occurringon thehome channel asa priority.
Tostart Scanning:
1. Briefly pressthe key. Thescan will appearin the
display, andthe radiowill begin toscroll throughthe channel
and codecombinations.
2. When theradio detects channelactivity matchingthe channel
and codecombination, it stopsscrolling andyou can hearthe
transmission.
3. Torespond and talkto theperson transmitting, press within
five secondsafter the endof thetransmission.
4. The radiowill resume scrollingthrough thechannels five
seconds afterthe end ofany receivedactivity.
5. Tostop scanning, brieflypress the key.
Tostart Advanced Scanning:
1. Set theInterference Eliminator Codeto “zero”or OFF.
2. Briefly pressthe key. Thescan will appearin the
display, andthe radiowill begin toscroll throughthe channels.
No InterferenceEliminator Codes willfilter whatis heard.
3. When theradio detects channelactivity withANY code (orNO
code), itstops scrolling andyou canhear the transmission.Any
Interference EliminatorCode that maybe inuse by thatparty
will bedetected and displayed.
4. Torespond and talkto theperson transmitting, press within
five secondsof the endof thetransmission. The radiowill
transmit usingthe newly detectedInterference EliminatorCode.
5. The radiowill resume scrollingthrough thechannels five
seconds afterthe end ofany receivedactivity.
6. Tostop scanning, brieflypress the key.
Scanning Notes:
1. If youpress while the radiois scrollingthrough inactive
channels, thetransmission will beon the“home channel”.
Scanning willresume five secondsafter theend of your
transmission. Youmay pressthe key tostop scanningat any
time.
2. If theradio stops onan undesiredtransmission, you may
immediately resumethe scan bybriefly pressing or .
3. If theradio repeatedly stopson anundesired transmission, you
may temporarilyremove that channelfrom thescan list by
pressing andholding or for threeseconds. Youmay
remove morethan one channelin thisway.
4. Torestore the removedchannel(s) tothe scan list,turn theradio
off andthen back on,or exitand re-enter thescanning modeby
pressing .
5. Youcannot remove thehome channelfrom the scanlist.
6. In AdvancedScan, the detectedcode willonly be usedfor one
transmission. Youmust notethe code,exit scan, andset that
detected codeon that channelto permanentlyuse the detected
code.
Weather Receiver
Weather Receiver
Yourradio can tunein tobroadcasts by theUnited StatesNational
Oceanic andAtmospheric Administration (NOAA)Weather Radio
and EnvironmentCanada Weatheradio.
Youcan listen toa weatherchannel (see “WeatherChannels and
Frequencies” tablebelow) or setyour radioto alert youto
emergency weatherbroadcasts that interruptroutine broadcasts.
When youlisten to aweather channel,you cannot useyour radioin
scan modeor for two-waycommunications.
Both NOAAand Environment Canadahave transmitterslocated
throughout theUnited States andCanada, respectively.These
transmitters broadcastwatches, forecasts, andother information24
hours aday.
Note: NOAAweather radio stationsare assignedto cover specific
areas andservice may belimited. Pleasecheck with yourlocal
weather officefor frequency anddetails, orvisit
www.weather.gov/nwrin theUS or
www.msc.ec.gc.ca/msb/weatheradio inCanada toview the
appropriate transmitterfor your area.
The useof the NOAAlogo doesnot provide anendorsement or
implied endorsementby NOAA’sNational WeatherService, nor
does theuse of theWeatheradio logoprovide anendorsement or
implied endorsementby Environment Canada.
TurningWeather Channel Reception Onand Off
1. Toturn weather receptionon, press and holdfor 3seconds.
2. Toturn off, press or turnthe radiooff andthen back on.
Setting theWeather Channel
Yourradio receives weatherfrequencies:
1. After turningweather reception on,press . Thecurrent
channel flashes.
2. Press or to select theappropriate channelwith good
reception inyour area.
3. Press to savethe weather channelsetting.
Setting theWeather Alert
Yourradio can beset torespond to NOAAWeather Radio
emergency messages.A special alarmtone soundsan alert and
turns onthe weather receiverto giveyou immediate weatherand
emergency information.
1. After turningweather reception on,press twice. On/Off
displays.
2. Press or to select On/Off.If youactivate WeatherAlert
and returnto two-way mode, will display.
3. Press to savethe WeatherAlert setting.
4. Press to returnto two-waymode.
As withtwo-way radioreception,weather channelreception depends
on howclose youare toa transmitterand whetheryou areindoors or
outdoors.Because weatherchannelsare transmitted withoutcodes,
theymay containstatic ornoise. WeatherAlertwill notfunction while
activelytransmittingor receivingin two-waymode.
Channel Frequency Description Channel Frequency Description
1 462.5625 MHz GMRS/FRS 12 467.6625 MHz FRS
2 462.5875 MHz GMRS/FRS 13 467.6875 MHz FRS
3 462.6125 MHz GMRS/FRS 14 467.7125 MHz FRS
4 462.6375 MHz GMRS/FRS 15 462.5500 MHz GMRS
5 462.6625 MHz GMRS/FRS 16 462.5750 MHz GMRS
6 462.6875 MHz GMRS/FRS 17 462.6000 MHz GMRS
7 462.7125 MHz GMRS/FRS 18 462.6250 MHz GMRS
8 467.5625 MHz FRS 19 462.6500 MHz GMRS
9 467.5875 MHz FRS 20 462.6750 MHz GMRS
10 467.6125 MHz FRS 21 462.7000 MHz GMRS
11 467.6375 MHz FRS 22 462.7250 MHz GMRS
Products Covered
Products andAccessories as
defined above,unless otherwise
provided forbelow.
1. Decorative Accessories and
Cases. Decorativecovers
and cases.
2. Monaural Headsets. Ear
buds andboom headsets that
transmit monosound through
a wiredconnection.
3. Consumer Two-WayRadio
Accessories.
4. Products and Accessories
that areRepaired or
Replaced.
Length ofCoverage
One (1)year from thedate of
purchase bythe first consumer
purchaser ofthe product unless
otherwise providedfor below.
1. Limited lifetime warrantyfor
the lifetimeof ownership by
the firstconsumer purchaser
of theproduct.
2. Limited lifetime warrantyfor
the lifetimeof ownership by
the firstconsumer purchaser
of theproduct.
3. Ninety (90) daysfrom the
date ofpurchase by thefirst
consumer purchaserof the
product.
4. The balance of theoriginal
warranty orfor ninety (90)
days fromthe date returned
to theconsumer, whichever
is longer.
Exclusions
Normal Wearand Tear.Periodic maintenance, repairand
replacement ofparts due tonormal wearand tear areexcluded
from coverage.
Batteries. Onlybatteries whose fullycharged capacityfalls below
80% oftheir rated capacityand batteriesthat leak arecovered by
this limitedwarranty.
Abuse& Misuse. Defectsor damagethat result from:(a) improper
operation,storage, misuseor abuse, accidentor neglect,such as
physicaldamage (cracks,scratches, etc.)to thesurface ofthe
productresulting frommisuse; (b) contactwith liquid,water, rain,
extremehumidity orheavy perspiration,sand, dirtor thelike, extreme
heat,or food;(c) useof theProducts orAccessoriesfor commercial
purposesor subjectingthe Product orAccessory to abnormalusage
or conditions; or(d) otheracts which arenot thefault of Motorolaor
GiantInternational Ltd.,are excludedfrom coverage.
Use ofNon-Motorola branded Products andAccessories. Defects
or damagethat result fromthe useof Non-Motorola brandedor
certified Products,Accessories, Software orother peripheral
equipment areexcluded from coverage.
Unauthorized Serviceor Modification. Defects ordamages
resulting fromservice, testing, adjustment,installation,
maintenance, alteration,or modification inany wayby someone
other thanMotorola, Giant InternationalLtd. orits authorized
service centers,are excluded fromcoverage.
Altered Products.Products or Accessorieswith (a)serial numbers
or datetags that havebeen removed,altered or obliterated;(b)
broken sealsor that showevidence oftampering; (c) mismatched
board serialnumbers; or (d)nonconforming ornon-Motorola
branded housings,or parts, areexcluded fromcoverage.
Communication Services.Defects, damages, orthe failureof
Products orAccessories due toany communicationservice or
signal youmay subscribe toor usewith the Productsor
Accessories isexcluded from coverage.
Warranty
Consumer Two-WayRadio Products andAccessories purchased in
the UnitedStates or Canada.
What Doesthis Warranty Cover?
Subject tothe exclusions containedto theright, Giant International
Ltd. warrantsthe Motorola brandedconsumer two-wayradios that
operate viaFamily Radio Serviceor GeneralMobile Radio Service
that itmanufactures (“Products”), theMotorola brandedor certified
accessories soldfor use withthese Productsthat it manufactures
(“Accessories”) tobe free fromdefects inmaterials and
workmanship undernormal consumer usagefor theperiod(s)
outlined below.This limitedwarranty is aconsumer’s exclusive
remedy, andapplies asfollows to newMotorola brandedProducts
and Accessoriesmanufactured by GiantInternational Ltd.,and
purchased byconsumers in theUnited Statesor Canada, whichare
accompanied bythis written warranty:
Who iscovered?
This warrantyextends only tothe firstconsumer purchaser,and is
not transferable.
What willGIANT INTERNATIONAL LTD.do?
GIANT INTERNATIONALLTD., atits option,will atno charge repair,
replace orrefund the purchaseprice ofany Products or
Accessories thatdoes not conformto thiswarranty. Wemay use
functionally equivalentreconditioned/ refurbished/ pre-ownedor
new Products,Accessories or parts.
How toObtain Warranty Service orOther Information?
Toobtain service orinformation, pleasecall:
USATwo-Way Radios Canada Two-WayRadios
1-800-638-5119 1-800-638-5119
giantintl@callcenter.com giantintl@callcenter.com
For Accessories,please call thetelephone numberdesignated
above forthe product withwhich theyare used.
Youwill receive instructionson howto ship theProducts or
Accessories atyour expense, toa GIANTINTERNATIONAL LTD.
Authorized RepairCenter. To obtainservice, you mustinclude: (a)a
copy ofyour receipt, billof saleor other comparableproof of
purchase; (b)a written descriptionof theproblem; (c) thename of
your serviceprovider, ifapplicable; (d)the name andlocation ofthe
installation facility(if applicable) and,most importantly;(e) your
address andtelephone number.
What OtherLimitations Are There?
ANY IMPLIEDWARRANTIES, INCLUDINGWITHOUT LIMITATION
THE IMPLIEDWARRANTIES OFMERCHANTABILITY ANDFITNESS
FOR APARTICULAR PURPOSE,SHALL BE LIMITEDTO THE
DURATIONOF THIS LIMITEDWARRANTY, OTHERWISETHE REPAIR,
REPLACEMENT,OR REFUNDAS PROVIDED UNDERTHIS EXPRESS
LIMITED WARRANTYIS THEEXCLUSIVE REMEDY OFTHE
CONSUMER, ANDIS PROVIDED INLIEU OFALL OTHER
WARRANTIES, EXPRESSOF IMPLIED.IN NO EVENTSHALL
MOTOROLA ORGIANT INTERNATIONALLTD. BELIABLE, WHETHER
IN CONTRACTOR TORT (INCLUDINGNEGLIGENCE) FORDAMAGES
IN EXCESSOF THE PURCHASEPRICE OFTHE PRODUCT OR
ACCESSORY,OR FOR ANYINDIRECT, INCIDENTAL,SPECIAL OR
CONSEQUENTIAL DAMAGESOF ANY KIND,OR LOSSOF REVENUE
OR PROFITS,LOSS OF BUSINESS,LOSS OFINFORMATION OR
OTHER FINANCIALLOSS ARISING OUTOF ORIN CONNECTION
WITH THEABILITY OR INABILITYTO USETHE PRODUCTS OR
ACCESSORIES TOTHE FULL EXTENTTHESE DAMAGESMAY BE
DISCLAIMED BYLAW.
Some statesand jurisdictions donot allowthe limitation or
exclusion ofincidental or consequentialdamages, orlimitation on
the lengthof an impliedwarranty, sothe abovelimitations or
exclusions maynot apply toyou. Thiswarranty gives youspecific
legal rights,and you mayalso haveother rights thatvary fromstate
to stateor from onejurisdiction toanother.
Patent and Copyright Information
Manufactured, distributedor sold byGiant InternationalLtd., official
licensee forthis product. Motorola,the StylizedM Logo, andother
Motorola trademarksand trade dressare ownedby Motorola, Inc.
and areused under licensefrom Motorola,Inc. MOTOROLA andthe
Stylized MLogo are registeredin theUS Patent &Trademark Office.
All otherproduct or servicenames arethe property oftheir
respective owners.©Motorola, Inc. 2008.All rightsreserved.
Please contactcustomer service at1-800-638-5119 ore-mail us at
giantintl@callcenter.comfor questions/comments, warranty,support
or servicerelated to thisproduct.
EM1000
Weather Channelsand Frequencies
Weather
Channel
Frequency Weather
Channel
Frequency
WX1 162.550 MHz WX7 162.525 MHz
WX2 162.400 MHz WX8 161.650 MHz
WX3 162.475 MHz WX9 161.775 MHz
WX4 162.425 MHz WX10 161.750 MHz
WX5 162.450 MHz WX11 162.000 MHz
WX6 162.500 MHz
Channels and Frequencies
 Loading...