

Page 1

MPx220
GSM
START HERE >
Page 2

Page 3

Welcome
Welcome to the world of Motorola MOTOPro devices. Your
selection, the Motorola MPx220, delivers to you simplified
communications, increased productivity and the control to
develop a superior mobile experience whether at work, at
home, on the road or at play.
Earpiece
Left soft key
Headset jack
Volume key
Action button
Home key
Send key
Power button
Sync/charger
port
Main display
Right soft key
Mini SD slot
4-way navigation
key
Back key
End key
Camera button
Infrared port
Keypad
Microphone
1
Page 4

Motorola, Inc.
Consumer Advocacy Office
1307 East Algonquin Road
Schamburg, IL 60196
1-800-331-6456 (United States)
1-888-390-6456 (TTY/TDD United States)
1-800-461-4575 (Canada)
www.motorola.com
www.motorola.ca
MOTOROLA and the Stylized M Logo are registered in the US Patent &
Trademark Office. The Bluetooth trademarks are owned by their proprietor and
used by Motorola, Inc., under license. Microsoft, Windows, ActiveSync and
Window Media are registered trademarks of Microsoft Corporation; and
Windows XP and Windows Mobile are trademarks of Microsoft Corporation. All
other product or service names are the property of their respective owners.
© Motorola, Inc. 2004.
The information contained in Motorola's user's guides is believed to be correct
at the time of printing. Motorola reserves the right to change or modify any
information or specifications without notice. The contents of Motorola’s user's
guides are provided “as is.” Except as required by applicable law, no warranties
of any kind, either express or implied, including, but not limited to, the implied
warranties of merchantability and fitness for a particular purpose, are made in
relation to the accuracy, reliability, or contents of this guide.
Caution:
expressly approved by Motorola, will void the user's authority to operate
the equipment.
Manual number: 6809489A67-A
Changes or modifications made in the radio phone, not
(United States)
(Canada)
2
Page 5

Contents
Getting Started
What’s in the Box? . . . . . . . . . . . . . . . . . . . . . . . . . . . . . . 5
About This Guide . . . . . . . . . . . . . . . . . . . . . . . . . . . . . . . 5
Installing the SIM Card . . . . . . . . . . . . . . . . . . . . . . . . . . . 6
Installing the Battery . . . . . . . . . . . . . . . . . . . . . . . . . . . . . 7
Battery Use. . . . . . . . . . . . . . . . . . . . . . . . . . . . . . . . . . . . 8
Charging the Battery. . . . . . . . . . . . . . . . . . . . . . . . . . . . . 9
Turning Your Phone On/Off. . . . . . . . . . . . . . . . . . . . . . . 11
Adjusting Volume . . . . . . . . . . . . . . . . . . . . . . . . . . . . . . 11
Making a Call . . . . . . . . . . . . . . . . . . . . . . . . . . . . . . . . . 12
Answering a Call. . . . . . . . . . . . . . . . . . . . . . . . . . . . . . . 13
Learning to Use Your Phone
Using the Internal Display. . . . . . . . . . . . . . . . . . . . . . . . 15
Using the External Display . . . . . . . . . . . . . . . . . . . . . . . 17
Using the Home Key . . . . . . . . . . . . . . . . . . . . . . . . . . . . 18
Using the 4-Way Navigation Key. . . . . . . . . . . . . . . . . . . 19
Using the Action Button . . . . . . . . . . . . . . . . . . . . . . . . . 20
Using the Soft Keys . . . . . . . . . . . . . . . . . . . . . . . . . . . . 20
Using the Back Button . . . . . . . . . . . . . . . . . . . . . . . . . . 21
Using Menus . . . . . . . . . . . . . . . . . . . . . . . . . . . . . . . . . . 22
Entering Text and Numbers . . . . . . . . . . . . . . . . . . . . . . 22
Viewing Phone Information. . . . . . . . . . . . . . . . . . . . . . . 26
Setting Up Your Phone
Setting the Time and Date . . . . . . . . . . . . . . . . . . . . . . . 27
Entering Owner Information . . . . . . . . . . . . . . . . . . . . . . 27
Configuring Power Management . . . . . . . . . . . . . . . . . . 28
. . . . . . . . . . . . . . . . . . . . . . . . . . . . . . . . . . 5
. . . . . . . . . . . . . . . . . . . . . . 15
. . . . . . . . . . . . . . . . . . . . . . . . . . . 27
3
Page 6

Calling Features
Redialing a Number . . . . . . . . . . . . . . . . . . . . . . . . . . . 29
Calling a Contacts Entry . . . . . . . . . . . . . . . . . . . . . . . . 29
Making a Call with Voice Dialing . . . . . . . . . . . . . . . . . . 32
Making a Call from the Call History List . . . . . . . . . . . . 38
Calling a Number in a Message . . . . . . . . . . . . . . . . . . 39
Calling an Emergency Number . . . . . . . . . . . . . . . . . . . 39
Managing Call History. . . . . . . . . . . . . . . . . . . . . . . . . . 40
Calling with Speed Dial . . . . . . . . . . . . . . . . . . . . . . . . . 41
Using Voicemail. . . . . . . . . . . . . . . . . . . . . . . . . . . . . . . 43
Using Call Waiting. . . . . . . . . . . . . . . . . . . . . . . . . . . . . 43
Putting a Call on Hold . . . . . . . . . . . . . . . . . . . . . . . . . . 44
Muting a Call . . . . . . . . . . . . . . . . . . . . . . . . . . . . . . . . . 45
Turning the Speaker On/Off . . . . . . . . . . . . . . . . . . . . . 45
Phone Features
Main Menu . . . . . . . . . . . . . . . . . . . . . . . . . . . . . . . . . . 46
Messages
Chat with MSN Messenger . . . . . . . . . . . . . . . . . . . . . . 57
Phone Customization
Advanced Features
Synchronization with ActiveSync . . . . . . . . . . . . . . . . . 76
Bluetooth Connection . . . . . . . . . . . . . . . . . . . . . . . . . . 80
Phone Modem. . . . . . . . . . . . . . . . . . . . . . . . . . . . . . . . 81
Personal Organizer . . . . . . . . . . . . . . . . . . . . . . . . . . . . 85
Security . . . . . . . . . . . . . . . . . . . . . . . . . . . . . . . . . . . . . 89
News and Entertainment
Specific Absorption Rate Data
Microsoft End User License Agreement
Index
. . . . . . . . . . . . . . . . . . . . . . . . . . . . . . . . . . . . . . . 121
. . . . . . . . . . . . . . . . . . . . . . . . . . . . . . . 29
. . . . . . . . . . . . . . . . . . . . . . . . . . . . . . . . 46
. . . . . . . . . . . . . . . . . . . . . . . . . . . . . . . . . . . . . . . .
. . . . . . . . . . . . . . . . . . . . . . . . . . . . . .
. . . . . . . . . . . . . . . . . . . . . . . . . . . . . . . .
. . . . . . . . . . . . . . . . . . . . . . . . . . .
. . . . . . . . . . . . . . . . . . 112
. . . . . . . . . . . 114
48
60
65
90
4
Page 7

Getting Started
CAUTION: Before using the phone for the
first time, read the
Legal Information
gray-edged pages at the back of this guide.
What’s in the Box?
Your wireless mobile phone comes with a battery, travel
charger, USB data cable, mono headset, companion CD,
user manual, product and service user data, and cables*.
You can purchase other accessories to customize your
phone for maximum performance and portability.
Note:
Additional accessories may be available depending
on product promotions.
* In-box content may vary by region.
About This Guide
This user guide describes how to use your Motorola
MPx220 to its maximum potential.
Important Safety and
included in the
032259o
Getting Started
Note:
In this user’s guide, “Find the Feature” always
indicates the feature's position from the Home screen.
5
Page 8
Optional Features
This label identifies an optional network, SIM
card, or subscription-dependent feature that
may not be offered by all service providers in
all geographical areas.
Optional Accessories
This label identifies a feature that requires an
optional Motorola Original™ accessory.
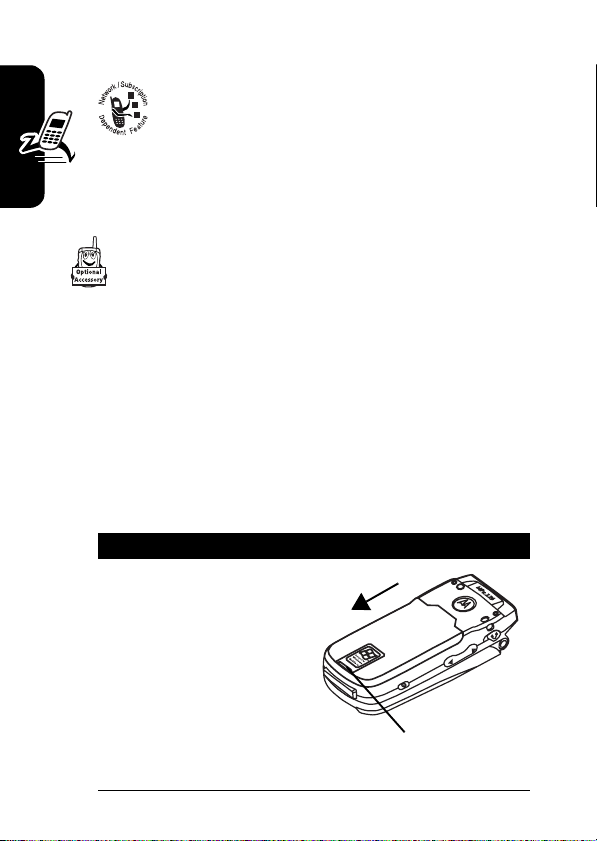
Installing the SIM Card
Getting Started
Your Subscriber Identity Module (SIM) card contains your
phone number, service details, and phonebook/message
information. It is stored in a recess in the battery
compartment.
Caution:
exposing your SIM card to static electricity, water, or dirt.
6
Do not bend or scratch your SIM card. Avoid
Action
1
If the phone’s battery
door is already in
place, push down the
battery door release
latch and lift the battery
door off the phone.
Note:
Turn off your
phone every time when
you remove/insert the SIM card.
Latch
Page 9
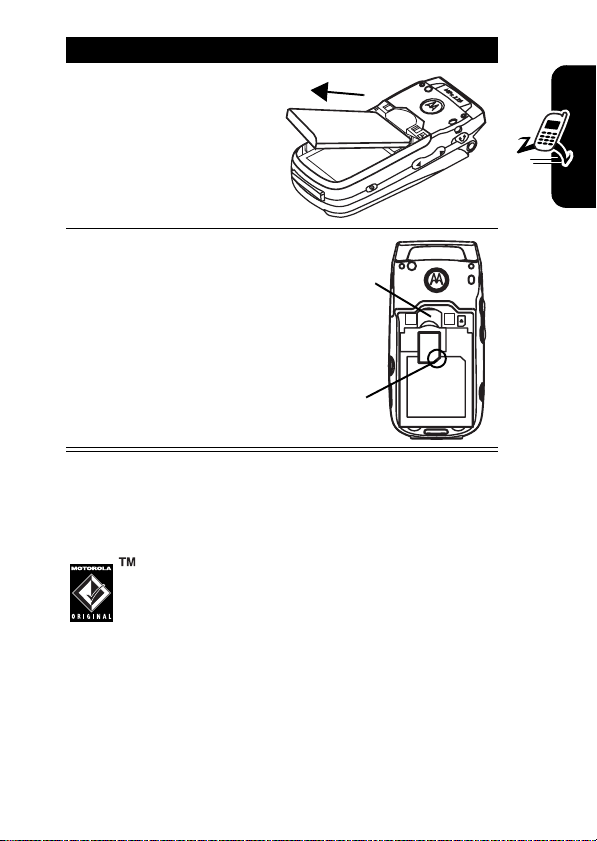
Action
2
Lift the battery up from
the bottom end and
remove it from the
phone.
3
Hold the SIM card
with the gold
contact side facing
SIM card holder
MPx220
down and the cut
corner on the
bottom right. Slide
the SIM card all the
way into the SIM
Cut corner
card holder.
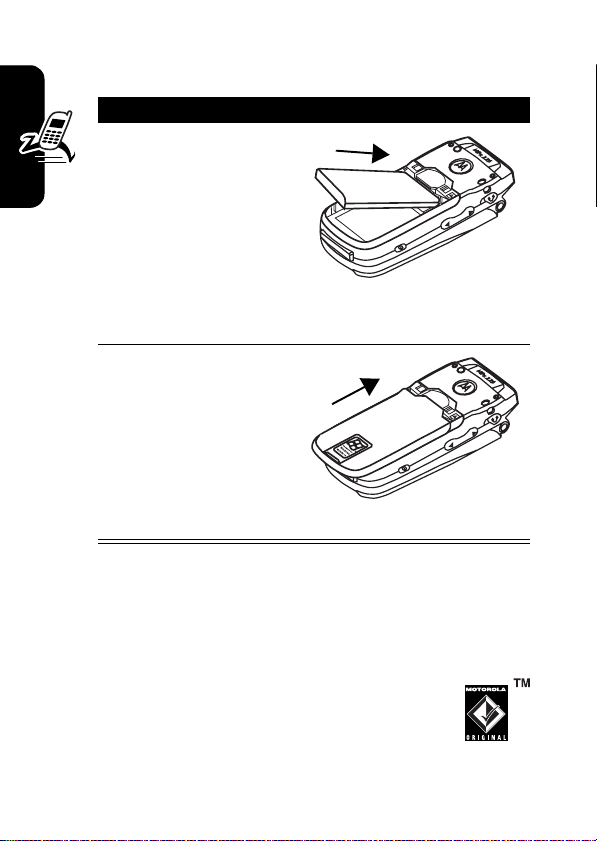
Installing the Battery
You must install and charge the battery to use your phone.
Your phone is designed to use only Motorola
Original™ batteries and accessories. We
Getting Started
7
Page 10
recommend that you store batteries in their protective
cases when not in use.
Action
1
Insert the battery into
the back of the
phone, with the
contacts on the top
end of the battery in
alignment with the
contacts on the
phone. Push the bottom end of the battery into
the phone until it clicks into the compartment.
Getting Started
2
Place the battery
cover back on the
phone, aligning the
tabs on the cover with
the groove on the
phone. Slide the
battery cover in the
direction shown until it locks into place.
Battery Use
Battery life depends on the network, signal strength,
temperature, features, and accessories you use.
Always use Motorola Original™ batteries and
chargers. The warranty does not cover damage
caused by non-Motorola batteries and/or
chargers.
8
Page 11

New batteries or batteries stored for a long time may take
more time to charge.
When charging your battery, keep it near room
temperature.
When storing your battery, keep it uncharged in a cool,
dark, dry place, such as a refrigerator.
Never expose batteries to temperatures below -10°C
(14°F) or above 45°C (113°F). Always take your phone
with you when you leave your vehicle.
It is normal for batteries to gradually wear down and
require longer charging times. If you notice a change in
your battery life, it is probably time to purchase a new
battery.
Contact your local recycling center for proper
battery disposal.
Warning:
because they may explode.
Before using your phone, read the battery safety
information in the “Safety and General Information” section
included in this guide.
Never dispose of batteries in a fire
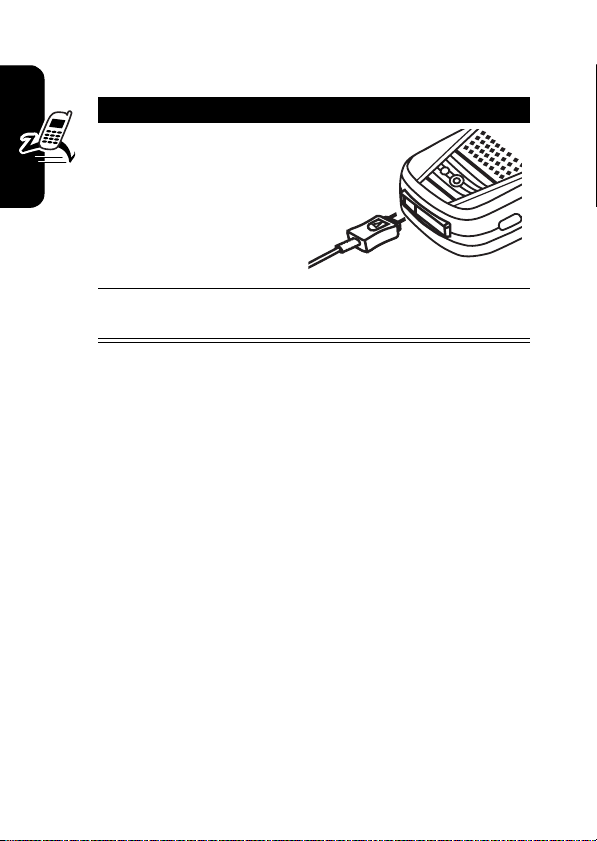
Charging the Battery
New batteries are partially charged. Before using your
phone, charge the battery as described below. Some
Getting Started
9
Page 12
batteries perform best after several full charge/discharge
cycles.
Action
1
Plug battery charger
connector into the
sync/charger port.
Note:
The connector
is keyed and can only
be inserted 1 way.
2
Plug the other end of the charger into the
electrical outlet.
Getting Started
Notes:
•
When you charge the battery, the battery power level
indicator in the external display shows how much of
the charging process is complete. At least 1 segment
of the battery power level indicator must be visible to
ensure full phone functionality while charging. You
can use the phone during the charging process.
However, the battery will take longer to fully charge.
•
Your phone will indicate a full charge before 24 hours
have passed, however, allow your phone to charge for
the full 24 hours before 1st use.
•
When battery power is low, a low battery message
displays. Charge the battery immediately.
•
If battery power is completely drained, the phone
turns off automatically.
10
Page 13
•
The charging indicator may take several minutes
before appearing in the external display.
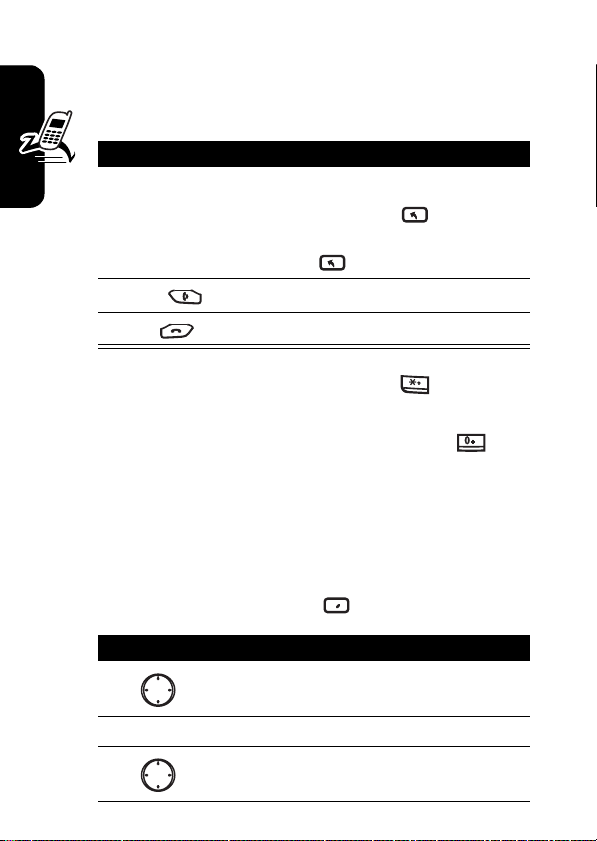
Turning Your Phone On/Off
Press To
Power
(p)
turn on or off your phone
Adjusting Volume
Press To
increase/decrease earpiece
1
up/down
2
Action
(A) save the setting
Tip:
When a call is ringing/incoming, press to mute the
ring.
volume in idle or during a call
Note:
You can adjust the
volume only when the phone
flip is opened.
Getting Started
11
Page 14
Making a Call
There are several ways to make a call. The easiest
way is to dial a phone number from the Home screen.
Press To
1
keypad keys enter the phone number
Tip:
Press
Back
the last digit; press and hold
Back
2
Send
3
Getting Started
Tip:
“P” (pause character); then enter the extension following it.
Tip:
insert a “+”; then enter the country code, area code
(omitting the starting 0), and phone number following it.
Some international calls require a 3-second pause in the
dialing sequence for the call to process successfully.
Follow the steps:
End
To enter an extension, press and hold to insert a
To make an international call, press and hold to
make the call
end the call
to delete all digits.
to delete
12
Find the Feature
Press To
1
2
Action
(A)
3
Start
scroll to a desired entry
select the entry
scroll to a desired phone
number
>
Contacts
Page 15
Press To
4
Edit
5
6
7
8
9
The letter “p” appears where the 3-second pause will occur
in the dialing sequence. You can also add a “p” via text
entry.
Menu
Action
Done
left/right
(A)
edit the phone number
move the cursor between the
numbers where you want to
insert a 3-second pause
open the options menu
scroll to
insert a 3-second pause
save the setting
Insert Pause
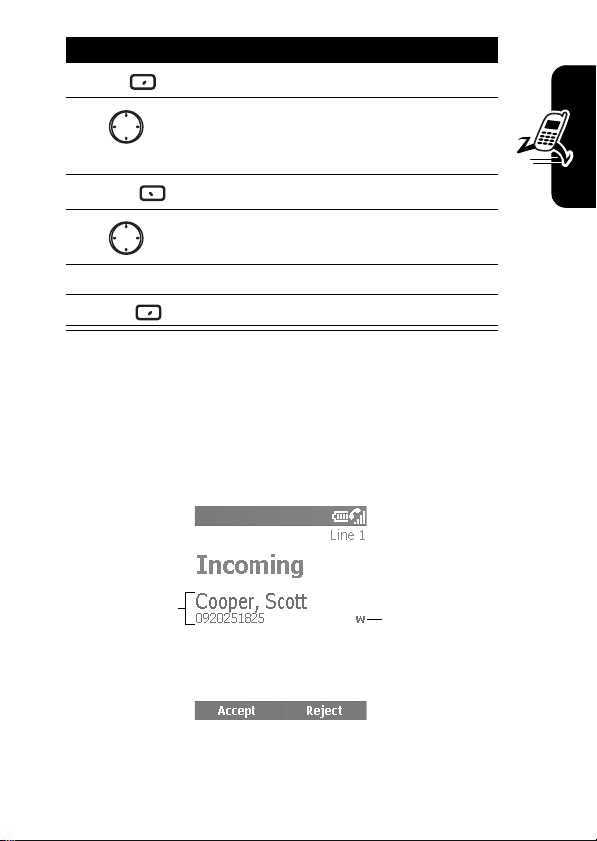
Answering a Call
Getting Started
Caller ID
information is
matched to a
contact
Phone number
is identified as
Work
number in
Contacts
13
Page 16
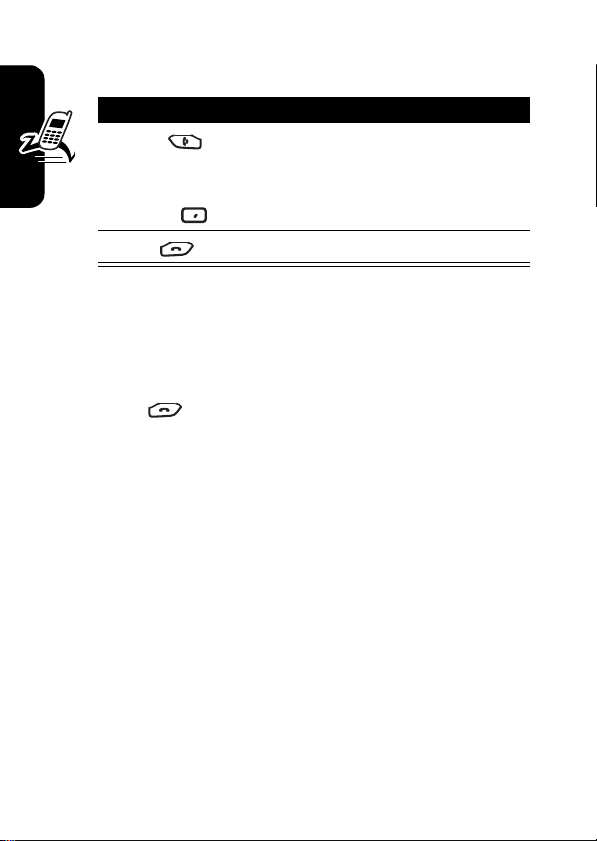
When you receive a call, your phone rings and/or vibrates
and displays an incoming call message.
Press To
1
Send
answer the call
or
Accept
end the call
Tip:
2
When
End
Flip Answer
is active, open the flip to answer the
call. (To activate, see “Use Advanced Phone Setting” on
Getting Started
page 64.)
Tip:
When
except
Any key answer
End
is active, press any of the keys
to answer the call. (To activate, see “Use
Phone Setting” on page 60.)
14
Page 17
Learning to Use Your Phone
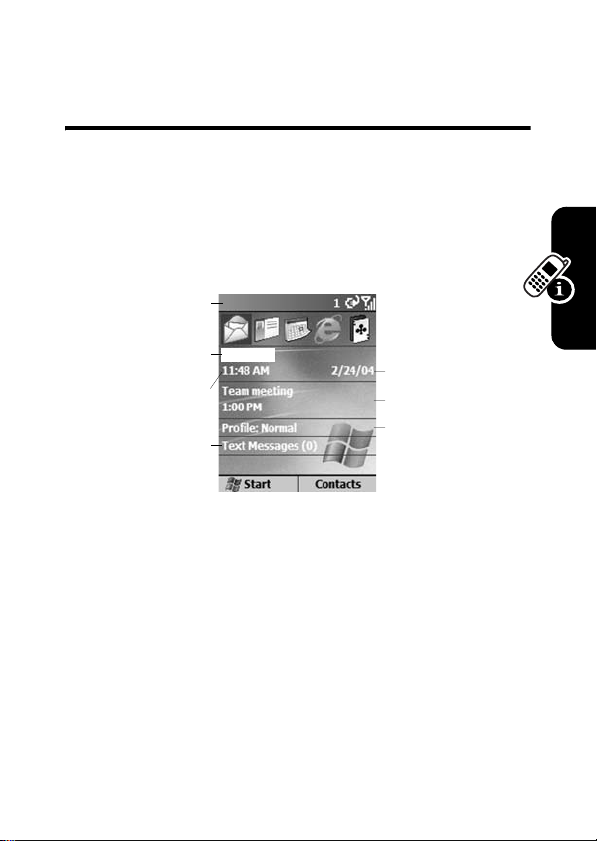
Using the Internal Display
The Home screen (shown) is the standard display when
you are not on a call or using the menu.
Status indicators
Service provider
Current time
Number of unread
messages
On the Home screen, you will find:
•
The top of the display shows status indicators about
your phone’s current mode.
•
The center of the display shows the Home screen, as
well as
icons, appointments, other types of
information, and
•
The bottom of the display shows the soft key
commands.
messages.
Current date
Next appointment
Ring type or
volume profile
Learning to Use Your Phone
15
Page 18
Note:
The display shown may be different based on the
specific Home screen configuration chosen.
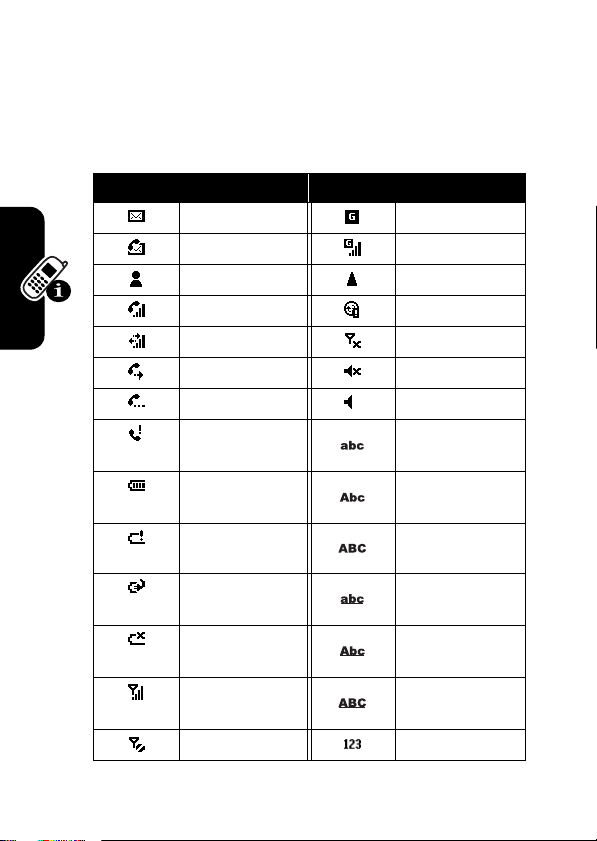
Status indicators display at the top of your phone’s internal
screen. The following table lists common status indicators
and their meanings.
Icon Meaning Icon Meaning
New email or SMS GPRS available
New voicemail GPRS in use
New instant message Roaming
Voice call active Sync error
Data call active Radio off
Call forwarding Ringer off
Call on hold Speaker
Missed call Multi-Tap text input
mode, lowercase
Battery level Multi-Tap text input
mode, uppercase
Low battery Multi-Tap text input
Battery charging iTAP text input mode,
Learning to Use Your Phone
No battery iTAP text input mode,
Signal strength iTAP text input mode,
No signal Numeric input mode
mode, caps lock
lowercase
uppercase
caps lock
16
Page 19
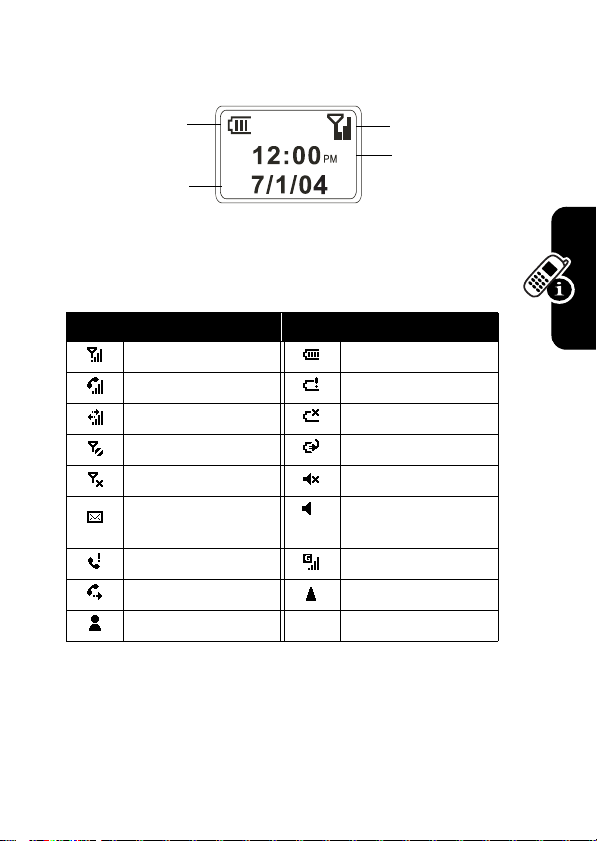
Using the External Display
Battery level
Signal strength
Current time
Current date
The following table lists the icons and their meanings
that appear on the external display.
Icon Meaning Icon Meaning
Signal strength Battery level
Call in progress Battery low
Data call active No battery
No signal Charging
Radio off Ringer off
You have unread new
message(s)
You have missed call(s) GPRS in use
Call forwarding Roaming
New instant message
Speaker
When enabled, the external display shows the incoming
photo Caller ID (see “Take Picture Using Normal Mode” on
page 90).
Learning to Use Your Phone
17
Page 20
Your phone’s display may differ based on the specific
external LCD style chosen (see “Use Advanced Phone
Setting” on page 64).
Using the Home Key
Use the Home key to do the following:
•
Learning to Use Your Phone
From the Home screen, press and hold
access the
Power
Quick List
(p). The
, or quickly press and release
Quick List
displays a list of available
profile types and commands, such as turn off your
phone, turn on/off the
Flight mode
phone’s keypad, and lock your phone.
Note:
Be aware that when the
Flight mode
turned on, then your phone cannot receive and make
a call, including an emergency call. In order to receive
and make a call, you must turn off the
and re-engage your phone’s RF capability. Always
obey the instructions of your airline crew.
•
Display the Home screen to dial a number.
•
The Home screen is your starting place for most
tasks. You can easily navigate to any program or
setting from this screen. The top of the Home screen
displays the last 10 icons you browsed. Just select a
program and press
can also press
Start
Action
(A) to open the program. You
to enter the programs on the
Start list. The Home screen also displays the current
time and date, your next appointment, your current
profile, and the number of unread messages in
Messaging
. Select your next appointment and press
Home
feature, lock your
feature is
Flight mode
to
feature
Action
18
Page 21
(A) to open
appointments for the day. To view
messaging status showing the number of unread
messages you have, and press
Contacts
•
The Home screen automatically displays when you
turn on the phone or leave the phone idle, but you can
navigate to it at any time by pressing
•
To change Home screen settings, see “Customize
Home Screen” on page 62.
, press
Calendar
, and you can see all of your
Action
Contacts
.
Messaging
, select the
(A). To view
Home
.
Using the 4-Way Navigation Key
Use the 4-Way Navigation key to navigate the menu
system, change feature settings and play games.
Tip:
Down and up are your primary movements within
menus and navigation through contacts. Move left and
right to change feature settings and edit text.
From the Home screen, press to do the following:
•
Select a program at the top of the screen, and then
press
Action
(A) to open the program.
•
Select an item in the center of the Home screen, such
as your next appointment, your profile type, or your
messaging information, and then press
open the program or access the settings associated
with the item selected.
Action
(A) to
Learning to Use Your Phone
19
Page 22
Using the Action Button
The Action button confirms your selection. Pressing
Action
(A) is similar to pressing “Enter” on a keyboard. In
some cases, confirming your selection accesses a
program or setting. You can also press
or uncheck a feature.
Action
(A) to check
Using the Soft Keys
The 2 Soft keys on your phone are located directly
below the display screen. Each soft key performs the
command displayed immediately above it on the
screen. Both soft keys are context sensitive — their
function changes according to the phone’s status, for
example, when in a particular application or making a
phone call.
On the Home screen:
Press To
1
Learning to Use Your Phone
Left soft
key
(
Start
access programs in the Start
list
)
Tip:
The phone comes preinstalled with programs that
you can start using
immediately. To install
additional programs on your
phone, refer to the Motorola
MPx220 companion CD that
came with the phone.
20
Page 23
Press To
2
Right soft key
access the following during
normal use:
•
Contacts
: displays to open
your contacts list.
•
Voicemail
: displays to play
a received voicemail.
•
Messages
: displays to read
new messages in
Messaging
.
You can also use numbers to navigate quickly to programs
and settings on the phone. Press the number on the
keypad that corresponds to the number of the program or
setting you want. For example, in the Start list,
press to open
select menu options by pressing the number that
corresponds to the menu option in descending order. For
example, to select
press .
Calendar
. You can also use numbers to
Filter
in the list of
Contacts
menu options,
Using the Back Button
Press the Back button to navigate to the previous screen,
or move the cursor back to delete 1 or more characters in
a text field.
Press To
1
Back
backspace and remove 1
character in a text field
Learning to Use Your Phone
21
Page 24
Press To
2
Back
while
for a
backspace and remove
multiple characters in a text
field
Using Menus
On many screens, the Menu soft key is the Right soft key.
Menu
Press
relevant to the screen you are viewing. Selecting a
menu option will either perform the command or take
you to another part of the user interface where you can
perform the command.
Learning to Use Your Phone
Tip:
Press up to move to the bottom of the menu.
to display a list of options that are
Press
Menu
menu options
to display
Entering Text and Numbers
You can enter text and numbers on the phone using the
keypad. The phone supports 3 input modes for entering
text and numbers:
iTAP
modes are used for entering text, and the
22
Multi-Tap, iTAP
, and
Numeric
. The
Multi-Tap
Numeric
and
mode
Page 25
is used for entering numbers. When you select a field that
requires text or numeric entry, the phone automatically
defaults to the appropriate input mode. The status
indicator on the top of the display shows the input mode
you are currently using.
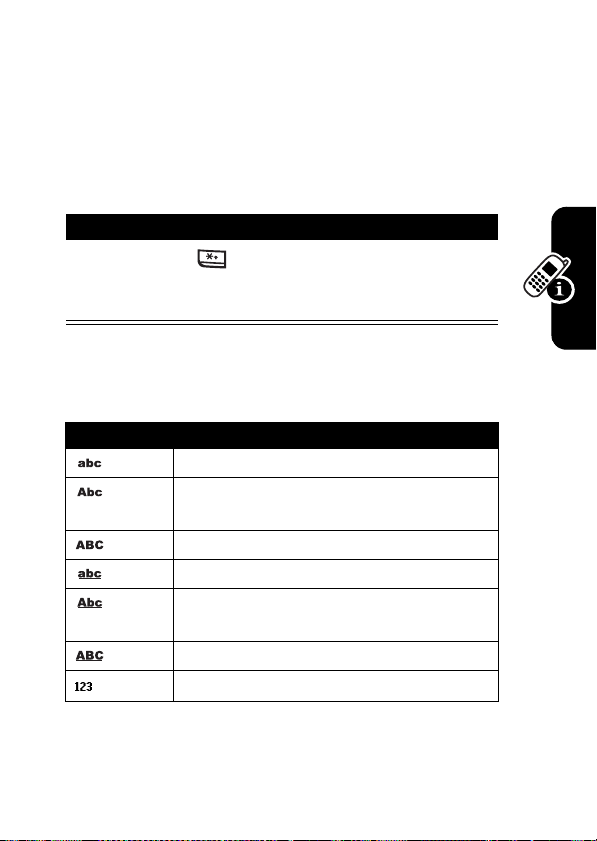
Changing Input Modes
Action
Press and hold until the status indicator for the
input mode you want is shown at the top of the
display.
The following table shows the complete list of input mode
status indicators.
Indicator Mode
Multi-Tap
text input mode, lower case
Multi-Tap
text input mode, temporarily
upper case
Multi-Tap
text input mode, caps lock
iTAP
text input mode, lower case
iTAP
text input mode, temporarily upper
case
iTAP
text input mode, caps lock
Numeric
input mode
Learning to Use Your Phone
23
Page 26

Entering Text in Multi-Tap Mode
You can enter a letter in
Multi-Tap
mode by pressing the
number key on which the letter appears. To enter the 1st
letter on the number key, press the key once. To enter the
2nd letter, press the key twice, and so on. The letter
entered remains underlined until you complete the
keypresses and the cursor moves to the next position. For
example:
Press To
1
2
enter the letter
enter the word
s
hat
When you enter letters that are on the same number key,
wait until the underline disappears before entering the next
letter so that your phone can process the 1st letter. This
pause is called the
Multi-Tap
time out, and you can adjust the
length of the pause between keypresses.
To change the
Find the Feature
Learning to Use Your Phone
1
2
Multi-Tap
time out:
Start
Press To
left/right
select the time interval you
want for the pause between
keypresses under
time out
Done
save the setting
>
Settings > Accessibility
Multipress
24
Page 27
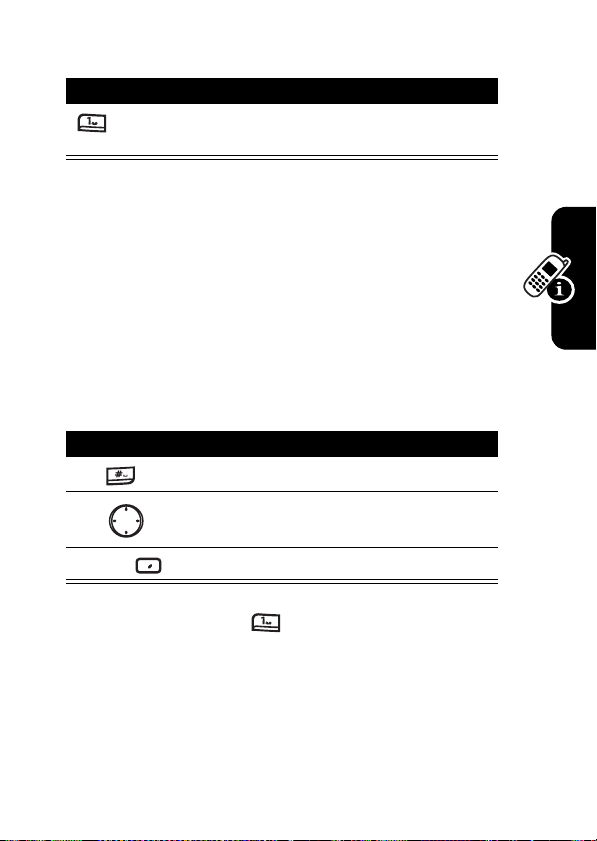
Entering Punctuation in Multi-Tap Mode
Press To
repetitively
scroll through common
punctuation:
.,?! - @:1
Entering Numbers in Numeric Mode
When you are in
want to enter on the keypad. If a field permits a
numerical entry only, such as the
Contacts
, the input mode will automatically default to
Numeric
mode. To enter an asterisk (*) or a hash sign (#),
press the corresponding key on the keypad.
Numeric
mode, press the number(s) you
Work
phone field in
Inserting Symbol
Press To
1
2
3
Tip:
for a while
Done
You can also press to select and enter a symbol.
open the
scroll to a symbol
select and enter the symbol
Pick a symbol
list
Using Special Key Functions
The following is a list of the keys and their corresponding
functions in input mode.
Learning to Use Your Phone
25
Page 28
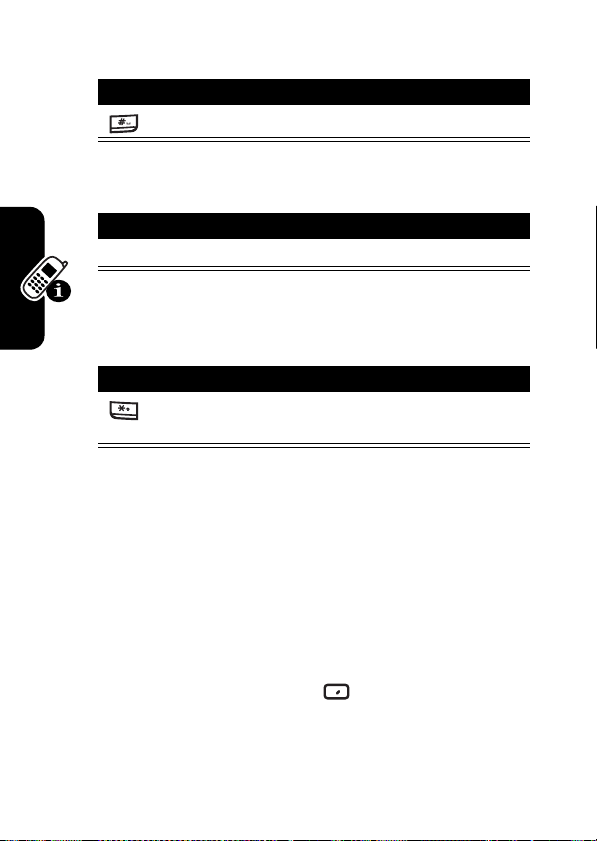
To enter a space in
Press To
To start a new line:
Press To
Action
(A)
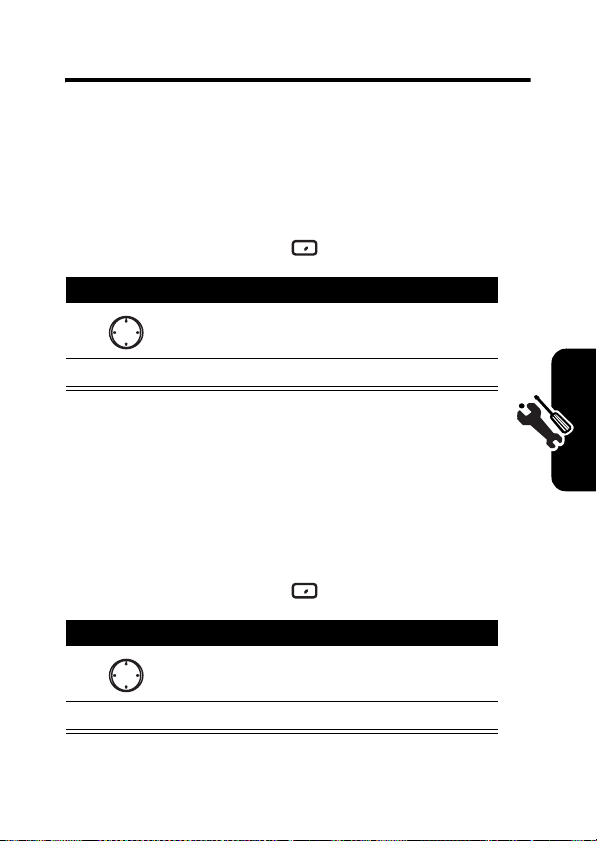
To change among uppercase, lowercase, and caps
lock:
Press To
Tip:
In text mode, the 1st letter of a sentence is
automatically capitalized.
Multi-Tap
mode:
enter a space
start a new line
change among uppercase,
lowercase, and caps lock
Viewing Phone Information
Use
About
Learning to Use Your Phone
phone’s operating system, including version numbers,
copyright information and available storage.
settings to display information about your
26
Find the Feature
Start
>
Settings > About
Page 29
Setting Up Your Phone
Setting the Time and Date
Use
Date and Time
the current date and time, and to set the alarm.
settings to change the local time zone and
Find the Feature
Press To
1
2
Action
(A)
Start
scroll to
set
>
Settings > More
Date and Time
Date and Time
settings
Entering Owner Information
Use
Owner Information
information, such as your name, phone number, and email
address. In the event that you lose your phone and it is
found, you can be contacted.
Find the Feature
Press To
1
2
Action
(A)
settings to enter and display personal
Start
scroll to
set
>
Settings > More
Owner Information
Owner Information
settings
Setting Up Your Phone
27
Page 30

Configuring Power Management
Use
Power Management
display time-outs, and to check the battery level.
settings to change the backlight and
Find the Feature
Press To
1
2
Action
(A)
Setting Up Your Phone
Start
scroll to
set
>
Settings > More
Power Management
Power Management
settings
28
Page 31

Calling Features
Redialing a Number
To redial the last number called from the Home screen:
Press To
Send
twice
place a call to the last dialed
number
Calling a Contacts Entry
As you enter a contact name, the phone searches
Call History, Speed Dial
name and number.
Number matches contact
Number matches entry
lists, and the SIM card to find a matching
in Call History
Contacts
Calling Features
,
29
Page 32

Making a Call from the Home Screen
Press To
1
keypad keys enter the contact name
(For example, to call Scott,
press
.)
2
3
Send
select the name from your
contacts list
make the call
Making a Call from Contacts
You can select a person’s name from your contacts list and
Send
press
1 phone number, such as
Calling Features
phone number is set as the default.
to place the call. If a contact has more than
Work, Home
, and
Fax
, the
Work
Find the Feature
Press To
1
2
Send
Tip:
If you have a long list of contacts, enter the 1st few
letters of a contact’s name. Your phone searches the entire
contacts list to display the name.
30
Start
scroll to the contact name to
call
make the call
>
Contacts
Page 33

Changing the Default Number for a Contact
Find the Feature
Start
>
Contacts
Press To
1
2
left/right
scroll to a desired contact
change the default number
(For example, if you change
w
to m, the default number
changes from
Mobile
phone.)
Work
phone to
Making a Call to a Desired Phone Number
Find the Feature
Press To
1
2
Action
(A)
3
4
Send
Start
scroll to the contact to call
open the contact
scroll to the number you want
to call
place the call
>
Contacts
Calling Features
31
Page 34

Making a Call with Voice Dialing
You can dial a phone number by speaking a word.
Note:
The voice recognition application works only via the
phone directly or a wired headset attached to the phone,
but not with a Bluetooth headset.
Dialing a Phone Number by Saying the
Name Exactly Saved in Contacts
On the Home screen:
Action
1
Calling Features
Press and hold up to open
2
Wait for the audio and visual cue and begin
saying
Voice Dial
.
3
Wait for the audio and visual cue and begin
saying the name exactly stored in your contacts
list.
4
If there is only 1 number for this contact, the
phone dials the number automatically. If there
are multiple numbers, the phone displays the
different locations and asks you which 1 to call.
Say the name of the location you want to call, for
example,
and then dials the number.
Work
. The phone repeats the location
Speech Recognition
.
32
Page 35

Changing How Voice Dial Works with Names
If you want to review and confirm names before dialing the
associated numbers, you must enable
say a name, your phone prompts you
the name that most nearly matches the name you spoke.
You can confirm the name by saying
Yes
, or by selecting the correct name from a list of up
to 3 names displayed on the screen.
by default. To enable it, follow the steps from the Home
screen:
Choice Lists
Did you say
Yes
or pressing
Choice Lists
. After you
followed by
is disabled
Action
Press and hold up to open
Press To
1
2
3
4
5
6
Settings
Action
Action
OK
(A)
(A)
open the settings menu
scroll to
select
select
scroll to
save the setting
Speech Recognition
Choice Lists
Choice Lists
Name dialing
Always On
Calling Features
.
33
Page 36

Adjusting the Name Sensitivity Setting
If the phone seldom recognizes your name commands,
follow the steps from the Home screen:
Action
Press and hold up to open
Speech Recognition
Press To
open the settings menu
scroll to
scroll to
adjust the
toward
Sensitivity
Sensitivity
Names
Names
Names
Reject Less
save the setting
Calling Features
1
2
3
4
5
6
7
Settings
Action
(A)select
Action
(A)select
down
OK
Changing How Speech Recognition Updates
Contacts
When you start
added or changed names in your contacts list. If the
contacts list has changed,
reloads the entire list of names. You can also turn off
Speech Recognition
Speech Recognition
, it checks to see if you have
automatically
.
setting
34
Page 37

automatic update and then update the list manually at your
convenience. To turn off automatic update:
Action
Press and hold up to open
Speech Recognition
.
Press To
1
2
3
4
5
6
Settings
Action
Action
OK
(A)
(A)
open the settings menu
scroll to
select
select
scroll to
Contacts Update
Contacts Update
Configure
Manual
save the setting
Dialing a Phone Number by Speaking the
Number Continuously
You can dial valid 7-digit or 10-digit phone numbers
simply by speaking the number continuously, without
pausing between the digits.
Note:
The phone recognizes the digits “one,” “two,” “three,”
“four,” “five,” “six,” “seven,” “eight,” “nine,” “zero,” and “oh.”
The phone cannot recognize numbers such as “1 eight
hundred” for “1 800.” Say “one eight zero zero” instead.
Calling Features
35
Page 38

On the Home screen:
Action
1
Press and hold up to open
2
Wait for the audio and visual cue and begin
saying
Voice Dial
.
3
Say a valid 7-digit or 10-digit number
Speech Recognition
distinctively, without pausing between digits.
Optionally, you can say the 1st digit of the
number and the phone displays a list of up to 3
numbers and prompts you
Did you say
the 1st number in the list.
4
If the number is correct, say
Yes
to initiate dialing.
If the number is not correct, say
next match or select the correct number from the
Calling Features
list.
Changing How Voice Dial Works with Phone
Numbers
By default,
allows you to review and confirm numbers before
dialing them. If you disable
automatically dials the recognized number, without
Choice Lists
for
Digit Dialing
Choice Lists
is enabled, which
, the phone
followed by
No
to hear the
.
36
Page 39

requiring you to confirm it. To disable
Home screen:
Action
Choice Lists
from the
Press and hold up to open
Speech Recognition
.
Press To
1
2
3
4
5
6
7
Settings
Action
Action
OK
(A)
(A)
open the settings menu
scroll to
select
scroll to
select
scroll to
Choice Lists
Choice Lists
Digit Dialing
Digit Dialing
Always On
save the setting
Customizing Digit Dialing to Your Voice
You can adapt
necessary. Adaptation involves recording 12 sequences of
4 digits each to teach the system your voice.
Digit Dialing
to your personal accent, if
Calling Features
37
Page 40

On the Home screen:
Action
Calling Features
Press and hold up to open
Press To
1
Settings
2
Action
(A)
3
4
Action
(A)
5
OK
Speech Recognition
open the settings menu
select
Digit Dialing
scroll to
select
to start recording
Tip:
then repeat the digits of the
1st sequence displayed on
the screen. Then follow the
instructions on the screen to
complete the adaptation.
Adapt Digits
Adapt Digits
Wait for the beep and
Making a Call from the Call History List
The
Call History
received, or missed. Choose a name or number to call
from the list.
list displays the last 25 calls you made,
.
38
Find the Feature
Start
>
Call History
Page 41

Press To
1
2
Send
scroll to the number or entry
to call
place the call
Calling a Number in a Message
When you see an underlined phone number as a hyperlink
in a message, you can place a call to the phone number.
After opening a message:
Press To
1
2
Action
(A)
scroll to the phone number as
a hyperlink
place the call
Calling an Emergency Number
Calls to emergency service numbers can be made under
any circumstances, even if you have locked the SIM
card and/or the phone.
Notes:
Emergency numbers vary by country. Your phone’s
•
preprogrammed emergency number(s) may not work
in all locations, and sometimes an emergency call
cannot be placed due to network, environmental, or
interference issues
•
Be aware that when the
the phone cannot receive and make a call, including
Flight mode
feature is turned on,
Calling Features
39
Page 42

an emergency call. In order to receive and make a
call, you must turn off the
engage the phone’s RF capability. Always obey the
instructions of your airline crew.
From the Home screen:
Press To
1
keypad keys dial your local emergency
2
Send
Flight mode
number
place the call
feature and re-
Managing Call History
Call History
received, and missed. Each entry in
start time of the call, the duration, the caller’s name, if
available, and the caller’s number. The oldest calls are
Calling Features
automatically deleted from the list to make room for new
calls.
filter you want.
displays the last 25 calls you have made,
Call History
Find the Feature
Tip:
You can filter
by pressing
Menu
Start
Missed Calls, Incoming Calls
, selecting
>
Call History
Filter
, and selecting the
, and
Sending an Email from Call History
Press To
1
40
scroll to a desired entry
contains the
Outgoing Calls
Page 43

Press To
2
Menu
3
4
Action
(A)
open the options menu
scroll to
edit and send an email to the
entry’s recipient
E-mail
Creating a New Contact from a Number in
Call History
Press To
1
2
Menu
3
4
Action
(A)
5
Action
(A)
scroll to a desired entry
open the options menu
scroll to
select
Note:
highlighted.
enter the contact information
Save to Contacts
Save to Contacts
Make sure
<New Item>
is
Calling with Speed Dial
You can quickly dial phone numbers by assigning speed
dial numbers. Press and hold 1 or 2 keys from the Home
screen to make a speed dial call. Choose speed dial
entries from 2-99. The speed dial entry 1 is often reserved
to set up or dial your voicemail after initial setup.
Calling Features
41
Page 44

Note:
The
Speed Dial
setting is available only for a phone
number stored in the phone memory.
To create a speed dial shortcut 1st:
Find the Feature
Start
>
Press To
scroll to a desired contact
open the contact
scroll to a desired phone
number
open the options menu
select
Add Speed Dial
under
Keypad assignment
save the setting
Calling Features
1
2
Action
(A)
3
4
Menu
5
Action
(A)
6
keypad keys enter the speed dial number
7
Done
Tip:
You can also assign speed dial numbers to Web
addresses and email addresses that are stored in
Contacts
of your phone.
To make a speed dial call from the Home screen:
Action
Press and hold the keypad number that you have
assigned as a speed dial number. If the keypad
assignment has 2 digits, press the 1st digit, then
press and hold the 2nd digit.
Contacts
42
Page 45

Using Voicemail
On the Home screen:
Action
Press and hold to automatically call voicemail
after initial setup.
Using Call Waiting
To answer the incoming call when you are talking
on the phone:
Press To
Accept
or
Send
To end the 1st call before answering the incoming call:
Press To
1
End
2
Accept
or
place the 1st call on hold, and
answer the 2nd call
end the 1st call
answer the 2nd call
Calling Features
Send
43
Page 46

Tip:
If the 2nd call is answered but the caller hangs up,
press
Press
Menu
Send
and select
Unhold
to rejoin the original call.
to change between an active call and a call
that is on hold.
To reject the incoming call when you are talking on the
phone:
Press To
Reject
reject the 2nd call
This will keep your current call in progress, but will reject
the
Call Waiting
call.
Putting a Call on Hold
While a call is in progress, you can hold the call and then
reconnect it.
Calling Features
Press To
1
Menu
2
3
Action
(A)
open the options menu
scroll to
Hold
place the active call on hold
Tip:
Select
Unhold
to activate
the call on hold.
44
Page 47

Muting a Call
You can mute the microphone for the active call. The other
party will not hear anything you say, but you can still hear
the other party.
Press To
1
Menu
2
3
Action
(A)
open the options menu
scroll to
mute the active call
Tip:
microphone back on for the
active call.
Mute
Select
Unmute
to turn the
Turning the Speaker On/Off
You can turn the speaker on or off during a call.
Press To
1
Menu
2
3
Action
(A)
open the options menu
scroll to
Speakerphone Off
turn the speaker on/off
Speakerphone
/
Calling Features
Tip:
During an incoming or outgoing call, you can toggle
between the earpiece and speakerphone by holding down
Send
.
45
Page 48

Phone Features
Main Menu
This is the standard main menu layout.
Menu
organization and feature names may vary on your
phone.
Not all features may be available for all users.
Messaging
• Text Messages
• Outlook E-Mail *
• Media Messages *
Contacts
Calendar
Internet Explorer *
ActiveSync
Call History
MSN Messenger *
Settings
• Phone *
• Sounds
•Profiles
• Home Screen
• About
• Accessibility
•Beam
Phone Features
# The voice recognition application works only via the phone directly or a wired
headset attached to the phone, but not with a Bluetooth headset.
• Bluetooth
• Certificates
• Data Connections
• Date and Time
• Owner Information
• Power Management
• Regional Settings
• Remove Programs
* Optional network, SIM card, or subscription-dependent feature.
•Security
• Phone Settings
Camera
Favorites Manager
File Manager
File Viewer
Games & Apps
Media Center
MMSSettings *
PhotoAlbum
Pocket M SN *
4646
Page 49

Resource Manager
• Task Manager
• Space Manager
Speed Dial
Tasks
Speech Recognition
Voice Recorder
Windows Media
Accessories
•Calculator
• Video Camera
• Modem Link
• Video Player
Games
• Jawbreaker
• Solitaire
#
Shortcuts
Go to dialed calls list:
Press (in idle).
Use Speech Recognition or
Voice Recorder:
Press and hold up or down
(in idle).
Take photos:
Press
Start
Camera
, and then press .
>
More >
Open Quick List:
Press and hold (in idle).
Exit menu system:
Press .
Phone Features
47
Page 50

Messages
Feature Description
Compose
MMS Message
Add Photo/
Video to MMS
Message
Add Text
Template to
MMS Message
Phone Features
Compose an MMS
message:
Start
Messages
Tip:
>
Messaging > Media
>
New
MMS messages are created by
combining various slides. Each
slide can consist of a photo or
video, audio (only when photos are
used), and text.
Add a still image/video clip
to your MMS message:
Highlight the
area > press
desired photo/video clip > press
Select
Picture/Video
Action
.
(A)
, scroll to a
Add preset words/phrases
to your MMS message:
Highlight the
press
Action
(A)
Text
>
area >
Menu
>
Action
(A)
scroll to a desired text template >
press
Select
>
Done
.
,
4848
Tip:
To edit text templates, select a
text template, press
Menu
>
Edit
.
Page 51

Feature Description
Add Preset
Audio to MMS
Message
Add preset audio clips to
your MMS message:
Highlight the
Action
press
(A)
audio clip > press
Add Recorded
Audio to MMS
Message
Manage Slide
for MMS
Message
Preview MMS
Message
Add recorded audio clips to
your MMS message:
Highlight the
Action
>
Record
(A)
.
press
Audio
>
Done
Add, remove, or jump to
additional slides in your
MMS message:
Menu
>
Slides
Preview your MMS
message before sending it:
Menu
>
Preview Message
Audio
area >
, scroll to a desired
Audio
>
Select
area >
Menu
>
Play
.
>
Capture
>
Stop
Phone Features
49
Page 52

Feature Description
Send MMS
Message
Send your MMS message
starting from the
Menu
>
To
field:
Recipients > Add
,
choose a recipient from your
contacts list (or use keypad keys to
enter in your recipient’s phone
number/email address), highlight
the
Subject
field, enter in a subject of
your message > press
Tip:
You can add other recipients
Send
.
separated by semicolons.
Configure
Sending
Performance
Read MMS
Message
Customize how your MMS
message is sent:
Menu
>
Send Options
View your MMS messages
in different message
boxes:
Start
>
Menu
Phone Features
Tip:
desired one >
>
Messaging > Media Messages
>
Folders
To view objects, scroll to a
Action
(A)
.
5050
Page 53

Feature Description
Configure
MMS Setting
Save the messages you
sent, download new
messages automatically,
sort messages by different
ways, define the maximum size limit
for messages that you send and
receive, set the number of times
you attempt to send your messages
before stopping, and select a type
of Internet connection:
Configure
Email Account
Start
Complete the email
account setup before
>
More > MMSSettings
sending and receiving
emails:
Start
>
>
Tip:
>
Messaging > Outlook E-Mail
Menu
Menu
>
>
Your service provider may have
configured email settings for your
phone before you received it;
otherwise, contact your service
provider to set up your email
account.
Options > Account Setup
New
Phone Features
51
Page 54

Feature Description
Receive Email
from the
Internet
Receive email messages
by connecting to your
email server:
Start
Menu
Tip:
>
Messaging > Outlook E-Mail >
>
Send/Receive
To receive emails by
synchronizing Inbox, see
“Synchronization with ActiveSync
®
”
on page 76.
Receive
Complete
Email
Receive emails in full,
instead of receiving only
the 1st 5 KB set by default:
Start
>
Messaging > Outlook E-Mail
scroll to a desired email > press
Menu
>
Mark for Download
.
>
Phone Features
5252
Page 55

Feature Description
Receive Email
Attachment
Download email
attachments (displayed as
a list of hyperlinks at the
bottom of the email
message) to your phone:
Start
>
Messaging > Outlook E-Mail
scroll to a desired email that
contains an attachment(s) > press
Action
(A)
> scroll to a desired
attachment > press
Tip:
To view downloaded
attachments, select a desired one >
press
Action
(A)
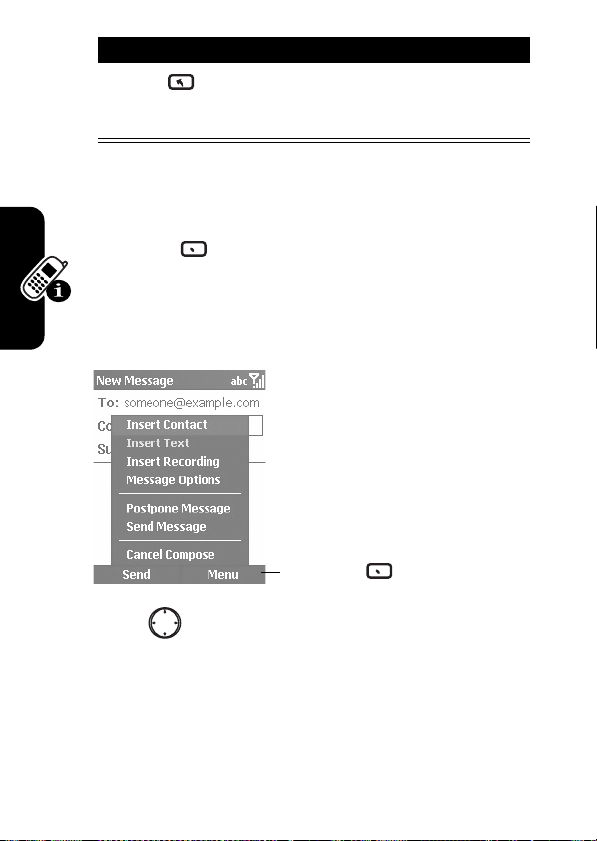
Compose and
Send Email/
SMS Message
from
Messaging
Compose and send an email or
SMS message from
Start
Outlook E-Mail > New
>
Messaging > Text Messages
recipient’s (SMS) phone number or
email address in the
select a recipient from your contacts
list by pressing
Contact
) > enter in your message >
press
Send
Action
.
Messaging
> enter in your
To
Menu
.
>
(A).
:
field (or
>
Insert
/
Phone Features
Tip:
To add multiple recipients,
separate each with a semicolon by
pressing in
Multi-Tap
mode. You
can also press to insert @.
53
Page 56

Feature Description
Compose and
Send Email/
SMS Message
from Contacts
Insert
Predefined
Text into
Email/SMS
Message
Edit
Predefined
Text
Insert Voice
Recording into
Email
Compose and send an email or
SMS message from
Start
>
Contacts
Contacts
:
> select a contact
> select an email address or (SMS)
phone number > select
or
Outlook E-Mail
for your email > enter
in your message > press
Text Messages
Send
.
In the body or subject text field of
your message:
Menu
desired text template > press
Insert
>
Insert Text
.
> scroll to a
Edit the predefined text:
Start
Outlook E-Mail/Media Messages > Menu
Options
>
Messaging > Text Messages
>
Edit My Text
/
>
In the body text field of
your email:
Menu
Record
>
Insert Recording >
>
Done
Phone Features
Tip:
You can create only 1 voice
recording at a time. A new voice
recording replaces the prior
recording.
5454
Page 57

Feature Description
Import SMS
Message from
Your SIM Card
to Your Phone
Import SMS messages from your
SIM card to
Start
>
Note:
>
Messaging > Text Messages
Menu
>
SMS messages are not
removed from your SIM card after
they are imported. You cannot
export SMS messages from your
phone to your SIM card.
Read Email/
SMS Message
Read your email or SMS messages,
accompanied by the icon :
Start
Outlook E-Mail
Tip:
>
Messaging > Text Messages
If you want to create a contact
card for the sender, press
>
Save to Contacts
Note:
SMS messages cannot be
synchronized.
Use Email/
SMS Message
Menu Options
Delete, reply, forward your email or
SMS messages, and more:
Start
Outlook E-Mail > Menu
>
Messaging > Text Messages
Messaging
of your phone:
Options > Import SIM Messages
/
Menu
.
/
Phone Features
55
Page 58

Feature Description
Optimize
Messaging
Change the way your email/SMS
messages display and send, specify
how to sort your messages, create
your text phrase and signature, and
more:
Accept
Meeting
Request
Start
Outlook E-Mail > Menu
Accept a meeting request:
Start
Outlook E-Mail
request > press
Tip:
>
Messaging > Text Messages
>
Options
>
Messaging > Text Messages
> select a meeting
Accept
.
When you accept a meeting
/
/
request, the meeting immediately
appears in
Calendar
and a message
will be sent back to the meeting
organizer the next time you
synchronize
Calendar
ActiveSync
View Email/
Phone Features
SMS Message
Folder
View your deleted, draft, received,
and sent messages in the different
folders:
Start
Outlook E-Mail > Menu
Calendar
. To synchronize
, see “Synchronization with
®
” on page 76.
>
Messaging > Text Messages
>
Folders
/
5656
Page 59

Feature Description
Listen to
Voicemail
Message
Modify Sound
Alert for Email/
SMS/Voicemail
Message
Listen to your new voicemail
messages , press
from the Home screen, or press and
hold from the Home screen to
dial your voicemail service number.
Choose a sound alert for your
email/SMS/voicemail messages:
Start
>
Settings > Sounds
Voicemail
Chat with MSN® Messenger
To use
MSN Messenger
account unless you already have a hotmail account. To set
up a Microsoft.NET Passport account, go to:
www.passport.net
When you are using
out or end unless you end
incoming voice call; an outgoing voice call is placed; the
device is turned off; or the device moves out of range.
Feature Description
Sign In MSN
Messenger
, you need a Microsoft.NET® Passpor t
.
MSN Messenger
Use
MSN Messenger
Start
>
Sign In
, the session will not time
MSN Messenger
>
MSN Messenger
; you “Accept” an
:
http://
Phone Features
57
Page 60

Feature Description
Sign Out of
MSN
Messenger
End
MSN Messenger
End
Note:
If you do not sign out
of
MSN Messenger
, you remain on a
:
data connection, which may result
in additional charges from your
service provider.
Send Instant
Message
Send an IM after signing
into
MSN Messenger
:
Select a person you want
to send your IM > press
Send
press
Tip:
> enter your message >
Send
.
Use the menu options to add
text templates, invite a contact to
the ongoing chat, see who is
already chatting, or change
between chats.
Manage MSN
Messenger
Phone Features
Contacts List
Add, delete, or block/
unblock a contact in the
messenger contacts list
after signing into
Messenger
Menu
:
MSN
5858
Tip:
Block/unblock the selected
contact from seeing your status and
sending you messages.
Page 61

Feature Description
Change Your
Status
Change your status in the
messenger contacts list
after signing into
Messenger
:
Select your name > select a status
description.
Change Your
Displayed
Name
Change your displayed
name after signing into
Messenger
Options
:
>
enter the name you want others to
see when you send IM.
Action
MSN
(A)
MSN
>
Phone Features
59
Page 62

Phone Customization
Feature Description
Use Phone
Setting
Use Sound
Phone Features
Setting
Set options like
(block incoming/outgoing
calls),
Call Forwarding
all/selected calls to another
number),
numbers, such as your voicemail/
SMS service center, answer
incoming calls by pressing any key),
Call Waiting, Caller ID
identification be known to all callers/
only your contacts/no callers),
Channels
(configure cell broadcast),
Fixed Dialing
or more specific phone numbers/
area codes), and
your current network and change
your network selection):
Start
Customize the sounds for ring
tones, notifications, and reminders:
Start
Call Barring
(transfer
Call Options
(change phone
(let your
(limit your calling area to 1
Networks
>
Settings
>
>
Settings > Sounds
(identify
Phone
6060
Page 63

Feature Description
Use Your Own
Sound
Use your own sound for ring tones/
notifications/reminders:
Copy the sound file on your PC >
connect your phone to the PC >
open
ActiveSync
Explore
, double-click
double-click
Application Data
Sounds
, paste the sound file into the
Sounds
folder (create a
folder, if necessary) > on your
phone’s Home screen, press
Start
>
Settings > Sounds
desired option to customize,
press left/right to select the
on your PC, click
My Smartphone
Storage
, double-click
, double-click
Sounds
, scroll to a
,
sound file, press
Done
.
Phone Features
61
Page 64

Feature Description
Use Profile
Configure how your phone notifies
you about an incoming call/
approaching appointment/arriving
message:
Start
a desired profile > press
>
Tip:
plugged into your phone, the
Car
Speakerphone
>
Action
Settings > Profiles
(A).
> scroll to
Menu
When a headset/car kit is
Headset
profile is used automatically. The
profile is automatically
/
selected when you activate the
speakerphone in a call.
Customize
Home Screen
Change the Home screen layout/
color scheme/background image/
time delay in the idle display:
Start
>
Settings > Home Screen
Phone Features
6262
Page 65

Feature Description
Use Your Own
Image
Use your own image for the Home
screen:
Copy the image file (with a 176x200
screen resolution for best results)
on your PC > connect your phone to
the PC > open
PC, click
Explore
Smartphone
double-click
double-click
file into the
Home
folder, if necessary) > on your
phone’s Home screen, press
Start
>
Settings > Home Screen
ActiveSync
, double-click
, double-click
Application Data
Home
, paste the image
Home
folder (create a
on your
My
Storage
,
, under
,
Change
Regional
Setting
Set Font Size/
Time-Out/Alert
Vol um e
Background image
, press left/right
to select the image file, press
Done
.
Change the language, date, time
style of the phone, and number and
currency formatting options:
Start
Settings
Configure the system font size,
Tap
>
Settings > More > Regional
Multi-
and confirmation time-out, and
in-call alert volumes:
Start
>
Settings > Accessibility
Phone Features
63
Page 66

Feature Description
Use Advanced
Phone Setting
Customize flip answer on or off
control, display style, and screen
contrast:
Remove
Program
Start
Settings
Remove programs installed on your
phone, with the exception of core
>
Settings > More > More > Phone
programs that came with the phone:
Start
Programs
Tip:
>
Settings > More > Remove
If you accidentally remove a
program from your phone, you can
find it on the companion CD to
reinstall.
Use Favorites
Manager
Change the position of applications
to be shown on the Start list:
Start
>
More > Favorites Manager
>
select an application > press
up/down to move the application to
Phone Features
a desired position > press
Action
(A).
6464
Page 67

Advanced Features
Feature Description
Make
Conference
Call
Monitor Phone
Use
Join together all existing
calls to make a conference
call from the Home screen:
Enter a phone number for the 1st
call > press
Send
phone number for the 2nd call >
Send
press
>
Conference
Note:
.
The 1st call is automatically
put on hold when the 2nd call is
active.
Tip:
To break 1 call out of a
conference and make this call
active (while the rest is on hold),
press
Menu
desired call >
End
>
Action
to end the active call.
Keep track of your calling patterns,
to help you choose a calling plan or
estimate your monthly billing:
Start
Timers
>
Call History > Menu
>
Menu
Private
> enter a
> scroll to a
(A)
. Press
>
Phone Features
View
65
Page 68

Feature Description
Open
Application
with Speed
Dial
Assign an application with a speed
dial entry; then press and hold 1 or
2 keys (entries from 2-99) from the
Home screen to quickly launch it:
Start
> scroll to a desired
application > press
>
Action
(A) > select a speed dial
entry under
Done
Tip:
.
To launch an application with 2
speed dial digits, press the 1st digit;
then press and hold the 2nd digit.
Open
Application by
Launch an application by speaking
a word from the Home screen:
Voice
Press and hold up to open
Menu
Keypad assignment
> press
Speech
6666
Recognition
> say the name of the
application you want to open
preceded by
Open
(for example,
saying “Open Calendar”).
Phone Features
Note:
The voice recognition
application works only via the phone
directly or a wired headset attached
to the phone, but not with a
Bluetooth headset.
Page 69

Feature Description
View Contact
Card by Voice
View a contact card saved in
by voice from the Home screen:
Contacts
Use Speech
Recognition
Settings Menu
Press and hold up to open
> say
Recognition
Name Lookup
Speech
> say the
name exactly saved in your
contacts list.
Set options like
Application Launcher
(customize the list of applications
that can be opened by voice),
Sensitivity > Commands
(let your phone
easily or seldom recognize your
commands),
>
Speed
faster or slower), and
>
Name Lookup > Always On
Sound > Name Settings
(initiate your commands
Choice Lists
(review and
confirm names before your phone
retrieves contact information) from
the Home
screen:
Press and hold up to open
Recognition
>
Settings
.
Speech
Phone Features
67
Page 70

Feature Description
Use File
Viewer
File Viewer
allows you to view
the documents attached,
locally stored, or stored on
your storage card without any fileconversion or loss of content. It
supports most common desktop
document formats (including PDF,
Word, Excel, PowerPoint...) and
significant image formats (such as
JPEG, GIF,
PNG...).
By default, Microsoft ActiveSync
converts documents that it
recognizes to simpler formats. With
File Viewer
, this is not necessary.
Before you synchronize emails or
copy files to your phone for the 1st
time, you should disable this
conversion, or you will not be able
to open the email attachments or
copied files with
ActiveSync
Phone Features
computer, then to the
click on
Conversion Settings
Uncheck “
synchronized, copied or moved
click on
OK
Tools
File Viewer
>
. Go to the
Options
Rules
on your
tab, and
.
Convert files when
”; then
in each dialogue box.
View a document on your phone:
Start
>
More > File Viewer
> press
6868
Page 71

Feature Description
to scroll to a desired folder >
press
Action
press to scroll to a desired
(A) to select the folder >
folder or file > press
Action
(A) to
select the folder or file (repeat those
steps until your desired file is
found). Press
Action
(A) to launch the
document zooming mode with
displayed in the bottom right corner
of the screen > press up/right
or down/left to zoom the selected
file in or out (press and hold to
continuously magnify or minify the
size of the selected document).
Press
Action
(A) to switch to the
document scrolling mode with
displayed in the bottom right corner
of the screen > press up/down/
left/right to view the different part of
the selected file (press and hold
to continuously move the
page in the desired direction).
Phone Features
69
Page 72

Feature Description
You may also press
Hide Mode
to
keep or from displaying on
the screen.
Note:
Whether your phone is
equipped with
File Viewer
is subject to
your service provider.
Tip:
To send emails with
Use File
Viewer Menu
Options
attachments, press
>
File Manager
> scroll to the file you
want to send > press
>
Send& Receive > Send by E-mail
Use the context-sensitive
menu for folders or files:
•
Document View/Folders
Start
Menu
>
More
.
:
Switch between the document
you are viewing and the entire
file structure. To go to the folder
above, tap the
Up directory
icon
in the corner.
•
Page
Phone Features
: Rotate the screen, fit the
size of the file to the width of
the screen (which may leave
blank areas depending on the
aspect ratio), or move to the
page of the selected document
you want to view.
7070
Page 73

Feature Description
•
Favorites
document to the Favorites list
where it will be displayed as a
thumbnail image or remove a
desired document from the
Favorites list by pressing
Delete
•
History
: Display the file(s) you
have viewed. Press
open files directly from the
History list.
•
Settings
: Define how long you
want the files stored on the
History list or clear the history
records immediately. You can
also select file types to
associate with
how to use
the details about it.
•
Close
: Exit from
: Add the selected
.
Action
File Viewer
File Viewer
File Viewer
, learn
and view
.
Add/
(A) to
Phone Features
71
Page 74

Feature Description
Use Keypad to
Replace File
Viewer Menu
Options
Phone Features
Use the keypad to zoom
pages in or out, view
different parts of pages,
navigate among pages, rotate
pages and fit the size of pages to
the width of the screen:
•
: Go to the previous page
of the selected document.
•
: Scroll the page you are
viewing up.
•
: Go to the next page of
the selected document.
•
: Scroll the page you are
viewing left.
•
: Rotate the page you are
viewing 90 degrees
counterclockwise/clockwise.
•
: Scroll the page you are
viewing right.
•
: Go to the 1st page of the
selected document.
•
: Scroll the page you are
viewing down.
•
: Go to the last page of the
selected document.
7272
Page 75

Feature Description
•
: Fit the size of the page
you are viewing to the width of
the screen.
•
: Zoom the page you are
viewing in.
•
: Zoom the page you are
viewing out.
Use File
Manager
Manage files and folders in your
phone:
Start
Tip:
View
>
More > File Manager
It operates in 2 major views,
(displays the entire file structure
in the phone memory and focuses
on folder management) and
(displays the details of selected
folder (its sub-folders and files) and
is basically file-oriented). Select a
file or folder you want to operate on
and press
Menu
command. Press
the selected file.
to select a
Action
(A) to run
Tree
List View
Phone Features
73
Page 76

Feature Description
Make Data Call
Set up General Packet
Radio Service (GPRS),
dial-up, Virtual Private
Network (VPN), and proxy
connections so you can connect to
the Internet or your corporate/work
place network. With a data
connection, you can browse the
Web, download email, chat using
MSN Messenger
wirelessly with server:
Settings
Menu
Connections
Connections
>
Add
Tip:
Your phone has already been
, and synchronize
Start
>
More > Data Connections >
>
Edit Connections > Dial-up
/
VPN Connections/Proxy
/
GPRS Connections > Menu
>
configured to allow you to browse
and chat. Contact your Information
Technology (IT) manager for more
information. In addition, a GPRS
Phone Features
connection accesses the Internet/
MMS network/(secure) WAP
network/corporate network by using
an access point your service
provider provides.
7474
Page 77

Feature Description
Use Resource
Manager
Manage your phone’s system
resources:
Start
Manager
Tip:
Manager
>
More > More > Resource
>
Menu
It consists of two features:
(lists all applications
currently running on your phone and
you can easily activate any currently
running application, terminate
applications, and refresh the list of
currently running applications) and
Space Manager
messages, voice notes, speed
dials, and call history stored on your
phone’s flash memory and you can
easily delete any file and refresh the
amount of free flash memory).
Task
(lists all emails, SMS
Phone Features
75
Page 78

Synchronization with
ActiveSync
®
Use Microsoft®
your desktop computer/a Microsoft Exchange Server
the information on your phone.
phone’s information with the information on the desktop
computer/server, and then updates all locations with the
most recent information. For more information about
synchronization, see
computer.
ActiveSync
You have to install
using the companion CD or download from the Microsoft
web site (
installation, the wizard starts to create a partnership
between your phone and PC. Connecting to a company
server requires assistance from an IT professional.
Phone Features
is already installed on your Motorola MPx220.
Feature Description
Use Acti
ActiveSync
http://www.microsoft.com
veSync
to synchronize information on
ActiveSync
ActiveSync Help
ActiveSync
(3.7.1 or later) on your PC
Connect your phone to your
PC using the infrared port or
USB data cable before
synchronization:
Start
on the desktop
>
ActiveSync > Sync
compares your
). After the
®
with
7676
Page 79

Feature Description
Synchronize
Remotely with
PC
Synchronize remotely with your
computer:
Start
Action
Tip:
>
ActiveSync > Menu
(A
)
>
PC Settings
To synchronize remotely with a
desktop computer, turn on the
computer 1st.
Synchronize
Remotely with
Server
Create
Schedule to
Sync with
Server When
Your Phone Is
Connected to
PC
Create
Schedule to
Sync with
Server When
Your Phone Is
Not Connected
Synchronize remotely with a server:
Start
Action
>
ActiveSync > Menu
(A
)
>
Server Settings
Create a server
synchronization schedule so
that your information is
automatically synchronized with the
server at specified time intervals:
Start
Action
>
Menu
>
ActiveSync > Menu
(A
)
>
Server Settings > Connection
>
Create a server synchronization
schedule so that your information is
automatically synchronized with the
server at specified time intervals:
Start
Action
>
ActiveSync > Menu
(A
)
>
to PC (Sync
Wirelessly)
Rules
Mobile Schedule
>
>
>
Phone Features
>
77
Page 80

Feature Description
Sync over
Infrared
Use an infrared connection to
quickly create a direct connection
between your phone and another
mobile device/desktop computer:
Start
Tip:
>
ActiveSync > Sync
Align your phone to your PC or
mobile device when using an
infrared connection.
Exchange File
between Your
Phone and PC
With
ActiveSync
, you can
exchange files between your
phone and desktop PC:
Connect your phone to your PC >
on your PC, open
Explore
, in
ActiveSync
Windows Explorer
, click
, browse
to the file that you want to copy to
your phone/PC, right-click the file,
select
Copy
, place the cursor in the
desired folder, right-click, select
Paste
.
Phone Features
7878
Page 81

Feature Description
Beam Contact
Card/
Appointment
Use your phone’s infrared port to
send and receive (beam) contact
cards/appointments between your
devices:
Start
>
Contacts/Calendar
desired contact card/select an
appointment > press
Contact
/
Beam Appointment
device your phone searches in it’s
range > press
Tip:
To beam information over IR,
align the infrared ports so that they
are unobstructed and within close
range of each other.
Receive
Beamed
Information
Use your phone’s infrared port to
send and receive (beam) contact
cards/appointments between your
devices:
Start
>
Settings > Beam
Beam
> scroll to a
Menu
>
Beam
> select an IR
.
> press
Phone Features
press
to check
Done
Receive incoming beams
.
>
79
Page 82

Bluetooth® Connection
Feature Description
Create
Partnership
from Your
Phone with
Bluetooth
Device
Phone Features
Create a partnership from your
phone with a Bluetooth device:
Start
Menu
scroll to the Bluetooth device you
want to pair with > press
enter the same PIN both on your
phone and on the Bluetooth device
> press
Tip:
bond with a device that has headset
or handsfree capabilities, you are
notified through the dialog boxes to
set up that device as your Bluetooth
headset or handsfree by pressing
Yes
using your Bluetooth headset, you
can transfer audio to your phone’s
earpiece by using the menu options.
If you want to transfer audio again
to the headset, push the headset
hardware button.
>
Settings > Bluetooth >
>
Devices > Menu
Done
When your phone is creating a
. When you are on a call
>
New
>
Add
.
>
8080
Page 83

Feature Description
Accept
Partnership
from Your
Phone
On a Bluetooth device, you can
configure a partnership with your
phone:
Start
Bluetooth
, press left/right to
select
Discoverable
radio turns on and makes your
phone discoverable for 3 minutes)
on the Bluetooth device, select your
phone and attempt to pair with it >
enter the same PIN both on your
Bluetooth device and on your phone
to create the partnership.
Tip:
The partnership is created. Your
phone can now be used as a data
modem. The phone automatically
becomes a data modem over
Bluetooth if a paired device
attempts to connect to it.
Phone Modem
>
Settings > Bluetooth
(the Bluetooth
> under
>
Phone Features
Use your phone as an external modem for another device
by using an infrared or USB connection. Download the
USB driver to your C: drive from the Motorola MPx220
companion CD. Your computer should automatically
add the Motorola MPx220 as a new modem device.
81
Page 84

The
Smartphone 2003 Wireless USB Modem
properly listed in the
Device Manager
Feature Description
Activate
Modem Link
Select the USB or infrared
connection for your phone to link
with another device:
Disconnect your phone from
another device (if you use the USB
connection) > on the Home screen,
press
Start
>
Accessories > Modem Link
should now be
window.
>
More > More > More
> under
8282
Connection
select
>
, press left/right to
USB/IrCOMM
Activate
> connect your phone to
> press
Menu
your computer with the USB data
cable or infrared port.
Deactivate
Modem Link
Phone Features
End the USB or infrared modem
connection:
Start
Accessories
>
Deactivate
Note:
>
More > More > More >
>
Modem Link > Menu
Deactivate the modem link
when you are finished using it in
order to avoid potential problems
when using
ActiveSync
in the same
session.
Page 85

Feature Description
Query Modem
A modem query is necessary to
establish a PC and modem
connection:
On your computer, click on
>
Settings > Control Panel > System
>
Hardware > Device Manager
>
Modems
> in the
window, double click on
2003 Wireless USB Modem
Diagnostics
Note:
tab, click
If the PC and modem
connection is not established in
approximately 30 seconds,
will take over the USB port.
Add
Initialization
String
Add an extra initialization string to
Modem Properties
needed) after querying the modem.
An extra initialization string is
needed on your ph3one for setting
up the GPRS server configuration:
On your computer, click the
Advanced
tab in the
dialogue window
initialization string and change the
APN name as needed (for network’s
initialization string, use:
+CGDCONT=1,“IP”,“apnname”,“”,0,0
Start
Device Manager
Smartphone
> select the
Query Modem
ActiveSync
(change APN as
Modem Properties
>
type in your
.
Phone Features
).
83
Page 86

Feature Description
Add Dial-up
Connection
Phone Features
Add a new dial-up connection:
From the
Network and Dial-up Connection >
double click
click
click
Connection Wizard
Connection Manually
select
and Modem
select
Modem
Number
administrator provides, uncheck
area codes and dialing rules, click
Next
Password
connection name (i.e., Smartphone
USB Cable GPRS), click
select
Control Panel
Make New Connection
Next
> select
Next
> from the
Connect Through Phone Line
> from modem selection,
Smartphone 2003 Wireless USB
, click
Next
type the codes your network
> fill in the
, click
No
, select
select
Dial-up to Internet
Internet
select
Internet
, click
Next
> under
User Name
Next
Next
Telephone
and
> type in
Next
, click
>
>
Finish
,
.
,
8484
Page 87

Feature Description
Connect to
GPRS Network
Connect to the GPRS network:
Open the newly created dial-up
connection
Smartphone 2003 Wireless USB Modem
is selected
all hardware features are selected
as shown above
> click
connected when the dial-up
dialogue window changes to an icon
in your icon tray.
>
click
> click
> click OK, click
Dial
. You are GPRS
Properties
Configure
, verify
, ensure
OK
Personal Organizer
Manage and keep track of contacts and appointments,
maintain a “things to do” list and use the calculator.
Feature Description
Create New
Contact Card
Create a new contact card in your
contacts list:
Start
Tip:
phone number (
automatically set it as the default
communication method. The
contact cards along with the icon
are the entries stored on your SIM
card. To view a contact card, press
Start
desired one > press
>
Contacts > New
If a contact card includes a work
>
Contacts
w
), your phone will
> scroll to a
Action
(A)
.
Phone Features
85
Page 88

8686
Feature Description
Create New
Appointment
Create a new appointment in your
calendar list:
Start
Action
Tip:
Start
desired one > press
>
Calendar > Menu
(A)
>
To view an appointment, press
>
Calendar
> scroll to a
Action
(A)
. Use
the menu options and view your
schedule in 3 different views:
View
(default view, which displays
Agenda
appointments scheduled for current
day),
Week View
(shows schedule for
the specified week, allowing you to
get a quick indication of your free
and busy time and to create an
appointment at a selected time
easily), and
Month View
(provides an
overview of your monthly schedule.
Arrow indicators pointing up
represent morning appointments;
arrows pointing down represent
Phone Features
afternoon appointments; a hollow
box indicates an all-day event; a
solid box indicates you have
morning and afternoon
appointments; and a solid box
surrounded by a hollow box
indicates you have morning and
afternoon appointments plus an allday event).
Page 89

Feature Description
Create New
Task
Create a new task in your tasks list
to track a project from beginning to
completion:
Start
>
More > More > Tasks
>
press up to select the
task here
field.
Tip:
Press
Complete
or
Enter new
Activate
to mark a task as complete or
incomplete. A task can occur once
or repeatedly. A recurring task can
repeat at regular intervals or repeat
based on the date you mark the
task as complete. A task followed
by an exclamation mark indicates
high priority and a task with a down
arrow is marked as low priority.
Overdue tasks display bold and red.
Completed tasks display with the
corresponding check box selected.
Phone Features
87
Page 90

Feature Description
Create New
Voice Note
Create a new short voice recording:
Start
>
More > More > Voice Recorder
hold your phone’s microphone near
your mouth > press
Tip:
On the Home screen, press and
Record
>
.
8888
hold down to quickly open
Recorder
. The length of time to record
Voice
a voice note depends on the
remaining phone storage. To play a
Use Calculator
voice note, press
>
More > Voice Recorder
desired one > press
Perform standard operations for
Start
> scroll to a
Action
(A)
>
More
.
which you would normally use a
handheld calculator:
Start
>
Accessories > Calculator
Tip:
>
More > More > More
Press to select a
mathematical symbol; press to
Phone Features
enter a decimal point; and press
Action
(A)
to perform the calculation.
You can also press up for the
plus sign (+), down for the minus
sign (-), left for the division sign (/),
and right for the multiplication sign
(x).
Page 91

Security
Feature Description
Lock Keypad
Unlock
Keypad
Lock Phone
Unlock Phone
Turn Phone
Lock Off
Lock SIM Card
Prevent accidental key presses and
you still can receive calls and make
emergency calls:
Press and hold
Home screen.
On the Home screen:
Unlock
Prevent access to personal data
and you still can receive calls and
make emergency calls:
Press and hold
Home screen > select
On the Home screen:
Unlock
press
Unlock
Turn the phone lock function off:
Start
>
Disable Phone Lock
Prevent others from using your
phone until the correct password is
entered and you still can make
emergency calls:
Start
>
Enable SIM Lock
End
from the
>
Home
from the
Device lock
.
> enter your password >
.
>
Settings > More > Security
>
Settings > More > Security
Phone Features
89
Page 92

Feature Description
Unlock SIM
Card
Unlock your SIM card:
Start
>
Disable SIM Lock
>
Settings > More > Security
News and Entertainment
Feature Description
Take Picture
Using Normal
Mode
Capture images and store them in
your phone/memory card:
Start
>
More > Camera
> press
up/down to zoom in/out > press
left/right to decrease/increase
9090
the brightness > press
Action
(A)/ to take pictures >
Menu
press
pictures in
PhotoAlbum
Tip:
The
Phone Features
the default when you launch
>
Start
.
Normal
mode is selected as
Action
(A) to save
>
More >
Capture
Camera
/
.
You may press to take pictures
when the flip is closed and the
external viewer is used.
Page 93

Feature Description
Take Picture
Using Timer
Mode
Capture images and store them in
your phone/memory card:
Start
>
>
Start
Tip:
>
More > Camera > Menu
Mode > Timer > Start
Action
(A) to save pictures in
>
More > PhotoAlbum
There is a delay before the
photo is taken. Your phone will beep
for each second of the countdown
(which can be adjusted in
>
Settings > Self-imaging Timer
Take Picture
Using Burst
Mode
Capture images and store them in
your phone/memory card:
Start
>
>
More > Camera > Menu
Mode > Burst > Start
save pictures in
>
PhotoAlbum
Take Self-Shot
Take a shot of yourself and store it
in your phone/memory card:
Start
>
More > Camera
phone flip and use the external
viewer to capture images >
press to take your picture >
open the phone flip > press
Menu
picture in
>
Action
Start
>
Menu
Menu
).
>
Stop
Start
>
More
> close the
(A) to save the
>
More > PhotoAlbum
to
Phone Features
.
91
Page 94

Feature Description
Use Menu
Options
Before Taking
Picture
Before taking pictures, use the
menu options to switch between 3
modes, customize the settings
menu, view photos you took, and
create video
clips:
Use Settings
Menu Before
Taking Picture
Start
Before taking pictures, use the
settings menu to choose a shooting
condition, define the resolution,
>
More > Camera > Menu
select a folder to save photos, keep
files under
100KB
(or place no
constraint at all), conserve power,
enter in a prefix to save as the file
name, include an overlay of the
date on photos, select a contrast/
hue/saturation for the viewer, set a
timer duration for use in taking
delayed photos while in
Timer
, and
set a maximum number of images
that can be taken at a time while in
Burst
Phone Features
:
Start
>
Settings
>
More > Camera > Menu
9292
Page 95

Feature Description
Use Menu
Options After
Taking Picture
After taking pictures, use the menu
options to save the photo, send an
MMS message with the photo
attached, set the photo as your
wallpaper, and set the photo as
Caller ID to a contact (the photo
displays when you receive the call):
Start
>
Tip:
either
Menu
For
Fit in
>
More > Camera > Capture
Apply as Wallpaper
or
displays the entire photo, which
may leave blank areas depending
on the aspect ratio. The latter crops
the photo and fills it entirely on the
screen.
Manage
Picture Using
Album Mode
View and edit your photos, play a
slide show, attach photos to
contacts (Caller ID), detach photos
from contacts, and send photos:
Start
>
More > PhotoAlbum
highlight a photo > press
Best fit
, choose
. The former
>
Menu
Phone Features
.
Tip:
The
Album
mode displays
thumbnail images of photos. To
view a photo, press the
corresponding number. Or, highlight
a desired thumbnail > press
Open
.
93
Page 96

Feature Description
Manage
Picture Using
Single Photo
Mode
Rotate and crop photos, add text/
fun images/comical frames to
photos:
Start
>
More > PhotoAlbum
>
highlight a desired thumbnail >
press
Tip:
Open
The
>
Single Photo
Menu
.
mode displays
each photo on the screen. Press
to display the previous/next
photo in the current folder. If your
photo does not fit entirely on the
display when zooming, press
to scroll. For
toggle between
Crop
, press
Move
and
Action
Resize
(A) to
(use to move and resize the
crop box) for ease of use. For
Art
, press to rotate images.
Add Clip
Phone Features
9494
Page 97

Feature Description
Create Video
Clip
Record video clips with or without
audios:
Start
>
>
More > More > More
Accessories > Video Camera
press left/right to decrease/
>
Customize
Video Camera
increase brightness level > press
Record
Stop
>
recording in
>
More > Accessories > Player
Tip:
between
Press
>
Pause
>
Save
Start
Action
(A) to toggle
Record
and
(if necessary)
to save your
>
More > More
.
Pause
.
Turn audio capture on or off, select
a storage location, adjust the
recording contrast/brightness/
quality value, specify maximum file
size, select the default file name,
and enter in necessary information:
Start
>
Accessories
> (
Settings
>
More > More > More
>
Video Camera > Menu
)
Phone Features
95
Page 98

Feature Description
Play Video
Clip Saved in
Your Phone/
Memory Card
Play recorded clips directly from
your phone or memory card:
Start
Tip:
>
More > More > More > Player
For best results and
performance, store clips on your
storage card instead of the phone
memory. While the clip is playing,
press and hold left/right to
reposition forward/backward in the
clip. A single movement to the left or
right position will reposition the clip
to its end or beginning.
Play
Streaming Clip
from Web Site
Phone Features
Simultaneously download
and play streaming clips
from a Web site:
Start
>
Menu
Web address > press
>
Internet Explorer
>
Address Bar
> enter in a
Go
to a desired stream > press
(
A
)
.
Tip:
You can play a stream/clip
> scroll
Action
directly from a link in emails by
scrolling to a desired link > pressing
Action
(A).
9696
Page 99

Feature Description
Manage Clip/
Stream
Play and pause a clip or stop a
stream, edit a URL to link with,
rename/delete/move a clip, send an
MMS message with a clip attached,
and control the amount of data that
is stored in your phone before
playback begins (increasing the
media buffer may improve the
consistency of your viewing
experience, but will increase the
time before the playback starts):
Start
>
Tip:
>
More > More > More > Player
Menu
To clear the last download clip
from your phone’s cache memory,
press
Start
>
Player > Menu
>
Menu
>
>
More > More > More
>
Options
Clear Cache
.
Phone Features
97
Page 100

Feature Description
Browse Web
Using Internet
Explorer
®
Connect to a favorite Web
page:
Start
scroll to a desired favorite
Go
Tip:
>
Internet Explorer
>
> press
.
While you are connected to the
Internet, to change to other
programs on your phone, press
Home
. This will not close your
Internet connection. To go to the
previous Web page in the same
session, press
disconnect from the Internet, press
End
Edit URL to
Link with
Phone Features
View History
Edit a Web address and
link to it:
Start
>
Menu
Go
press
Tip:
To specify how Web pages
display, press
View a list of the most recently-
Back
.
>
Internet Explorer
>
Address Bar
.
Menu
. To
> edit a URL >
>
Layout
.
visited Web pages:
Start
>
Address Bar > View History > Go
>
Internet Explorer > Menu
9898
 Loading...