

Page 1

MD490 Series
Digital 2.4 GHz
Expandable Cordless Telephone System
with Answering Machine
Système téléphonique
sans fil évolutif numérique 2,4 GHz
avec répondeur
User’s Guide >
Guide de l’utilisateur >
Page 2

Page 3

Welcome
Congratulations on your purchase of a Motorola product!
Product registration is an important step. Registering helps
us facilitate warranty service and permits us to contact you
if your Motorola product requires an update or other
service.
To register your product online, visit:
warranty/cordless
Please retain your original dated sales receipt for your
records. For warranty service of your Motorola product, you
will need to provide a copy of your dated sales receipt to
confirm warranty status. Registration is not required for
warranty coverage.
For a large-print version of this guide, or for product-related
questions, please call:
1-800-353-2729 in the USA
1-800-461-4575 in Canada
1-888-390-6456 TTY (Text Telephone)
On the Web:
www.motorola.com/cordless
Copyright © 2004 by Motorola, Inc.
All rights reserved. No part of this publication may be reproduced in any
form or by any means or used to make any derivative work (such as
translation, transformation or adaptation) without written permission from
Motorola, Inc.
Motorola reserves the right to revise this publication and to make changes
in content from time to time without obligation on the part of Motorola to
provide notification of such revision or change. Motorola provides this guide
without warranty of any kind, either implied or expressed, including, but not
limited to, the implied warranties of merchantability and fitness for a
particular purpose. Motorola may make improvements or changes in the
product(s) described in this manual at any time.
www.motorola.com/
MOTOROLA, the Stylized M Logo, and PhoneWrap are registered in the US
Patent & Trademark Office. All other
property of their respective owners.
product or service names are the
516515-001
1
Page 4

FCC and Interference Information
This equipment complies with Parts 15 and 68 of the FCC rules and
the requirements adopted by the Administrative Council for Terminal
Attachments (ACTA).
A plug and jack used to connect this equipment to the premises wiring
and telephone network must comply with applicable FCC Part 68 rules
and requirements adopted by the ACTA. A compliant telephone cord
and modular plug is provided with this product. It is designed to be
connected to a compatible modular jack that is also compliant. See
installation instructions for details.
Notification of the Local Telephone Company
On the bottom of this equipment is a label that contains, among other
information, a product identifier in the form US:AAAEQ##TXXXX. You
must, upon request, provide this information to your telephone
company.
The digits represented by ## in the product identifier indicate the
Ringer Equivalency Number (REN) for this equipment. The REN is
useful in determining the number of devices you may connect to your
telephone line and still have all of these devices ring when your
FCC and Interference Information
telephone number is called. In most (but not all) areas, the sum of the
RENs of all devices connected to one line should not exceed 5. To be
certain of the number of devices you may connect to your line as
determined by the REN, contact your local telephone company.
Notes
:
•
This equipment may not be used on coin service provided by the
telephone company.
•
Connection to party line service is subject to state tariffs. Contact
the state public utility commission, public service commission or
corporation commission for information.
2
Page 5

•
If your home has specially wired alarm equipment connected to
the telephone line, ensure the installation of this cordless phone
does not disable your alarm equipment. If you have questions
about what will disable alarm equipment, consult your telephone
company or a qualified installer.
•
Notice must be given to the telephone company upon permanent
disconnection of your telephone from your line.
•
The FCC requires that you connect your cordless telephone to the
nationwide telephone network through a modular telephone jack
(USOC RJ11C/RJ11W or RJ14C/RJ14W).
Rights of the Telephone Company
Should your equipment cause trouble on your line which may harm the
telephone network, the telephone company shall, where practicable,
notify you that temporary discontinuance of service may be required.
Where prior notice is not practical and the circumstances warrant such
action, the telephone company may temporarily disconnect service
immediately. In case of such temporary discontinuance, the telephone
company must:
1. Promptly notify you of such temporary discontinuance;
2. Afford you the opportunity to correct the situation;
3. Inform you of your right to bring a complaint to the Commission
pursuant to procedures set forth in Subpart E of Part 68, FCC
Rules and Regulations.
The telephone company may make changes in its facilities, equipment,
operations, or procedures that could affect the operation of the
equipment. If this happens, the telephone company will provide
advance notice in order for you to make necessary modifications to
maintain uninterrupted service.
FCC and Interference Information
3
Page 6

Interference Information
This device complies with Part 15 of the FCC Rules. Operation is
subject to the following two conditions:
1. This device may not cause harmful interference.
2. This device must accept any interference received, including
interference that may cause undesired operation.
This equipment has been tested and found to comply with the limits for
a Class B digital device, pursuant to Part 15 of the FCC Rules. These
limits are designed to provide reasonable protection against harmful
interference in a residential installation.
This equipment generates, uses, and can radiate radio frequency
energy and, if not installed and used in accordance with the
instructions, may cause harmful interference to radio communications.
However, there is no guarantee that interference will not occur in a
particular installation.
If this equipment does cause harmful interference to radio or television
reception, which can be determined by turning the equipment on and
off, the user is encouraged to try to correct the interference with one or
more of the following measures:
Reorient or relocate the receiving antenna (that is, the antenna for the
radio or television that is “receiving” the interference).
Reorient or relocate and increase the separation between the
FCC and Interference Information
telecommunications equipment and the receiving antenna.
Connect the telecommunications equipment into an outlet on a circuit
different from that to which the receiving antenna is connected.
4
Page 7

If these measures do not eliminate the interference, please consult
your dealer or an experienced radio/television technician for additional
suggestions. Also, the Federal Communications Commission has
prepared a helpful booklet, “How to Identify and Resolve Radio/TV
Interference Problems.” This booklet is available from the U.S.
Government Printing Office, Washington, D.C. 20402. Please specify
stock number 004-000-00345-4 when ordering copies.
The FCC requires this product to be serviced only by Motorola or its
authorized service agents.
CAUTION/WARNING: Changes or modifications not expressly
approved by Motorola could void not only the user's authority to
operate the equipment, but also the limited warranty.
Hearing Aid Compatibility
This telephone system meets the FCC standards for hearing aid
compatibility.
FCC and Interference Information
5
Page 8

Industry Canada (IC) Information
This equipment meets the applicable Industry Canada (IC) radio and
terminal equipment technical specifications. This is confirmed by the
certification/registration number found on the label on the bottom of
the base unit. The abbreviation IC before the certification/registration
number only signifies that registration was performed based on a
Declaration of Conformity and that the Industry Canada technical
specifications were met. It does not imply that Industry Canada
approved the equipment. The term “IC:” before the certification/
registration number only signifies that the Industry Canada technical
specifications were met.
The Ringer Equivalency Number (REN) for this equipment is 0.6. The
REN is useful in determining the maximum number of devices you
may connect to your telephone line and still have all of these devices
ring when your telephone number is called. The sum of the RENs of all
devices connected to one line may not exceed 5.
Before installing this cordless phone, you should make sure that it is
permissible to be connected to the facilities of the local
telecommunications company. The equipment must be installed using
an acceptable method of connection. In some cases, the
Industry Canada (IC) Information
telecommunications company’s inside wiring associated with a single
line individual service may be extended by means of a certified
connector assembly (telephone extension cord). You should be aware
that compliance with the above conditions may not prevent
degradation of service in some situations.
The plug and jack used to connect this equipment to the premises
wiring and telephone network must comply with the rules and
requirements in Industry Canada’s CS-03. A compliant telephone cord
and modular plug is provided with this product. It is designed to be
connected to a compatible modular jack that is also compliant.
6
Page 9

For your protection, ensure that the electrical ground connections of
the power utility, telephone lines, and internal metallic water pipe
system, if present, are connected together. This precaution may be
particularly important in rural areas.
Caution:
Contact the appropriate electrical inspection authority or an
electrician, as appropriate.
Note:
the telephone line, ensure the installation of this cordless phone does
not disable your alarm equipment. If you have questions about what
will disable alarm equipment, consult your telephone company or a
qualified installer.
You should not attempt to make such connections yourself.
If your home has specially wired alarm equipment connected to
Repairs
Repairs to this equipment should be made by an authorized Canadian
maintenance facility designated by Motorola. Any repairs or alterations
made by the consumer, or any malfunctions of this equipment, may
give the telecommunications company cause to request that you
disconnect the equipment, and may void the limited warranty.
Privacy
Privacy of communications may not be ensured when using this
telephone. Other devices, including other cordless telephones, may
interfere with the operation of this cordless phone or cause noise
during operation. Units without code access may be accessed by other
radio communications devices.
Hearing Aid Compatibility
This telephone system meets Industry Canada standards for hearing
aid compatibility.
Industry Canada (IC) Information
7
Page 10

Interference Information
This device complies with Industry Canada’s RSS-210. Operation is
subject to the following two conditions:
(1) This device may not cause harmful interference; and
(2) This device must accept any interference received, including
interference that may cause undesired operation.
This equipment has been tested and found to comply with the limits for
a Class B digital device, pursuant to Industry Canada’s ICES-003.
These limits are designed to provide reasonable protection against
harmful interference in a residential installation.
This equipment generates, uses, and can radiate radio frequency
energy and, if not installed and used in accordance with the
instructions, may cause harmful interference to radio communications.
However, there is no guarantee that interference will not occur in a
particular installation.
If this equipment does cause harmful interference to radio or television
reception, which can be determined by turning the equipment on and
off, the user is encouraged to try to correct the interference with one or
more of the following measures:
•
Reorient or relocate the receiving antenna (that is, the antenna for
radio or television that is “receiving” the interference).
•
Reorient or relocate and increase the separation between the
Industry Canada (IC) Information
telecommunications equipment and the receiving antenna.
•
Connect the telecommunications equipment into an outlet on a
circuit different from that to which the receiving antenna is
connected.
If these measures do not eliminate the interference, please consult
your dealer or an experienced radio/television technician for additional
suggestions.
Industry Canada publishes several publications to assist consumers
with solving interference problems, which are available from its offices
or from its web site (strategis.gc.ca).
8
Page 11

Important Safety Instructions
Follow these safety precautions when using your cordless phone to
reduce the risk of fire, electric shock, and injury to persons or property:
1. Keep all slits and openings of the phone unblocked. Do not set the
phone on a heating register or over a radiator. Ensure that proper
ventilation is provided at the installation site.
2. Do not use while wet or while standing in water.
3. Do not use this product near water (for example, near a bath tub,
kitchen sink, or swimming pool).
4. Do not allow anything to rest on the power cord. Place the power
cord so that it will not be walked on.
5. Never insert objects of any kind into the product slits as that may
result in fire or shock.
6. Unplug this product from the wall outlet before cleaning. Do not
use liquid cleaners or aerosol cleaners. Use a damp cloth for
cleaning.
7. Do not disassemble this product. If service or repair work is
required, contact the Motorola address found in the back of this
user’s guide.
8. Do not overload wall outlets and extension cords.
9. Avoid using during an electrical storm. Use a surge protector to
protect the equipment.
10. Do not use this cordless phone to report a gas leak, especially if
you are in the vicinity of the gas line.
Caution:
Listed or CSA Certified Telecommunication Line Cord.
To reduce the risk of fire, use only No. 26 AWG or larger UL
Important Safety Instructions
9
Page 12

Unplug this cordless phone immediately from an outlet if:
•
The power cord or plug is damaged or frayed.
•
Liquid has been spilled into the product.
•
The product has been exposed to rain or water. Do not retrieve
the handset or base until after you have unplugged the power
and phone from the wall. Then retrieve the unit by the
unplugged cords.
•
The product has been dropped or the cabinet has been
damaged.
•
The product exhibits a distinct change in performance.
Installation Guidelines
1. Read and understand all instructions and save them for future
reference.
2. Follow all warnings and instructions marked on the product.
3. Do not install this product near a bath tub, sink, or shower.
4. Operate this phone using only the power source that is indicated
on the marking label. If you are unsure of the power supply to your
home, consult with your dealer or local power company.
5. Do not place this product on an unstable cart, stand, or table. This
product may fall, causing serious damage to the product.
6. Adjust only those controls that are covered by the operating
Important Safety Instructions
instructions. Improper adjustment of other controls may result in
damage and will often require extensive work to restore the
product to normal operation.
7. Clean this product with a soft, damp cloth. Do not use chemicals
or cleaning agents to clean this phone.
10
Page 13

8. Use only the power supply that came with this unit. Using other
power supplies may damage the unit.
9. Because cordless phones operate on electricity, you should have
at least one phone in your home that is not cordless in case the
power in your home goes out.
10. To avoid interference to nearby appliances, do not place the base
of the cordless phone on or near a TV, microwave oven, or VCR.
Caution:
To maintain compliance with the FCC’s RF exposure
guidelines, place the base unit at least 20 cm from nearby persons.
Battery Safety Instructions
•
Do not burn, disassemble, mutilate, or puncture the battery. The
battery contains toxic materials that could be released, resulting
in injury.
•Caution:
There is a risk of explosion if you replace the battery
with an incorrect battery type. Use only the battery that came
with your phone or an authorized replacement recommended by
the manufacturer.
•
Keep batteries out of the reach of children.
•
Remove batteries if storing over 30 days.
•
Do not dispose of batteries in fire, which could result in
explosion.
•
The rechargeable batteries that power this product
must be disposed of properly and may need to be
recycled. Refer to your battery’s label for battery type.
Contact your local recycling center for proper disposal methods.
ITC03-201
Important Safety Instructions
11
Page 14

Contents
Welcome . . . . . . . . . . . . . . . . . . . . . . . . . . . . . . . . . . . . . 1
FCC and Interference Information . . . . . . . . . . . . . . . . 2
Industry Canada (IC) Information . . . . . . . . . . . . . . . . . 6
Important Safety Instructions . . . . . . . . . . . . . . . . . . . . 9
Getting Started . . . . . . . . . . . . . . . . . . . . . . . . . . . . . . . 15
Powering the Base Station and Phone Line
Connection . . . . . . . . . . . . . . . . . . . . . . . . . . . . . . . 16
Wall Mounting the Base Station . . . . . . . . . . . . . . . . . 17
Base Station Controls . . . . . . . . . . . . . . . . . . . . . . . . 19
Expansion Handset Controls . . . . . . . . . . . . . . . . . . . 19
Using the Soft Keys . . . . . . . . . . . . . . . . . . . . . . . . . . 19
Using the Navigation Key . . . . . . . . . . . . . . . . . . . . . 20
Using the Displays . . . . . . . . . . . . . . . . . . . . . . . . . . . 20
Base Station Display . . . . . . . . . . . . . . . . . . . . . . 20
Expansion Handset Display . . . . . . . . . . . . . . . . . 21
Setting Up Your Phone and Expansion Handsets. . . 22
Installing Batteries in the Handsets . . . . . . . . . . . . . . 22
Charging the Expansion Handsets . . . . . . . . . . . . . . 23
Registering an Expansion Handset . . . . . . . . . . . . . . 23
Personalizing Your Phone System . . . . . . . . . . . . . . . 24
Setting the Ring Tone and Ring Volume . . . . . . . . 24
Setting Key Beeps On or Off . . . . . . . . . . . . . . . . 25
Naming the Base Station or Expansion Handset . 26
Entering Text . . . . . . . . . . . . . . . . . . . . . . . . . . . . . 27
Storing Area Codes for Caller ID . . . . . . . . . . . . . . . . 27
Setting the Date and Time . . . . . . . . . . . . . . . . . . . . . 29
Setting the Display Language . . . . . . . . . . . . . . . . . . 30
Setting Touch Tone or Pulse Dialing . . . . . . . . . . . . . 30
12
Page 15

Using the Basic Functions . . . . . . . . . . . . . . . . . . . . . 31
Making a Call Using the Base Station . . . . . . . . . . . . 31
Making a Call Using the Speakerphone on the
Base Station . . . . . . . . . . . . . . . . . . . . . . . . . . . . . . 31
Adjusting the Speakerphone Volume on the
Base Station During a Call . . . . . . . . . . . . . . . . 32
Making a Call Using an Expansion Handset . . . . . . . 32
Adjusting the Volume During a Call on the
Expansion Handset . . . . . . . . . . . . . . . . . . . . . 33
Switching Between the Handset and Speakerphone . 33
Muting a Call . . . . . . . . . . . . . . . . . . . . . . . . . . . . . . . 33
Putting a Call on Hold . . . . . . . . . . . . . . . . . . . . . . . . 33
Redialing a Number . . . . . . . . . . . . . . . . . . . . . . . . . . 33
Finding a Lost or Misplaced Handset . . . . . . . . . . . . . 34
Saving a Number in the Phonebook . . . . . . . . . . . . . 34
Private Phonebooks . . . . . . . . . . . . . . . . . . . . . . . 35
Shared Phonebooks . . . . . . . . . . . . . . . . . . . . . . . 35
Sorting Phonebooks . . . . . . . . . . . . . . . . . . . . . . . . . 36
Calling a Number from the Phonebook . . . . . . . . . . . 37
Editing a Phonebook Entry . . . . . . . . . . . . . . . . . . . . 38
Deleting a Phonebook Entry . . . . . . . . . . . . . . . . . . . 38
Inserting Pauses in a Number . . . . . . . . . . . . . . . . . . 39
Automated Dialing . . . . . . . . . . . . . . . . . . . . . . . . . . . 39
Using Caller ID . . . . . . . . . . . . . . . . . . . . . . . . . . . . . . 40
Reviewing the List of Caller ID Calls . . . . . . . . . . . 40
Store a Caller ID Number in the Phonebook . . . . . 41
Deleting Caller ID Calls . . . . . . . . . . . . . . . . . . . . . 41
Answering Machine . . . . . . . . . . . . . . . . . . . . . . . . . . . 42
Setting Up the Answering Machine . . . . . . . . . . . . . . 42
Turning the Answering Machine On or Off . . . . . . 42
Outgoing Message (OGM) Greeting . . . . . . . . . . . 43
Recording an Outgoing Message (OGM) . . . . . . 43
13
Page 16

Changing the Outgoing Message . . . . . . . . . . . . 43
Erasing the Outgoing Message . . . . . . . . . . . . . . . 44
Setting the Number of Rings Before the Answering
Machine Picks Up . . . . . . . . . . . . . . . . . . . . . . . 44
Using Call Screening . . . . . . . . . . . . . . . . . . . . . . 45
Setting the Security ID Number . . . . . . . . . . . . . . 45
Setting the Voice Prompts
(Canadian models only) . . . . . . . . . . . . . . . . . . 46
Recording a Memo . . . . . . . . . . . . . . . . . . . . . . . . 46
Using the Answer Machine . . . . . . . . . . . . . . . . . . . . 47
Checking Messages from the Base Station . . . . . 47
Checking Messages from an Expansion Handset 47
Checking Messages Remotely from a
Touch-Tone Phone . . . . . . . . . . . . . . . . . . . . . . 48
Advanced Features . . . . . . . . . . . . . . . . . . . . . . . . . . . 50
Conference Calling . . . . . . . . . . . . . . . . . . . . . . . . . . 51
Using the Intercom . . . . . . . . . . . . . . . . . . . . . . . . . . . 51
Intercom Setup . . . . . . . . . . . . . . . . . . . . . . . . . . . 51
Handset to Handset Intercom . . . . . . . . . . . . . . . . 52
Transferring a Call from One Handset to Another . . . 53
Unannounced Transfer . . . . . . . . . . . . . . . . . . . . . 53
Announced Transfer . . . . . . . . . . . . . . . . . . . . . . . 54
Using the Handset as a Walkie Talkie . . . . . . . . . . . . 55
Monitoring a Room . . . . . . . . . . . . . . . . . . . . . . . . . . 56
Deregistering All Expansion Handsets . . . . . . . . . . . 57
Motorola Limited Warranty for the
United States and Canada . . . . . . . . . . . . . . . . . . . . . 58
14
Page 17

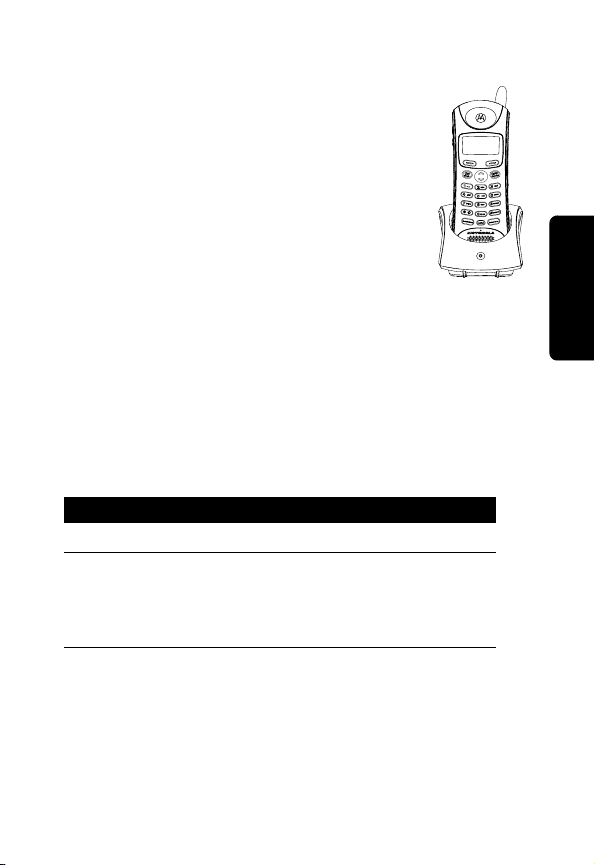
Getting Started
To set up your Motorola digital cordless phone
system:
1 Install optional backup batteries in the base
station, plug into a power outlet, and connect to
phone line (see page 16).
2 Plug in charging bases and install batteries in
expansion handsets (see page 22).
3 Charge expansion handset batteries (see
page 23).
A rechargeable NiCd battery powers each
expansion handset. Charge the battery for about
12 hours before initial use.
4 Register expansion handsets to the base station
(see page 23).
5 Set the ring tone, date, time, and other features of
your expansion handset(s) and base station (see
page 24).
Place the Base Station:
• Away from electrical appliances such as a TV,
personal computer, or another cordless phone.
• In a high and central location with no obstructions,
such as walls.
If you hear noise while using the handset near a
microwave or another cordless phone’s base unit,
move away from the microwave or base unit and
closer to your handset’s base station.
Getting Started
15
Page 18
Powering the Base Station and Phone Line Connection
Important: Before installing or handling batteries,
please read the “Battery Safety Instructions” on
page 11.
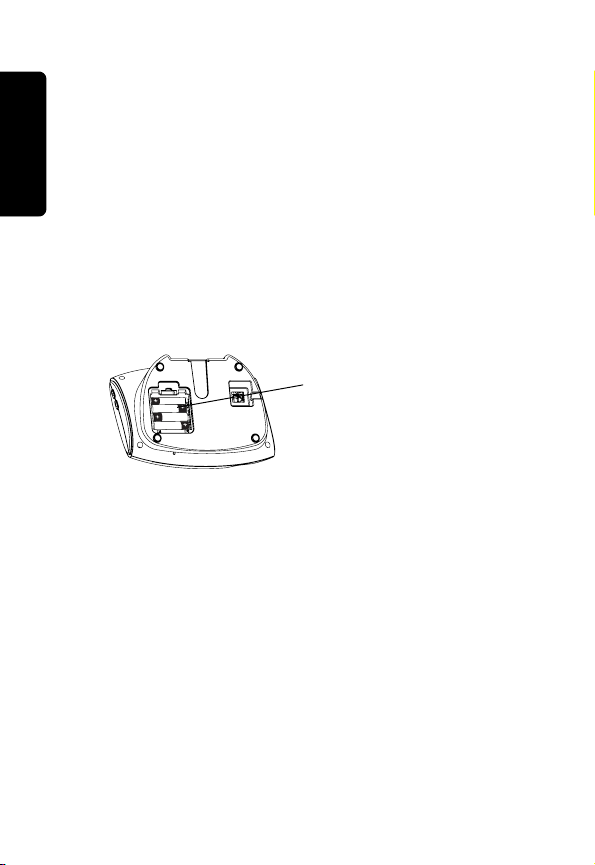
The base station uses 4 AAA alkaline batteries for
optional backup power. To install the batteries:
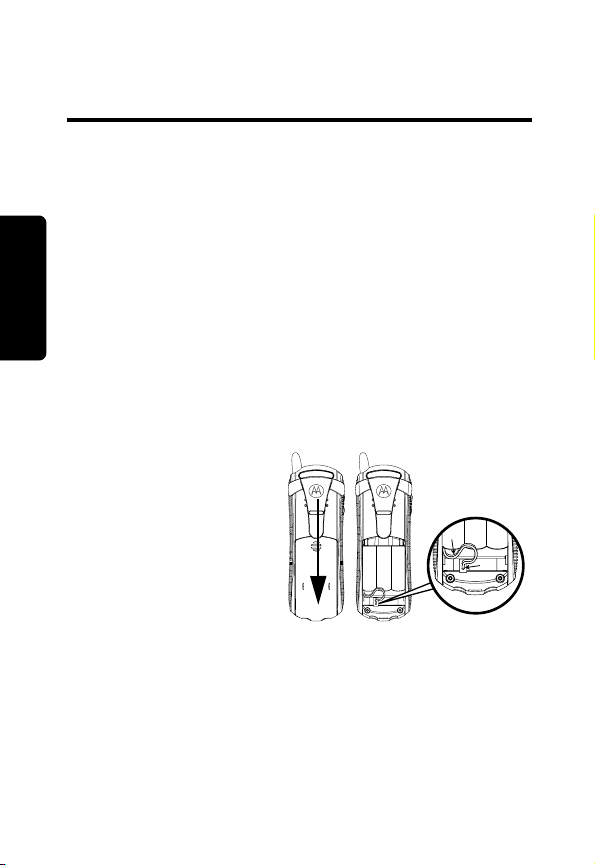
1 With the bottom of the base station facing you,
press the cover latch with a screwdriver to lift and
remove the battery cover.
2 Insert 4 AAA alkaline batteries into the battery
compartment.
Getting Started
Battery
compartment
(cover removed)
3 To replace the cover, insert the tabs of the cover
into the slots and press down until the cover
clicks into place.
4 Plug the power cord into the back of the base
station and into an outlet.
5 Plug one end of the telephone line cord into the
jack on the bottom of the base station.
16
Page 19
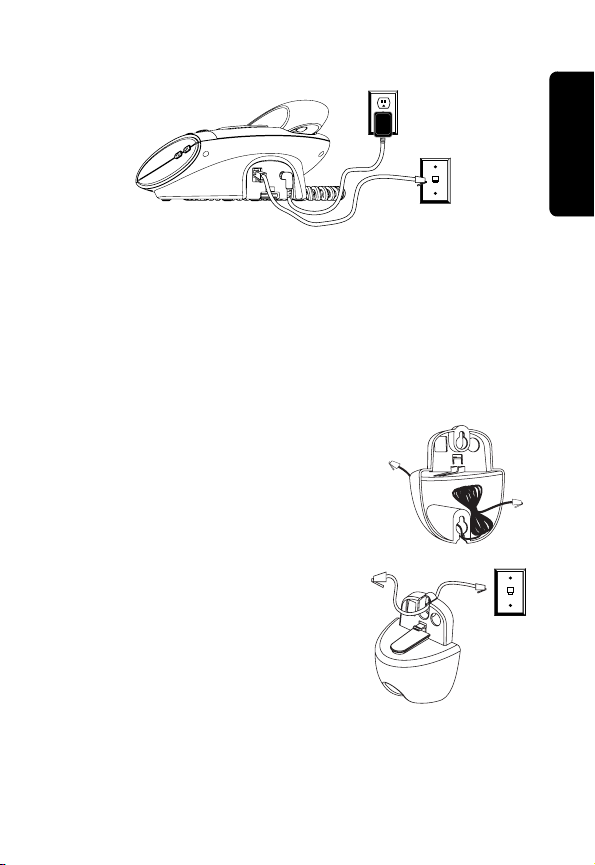
6 Plug the other end of the cord into the phone
jack.
Wall Mounting the Base Station
The base station can be mounted on a wall instead of
placed on a flat surface.
1 Remove the twist-tie from the phone cord. Do not
unfold the cord.
2 Untuck both ends of the cord.
3 Hold the folded cord at the
center and insert it into the
back of the wall mount bracket.
4 Plug the telephone cord into
the phone jack on the wall.
Getting Started
17
Page 20

5 Hang the wall mount
bracket on the phone wall
plate.
6 Plug the other end of the
telephone cord into the
back of the base station.
7 Plug the power cord
into a power outlet, if
not already plugged in.
Getting Started
8 Insert the guide rail
on the wall mount
into the slot on the
bottom of the base
station and push
until it snaps into
place.
Note: To separate wall mount from base, press down
on the middle clasp of the bracket and pull out.
031656o
18
Page 21
Base Station Controls
Left soft key
ON
Navigation
key
del
in use/
voice mail
charge/
page
page
memo
Right soft key
i
Play/stop
message
h
Skip backward
g
Skip forward
f
Delete message
Volume buttons
OFF
Getting Started
031388o
Page a handset
Record a memo
Handsfree
Redial
Intercom
Expansion Handset Controls
Left soft key
function
Left soft key
Right soft key
function
Right soft key
Navigation key
Using the Soft Keys
The left and right soft keys on the base station and
expansion handsets perform the function displayed
above them. For example, pressing the left soft key
while
PHONEBK
numbers and names. The functions change as you
is displayed, opens your list of phone
19
Page 22
move from one screen to the next. In this guide, soft
key functions are shown as the function name
followed by
a, for example, press CHANGE (a).
Using the Navigation Key
c is used to scroll up and
down through menu items, a
list of settings, and other
screens.
On expansion handsets,
points to the currently
Caller ID Log
Ringer
Loc Area Codes
BACK SELECT
selected item, and b
indicates there are more items above and below the
currently selected item.
Getting Started
Press c to scroll up or down on the display.
Using the Displays
Your phone has a display on the base station.
Expansion handsets have a display on the front of
them. The base station and expansion handsets,
when not in use, show the standby screen.
Base Station Display
Time
Base
name
Number of
04:26 PM 09/26
Base (1)
6 Calls
Caller ID
records
PHONEBK MENU
Left soft key function
Date
Answer ON
Battery meter
Number of
New
9
Messages
2Msg
^
Answering
Ringer off
Machine
status
Right soft key function
20
Page 23

Expansion Handset Display
Time
Handset
name
Number of
Caller ID
records
Left soft key function
04:26 PM 09/26
Handset (1)
6 Calls
PHONEBK MENU
Date
Answer ON
Battery meter
Number of
New
9
Messages
2Msg
Right soft key function
^
Ringer off
Answering
Machine
status
Getting Started
21
Page 24
Setting Up Your Phone and Expansion Handsets
If you have expansion handsets, they do not need to
be plugged into a phone line. Simply plug the power
cord into the back of the charging base and into an
outlet wherever you want to place the handset.
Installing Batteries in the Handsets
Important:
Battery Safety Instructions on page 11.
1
Remove the battery cover by pressing on the
recess and sliding down and off the handset.
2
Plug the connector into the receptacle.
3
Insert the battery
pack into the
compartment.
4
Slide and snap the
battery cover back
into place.
Setting Up Your Phone and Expansion Handsets
22
Before installing or handling batteries, read the
Black
Red
Page 25
Charging the Expansion Handsets
Place the handset in the charging base.
The charging LED is solid red when the
handset is charging.
For the initial charge, charge the
battery for at least 12 hours.
charge
Registering an Expansion Handset
You can have up to 4 expansion handsets registered
to a base station.If you try to register a 5th handset,
Too Many Handsets displays.
You only need to register new accessory handsets
you add to your phone system. To register a new
handset:
Action
1
Press OK (a).
2
Press and hold
at least 6 seconds or until you hear a long
beep and see the expansion handset name,
for example, Handset(2).
PAG E
on the base station for
Setting Up Your Phone and Expansion Handsets
23
Page 26

Personalizing Your Phone System
You can personalize the base station and each
expansion handset by setting unique ring tones,
adjusting the ring tone volume for day and night time,
and assigning a name to distinguish 1 handset from
another.
Setting the Ring Tone and Ring Volume
Your can set a ring tone for incoming calls from
numbers that are stored in the phonebook, and a
different ring tone for other incoming calls. The
phonebook ring tone works only if you subscribe to
caller ID service from your local telephone company.
Action
1
Press MENU (a).
2
Scroll to Ringer and press SELECT (a).
3
The Day Volume displays. This is the ringer
volume from 6 am to 9 pm. Press CHANGE
(
a) to scroll through the settings (off, low,
medium, high). Each volume level plays as
Setting Up Your Phone and Expansion Handsets
you press CHANGE (
level you want to set.
4
Scroll down (c) to advance to the Night
Volume.
This is the ringer volume from 9 pm
to 6 am. Press CHANGE (
the settings. Each volume level plays as you
press CHANGE (
you want to set.
5
Scroll down (c) to advance to the Ring Tone.
This is the ring sound used for incoming calls.
a). Stop at the volume
a) to scroll through
a). Stop at the volume level
24
Page 27

Action
6
Press CHANGE (a) to scroll through the ring
tones. Each tone plays as you select CHANGE
(
a). Stop at the ring tone you want to set,
then press DONE (
7
Scroll down (c) to advance to the Phonebook
Tone.
This is the sound for incoming calls
a).
from numbers stored in your phonebook.
You must subscribe to caller ID service from
your local telephone company for this ring
tone to work. Press DONE (
8
Press CHANGE (a) to scroll through the
a) to confirm.
phonebook tones. Each tone plays as you
select CHANGE (
a). Stop at the phonebook
tone you want to set.
9
Press DONE (a).
10
Press EXIT (a) to return to the standby
screen, or c to scroll to a different menu
option.
Setting Key Beeps On or Off
You can turn on or off the key beeps on the base
station and each handset.
Action
1
Press MENU (a).
2
Scroll to Ringer and press SELECT (a).
Setting Up Your Phone and Expansion Handsets
25
Page 28

Action
3
Scroll to
4
Press CHANGE (a) to scroll through the
Key Beeps and press SELECT (a).
selections. When your choice (ON, OFF, or LINKED
to RINGER) display, press SELECT (
a).
Note: When set to LINKED to RINGER, key beeps
are on when the ringer is set to on, and off
when the ringer is set to off.
Naming the Base Station or Expansion Handset
When you register an expansion handset, it is
assigned a default name of Handset(
1, 2, 3, or 4. You can change the name to something
more useful, for example a location (Kitchen) or
someone’s name (Susan). Naming an expansion
handset makes it easy to select the handset from a
list (for example, to intercom another handset).
If you name an expansion handset, the handset
number remains part of the name, for example,
Kitchen(2).
Action
1
Press MENU (a).
2
Scroll to Name handset or Name base, then press
SELECT (a).
3
Use the keypad to enter the new name (up
to12 characters). The flashing underline
shows the input cursor position. Press
DELETE (
a) to backspace and erase
characters to the left of the input cursor, see
Setting Up Your Phone and Expansion Handsets
“Entering Text” on page 27.
x
), where x can be
26
Page 29

Action
4
Press DONE (a).
5
Press EXIT (a) to return to the standby
screen, or c to scroll to a different menu
option.
Entering Text
Press each button on the keypad the indicated
number of times shown in the table below to enter
text, numbers, and other characters. For example, to
enter R, press the 7 button 3 times.
Number of Presses
Button
1space– * , 1
2ABC( 2
3DEF) 3
4GH I #4
5JKL /5
6MNO‘ 6
7PQRS7
8TUV?8
9WXYZ 9
1 2 3 4 5
Storing Area Codes for Caller ID
Setting Up Your Phone and Expansion Handsets
Note: This section applies only if you subscribe to
caller ID service from your local phone company.
You can store up to 5 area codes to make it easy to
dial numbers from your list of caller ID calls. Each
area code can be:
27
Page 30

• 7-digit format
You do not have to dial the area code to call numbers
in this area code.
•10-digit format
You have to dial the 3-digit area code + 7-digit phone
number to call numbers in this area code.
•11-digit format
You have to dial the 1 + 3-digit area code + 7-digit
phone number to call numbers in this area code.
For example, if you store area code 954 in 10-digit
format, when you receive a call from that area code,
the phone number is stored in your call list with all
10 digits. The number will then be in the correct
format for you to dial directly from the call list without
any reformatting.
Action
1
Press MENU (a).
2
Scroll to Loc area code and press SELECT (a).
3
Enter the first area code.
4
Press FORMAT (a) to scroll through the
formats. Stop at the format you want to set
for the area code, then scroll down (c) to
move to the next area code.
5
Repeat steps 3 and 4 to store up to 4 more
area codes. When you are finished, press
DONE (
a).
6
Press EXIT (a) to return to the standby
screen, or c to scroll to a different menu
option.
28
Setting Up Your Phone and Expansion Handsets
Page 31

Setting the Date and Time
Note: If you subscribe to a caller ID service, the date
and time is automatically set after the 2nd ring on an
incoming call.
Action
1
Press MENU (a).
2
Scroll to Date/Time and press SELECT (a).
3
Enter the time. (2 digits are required for
both the hour and the minutes, so use a
leading 0 for 1-digit values.)
4
If using a 12-hour clock, press AM/PM (a)
to switch between am and pm.
5
Scroll down (c) to the next field.
6
Press CHANGE (a) to change the time
format (12- or 24-hour clock). Scroll down
(c) to the next field.
7
Press CHANGE (a) to select date format
(MM/DD or DD/MM).
8
Scroll down (c) to the next field.
9
Enter the current date.
10
Press DONE (a).
11
Press EXIT (a) to return to the standby
screen or c to scroll to a different menu
option.
Setting Up Your Phone and Expansion Handsets
29
Page 32

Setting the Display Language
Action
1
Press MENU (a).
2
Scroll to Language and press SELECT (a).
3
Press c until points to the language you
want to set (English, French, Spanish, or Portuguese).
4
Press DONE (a).
5
Press EXIT (a) to return to the standby
screen or c to scroll to a different menu
option.
Setting Touch Tone or Pulse Dialing
Your phone is set to touch-tone dialing as the default
setting. Do not change this setting unless touch-tone
service is not available in your area.
Action
1
Press MENU (a).
2
Scroll to Tone/Pulse.
3
Press c or CHANGE (a) to switch between
Tone and Pulse.
4
Press DONE (a).
5
Press EXIT (a) to return to the standby
screen or c to scroll to a different menu
option.
30
Setting Up Your Phone and Expansion Handsets
Page 33

Using the Basic Functions
Making a Call Using the Base Station
Pickup the corded handset or press ON. When you
hear the dial tone, dial the number.
or
Enter the phone number, press ON, then pickup the
handset. This lets you see the phone number on the
display before the number is dialed.
During a call, a timer on the display shows the
amount of time on the call.
When you are finished talking, place the handset
back on the base station, or press
Press
ON
or
Handsfree
speakerphone.
If you have call waiting service, press
second call.
to answer a call using the
Making a Call Using the Speakerphone on the Base Station
Press
Handsfree
When the speakerphone is on,
display.
When you are finished talking, press
and turn the speakerphone off.
Note: Pressing
redial list, or phonebook turns the speakerphone on
and dials the number.
, then dial the number.
Handsfree
while in the caller ID list,
OFF
to hang up.
ON
to answer a
V appears on the
OFF
to hang up
Using the Basic Functions
31
Page 34

If you have call waiting service, press ON to answer
the second call.
Adjusting the Speakerphone Volume on the Base Station During a Call
Press the volume up or volume down key on the side
of the base station.
Press to
make caller’s
voice
Louder
Softer
031388o
del
in use/
voice mail
charge/
page
page
memo
When you are not on a call, use the volume keys to
change the day (6 am–9 pm) or night (9 pm–6 am)
ringer volume. The time of day as set on the phone
determines whether you are adjusting the day or
night volume. To set the time, see page 29.
Making a Call Using an Expansion Handset
The procedure for making a call using an expansion
handset is the same as for making one from the base
station. However, when you dial from the base
station, you can use it in speakerphone mode and by
picking up the handset.
Using the Basic Functions
32
Page 35

Adjusting the Volume During a Call on the Expansion Handset
Press to
make caller’s
voice:
Louder
Softer
Switching Between the Handset and Speakerphone
Press
Handsfree
speakerphone.
to toggle between handset and
Muting a Call
Press MUTE (a).
To unmute the call, press UNMUTE (
a).
Putting a Call on Hold
Press HOLD (a).
To return to the call, press UNHOLD (
When a call is on hold, you can use the intercom
features (see page 52).
a) or
ON
.
Redialing a Number
To redial the most recently dialed number:
Action
1
Press ON.
2
Press Redial.
Using the Basic Functions
33
Page 36

To redial one of the last 5 numbers you dialed:
Action
1
Press Redial.
2
Press c until points to the number you
want to redial.
3
Press Dial (a), ON or
If a number in the redial list matches a number in your
phonebook, the phonebook name and number
display in the redial list instead of just the phone
number.
Handsfree
.
Finding a Lost or Misplaced Handset
Press
PAG E
on the base station.
All handsets registered to the base station start
beeping.
Press
OFF
or EXIT (a) to stop paging all handsets,
or OK (
a) on the expansion handset to stop paging
that individual handset. You can also press
the base station to stop paging all handsets
simultaneously.
PAG E
Saving a Number in the Phonebook
Storing numbers in the phonebook makes it easy to
dial numbers you call frequently. You can enter
numbers directly into the phonebook or add them
from the caller ID or redial list. You can also select to
save the number in the private (handsets) or shared
Using the Basic Functions
(base station) phonebook.
on
34
Page 37

Private Phonebooks
The private phonebook is unique to each handset
and is not accessible by other handsets or the base
station. Each private phonebook stores up to 50
names and numbers.
Shared Phonebooks
The shared phonebook is stored in the base station
and is accessible by all handsets. The shared
phonebook stores up to 49 names and numbers.
Action
1
Press PHONEBK (a).
2
Scroll (c) to (New Entry) and press
SELECT (
a).
The private phonebook is the default. To change
phonebooks, press the right soft key (
example, if
soft key (
3
Enter the name (up to 12 characters). Press
SHARED
is displayed, press the right
a
) to enter that phonebook.
DELETE (a) to backspace and erase
characters to the left of the blinking cursor.
See page 27 for information on entering
text.
4
Scroll down (c).
5
Enter the phone number (up to 24 digits).
Press DELETE (
a) to backspace and erase
characters to the left of the blinking cursor.
6
Press DONE (a).
a
). For
Using the Basic Functions
35
Page 38

To store a recently called number in the phonebook:
Action
1
Press
Redial
. The display shows the last
5 numbers you dialed, with the most recent
number at the top.
2
Press c until points to the number you
want to save.
3
Press STORE (a).
4
Enter the name (up to 12 characters). Press
DELETE (
a) to backspace and erase
characters to the left of the blinking cursor.
See
page 27
5
Scroll down (c).
6
The phone number displays in the Number:
for information on entering text
.
field. To modify the number, press
DELETE
(
a
)
to backspace and erase
characters to the left of the blinking cursor.
7
When the phone number is correct as you
want to store it, press DONE (
a).
Note: You can also store a number in the phonebook
from the caller ID list (see page 41).
Sorting Phonebooks
The private and shared phonebooks can be sorted
alphabetically and independently of each other. Once
sorted, a phonebook cannot be unsorted or reset to
its previous list order.
Using the Basic Functions
36
Page 39

Note: The shared phonebook can only be sorted
from the base station.
Action
1
Press PHONEBK (a).
2
Scroll to any phonebook entry.
3
Press OPTIONS (a).
4
Scroll to SORT PHONEBK.
5
Press SELECT (a).
ALPHABETICALLY SORT PHONEBK?
6
Press YES (a) or NO (a).
7
Press OFF to return to the standby screen.
displays.
Calling a Number from the Phonebook
Action
1
Press PHONEBK (a).
2
Press c until points to the entry you want
to call.
Note:
You can also search numerically by
pressing the number(s) of the phone entry you
want to dial.
3
Press ON, Handsfree, or pickup the corded
handset on the base.
Using the Basic Functions
37
Page 40

Editing a Phonebook Entry
When editing a phonebook entry, you can change
upper case letters to lower case letters.
Action
1
Press PHONEBK (a).
2
Press c until points to the entry you want
to edit.
3
Press OPTIONS
4
Scroll to Edit and press SELECT (a).
5
To modify the name, press DELETE (a) to
backspace and erase characters to the left
of the blinking cursor. See page 27 for
information on entering text.
Note:
The first letter of the entry is an uppercase
letter. To change the entry from upper case to
lowercase, press *. A flashing square indicates
that you are in the upper case text entry mode. A
flashing _ indicates that you are in the lowercase
text entry mode.
6
Scroll down (c)
number field.
7
Modify the number.
8
Press DONE (a).
(
a
)
.
to move to the phone
Deleting a Phonebook Entry
Using the Basic Functions
38
Action
1
Press PHONEBK (a).
Page 41

Action
2
Press
c
until points to the entry you
want to delete.
3
Press OPTIONS
4
Scroll to Delete and press SELECT (a).
(
a
)
.
Inserting Pauses in a Number
At the position where you want to insert a pause,
press
# twice. P appears. When you call a number
with a pause, the phone waits 3 seconds before
transmitting the next digits in the dialing sequence.
This is useful, for example, when you have to dial 9 to
get a dial tone or for going into a voicemail system.
Automated Dialing
You can retrieve previously entered information from
the phonebook (such as PIN or credit card number)
during a phone call without having to re-enter the
numbers.
Action
1
While on a call, press
the entry you want to recall.
2
Press DIAL
3
Repeat steps 1 and 2 as many times as
(
a
necessary to complete your transaction.
c
until points to
)
.
Using the Basic Functions
Note: This function is useful when using automated
response systems. For example, you could access
your bank account by dialing the bank's telephone
number, entering your account number (using
39
Page 42

automated dialing), and PIN (using automated
dialing). Then, you can enter your most frequently
used prompt, for example balance inquiry.
Using Caller ID
Note: You must subscribe to caller ID service from
your local telephone company to use the caller ID
features of your phone.
If you subscribe to caller ID service, the caller’s name
and/or number are displayed when you receive an
incoming call.
If no caller ID information was sent from the phone
company, or you do not subscribe to caller ID service,
the display shows Incoming Call.
Reviewing the List of Caller ID Calls
The base station and each expansion handset can
hold up to 40 caller ID records.
Action
1
Press
c to enter the recent calls list. The
most recent call is listed first.
2
Press c to review more calls.
3
To call the number, press ON or
Handsfree
.
To reformat the number before you call it, press
FORMAT
(
a
) until the correct format displays. For
example, if a number you want to call is stored with
the area code (10 digits), but you do not use the area
code to call this number, press
Using the Basic Functions
FORMAT
(
a
number appears without the area code (7 digits). For
information on dialing formats, see page 27.
40
)
until the
Page 43

Store a Caller ID Number in the Phonebook
Action
1
From the caller ID list, press OPTIONS (a).
2
Scroll to
3
The caller’s name displays in the Name: field.
STORE and press SELECT (a).
You can modify the name before storing it.
4
When the name is correct as you want to
store it, press
5
The caller’s phone number displays in the
c to scroll down.
Number: field.You can modify the number
before storing it.
6
When number is correct as you want to
store it, press DONE
(
a
)
.
Note: To modify the name or number before storing
it, press DELETE
(
a
)
to backspace and erase
characters to the left of the blinking cursor. Then use
the keypad to enter the name or number. See
page 27 for information on entering text.
Deleting Caller ID Calls
Action
1
From the caller ID list, press OPTIONS (a).
2
Scroll to Delete (to delete the current caller ID
entry) or Delete All (to delete all caller ID calls)
and press SELECT (
Note:
If deleting all calls, press YES
3
Delete All?
Press NO
prompt.
(
a
a).
(
a
)
at the
)
to return to the caller ID list.
Using the Basic Functions
41
Page 44

Answering Machine
The answering machine stores up to 15 minutes of
messages and/or memos. You can listen to your
messages from the base station, from an expansion
handset, or remotely. You can set up the answering
machine from an expansion handset or the base
station.
Setting Up the Answering Machine
All answering machine features are in the Ans mach setup
menu. To get to this menu:
Action
1
From the standby screen, press MENU (a).
2
Scroll (c) to Ans mach setup and press
SELECT (
a).
Answering Machine
Turning the Answering Machine On or Off
Action
1
Go to the Ans mach setup menu.
2
Scroll to Answer ON/OFF and press SELECT (a).
3
Scroll to select ON or OFF and press
DONE (
a).
4
Press EXIT (a) twice to return to the
standby screen, or press
different function.
c to scroll to a
42
Page 45

Outgoing Message (OGM) Greeting
You can record a personal outgoing message
greeting that plays when you receive a call and do not
answer. If you do not record a personal greeting, a
prerecorded greeting plays when you receive a call.
Recording an Outgoing Message (OGM)
Action
1
Go to the Ans mach setup menu.
2
Scroll to Outgoing Msg and press SELECT (a).
3
Scroll to Record OGM and press SELECT (a).
4
Press YES (a) to record your message.
5
Press END (a) when finished. Press
REPLAY (
a) to listen to the message.
6
Press EXIT (a) twice to return to the
standby screen, or press
c to scroll to a
different feature.
Changing the Outgoing Message
Action
1
Go to the Ans mach setup menu.
2
Scroll to Outgoing Msg and press SELECT (a).
3
Scroll to Change OGM and press SELECT (a).
4
Scroll to Default OGM or Recorded OGM and press
SELECT (
a).
Answering Machine
43
Page 46

Action
5
Press EXIT (a) twice to return to the
standby screen, or press
different feature.
Note: To play the current outgoing message, select
Play OGM from the Outgoing Msg menu.
c to scroll to a
Erasing the Outgoing Message
Note: You cannot erase the default message.
Action
1
Go to the Ans mach setup menu.
2
Scroll to Outgoing Msg and press SELECT (a).
3
Scroll to Erase OGM and press SELECT (a).
4
Press YES (a).
5
Press EXIT (a) twice to return to the
Answering Machine
Note: To play the current outgoing message, select
Play OGM from the Outgoing Msg menu.
standby screen, or press
different feature.
c to scroll to a
Setting the Number of Rings Before the Answering Machine Picks Up
44
Action
1
Go to the Ans mach setup menu.
2
Scroll to Ring Number and press SELECT (a).
Page 47

Action
3
Scroll (c) to select 3, 4, 5, or 6 rings and
press DONE (
4
Press EXIT (a) twice to return to the
a).
standby screen or c to scroll to a different
feature.
Using Call Screening
You can screen incoming calls so you can decide to
answer the call or allow the answering machine to
answer the call.
Action
1
When RECORDING INCOMING MESSAGE displays, press
SCREEN (
a) to hear the caller without
answering.
2
Press ON to answer the call, or press
OFF
to
cancel call screening.
Setting the Security ID Number
The security ID number allows you to remotely
access your messages from any touch-tone phone.
The default ID is 123. To change it:
Answering Machine
Action
1
Go to the Ans mach setup menu.
45
Page 48

Action
2
Scroll (c) to Security ID and press
SELECT (
a).
3
Enter a 3-digit number and press
DONE (a).
4
Press EXIT (a) twice to return to the
standby screen, or press c to scroll to a
different feature.
Setting the Voice Prompts (Canadian models only)
You can choose between English or French voice
prompts.
Action
1
Go to the Ans mach setup menu.
2
Answering Machine
Scroll (c) to scroll to Voice prompt and press
SELECT (
a).
3
Scroll (c) to English or French and press DONE
(
a).
4
Press EXIT (a) twice to return to the
standby screen or, press
c to scroll to a
different feature.
Recording a Memo
Press d on the base station to record a message
that you can playback later.
46
Page 49

Using the Answer Machine
Checking Messages from the Base Station
Action
Press
Press
Press
Press
i
g
h
f
to play and stop messages
to skip forward
to skip backward
to delete message
Checking Messages from an Expansion Handset
Action
1
Press MENU (a), scroll (c) to Messages, and
press SELECT (
2
Scroll (c) to the function you want, then
press SELECT (
2:Play/Stop
3:Skip
4:Answer On/Off
5:Memo
7:Repeat menu
0:Erase
a).
a). The selections are:
Answering Machine
47
Page 50

Checking Messages Remotely from a Touch-
✂
Tone Phone
Action
1
Call your base station.
2
When the answering machine picks up the
call, enter the security ID. A synthesized
voice prompts you with instructions.
3
To skip the voice prompts and operate the
base station directly, press the appropriate
number key on the phone. The selections
are:
Press
2 to play/stop messages
Press
3 to skip forwards
Press
1 to skip backwards
Press
4 to answer (turns the
answering machine on/off)
Press
5 to record a memo
Press
7 to repeat the memo
Press
0 to delete the message
For your convenience, cut this page out and take it
with you so you’ll have it when you call your
answering machine while you are away from home.
Use the other side of this page to write down notes
and phone numbers.
Answering Machine
48
Page 51

Notes
. . . . . . . . . . . . . . . . . . . . . . . . . . . . . . . . . . . . . . . . . . . . . . . . .
. . . . . . . . . . . . . . . . . . . . . . . . . . . . . . . . . . . . . . . . . . . . . . . . .
. . . . . . . . . . . . . . . . . . . . . . . . . . . . . . . . . . . . . . . . . . . . . . . . .
. . . . . . . . . . . . . . . . . . . . . . . . . . . . . . . . . . . . . . . . . . . . . . . . .
. . . . . . . . . . . . . . . . . . . . . . . . . . . . . . . . . . . . . . . . . . . . . . . . .
. . . . . . . . . . . . . . . . . . . . . . . . . . . . . . . . . . . . . . . . . . . . . . . . .
. . . . . . . . . . . . . . . . . . . . . . . . . . . . . . . . . . . . . . . . . . . . . . . . .
. . . . . . . . . . . . . . . . . . . . . . . . . . . . . . . . . . . . . . . . . . . . . . . . .
. . . . . . . . . . . . . . . . . . . . . . . . . . . . . . . . . . . . . . . . . . . . . . . . .
. . . . . . . . . . . . . . . . . . . . . . . . . . . . . . . . . . . . . . . . . . . . . . . . .
. . . . . . . . . . . . . . . . . . . . . . . . . . . . . . . . . . . . . . . . . . . . . . . . .
. . . . . . . . . . . . . . . . . . . . . . . . . . . . . . . . . . . . . . . . . . . . . . . . .
. . . . . . . . . . . . . . . . . . . . . . . . . . . . . . . . . . . . . . . . . . . . . . . . .
. . . . . . . . . . . . . . . . . . . . . . . . . . . . . . . . . . . . . . . . . . . . . . . . .
. . . . . . . . . . . . . . . . . . . . . . . . . . . . . . . . . . . . . . . . . . . . . . . . .
. . . . . . . . . . . . . . . . . . . . . . . . . . . . . . . . . . . . . . . . . . . . . . . . .
. . . . . . . . . . . . . . . . . . . . . . . . . . . . . . . . . . . . . . . . . . . . . . . . .
. . . . . . . . . . . . . . . . . . . . . . . . . . . . . . . . . . . . . . . . . . . . . . . . .
. . . . . . . . . . . . . . . . . . . . . . . . . . . . . . . . . . . . . . . . . . . . . . . . .
. . . . . . . . . . . . . . . . . . . . . . . . . . . . . . . . . . . . . . . . . . . . . . . . .
. . . . . . . . . . . . . . . . . . . . . . . . . . . . . . . . . . . . . . . . . . . . . . . . .
. . . . . . . . . . . . . . . . . . . . . . . . . . . . . . . . . . . . . . . . . . . . . . . . .
Answering Machine
49
Page 52

Advanced Features
To use some of the advance features, you need at
least 2 (up to 4) expansion handsets registered to the
base station.
You can expand your phone system by adding
cordless handsets (up to a total of 4 expansion
handsets). Expansion handsets do not require
connection to a phone line. You can place the
handset and its charging base anywhere a standard
electrical outlet is available.
With multiple expansion handsets, you can:
•
Conference call
•
Talk handset to handset on the intercom
•
Set up handsets to automatically answer intercom
calls
•
Transfer calls from one handset to another
•
Monitor a room
•
Use 2 handsets as walkie talkies
To order expansion handsets, call:
1-800-353-2729 in the USA
1-800-461-4575 in Canada
1-888-390-6456 TTY (Text Telephone)
Advanced Features
www.motorola.com/cordless
On the Web:
50
Page 53

Conference Calling
If one handset is already on a call, the display on
other handsets registered to the same base station
shows Line in use.
Once a second handset is added to the call, the
display on all handsets shows On conference. A
maximum of 2 handsets can be on a conference call
at the same time.
Action
To connect a second handset to a call, press
ON
or
Handsfree
To join a conference call, press
base station.
To disconnect from the conference call, press
OFF
on either or both handsets.
on the second handset.
ON
from the
Using the Intercom
Intercom Setup
You can set up a handset or base station so it
automatically answers an intercom page after 1 or 3
rings. All
factory.
handset to change this setting.
handsets are set to No Auto Answer at the
Perform the following procedure on each
Advanced Features
51
Page 54

Action
1
Press MENU
2
Scroll to Intercom Setup and press SELECT
3
Scroll to one of the answering options and
press SELECT
(
a
(
a
No Auto Answer—The handset does not
automatically answer an intercom page.
After 1 Ring or After 3 Rings—The handset
automatically answers and turns on the
speakerphone after 1 or 3 rings.
4
Press SELECT (a).
5
Press EXIT (a) to return to the standby
screen, or
to scroll to a different menu
c
option.
Handset to Handset Intercom
Action
1
Press
Intercom
2
From the list of handsets, press c until
points to the handset you want to page, or
to Select All to page all handsets.
Note:
Advanced Features
If you have only 1 expansion handset,
pressing the Intercom button automatically
pages the base station and vice-versa.
)
.
(
a
)
.
)
:
.
52
Page 55

Action
3
Press PAGE
4
To answer the page, press OK
(
a
)
.
(
a
)
. The
first handset to respond is connected.
If no one answers the page after 2 minutes,
or if the person you are paging presses
EXIT
(
a
)
or
OFF
, No Answer displays on your
handset and paging stops.
5
When someone answers the page, talk into
the handset.
6
To end the intercom session, press
OFF
.
To turn the speakerphone on or off, press
To mute or unmute the sound, press MUTE
UNMUTE
(
a
)
.
Transferring a Call from One Handset to Another
Unannounced Transfer
Action
1
Press HOLD
2
Press
(
a
Intercom
)
.
.
Handsfree
(
a
)
or
.
Advanced Features
53
Page 56

Action
3
Scroll to the handset you want to transfer
the call to and press PAGE
Note:
the Intercom button automatically pages the
other handset, and vice-versa.
4
Press
transferred to the other handset.
Announced Transfer
Action
1
Follow steps 1 through 3 above.
2
To answer the page on the other handset,
press OK
3
Tell the person on the other handset that
you are transferring a call, then press
UNHOLD
other handset and all three individuals are
on the call.
4
Press OFF
Advanced Features
(
a
)
.
If you have only 1 handset, pressing
OFF
to hang up. The call is
(
a
)
.
(
a
)
. The call is transferred to the
(
a
)
to hang up the 2nd handset.
54
Page 57

Using the Handset as a Walkie Talkie
The walkie talkie feature lets you talk handset to
handset even when the handsets are out of range
from the base station. When a handset is in walkie
talkie mode, you cannot make or receive phone calls
You must complete steps 1 and 2 for both handsets to
use walkie-talkie mode.
Action
1
Press MENU
2
Scroll to Walkie Talkie and press SELECT
3
Press
4
Press the number on the handset keypad
that corresponds to the handset you want to
use walkie talkie with.
For example, if the handset you want to talk
to is named Kitchen(2), press 2 on the keypad.
5
To answer the page on the other handset,
press OK
6
To end the walkie talkie session, press
EXIT
(
(
a
)
Intercom
a
on one of the handsets.
(
a
)
.
)
on either handset.
.
(
a
)
.
Advanced Features
55
Page 58

Monitoring a Room
Room monitoring allows you to place a handset in a
room and listen to the sounds in that room from
another handset.
Action
1
Place a handset in the room to be
monitored.
2
On that handset, press MENU
3
Scroll to Monitor Room and press SELECT
The display shows Ready to monitor room.
4
On the handset you want to listen from,
press
Intercom
. The display lists the
handsets registered to the base station.
Note:
If you have only 1 handset, pressing
the
Intercom
button automatically pages the
other handset.
5
Scroll to the handset you set up monitoring
on and press PAGE
(
a
The handset that was set up for monitoring
automatically answers the page. The microphone on
that handset is turned on, and the speaker is turned
off. The handset you are monitoring from shows
Monitoring (handset name).
Advanced Features
You can also use the base station for monitoring by
following the instructions above from the base
station.
To turn off monitoring, press CANCEL
either handset.
Note:
If you answer an incoming call, monitoring is
turned off.
(
a
)
.
)
.
(
a
)
or
(
a
OFF
)
.
on
56
Page 59

Deregistering All Expansion Handsets
You may deregister all expansion handsets from the
base station.
Caution:
carefully. Missing a step or performing a step incorrectly
may render your telephone system inoperable.
1
2
3
4
5
6
Read and perform the following instructions
Action
Delete or listen to all voice mail messages,
if necessary, to clear the IN USE/voice mail
indicator.
Note:
Skip this step if it does not apply to
your MD Series cordless telephone model.
Press
OFF
on the base station and all
handsets.
Press and hold down
PAG E
on the base
station until the IN USE indicator begins to
flash slowly, then release
Press and hold down
PAG E
PAG E
again until the
.
IN USE indicator begins to flash quickly, then
release
Quickly and fully press and release
PAG E
.
PAG E
again.
Register handset displays. Press OK
(
a
)
to begin the registration process (see
page 23), or press EXIT
(
a
)
.
Advanced Features
57
Page 60

Motorola Limited Warranty for
the United States and Canada
Motorola Limited Warranty
What Does this Warranty Cover?
Subject to the exclusions contained below, Motorola, Inc. warrants its
cordless telephones ("Products"), Motorola-branded or certified
accessories sold for use with these Products ("Accessories"), and
Motorola software contained on CD-ROMs or other tangible media
and sold for use with these Products ("Software") to be free from
defects in materials and workmanship under normal consumer usage
for the period(s) outlined below. This limited warranty is a consumer's
exclusive remedy, and applies as follows to new Motorola Products,
Accessories and Software purchased by consumers in the United
States or Canada, which are accompanied by this written warranty:
Products and Accessories
provided for below. Length of coverage: one (1) year from the date of
purchase by the first consumer purchaser of the product unless
otherwise provided for below.
•
Decorative Accessories and Cases
bezels, PhoneWrap
as defined above, unless otherwise
®
covers and cases. Length of coverage:
. Decorative covers,
limited lifetime warranty for the lifetime of ownership by the
first consumer purchaser of the product.
•
Monaural Headsets
. Ear buds and boom headsets that
transmit mono sound through a wired connection. Length of
coverage: limited lifetime warranty for the lifetime of
ownership by the first consumer purchaser of the product.
•
Products and Accessories that are Repaired or
Replaced
. Length of coverage: The balance of the original
warranty or for ninety (90) days from the date returned to the
consumer, whichever is longer.
•
Software
. Applies only to physical defects in the media that
embodies the copy of the software (e.g. CD-ROM, or floppy
disk). Length of coverage: ninety (90) days from the date of
purchase.
58
Page 61

Exclusions
Normal Wear and Tear
replacement of parts due to normal wear and tear are excluded from
coverage.
Batteries
80% of their rated capacity and batteries that leak are covered by this
limited warranty.
Abuse & Misuse
operation, storage, misuse or abuse, accident or neglect, such as
physical damage (cracks, scratches, etc.) to the surface of the
product resulting from misuse; (b) contact with liquid, water, rain,
extreme humidity or heavy perspiration, sand, dirt or the like, extreme
heat, or food; (c) use of the Products or Accessories for commercial
purposes or subjecting the Product or Accessory to abnormal usage
or conditions; or (d) other acts which are not the fault of Motorola, are
excluded from coverage.
Use of Non-Motorola Products and Accessories
damage that result from the use of Non-Motorola branded or certified
Products, Accessories, Software or other peripheral equipment are
excluded from coverage.
Unauthorized Service or Modification
resulting from service, testing, adjustment, installation, maintenance,
alteration, or modification in any way by someone other than
Motorola, or its authorized service centers, are excluded from
coverage.
Altered Products
date tags that have been removed, altered, or obliterated; (b) broken
seals or that show evidence of tampering; (c) mismatched board
serial numbers; or (d) nonconforming or non-Motorola housings, or
parts, are excluded from coverage.
Communication Services
Products, Accessories or Software due to any communication service
or signal you may subscribe to or use with the Products, Accessories
or Software is excluded from coverage.
Software Embodied in Physical Media
the software will meet your requirements or will work in combination
with any hardware or software applications provided by third parties,
that the operation of the software products will be uninterrupted or
error free, or that all defects in the software products will be corrected.
Software NOT Embodied in Physical Media
embodied in physical media (e.g. software that is downloaded from
the internet), is provided "as is" and without warranty.
. Only batteries whose fully charged capacity falls below
. Periodic maintenance, repair and
. Defects or damage that result from: (a) improper
. Defects or
. Defects or damages
. Products or Accessories with (a) serial numbers or
. Defects, damages, or the failure of
. No warranty is made that
. Software that is not
59
Page 62

Who is Covered
This warranty extends to the first end-user purchaser, only.
What will Motorola Do?
Motorola, at its option, will at no charge repair, replace or refund the
purchase price of any Products, Accessories or Software that does
not conform to this warranty. We may use functionally equivalent
reconditioned/refurbished/pre-owned or new Products, Accessories
or parts. No data, software or applications added to your Product,
Accessory or Software, including but not limited to personal contacts,
games and ringer tones, will be reinstalled. To avoid losing such data,
software and applications please create a back up prior to requesting
service.
How to Get Warranty Service or Other
Information
In the USA, call: In Canada, call:
1-800-353-2729 1-800-461-4575
TTY 1-888-390-6456 TTY 1-888-390-6456
For accessories and software, please call the telephone number
designated above for the product with which they are used. You will
receive instructions on how to ship the Products, Accessories or
Software, at your expense, to a Motorola Authorized Repair Center.
To obtain service, you must include: (a) a copy of your receipt, bill of
sale or other comparable proof of purchase; (b) a written description
of the problem; (c) the name of your service provider, if applicable; (d)
the name and location of the installation facility (if applicable) and,
most importantly; (e) your address and telephone number.
60
Page 63

What Other Limitations Are There?
ANY IMPLIED WARRANTIES, INCLUDING WITHOUT LIMITATION
THE IMPLIED WARRANTIES OF MERCHANTABILITY AND
FITNESS FOR A PARTICULAR PURPOSE, SHALL BE LIMITED TO
THE DURATION OF THIS LIMITED WARRANTY, OTHERWISE THE
REPAIR, REPLACEMENT, OR REFUND AS PROVIDED UNDER
THIS EXPRESS LIMITED WARRANTY IS THE EXCLUSIVE
REMEDY OF THE CONSUMER, AND IS PROVIDED IN LIEU OF
ALL OTHER WARRANTIES, EXPRESS OF IMPLIED. IN NO EVENT
SHALL MOTOROLA BE LIABLE, WHETHER IN CONTRACT OR
TORT (INCLUDING NEGLIGENCE) FOR DAMAGES IN EXCESS
OF THE PURCHASE PRICE OF THE PRODUCT, ACCESSORY OR
SOFTWARE, OR FOR ANY INDIRECT, INCIDENTAL, SPECIAL OR
CONSEQUENTIAL DAMAGES OF ANY KIND, OR LOSS OF
REVENUE OR PROFITS, LOSS OF BUSINESS, LOSS OF
INFORMATION OR DATA, SOFTWARE OR APPLICATIONS OR
OTHER FINANCIAL LOSS ARISING OUT OF OR IN CONNECTION
WITH THE ABILITY OR INABILITY TO USE THE PRODUCTS,
ACCESSORIES OR SOFTWARE TO THE FULL EXTENT THESE
DAMAGES MAY BE DISCLAIMED BY LAW.
Some states and jurisdictions do not allow the limitation or exclusion
of incidental or consequential damages, or limitation on the length of
an implied warranty, so the above limitations or exclusions may not
apply to you. This warranty gives you specific legal rights, and you
may also have other rights that vary from state to state or from one
jurisdiction to another.
Laws in the United States and other countries preserve for Motorola
certain exclusive rights for copyrighted Motorola software such as the
exclusive rights to reproduce and distribute copies of the Motorola
software. Motorola software may only be copied into, used in, and
redistributed with, the Products associated with such Motorola
software. No other use, including without limitation disassembly of
such Motorola software or exercise of the exclusive rights reserved for
Motorola, is permitted.
61
Page 64

62
Page 65

Bienvenue
Félicitations! Vous venez de faire l’acquisition d’un
produit Motorola!
Veuillez conserver votre reçu original indiquant la
date d’achat du produit. Pour obtenir le service
couvert par la garantie pour votre produit Motorola,
vous devrez fournir une copie du reçu indiquant la
date d’achat du produit afin de confirmer l’état de la
garantie.
Pour toute question relative au produit, veuillez
communiquer avec Motorola de la manière suivante :
1-800-353-2729 aux États-Unis
1 800 461-4575 au Canada
1 888 390-6456 ATS (téléphone textuel)
Copyright © 2004 par Motorola, Inc.
Tous droits réservés. Aucune partie de ce guide ne peut être reproduite
sous quelque forme ou par quelque procédé que ce soit, ni utilisée pour
tout travail dérivé (traduction, modification ou adaptation) sans l'accord écrit
de Motorola, Inc.
Motorola se réserve le droit de revoir ce guide et d'en modifier le contenu
de temps à autre sans obligation de notifier de telles révisions ou
modifications. Motorola fournit ce guide sans aucune garantie implicite ni
explicite, y compris mais sans s'y limiter les garanties implicites de qualité
marchande d'adaptation à un usage particulier. Motorola peut apporter des
améliorations ou des modifications au(x) produit(s) décrit(s) dans ce
manuel à tout moment.
Le nom MOTOROLA,
auprès du Patent & Trademark Office des Etats-Unis (bureau
d'enregistrement des brevets et marques). Tous les autres noms de produit
ou de service sont la propriété de leurs détenteurs respectifs.
le logo M stylisé, et le nom PhoneWrap sont déposés
516515-001
63
Page 66

Renseignements d’Industrie Canada (IC)
Cet appareil est conforme aux normes applicables d’Industrie Canada
en matière d’équipement radio et terminal. Le numéro de certification/
enregistrement qui apparaît sur l’étiquette située sous le socle de
l’appareil en fait foi. L’abréviation IC devant le numéro de certification/
enregistrement indique seulement que l’enregistrement a été effectué
en fonction de la Déclaration de conformité et que l’appareil est
conforme aux spécifications techniques d’Industrie Canada. Cette
abréviation ne signifie pas qu’Industrie Canada a approuvé l’appareil.
Le nombre équivalent de sonneries (REN) pour cet appareil est
de 0.6. Le REN sert à déterminer le nombre maximal d’appareils que
vous pouvez connecter à votre ligne téléphonique pour que chacun de
ces appareils puisse sonner lorsque vous recevez un appel. La
somme des REN de tous les appareils connectés à une même ligne
ne doit pas être supérieure à 5.
Avant d’installer ce téléphone sans fil, vous devez vous assurer que
votre compagnie de télécommunication locale en permet la connexion
à son système. Cet appareil doit être installé à l’aide d’une méthode
de connexion acceptable. Dans certains cas, le câblage interne de la
compagnie de télécommunications, associé au service de ligne
individuelle, peut être prolongé au moyen d’un connecteur certifié
(rallonge téléphonique). Vous devez savoir que la conformité aux
Renseignements d’Industrie Canada (IC)
conditions susmentionnées ne peut empêcher, dans certains cas, la
dégradation du service.
La fiche et la prise utilisées pour connecter cet appareil au réseau
téléphonique et au câblage de l’endroit où il est utilisé doivent être
conformes aux règles et exigences CS-03 d’Industrie Canada. Un fil
téléphonique et une prise modulaire conformes accompagnent ce
produit. La fiche est conçue pour être connectée à une prise modulaire
compatible qui est également conforme à ces règlements et exigences.
64
Page 67

Pour votre protection, assurez-vous que les connexions électriques
terrestres de la compagnie d’électricité, les lignes téléphoniques et le
système d’aqueduc métallique interne, le cas échéant, sont raccordés
ensemble. Cette précaution est particulièrement importante dans les
régions rurales.
Attention :
Communiquez avec un électricien ou avec les autorités en charge de
l’inspection électrique, tel qu’approprié.
Nota :
téléphonique, assurez-vous que l’installation de ce téléphone sans fil
ne le désactive pas. Pour savoir ce qui pourrait désactiver votre
système d’alarme, communiquez avec votre compagnie de téléphone
ou avec un installateur qualifié.
Ne tentez pas d’effectuer ces connexions vous-même.
Si un système d’alarme résidentiel est connecté à votre ligne
Réparations
Toute réparation de cet appareil doit être effectuée dans un centre
d’entretien canadien autorisé et désigné par Motorola. Toute
réparation ou modification effectuée par le consommateur, ou toute
défectuosité de cet appareil peut donner droit à la compagnie de
télécommunications d’exiger la déconnexion de l’appareil et peut
également annuler la garantie limitée.
Confidentialité
La confidentialité des communications ne peut être assurée par ce
téléphone. D’autres appareils, y compris des téléphones sans fil,
peuvent interférer avec le fonctionnement de ce téléphone sans fil ou
causer du bruit pendant son utilisation. D’autres dispositifs de
communication radio peuvent accéder aux appareils qui ne sont pas
protégés par un code d’accès.
Compatibilité avec les prothèses auditives
Cet appareil téléphonique est conforme aux normes d’Industrie
Canada relatives à la compatibilité avec les prothèses auditives.
Renseignements d’Industrie Canada (IC)
65
Page 68

Information sur l’interférence
Cet appareil est conforme à la norme RSS-210 d’Industrie Canada.
Son fonctionnement est soumis aux deux conditions suivantes :
(1) Cet appareil ne doit pas causer d’interférence nuisible, et
(2) cet appareil doit supporter toutes les interférences reçues, incluant
celles susceptibles de perturber son bon fonctionnement.
Cet appareil a été testé et déclaré conforme aux limites des appareils
numériques de catégorie B, en vertu de la norme ICSE-003 d’Industrie
Canada. Ces limites ont été établies pour offrir une protection
raisonnable contre toute interférence nuisible dans un environnement
résidentiel.
Cet appareil produit, consomme et peut émettre de l’énergie
radioélectrique et, s’il n’est pas installé et utilisé conformément aux
directives qui l’accompagnent, il peut entraîner des interférences
nuisibles dans les communications radio. Cependant, rien ne peut
garantir qu’il n’y aura pas d’interférence dans un environnement
donné.
Si cet équipement cause de l’interférence nuisible aux radios ou
téléviseurs, ce qui peut être déterminé en mettant l’appareil sous
tension et hors tension, nous vous conseillons d’essayer de corriger la
situation à l’aide des mesures suivantes :
•
Rediriger ou déplacer l’antenne réceptrice, c’est-à-dire l’antenne de
la radio ou du téléviseur qui reçoit l’interférence.
•
Rediriger ou déplacer l’antenne réceptrice et l’éloigner de l’appareil
Renseignements d’Industrie Canada (IC)
de télécommunication.
•
Connecter l’appareil de télécommunication dans une prise dont le
circuit n’est pas le même que celui auquel est connecté l’appareil
avec l’antenne de réception.
Si ces mesures ne permettent pas d’éliminer l’interférence, veuillez
consulter votre distributeur ou un technicien d’expérience en radiotélévision pour obtenir d’autres suggestions.
Industrie Canada offre plusieurs publications pour aider les
consommateurs à régler les problèmes d’interférence. Ces
publications sont disponibles dans les bureaux d’Industrie Canada ou
sur son site Web (strategis.gc.ca).
66
Page 69

Instructions importantes sur la sécurité
Lorsque vous utilisez votre téléphone sans fil, respectez les consignes
de sécurité suivantes pour réduire le risque d’incendie, de choc
électrique, de blessure corporelle ou de bris de biens en :
1. gardant toutes les fentes et ouvertures du téléphone dégagées.
Ne placez pas le téléphone au-dessus d’un registre ou d’un
radiateur et assurez-vous que l’endroit choisi pour l’installation est
suffisamment aéré;
2. n’utilisant pas l’appareil lorsque vous êtes mouillé ou dans l’eau;
3. n’utilisant pas ce produit près de l’eau (une baignoire, un évier ou
une piscine, par exemple);
4. ne laissant rien reposer sur le câble d’alimentation. Placez le câble
d’alimentation de façon à ne pas marcher dessus;
5. n’insérant jamais d’objets, quels qu’ils soient, dans les fentes du
produit, car cela pourrait entraîner un incendie ou un choc
électrique;
6. débranchant le produit de la prise de courant avant de le nettoyer.
N’utilisez pas de nettoyant liquide ou en aérosol et utilisez un linge
humide pour le nettoyage;
7. ne démontant pas le produit. Si des travaux de réparation ou
d’entretien s’avéraient nécessaires, communiquez avec Motorola
à l’adresse indiquée sur la couverture arrière de ce guide de
l’utilisateur;
8. ne surchargeant pas les prises de courant ou les rallonges;
9. évitant d’utiliser le produit pendant un orage. Utilisez un
éliminateur de surtensions pour protéger le matériel;
10. n’utilisant pas le téléphone sans fil pour signaler une fuite de gaz,
en particulier si vous êtes près de la conduite de gaz.
Attention :
cordon d’alimentation n
Pour réduire le risque d’incendie, utilisez uniquement un
o
26 AWG ou supérieur, certifié UL ou CSA.
Instructions importantes sur la sécurité
67
Page 70

Débranchez sur-le-champ ce téléphone sans fil de la prise de
courant dans les situations suivantes :
•
le câble d’alimentation ou sa fiche est endommagé;
•
un liquide a été répandu sur le produit;
•
le produit a été exposé à la pluie ou à l’eau. Ne touchez pas au
combiné ni au socle avant d’avoir débranché le câble
d’alimentation et le fil téléphonique de leur prise. Prenez ensuite
l’appareil par les câbles débranchés;
•
le produit est tombé ou le boîtier est endommagé;
•
le produit a subi une modification de rendement importante.
Directives d’installation
1. Assurez-vous de lire et de bien comprendre toutes les directives
et conservez-les pour vous y référer au besoin.
2. Respectez toutes les mises en garde et instructions indiquées sur
le produit.
3. N’installez pas ce produit près d’une baignoire, d’un évier ou
d’une douche.
4. Utilisez ce téléphone uniquement à partir de la source
d’alimentation indiquée sur l’étiquette. Si vous n’êtes pas certain
du type d’alimentation électrique de votre résidence,
communiquez avec votre distributeur ou votre compagnie
d’électricité.
5. Ne placez pas ce produit sur une table, un stand ou un chariot
Instructions importantes sur la sécurité
instable. Il pourrait être sérieusement endommagé s’il tombait.
6. Réglez uniquement les commandes dont il est question dans les
directives d’utilisation. Le réglage inadéquat des autres
commandes peut endommager le produit et nécessiter un travail
important pour rétablir son fonctionnement normal.
7. Nettoyez ce produit avec un linge doux et humide. N’utilisez pas
d’agents de nettoyage ou de produits chimiques pour nettoyer ce
téléphone.
68
Page 71

8. Utilisez uniquement le bloc d’alimentation qui accompagne cet
appareil. L’utilisation d’autres blocs d’alimentation pourrait
l’endommager.
9. Puisque les téléphones sans fil fonctionnent à l’électricité, vous
devriez avoir au moins un téléphone à fil dans votre résidence, au
cas où il y aurait une panne de courant.
10. Pour éviter l’interférence avec des appareils situés à proximité du
téléphone, ne placez pas le socle du téléphone sans fil près d’un
téléviseur, d’un four à micro-ondes ou d’un magnétoscope.
Attention :
directrices de la FCC relatives à l’exposition aux radiofréquences,
placez le poste de base à au moins 20 cm de toute personne.
Consignes de sécurité relatives aux batteries
Afin que l’appareil continue d’être conforme aux lignes
•
Évitez de brûler, de démonter, de mutiler ou de percer la
batterie. La batterie contient des substances toxiques qui
pourraient s’en écouler et causer des blessures.
• Attention :
batterie par un autre type que celui recommandé. Utilisez
seulement la batterie vendue avec votre téléphone ou une
batterie de remplacement autorisée recommandée par le
fabricant du téléphone.
•
Gardez les batteries hors de portée des enfants.
•
Retirez les batteries du téléphone si vous le rangez pendant
plus de 30 jours.
•
Ne jetez pas les batteries au feu car elles pourraient exploser.
•
Les batteries rechargeables qui alimentent ce produit
doivent être mises au rebut de la manière appropriée
ou être recyclées. Consultez l’étiquette de la batterie
pour connaître le type de batterie. Communiquez avec votre
centre de recyclage local pour connaître les méthodes de mise
au rebut appropriées.
Il y a risque d’explosion si vous remplacez la
Instructions importantes sur la sécurité
69
Page 72

Table de matières
Bienvenue. . . . . . . . . . . . . . . . . . . . . . . . . . . . . . . . . . . 63
Renseignements d’Industrie Canada (IC) . . . . . . . . . 64
Instructions importantes sur la sécurité . . . . . . . . . . 67
Préliminaires. . . . . . . . . . . . . . . . . . . . . . . . . . . . . . . . . 74
Mise sous tension du socle et connexion de la ligne
téléphonique . . . . . . . . . . . . . . . . . . . . . . . . . . . . . . 75
Fixation murale du socle de base . . . . . . . . . . . . . . . 76
Commandes du socle de base . . . . . . . . . . . . . . . . . 78
Commandes du combiné . . . . . . . . . . . . . . . . . . . . . . 78
Utilisation des touches programmables . . . . . . . . . . . 79
Utilisation de la touche de navigation . . . . . . . . . . . . 79
Utilisation des visuels . . . . . . . . . . . . . . . . . . . . . . . . 80
Visuel du socle de base . . . . . . . . . . . . . . . . . . . . 80
Visuel du combiné . . . . . . . . . . . . . . . . . . . . . . . . 80
Configuration du téléphone et des combinés
additionnels . . . . . . . . . . . . . . . . . . . . . . . . . . . . . . . . . 81
Installation de la batterie dans le combiné . . . . . . . . 81
Charge des combinés additionnels . . . . . . . . . . . . . . 82
Enregistrement d’un combiné additionnel . . . . . . . . . 82
Personnalisation du système téléphonique . . . . . . . . 83
Réglage de la tonalité et du volume de sonnerie . 83
Activation et désactivation des timbres des
touches . . . . . . . . . . . . . . . . . . . . . . . . . . . . . . . 85
Attribution d'un nom à un socle de base ou
combiné additionnel . . . . . . . . . . . . . . . . . . . . . 86
Entrée du texte au combiné . . . . . . . . . . . . . . . . . 87
Sauvegarde des indicatifs régionaux
pour la fonction d’identification de l’appelant . . . . . . 88
70
Page 73

Réglage de la date et de l’heure . . . . . . . . . . . . . . . . 89
Réglage de la langue . . . . . . . . . . . . . . . . . . . . . . . . . 91
Réglage de la tonalité d’appel
(Touch Tone ou Pulse) . . . . . . . . . . . . . . . . . . . . . . . 91
Utilisation des fonctions de base . . . . . . . . . . . . . . . . 92
Acheminement d’un appel à l’aide du socle de base . 92
Acheminement d’un appel à l’aide du haut-parleur du
socle de base . . . . . . . . . . . . . . . . . . . . . . . . . . . . . . 92
Réglage du volume du haut-parleur sur le socle de
base durant un appel . . . . . . . . . . . . . . . . . . . . 93
Acheminement d'un appel à l'aide d’un combiné
additionnel . . . . . . . . . . . . . . . . . . . . . . . . . . . . . . . . 94
Réglage du volume en cours d'appel sur le
combiné additionnel . . . . . . . . . . . . . . . . . . . . . 94
Passer du combiné au haut-parleur et vice-versa . . . 94
Blocage du son d’un appel . . . . . . . . . . . . . . . . . . . . . 94
Mise en garde d’un appel . . . . . . . . . . . . . . . . . . . . . . 95
Recomposition d’un numéro . . . . . . . . . . . . . . . . . . . 95
Recherche d’un combiné égaré . . . . . . . . . . . . . . . . . 96
Sauvegarde d’un numéro dans l’annuaire . . . . . . . . . 96
Annuaires privés . . . . . . . . . . . . . . . . . . . . . . . . . . 96
Annuaires partagés . . . . . . . . . . . . . . . . . . . . . . . . 97
Tri des annuaires . . . . . . . . . . . . . . . . . . . . . . . . . . . . 99
Acheminement d’un appel à partir de l’annuaire . . . 100
Modification d’une entrée d’annuaire . . . . . . . . . . . . 100
Suppression d’une entrée d’annuaire . . . . . . . . . . . 101
Insertion de pauses dans un numéro . . . . . . . . . . . 102
Composition automatisée . . . . . . . . . . . . . . . . . . . . 102
Utilisation de l’identification de l’appelant . . . . . . . . 103
Consultation de la liste d’identification de
l’appelant . . . . . . . . . . . . . . . . . . . . . . . . . . . . 103
71
Page 74

Sauvegarde d’un numéro d’identification de
l’appelant dans l’annuaire . . . . . . . . . . . . . . . . 104
Suppression des entrées d’identification
de l’appelant . . . . . . . . . . . . . . . . . . . . . . . . . . 105
Répondeur. . . . . . . . . . . . . . . . . . . . . . . . . . . . . . . . . . 106
Réglage du répondeur . . . . . . . . . . . . . . . . . . . . . . . 106
Activation et désactivation du répondeur . . . . . . 106
Message d’accueil . . . . . . . . . . . . . . . . . . . . . . . 107
Enregistrement d’un message d’accueil . . . . . . . 107
Modification du message d’accueil . . . . . . . . . . . 107
Suppression du message d’accueil . . . . . . . . . . 108
Réglage du nombre de sonneries avant la
réponse par le répondeur . . . . . . . . . . . . . . . . 109
Filtrage des appels . . . . . . . . . . . . . . . . . . . . . . . 109
Réglage du numéro d’identification de sécurité . 110
Réglage des messages-guide vocaux
(pour les modèles canadiens seulement) . . . . 110
Enregistrement d’un mémo . . . . . . . . . . . . . . . . . 111
Utilisation du répondeur . . . . . . . . . . . . . . . . . . . . . . 111
Vérification des messages à partir du socle
de base . . . . . . . . . . . . . . . . . . . . . . . . . . . . . . 111
Vérification des messages à partir du combiné . 112
Vérification des messages à distance à partir
d’un téléphone Touch Tone . . . . . . . . . . . . . . . 113
72
Page 75

Fonctions évoluées . . . . . . . . . . . . . . . . . . . . . . . . . . 115
Conférence téléphonique . . . . . . . . . . . . . . . . . . . . . 116
Utilisation de l’interphone . . . . . . . . . . . . . . . . . . . . . 116
Configuration de l’interphone . . . . . . . . . . . . . . . 116
Interphone d’un combiné à un autre . . . . . . . . . . 117
Transfert d’un appel d’un combiné à un autre . . . . . 118
Transfert non annoncé . . . . . . . . . . . . . . . . . . . . 118
Transfert annoncé . . . . . . . . . . . . . . . . . . . . . . . . 119
Utilisation des combinés comme
émetteurs-récepteurs . . . . . . . . . . . . . . . . . . . . . . . 120
Surveillance d’une pièce . . . . . . . . . . . . . . . . . . . . . 121
Désenregistrement de tous les combinés . . . . . . . . 122
Garantie limitée de Motorola pour le
Canada et les États-Unis . . . . . . . . . . . . . . . . . . . . . . 124
73
Page 76

Préliminaires
Pour préparer votre système de téléphone sans fil
numérique de Motorola :
1 Installez les piles d'urgence optionnelles dans le
socle, branchez le socle dans une prise
électrique et connectez-le à la ligne téléphonique
(voir page 75).
2 Branchez les socles de charge et installez les
piles dans les combinés additionnels (voir
page 81).
Préliminaires
3 Chargez les batteries des combinés additionnels
(voir page 82).
Tous les combinés additionnels sont alimentés
par une batterie au NiCd. Chargez la batterie
pendant 12 heures avant la première utilisation.
4 Enregistrez chaque combiné additionnel auprès
du socle (voir page 83).
5 Réglez la tonalité de sonnerie, la date, l’heure et
toutes les autres fonctions pour chaque socle et
combiné (voir page 83).
Placez le socle :
• loin de tout appareil électrique comme un
téléviseur, un ordinateur personnel ou tout autre
téléphone sans fil;
• dans un endroit central et élevé, sans obstructions
telles que des murs.
74
Page 77

Si vous entendez du bruit pendant que vous utilisez
le combiné près d’un four à micro-ondes ou du socle
d’un autre téléphone sans fil, éloignez-vous de ces
appareils et rapprochez-vous du socle de votre
téléphone.
Mise sous tension du socle et connexion de la ligne téléphonique
Important: Avant d’installer et de manipuler les
piles, veuillez lire les “Consignes de sécurité
relatives aux batteries” relatives aux piles à la
page 69.
Le socle utilise quatre piles alcalines AAA comme
source d'alimentation d'urgence facultative. Pour
installer les piles dans le socle :
1 Sous le socle, appuyez sur la patte de
déclenchement du couvercle de logement de
piles à l’aide d’un tournevis, puis soulevez le
couvercle de piles pour le retirer du socle.
2
Insérez quatre piles alcalines AAA dans le logement
de piles.
Battery
compartment
(cover removed)
Préliminaires
3
Pour replacer le couvercle, insérez les pattes du
couvercle dans les fentes du socle et appuyez sur le
couvercle jusqu’à ce qu’il s’enclenche.
4 Connectez une extrémité du câble d’alimentation
dans la prise située à l’arrière du socle, puis
l’autre extrémité dans une prise de courant.
75
Page 78

5 Connectez une extrémité du fil téléphonique à la
fiche située à la base du socle.
6 Connectez l'autre extrémité du fil à la prise
téléphonique.
Fixation murale du socle de base
Préliminaires
Le socle de base peut être fixé à un mur plutôt que
placé sur une surface plane.
1 Enlevez l’attache du fil téléphonique. Ne dépliez
pas le fil.
2 Sortez les deux extrémités du fil.
3 Tenez le fil plié par le centre et
insérez-le à l’arrière du support
de fixation murale.
4 Connectez le fil téléphonique
à la prise téléphonique
murale
.
76
Page 79

5 Fixez le support de fixation
murale à la plaque
téléphonique murale.
6 Connectez l’autre extrémité
du fil téléphonique à la
prise située à l’arrière du
socle.
7 Si ce n'est déjà fait,
branchez le câble
d'alimentation dans
une prise de courant.
8 Insérez les quatre
rails de la plaque de
fixation murale dans
les fentes situées à
l'arrière du socle,
puis enfoncez le
socle jusqu'à ce qu'il
031656o
s'enclenche.
Nota: Pour séparer la fixation murale du socle,
appuyez sur le fermoir central du support et tirez sur
le support.
Préliminaires
77
Page 80

Commandes du socle de base
Touche programmable
de droite
i
Ecouter/arrêter le
message
h
Reculer d’un message
g
Avancer d’un message
f
del
in use/
voice mail
charge/
page
page
memo
Supprimer le message
Commandes de volume
Mise Hors Tension
Appeler un combiné
Enregistrer un mémo
Préliminaires
Touche
programmable
de gauche
Mise Sous
Te ns i on
Touche de
navigation
031388o
Mains libres
Recomposition
Commandes du combiné
Fonction de la
touche
programmable
de gauche
Touche
programmable
de gauche
78
Interphone
Fonction de la
touche
programmable
de droite
Touche
programmable
de droite
Touche de navigation
Page 81

Utilisation des touches programmables
Les touches programmables de gauche et de droite
du socle et des combinés additionnels effectuent la
fonction affichée. Par exemple, si vous appuyez sur
la touche programmable de gauche pendant que
PHONEBK
(annuaire) est affiché, le téléphone ouvre
votre liste de noms et de numéros de téléphone. Les
fonctions changent lorsque vous passez d’un écran à
un autre. Dans ce guide, les fonctions des touches
programmables sont indiquées par le nom de la
fonction suivi du symbole
sur CHANGE (
a).
a, par exemple appuyez
Utilisation de la touche de navigation
c permet de faire défiler les
éléments du menu, la liste des
paramètres et d’autres écrans.
Sur les combinés additionnels,
le symbole indique
l’élément sélectionné et le
symbole b indique qu’il y a
d’autres éléments au-dessus et en dessous de
l’élément sélectionné.
Appuyez sur c pour faire défiler le visuel vers le haut
ou vers le bas.
Caller ID Log
Ringer
Loc Area Codes
BACK SELECT
Préliminaires
79
Page 82

Utilisation des visuels
Votre système téléphonique comprend un visuel sur
le socle de base. Un visuel se trouve également sur
la face avant de chaque combiné additionnel.
Lorsque le socle et les combinés ne sont pas utilisés,
les visuels affichent stand by screen (l’écran de
veille).
Visuel du socle de base
Nom du
Préliminaires
socle
Nombre
d’entrées
d’identification
de l’appelant
Fonction de la touche
programmable de gauche
Visuel du combiné
Nom du
combiné
Nombre
d’entrées
d’identification
de l’appelant
Fonction de la touche
programmable de gauche
80
Heure
04:26 PM 09/26
Base (1)
6 Calls
Answer ON
PHONEBK MENU
Heure
04:26 PM 09/26
Handset (1)
6 Calls
Answer ON
PHONEBK MENU
2Msg
Fonction de la touche
programmable de droite
2Msg
Fonction de la touche
programmable de droite
VoltmètreDate
9
^
9
^
Nombre de
nouveaux
messages
Sonnerie
désactivée
État du
répondeur
VoltmètreDate
Nombre de
nouveaux
messages
Sonnerie
désactivée
État du
répondeur
Page 83

Configuration du téléphone et des combinés additionnels
Si vous possédez des combinés additionnels, il n’est
pas nécessaire de les connecter à une ligne
téléphonique. Il suffit de connecter le cordon
d’alimentation situé à l’arrière de chaque socle dans
une prise électrique, à l’endroit où vous désirez
placer le combiné.
Installation de la batterie dans le combiné
Important :
batterie, veuillez lire les consignes de sécurité
relatives aux batteries à la page 69.
1. Retirez le couvercle de batterie en appuyant sur
le renfoncement et en faisant glisser le couvercle
avant de le soulever du combiné.
2. Branchez le connecteur dans la prise.
3. Insérez la batterie
dans son
logement.
4. Faites glisser le
couvercle de batterie en place et
enclenchez-le.
Avant d’installer et de manipuler la
Noir
Black
Rouge
Red
additionnels
Configuration du téléphone et des combinés
81
Page 84

Charge des combinés additionnels
Placez le combiné dans le socle de
charge. Le voyant de charge à DEL
s’allume en rouge pendant la charge du
combiné.
Pour la charge initiale, vous devez
charger la batterie pendant au moins
12 heures.
Enregistrement d’un combiné additionnel
Vous pouvez enregistrer jusqu'à quatre combinés
auprès d'un socle de base. Si vous tentez d'en
enregistrer un cinquième, le visuel affiche
additionnels
Handsets.
Vous devez enregistrer uniquement les nouveaux
combinés annexes ajoutés à votre système
téléphonique. Pour enregistrer un nouveau combiné :
Action
1
Appuyez sur OK (a).
2
Tenez la touche
PAG E
enfoncée sur le socle
de base pendant au moins six secondes ou
jusqu’à ce que vous entendiez une longue
tonalité et que le nom du combiné s’affiche,
Configuration du téléphone et des combinés
par exemple Handset(2).
Too Many
charge
82
Page 85

Personnalisation du système téléphonique
Vous pouvez personnaliser chaque combiné ainsi
que le socle de base en lui attribuant une tonalité de
sonnerie unique, en réglant le volume de la sonnerie
pour le jour et pour la nuit et en lui attribuant un nom
afin de le distinguer des autres combinés.
Réglage de la tonalité et du volume de sonnerie
Vous pouvez régler une tonalité de sonnerie pour les
appels provenant des numéros sauvegardés dans
l’annuaire et une tonalités de sonnerie différente
pour tous les autres appels entrants. La fonction de
tonalité de sonnerie pour les appels sauvegardés
dans l’annuaire fonctionne seulement si vous êtes
abonné au service d’identification de l’appelant.
Action
1
Appuyez sur MENU (a).
2
Faites défiler jusqu’à Ringer, puis appuyez sur
SELECT (a).
3
Le volume de jour s’affiche. Il s’agit du
volume de la sonnerie entre 6 h et 21 h.
Appuyez sur
les réglages (désactivé, faible, moyen,
élevé). Chaque niveau de volume se fait
entendre lorsque vous appuyez sur
(
a). Arrêtez-vous au niveau de volume
désiré.
CHANGE (a) pour faire défiler
CHANGE
additionnels
Configuration du téléphone et des combinés
83
Page 86

Configuration du téléphone et des combinés
additionnels
Action
4
Faites défiler vers le bas (c) pour passer au
volume pour la nuit.
Il s’agit du volume de la
sonnerie entre 21 h et 6 h. Appuyez sur
(
a) pour faire défiler les réglages.
Chaque niveau de volume se fait entendre
lorsque vous appuyez sur
CHANGE (a).
Arrêtez-vous au niveau de volume désiré.
5
Faites défiler vers le bas (c) pour passer à
Ring Tone. Il s’agit de la tonalité de sonnerie
pour les appels entrants.
6
Appuyez sur CHANGE (a) pour faire défiler
les tonalités de sonnerie. Chaque tonalités
de sonnerie se fait entendre lorsque vous
sélectionnez
CHANGE (a). Arrêtez-vous à la
tonalité de sonnerie désirée et appuyez sur
DONE (a).
7
Faites défiler vers le bas (c) pour passer à
Phonebook Tone.
Il s’agit de la tonalité de
sonnerie pour les appels entrants dont le
numéro est sauvegardé dans l’annuaire.
Pour utiliser cette tonalité de sonnerie, vous
devez être abonné au service d’identification
de l’appelant auprès de votre compagnie de
téléphone. Appuyez sur
DONE (a) pour
confirmer.
8
Appuyez sur CHANGE (a) pour faire défiler
les tonalités d’annuaire. Chaque tonalités de
sonnerie se fait entendre lorsque vous
sélectionnez
CHANGE (a). Arrêtez-vous à la
tonalité d’annuaire désirée.
9
Appuyez sur DONE (a).
CHANGE
84
Page 87

Action
10
Appuyez sur EXIT (a) pour retourner à
l’écran de veille ou c pour faire défiler
jusqu’à une autre option de menu.
Activation et désactivation des timbres des touches
Il est possible d'activer et de désactiver le timbre
produit par les touches du socle de base et des
combinés.
Action
1
Appuyez sur MENU (a).
2
Faites défiler jusqu’à Ringer, puis appuyez sur
SELECT (a).
3
Faites défiler jusqu’à Key Beeps, puis appuyez
sur
SELECT (a).
4
Appuyez sur CHANGE (a) pour faire défiler
les timbres des touches. Lorsque l'option
que vous désirez (
s'affiche, appuyez sur
Nota : Quand l'option
choisie, la fonction de timbre des touches
est activée si la sonnerie l'est et désactivée
si la sonnerie du socle de base ou d'un
combiné est désactivée.
ON, OFF ou LINKED to RINGER)
SELECT (a).
LINKED to RINGER est
additionnels
Configuration du téléphone et des combinés
85
Page 88

Attribution d'un nom à un socle de base ou combiné additionnel
Lorsque vous enregistrez un combiné additionnel, le
nom « Handset (
lequel x peut être 1, 2, 3 ou 4. Vous pouvez
remplacer ce nom par un nom plus utile, par exemple
un endroit (Cuisine) ou le nom d’une personne (Suzanne).
En attribuant un nom aux combinés additionnels, il
devient plus facile de les sélectionner dans une liste
(pour joindre un combiné par interphone, par
exemple). Lorsque vous attribuez un nom à un
combiné additionnel, le numéro du combiné reste
accolé au nom, par exemple « Cuisine(2) ».
1
2
additionnels
3
4
5
Configuration du téléphone et des combinés
x
) » lui est attribué par défaut, pour
Action
Appuyez sur MENU (a).
Faites défiler jusqu’à Name handset ou Name base,
puis appuyez sur
Utilisez le clavier pour entrer le nouveau
nom (jusqu’à 12 caractères). La barre de
soulignement clignotante indique le curseur,
c’est-à-dire la position d’insertion. Appuyez
sur
DELETE (a) pour reculer et effacer des
caractères à la gauche du curseur. Pour
savoir comment entrer du texte, voir
“Entrée du texte au combiné” à la page 87.
Appuyez sur DONE (a).
Appuyez sur EXIT (a) pour retourner à
l’écran de veille ou c pour faire défiler
jusqu’à une autre option de menu.
SELECT (a).
86
Page 89

Entrée du texte au combiné
Appuyez sur les touches du clavier le nombre de fois
indiqué pour entrer le texte, les chiffres et les autres
caractères. Par exemple, pour entrer un R, appuyez
trois fois sur la touche 7.
Nombre d’enfoncements
Touche
1 espace – * , 1
2ABC( 2
3DEF) 3
4GH I #4
5JKL /5
6MNO‘ 6
7PQRS7
8TUV?8
9WXYZ 9
1 2 3 4 5
additionnels
Configuration du téléphone et des combinés
87
Page 90

Sauvegarde des indicatifs régionaux pour la fonction d’identification de l’appelant
Nota : Cette section s’applique seulement si vous
êtes abonné au service d’identification de l’appelant
auprès de votre compagnie de téléphone locale.
Vous pouvez sauvegarder jusqu’à cinq indicatifs
régionaux pour simplifier la composition de numéros
à partir de votre liste d’identification de l’appelant.
Chaque indicatif régional peut être :
•
en format 7 chiffres
Vous n’avez pas à composer l’indicatif régional
pour acheminer un appel aux numéros de cet
indicatif.
•
en format 10 chiffres
Vous devez composer l’indicatif régional à
3 chiffres ainsi que le numéro de téléphone à
additionnels
7 chiffres pour acheminer un appel aux numéros
de cet indicatif.
•
en format 11 chiffres
Vous devez composer le 1 puis l’indicatif régional
à 3 chiffres ainsi que le numéro de téléphone à
7 chiffres pour acheminer un appel aux numéros
de cet indicatif.
Par exemple, si vous sauvegardez 954 en format
10 chiffres, lorsque vous recevrez un appel
provenant de cet indicatif régional, le numéro de
téléphone sera sauvegardé dans votre liste d’appels
avec tous les numéros à 10 chiffres. Le numéro sera
Configuration du téléphone et des combinés
alors dans le bon format pour que vous puissiez le
composer directement sans avoir à le retoucher.
88
Page 91

Action
1
Appuyez sur MENU (a).
2
Faites défiler jusqu’à Loc area code et appuyez sur
SELECT (a).
3
Entrez le premier indicatif régional.
4
Appuyez sur FORMAT (a) pour faire défiler les
formats. Arrêtez-vous au format que vous
désirez régler pour cet indicatif régional, puis
faites défiler vers le bas (c) pour passer à
l’indicatif régional suivant.
5
Répétez les étapes 3 et 4 pour sauvegarder
jusqu’à quatre autres indicatifs régionaux.
Lorsque vous avez terminé, appuyez sur
(
a).
6
Appuyez sur EXIT (a) pour retourner à
DONE
l’écran de veille ou c pour faire défiler
jusqu’à une autre option de menu.
Réglage de la date et de l’heure
Nota: Si vous êtes abonné au service d'identification
de l'appelant, lors d’un appel entrant, la date et
l’heure sont réglées automatiquement après la
deuxième sonnerie.
Action
1
Appuyez sur MENU (a).
2
Faites défiler jusqu’à Date/Time et appuyez sur
SELECT (a).
3
Entrez l’heure (deux chiffres sont requis
pour l’heure et deux chiffres pour les
minutes; vous devez donc faire précéder les
valeurs à un chiffre d’un zéro).
additionnels
Configuration du téléphone et des combinés
89
Page 92

additionnels
Action
4
Appuyez sur AM/PM (a) pour passer de am
à pm et vice-versa.
Nota : Cela s’applique seulement si vous
utilisez le format 12 heures.
5
Faites défiler vers le bas (c) pour passer au
champ suivant.
6
Appuyez sur CHANGE (a) pour changer le
format de l’heure (12 heures ou 24 heures).
Faites défiler vers le bas (c) pour passer au
champ suivant.
7
Appuyez sur CHANGE (a) pour sélectionner le
format de la date (MM/JJ ou JJ/MM).
8
Faites défiler vers le bas (c) pour passer au
champ suivant.
9
Entrez la date.
10
Appuyez sur DONE (a).
11
Appuyez sur EXIT (a) pour retourner à
l’écran de veille ou c pour faire défiler
jusqu’à une autre option de menu.
90
Configuration du téléphone et des combinés
Page 93

Réglage de la langue
Action
1
Appuyez sur MENU (a).
2
Faites défiler jusqu’à Language, puis appuyez
sur
SELECT (a).
3
Appuyez sur c jusqu’à ce que pointe
vers la langue à régler.
4
Appuyez sur DONE (a).
5
Appuyez sur EXIT (a) pour retourner à
l’écran de veille ou c pour faire défiler
jusqu’à une autre option de menu.
Réglage de la tonalité d’appel (Touch Tone ou Pulse)
Votre téléphone est réglé à la composition par
tonalité Touch Tone. Ne modifiez pas ce réglage à
moins que le service Touch Tone ne soit pas
disponible dans votre localité.
Action
1
Appuyez sur MENU (a).
2
Faites défiler jusqu’à Tone/Pulse.
3
Appuyez sur c ou CHANGE (a) pour passer
de Tone à Pulse et vice-versa.
4
Appuyez sur DONE (a).
5
Appuyez sur EXIT (a) pour retourner à
l’écran de veille ou c pour faire défiler
jusqu’à une autre option de menu.
additionnels
Configuration du téléphone et des combinés
91
Page 94

Utilisation des fonctions de base
Acheminement d’un appel à l’aide du socle de base
Décrochez le combiné filaire et appuyez sur ON.
Lorsque vous entendez la tonalité de composition,
composez le numéro.
ou
Entrez le numéro de téléphone, appuyez sur ON puis
décrochez le combiné. Cela vous permet de voir le
numéro de téléphone au visuel avant d’acheminer
l’appel.
Pendant l’appel, un compteur s’affiche au visuel pour
indiquer la durée de l’appel.
Lorsque vous avez fini de parler, replacez le combiné
sur le socle ou appuyez sur OFF pour raccrocher.
Appuyez sur ON ou sur Handsfree pour répondre
avec le haut-parleur.
Si vous êtes abonné au service d’appel en attente,
appuyez sur ON pour répondre au deuxième appel.
Acheminement d’un appel à l’aide du haut-parleur du socle de base
Appuyez sur Handsfree puis composez le numéro.
Lorsque le haut-parleur est activé, «
visuel.
Utilisation des fonctions de base
92
V» s'affiche au
Page 95

Lorsque vous avez fini de parler, appuyez sur OFF
pour raccrocher et désactiver le haut-parleur.
Nota : L’enfoncement de la touche Handsfree à
partir de la liste d’identification de l’appelant, de la
liste de recomposition ou de l’annuaire active le
microphone et compose le numéro.
Si vous êtes abonné au service d’appel en attente,
appuyez sur ON pour répondre au deuxième appel.
Réglage du volume du haut-parleur sur le socle de base durant un appel
Appuyez sur la touche de volume vers le haut ou vers
le bas sur le côté du socle de base.
Appuyez sur cette
touche pour
entendre la voix de
l'interlocuteur plus
del
fort ou moins fort.
in use/
voice mail
charge/
page
page
memo
031388o
Lorsque vous n'êtes pas sur un appel, utilisez les
touches de volume pour changer le volume de la
sonnerie de jour (6 h à 21 h) ou de nuit (21 h à 6 h).
L’heure indiquée sur le combiné détermine le volume
que vous réglez (jour ou nuit). Pour régler l'heure,
voir la page 89.
Plus fort
Moins fort
Utilisation des fonctions de base
93
Page 96

Acheminement d'un appel à l'aide d’un combiné additionnel
La procédure d'acheminement d'un appel à partir
des combinés additionnels est la même que pour le
socle de base. Cependant, lorsque vous acheminez
un appel à partir du socle de base, vous pouvez
l’utiliser en mode haut-parleur et en décrochant le
combiné.
Réglage du volume en cours d'appel sur le combiné additionnel
Appuyez sur cette
touche pour entendre la
voix de l'interlocuteur
plus fort ou moins fort.
Plus fort
Moins fort
Passer du combiné au haut-parleur et vice-versa
Appuyez sur Handsfree pour passer du combiné au
haut-parleur et vice-versa.
Blocage du son d’un appel
Appuyez sur MUTE (a).
Pour débloquer le son de l’appel, appuyez sur
UNMUTE (
Utilisation des fonctions de base
94
a).
Page 97

Mise en garde d’un appel
Appuyez sur HOLD (a).
Pour revenir à l’appel, appuyez sur UNHOLD (
sur ON.
Lorsqu’un appel est en attente, vous pouvez utiliser
les fonctions d’interphone (voir la page 116).
a) ou
Recomposition d’un numéro
Pour recomposer le dernier numéro appelé :
Action
1
Appuyez sur la touche ON.
2
Appuyez sur la touche Redial.
Pour recomposer l’un des cinq derniers numéros
appelés :
Action
1
Appuyez sur la touche Redial.
2
Appuyez sur c jusqu’à ce que pointe vers
le numéro à recomposer.
3
Appuyez sur Dial (a) ou sur ON, ou
encore sur Handsfree.
Utilisation des fonctions de base
Si un numéro de la liste de recomposition correspond
à un numéro de l’annuaire, le nom et le numéro
sauvegardés dans l’annuaire s’affichent dans la liste
de recomposition plutôt que seulement le numéro.
95
Page 98

Recherche d’un combiné égaré
Appuyez sur PAG E sur le socle de base.
Tous les combinés enregistrés auprès du socle de
base émettront une tonalité.
Appuyez sur Off, EXIT (
combiné pour arrêter l’appel d’interphone de ce
combiné, ou sur la touche PAG E du socle de base
pour arrêter l’appel d’interphone de tous les
combinés.
a) ou OK (a) sur un
Sauvegarde d’un numéro dans l’annuaire
La sauvegarde de numéros dans l'annuaire facilite la
composition des numéros que vous appelez
fréquemment. Vous pouvez entrer des numéros
directement dans l’annuaire ou les ajouter à partir de
la liste d’identification de l’appelant ou de la liste de
recomposition. Vous pouvez également choisir de
sauvegarder le numéro dans l’annuaire privé
(combinés) ou l’annuaire partagé (socle de base).
Annuaires privés
L’annuaire privé est unique à chaque combiné et ni
les autres combinés ni le socle de base n’y ont
accès. Chaque annuaire privé peut contenir jusqu’à
50 noms et numéros.
96
Utilisation des fonctions de base
Page 99

Annuaires partagés
L'annuaire partagé est conservé dans le socle de
base et est accessible par tous les combinés.
L’annuaire partagé peut contenir jusqu’à 49 noms et
numéros.
Action
1
Appuyez sur PHONEBK (a).
2
Faites défiler (c) jusqu’à (New Entry) et
appuyez sur SELECT (
L’annuaire privé est l’annuaire par défaut.
Pour changer d’annuaire, appuyez sur la
touche programmable de droite (
exemple, si SHARED s’affiche, appuyez sur la
touche programmable de droite (
accéder à cet annuaire.
3
Entrez le nom (jusqu’à 12 caractères).
Appuyez sur
effacer des caractères à la gauche du
curseur clignotant. Pour plus d’information
sur l’entrée de texte, voir la page 87.
4
Faites défiler vers la bas (c).
5
Entrez le numéro de téléphone (jusqu’à
24 caractères). Appuyez sur DELETE (
pour reculer et effacer des caractères à la
gauche du curseur clignotant.
6
Appuyez sur DONE (a).
a).
a). Par
a) pour
DELETE (a) pour reculer et
a)
Utilisation des fonctions de base
97
Page 100

Pour sauvegarder dans l’annuaire l’un des derniers
numéros composés:
Action
1
Appuyez sur la touche Redial. Le visuel
affiche les cinq derniers numéros
composés, en commençant par le plus
récent.
2
Appuyez sur c jusqu’à ce que pointe
vers le numéro à sauvegarder.
3
Appuyez sur STORE (a).
4
Entrez le nom de la personne (jusqu’à
12 caractères).
Appuyez sur DELETE (a)
pour reculer et effacer des caractères à la
gauche du curseur clignotant. Pour plus
d’information sur l’entrée de texte,
voir la
page 87.
5
Faites défiler vers la bas (c).
6
Le numéro de téléphone s’affiche dans le
champ Number: Pour modifier le numéro,
appuyez sur DELETE
(
a
)
pour reculer et
effacer des caractères à la gauche du
curseur clignotant.
7
Lorsque le numéro de téléphone est entré
correctement, appuyez sur DONE (
a).
Nota : Vous pouvez également sauvegarder un
numéro dans l’annuaire à partir de la liste
d’identification de l’appelant (voir la page 104).
Utilisation des fonctions de base
98
 Loading...