

Page 1

Motorola
iDEN
Digital Multi-service Data-capable Phone
i930 Phone User’s Guide
Smartphon e Info rm atio n Pr ovid ed by Mi cro sof t
Page 2

MOTOROLA, the Stylized M Logo and all other trademarks indicated as such herein are trademarks of
Motorola, Inc. ® Reg. U.S. Pat. & Tm. Off. © 2005 Motorola, Inc. All rights reserved.
Microsoft and Microsoft Internet Explorer are registered trademarks of Microsoft Corporation.
T9 is a trademark owned by Tegic Communications.
®
Text Input Patent and Trademark Information
T9
This product is covered by U.S. Pat. 5,818,437, U.S. Pat. 5,953,541, U.S. Pat. 6,011,554 and other
patents pending.
Java and all other Java-based marks are trademarks or registered trademarks of Sun Microsystems, Inc.
in the U.S. and other countries.
All other product names or services mentioned in this manual are the property of their respective
trademark owners.
Information in this document, including URL and other Internet Web site references, is subject to change
without notice. Unless otherwise noted, the example companies, organizations, products, domain names,
email addresses, logos, people, places and events depicted herein are fictitious, and no association with
any real company, organization, product, domain name, email address, logo, person , place or event is
intended or should be inferred. Complying with all applicable copyright laws is the responsibility of the
user. Without limiting the rights under copyright, no part of this document may be reproduced, stored in or
introduced into a retrieval system, or transmitted in any form or by any means (electronic, mechanical,
photocopying, recording, or otherwise), or for any purpose, without the express written permission of
Microsoft Corporation.
Microsoft may have patents, patent applications, trademarks, copyrights, or other intellectual property
rights covering subject matter in this document. Except as expressly provided in any written license
agreement from Microsoft, the furnishing of this document does not give you any license to these patents,
trademarks, copyrights, or other intellectual property.
© 2003 Microsoft Corporation. All rights reserved. Microsoft products are licensed to OEMs by Microsoft
Licensing Inc., a wholly owned subsidiary of Microsoft Corporation.
Microsoft, ActiveSync, MSN, Outlook, Windows, the Windows logo, and Windows Me dia are either
registered trademarks or trademarks of Microsoft Corporation in the United States and/or other countries.
The names of actual companies and products mentioned herein may be the trademarks of their respective
owners.
Software Copyright Notice
The Motorola products described in this manual may include copyrighted Motorola and third party software
stored in semiconductor memories or other media. Laws in the United States and other countries preserve
for Motorola and third party software providers certain exclusive rights for copyrighted software, such as
the exclusive rights to distribute or reproduce the copyrighted software. Accordingly, any copyrighted
software contained in the Motorola products may not be modified, reverse-engineered, distributed, or
reproduced in any manner to the extent allowed by law. Furthermore, the purchase of the Motorola
products shall not be deemed to grant either directly or by implication, estoppel, or otherwise, any license
under the copyrights, patents, or patent applications of Motorola or any third party software provider,
except for the normal, non-exclusive, royalty-free license to use that arises by operation of law in the sale
of a product.
Page 3

Contents
Getting Started............................................................................................................... 1
Getting to Know Your Smartphone ............................................................................... 1
Setting Up Your Smartphone........................................................................................ 6
Installing ActiveSync................................................................................................... 11
Turning Your Smartphone On.....................................................................................12
i930 Sync Cradle......................................................................................................... 12
Synchronizing by Using ActiveSync............................................................................ 16
Accessories................................................................................................................. 16
Finding More Information............................................................................................ 17
The Basics.................................................................................................................... 18
Navigation Methods .................................................................................................... 18
Understanding Status Indicators.................................................................................22
Backlight Dimming ...................................................................................................... 23
Finding Your Phone Number and Other Basic Information......................................... 24
Entering Text and Numbers........................................................................................ 24
Securing Your Smartphone......................................................................................... 28
Using a Headset.......................................................................................................... 33
Navigating and Managing Stored Files....................................................................... 34
Managing Memory......................................................................................................34
Phone Calls.................................................................................................................. 35
Making a Phone Call................................................................................................... 35
Receiving a Phone Call............................................................................................... 39
Managing Phone Calls................................................................................................ 40
Call Forwarding...........................................................................................................41
Using the Flip to Answer or End Calls.........................................................................42
Retrieving Voice Mail Messages................................................................................. 42
Speed Dials and Voice Shortcuts................................................................................ 42
Advanced Calling Options........................................ ......... ......... .......... ......... ......... .....45
Private Calls, Call Alerts, and Group Calls................................................................ 47
Making a Private Call..................................................................................................47
Receiving a Private Call.............................................................................................. 49
Managing Private Calls............................................................................................... 50
Voice Shortcuts...........................................................................................................50
Page 4

One Touch PTT........................................................................................................... 52
Call Alerts.................................................................................................................... 52
Group Calls................................................................................................................. 55
Recent Calls................................................................................................................. 56
Viewing the Recent Calls List...................................................................................... 56
Saving to Contacts...................................................................................................... 57
Making Calls From the Recent Calls List.................................................................... 57
Deleting Items From the Recent Calls List.................................................................. 59
Returning to the Home Screen After a Call................................................................. 59
Contacts, Calendar, and Tasks................................................................................... 60
Using Contacts............................................................................................................ 60
Using Calendar ........................................................................................................... 65
Using Tasks ................................................................................................................ 67
SIM Manager................................................................................................................. 69
Using SIM Manager .................................................................................................... 69
Changes When Contacts Are Copied to Your SIM Card ............................................ 72
Voice Notes.................................................................................................................. 73
Settings......................................................................................................................... 74
Viewing and Changing Settings.................................................................................. 74
Display Properties....................................................................................................... 74
Phone Calls................................................................................................................. 76
PTT .............................................................................................................................80
Vibrate All.............................................. ......... .......... ......... ......... .................................81
Notifications................................................................................................................. 82
Voice Volume.............................................................................................................. 84
Power Management.................................................................................................... 84
Accessibility................................................................................................................. 85
Regional Settings........................................................................................................ 85
Date and Time............................................................................................................. 86
Phone Networks..........................................................................................................86
Data Connections........................................................................................................ 87
Beam...........................................................................................................................93
Certificates.................................................................................................................. 93
Flight Mode ................................................................................................................. 94
Page 5

Profiles........................................................................................................................94
Security....................................................................................................................... 96
Owner Information....................................................................................................... 97
Phone Information.......................................................................................................97
Remove Programs...................................................................................................... 99
Messaging Features .................................................................................................. 100
Understanding Messaging Features......................................................................... 100
Setting up Messaging................................................................................................ 101
Working with Accounts................................... .......... ......... ......... .......... ......... ......... ... 102
Creating Messages................................................................................................... 103
Sending and Receiving Messages............................................................................ 106
Importing Text Messages............................... .......... ......... ......... .......... ..................... 107
Viewing and Responding to Messages..................................................................... 107
Working with Message Folders................................................................................. 111
Configuring Message Notifications............................................................................ 112
Sending and Receiving Instant Messages................................................................ 113
Camera and Camcorder............................................................................................ 116
Pictures..................................................................................................................... 116
Video Clips................................................................................................................ 118
Sending Captured Pictures and Video Clips............................................................. 121
Closing the Camera and Camcorder......................................................................... 122
Media Theater............................................................................................................. 123
Pictures..................................................................................................................... 123
Video Clips................................................................................................................ 127
Audio Only Files........................................................................................................ 129
Sending Video Pictures and Clips............................................................................. 129
Opening Camera and Camcorder............................................................................. 130
GPS Enabled.............................................................................................................. 131
IMPORTANT: Things to Keep in Mind...................................................................... 131
Making an Emergency Call....................................................................................... 132
Viewing Your Approximate Location......................................................................... 133
Enhancing GPS Performance................................................................................... 134
Updating Satellite Almanac Data .............................................................................. 135
Setting Privacy Options............................................................................................. 135
Page 6

Using GPS with Map Software.................................................................................. 136
Java Applications...................................................................................................... 139
Deleting Java Applications............................. .......... ..................................... ............ 140
Java Applications and GPS Enabled ........................................................................ 140
Beaming Information................................................................................................. 143
ActiveSync.................................................................................................................. 145
Understanding ActiveSync........................................................................................ 145
Setting up ActiveSync...............................................................................................145
Synchronization Methods.......................................................................................... 149
Deciding Which Information to Synchronize ............................................................. 151
Using Your Smartphone as a Modem...................................................................... 153
Internet........................................................................................................................ 154
Browsing the Web..................................................................................................... 154
Using Your Phone Internationally............................................................................ 158
Features Available at Home and Abroad.................................................................. 158
Setting the Way Your Phone Searches for Networks ............................................... 158
Searching for a Network............................................................................................ 159
Windows Media Player.............................................................................................. 160
Games......................................................................................................................... 171
Solitaire..................................................................................................................... 171
Calculator ................................................................................................................... 172
Page 7
Getting Started
1
Getting Started
Congratulations on the purchase of your new i930 phone, a Smartphone with Windows
Mobile™ software! This chapter will help you familiarize yourself with your i930 phone
and get it ready to use. You will also find information about installing Microsoft®
ActiveSync®, how to purchase accessories, and where to find additional help for using
your i930 phone.
Getting to Know Your Smartphone
Before you set up your i930 phone and start using it, take a moment to get familiar with
your Smartphone.
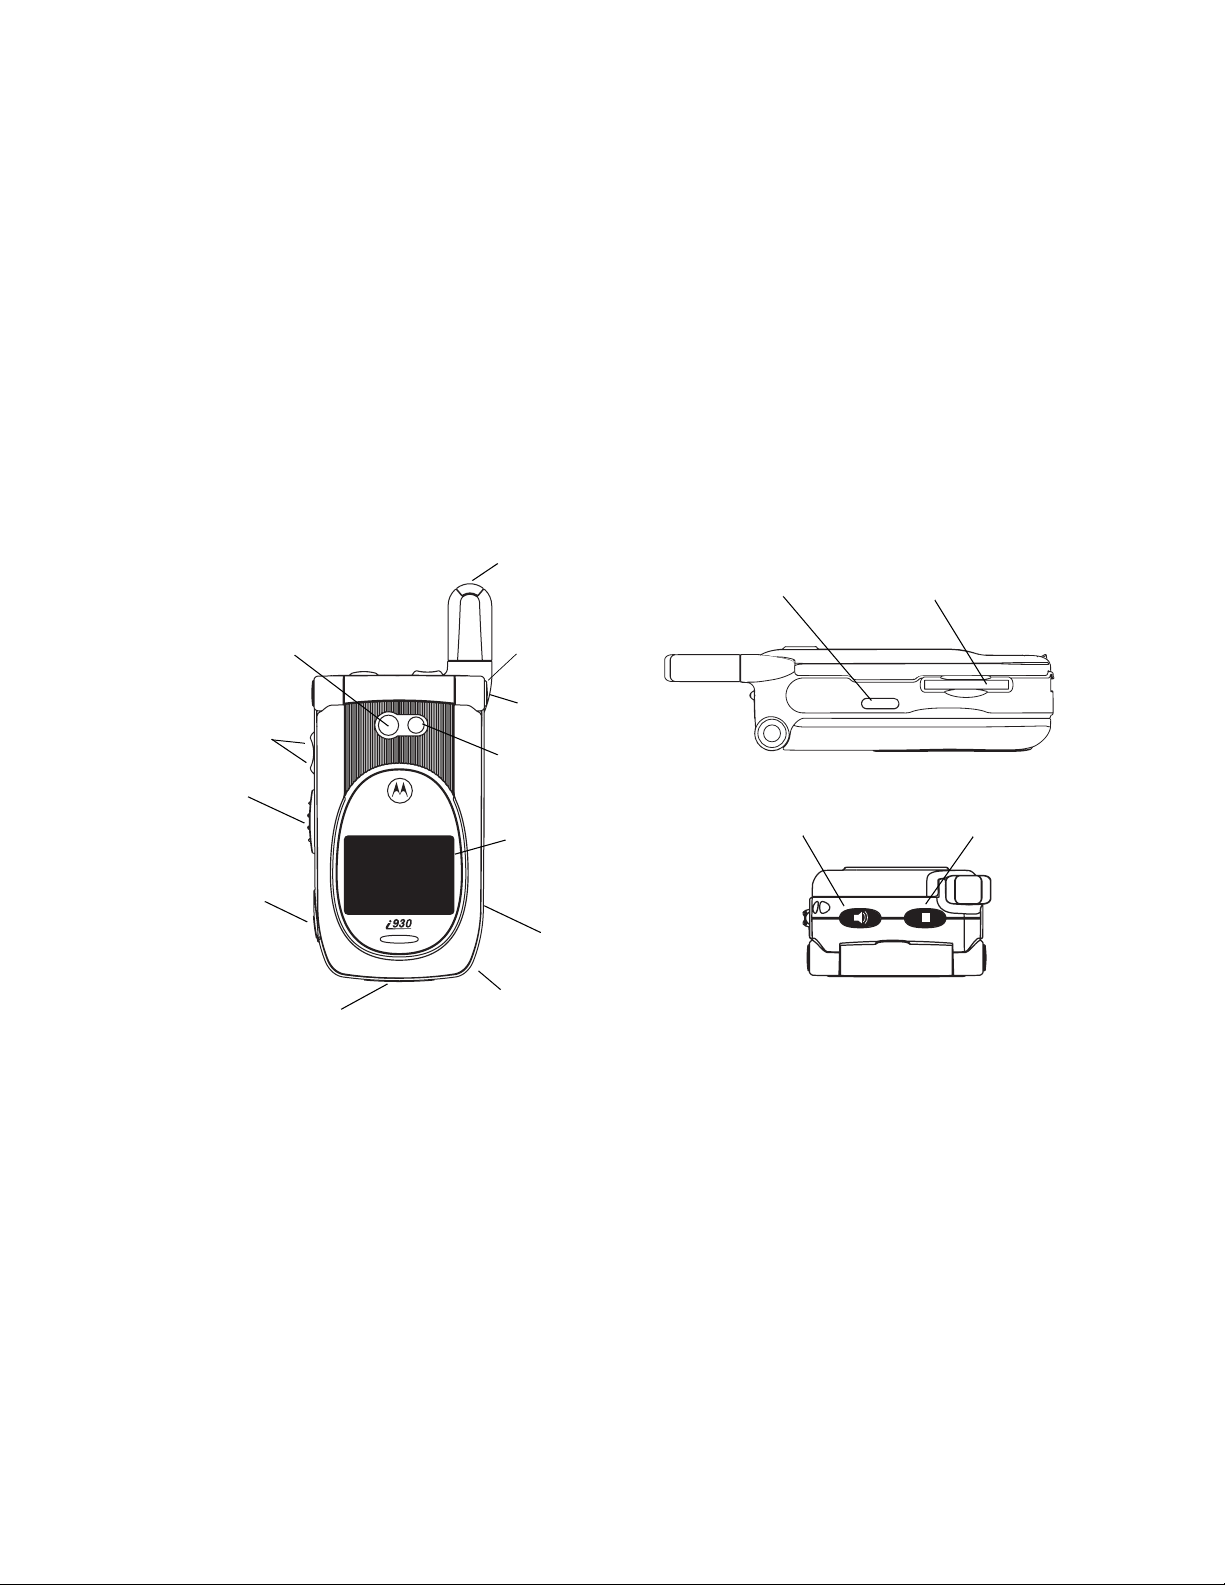
Flip Closed — External Features
retractable antenna
infrared port
SD card slo t
camera
lens
volume
controls
stereo
audio port
accessory connector
status light
flip open
button
camera
short-range
flash light
external
display
SD card slo t
speaker
(in back)
speaker key
smart key
Retractable Antenna
The retractable antenna on your Smartphone is designed to be extended during calls.
To extend the antenna, pull gently on the rounded tip until the antenna is fully extended
and clicks into position.
When finished with a call, retract the antenna by pushing gently on the rounded tip until
the antenna clicks into place.
To optimize your Smartphone’s performance, extend the antenna when you make or
receive a call, and avoid touching the antenna with any body part.
Import an t: Failure to fully exten d or re tr act the an ten na u ntil the anten na clicks
into place cau ses sev ere ly deg rad ed p erf or mance, which m ay result
in missed calls, dropped calls, or garbled audio.
Page 8

Getting Started
2
Flip Open Button
Press this to open your Smartphone’s flip easily.
Status Light
The status light appears as a ring around the flip open button.
Status Light Meaning when phone is on Meaning when phone is off
Flashing green In service. N/A
Solid red No service. Connected to the charger and charging.
Solid green Making a call or in a call. Connected to the charger, and fully
charged.
The status light also flashes when you reci eve a call, a call alert, or message notification,
or play a .midi audio recording on your phone.
You can set the status light not to light up. See “Turn the status light on or off” on page
84.
Camera Lens
Lets you take pictures with your Smartphone.
Camera Short-Range Flash Light
Helps light the pictures you take with your Smartphone.
Volume Controls
Sets the volume of the sound coming out of the earpiece and speaker. When your
Smartphone is in a call, the volume controls set the volume of calls. When your
Smartphone is not engaged in any activity, the volume controls set the volume of the
ringer and of multimedia audio.
The volume controls can also by used to scroll through lists that appear on the external
display.
Push-to-Talk (PTT) Button
Lets you make Private calls and group calls.
External Display
Shows a porti on of the info rmation on the in ternal display. T o see mor e informat ion, op en
the flip.
Speaker
Sound comes out of your Smartphone here when you have the speaker turned on.
Ste r eo Audio Port
Insert headset connector here.
Note: The stereo audio port is compatible with non-stereo headsets.
Accessory Connector
Insert the co nnecto rs of accesso ries su ch as a char ger , Ac tiveSy nc cra dle, o r da ta ca ble
here.
Page 9

Getting Started
3
Infrared Port
The infrared port on your Smartphone enables you to send and receive (beam) contact
cards, calendar appointments, messages, pictures, and video clips using infrared
technology.
SD Card Slot
A secure disk flash memory card (SD card) can be use with the Smartphone. If one has
not been given to you by your service provider, you can purchase one.
Speaker Key
The speaker key (t):
• Acts like the s when your Smartphone’s flip is closed.
• Turns speaker on and off.
• Used with voice shortcuts.
Smart Key
The smart key (.):
• Acts like e when your Smartphone’s flip is closed.
• Accesses recent calls when the flip is closed.
• Suspends and resumes Java applications when the flip is closed.
Page 10
Getting Started
4
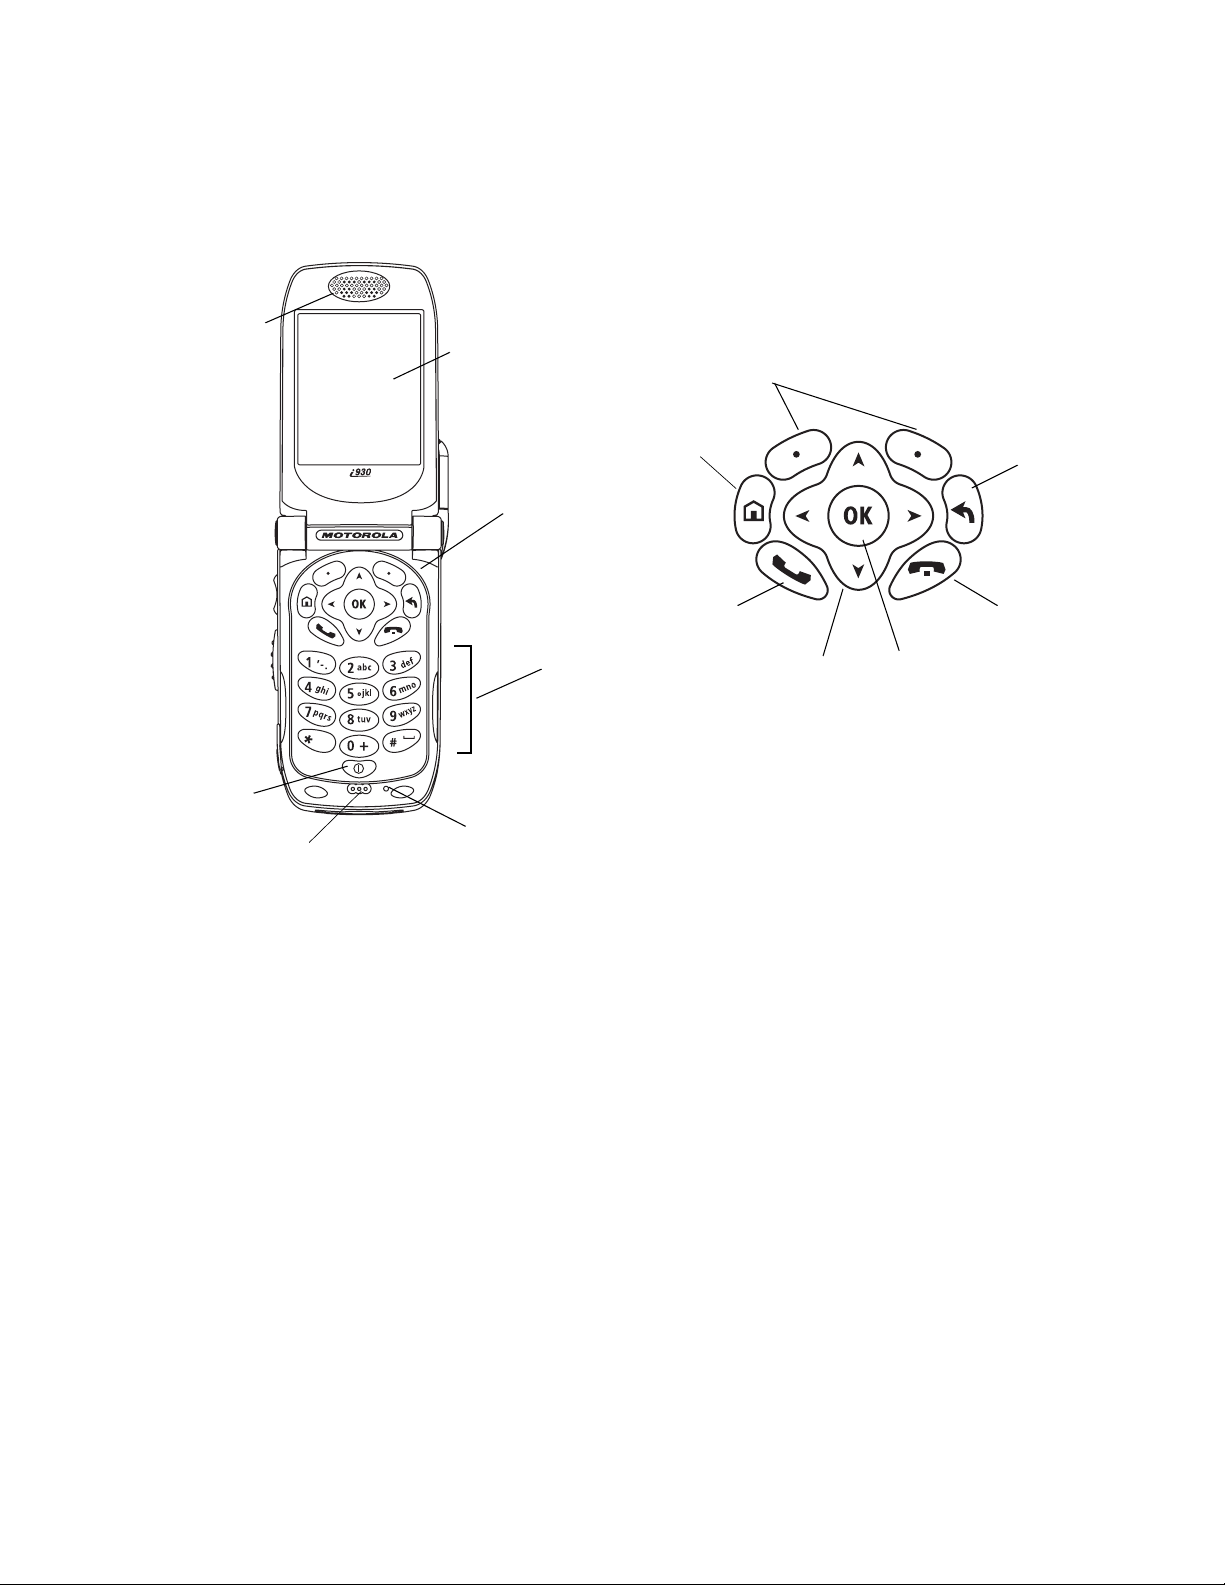
Flip Open — Keypad, Navigation Area, and More
earpiece
internal display
soft keys
home key
navigation
area
send key
navigation pad
power key
microphone
keypad
light sensor
Earpiece
Sound comes out of the earpiece when the speaker is off.
Power Key
back key
end key
OK key
When the Smartphone is turned off:
• Press and hold the Power key (p) for 2 to 3 seconds to turn on the Smartphone.
When the Smartphone is on:
• Press p to display the Quick List, a fast way to change your profile settings or lock
the Smartphone.
• Press and hold p to turn off the Smartphone. Or, press p and then press 1.
Internal Disp la y
The internal display shows the following information:
• At the top of the screen are status indicators about the current mode, the name of the
current activity, or the name of the active program, if one has been selected.
• In the center of the screen is the active menu or program.
• At the bottom of the screen are menus or commands related to the active program.
Page 11

Getting Started
5
Navigation Area
This area contains the keys and controls used to:
• Navigate through your phone’s menus, lists, and screens.
• Perform commands.
• Begin phone calls, end phone calls, and put phone calls on hold.
Navigation pad
Use the navigation pad to move the selection focus up, down, left, or right. Th is is called
“scrolling.” In a text field, use the navigation pa d to move the cursor right or left, cha racter
by character.
OK Key
Press the OK key (O) to open a highlighted item, or to select or clear a check box. The
OK key works much like the ENTER key on a keyboa rd, and is sometim es referre d to as
the Action key or the “Do It” key.
Soft Keys
Press a soft key (A or B) to open the menu or perform the command shown on the
screen immediately above the key.
Send Key
Press the send key (s) to:
• Dial a phone number that you entered or selected.
• Answer an incoming call.
• Place a call on hold to answer a second incoming call (call waiting).
• Change between an active call and a call that is on hold.
End Key
Press the end key (e) to:
• End a call when 1 part y is on the line, and end the active call when mul tiple par ties are
connected.
• Return to the Home screen.
Press and hold e to lock the keypad.
Home Key
Press the hom e key (h) to vi e w the Home screen. The Home scree n i s described later, in
“Using the Home Screen” on page 19.
Back Key
Press the back key (m) to go to the previous screen or to end a Private call.
In a text field:
• Press m to backspace over 1 or more characters.
• Press and hold m to delete the entire contents of the field.
Page 12
Getting Started
6
Keypad
Press keys on the keypad to enter numbers and characters.
* Key
• Press * to change between uppercase and lowercase in text input modes.
• Press and hold * to change between text and numeric input modes.
# Key
• Press and hold # to view a list of symbols that you can enter as text.
• On the Home screen, press and hold # to switch between phone lines. This feature
is available if your phone supports 2 phone lines.
Note: If you are not provisioned for a second line and you set your line to line 2, you
will not be able to make or receive calls.
Setting Up Your Smartphone
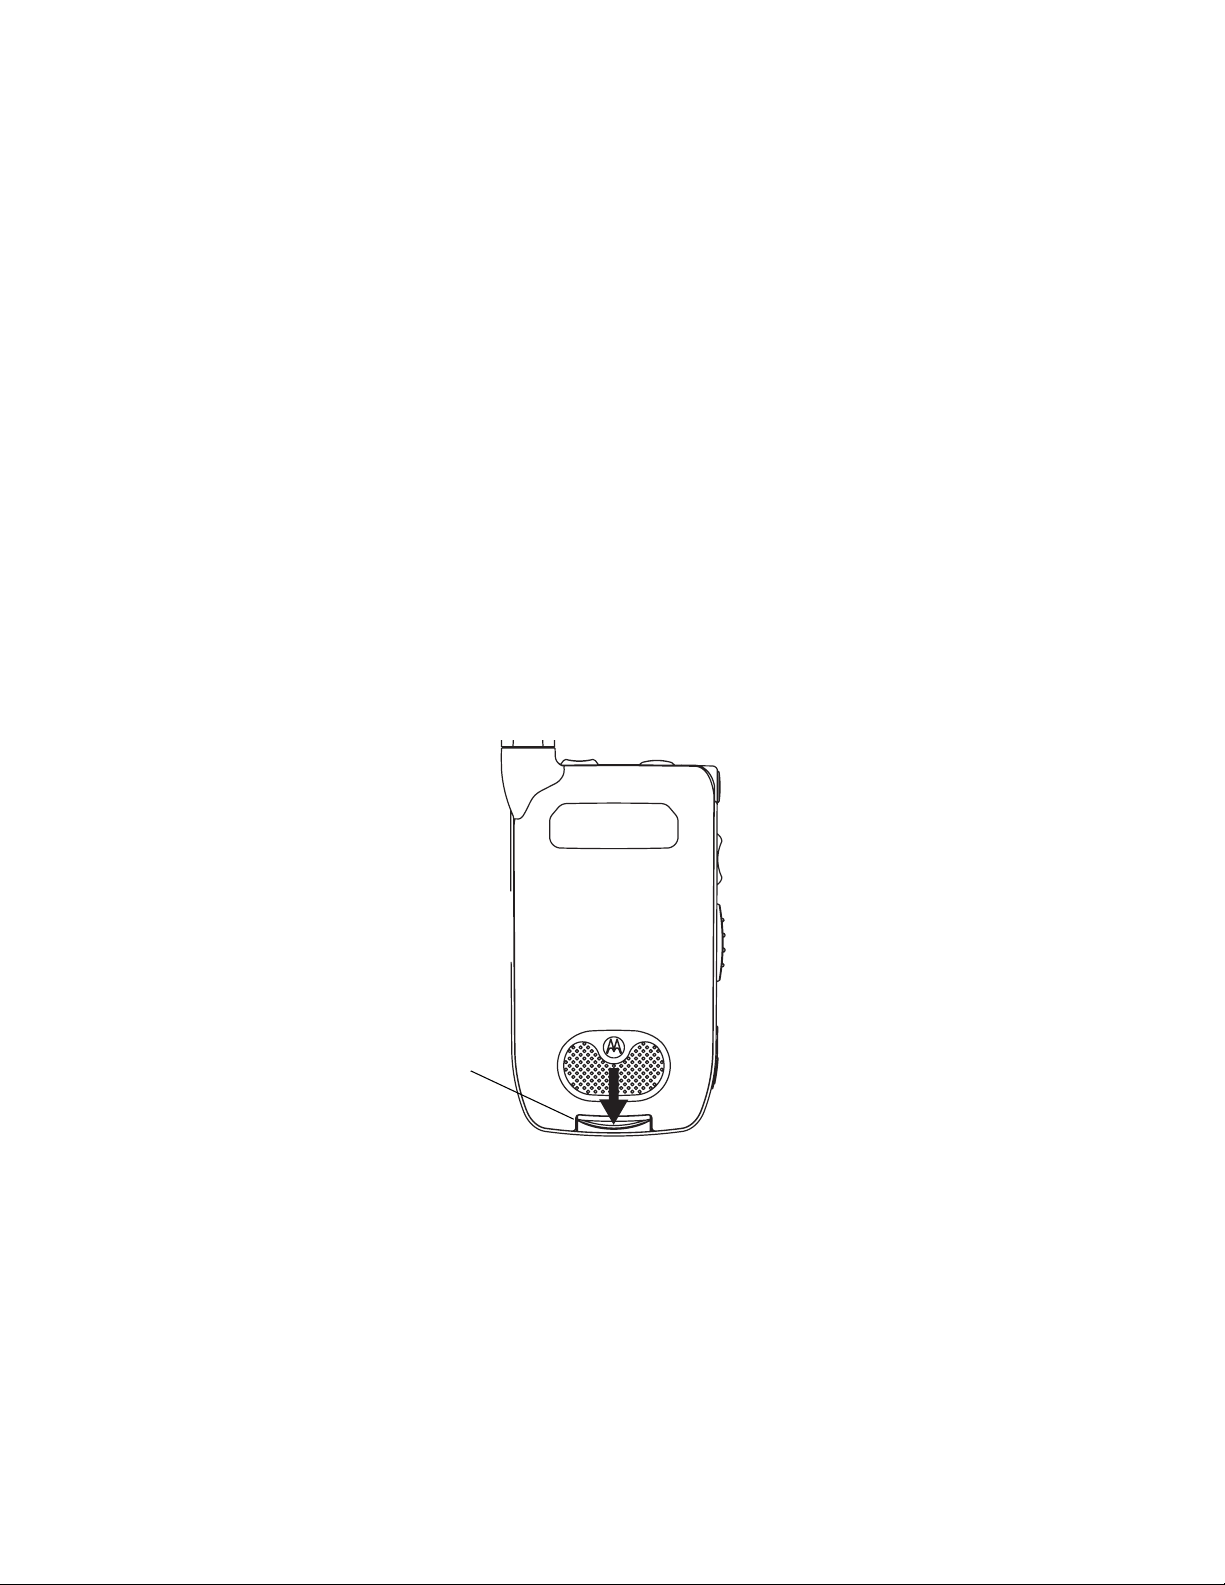
Locating Your SIM Card
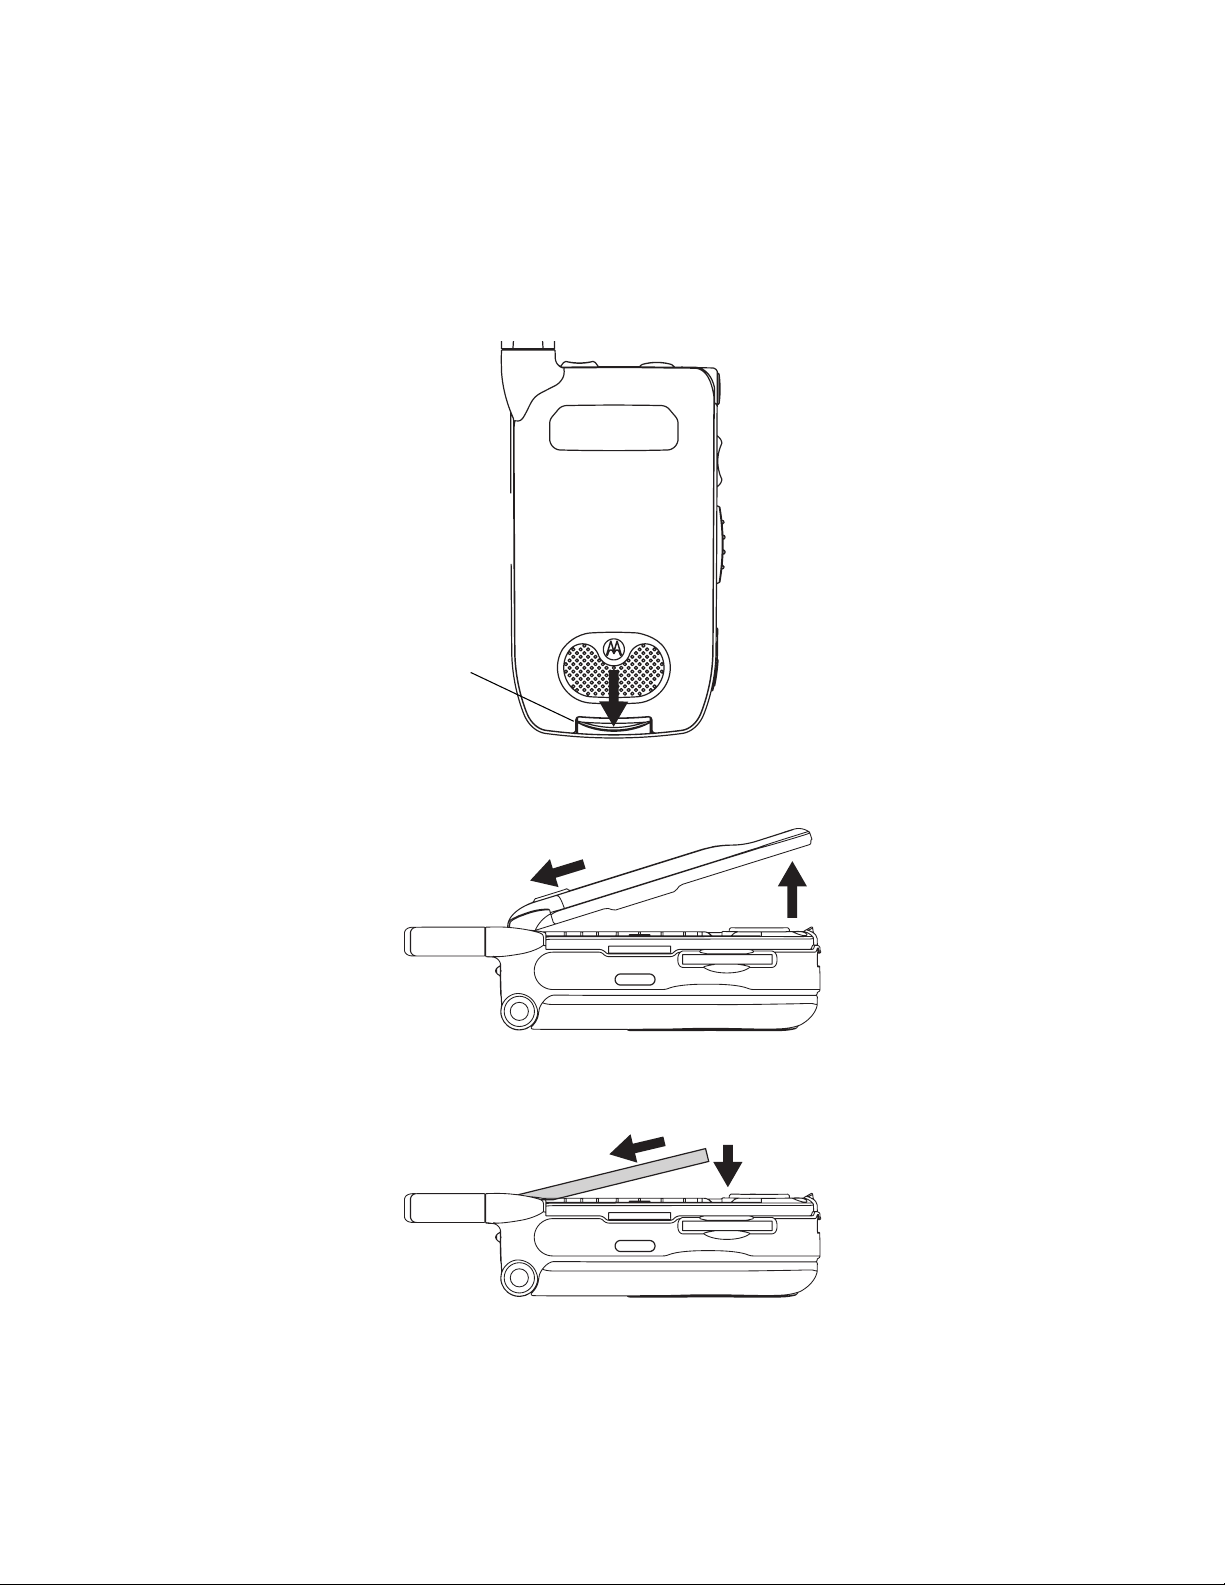
Remove the battery door
1 Slide the release button back until it releases the battery door.
release
button
Page 13
Getting Started
7
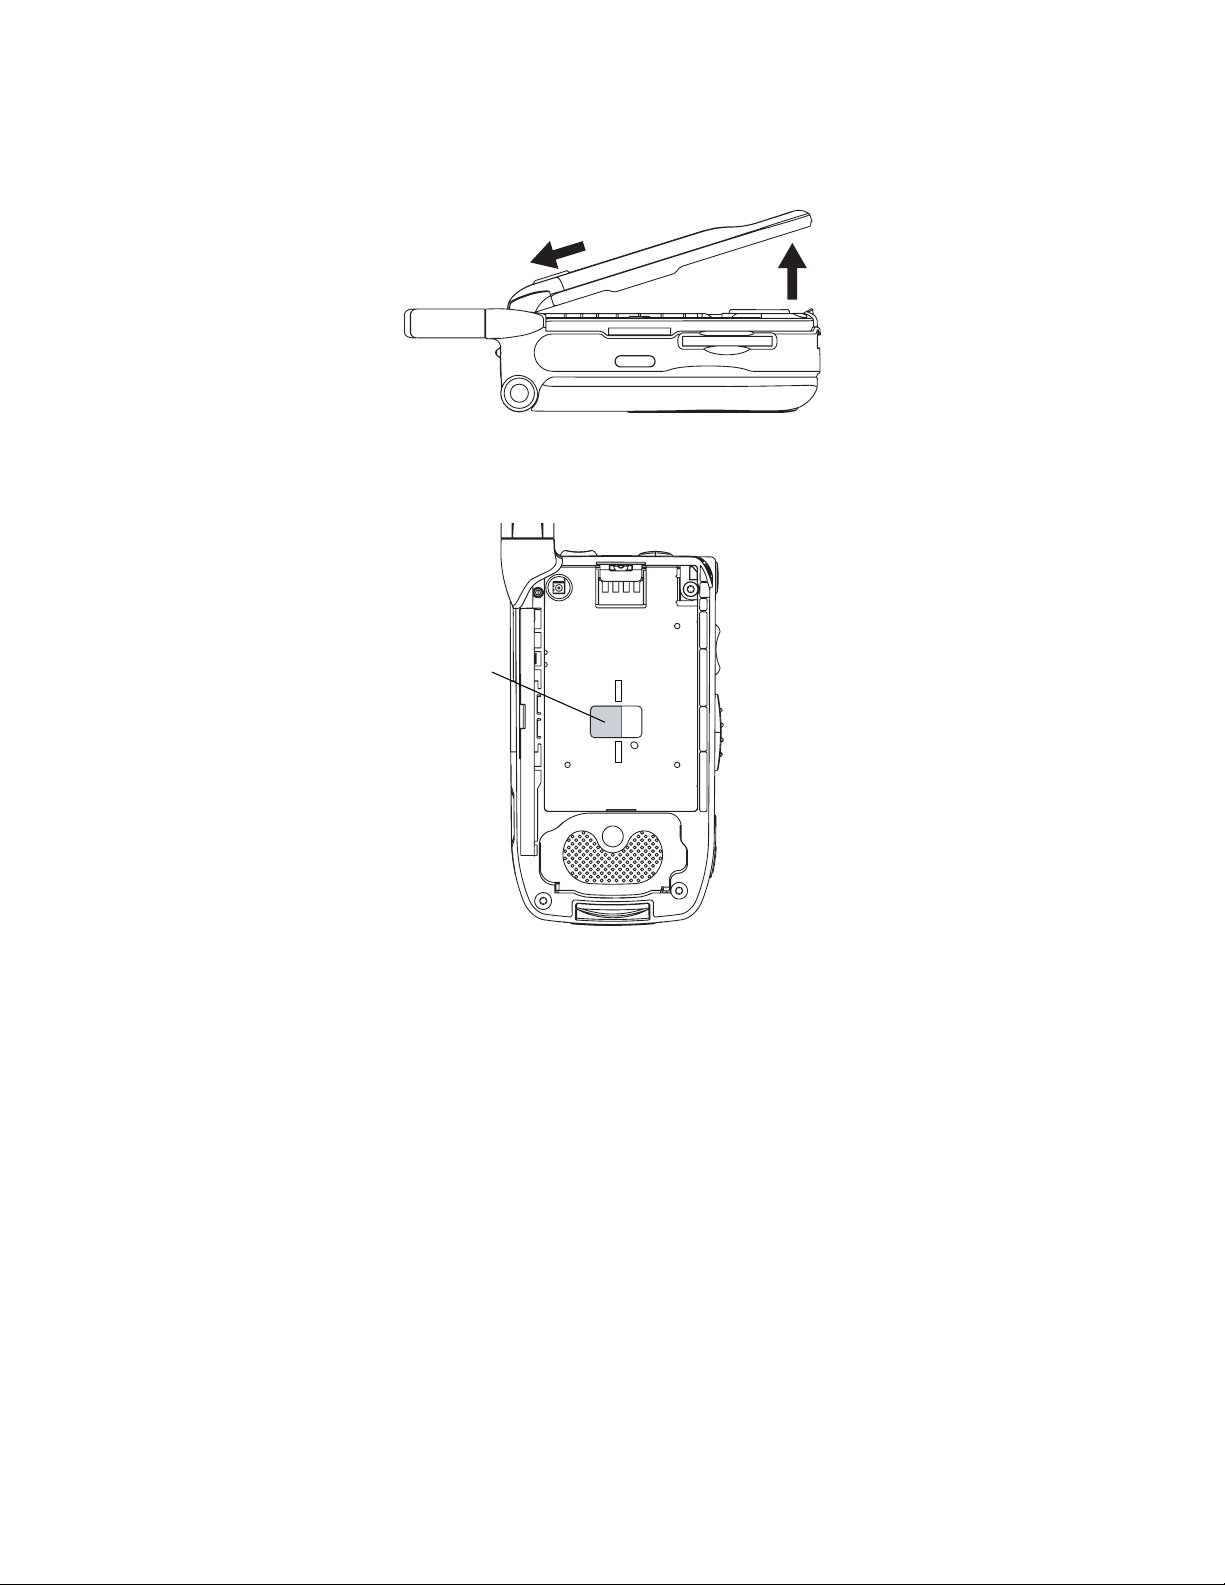
2 Allow the battery d oor to pop up, sli de it forw ard, and r emo ve i t from the back of your
Smartphone.
Your SIM (Subscriber Identity Module) card is a small piece of plastic located in the SIM
card holder in the back of your Smartphone, underneath the battery.
SIM card
If there is no SIM card in your Smartphone, contact your service provider.
Page 14
Getting Started
8
Charging the Battery
Your Smartphone come s with a High Perfo rma nce Li thium Ion Batt ery and a ra pid trave l
charger to charge it.
Insert the battery before ch arging it
1 Slide the release button back until it releases the battery door.
release
button
2 Allow the battery d oor to pop up, sli de it forw ard, and r emo ve i t from the back of your
Smartphone.
3 Insert the top of the battery into the battery area. Press the bottom of the battery to
secure it.
Page 15
Getting Started
9
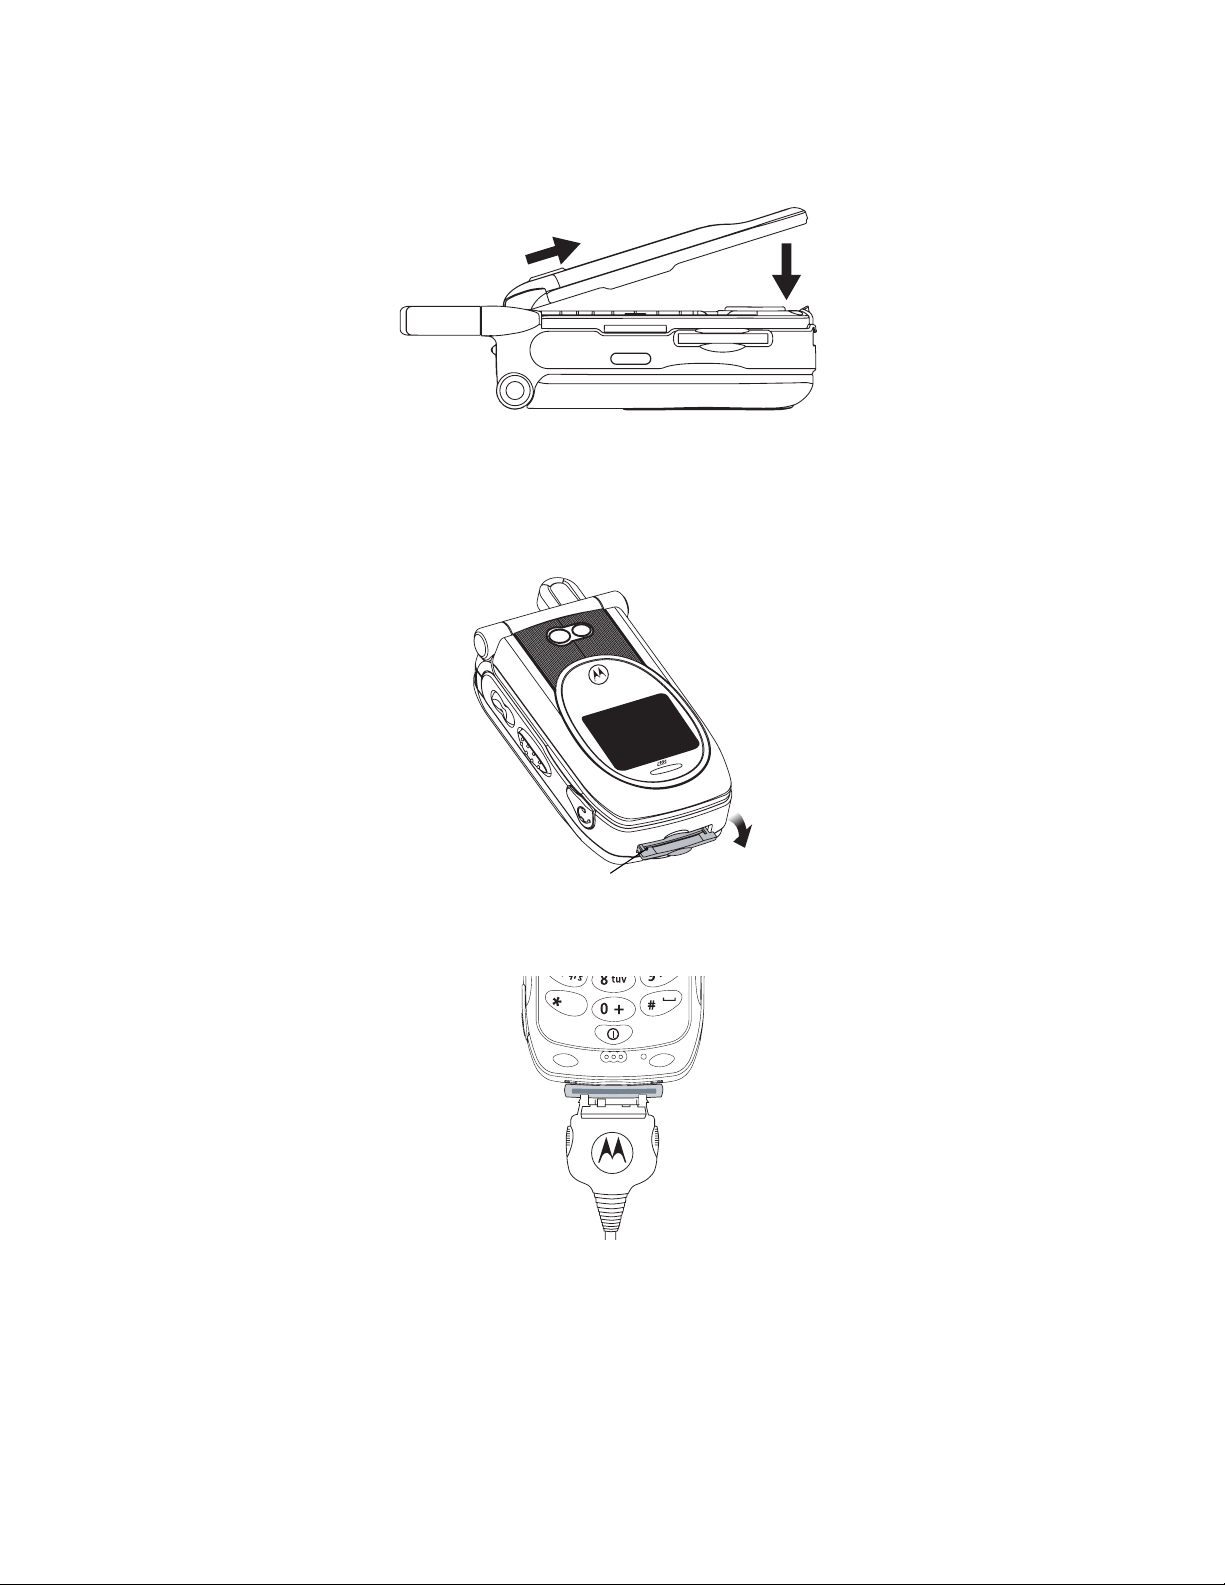
4 Replace the battery door and press it gently until you hear a click.
Charge the battery
1 Plug the charger into an electrical outlet.
2 Open the connector cover.
connector
cover
3 Plug the other end of the charger into the accessory connector.
Tip: To remove the charger from the accessory connector: Press the buttons on the
sides of the plug. Pull the plug straight out.
4 If you have purchased optional batteries or chargers, see “Charging Times”.
Page 16
Getting Started
10
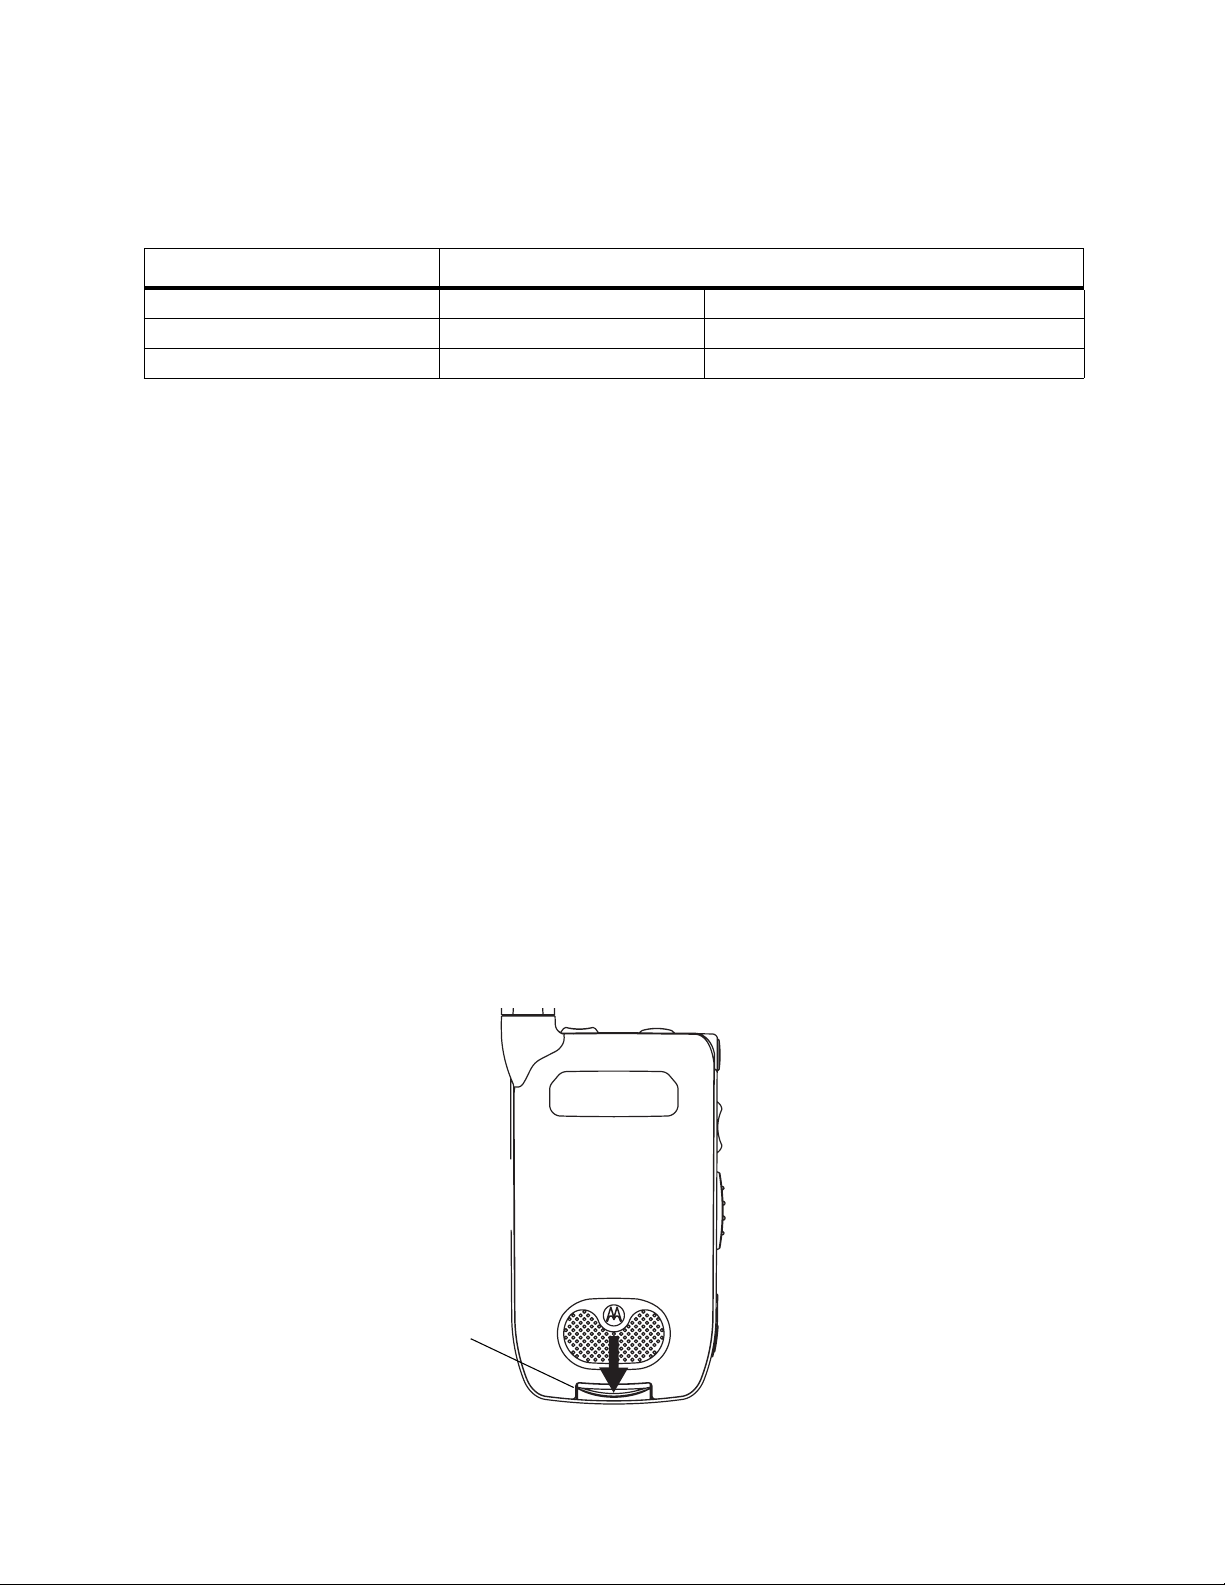
Charging Tim es
Check your battery and charger type against the grid below to determine appropriate
charging times.
Battery Charger
Rapid Standard
High Performance 2 hours 4 hours
Extra Capacity 2.5 hours 5.5 hours
For best results, charge the batteries within the temperature range of 50°F to 104°F
(10°C to 40°C).
Prolonged charging is not recommended.
Battery Use and Maintenance
• The Motorola iDEN Approved Lithium Ion chargers provide optimum performance.
Other chargers may not fully charge the iDEN Lithium Ion battery or may yield a
reduced number of lifetime charge cycles.
• Extreme temperatures degrade battery performance. Do not store the battery where
temperatures exceed 140°F (60°C) or fall below 4°F (-20°C).
• Lithium Ion batteries have a self discharge rate and without use, lose about 1% of
their charge per day.
• The battery capacity is degraded if the battery is stored for long periods while fully
charged. If long term storage is required, store at half capacity.
Removing the Battery
Normally, it is not necessary to remove your Smartphone’s battery, but you may want to
if you have purchased an optional charger or want to remove your SIM card.
Remove the battery
1 Power off your Smartphone.
2 Slide the release button back until it releases the battery door.
release
button
Page 17
Getting Started
11
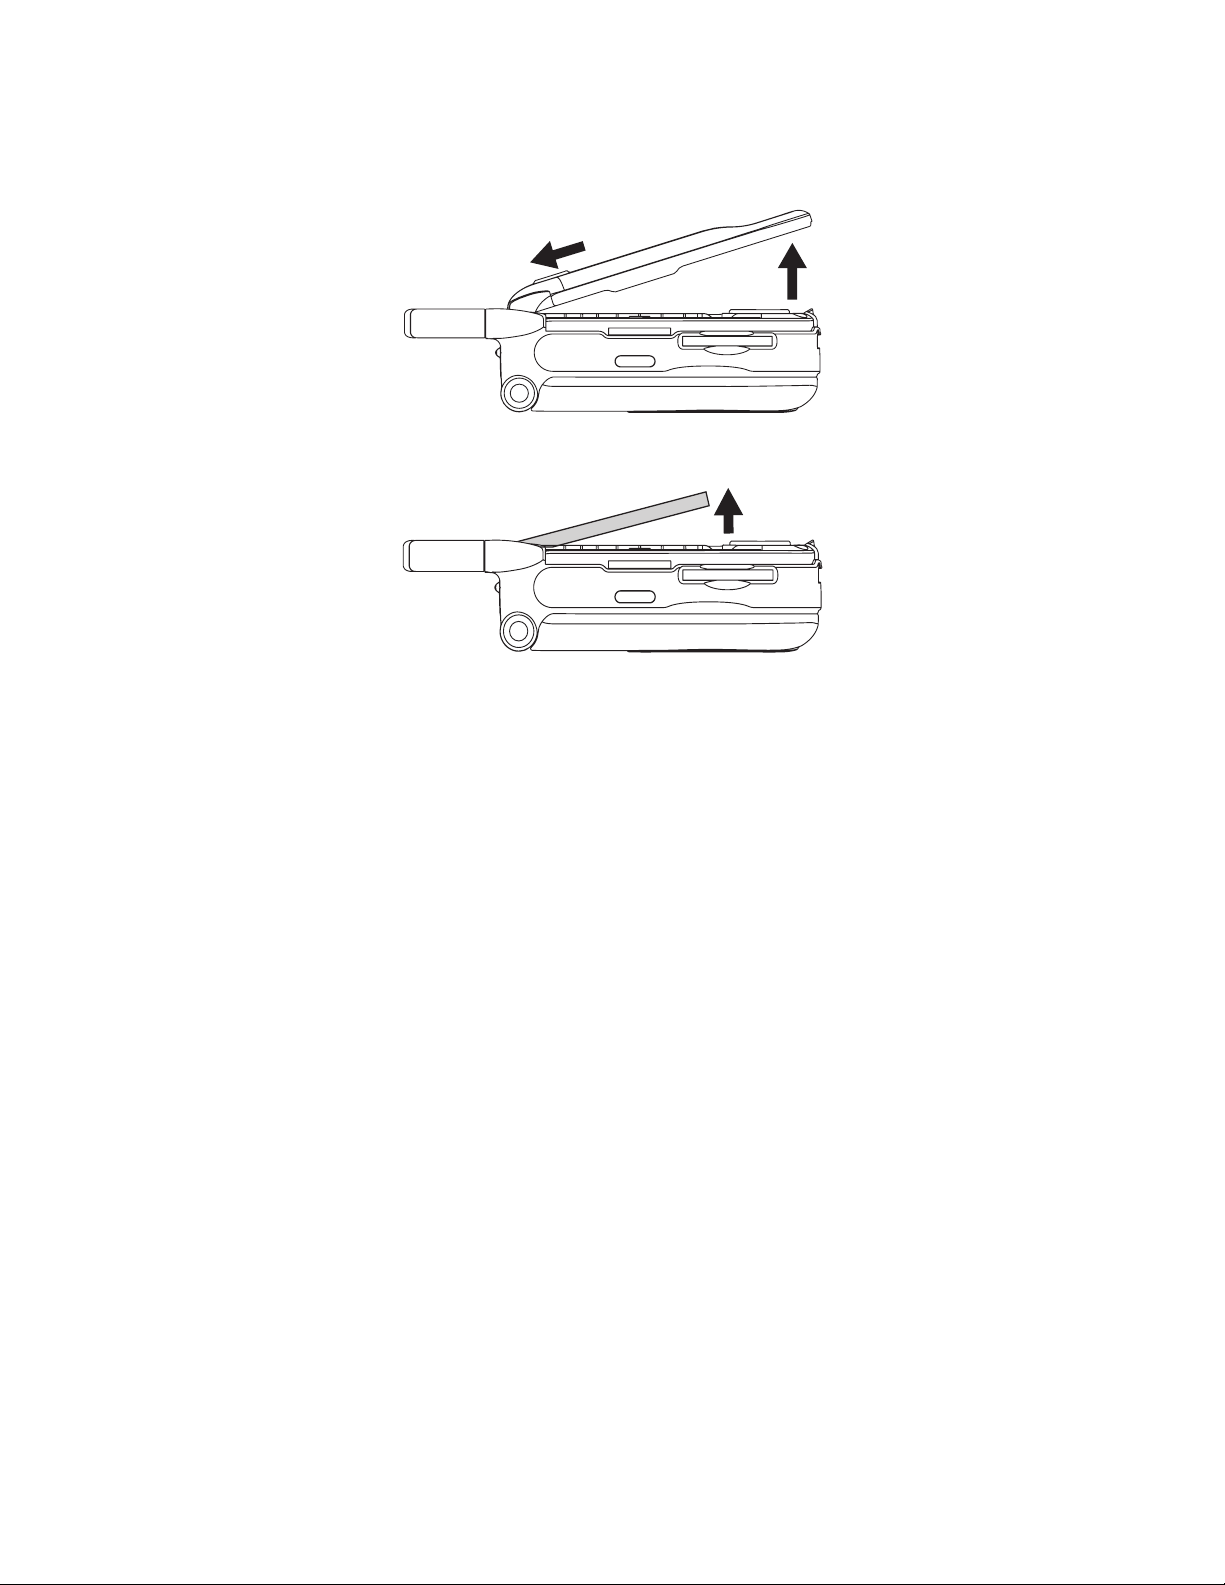
3 Allow the battery d oor to pop up, sli de it forw ard, and r emo ve i t from the back of your
Smartphone.
4 Remove the battery by pushing it toward the antenna and lifting it out.
Installing ActiveSync
You can use Microsoft® ActiveSync® technology to synchronize the information on your
Smartphone with information on your desktop computer and optionally, a server running
Microsoft® Exchange® Server with Exchange ActiveSync.
Inst all ActiveSync on the desktop computer
1 Insert the Smartphone CD into the CD drive of your desktop computer. The CD
screen will open.
2 Click Getting Started with Windows Mobile.
3 Click Start Here.
4 Click Install ActiveSync.
5 Click Install.
6 Follow the instructions.
Page 18

Getting Started
12
Turning Your Smartphone On
Turn On
Press and hold the power button for 2 or 3 seconds.
power
button
While your Smartphone pow ers on for the first time, you will rece ive an alert to select OK
to restart the device. Select OK when prompted.
Note: This step is only necessary the first time you power on your Smartphone.
Turn Off
Press and hold the power button for 2 or 3 seconds.
Or, press the power button and then press 1.
i930 Sync Cradle
Depending on your service provider, your Smartphone may come with an i930 Sync
Cradle and mini USB cable that you use when using ActiveSync. Before using
ActiveSync, assemble the i930 Sync Cradle, connect the mini USB cable, and place the
Smartphone in the cradle.
Place the Smartphone in the cradle with the Smartphone powered off unless you have
already installed ActiveSync on your desktop computer. Do not power on the
Smartphone while it is in the cradle until you have installed ActiveSync on your desktop
computer.
Tip: You can also use the i930 Sync Cradle to charge the battery in your
Smartphone.
Assemble the i930 Sync Cradle
1 Place the tabs of the phone support into the slots in the base of the cradle.
• If you are using a High Performance Lithium Ion battery, place the tabs in the slots
closest to the front of the base.
• If you are using an Extra Capacity Lithium Ion battery, place the tabs in the slots
just behind the slots closest to the front.
Page 19
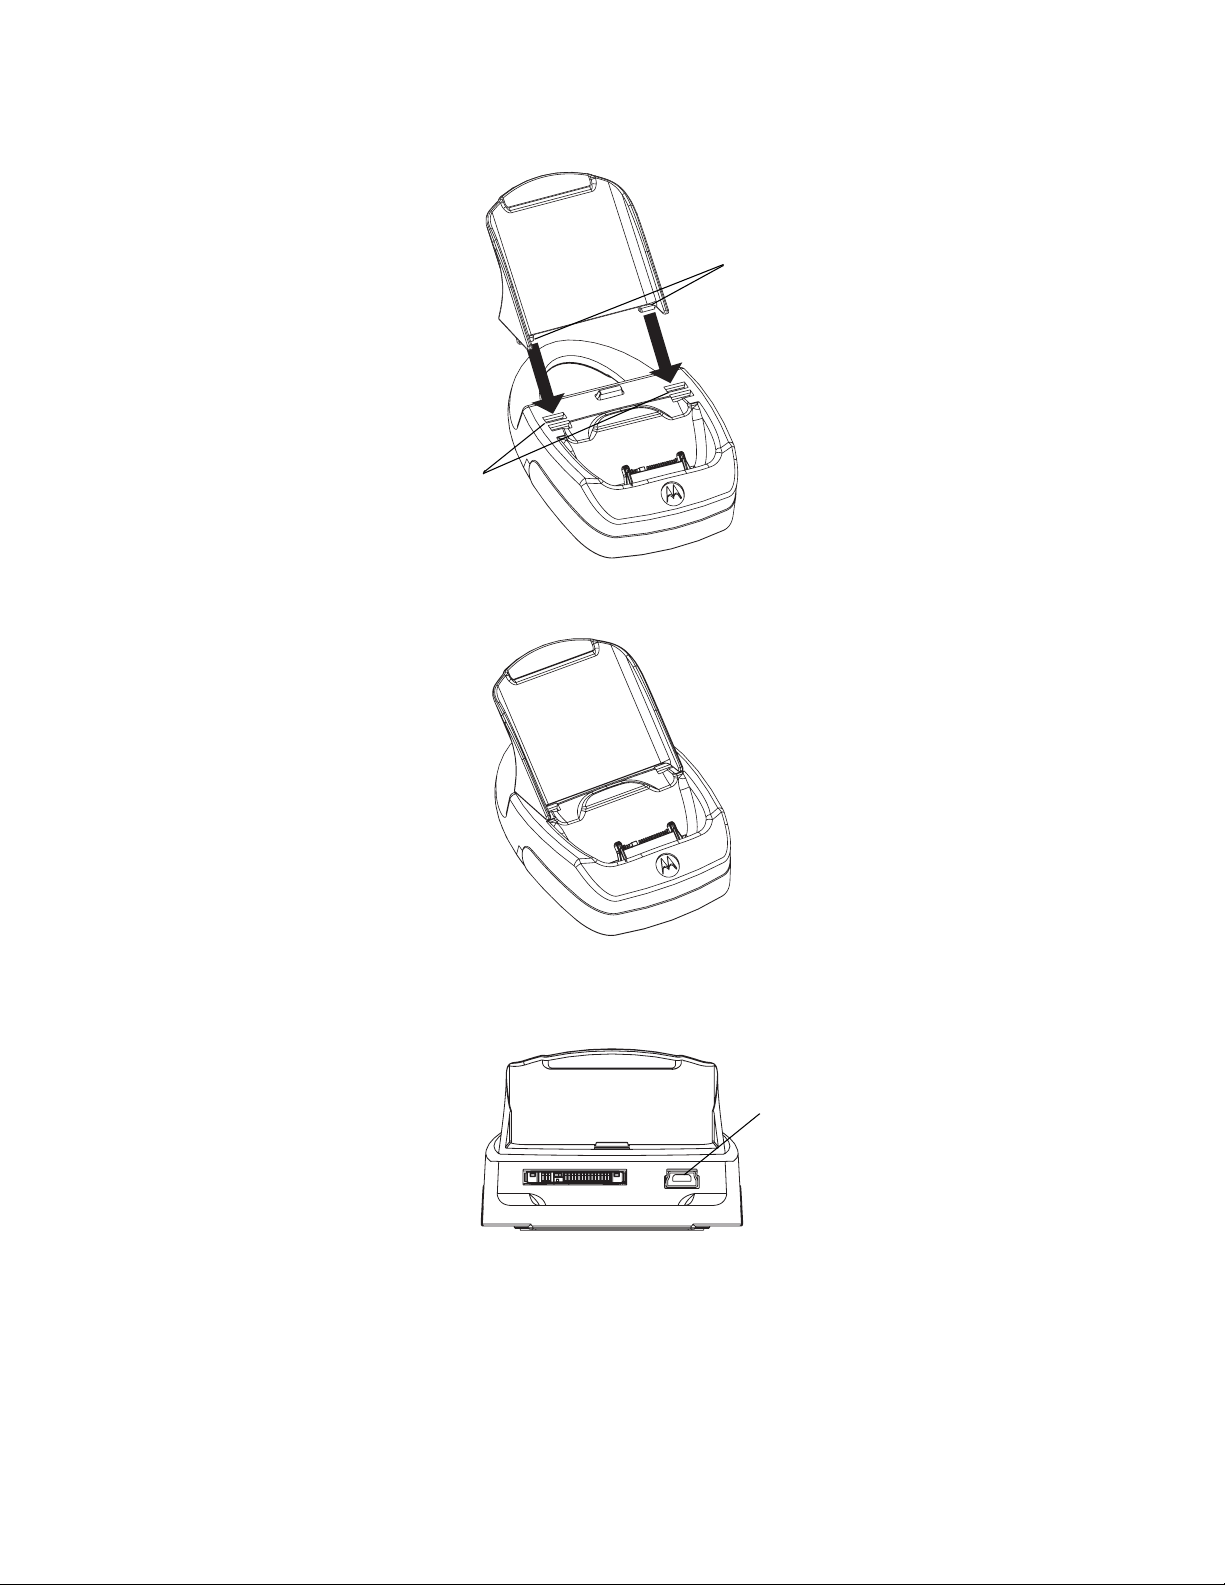
Getting Started
13
tabs
slots
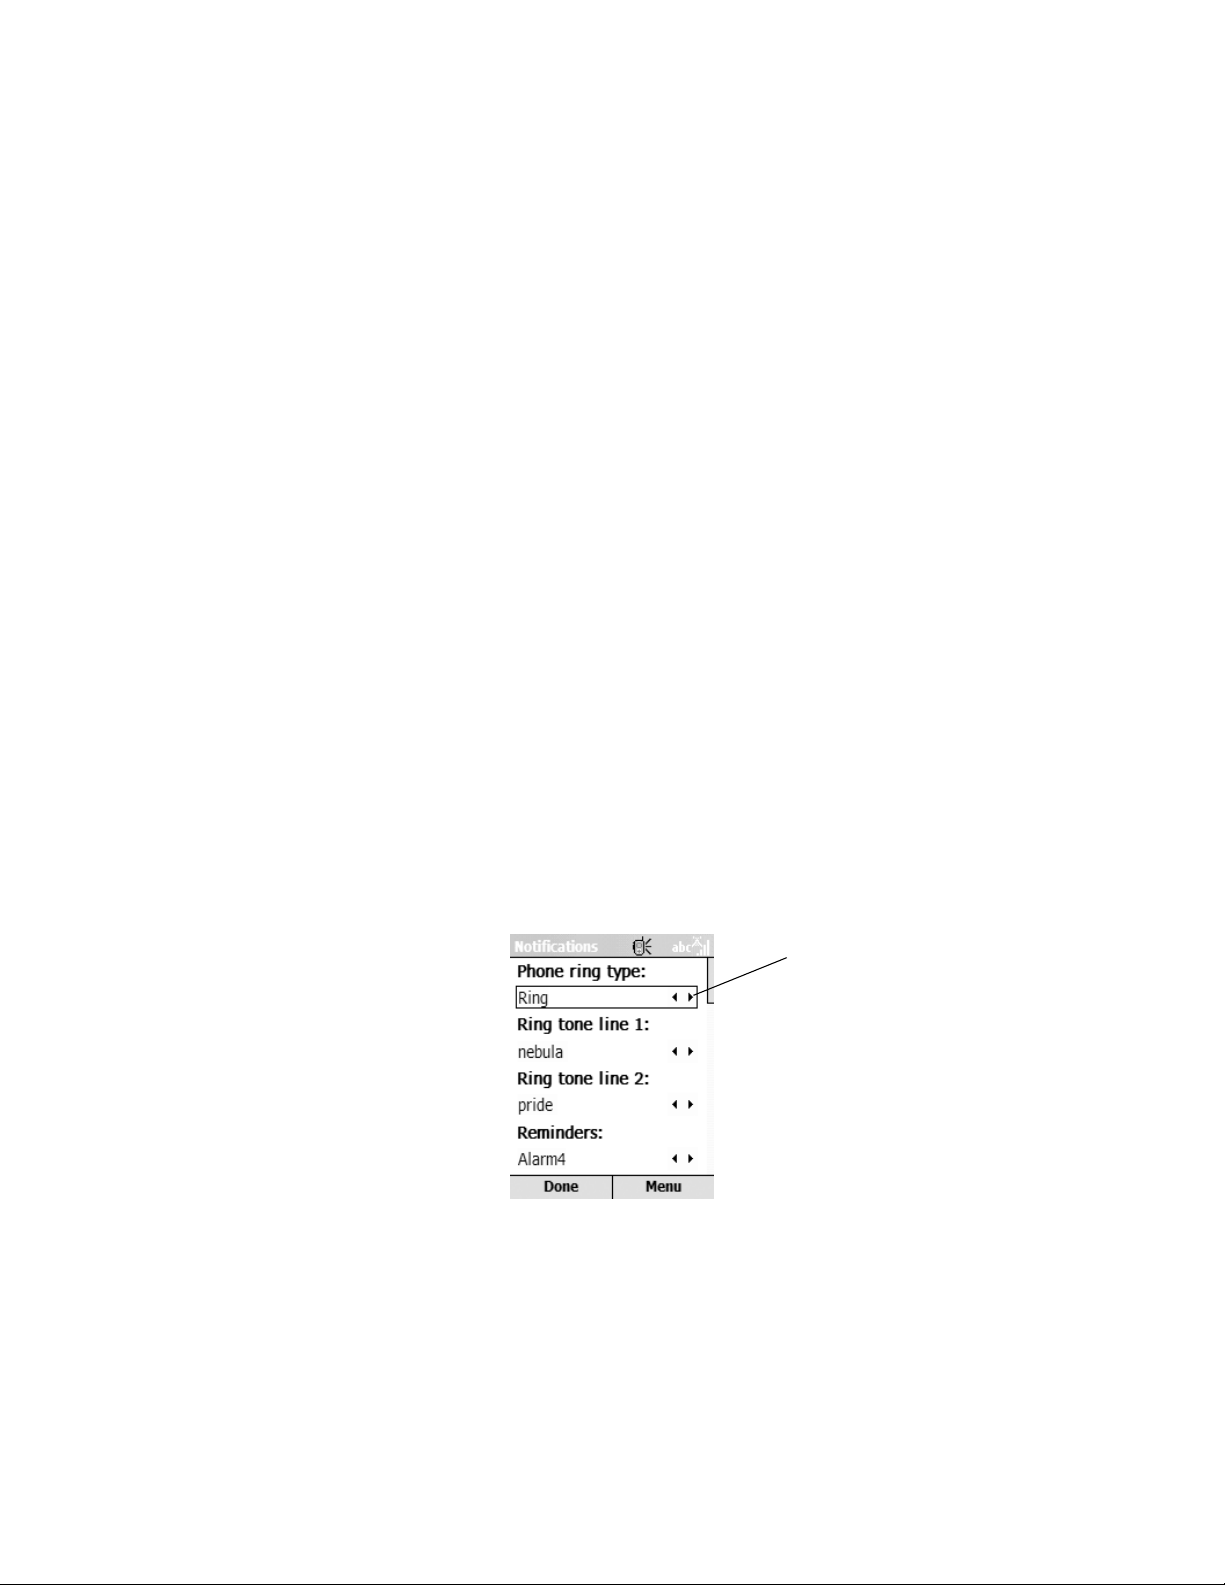
2 Press the phone sup port d ownw ard on to t he base of the cradle, until it cannot easil y
be removed.
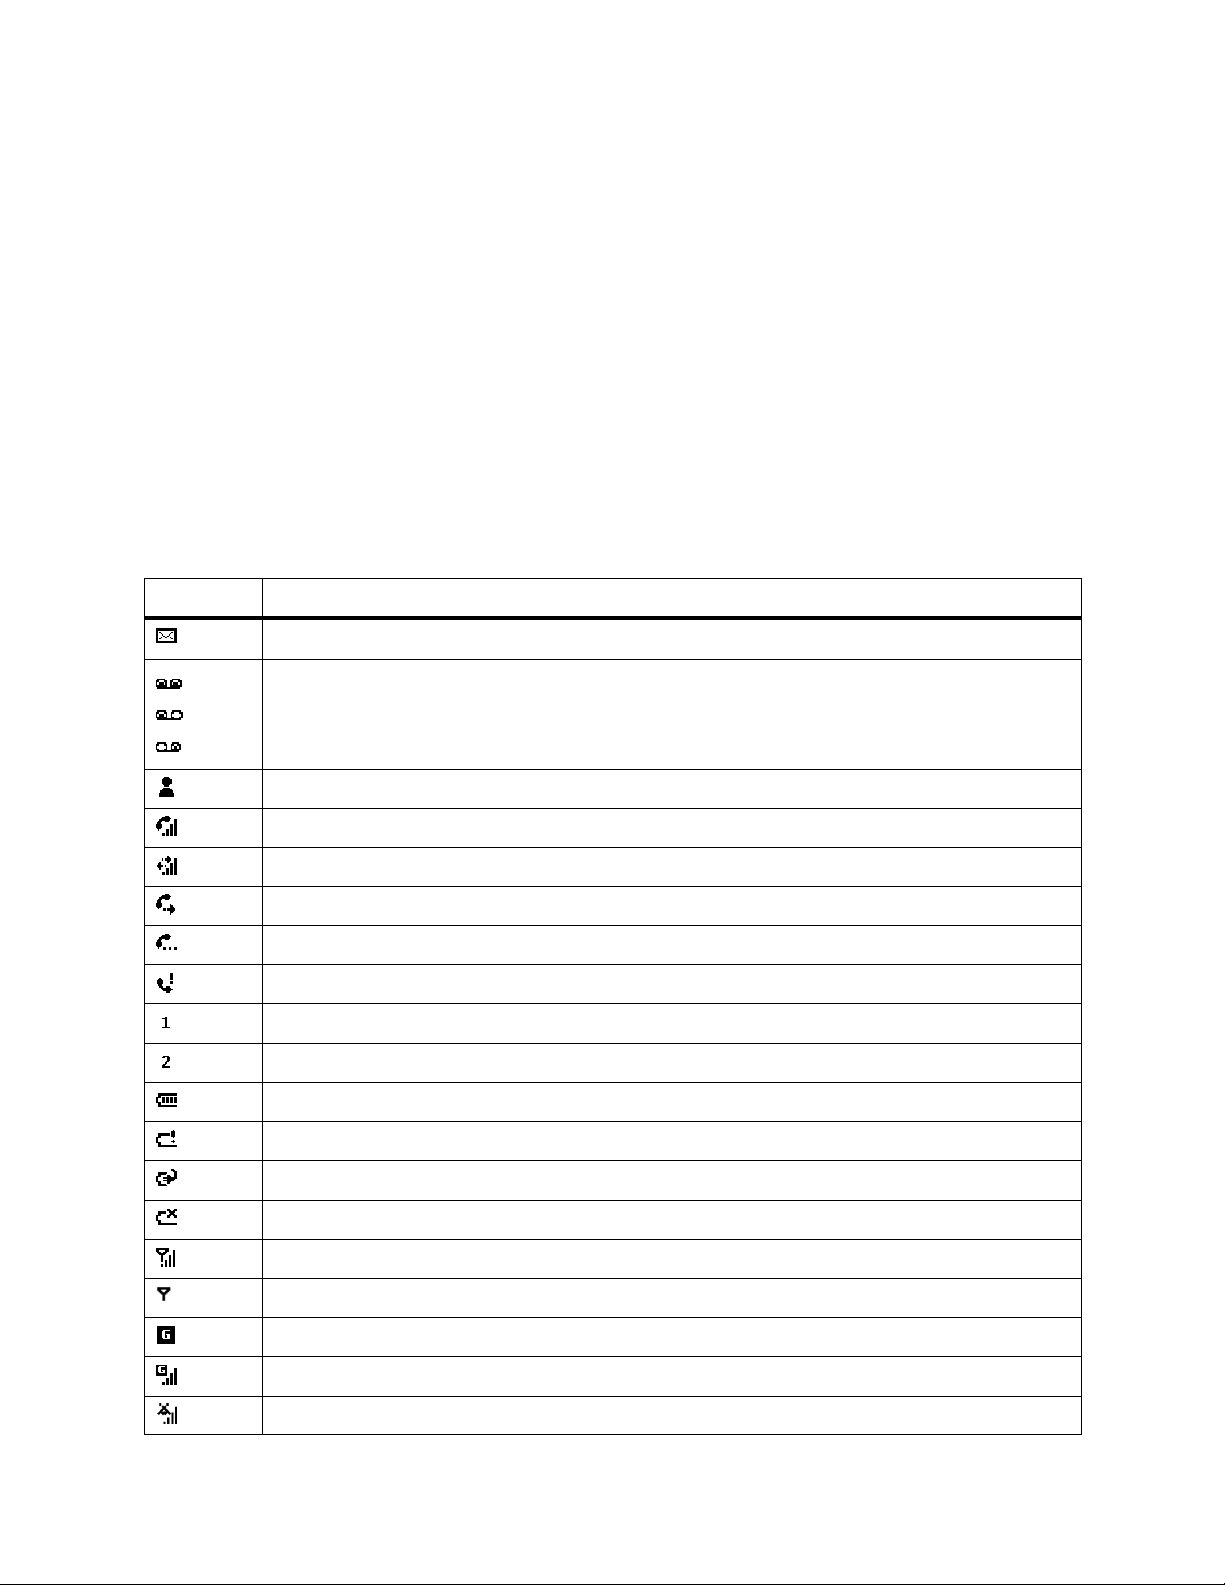
Connect the mini USB cable
1 Insert the cable’s smaller connector into the cradle’s USB port.
USB port
2 Insert the cable’s large connector into desktop computer’s USB port.
Page 20

Getting Started
14
Place the Smartphone into the cradle
1 Open the Smartphone’s connector cover.
connector
cover
2 Place the Smartphone into the cradle, inserting the connector in the base of the
cradle into the Smartphone’s accessory connector.
Using the i930 Sync Cradle to Charge Your Smartphone
You can use the i930 Sync Cradle to charge your Smartphone any time, whether or not
you are using ActiveSync or have the mini USB cable attached.
Charge the battery
1 Plug the charger into an electrical outlet.
Page 21

Getting Started
15
2 Plug the other end of the charger into the cradle’s charger port.
charger port
3 Open the Smartphone’s connector cover
connector
cover
4 If you have not yet installed ActiveSync on your desktop computer, make sure your
Smartphone is powered off.
5 Place the Smartphone into the cradle, inserting the connector in the base of the
cradle into the Smartphone’s accessory connector.
Page 22

Getting Started
16
Synchronizing by Using ActiveSync
You can use Microsoft® ActiveSync® technology to synchronize the information on your
Smartphone with information on your desktop computer and optionally, a server running
Microsoft® Exchange® Server with Exchange ActiveSync. When you do this, ActiveSync
compares the information on the Smartphone with the information on the desktop
computer and Exchange Server, and updates all locations, keeping you up to date with
the most recent information. You can even synchronize on a customizable schedule, or
as items arrive.
Use the i930 Sync Cra dle and mini USB cable in cluded with your Smartpho ne to connect
your Smartphone to your desktop computer.
To successfully connect your Smartphone to your desktop computer and synchronize
information, you must first install ActiveSync on your desktop computer.
Do not connect your desktop computer and Smartphone with the USB cable until after
you have installed ActiveSync.
After synchronizing for the first time, take a look at Calendar, Contacts, and Tasks on the
Smartphone. You will notice that your information has been copied to the Smartphone.
Disconnect the Smartphone from the desktop computer and you are ready to go!
Tip: Before you copy your Outlook Contacts to your Smartphone Contact list, it is a
good idea to clean up you r Outloo k Contacts list to avoid dup lica tion of Cont acts
that may already be on your Smartphone, and to assure that your Contacts are
alphabetized consistently with the Contacts on your Smartphone. Your Outlook
Contacts are combined in the same list as your Smartphone Contacts.
For more information about installing and using ActiveSync, see “ActiveSync” on page
145.
Setting Up a Partnership
After you install ActiveSync, assemble the i930 Sync Cradle and use it to connect your
Smartphone to your desktop computer. You are now ready to set up a partnership
between your Smartphone and your desktop computer.
Run the ActiveSy nc New Partnership W izard
1 Press and hold p for 2 to 3 seconds to power on the Smartphone.
2 When your desktop com puter detects th e U SB con nection, it will start the Ac tiveSyn c
New Partnership Wizard. Follow the instructions on the screen.
After you finish using the wizard, your data will begin to synchronize between your
desktop computer and your Smartphone.
Accessories
To order accessories, log on to our Web site at www.motorola.com/store /iden or contact
your Motorola Authorized Retailer.
Page 23

Getting Started
17
Finding More Information
The following table is a guide to finding more information about using your Smartphone.
Information about Source
Making a phone call This user guide: “Phone Calls” on page 35.
SIM card This user guide: “Securing Your Smartphone” on page
28 and “SIM Manager” on page 69.
Entering text This user guide: “Entering Text and Numbers” on page
24.
Customizing your Smartphone’s features This user guide: “Settings” on page 74.
Programs on the Smartphone This user guide: “Using the Start Menu” on page 20.
Additional programs that you can install on the
Smartphone
Connecting to and synchronizing with a desktop
computer or a Microsoft Exchange Server
Motorola warranty service or other information. http://www.motorola.com/iden/support
Last-minute updates and detailed technical
information
Up-to-date information on using ActiveSync with
your Smartphone
Companion CD.
Welcome Guide or ActiveSync Help on the desktop
computer.
Readme files, located in the Microsoft ActiveSync folder
on the desktop computer.
http://www.microsoft.com/mobile
Page 24
The Basics
18
The Basics
This chapter provides basic information about using your Smartphone, such as moving
through the screens, understanding what is on your screen, entering text and numbers,
and securing the Smartphone.
Navigation Methods
The following to pics descr ibe how to m ove throu gh the S martphone scre ens and pe rform
tasks quickly and easily.
Using the Navigation Pad
You can use the navigation pad to perform the following actions:
• Scrolling horizontally and vertically, moving the selection focus on the screen.
• Selecting an item that has the focus (is highlighted).
Scroll by pressing the part of the navigation pad that corresponds to the direction in
which you want to scroll. Once you have scrolled to an item, you can then select it by
pressing O at the center of the navigation pad.
In many cases, scrolling to an item and pressing O (in other words, “selecting” the item)
takes you to a program or setting. W hen you scro l l to a check box, p ressing O selects or
clears the check box.
In most procedures in this document, “se lect” means scrolling to an item and pressing O.
In some programs, such as Messaging, you can move to the next or previous item by
scrolling left or right. For example, when you are viewing a message in Messaging, you
can move to subsequent messages in the message list by scrolling right.
Some screens, such as the o nes in S ett ings, let yo u sel ect an opti o n by scr olling l eft a nd
right within a field. Usually, you apply the option by pressing the soft key below Done.
spinner
Using Soft Keys
There are 2 soft keys on the Smartphone, located directly below the display screen.
Pressing a soft key performs the command displayed immediately above it on the
screen. Soft key commands may change from one screen to the next.
Page 25

The Basics
19
Using Menus
On many screens, the right soft key is the Menu soft key. Pressing this soft key displays
a list of command s for the cu rrent scre en. Depending on the men u, select ing a comma nd
has one of the following results:
• Performs the command.
• Takes you to another screen where you can perform the command.
• Displays another menu.
• Opens a program.
Use a menu command
1 Select Menu by pressing B beneath Menu on any screen where Menu is displayed.
2 Select a command by scrolling to it and pressing O.
Navigate a menu
• You can choose menu commands quickly by pressing the number on the keypad that
corresponds to the number shown next to the command you want.
• When the top menu command is selected, scrolling up moves the selection focus to
the menu item on the bottom of the screen.
• To see more of a menu that takes up more than one screen, select More from the
menu or press 9.
Using the Home Key
Pressing h takes you to the Home screen.
Using the Home Screen
The Home screen is your starting place for most tasks. You can gain access to all of the
Smartphone features and programs from the Home screen.
The Home screen displays automatically when you turn on the Smartphone or leave the
Smartphone idle when it is on, but you can go to it at any time by pressing h.
You can control what displays on your Home screen by choosing from 6 Home screen
layout settings: Motorola Basic, Motorola Default, Windows Simple, Windows Default,
Windows Basic, and Large Font.
When you recieve your Smartphone the Home screen layout setting is Motorola Default.
Motorola Default Layout
The Home screen displays:
• Status icons
• Icons for the 5 programs that you have most recently used.
• The name of the program associated with the icon selected in the row above
• Your service provider’s name
• The time and date
• Information about items in your recent calls list, if you are not in a call. Information
about active calls and calls on hold, if you are in a phone call.
• The upcoming appointments stored in the phone Calendar.
Page 26

The Basics
20
• The number of voice mail messages you have. Select this area to go to your voice
mail messages.
• The number of email messages and text messages (SMS). Select this area to go to
your Inbo x.
• The Start menu, on the left. Pressing the soft key for this menu takes you to the list of
installed programs.
• A variable option, on the right. Pressing this soft key opens the associated program.
Chang e the Home screen layout
1 On the Home screen, select Start.
2 Select Settings and then Display Properties.
3 In Home screen layout, select the option you want.
4 Select Done.
Note: To ch ange o ther di splay pro pert y settings, se e “D ispl ay Prop erties” on p age 74.
Open programs from the Home screen
For all Home screen layouts:
• To open a program from the list of programs on the Start menu, select the start menu
by pressing A beneath Start, and then select a program by scrolling to it and
pressing O.
• To open the program that appears as the right variable option, such as Contacts,
press B beneath it.
For some Home screen layouts:
• To open any the programs that you have most recently used, select the icon
associated with the program by scrolling to it (you can scroll left and right by pressing
the left and right parts of your navigation pad) and pressing O.
• To go to your list of voice mail messages, select voice mail by scrolling to the voice
mail area of the screen and pressing O.
• To go to your Inbox for your email messages and text messages (SMS), select the
Inbox by scrolling to the message area of the screen and pressing O. If you have
additional email accounts set up, scroll down to view and select them.
• To go to the recent calls list, select it by scrolling to the area showing information
about the recent calls list and pressing O.
• To go to the Calendar, select it by scrolling to the area showing information about
upcoming appointments and pressing O.
Using the Start Menu
You can access most of your Smartphone’s features directly from the Start menu.
Pre-installed programs appear on the Start menu, as do programs you install on your
phone, such as Java applications.
Open a program
1 On the Home screen, select Start by pressing A beneath Start.
2 Select a program by scrolling to it and pressing O.
Page 27

The Basics
21
Assigning a Speed Dial Number to a Program
To make a program on the Start menu easier to access, you can assign that program a
speed dial number. When you press and hold the number you have assigned, the
program will open.
Assign a speed dial numbe r to a program
1 On the Home screen, select Start by pressing A beneath Start.
2 Highlight the program you want to assign a speed dial number to.
3 Select Menu.
4 Select Add Speed Dial.
5 In the screen that appears, you can assign a speed dial number and the name that
will appear for th e spee d d ial nu mber in you r list of spee d dial numbers, or accept the
default values that are shown.
6 Select Done.
Using the Quick List
The Quick List provides a lis t of commands tha t you can use to quickly perfor m com mon
actions.
Use the Quick List
1 Press p.
2 Select the Quick List command you want by scrolling to it and pressing O.
Commands are described in the following table.
To
Turn off the Smartphone. Power off
Turn off wireless c a pa bilit y. You can turn o ff wire l e ss c a pa bilit y to
conserve battery life when you do not want to make or receive calls,
or in environments where cell phones must be turned off. When the
wireless capability is turned off you can still use the other Smartphone
features.
Lock the keypad so that you cannot make accidental keypresses. To
unlock the keypad, select Unlock, and then press #.
Turn on all wireless capability, so t hat you c an make and receive calls. Flight mode of f
Make one of these profiles the active profile. Normal
Select this Quick List
Command
Flight mode
Key lock
Silent
Meeting
Outdoor
Automatic
Headset
Car
Speakerphone
Page 28
The Basics
22
Using the Back Key
Pressing m takes you to the previous screen, in a similar manner to m on a browser.
In a text field, pressing m moves the cursor back to delete 1 or more characters. This is
similar to pressing the BACKSPACE key on a keyboard.
Backspace and remove 1 character
• Press m.
Backspace and remove a line of text
• Press and hold m.
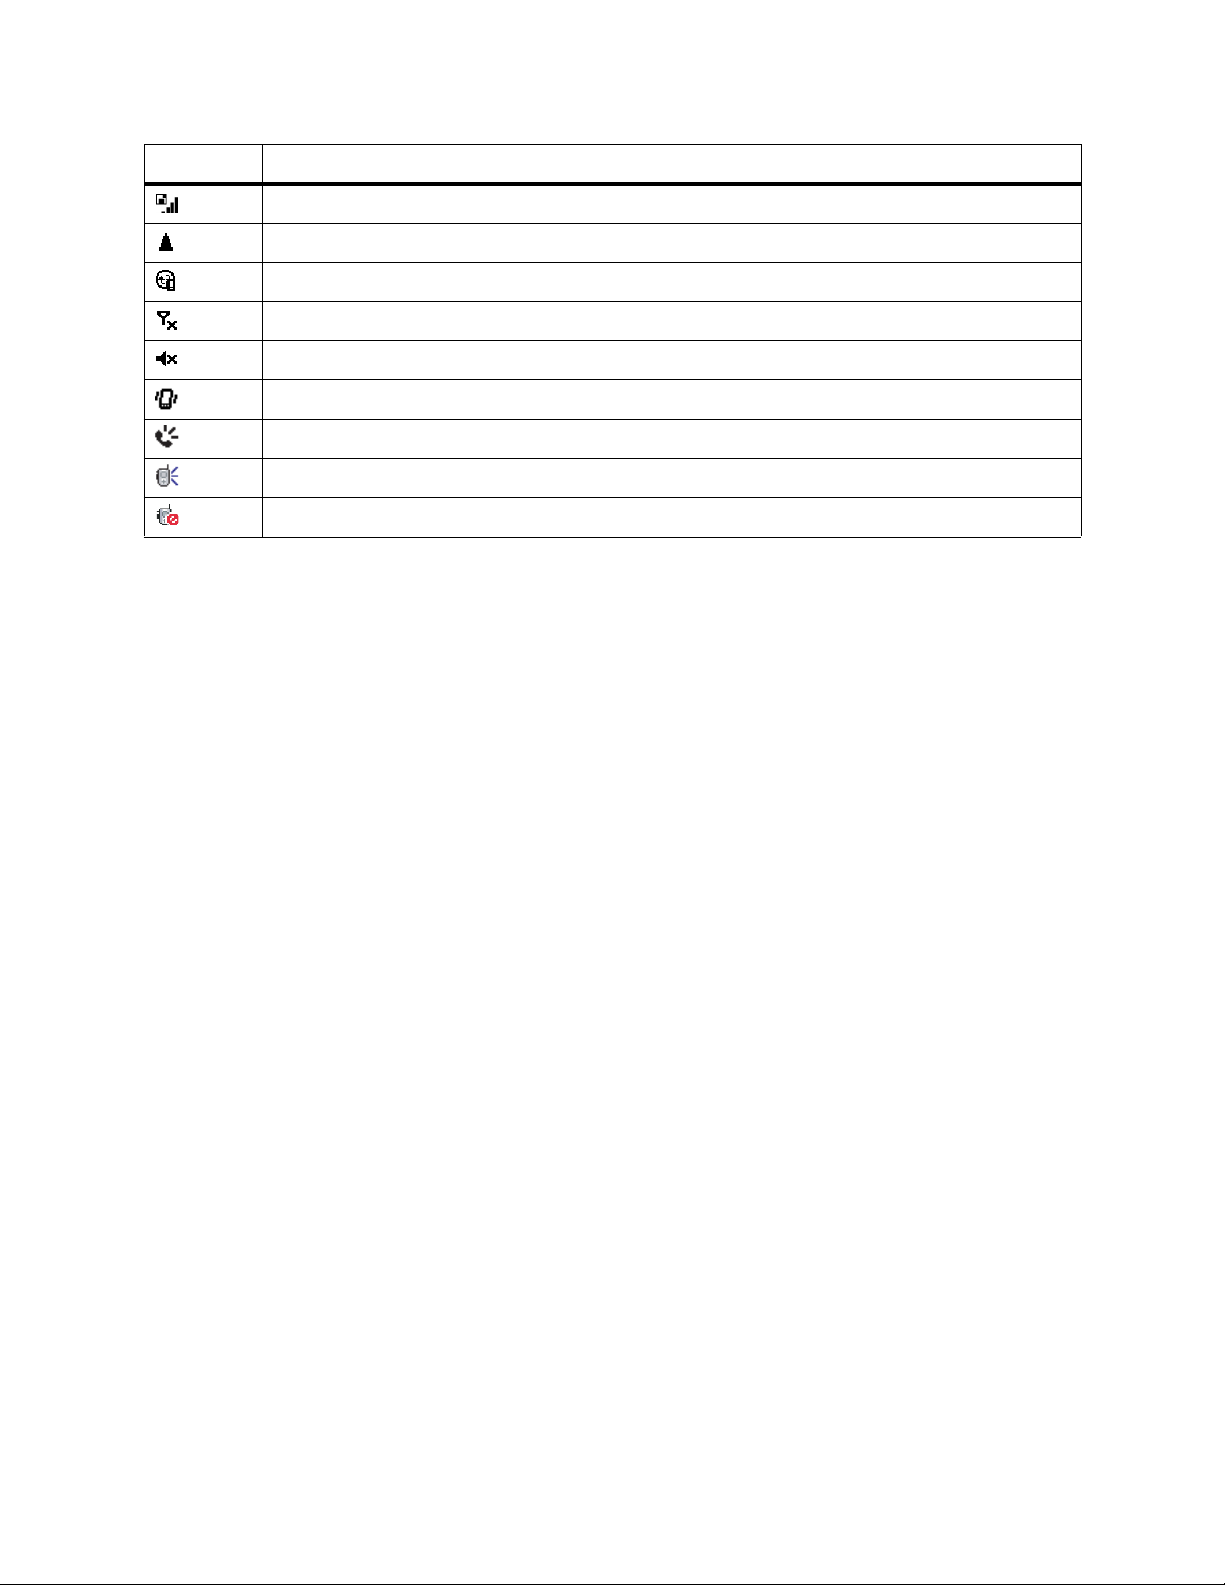
Understanding Status Indicators
Status indicators appear at the top of the Smartphone screen. The following table lists
common status indicators and their meanings.
Indicator Me aning
New email or text message (SMS)
New voice mail. The icon or icons you see may depend on your network.
New instant message
Voice call in progress
Data call in progress
Incoming voice calls are being forwarded to another number
Call on hold
Missed call
Outgoing line 1
Outgoing line 2
Battery level
Low battery
Battery charging
No battery
Signal strength
No signal
General Packet Radio Services (GPRS) available
General Packet Radio Services (GPRS) in use
General Packet Radio Services (GPRS) in use for IDEN mode
Page 29
The Basics
23
Indicator Me aning
Packet data exchanging for IDEN mode
Roaming
Sync error
Radio off
Ringer off
Vibrate instead of ringing
Speakerphone on — Phone call sounds come through the speaker
Speaker on — Private call and group call sounds come through the speaker
Speaker off — Private call and group call sounds come through the earpiece
Backli ght D im ming
A backlight light s the di splay an d keyp ad whe n you make or recei ve a call, open or close
the flip, or press keys or buttons.
If you do not do any of these things for 10 seconds, the backlight of the internal display
dims. If you do not do any of these things for 30 seconds or more, the backlight turns off.
While on an active call wi th the flip open o r closed, the inter nal display or external display
will remain dimly lit for the duration of the call.
When the backlight is off, pressing a key on the keypad turns the backlight on but does
not perform the action associated with the key.
Set time it takes for the backlight to turn off
1 On the Home screen, select Start.
2 Select Settings and then Power Management.
3 In Backlight timeout, select the amount of time for the Smartphone before the
backlight turns of f, if you do not make or receive a call, open or close the flip, or press
keys or buttons.
4 Select Done.
Page 30
The Basics
24
Finding Your Phone Number and Other Basic In form ation
The Owner Information screen displays the following information about your
Smartphone:
This Field Displays
Name If you want to fill in this field, enter your name.
Line 1 Your phone number . This number appears when your receive your first
phone call.
Line 2 Your Smartphone’s second line, if you have one.
PTT Your Private ID, the number others use to contact you on Private calls.
Email address If you want to fill in this field, enter your email address here.
PTT Group ID The number of the Talkgroup you have joined.
Carrier IP The IP address assigned to your service provider. This field is filled in
when you register for packet data services.
IP Address - 1 The IP address you use to access the Internet with your Smartphone.
This number appears when you register for packet data service.
IP Address - 2 The IP address you use to access the Internet with your Smartphone.
This number appears when you register for packet data service.
Circuit Data The number you want if you want you use your Smartphone to transfer
circuit data. See “Using Your Smartphone as a Modem” on page 153. You
get this number from your service provider.
Notes: If you want to fill in this field, enter the note you want to appear here.
Access the Owner Information screen
1 On the Home screen, select Start.
2 Select Settings and then select Owner Information.
Entering Text and Numbers
You can enter text and numbers by using the keypad. Smartphone supports 4 input
modes for entering text and numbe rs: Multi pr ess, T9 , Numer ic, and Sym bols. Mu lti press
and T9 modes are used for entering text, Numeric mode is used for entering numbers,
and Symbols is used for entering symbols.
When you select a field that requi re s text or num bers, Smartpho ne auto matical ly selects
the appropriate input mode.
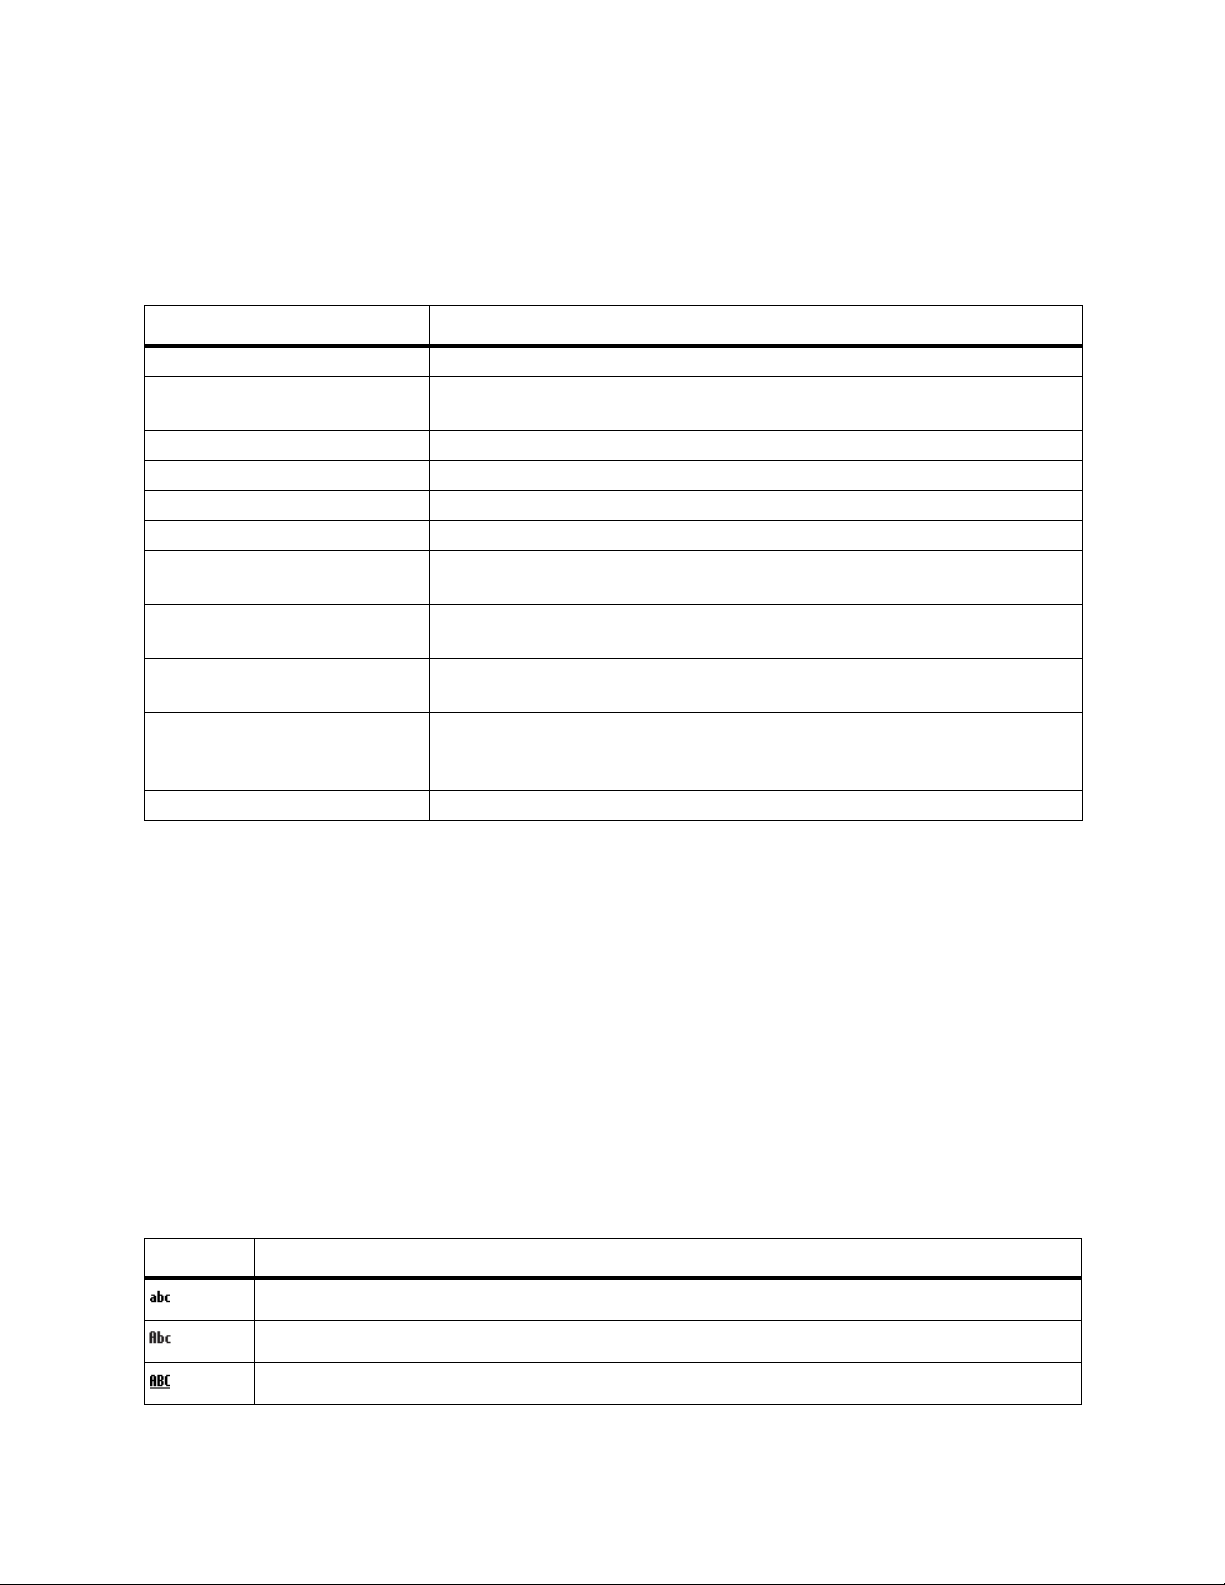
The status indicator on the top right side of the display screen shows the input mode and
capitalization that you are currently using.
Indicator Input mode
Multipress text input mode, lowercase
Multipress text input mode, uppercase 1 letter
Multipress text input mode, caps lock
Page 31

The Basics
25
Indicator Input mode
T9 text input mode, lowercase
T9 text input mode, uppercase 1 letter
T9 text input mode, caps lock
Numeric input mode
If you are using Symbols mode, a page of symbols for you to choose from appears on
the screen, but no status indicator appears.
Change input modes and capitalization
To choose Multipress, T9, Numeric, or Symbols mode:
1 Press and hold * until a menu appears showing all input modes.
2 Select the mode you want.
To choose Multipress, T9, or Numeric mode, and choose the capitalization you want:
• Press * repeatedly until the st atus in dicator for the input m ode you want is shown on
the top of the display screen.
To select Symbols mode:
• Press and hold #.
Delete characters
• Press m to delete character to the left of the cursor.
• Press and hold m to delete all the characters in a line.
Insert a space
• Press #.
Entering Text in Multipress Mode
To enter a letter in Multipress mode, press the number key on which the letter appears.
To enter the first letter on the number key, press the key once. To enter the second
letter, press the key twice, and so on.
For example:
• To enter the letter “s,” press 7777.
• To enter the word “hat,” press 44, 2, 8.
The letter entered most recently is underlined until you have completed the keypresses
for the letter a nd moved on to the next letter . When yo u enter lette rs that are o n the same
number key, you must pause after entering the first letter and wait until the underline
disappears before entering the next letter so that the first letter can be processed. For
example:
• To enter the word “cat,” press 222, pause, press 2, pause, and press 8.
The pause betwee n keypre sses is call ed the M ultipress tim e out, an d you can ad j ust the
length of the pause.
Page 32

The Basics
26
Change the Multipress time out
1 On the Home screen, select Start.
2 Select Settings and then Accessibility.
3 Select Multipress Timeout.
4 In Multipress time out, select the length of the pause between keypresses.
5 Select Done.
Enter Punctuation in Multipress Mode
• Press 1 repeatedly until you see the punctuation mark that you want.
Tip: To see all of the available symbols, press and hold #.
Entering Text in T9 Mode
To form a word in T9 mode, press the number keys that contain the letters you want. As
you enter letters, T9 analyzes your keypresses and attempts to complete the word. For
example, to enter the word “shoe,” press 7, 4, 6, 3.
Enter text in T9 mode
1 Select T9 as your input mode.
2 Enter letters by pressing the keys on which the letters ap pear. Press a key only once
for each letter.
Tip: If your word is 3 letters long or longer, it is best to press the keys for at least the
first 3 letters.
3 If the word you want appears:
• Scroll right to accept the word and move the cursor to the end of the word.
• Scroll left to accept the word and move the cursor to the beginning of the word.
• Press # or O to accept the word and enter a space after it.
4 If you want to view a list of available words, use the navigation pad to scroll up or
down. When the word you want is highlighted:
• Scroll right to accept the word and move the cursor to the end of the word.
• Scroll left to accept the word and move the cursor to the beginning of the word.
• Press # or O to accept the word and enter a space after it.
If you do not see the correct word, backspace to delete the word you entered, press and
hold * to change to Multipress mode, and then manually enter the word.
Enter compound words in T9 mode
You can string short words togeth er to create longer, comp ound words like “ma i lman” or
“cannot”.
1 Enter the word that is the first part of the compound word, like “mail” or “can”.
2 Scroll right to accept the word and move the cursor to the end of the word.
3 Enter the word that is the next part of the compound word, like “man” or “not”.
Enter pu nctuation in T9 mode
• Press 1, then use the navigation pad to scroll through a list of common punctuation
and select the one you want.
Page 33

The Basics
27
Enter “emoticons” in T9 mode
1 Press 1 twice or 3 times, dep ending on the numbe r of charact ers in the “em oticon”
you want.
2 Use the navigation pad to scroll through a list of “emoticons” and select the one you
want.
Having Trouble Entering a Word in T9 M ode?
T9 cannot always f ind the word yo u want in the l ist of possible words; in these cases, a dd
the word to the T9 dictionary. Next time, you will be able to enter the word in T9 mode.
Add a word to the T9 d ictionary
1 Scroll to the end of the list of words and select Add Word?.
2 Enter the word in Multipress mode.
3 Select Done.
Entering Numbers
You can enter numbers by using Numeric mode. If you need to enter a number within a
line of text, you can change to Numeri c mode to enter the numbe r, and then cha nge back
to Multipress or T9 mode to finish entering the text.
Enter a number
1 If necessary, change to Numeric mode by pressing and holding *.
2 On the keypad, press the number you want.
3 Change back to Multipress or T9 input mode by pressing and holding *, and then
finish entering your text.
Note: If a field permits a numeric entry only, such as the Work phone field in
Contacts, the input mode automatically defaults to Numeric mode.
Entering Symbols
In Multipress and T9 modes, you can access some symbols by pressing 1.
In any mode you can access all symbols by pressing and holding # until a page of
symbols appears. When you select the symbol you want, you are returned to the
previous mode.
Enter a symbol
• In Multipress or T9 mode, press 1 repeatedly until the symbol you want appears.
• In any mode, press and hold # and select the symbol you want.
Performing Common Input Tasks
Enter a space
• In Multipress or T9 mode, press #.
Start a new line
• In any input mode, press O.
Page 34

The Basics
28
Delete characters
• Press m to delete the character to the left of the cursor.
• Press and hold m to delete all the characters in a line.
Change between uppercase and lowercase
• In Multipress or T9 mode, press *.
Tip: In Multipress or T9 mode, the first letter of a sentence is automatically
capitalized.
Lock caps
• In Multipress or T9 mode, press * twice. Press * again to return to lowercase.
Enter a symbol
• In any input mode, press and hold # and select a symbol.
Enter the plus (+) sign for international calls
• Press and hold 0.
Securing Your Smartphone
You can secure your Smartphone by:
• Using your SIM card PIN feature
• Removing the SIM card from your Smartphone
• Locking the Smartphone’s keypad
For more security settings, see “Security” on page 96.
Using the SIM Card PIN
To prevent unauthorized use of your Smartphone, your SIM card can be pr otected by a
PIN that you enter each time the Smartphone is powered on. Y ou can change the PIN,
and you can select whether you want the requirement that it be entered on or off. The
default selection is off.
When the SIM PIN requirement is off, your Smartphone can be used without entering a
PIN.
Important: When the SIM PIN requirement is off, the personal data on your SIM
card is not p rotected. Anyone can use y our S ma rtpho ne and acce ss
your personal data.
When the SIM PIN req uirem ent is on, yo u are p rom pted to e nter your P IN each tim e you
power on your Smartphone.
Note: If a SIM PIN is required, your Smartphone will not function until the SIM PIN is
entered, except for making emergency calls.
Page 35

The Basics
29
Turn the PIN requirement on or off
1 On the Home screen, select Start.
2 Select Settings then Security.
3 Select Enable SIM PIN or Disable S IM PIN .
4 Enter your PIN and select Done.
Note: The default SIM PIN is 0000. Change your PI N to pr event fraud ul ent u se of t he
SIM card (see “Change the PIN”).
Enter the PIN
1 When the Enter PIN screen appears after you power on your Smartphone, enter
your SIM PIN.
2 Select Done.
Note: If you enter your PIN incorrectly 3 times, your SIM card is blocked. To unblock
your SIM card, you must contact your service provider. See “Unblock the PIN”
on page 29.
Change the PIN
Note: The SIM PIN requirement must be turned on in order to access this feature.
1 On the Home screen, select Start.
2 Select Settings and then Security.
3 Select Change PIN.
4 In Old PIN, enter the current PIN number.
5 In New PIN, enter the new PIN number.
6 In Confi rm new PIN, enter the new PIN number again, and select Done.
Important: Be sure to make a note of your PIN. When the SIM lock is enabled,
you must provide this PIN when you turn on your Smartphone to
make calls.
Unblocking the PIN
If you enter your PIN incorrectly 3 times, your SIM card is blocked. To unblock your SIM
card, you must contact your service provider to get a PIN Unblock Code (PUK).
Import an t: If you unsuc cess full y ent er th e PUK co de 10 time s, you r SI M card is
permanently blocked and must be replaced. If this happens, all data
is lost. You will get a message to contact your service provider.
Except for making emergency calls, yo ur Smartphone will not
function with a blocked SIM card.
Unbloc k the PIN
1 Contact your service provider.
2 At your servic e provider ’s represe ntative’ s re quest, pro vide the informatio n needed to
give you a PUK code.
3 Select Unblock PIN.
4 Enter the PUK code.
5 Enter a new 4- to 8-digit SIM PIN.
6 Re-enter your SIM PIN.
Page 36

The Basics
30
Note: These steps must be performed in quick succession.
If you entered the codes properly, SIM Unlocked appears on the display.
Removing the SIM Card
Normally, it is not necessary to remove your SIM card, but you may wish to do so for an
extra measure of security.
Important: Do not touch the gold-colored areas of your SIM card. Protect your
SIM card as you would any delicate obj ect. S to re it careful ly.
Removing the SIM card
1 Power off your Smartphone.
2 Slide the release button back until it releases the battery door.
release
button
3 Allow the battery d oor to pop up, sli de it forw ard, and r emo ve i t from the back of your
Smartphone.
Page 37

The Basics
31
4 Remove the battery by pushing it toward the antenna and lifting it out.
5 Slide your SIM card out of the SIM card holder.
SIM card
holder
Return the SIM card to your Smartphone
1 Make sure the Smartphone is powered off
2 If necessary, remove the battery door and battery.
3 Hold your SIM card and Smartphone in the orientation shown in step 4.
4 Carefully slide your SIM card into your Smartphone until it lines up with the marks
above and below the SIM card holder.
SIM card
holder
Page 38

The Basics
32
Using a Different SIM Card in Your Smartphone or Using Your SIM
Card in a Different Phone — Information May Be Lost
If you remove your SIM card and use it with another phon e, or use another SIM card with
your Smartphone, the following information is erased:
The SIM card th at comes with you r Smartphon e is design ed for optim al Conta cts storage
and feature use. For SIM card compatibility information, go to www.motorola.com/iden/
support.
If you remove your SIM card and use it with another phon e, or use another SIM card with
your Smartphone, the following information is erased from your Smartphone:
• The recent calls list
• The call alert queue
• Call forwarding settings
• Call waiting settings
• Owner information
Note: In some cases, Contacts may not be accessible if you move your SIM card to
another phone. Contacts entries created with your Smartphone may not
readable be by a n older iDEN SIM-based phone or may appe ar d iffere ntl y tha n
on your Smartphone.
Locking the Keypad
• Locking the keypad turns off keypad functionality. This is a helpful feature if, for
example, the Smartphone is turned on and in your pocket, and you want to prevent
accidental keypresses.
Lock the keypad
• On the Home screen, press and hol d e. When the Smar tphon e is l o cked, t he lef t soft
key command displays Unlock.
Unlock the keypad
• On the Home screen, select Unlock and press #.
Note: You can still receive calls and make emergency calls when the keypad is
locked.
Page 39

The Basics
33
Using a Headset
If you use a headset or similar device with your Smartphone, you can set your phone to
send incoming sound to the headset only, or to the headset and the speaker at the sam e
time.
Note: If you are using your Smartp hone with a headset, and you have the Flip to End
option set to On, closing your flip sends incoming sound to the headset and
does not end the call.
Send incoming sound to headset only
1 On the Home screen, select Start.
2 Select Settings and then Phone Calls.
3 Select Headset/Speaker.
4 Select Headset only.
• Select Headset & Speaker to send incoming sound to the headset and ring tones
to the speaker.
5 Select Done.
Send incoming sound to headset and speaker
1 On the Home screen, select Start.
2 Select Settings and then Phone Calls.
3 Select Headset/Speaker.
4 Select Headset & Speaker.
5 Select Done.
Using a Remote PTT Button
If you are usin g a h eadset or o ther accessor y w ith a rem ote PT T bu tton, you can use the
remote PTT button for phone calls, Private calls, and group calls.
For phone calls, use the remote PTT button to answer calls, switch between calls, and
end calls. Hold the rem ote PTT button for less than 2 second s to answer calls and switch
between calls. Hold the remote PTT button for more than 2 seconds to end calls.
For Private calls and group calls, use the remote PTT button as you would the PTT
button on your phone.
When you are not in a call or receiving a call, pressing the remote PTT button for more
than 2 seconds enables you to enter a phone number by using a voice shortcut.
Note: When using a headset, the PTT button on your phone works the same way as
when you are not using a headset. Private call and group call sounds will be
heard through the headset.
Page 40

The Basics
34
Navigating and Managing Stored Files
File Explorer enables you to navigate and manage the files stored on your Smartphone,
and, if you have p urcha sed an SD ca rd an d inser ted i t in to your Smart phone , the files on
your SD card.
File Explorer on your Smartphone works similarly to Windows Explorer on your PC. You
can view, run, copy, rename, and delete files with it.
Access File Explorer from the Start menu.
When using File Explorer:
• Scroll to highlight folders and files.
• Press O to expand or close highlighted folders.
• Use the option on the left soft key and the menu on the right soft key to open, run,
move, copy, paste, rename, and delete.
Managing Memory
The following types of items share memory space in your Smartphone:
• Ring tones and other sounds
• Pictures and wallpapers
• Video clips
• All types of messages, except voice mail messages
• Applications you have downloaded
• Contacts entries
• Calendar entrie s
Deleting any of these items frees more memory for all of these types of items.
Page 41

Phone Calls
35
Phone Calls
This chapter explains how to make, receive, and manage digi tal cellular phone calls, and
create aids that help you make calls more efficiently, such as speed dials and voice
shortcuts.
Maki ng a Phon e Call
There are several ways to make a phone cal l. This section descr ibes how to make a call
from the following locations:
• The Home screen
• Contacts
• The list of recently dialed phone numbers
• The recent calls list
• An email message
This section also covers how to make emergency calls.
Making a Phone Call from the Home Screen
On the Home screen, you can call someone by entering a phone number or a contact
name using the keypad.
As you begin pressing keys, your Smartphone displays the names from your Contacts
and recent call list whose name or phone number match your entry. You can then select
the name or number to call without having to enter the entire name or number.
Contacts appear on the Home screen with this icon and a contact list abbreviation.
You can view a ll the contact list abbrevi ations for all the numb ers stored in this contact by
scrolling to the name and then scrolling left and right. The phone call is made to the
phone number associated with the contact list abbreviation that is showing when you
press s.
Note: For more i nf orma tion about contact list abbrev iations, see “C ont act s, C alenda r,
and Tasks” on page 60.
Make a call by entering a phone number
1 On the Home screen, begin entering the phone number.
2 Do one of the following:
• If you see the number or contact name to call, scroll to it. If the contact list
abbreviation for the number you want to call is not showing, scroll left or right to
display it. Then press s.
• If you do not see th e number or cont ac t name, finish en tering the number and press
s.
Page 42

Phone Calls
36
Make a call by entering a contact name
1 On the Home screen, begin pressing the numbers on the keypad the correspond to
the letters in the contact name.
2 When you see the contact name, scroll to it. If the contact list abbreviation for the
number you want to call is not showing, scroll left or right to display it.
3 Press s.
Note: The number you make the call to becomes the contact’s default number.
Making a Phone Call from Contacts
You can make a phone call from your contact list or from an open contact.
When you make a call from your contact list, the Smartphone dials the contact’s default
number. The contact list abbreviation associated with the default number appears with
the contact when you view the co ntact list. You can cha nge a contact’ s default numb er at
any time.
You can view all the contact list abbreviations for all the numbers stored in a contact by
scrolling to the name and then scr olling left or right. T he pho ne call is made to t he pho ne
number associated with the contact list abbreviation that is showing when you press s.
When you make a call from an open contact, you can select the number to dial from the
contact card.
Make a call from the contact list
1 On the Home screen, select Start.
2 Select Contacts.
3 Scroll to the contact. If the contact list abbreviation for the number you want to call is
not showing, scroll left or right to display it.
4 Press s.
Tip: If you have a long list of contacts, and you don’t see the contact you want, enter
the first few letters of the contact’s name. When you do this, the Smartphone
searches through the contact list and displays the name.
Change the default number for a contact
1 On the Home screen, select Start.
2 Select Contacts.
3 Select the contact whose default number you want to change.
4 Scroll to the phone number that you want to set as the new default number. Make
sure you choose a phone number as the default number.
5 Select Menu, and then select Set as Default.
Note: When you make a call from the Home screen using a contact, the number you
make the call to becomes the contact’s default number.
Make a call from an open contact
1 On the Home screen, select Start.
2 Select Contacts.
3 Select the contact to call.
4 Select the phone number to call.
5 Press s.
Page 43

Phone Calls
37
Making a Phone Call Using a Recently Dialed Number
You can select a name or number from the list of recently dialed phone numbers to call
that person again. You can also quickly redial the last number called.
Make a call using a recently dialed phone number
1 On the Home screen, press s to display a list of recently dialed phone numbers.
2 Scroll to the name or phone number to call.
3 Press s.
Dial the last number called
• On the Home screen, press s twice.
Making a Phone Call from the Recent Calls List
When you make a phone call from the recent calls list, the call is made to the phone
number you choose.
If a name on the recent calls list is stored in Contacts with more than one phone number,
you can choose to make the call to a different phone number in that contact by scrolling
left or right through the contact list abbreviations stored with the contact. The phone call
is made to t he phone number associated wi th the co ntact list abbr eviation that is sho wing
when you press s.
Make a phone call from the recent call list
With the Flip Open
1 From the Home screen, select St art.
2 Select Recent Calls.
3 Choose a numb er to call:
• Scroll to or select the name or number you want to call.
• Scroll to a name that is stored in your Contacts. If the contact list abbreviation for
the number you want to call is not showing, scroll left or right to display it.
4 Press s.
With the Flip Closed
1 Press ..
2 Press the volu me contr ols to scr oll to th e n ame or nu mber yo u wan t to m ake a p hone
call to.
3 To make a phone call, press t.
4 To end the phone call, press ..
Page 44

Phone Calls
38
Making a Phone Call from a Hyperlink Phone Number
You can quickly dial a phone number from an email that contains a hyperlink phone
number. A hyperlink phone number is underlined, in the same manner as a Web site
address.
Make a call from a hyperlink phone number
1 From a message containing a hyperlink phone number, scroll to and then select the
phone number.
You will be prompted to verify the phone number and if necessary, to include the
country code or area code.
2 Select Call.
For more information about opening messages, see “Viewing and Responding to
Messages” on page 107.
Making Emergency Phone Calls
Your Smartphone supports emergency calling. Emergency phone calls can be made
even when your SIM card is blocked or not in your Smartphone.
Dial 911 to be connected to an emergency response center.
When you make an emergency call, your Smartphone’s GPS Enabled feature can help
emergency service personnel find you, if you are in a location where your Smartphone's
GPS antenna has established a clear view of the open sky and your local emergency
response center has the equi pmen t to process location informat io n. See “GPS Enabled”
on page 131, and particularly “IMP ORTANT: Things to Keep in Mind” on page 131 and
“Making an Emergency Call” on page 132, for more information on the limitations of this
feature. Because of the limitations of this feature, always prov ide your best knowledge of
your location to the emergency response center when you make an emergency call.
Important: If you have not registered on the network, emergency calls cannot
be placed while your SIM card is in your Smartphone.
Make an emergency call
• Enter 911 and press s.
Having Problems Making a Call?
Check to make sure that the Smartphone contains a valid SIM card and that the
Smartphone is turned on and unlocked, and your Smartphone is receiving an adequate
signal.
Page 45

Phone Calls
39
Receiving a Phone Call
When you receive a call on your Smartphone, the Smartphone rings, and the name and
number of the caller are displayed on the screen. If the name of the caller is not in your
contact list, only the caller’s phone number is displayed.
The Smartphone provides different options for handling a call, depending on whether or
not you already have a call on the lin e. The following screen capture shows the Incoming
screen that appears when you are not already on a call.
Answer or reject a first call
• To answer the call, press s or select Accept.
• To reject the call, press e or select Reject.
Note: Selecting Reject will connect the caller to your voice mail if you subscribe to
this service.
If your service includes C all Waiting, you ca n receive a second call when you are alr eady
on a call. In this case, the Smartphone notifies you with a beep and displays a screen
such as the following:
Answer or reject a second call
• To end the first call and answer the second call, press e and then select Accept.
• To put the first call on hold and answer the second call, press s or select Accept. To
switch between calls, press s.
• To postpone answering the call, select Reject.
Tip: To immediately silence the ring of an incoming call, press the Volume control.
You can then proceed to answer the call, if you want.
Page 46

Phone Calls
40
Managing Phone Calls
While a call is in progress, you can use menu commands for common tasks. Some of
these commands are available only when multiple calls are in progress or during a
conference call.
Use me nu commands during a call
• Select Menu and then one of the commands described in the following table.
To Select this menu command
End the active call End
Put the active call on hold Hold
Activate the call on hold Unhold
Switch between 2 calls Swap*
Create a contact card for the caller Save to Contacts
Join together all existing calls, if you have
subscribed to this service
Break one call out of a conference and make it
active while the rest of the conference is on hold
Mute the microphone for the active call; the
other party will not hear anything you say, but
you can still hear the other party
Turn the microphone back on for the active call Unmute
Conference
Private
Mute
* If you have two active calls and you end one call, and then you attempt to Swap to another call, you will
disconnect the active call.
Use call management commands that are not on the menu
The following table describes other tasks that you can perform while on a call.
To Do this
Put the current call on hold and answer an
incoming call
Send the incoming call to voice mail Select Reject.
End the active ca ll Press e.
Turn the microphone off for the active call so the
other party cannot hear you, but you can still hear
the other party
Turn the microphone back on for the active call
so the other party can hear you
Select Accept.
Select Mute.
Select Unmute.
Switch between phone lines
• On the Home screen, press and hold # to switch between phone lines. This feature
is available if your phone supports 2 phone lines.
Note: If you are not provisioned for a second line and you set your line to line 2, you
will not be able to make or receive calls.
Page 47

Phone Calls
41
Go to the Home screen during a call
• Press h.
You can then access other features from the Home screen.
To return to the call screen:
• Press m as many times as needed.
Speakerphone
Turning on speakerphone makes incoming sound come out of the Smartphone’s
speaker instead of the earpiece. Speakerphone is available whenever you are on an
active phone call.
You can turn the speakerphone on or off any time you are on a phone call or dialing a
phone number.
Turn speakerphone on or off
With the Flip Open
• Press and hold s.
• Press t on top of your phone.
With the Flip Closed
• When you make a call with the flip closed, speakerphone is always on.
• Opening the flip turns speakerphone off.
Call For war ding
Call forwarding sends calls to the phone numbers you specify. You can forward all calls
to one numbe r or forward m issed calls t o different numbers de pending on the reason you
missed the call.
Set call forwarding
1 On the Home screen, select Start.
2 Select Settings and then Phone Calls.
3 Select Call Forwarding.
4 Select the condition under which to forward calls:
• Unconditional to forward all calls
•No Reply to forward calls when you do not answer
•Busy to forward calls when your line is busy
• Unavailable to forward calls when your Smartphone is off or out of service range
5 Select Enable call forwarding.
6 Enter the phone number to which calls are to be forwarded.
7 Select Done.
Note: This sets call forwarding for the current outgoing line. To set call forwarding for
the other line, make that line the current outgoing l in e (see “C ha nge th e line for
outgoing calls” on page 76) and then set call forwarding for that line. The
setting for each line remains even if that line is no longer the outgoing line.
Page 48

Phone Calls
42
Using the Flip to Answer or End Calls
You can set you r S martpho ne to answ e r ph one call s by opening the fl ip, e nd phone call s
by closing the flip, or both.
Set flip optio ns
1 On the Home screen, select Start.
2 Select Settings and then Phone Calls.
3 Select Flip Activation.
4 To set your phone to answer calls by opening the flip, select Open flip to answer
call.
5 To set your phone to end calls by closing the flip, select Close flip to end call.
6 Select Done.
Note: If you are using your Smartphone with a headset, and you have the Flip to End
option set to On, closing your flip sends incoming sound to the headset and
does not end the call.
Retrieving Voice Mail Messages
Note: To receive voice mail messa ges, you must first set up a voice mai l account with
your service provider.
If you are on the iDEN digital network, you can call your voice mail box by using speed
dial 1, which is reserved for your voice mail number, by selecting Voice Mail from the
Start menu, or by selecting the voice mail area on the Home screen.
Follow the instructions to retrieve your messages.
If you are roaming internationally on a GSM network, you voice mail messages arrived
as text messages (SMS). You retrieve them as you would any text messages.
Speed Dials and Voice Shortcuts
Speed dials and voice short cuts are ai ds tha t you can create for di aling fre quentl y called
phone numbers quickly, automatically browsing to Web pages, or addressing email
messages quickly.
Speed Dials
You can create 1- or 2-digit speed dials. When you press a speed dial, Smartphone
automatically dials the associated phone number, opens an email message using the
associated address, or goes to the associated Web page.
You can create speed dials from 2 to 99. Speed dial 1 is reserved for your voice mail
number, and is automatically configured in your speed dial settings.
Create a speed dial
1 On the Home screen, select Start.
2 Select Contacts.
3 Select the contact for whom to create a speed dial.
4 Scroll to the phone numb er, email address, or Web pa ge addr ess for whic h to create
a speed dial.
Page 49

Phone Calls
43
5 Select Menu and then Add Speed Dial.
6 In Keypad assign ment, select the speed dial number to use.
7 Select Done.
Note: You can create a speed dial only for a phone number, email address, or Web
page address that is stored in Contacts.
Use a speed dial
• On the Home screen, press and hold the number on the keypad that you have
assigned as a speed dial for the phone number, email address, or Web page. If the
speed dial is 2 digits, press the first digit, and press and hold the second digit. The
Smartphone dials the phone number, opens a new email message, or goes to the
Web page.
View and edit a speed dial
1 On the Home screen, select Start.
2 Select Speed Dial.
3 Select the speed dial and then Edit.
4 Make any changes and select Done.
Delete a speed dial
1 On the Home screen, select Start.
2 Select Speed Dial.
3 Select the speed dial to delete.
4 Select Menu and then Delete.
5 Select Yes.
Voice Shortcuts
You can record a voice shortcut for a phone number. Then, when you speak the voice
shortcut, Smartphone automatically dials the associated phone number. You can use a
voice shortcut to make a phone call with the flip open or closed.
You can create one voice shortcut for each phone number in a contact. To change the
voice shortcut associated with a number, simply record a new voice shortcut in place of
the old one.
You can create up to 25 voice shortcuts in all.
Create a voice short cut
1 On the Home screen, select Start.
2 Select Contacts.
3 Select the contact containing the phone number you want to create a voice shortcut
for.
4 Scroll to the phone number you want to create a voice shortcut for.
5 Select Menu and then Set Voice Shortcut.
6 After the audio and visual cue, begin recording the voice shortcut.
7 When prompted, repeat the voice shortcut. The Smartphone plays back the voice
shortcut.
Page 50

Phone Calls
44
Use a voice shortcut to make a phone call
1 While your phone is idle, press and hold t. You can do this with the flip open or
closed.
2 Say the word or words that you recorded as a voice shortcut.
The Smartphone plays back the voice shortcut and then places the call to the phone
number associated with the shortcut.
3 To end the phone call:
• If the flip is closed, press ..
• If the flip is open, press e.
Tip: To cancel the call before it is placed, do the same as you would to end the call.
Change a voice shortcut
1 On the Home screen, select Start.
2 Select Contacts.
3 Select the contact containing the phone number you want to change the voice
shortcut for .
4 Scroll to the phone number that is associated with the voice shortcut you want to
change.
5 Select Menu and then Set Voice Shortcut.
6 Select Record New.
7 After the audio and visual cue, begin recording the voice shortcut.
8 When prompted, repeat the voice shortcut. The Smartphone plays back the voice
shortcut.
Play a voice shortcut
1 On the Home screen, select Start.
2 Select Contacts.
3 Select the contact containing the phone number you want to play the voice shortcut
for.
4 Scroll to the phone number that is associated with the voice shortcut you want to
play.
5 Select Menu and then Set Voice Shortcut.
6 To play the shortcut again, select Menu and then Playback.
Delete a voice shortcut
1 On the Home screen, select Start.
2 Select Contacts.
3 Select the cont act cont aining the pho ne nu mber you wan t to delete the voice shor tcut
for.
4 Scroll to the phone number that is associated with the voice shortcut you want to
delete.
5 Select Menu and then Set Voice Shortcut.
6 Select Menu and then Remove.
7 Select Yes.
Page 51

Phone Calls
45
Advanced Calling Options
This section covers advanced dialing options that may be required for making certain
types of calls, such as international calls.
Adding a Pause to a Dialing Sequence
Smartphone allows you to insert an automatic 3-second pause in a dialing sequence.
If you want to inser t a pause l onge r th an 3 secon ds in the d ial ing se quence , S martphone
allows you to insert a m anual pause, also known as a “wait”. W hen Smartp hone reaches
a manual pause while dialing a number, it pauses until you press s to continue the
dialing sequence.
Insert a 3-second pause in a dialing sequence
1 On the Home screen, select Start.
2 Select Contacts.
3 Select the contact in whose phone number you want to insert a pause.
4 Scroll to the phone number and select Edit.
5 Scroll through the number and place the cursor where you want to insert the pause.
6 Select Menu and then Insert Pause. The letter “p” appears where the 3-second
pause will occur in the dialing sequence.
7 Select Done.
Insert a manual pause in a dialing sequence
1 On the Home screen, select Start.
2 Select Contacts.
3 Select the contact in whose phone number you want to insert a manual pause.
4 Scroll to the phone number and select Edit.
5 Scroll through the number and place the cursor where you want to insert the pause.
6 Select Menu and then Insert Wait. The letter “w” appears where the manual pause
will occur in the dialing sequence.
7 Select Done.
Note: To resume dialing after reaching a manual pause, press s.
International Calls From the United States
Note: This service may not be offered by your service provider.
Calls placed between the United States and Canada do not require an international
access code.
To make an international call, you must include an international access code at the
beginning of the dialing sequence for the phone nu mber. Then enter the country code,
city code or area code, and phone number.
Insert an international access code
• Press and hold 0 until a plus (+) sign appears. The network translates the (+) into
the appropriate international access code needed to place the call.
Note: You can insert a plus (+) sign into a contact’s phone number or dial it directly
from the keypad.
Page 52

Phone Calls
46
TTY Calls
You can use your Smartphone to make phone calls using a teletypewriter (TTY) device.
TTY device features such as Turbo-Code, High-Speed, and Interruption are not
supported by your Smartphone. These features must be turned off or disabled to use
your TTY device with your Smartphone.
Connect your Smartphone to your TTY device and make calls
1 Connect one end of a 2.5mm cable into the stereo audio port on your Smartphone.
Connect the other end of the cable to your TTY device.
2 Make sure that your Smartphone’s TTY feature is on and select the TTY mode you
want to use. See “Enable TTY” on page 85.
3 Use your Smartphone to enter phone numbers you want to call.
4 Press s to make the call.
Page 53

Private Calls, Call Alerts, and Group Calls
47
Private Calls, Call Alerts, and
Group Call s
This chapter explains how to make, receive, and manage Private calls, call alerts, and
group calls.
Private calls let you use your Smartphone as a long-range, digital walkie-talkie. Call
alerts let the recipient know you would like to talk to him or her on a Private call. Group
calls are Private calls to more than one Private ID at the same time.
Maki ng a Priv ate Ca ll
There are several ways to make a Private cal l. This section descri bes how to make a call
from the following locations:
• From the Home screen
• From Contacts
• From the recent calls list
Making a Private Call from the Home Screen
On the Home screen, you can call someone by entering a phone number or a contact
name using the keypad.
As you begin pressing keys, your Smartphone displays the names from your Contacts
and recent call list whose name or phone number match your entry. You can then select
the name or number to call without having to enter the entire name or number.
Contacts appear on the Home screen with this icon and a contact list abbreviation. If
a contact contains a Private ID, you can make a Private call to that number even if the
contact list abbreviation for the Private ID (PTT) is not showing.
Note: For more i nf orma tion about contact list abbrev iations, see “C ont act s, C alenda r,
and Tasks” on page 60.
Make a Private call by entering a Private ID
1 On the Home screen, enter the Private ID:
• If you see the number or contact name to call, scroll to it.
• If you do not see the number or contact name, finish entering the number.
2 Press and hold the PTT button on the side of your Smartphone.
3 Begin talking after your Smartphone emits a chirping sound.
4 Release the PTT button to listen.
5 To end the call:
• Wait a few seconds for the call to end automatically.
• Press e or press m.
A Private call ends automatically if there is no activity on the call for a few seconds.
Page 54

Private Calls, Call Alerts, and Group Calls
48
Make a call by entering a contact name
1 On the Home screen, begin entering the contact name.
2 When you see the contact name, scroll to it and then press and hold the PTT button.
3 Begin talking after your Smartphone emits a chirping sound.
4 Release the PTT button to listen.
5 To end the call:
• Wait a few seconds for the call to end automatically.
• Press e or press m.
Making a Private Call from Contacts
You can make a Private call from your contact list or from an open contact. If a contact
contains a Private ID, you can make a Private call to that number even if the contact list
abbreviation for the Private ID (PTT) is not showing.
Make a call from the contact list
1 On the Home screen, select Start.
2 Select Contacts.
3 Scroll to the contact to call.
4 Press and hold the PTT button.
5 Begin talking after your Smartphone emits a chirping sound.
6 Release the PTT button to listen.
7 To end the call:
• Wait a few seconds for the call to end automatically.
• Press e or press m.
Tip: If you have a long list of contacts, and you don’t see the contact you want, enter
the first few letters of the contact’s name. When you do this, the Smartphone
searches through the contact list and displays the name.
Make a call from an open contact
1 On the Home screen, select Start.
2 Select Contacts.
3 Select the contact to call.
4 Press and hold the PTT button.
5 Begin talking after your Smartphone emits a chirping sound.
6 Release the PTT button to listen.
7 To end the call:
• Wait a few seconds for the call to end automatically.
• Press e or press m.
Page 55

Private Calls, Call Alerts, and Group Calls
49
Making a Private Call from the Recent Calls List
The recent calls list displays calls you made, received, and missed, as we ll as call alerts
you received.
If a name on the recent calls list is stored in Contacts with a Private ID, you can make a
Private call to that number even if the PTT contact list abbreviation is not showing.
Make a Private call from the recent call list
With the Flip Open
1 From the Home screen, select St art.
2 Select Recent Calls.
3 Scroll to or select the name or number you want to call.
4 Press and hold the PTT button.
5 Begin talking after your Smartphone emits a chirping sound.
6 Release the PTT button to listen.
7 To end the call, press e or press m.
With the Flip Closed
1 Press ..
2 Press the volume controls to scroll to the name or number you want to make a
Private call to.
3 Press and hold the PTT button.
4 Begin talking after your Smartphone emits a chirping sound.
5 Release the PTT button to listen.
6 To end the call:
• Wait of few seconds for the call to end automatically.
• Press ..
• Open the flip and press e or press m.
Having Problems Making a Call?
Check to make sure that the Smartphone contains a valid SIM card and that the
Smartphone is turned on and unlocked, and your Smartphone is receiving an adequate
signal.
Receiving a Private Call
When you receive a Private call, your Smartphone emits a chirping sound or vibrates.
The name of the call er is displayed on the screen. If the name of the caller is not in your
contact list, only the caller’s Private ID is displayed.
You can recieve a Private call with the Smartphone’s flip open or closed.
Answer a Private call
1 Wait for the caller to finish speaking.
2 Press and hold the PTT button on the side of your Smartphone. Begin talking after
your Smartphone emits a chirping sound.
3 Release the PTT button to listen.
Page 56

Private Calls, Call Alerts, and Group Calls
50
End a Private call
• Press e.
• If the flip is closed, press ..
A Private call ends automatically if there is no activity on the call for a few seconds.
Managing Private Calls
While a Private call is in progress, you can u se me nu co mmands fo r co mmon tasks. You
can also go to the Home screen and access other features without ending the Private
call.
Use me nu commands during a call
• Select Menu and then one of the commands described in the following table.
To Select this menu command
Go to Contacts
Go to the recent calls list
Go to Owner Information
Go to the messaging Inbox
Go to the messaging Calendar
Contacts
Recent Calls
Owner Inform ati on
Inbox
Calendar
Go to the Home screen during a call
• Press h.
You can then access other features from the Home screen.
To return to the call screen:
• Press m as many times as needed.
Voice Shortcuts
You can record a voice shortcut for a Private ID. Then, when you speak the voice
shortcut, Smartphone automatically enters the Private ID associated with that voice
shortcut. You can use a voice shortc ut to make a Private call with the flip ope n or closed.
You can create only one voi ce short cut for each Private ID. To chang e the voice sh ort cut
associated with a number, simply record a new voice shortcut in place of the old one.
You can create up to 25 voice shortcuts in all.
Create a voice shortcut
1 On the Home screen, select Start.
2 Select Contacts.
3 Select the contact containing the Private ID you want to create a voice shortcut for.
4 Scroll to the Private ID you want to create a voice shortcut for.
5 Select Menu and then Set Voice Shortcut.
6 After the audio and visual cue, begin recording the voice shortcut.
Page 57

Private Calls, Call Alerts, and Group Calls
51
7 When prompted, repeat the voice shortcut. The Smartphone plays back the voice
shortcut.
Use a voice shortcut to make a phone call
1 While your Smartphone is idle, press and hold t. You can do this with th e fli p ope n
or closed.
2 Say the word or words that you recorded as a voice shortcut.
3 When the Private ID or name associated with the voice shortcut appears on the
screen, press and hold the PTT button.
4 Begin talking after your Smartphone emits a chirping sound.
5 Release the PTT button to listen.
6 To end the call:
• Press e or press m.
• Press ..
• Wait a few seconds for the call to end automatically.
Change a voice shortcut
1 On the Home screen, select Start.
2 Select Contacts.
3 Select the contact containing the Private ID that is associated with the voice shortcut
you want to change.
4 Scroll to the Private ID.
5 Select Menu and then Set Voice Shortcut.
6 Select Record New.
7 After the audio and visual cue, begin recording the voice shortcut.
8 When prompted, repeat the voice shortcut. The Smartphone plays back the voice
shortcut.
Play a voice shortcut
1 On the Home screen, select Start.
2 Select Contacts.
3 Select the contact containing the Private ID that is associated with the voice shortcut
you want to play.
4 Scroll to the Private ID.
5 Select Menu and then Set Voice Shortcut.
6 To play the shortcut again, select Menu and then Playback.
Page 58

Private Calls, Call Alerts, and Group Calls
52
One Touc h PT T
One Touch PTT sets your Smartphone to call the most recent Private ID on the recent
calls list, or a Private ID you choose, every time you press the PTT button.
Set the most recent call as your One Touch PTT number
1 On the Home screen, select Start.
2 Select Settings and then PTT.
3 Select One Touch PTT.
4 Select Use One Touch PTT.
5 In Place call to, select Last Call.
6 Select Done.
Set another number as your One Touch PTT number
1 On the Home screen, select Start.
2 Select Settings and then PTT.
3 Select One Touch PTT.
4 Select Use One Touch PTT.
5 In Place call to, select Assigned Number.
6 Enter the number you want in the Number field:
• Type the number you want into the field.
• Browse to the number. Select Menu and then Browse Contacts or Browse
Recent Calls, as required. Select the number you want.
7 Select Done.
Turn off One Touch PTT
1 On the Home screen, select Start.
2 Select Settings and then PTT.
3 Select One Touch PTT.
4 Select Use One Touch PTT. This clears the checkbox and turns off One Touch PTT.
Call Alerts
Sending a cal l aler t l ets the reci pient know you want to talk to him or her on a P rivat e call .
Sending Call Alerts
When you send a call alert, the recipient’s phone emits a series of beeps, or vibrates,
and displays your name or Private ID.
The recipient can:
• Answer — begin a Private call with the sender
• Queue — store the call alert to the call alert queue, which is a list of call alerts
• Clear — dismiss and delete the call alert
Page 59

Private Calls, Call Alerts, and Group Calls
53
Send a call alert
1 Enter the Private ID you want to send to, as you would when making a Private call.
Just as with making a Private call, you can enter the number from the Home screen
or choose it from Contacts or the recent call list.
2 Depending on how you enter the number, do one of the following:
• Select Alert.
• If Alert is not one of the soft key options, select Menu and then select Alert or
Alert/Join.
Ready to Alert appears on the display.
3 Press the PTT button until Alert Successful appears on the display.
Note: If the alert is not successful, this may mean the person you are trying to reach
is on a call or has their phone turned off.
Receiving Call Alerts
When you receive a call alert, you must answer, queue, or clear it. You cannot receive
phone calls or Private calls until you do.
Answer a call alert
• Press the PTT button to make a Private call to the sender.
Queue a call alert
• Select Queue.
Clear a call alert
• Select Clear.
• If the flip is closed, press ..
Note: The recent calls list also stores call alerts you have received. They appear as
Private calls. Call alerts remain in your recent calls list until you delete them or
until they reach the end of the list.
Using the Call Alert Queue
When you queue a call alert, it remains in the call alert queue until you make a Private
call to the sender, or delete the call alert from the queue.
View call alerts
1 On the Home screen, select Start.
2 Select Call Alert Queue.
3 Scroll through the list.
View the date and time a call alert was received
1 On the Home screen, select Start.
2 Select Call Alert Queue.
3 Select the call alert you want information on.
Page 60

Private Calls, Call Alerts, and Group Calls
54
Make a Private call to the sender
1 On the Home screen, select Start.
2 Select Call Alert Queue.
3 Scroll to the call alert you want to respond to.
4 Press the PTT button to begin the call.
This removes the call alert from the queue.
Send a call alert to the sender
1 On the Home screen, select Start.
2 Select Call Alert Queue.
3 Scroll to the call alert you want to respond to.
4 Select Alert. Ready to Alert appears on the display.
5 Press the PTT button until Alert Successful appears on the display.
Delete a call alert from the queue
1 On the Home screen, select Start.
2 Select Call Alert Queue.
3 Scroll to the call alert you want to delete.
4 Select Menu and then select Delete.
5 Select Yes to confirm.
Delete all call alerts from the queue
1 On the Home screen, select Start.
2 Select Call Alert Queue.
3 Select Menu and then select Delete All.
4 Select Yes to confirm.
Sort call alerts by the order they were received
1 On the Home screen, select Start.
2 Select Call Alert Queue.
3 Select Menu and then select Sort By.
4 Scroll left or right to select the First On Top or Last On Top.
5 Select Done.
Page 61

Private Calls, Call Alerts, and Group Calls
55
Group Calls
A group call is similar to a Private call, but is made to all members of a Talkgroup at
once. A Talkgroup is a predetermined group of your service provider’s customers.
Before you can make or receive group calls, a Talkgroup must be established. After the
Talkgroup is established, you must join the Talkgroup.
Setting Up and Joining Talkgroups
Your sales representative or your service provider establishes Talkgroups for you and
assigns each Talkgroup a Talkgroup number. You can choose a name for each of your
Talkgroups when you create entries for them in Contacts.
To receive group calls made to any of these Talkgroups, you must join the Talkgroup.
Join a Talkgroup
1 On the Home screen, select Start.
2 Select Contacts.
3 Scroll to the Talkgroup you want to join.
4 Select Menu and then select Alert/Join.
Note: You can only monitor one Talkgroup at a time.
Making and Receiving Group Calls
Make a group call
1 Enter the Talkgroup number:
• Press #. Then enter the Talkgroup number using the keypad.
• Choose the Talkgroup name from Contacts or the recent call list.
2 Proceed as if making a Private call.
Answer a group call
• Proceed as if answering a Private call. Only one person at a time may speak on a
group call.
The Private ID or name of the person who is speaking will appear on the display below
the Talkgroup number.
Turning Off Group Calls
If you don’t want hear any calls to your Talkgroup, you can set your Smartphone to
silence all group calls.
Silence all group calls
1 On the Home screen, select Start.
2 Select Settings and then PTT.
3 Select PTT Group Silent.
4 In PTT Group Silent, select On.
5 Select Done.
When you want to hear group calls again, select Off in step 4.
Page 62

Recent Calls
56
Recent Calls
The recent calls list contains the numbers of up to 20 of the most recent calls you have
made, received, and missed.
Viewing the Recent Calls List
The recent call list displays the following for each call on the list:
• An icon indicating the type of call:
• — missed phone call
• — incoming phone call
• — outgoing phone call
• — Private call or call alert
• — group call
• The name or number associated with the call. The name appears instead of the
number if the number is stored in Contacts with a name.
• How long ago the call ended.
• For phone calls, the number of missed calls from that phone number, if there have
been more than one. For example, “5x” means missed 5 calls from that number.
• If a number on the recent calls list is stored in Contacts, the contact list abbreviation
appears with the number. All Private calls, call alerts, and group calls appear with the
contact list abbreviation PTT. Phone calls stored in Contacts appear with the contact
list abbreviation the number is stored as.
• You can view all the contact list abbreviations for all the numbers stored in Contacts
with a name on the recent calls list by scrolling to the name as then scrolling left and
right.
When you select a call to view its details, you see the following additional information
about the call:
• Both the name and number associated with the call, if the number is stored in
Contacts with a name.
• The date and time of the call.
• The duration of the call.
• An icon indicating the type of call, like when viewing the list.
View the recen t ca lls list
With the Flip Open
1 From the Home screen, select St art.
2 Select Recent Calls.
3 Scroll through the list.
4 If a number on the recent call s lis t is stored in Co nt act s, you can scro l l to the num ber
and then scroll left or right to view all t he co ntact list abbreviations for a l l the num ber s
stored with that name.
Page 63

Recent Calls
57
With the Flip Closed
1 Press ..
2 If you want to view the rest of the recent calls list, press the volume controls.
3 Press . twice to dismiss the recent calls list.
View the details of a call on the recent calls list
1 From the Home screen, select St art.
2 Select Recent Calls.
3 Select the item you want information on.
Saving to Contacts
Numbers on the recent calls list can be saved as new contacts or in contacts entries.
Save a number from the recent calls list to Contacts
1 From the Home screen, select St art.
2 Select Recent Calls.
3 Select the item you want to save.
4 Select Menu and then select Save.
5 Choose to save the number as a new contact or in an existing contact:
• To save the number as a new contact, select <New Item>.
• To save the number in an existing contact, select the contact you want to save the
number to.
6 Scroll to the place in the Contacts entry screen where you want to store the number
from the recent calls list.
7 Select Insert.
8 Add any addition information that you want to save in the contact, such as a name.
9 Select Done.
Making Calls From the Recent Calls List
Phone Calls
When you make a phone call from the recent calls list, the call is made to the phone
number you choose.
If a name on the recent calls list is stored in Contacts with more than one phone number,
you can choose to make the call to a different phone number in that contact by scrolling
through the contact list abbreviations stored with the contact. The phone call is made to
the phone number associated with the contacts list abbreviation that is showing when
you press s.
Page 64

Recent Calls
58
Make a phone call from the recent call list
With the Flip Open
1 From the Home screen, select St art.
2 Select Recent Calls.
3 Choose a numb er to call:
• Scroll to or select the name or number you want to call.
• Scroll to a name that is stored in your Contacts. If the contact list abbreviation for
the number you want to call is not showing, scroll left or right to display it.
4 Press s.
With the Flip Closed
1 Press ..
2 Press the volume controls to the scroll to the name or number you want to call.
3 To make a phone call, press t.
4 To end the phone call, press ..
Private Calls
The recent calls list displays calls you made, received, and missed, as we ll as call alerts
you received.
If a name on the recent calls list is stored in Contacts with a Private ID, you can make a
Private call to that number even if the PTT contact list abbreviation is not showing.
Make a Private call from the recent call list
With the Flip Open
1 From the Home screen, select St art.
2 Select Recent Calls.
3 Scroll to or select the name or number you want to call.
4 Press and hold the PTT button.
5 Begin talking after your Smartphone emits a chirping sound.
6 Release the PTT button to listen.
7 To end the call, press e.
With the Flip Closed
1 Press ..
2 Press the volume controls to the scroll to the name or number you want to call.
3 Press and hold the PTT button.
4 Begin talking after your Smartphone emits a chirping sound.
5 Release the PTT button to listen.
6 To end the call:
• Wait of few seconds for the call to end automatically.
• Open the flip and press e.
Page 65

Recent Calls
59
Deleting Items From the Recent Calls List
Delete an item from the recent calls list
1 From the Home screen, select St art.
2 Select Recent Calls.
3 Select the item you want to delete.
4 Select Menu and then select Delete.
5 Select Yes to confirm.
Delete all items on the recent calls list
1 From the Home screen, select St art.
2 Select Recent Calls.
3 Select Menu and then select Delete All.
4 Select Yes to confirm.
Returning to the Home Screen After a Call
When you end a call, the recent calls list appears. You can set how long the recent calls
list is displayed before the Smartphone automatically displays the Home screen. The
values you can choose are: immediately, 30 seconds, 1 minute, 5 minutes, and 10
minutes.
Set the Return to Home screen time
1 From the Home screen, select St art.
2 Select Recent Calls.
3 Select Menu and the select Return to Home.
4 To set the amount of time the Smartphone displays the recent call list after a phone
call:
In Return after phone call, select a time.
5 To set the amount of time the phone displays the recent call list after a Private call:
In Return after PTT, select a time.
6 Select Done.
Page 66

Contacts, Calendar, and Tasks
60
Contacts, Calendar, and Tasks
This chapter introduces features on your Smartphone that help you manage and keep
track of contacts, appointments, and schedule, and maintain a things-to-do list. This
chapter also explains how to send and receive contact and appointment information
between your Smartphone and another mobile device or a desktop computer (beaming
data) by using infrared technology.
For information about synchronizing Contacts with your desktop computer, see
“ActiveSync” on page 145.
Using Contacts
You can think of Contacts as a n address b ook, where yo u store infor mation abo ut people
and businesses with whom you communicate. For example, you can store multiple
phone numbers, email and street addresses, Web pages, as well as other information
that relates to the contact, such as a birthday or anniversary date.
You can specify a special ring tone for the Smartphone to use when a contact calls. You
can also assign a contact to a category, such as business or personal, so you can filter
the contact list to view contacts in a category. You can use Contacts to dial phone
numbers and compose email and text messages directly from a contact card. The
contacts you create are saved in your Smartphone, but you can copy them to your SIM
card and copy contacts on your SIM card to your phone. You can synchronize contact
cards with your de sktop computer or beam contact cards to another device.
Note: Your Smartphone may display the menu option New SIM Contact. This option
has no function. Please do not select it.
The Contact List
The contact list displays the names of your contacts alphabetically. From this list, you
can create new contact cards with address, phone, and email information. You can also
easily call a contact directly from the list, open a contact card to view and edit its
information, or delete a contact card. When you synchronize with your desktop
computer, your contact information is updated to reflect any changes on both your
Smartphone and your desktop computer.
Beside each name in the contact list is an abbreviation for the default communication
method. If the default method is a phone number, such as a work (w) or home phone
number (h), when you scroll to the contact and press s, the Smartphone automatically
dials that number . If the defa ult method is email, when you scroll to the contact and press
O twice, the S martphon e opens an email messa ge addre ssed to the contact. T his makes
it easy to reach a contact by using the method you prefer.
Page 67

Contacts, Calendar, and Tasks
61
View the contact list
• On the Home screen, select Contacts.
The following table describes abbreviations that might be displayed to the right of a
contact name in the contact list.
Contact list
abbreviation
w Work phone
w2 Second work phone
h Home phone
h2 Second home phone
m Mobile phone
pgr Pager
car Car phone
PTT Private ID or Talkgroup number
txt Text message number
e Email add ress
e2 Second email address
e3 Third emai l addre s s
web Web page
wfx Work fax (appears only when contact is open)
hfx Home fax (appears only when contact is open)
ast Assistant’s phone (appears only when contact is open)
Meaning
Note: Although Private IDs and Talkgroup numbers both use the PTT abbreviation,
the # sign always appears before a Talkgroup to distinguish the 2 types of
numbers.
Find a contact
1 On the Home screen, select Start.
2 Select Contacts.
3 Begin entering the name of the contact to find until the name is displayed. For
example, to find “Sandr a,” ent er 7, 2, 6, 3, 7, 2 because these numbers
correspond to the letters for that name.
Filt er the contact list
1 On the Home screen, select Start.
2 Select Contacts.
3 Select Menu and then Filter.
4 Select a category to filter, such as Business, Miscellaneous, or Personal.
The contacts assigned to the category you selected are displayed in the list.
Page 68

Contacts, Calendar, and Tasks
62
Create a new contact
1 On the Home screen, select Start.
2 Select Contacts and then New.
3 Enter information for the new contact.
4 Select Done.
To cancel and return to the contact list without creating a contact card, select Menu and
then Cancel.
You can insert pauses in the dialing sequence of a phone number, such as for an
international call. For more information, see “Adding a Pause to a Dialing Sequence” on
page 45.
You can synchronize contact cards with your desktop computer or Microsoft® Exchange
Server to keep your contact in form ation up-to-date in all locations. For m ore inf orma ti on,
see “ActiveSync” on page 145.
Save numbers from the recent calls list to Contacts
1 From the Home screen, select St art.
2 Select Recent Calls.
3 Select the item you want to save.
4 Select Save.
5 Choose to save the number as a new contact or in an existing contact:
• To save the number as a new contact, select <New Item>.
• To save the number in as existing contact, select the contact you want to save the
number to.
6 Scroll to the place in the Contacts entry screen where you want to store the number
from the recent calls list.
7 Select Insert.
8 Add any additional information that you want to save in the contact, such as a name.
9 Select Done.
Delete a contact
1 On the Home screen, select Start.
2 Select Contacts.
3 Scroll to the contact to delete.
4 Select Menu and then Delete.
5 Select Yes.
Note: The next time you synchronize, the contact is deleted from Outlook on your
desktop computer as well. If you have not previously synchronized, however,
the contact is not deleted.
Page 69

Contacts, Calendar, and Tasks
63
Making Calls from Contacts
You can make phone calls and Private calls from your contact list or from an open
contact.
When you make a call from your contact list, the Smartphone dials the contact’s default
number. The contact list abbreviation associated with the default number appears with
the contact when you view the co ntact list. You can cha nge a contact’ s default numb er at
any time.
You can view a ll the contact list abbrevi ations for all the numb ers stored in this contact by
scrolling to the name and then scrolling left and right.
A phone call is made to the phone number associated with the contact list abbreviation
that is showing when you press s. When you make a call from an op en contact, you can
select the number to dial from the contact card.
If a contact contains a Private ID, you can make a Private call to that nu mber even if the
contact list abbreviation for the Private ID (PTT) is not showing.
Make a phone call from the contact list
1 On the Home screen, select Start.
2 Select Contacts.
3 Scroll to the contact. If the contact list abbreviation for the number you want to call is
not showing, scroll left or right to display it.
4 Press s.
Make a phone call from an open contact
1 On the Home screen, select Start.
2 Select Contacts.
3 Select the contact to call.
4 Scroll to phone number to call.
5 Press s or O.
Make a Private call from the contact list
1 On the Home screen, select Start.
2 Select Contacts.
3 Scroll to the contact to call.
4 Press and hold the PTT button.
5 Begin talking after your Smartphone emits a chirping sound.
6 Release the PTT button to listen.
7 To end the call, press e.
Make a Private call from an open contact
1 On the Home screen, select Start.
2 Select Contacts.
3 Select the contact to call.
4 Press and hold the PTT button.
5 Begin talking after your Smartphone emits a chirping sound.
6 Release the PTT button to listen.
Page 70

Contacts, Calendar, and Tasks
64
7 To end the call, press e.
Change the default number for a contact
1 On the Home screen, select Start.
2 Select Contacts.
3 Select the contact whose default number you want to change.
4 Scroll to the phone number that you want to set as the new default number. Make
sure you choose a phone number as the default number.
5 Select Menu, and then select Set as Default.
Note: When you make a call from the Home screen using a contact, the number you
made the call to becomes the contacts default number.
Contact Cards
A contact card displays all of the information that you have entered for the contact, such
as the name of the person or business, phone numbers, email addresses, and more.
You can select a phone number on a contact card and press s to dial it. You can also
select an email address or text message number and press O to open a message
addressed to the contact.
View and edit a contact card
1 On the Home screen, select Start.
2 Select Contacts.
3 Select the contact whose card you want to view.
4 To edit the card, select Edit.
5 When finished making changes, select Done.
Call a contact from a contact card
1 On the Home screen, select Start.
2 Select Contacts.
3 Select the contact to call.
4 Scroll to the phone number to dial.
5 Press s.
Send a message from a contact card
1 On the Home screen, select Start.
2 Select Contacts.
3 Select the contact.
4 Select the email address or text message number to use.
5 Select the account to use.
6 Enter a subject, compose your message, and then select Send.
Note: For information about composing email messages, see “Creating Me ssages”
on page 103.
Using the contact card menu commands, you can quickly create a speed dial or voice
shortcut for the contact. You can also beam the contact card to anot her m obile device or
a desktop computer by using infrared, if your device has this capability.
Page 71

Contacts, Calendar, and Tasks
65
Note: For information about creating speed dials and voice shortcuts, see “Phone
Calls” on page 35. For instructions on beaming a contact card, see “Beaming
Information” on page 143.
Using Calendar
Calendar is the scheduling program on your Smartphone, where you can create and
view appointments and view your calendar by day, week, or month. When you create
and edit appointments in Calendar, your changes are reflected in Outlook on your
desktop computer when you synchronize.
Tip: The default reminder time is 15 minutes prior to an appointment. You can
change this by selecting Menu and then Options from within Calendar.
Note: When you create a new appointment on your Smartphone, you can
synchronize Calendar wi th your desktop computer or Excha nge Server to keep
your schedule information up-to-date in all locations.
Open Calendar
• On the Home screen, select Start and then Calendar.
Create a new appointment
1 On the Home screen, select Start.
2 Select Calendar.
3 Select Menu and then New.
4 Enter information about the appointment.
5 In Reminder, scroll to the amount of tim e be fore the appo i ntmen t tha t you want to b e
reminded. If you don’t want to be reminded, select None.
6 Select Done.
View an appointment
1 On the Home screen, select Start.
2 Select Calendar.
3 Select the appointment to view.
Edit an appointment
1 On the Home screen, select Start.
2 Select Calendar.
3 Select the appointment and then Edit.
4 If the appointment is recurring, select Yes to edit only the current occurrence, or
select No to edit the series.
5 Make your changes and select Done.
Delete an appointment
1 On the Home screen, select Start.
2 Select Calendar.
3 Scroll to the appointment to delete.
4 Select Menu and then Delete.
Page 72

Contacts, Calendar, and Tasks
66
5 If the appointment is recurring, select Yes to delete only the current occurr ence, or
select No to delete the series.
Tip: To cancel a deletion, press m.
Note: When you delete an appointment in Calendar on your Smartphone, it is also
deleted on your desktop computer the next time you synchronize. If you have
not previously synchronized, however, the appointment is not deleted.
Viewing Your Schedule
You can view your schedule in 3 different views: Agenda, Week, and Month.
Agenda View
Agenda view is the default view for calendar information. This view displays meetings
and appointments scheduled for the current day. Appointments are shown in
chronological order according to start time. All-day appointments are shown as a single
line at the top of the Agenda view. Up to 3 all-day events are displayed. If more than 3
all-day events are scheduled, you can scroll to see the additional events.
View today’s agenda
Do one of the following:
• On the Home screen, select your upcoming appointments.
• From Week or Month view in Calendar, select Menu and then Go to Today.
Tip: To view previous or approaching dates, scroll left or right.
View your agenda for a specific date
1 On the Home screen, select Start.
2 Select Calendar.
3 Select Menu and then Go to Date.
4 Enter the date to view.
5 Select Done.
Week View
Week view shows your schedule a week at a time. Week view gives you a quick
indication of your free and busy time, and allows you to create an appointment at a
selected time easily.
By default, Week view displays the hours from 9:00 A.M. to 5:00 P.M. in 1-hour
increments on the left side of the screen. You can scroll up or down to show the hours
before or after those displayed.
Note: If you scroll up or down and then leave Week view, the hours last shown are
displayed when you return to Week view.
View appointments fo r the week
1 On the Home screen, select Start.
2 Select Calendar.
3 Select Menu and then Week View.
Page 73

Contacts, Calendar, and Tasks
67
Month View
Month view provides an overview of your schedule 1 month at a time. Arrows pointing
upward represent morning appointments, and arrows pointing downward represent
afternoon appointments. If you have both morning and afternoon appointments on the
same day, the arrows form a colored box. A ll-day events are indicated by an empty box.
If you have morning and afternoon appointments and an all-day event on the same day,
an empty box surrounds a colored box.
View your schedule for the month
1 On the Home screen, select Start.
2 Select Calendar.
3 Select Menu and then Month View.
Customizing the Calendar View
You can change viewing options for Calendar, such as specifying the first day of the
week and the number of days per week to display, as well as showing and hiding week
numbers.
Customize the calendar view
1 On the Home screen, select Start.
2 Select Calendar.
3 Select Menu and then Options.
4 Scroll to select the options you want, and make your changes.
5 Select Done.
Importing Calendar Information
You can import cal endar information f rom anoth er calendar program that uses the i Cal or
vCal format. You can import calendar information from attachments in email messages,
text messages, and links in Microsoft® Pocket Internet Explorer, or by beaming. When
you import in formation and then syn chroni ze, the infor mation is a dded to Ou tlook o n your
desktop computer.
Using Ta sks
A task is a personal or work-related project, assignment, or errand to track through
completion. A task can occur once, or it can recur. A rec urrin g task can rep eat at re gul ar
intervals or repeat based on the date you mark the task complete. For example, you
might want to pay a bill on the last Friday of every month, or get a haircut when 1 month
has passed since your last ha ircut.
The Task List
The task list is your “things to do” list. On the Smartphone you can create and delete
tasks and mark them as complete. Completed tasks are displayed with the
corresponding check box selected.
Page 74

Contacts, Calendar, and Tasks
68
When you create or edit tasks with Outlook on your desktop computer and then
synchronize with your Smartphone, additional task information may display. A task that
has been marked as high priority is preceded by an exclamation mark, and one marked
as low priority by a down arrow. On color devices, overdue tasks are displayed bold and
red.
Note: If you synchronize tasks with your desktop computer, completed tasks are
removed from your Smartphone during synchronization. They are then
displayed in gray with a strikethrough on your desktop computer.
Create a new task
1 On the Home screen, select Start.
2 Select Tasks.
3 Enter the task and press O.
Note: When you create a new task on your Smartphone, you can synchronize tasks
with your desktop computer to keep your task list up-to-date in both locations.
If you create a new task with a reminder on your desktop computer and
synchronize tasks with your Smartphone, you hear the reminder on your
Smartphone.
Mark a task as comp le te
1 On the Home screen, select Start.
2 Select Tasks.
3 Scroll to the task and select Complete.
Change a completed task to incomplete
1 On the Home screen, select Start.
2 Select Tasks.
3 Scroll to the task and select Activate.
Delete a task from the task list
1 On the Home screen, select Start.
2 Select Tasks.
3 Select the task and then Delete.
Page 75

SIM Manage r
69
SIM Manager
When you enter a new cont act i nto Con tacts, th at conta c t is store d on yo ur S martpho ne,
not your SIM card. The contact is not saved on your SIM card until you copy it to your
SIM card using SIM Manager.
Note: This section describes using the S IM Man ager with the SIM card provide d with
your Smartph one. Us ing SIM Manager with the S IM card prov ided wit h an older
iDEN SIM-based phone may produce different results.
Using SIM Manager
The SIM Manager lets you manage your contacts so that your SIM card stays current.
You can do the following with the SIM Manager:
• Copy a contact from your Smartphone (Contacts) to your SIM card
• Copy an contact from your SIM card to your Smartphone (Contacts)
• Manage your current set of SIM card contacts
You can select either a contact or only certain contact types for the given conta c t. When
you choose to select only certain contact types, the checkbox next to the contact in the
Contacts list will be both checked and grayed out.
The following table outlines the task set for each component of the SIM Manager.
Copy to SIM Copy to Contacts Manage SIM
Sort the contacts list S ort the contacts list Sort the contacts list
Search for contacts Search for contacts Search for contacts
View all contact types for a
selected contact
Select only certain contact types
for a selected contact
Select all contacts Select all contacts Select all contacts
Select only new contacts Select only new contacts Select only new contacts
Copy contacts from Smartphone to
SIM
View all contact types for a
selected contact
Select only certain contact types
for a given contact
Copy contacts from SIM to
Smartphone
View all contact types for a
selected cont ac t
Select only certain contact types
for a given contact
Copy contacts from SIM to
Smartphone
Copy contacts from Smartphone
to SIM
Edit a selected contact
Delete se lec ted contacts
Delete all contacts
The SIM Manager can store up to 3000 contacts.
Page 76

SIM Manager
70
Copy contacts from your Smartphone to your SIM
1 On the Home screen, select Start.
2 Select SIM Manager, and then Copy to SIM.
3 Select each contact you want to copy.
Note: If you select a contact that is already on your SIM, that contact will not be
copied.
4 Select Copy.
Copy contacts from your SIM to your Smartphone
1 On the Home screen, select Start.
2 Select SIM Manager, and then Copy to SIM.
3 Select each contact you want to copy.
Note: If you select a contact that is already on your Smartphone, that contact will not
be copied.
4 Select Copy.
Select all contacts in the list
1 On the Home screen, select Start.
2 Select SIM Manager.
3 Access the contacts in your Smartphone or on your SIM card:
• To access contacts on your Smartphone, select Copy to SIM.
• To access contacts on your SIM card, select Copy to Contacts or Manage SIM.
4 Select Menu and then Select.
5 Select All.
Select only new contacts
1 On the Home screen, select Start.
2 Select SIM Manager.
3 Access the contacts in your Smartphone or on your SIM card:
• To access contacts on your Smartphone, select Copy to SIM.
• To access contacts on your SIM card, select Copy to Contacts or Manage SIM.
4 Select Menu and then Select.
5 Select New.
Select only certain contact types in a contact
1 On the Home screen, select Start.
2 Select SIM Manager.
3 Access the contacts in your Smartphone or on your SIM card:
• To access contacts on your Smartphone, select Copy to SIM.
• To access contacts on your SIM card, select Copy to Contacts or Manage SIM.
4 Scroll to the contact you want.
5 Scroll right to view all the contact types saved in that contact.
6 Select the contact types that you want.
7 Select Done.
Page 77

SIM Manage r
71
View all contact types for a contact without the opportunity to select
1 On the Home screen, select Start.
2 Select SIM Manager.
3 Access the contacts in your Smartphone or on your SIM card:
• To access contacts on your Smartphone, select Copy to SIM.
• To access contacts on your SIM card, select Copy to Contacts or Manage SIM.
4 Scroll to the contact you want to view details for.
5 Select Menu and then Details.
Note: You can not select contact types from this screen.
6 Select Done.
Search for contacts
Note: The search feature is only available when the list displays alphabetically.
1 On the Home screen, select Start.
2 Select SIM Manager.
3 Access the contacts in your Smartphone or on your SIM card:
• To access contacts on your Smartphone, select Copy To SIM.
• To access contacts on your SIM card, select Copy To Contacts or Manage SIM.
4 Enter the first letter of the name of the contact you want.
Sort th e contacts list
1 On the Home screen, select Start.
2 Select SIM Manager.
3 Access the contacts in your Smartphone or on your SIM card:
• To access contacts on your Smartphone, select Copy to SIM.
• To access contacts on your SIM card, select Copy to Contacts or Manage SIM.
4 To sort the list of cont act s a lphabet i cally, select Menu, then Sort, then Alphabetical.
To sort the list of contacts so that new contacts appear at the top of the list, select
Menu, then Sort, then New entries first.
Edit a SIM contact
1 On the Home screen, select Start.
2 Select SIM Manager and then Manage SIM.
3 Scroll to or select the contact you want to edit.
4 To view all contact types for the selected contact before editing, select Detail or
select Menu and then View Details. To edit the selected contact after viewing its
contact types, select Edit.
To edit the contact without viewing contact details, select Menu and then Edit.
5 Enter the changes you want.
6 Select Done.
Page 78

SIM Manager
72
Delete selected SIM contacts
1 On the Home screen, select Start.
2 Select SIM Manager and then Manage SIM.
3 Scroll to or select the contacts you want to delete.
4 Select Menu and then Delete.
Note: You can only delete enti r e con ta ct s. If you se lect Delete wh en yo u ha ve cer ta in
contact types selected for a given contact, you will delete the entire contact.
5 Select Yes.
Delete all SIM contacts
1 On the Home screen, select Start.
2 Select SIM Manager and then Manage SIM.
3 Select Menu and then Delete All.
4 Select Yes.
Changes When Contacts Are Copied to Your SIM Card
When you copy a contact from your Smartphone to your SIM card, the contact may
display differently on the SIM than on your Smartphone.
The first and last name of a contact may be displayed in reverse order in SIM version of
the contact. Some long names may be truncated when in the SIM version of the contact.
These contact types are omitted from the SIM version of the contact:
• Categories
• Web page
• Custom ring tone
• Job title
• Department
• Company
• Office address
• Home address
• Other address
• Notes
• Birthday
• Anniversary
• Spouse
• Children
• Assistant
• File As
If a contact conta ins on ly these cont act typ es, the contact may not be copied to your SIM
card at all.
Page 79

Voice Notes
73
Voice Notes
You can use Vo ice Notes to w ork with sho rt voice recor dings. Voice note s are i ncluded in
the All Notes list and are named consecutively (Recording 1, Recording 2, and so on).
Create a voice note
1 On the Home screen, select Start.
2 Select Voice Notes.
3 Hold the Smartphone microphone near your mouth.
4 Press the Record key and speak your voice note.
5 Select Stop to stop recording a voice note. The voice note is recorded and appears
in the All Notes list of Voice Notes.
Playing a voice note
1 On the Home screen, select Start.
2 Select Voice Notes.
3 Scroll to the voice note to play.
4 Select Menu and then Play.
Tip: To stop playing a voice note before it is finished playing, select Stop.
Rename a voice note
1 On the Home screen, select Start.
2 Select Voice Notes.
3 Scroll to the voice note to rename.
4 Select Menu and then Rename.
5 In Name, hold down m to delete the current name and then enter a new name.
6 Select Done.
Delete a voice note
1 On the Home screen, select Start.
2 Select Voice Notes.
3 Scroll to the voice note to delete.
4 Select Menu and then Delete.
5 Select Yes.
Note: If you delete a voice note that has a default name, such as Recording 1, this
name becomes available for a new voice note that you create. For example, if
you have 3 voice notes, named Recording 1, Recording 2, and Recording 3,
and you delete Recording 1, the next voice note you create will be named
Recording 1.
Set a voice note as your ring tone
1 On the Home screen, select Start.
2 Select Voice Notes.
3 Scroll to the voice note you want to set as your ring tone.
4 Select Menu and then Set as Ringtone.
5 Select OK.
Page 80

Settings
74
Settings
This chapter describes how to customize the settings on your Smartphone and how to
restore your Smartphone to its original settings.
Viewing and Changing Settings
The Settings screen displays a list of settings that you can change to personalize the
Smartphone for the way you work. For example, you can change the sounds your
Smartphone makes and even use your own sounds for ring tones, notifications, and
reminders. You can also change the image for t he Home scre en backgrou nd, set up da ta
connections for remotely accessing a data network, and more.
View the list of settings
• On the Home screen, select Start and then Settings.
Tip: To view the remaining settings, select More.
Exiting Setting Screen
After you modify a Settings option, you may have to select Done one or more times to
exit the Setting screens. However, you only need to select Done once, as described in
each of the instructions in this chapter, to apply the setting you have chosen.
To exit the Setting screens without applying the setting you have chosen, press e.
Display Properties
You can use Display Properties to change the Home screen layout, the color scheme,
the internal and external wallpapers, and the time delay before the Home screen
appears when the Smartphone is idle.
Chang e the Home screen layout
1 On the Home screen, select Start.
2 Select Settings and then Display Properties.
3 In Home screen layout, select the option you want.
4 Select Done.
Choose a Home screen wallpaper for the internal display
1 On the Home screen, select Start.
2 Select Settings and then Display Properties.
3 In Wallpaper internal display, select the option you want.
4 Select Done.
Choose a Home screen wallpaper for the external display
1 On the Home screen, select Start.
2 Select Settings and then Display Properties.
3 In Wallpaper external display, select the option you want.
4 Select Done.
Page 81

Settings
75
Add your own wallpaper image
1 Connect the Smartphone to your desktop computer.
2 On your desktop computer, copy the i mage file you want. T he fi le for mat mu st be .g if,
.jpg, or .bmp.
3 In ActiveSync on your desktop computer, click Explore and then double-click My
Smartphone.
4 Double-click Storage, double-click Appli catio n data, double-click Home.
5 Paste the image file into the Home folder.
Note: Before you open ActiveSync to paste the image file, make sure that the
Smartphone is connected to your desktop computer by a USB connection. For
best results, use ima ges with a 176 x 200 scre en resol u tion to fit on the scre en.
You can use this image for your Home screen.
Chang e the color scheme for screens throughout your Smartphone
1 On the Home screen, select Start.
2 Select Settings and then Display Properties.
3 In Color scheme, select the option you want.
4 Select Done.
Change the font size for screens throughout your Smartphone
1 On the Home screen, select Start.
2 Select Settings and then Display Properties.
3 In System font size, select the option you want.
4 Select Done.
Change the contrast on the internal display
1 On the Home screen, select Start.
2 Select Settings and then Display Properties.
3 In Contrast internal display, scroll left or right to set the desired contrast.
4 Select Done.
Change the contrast on the external display
1 On the Home screen, select Start.
2 Select Settings and then Display Properties.
3 In Contrast external display, select the option you want.
4 Select Done.
Change the te xt color on the external disp lay
1 On the Home screen, select Start.
2 Select Settings and then Display Properties.
3 In Contrast external display, scroll left or right to set the desired contrast.
4 Select Done.
Page 82

Settings
76
Specify the idle time before returning to the Home screen
1 On the Home screen, select Start.
2 Select Settings and then Display Properties.
3 In Return to Home screen, select the option you want. This is the amount of time it
takes your Smartphone t o return t o the Home screen after yo u make or receive a cal l,
open or close the flip, or press keys or buttons.
4 Select Done.
Phone Calls
You use Phone Calls to set options such as call forwarding, call waiting, and caller ID.
Change the line for outgoing calls
1 On the Home screen, select Start.
2 Select Settings and then Phone Calls.
3 Select Line For Outgo ing Calls.
4 In Current outgoing line, select the option you want: line 1 or line 2.
5 Select Done.
Block incomin g or outgoi ng calls
1 On the Home screen, select Start.
2 Select Settings and then Phone Calls.
3 Select Call Barring.
4 In Block incoming calls or Block outgoing calls, select the option you want: Off,
When Roaming, or All Calls.
5 Select Done. You will now be able to receive or make calls according to the options
that you selected.
Forward calls
1 On the Home screen, select Start.
2 Select Settings and then Phone Calls.
3 Select Call Forwarding.
4 Select the condition under which to forward calls as follows:
• Unconditional to forward all calls
•No Reply to forward calls when you do not answer
•Busy to forward calls when your line is busy
• Unavailable to forward calls when your Smartphone is off or out of service range
5 Select Enable call forwarding.
6 Enter the phone number to which calls are to be forwarded.
7 Select Done.
Note: This sets call forwarding for the current outgoing line. To set call forwarding for
the other line, make that line the current outgoing line and then set call
forwarding for that line. The setting for each line remains even if that line is no
longer the outgoing line.
Page 83

Settings
77
Answer a cal l by pressing any key
1 On the Home screen, select Start.
2 Select Settings and then Phone Calls.
3 Select Call Options.
4 Select Any key answer. This lets you answer incoming calls by pressing any key.
5 Select Done.
Enter the phone numbers you call for voice mail messages
Note: In most cases, your voice mail access number is sent to your phone
automatically. Use this setting feature only if your phone did not receive this
number. If you use this feature to enter a number other than your voice mail
access number, the number you enter will be overwritten by the actual voice
mail access number the next time you receive a voice mail.
1 On the Home screen, select Start.
2 Select Settings and then Phone Calls.
3 Select Call Options.
4 In Voice mail number (L1), enter your voice mail number for line 1. T he Smartphone
dials this number when you press Speed Dial 1.
5 In Voice mail number (L2), enter your voice mail number for line 2. T he Smartphone
dials this number when you press Speed Dial 2.
Note: Do not use this option when on the iDEN network. The iDEN network does not
provide a voice ma il access number for line 2.
6 Select Done.
Chang e your text message service number
1 On the Home screen, select Start.
2 Select Settings and then Phone Calls.
3 Select Call Options.
4 In SMS service center, enter the phone number.
5 Select Done.
Specify your country code and area code
1 On the Home screen, select Start.
2 Select Settings and then Phone Calls.
3 Select Call Options.
4 In Country code, enter your country code.
5 In Area code, enter your area code.
6 Select Done.
Page 84

Settings
78
Turn call waiting notifications on and off
1 On the Home screen, select Start.
2 Select Settings and then Phone Calls.
3 Select Call Waiting.
4 Select or clear Provide call waiting notifications.
5 Select Done. If you selected Provide call waiting notifications, you will now be
notified when you receive a call while you are already on a call.
Configure caller ID
1 On the Home screen, select Start.
2 Select Settings and then Phone Calls.
3 Select Caller ID.
4 In Provide my caller ID to, select the option you want: Everyone, No one, or Only
my contacts.
5 Select Done. The selected callers will be able to see your name and phone number
information when you call them.
Configure channels
1 On the Home screen, select Start.
2 Select Settings and then Phone Calls.
3 Select Channels.
4 Select the options you want.
5 Select Done.
Limit calls to specific area codes or phone numbers
Note: You will see this option only if you are on a GSM network.
1 On the Home screen, select Start.
2 Select Settings and then Phone Calls.
3 Select Fixed Dialing and then Enable fixed dialing.
4 Select Menu and then Edit Numbers.
5 Select Menu and then Add.
6 Enter the phone number or area code to which to restrict calling and select Done.
7 Repeat steps 4, 5, and 6 to add more numbers as necessary. You will be able to
make and receive calls only to and from the numbers or area codes specified.
Answer calls automatically
Note: The Auto Answer setting affects the Car and Headset profiles. If you change
the setting for Auto Answer under Settings, the same change will be made
automatically under Profiles.
1 On the Home screen, select Start.
2 Select Settings and then Phone Calls.
3 Select Auto Answer.
4 In Auto-answer in, select the amount of time you want to elapse before your
Smartphone automatically answers the call.
Page 85

Settings
79
5 Select Done. All calls will be answered automatically once the selected interval has
elapsed.
Allow last number redial
1 On the Home screen, select Start.
2 Select Settings and then Phone Calls.
3 Select Auto redial.
4 In Auto Redial, select On.
5 Select Done. Your Smartphone will automatically redial calls you make when the
system is busy.
Activ ate flip options
1 On the Home screen, select Start.
2 Select Settings and then Phone Calls.
3 Select Flip Activation.
4 To set your Smartphone to answer calls by opening the flip, select Open flip to
answer call.
5 To set your Smartphone to end calls by closing the flip, select Close flip to end call.
6 Select Done.
Note: If you are using your Smartphone with a headset, and you have the Flip to End
option set to On, closing your flip sends incoming sound to the headset and
does not end the call.
Set headset options
1 On the Home screen, select Start.
2 Select Settings and then Phone Calls.
3 Select Headset/Speaker.
4 Choose a headset setting:
• Select Headset only to send incoming sound to the headset only.
• Select Headset & Speaker to send incoming sound to the headset and ring tones
to the speaker.
Note: If you are using your Smartphone with a headset, and you have the Flip to End
option set to On, closing your flip sends incoming sound to the headset and
does not end the call.
5 Select Done.
Block Private calls, group calls, and data transfers
1 On the Home screen, select Start.
2 Select Settings and then Phone Calls.
3 Select Phone Only.
4 In Phone only, select On.
5 Select Done. Your Smartphone can not make or receive Private calls or group calls,
or transfer data.
Page 86

Settings
80
PTT
You can set PTT settings to control how your Smartphone handles Private calls, and
group calls.
Mute Priva te cal ls an d gr ou p calls
1 On the Home screen, select Start.
2 Select Settings and then PTT.
3 Select PTT Group Silent.
4 In PTT Group Silent, select On.
5 Select Done. Your Smartphone will not alert you to Private calls or group calls.
Define your group calling area
1 On the Home screen, select Start.
2 Select Settings and then PTT.
3 Select PTT Group Area.
4 In PTT Group Area, select the option you want.
5 Select Done.
Add a new group calling area
1 On the Home screen, select Start.
2 Select Settings and then PTT.
3 Select PTT Group Area.
4 Select Menu and then New Area.
5 Enter a name for the area.
6 Enter a number for the area.
7 Select Done.
Edit a group calling area
1 On the Home screen, select Start.
2 Select Settings and then PTT.
3 Select PTT Group Area.
4 Select the area you want.
5 Select Menu and then Edit.
6 Make the necessary edits.
7 Select Done.
Delete a group calling area
1 On the Home screen, select Start.
2 Select Settings and then PTT.
3 Select PTT Group Area.
4 Select the area you want.
5 Select Menu and then Delete.
6 Select OK.
Page 87

Settings
81
Set the most recent call as your One Touch PTT number
1 On the Home screen, select Start.
2 Select Settings and then PTT.
3 Select One Touch PTT.
4 Select Use One Touch PTT.
5 In Place call to, select Last Call.
6 Select Done.
Set another number as your One Touch PTT number
1 On the Home screen, select Start.
2 Select Settings and then PTT.
3 Select One Touch PTT.
4 Select Use One Touch PTT.
5 In Place call to, select Assigned Number.
6 Enter the number you want in the Number field:
• Type the number you want into the field.
• Browse to the number. Select Menu and then Browse Contacts or Browse
Recent Calls, as required. Select the number you want.
7 Select Done.
Turn off One Touch PTT
1 On the Home screen, select Start.
2 Select Settings and then PTT.
3 Select One Touch PTT.
4 Select Use One Touch PTT. This clears the checkbox and turns off One Touch PTT.
Vibrate All
You can set your Smartphone to vibrate for all phone calls, Private calls, group calls,
message notificati ons, and call alerts, even if you want your Smartphone to ri ng for other
features, with the V ibrate All setting.
1 On the Home screen, select Start.
2 Select Settings and then Vibrate All.
3 Select Use Vibr ate Al l.
4 Select Done.
Page 88

Settings
82
Notifications
You can use Notifications settings to control how your Smartphone notifies you of calls,
call alerts, messages, Calendar reminders, and other events, such as pressing keys on
the keypad.
Note: With the exception of ring tones, only .midi and .wav files can be set for
notifications.
You can customize the sounds your Smartphone makes for many of these events.
Change how your phone notifies you of all calls
1 On the Home screen, select Start.
2 Select Settings and then Notifications.
3 In Phone ring type, select the option you want:
•Ring — your Smartphone makes a sound until you respond to the call.
•Ring once — your Smartphone makes a sound only once when you get a call.
• Increasing ring — your Smartphone ring s more lo udly with each ring when you get
a call.
•Vibrate — your Smartphone vibrates and does not make a sound when you get a
call.
• Vibrate then ring — your Smartphone vi brates and then makes a sound w he n you
get a call.
• Vibrate and ring — your Smartphone vibrates and makes a sound at the same
time when you get a call.
• Silent — your Smartphone does not vibrate or make a sound when you get a call.
4 Select Done.
Change how your Smartphone notifies you of Private calls and group calls
1 On the Home screen, select Start.
2 Select Settings and then Notifications.
3 In PTT, scroll right or left to select Ring, Vibrate, or Off.
4 Select Done.
Change how long your Smartphone notifies you of call alerts
1 On the Home screen, select Start.
2 Select Settings and then Notifications.
3 In Call alert timeout, select the option you want. This is the amount of time your
Smartphone continue s to notify you af ter you have rec eived a call alert and have not
responded to it.
4 Select Done.
Change the sound you hear when you press keys on the keypad
1 On the Home screen, select Start.
2 Select Settings and then Notifications.
3 In Keypad control, select the option you want: Tone, Click, or None.
4 Select Done.
Page 89

Settings
83
Note: Your Smartphone sends tones across the network, and they are audible to
devices or people on the other end of the line, even if you choose Click or
None.
Setting ring tones
1 On the Home screen, select Start.
2 Select Settings and then Notifications.
3 Scroll to the item that you want to specify a ring tone for:
• To specify the sound made when you receive calls on line 1 or line 2, select Ring
tone line 1 or R ing tone line 2.
• To specify the sound made when you receive call alerts, select Call alert.
• To specify the sound made when you receive reminders from the Calendar, select
Reminders.
• To specify the sound made when you receive each type of message, select New email, New text message, New voice message, New instant message, or New
channel message .
• To specify the sound made by the alarm, select Alarm clock.
• To specify the sound made when your Smartphone displays certain types of
information, select SIM toolkit messages, Exclamation, Question, or Warnings.
4 Scroll right or left to select a sound. Select None if you do not want to hear a sound.
Tip: When you select a sound, the sound plays. To hear the sound again, select
Menu and then Play.
Add your own sound
1 Connect the Smartphone to your desktop computer using a USB connection.
2 On your desktop computer, copy the sound file you want. The file format must be
.wav, .mid, or .wma.
3 In ActiveSync on your desktop computer, click Explore and then double-click My
Smartphone.
4 Do one of the following:
• To save the sound on your phone, double-click Storage, double-click Application
data, double-click Sounds, and then paste the sound file into the Sounds folder.
• To save the sound on your SD card, double-click Storage Card, double-click My
Documents, and then paste the sound file into the My Documents folder.
5 Select Done.
Tip: You can now specify this sound for a ring tone, notification, or reminder on your
Smartphone, as descr ibed in “Settin g ring ton es” on pag e 83. For ring to nes, you
can use sounds in either .wav, .mid, or .wma file format; you cannot use .mp3
files for ring tones. You can use sounds in the .wma file format as ring tones
only; you cannot use .wma files for notifications or reminders.
Delete a sound
1 On the Home screen, select Start.
2 Select Settings and then Notifications.
3 Select Menu and then Delete Sounds.
4 Select the sound you want to delete.
5 Select Yes.
Page 90

Settings
84
Note: Y o u can onl y delete sounds tha t you adde d. You cannot delete sounds include d
with the Smartphone.
Turn the status light on or off
1 On the Home screen, select Start.
2 Select Settings and then Notifications.
3 In Status LED, select the option you want.
4 Select Done.
Voice Volume
The Voice Volume screen sets the volume coming out of your Smartphone’s earpiece
and speaker when you are in a call and at most other times.
These settings do not con trol the volume of the sounds your Smartp hone makes to notify
you of phone calls, data calls, or messages. The volume of those sounds is set in
Profiles.
Set the volume of sound from the earpiece and the speaker
1 On the Home screen, select Start.
2 Select Settings and then Voice Volume.
3 In Earpiece, scroll to the volume you want for sound coming out your Smartphone’s
earpiece.
4 In Speaker, scroll to the volume you want for sound coming out your Smartphone’s
speaker.
5 Select Done.
Power Management
You can use Power M anag emen t to contr ol how lon g your Smartph one’ s ba cklight stays
on. You can also check the battery level.
Set time it takes for the backlight to turn off
1 On the Home screen, select Start.
2 Select Settings and then Power Management.
3 In Backlight timeout, select the amount of time for the Smartphone before the
backlight turns of f, if you do not make or receive a call, open or close the flip, or press
keys or buttons.
4 Select Done.
View battery power level
1 On the Home screen, select Start.
2 Select Settings and then Power Management.
Main battery displays the amount of battery life remaining.
3 Select Done.
Page 91

Settings
85
Accessibility
You can use Accessibility settings to configure large digit dialing, multipress time out,
confirmation time out, and TTY.
Change accessibility settings
1 On the Home screen, select Start.
2 Select Settings and then Accessibility.
3 Select the options you want to change, as follows:
• Large Digit Dialing to set your Smartphone to briefly displ ay very large d igits wh en
you enter numbers at the Home screen.
• Multipress Timeout to set the length of time between keypresses when enter ing
text in Multipress mode.
• Confirmation Timeout to set the delay before an unconfirmed action times out.
•TTY to set TTY options. Please refer to “Enable TTY” for more information.
4 When you are finished making the changes you want, select Done.
Enable TTY
1 On the Home screen, select Start.
2 Select Settings and then Accessibility.
3 Select TTY.
4 Select Use TTY.
5 Select the option you want for Type:
•TTY — You type and read text on your TTY device.
•VCO (Voice-Carry-Over) — You speak into your Smartphone and read text replies
on your TTY device.
• HCO (Hearing-Carry-Over) — You type text on your TTY device and listen to voice
replies on your Smartphone speaker.
6 Select the option you want for Baud.
• To make TTY calls within the U.S., set the baud rate to 45.45.
• To make calls outside the U.S., set the TTY baud rate to 50.0.
7 Select Done.
Regional Settings
You can use Regional Settings to change the language, date, and time style, as well as
number and currency formatting options.
Configure regional settings
1 On the Home screen, select Start.
2 Select Settings and then Regional Set tings.
3 In Language, select the language to use when entering information.
4 In Locale, select your locale. This changes the remaining settings appropriately for
your locale.
5 Configure other settings in the same manner:
Page 92

Settings
86
• Short date style and Long date styl e show how dates appear on your
Smartphone.
• Time Format shows how times of day appear on your Smartphone.
• Positive number, Negative number, Positive currency, and Negative currency
show how numbers and currency appear on your Smartphone.
6 Select Done.
Note: After changing the language, you must turn your device off and on for the
change to take effect.
Date and Time
You can use Date and Time setting s to change the local time zone, the current date and
time, and to set the alarm.
Set the date and time
1 On the Home screen, select Start
2 Select Settings and then Date and Time.
3 In Time Zone, select your time zone.
4 In Date, select the month, day, or year and edit the information.
5 In Time, select a number and edit it.
6 Select Done.
Set the alarm
1 On the Home screen, select Start.
2 Select Settings and then Date and Time.
3 In Alarm, select Off or On to turn the alarm off or on.
4 In Alarm time, specify the time for the alarm to go off.
5 Select Done.
Phone Networks
You can use settings in Phone Networks to view and configure networks and networkrelated values.
View current network
1 On the Home screen, select Start.
2 Select Settings and then Phone Networks.
3 Select Current Network.
4 Select Done.
Select iDEN/GSM options
1 On the Home screen, select Start.
2 Select Settings and then Phone Networks.
3 Select iDEN/GSM Selection.
4 In iDEN/GSM selection, select to the option you want.
5 Select Done.
Page 93

Settings
87
View current GSM band
1 On the Home screen, select Start.
2 Select Settings and then Phone Networks.
3 Select GSM Ba nd.
4 Select Done.
Select a GSM network
1 On the Home screen, select Start.
2 Select Settings and then Phone Networks.
3 Select GSM Network Selection.
4 In Network selection, select the option you want: Manual or Automatic.
5 If you selected Manual, select Menu and then Select a Network. Select the network
and select Done. The Smartphone will use the selected network.
6 If you selected Automatic, select Menu and then Prefer red Networks. Select the
networks to use and select Done. The Smartphone will automatically use the
preferred networks.
7 Select Done.
Set netw or k ID
1 On the Home screen, select Start.
2 Select Settings and then Phone Networks.
3 Select Network ID.
4 Select the Network ID you want.
5 Select the value you want. If you select Enter Value, then enter the value into the
entry field.
6 Select Done.
Data Connections
Baud Rate
When you use your Smartphone as a modem, you can set its baud rate.
Set baud rat e
1 On the Home screen, select Start
2 Select Settings and then Data Connections.
3 In Baud Rate, select the baud rate you want.
4 Select Done.
Adding a URL Exception
Some URLs for Web pages on your company intranet may use periods, for example:
intranet.companyname.com. To view these pages in Pocket Internet Explorer, you must
create a URL exception. Otherwise, the pages will not display.
Note: You do not need to create URL exceptions for Internet URLs.
Page 94

Settings
88
Add a URL exception
1 On the Home screen, select Start.
2 Select Settings and then Data Connections.
3 Select Internet Connection.
4 Select Menu and then Work URL Exceptions.
5 Select Menu and then Add.
6 In URL Pattern, enter the URL and select Do ne. Separate multiple URLs with a
semicolon (;).
Edit a URL exception
1 On the Home screen, select Start.
2 Select Settings and then Data Connections.
3 Select Internet Connection.
4 Select Menu and then Work URL Exceptions.
5 Select the URL to edit.
6 Select Menu and then Edit.
7 Edit the URL and select Done.
Delete a URL exc ep ti on
1 On the Home screen, select Start.
2 Select Settings and then Data Connections.
3 Select Internet Connection.
4 Select Menu and then Work URL Exceptions.
5 Scroll to the URL to delete.
6 Select Menu and then Delete.
7 Select Yes.
Data Connections for GSM
If you are roaming on a GSM network, you may need to use these Data Connections
settings. If you are on the iDEN digital network, you will not need to use these settings
and many of them will not appear in your Smartphone as described here.
You can use Data Co nnection s settings to creat e di al-up , Vir tual P rivate Netw ork (VPN ),
GPRS, and proxy connections so that you can connect to the Internet or your corporate
network. By using a data conn ection, you can br owse the W eb, download email, chat by
using MSN® Messenger, or synchronize remotely with an Exchange Server.
Working with D ial-up Connections
You can create a dial-up connection to connect remotely to the Internet, a Wireless
Application Protocol (WAP) network, or your corporate network. Then, when you open a
program that is configured to use this connection, the Smartphone uses it to
automatically connect to the network. For example, you can create an Internet
connection and then configure Pocket Internet Explorer to use it. Then, when you start
Internet Explorer and browse to a Web page on the Internet, the Smartphone
automatically connects to the Internet by using your Internet connection.
Page 95

Settings
89
Create a dial-up connection
1 On the Home screen, select Start.
2 Select Settings and then Data Connections.
3 Select Work Conn ect ion.
4 Select Menu and then Edit Connections.
5 Select Dial-up Connections.
6 Select Menu and then Add.
7 Enter the requested information as follows and then select Done:
• In Description, enter a name for the connection.
• In Connects to, select the network.
• In Phone number, enter the phone number you use to dial the network.
• In User name, enter your network user name.
• In Password, enter your password.
• In Domain, enter the domain name, if required.
Note: If you are not sure about the information to enter, ask your network
administrator.
Tip: If you subscribe to General Packet Radio Services (GPRS), you can set up a
GPRS connection to access your corporate network or the Internet, which is
faster than a dial-up connection. See “Working with GPRS Connections” on
page 92.
Edit a d ial-up connection
1 On the Home screen, select Start.
2 Select Settings and then Data Connections.
3 Select Work Conn ect ion.
4 Select Menu and then Edit Connections.
5 Select Dial-up Connections.
6 Scroll to the connection to edit.
7 Select Menu and then Edit.
8 Change any information and select Done.
Delete a dial-up connec tion
1 On the Home screen, select Start.
2 Select Settings and then Data Connections.
3 Select Work Conn ect ion.
4 Select Menu and then Edit Connections.
5 Select Dial-up Connections.
6 Scroll to the connection to delete.
7 Select Menu and then Delete.
8 Select Yes.
Work ing with VPN Connections
If your company has set up a virtual private network (VPN), you can create a VPN
connection to gain access to your corporate network over an Internet connection.
Page 96

90
Create a VPN connection
1 On the Home screen, select Start.
2 Select Settings and then Data Connections.
3 Select Work Conn ect ion.
4 Select Menu and then Edit Connections.
5 Select VPN Connections.
6 Select Menu and then Add.
7 Enter the requested information as follows and then select Done:
• In Description, enter a name for the connection.
• In VPN type, select the type of VPN.
• In Server, enter the VPN server name.
• In Connects from, select the type of network from which you will connect to the
VPN (typically The Internet).
• In Connects to, select the type of network to which you will connect.
• In User name, enter your user name for the VPN.
• In Password, enter your password.
• In Domain, enter the domain name, if required.
• If you selected IPSec in VPN type, In IPSec authentication, select the type of
authentication: Pre-Shared Key or Certificate.
• If you selected Pre-Shared Key in IPSec authentication, in IPSec Pre-shared
key, enter the key.
Note: If you are not sure about the information to enter, ask your network
administrator.
Settings
Edit a VPN connection
1 On the Home screen, select Start.
2 Select Settings and then Data Connections.
3 Select Work Conn ect ion.
4 Select Menu and then Edit Connections.
5 Select VPN Connections.
6 Scroll to the connection to edit.
7 Change any information and select Done.
Delete a VPN conn ection
1 On the Home screen, select Start.
2 Select Settings and then Data Connections.
3 Select Work Conn ect ion.
4 Select Menu and then Edit Connections.
5 Select VPN Connections.
6 Scroll to the connection to delete.
7 Select Menu and then Delete.
8 Select Yes.
Page 97

Settings
91
Working with Proxy Connections
You can use a proxy connection to gain access to the Internet over an existing
connection to your corporate network.
Create a proxy connection
1 On the Home screen, select Start.
2 Select Settings and then Data Connections.
3 Select Work Conn ect ion.
4 Select Menu and then Edit Connections.
5 Select Proxy Connections.
6 Select Menu and then Add.
7 Enter the requested information as follows and then select Done:
• In Description, enter a name for the connection.
• In Connects from, select the type of network from which you will connect.
• In Connects to, select the type of network to which you will connect.
• In Proxy (name:port) en ter the proxy server name and port number in the form:
server name:port number.
• In Type, select the type of proxy connection to create.
• In User name, en ter your user name for the network to which you will connect.
• In Password, enter your password.
Note: If you are not sure about the information to enter, ask your network
administrator.
Edit a proxy connection
1 On the Home screen, select Start.
2 Select Settings and then Data Connections.
3 Select Work Conn ect ion.
4 Select Menu and then Edit Connections.
5 Select Proxy Connections.
6 Scroll to the connection to edit.
7 Select Menu and then Edit.
8 Change any information and select Done.
Delete a prox y co nn ec tio n
1 On the Home screen, select Start.
2 Select Settings and then Data Connections.
3 Select Work Conn ect ion.
4 Select Menu and then Edit Connections.
5 Select Proxy Connections.
6 Scroll to the connection to delete.
7 Select Menu and then Delete.
8 Select Yes.
Page 98

Settings
92
Working with GPRS Connections
If you subscribe to General Packet Radio Services (GPRS), you can set up a GPRS
connection to gain access to your corporate network or the Internet. This is faster than a
dial-up connection.
You can also use your Smartphone as a GPRS modem for a desktop computer. To do
so, “Create a GPRS connection” on page 92, “Connect to the Internet with a GPRS
connection” on page 93, and “Create a new connection on your desktop computer” on
page 93.
Create a GPRS connection
Note: You are not required to enter a use r na me, p asswo rd, p rimar y DNS, seconda ry
DNS, or IP address to create GPRS connection.
1 On the Home screen, select Start.
2 Select Settings and then Data Connections.
3 Select Internet Connection.
4 Select Menu and then Edit Connections.
5 Select GPRS Connections.
6 Select Menu and then Add.
7 Enter the requested information as follows and select Done:
• In Description, enter a name for the connection.
• In Connects to, select the type of network to which you will connect.
• In Access point, enter the information provided by your service provider.
When you open a program that connects to the Internet, the Smartphone uses this
connection.
Note: If you are not sure about the information to enter, ask your network
administrator.
Edit a GPRS connection
1 On the Home screen, select Start.
2 Select Settings and then Data Connections.
3 Select Internet Connection.
4 Select Menu and then Edit Connections.
5 Select GPRS Connections.
6 Scroll to the connection to edit.
7 Select Menu and then Add.
8 Change any information and select Done.
Delete a GPRS connection
1 On the Home screen, select Start.
2 Select Settings and then Data Connections.
3 Select Internet Connection.
4 Select Menu and then Edit Connections.
5 Select GPRS Connections.
6 Scroll to the connection to delete.
Page 99

Settings
93
7 Select Menu and then Add.
8 Select Yes.
9 Select Menu and then Delete.
10 Select Yes.
Connect to the Internet with a GPRS connection
1 On the Home screen, select Start.
2 Select Settings and then Data Connections.
3 In Internet Connect ion , select the GPRS you want to use and select Done.
Tip: After you use the GPRS connection once, you may want to change your
Inte rnet Connec tion back to Automatic. Your phone will then automatically
select the correct connection based on the network.
Create a new connection on your desktop computer
1 Follow the instructions on your desktop computer.
2 Ensure that the area code and prefix fields are disabled, and enter *99# when
prompted for a phone number.
Beam
If you want to receive infrared beams from other devices, you must turn on the option to
receive incoming beams.
Receive incoming beams
1 On the Home screen, select Start.
2 Select Settings and then Beam.
3 Select Receive incom ing beams. The Smartphone receives all incoming beams
from other devices until you clear this option.
4 Select Done.
Certificates
On your Smartphone you can add and delete public key certificates. These certificates
help establish your identity when you log on to a secure network, such as a corporate
network. Certifica tes also help establish the identity of other computer s, such as servers,
with which you connect. This helps prevent unauthorized users from accessing your
Smartphone and its information.
You can store 2 types of certificates on your phone: personal certificates that establish
your identity, and root certificates that establish the identity of servers with which you
connect. Your Smartphone may include a set of preinstalled certificates.
View certificates
1 On the Home screen, select Start.
2 Select Settings and then Certificates.
3 To view the list of personal certificates, select Personal.
4 To view the list of root certificates, select Root.
5 To view details about a certificate, select it in the list.
Page 100

Settings
94
Delete certificates
1 On the Home screen, select Start.
2 Select Settings and then Certificates.
3 To view the list of personal certificates, select Personal. To view the list of root
certificates, select Root.
4 Scroll to the certificate you want to delete in the list, select Menu, and then select
Delete.
5 Select Yes.
Flight Mode
Sometimes you may want to have your Smartphone on, but turn off its ability to make
and receive call s, such a s when you ar e on an airplan e. You can set your Smartphone so
that it cannot make or receive phone calls, Private calls, or group calls; or transfer data.
Turn on or off calls and data transfers
1 On the Home screen, select Start.
2 Select Settings and then Flight Mode.
3 To turn off calls and data transfers, select Flight mode. To exit Flight mode, clear
Flight mode.
4 Select Done.
Profiles
You can use P ro files set tings to change how the Smartphone notifies you of events such
as incoming calls, approaching appointments, or arriving messages.
The Smartphone includes 8 profiles. You can use the profiles as-is, or you can edit and
rename them to suit your needs. For each profile, you can choose the ring type and
volume, the alarm type and volume, the notification type and volume, and the system
sound volume.
Note: The Ring Volume setting in profile s contro l s the volu me level fo r the ring so und
of line 1, line 2, messages, and data. For information about setting the volume
level for the earpi e ce or spe aker whe n you ar e in a cal l, see “Voice V olume ” on
page 84.
You can quickly select the profile suited to your cur rent situatio n. For example, when you
are attending a meeting, you can choose the Meeting profile, which silences the ring of
your Smartphone and provides visual notifications only. When you are waiting for an
important call, yo u can choose the Spe akerphone profile, w hich makes you r Smartpho ne
ring loudly.
 Loading...