

Page 1

FX855P
Dual Band GSM Fixed Wireless Phone
USER’S GUIDE
Page 2

(Back cover)
Motorola, the Stylized M Logo, and other Motorola trademarks and trade dress are owned
by Motorola, Inc. and are used under license from Motorola, Inc. MOTOROLA and the
Stylized M Logo are registered in the U.S. Patent & Trademark Office. All other
products or service names are the property of their respective owners. © Motorola, Inc.
2007. All rights reserved.
The information contained in the FX855P user guide is believed to be correct at the time
of printing. We reserve the right to change or modify any information, product
specifications, features or functionality without notice. The contents of the FX855P user
guide are provided “as is.” Certain features may not be activated by your service provider,
and/or their network settings may limit the feature’s functionality. Additionally, certain
features may require a subscription. Contact your service provider for details.
FX855P User Guide version 1.0 08/14/2007
© Copyright 2007, Motorola Inc., All rights reserved
Page 3

This page is intentionally left blank
Page 4

WELCOME
Congratulations on the purchase of your Motorola FX855P product!
Please retain your original dated sales receipt for your records.
For warranty service of your Motorola FX855P product, you will need to provide a copy
of your dated sales receipt to confirm warranty status.
Thank you for choosing a Motorola product.
Please read important safety instructions before use.
Read and understand all instructions before use.
Please retain this guide for future reference.
Page 5

1
1. PREPARING YOUR PHONE FOR USE
Before using your phone, the phone must be setup according to the following
instructions.
1.1. Installing the coiled cord
x Connect the coiled cord to both the handset and the base.
1.2. Plugging the AC/DC adaptor
z Connect the adaptor to the AC Wall outlet.
Page 6

2
1.3. Backup Battery
x
Remove the battery door.
x
Insert the rechargeable battery pack into the battery compartment.
x
Replace the battery door.
Note: The battery pack is a backup for emergencies in case of a power failure. Do
not operate the phone without having the AC/DC adaptor connected.
Be sure to carefully match the positive and negative terminals as shown on the
battery.
Caution:
x
It is prohibited to use the SIM card for this Fixed Wireless Phone in other
GSM mobile phones. Once the SIM pin number is entered, the SIM pin is
automatically changed so the initial PIN is no longer valid. Therefore, it is
highly recommended NOT to take out the SIM card once it is installed in this
product.
x
DO NOT bend or scratch your SIM card, and avoid exposing it to static
electricity, water, or dirt.
Page 7

3
2. FEATURE HIGHLIGHTS
z Voice mail
z Short Message Service
z Emergency call
z Call logs
z Call restriction
z Caller ID
z Clock with alarm
z Calculator
z Cordless function
z Blue back light
z Multiple ring tones
z Adjustable ring tone
z Profile setting
z Graphic display
z Multi language
z 100 phone book memories and 250 phone book memory additionally suppo
rted by SIM card.
z Keypad lock
z Dial tone generation
z Long Message Service up to 450 characters
z Antenna bar
z Battery bar
z Ear phone / microphone jack
Page 8

4
3. ABOUT THE PHONE
This phone can operate in different bands (depending on the service provider). It
supports dual band (850MHz / 1900MHz or 900MHz / 1800MHz).
3.1. Part of the Phone
Page 9

5
3.2. Identifiers
On your phone, you have two types of identifiers: indicators and icons. Icons are
graphic representations of a specific item or situation. For example, an icon appears
when you have a voice message waiting.
Indicators show the status of something. The phone uses three types of indicators:
z Signal strength indicator: This indicator shows the signal strength of the
wireless network at your current location. The higher the bar, the stronger
the signal.
z Ringer volume indicator: When you press , the upper key once during
standby, you are able to enter the ringer volume adjustment. Scrolling up
and down using the key adjusts the ringer volume higher or lower.
The list below shows what each icon means.
Tells you the strength of the network signal.
Battery indicator
You have one or more unread text messages waiting.
The alarm has been set and is on.
Page 10

6
4. BASIC OPERATIONS
4.1. Switching the phone ON and OFF
Case 1:
z To turn the phone ON, plug the power cable into the phone.
z To reset the phone, press and hold the
key.
4.2. Making a call
Case 1:
x
Deactivate the Key guard, if it is ON.
x
Pick up the handset, and dial tone is generated.
x
Enter the phone number, including the area code, and press .( if you don't p
ress
, the phone will call the number which you had input after 6 s
econd.)
.
x
Press to end the call or to cancel the call attempt. If handset is placed in
its base, call is automatically terminated.
Case 2:
x Enter the phone number with the handset on the base.
x Press
. The phone enters speaker mode.
Page 11

7
x Press
to end the call or to cancel the call attempt. If speaker button
is pressed, the call is automatically terminated.
4.3. Answering a call.
Case 1:
x When the phone rings, press the Send button. The phone will be in
speaker mode.
4.4. Speaker mode.
You can make or answer a phone call by pressing when the handset is on the
base.
To make a call:
x Press
to turn ON the speaker phone mode.
x If you hear the dial tone, press the number you want to connect to.
x Press
.( if you don't press , the phone will call the number whi
ch you had input after 6 second.)
To answer a call:
x When the phone rings, press
to turn ON the speaker phone mode.
Note: You can mute the microphone during a call by pressing the
key.
The handset can be unmuted by pressing the
.
When the handset is muted, the caller cannot hear you, but you ca
n still hear them.
4.5. Adjusting the Volume
4.5.1. Adjusting the ringer volume
Page 12

8
You can adjust the ring tone volume.
1. Press
up to enter the ring volume control screen.
2. Press right to increase the volume.
3. Press
left to decrease the volume.
4.5.2. Adjusting earpiece volume
You can adjust the earpiece volume during a call.
1. Press
right to increase the volume.
2. Press
left to decrease the volume.
Note: You can also adjust the speaker volume with
when you are in
speaker mode.
4.6. Redialing the last-dialed number
The phone stores up to 10 last dialed numbers. Stored numbers may be up to 20 digits
long.
1. Press
to find the most recently dialed numbers.
2. Press
to scroll to the number you wish to dial.
3. Press
once.
Note: Press
will also call the last phone number.
If no recently dialed numbers are stored, you will not be able to use this function.
4.7. Caller ID
Page 13

9
Requires a subscription to a calling plan that supports this feature. Not available in all
areas. Contact you telephone service provider for availability and details.
When Caller ID is active, your phone shows the caller’s phone number during an
incoming call, as long as this number is a part of your service provider’s wireless
network.
The wireless network lets you know if it does not recognize the caller’s phone number.
The wireless network will also let you know if the calling party has blocked the Caller
ID feature.
If you have stored the name and number of the calling party in your Phone Book and
that number is supported by the wireless network, the caller’s name will also appear.
4.8. SMS and Voice Mail
Requires a subscription to a calling plan that supports this feature. Not available in
all areas. Contact you telephone service provider for availability and details.
A new SMS or Voice mail arrives:
x
The back light of the keypad is ON and the display shows “New Message(s)” on
the screen.
x
The backlight is OFF if you lift the handset from the base.
5. USING PHONE MENUS
5.1. Navigate menus
A menu is a list of choices you can make. Your phone menu has 7 sub-menus. Each
sub-menu contains options that allow you to use the Phone Book, change the ring tone,
etc. You can use menus and sub-menus in two ways: by scrolling or by using shortcuts.
5.1.1. Scrolling through menus
x
From the Start screen, press Menu, and then scroll through the menus using
the
key.
Page 14

10
x
Use the scroll and selection keys to navigate the submenus and to return to the
Start screen.
5.1.2. Using a shortcut
x
From the start screen, press the down arrow on the arrow key and scroll
through the shortcuts.
You can use a shortcut to get to Options directly without scrolling through lists.
To change one of the shortcuts, press the left soft key and select from a list of
different options, once you select the option desired, press the left soft key Ok to
assign the new shortcut.
5.1.3. Exiting menu levels
x To return to the previous menu level, press Back or Cancel.
x To return to the Start screen, press
.No menu setting changes will be saved.
5.2. Menu Tree
Your phone’s menu may differ from the following list, depending on the network
services to which you have subscribed and the accessories you are using. If you have
any questions, please call your service provider.
1. Short Messages
1. Read Message
2. Write Message
3. Outbox
4. Draftbox
5. Voice Mail
1. Listen to Voice Mail messages
2. Voice mailbox number
6. Message setup
1. Service Center
2. Protocol Type
3. Validity Period
Page 15

11
4. Status Report
5. Reply Path
6. Storage media
7. Storage status
7. Broadcast Message
1. Topic
2. Language
3. Service Status
8. Delete all
1. Delete all messages
2. Delete inbox messages
3. Delete outbox messages
4. Delete draftbox messages
9. SMS Template
2. Phone Book
1. Browse
2. Create
1. Save to SIM
2. Save to NVM
3. SIM phonebook
4. Me phonebook
5. Storage status
6. Abbr.dial
7. Fixed dial
8. Enable FDN
9. Copy
1. From SIM card to phone
2. From phone to SIM card
4. Delete all entries
1. Delete all ME entries
Page 16

12
2. Delete all SIM entries
5. SDN phonebook
6. Group
1. Family
2. Friends
3. Office
4. Others
3. Call records
1. Incoming call
2. Outgoing call
3. Missed call
4. Call Duration
4. Settings
1. Phone settings
1. Display Settings
2. Security settings
3. Clock settings
4. Own number
5. Keypad Locking Settings
6. Factory Default
2. Network settings
1. Call waiting
2. Call forwarding
3. Call barring
4. Network select mode
3. Call settings
1. CLIR
2. Auto redial
3. Any key answer
4. Shortcut Settings
Page 17

13
1. Left key
2. Right key
3. Up key
4. Down key
5. Profiles
1. Ringing tone
2. SMS alert tone
3. Call alert
4. Ringing volume
5. Key volume
6. Alarm tone
5. Alarm
1. Alarm 1
2. Alarm 2
3. Alarm 3
6. Tools
1. Calculator
2. Calendar
6. ENTER LETTERS AND NUMBERS
You can enter letters, as well as numbers, when storing information in your phone by
using your phone’s keypad. To enter letters, press the key associated with the letter
you wish to enter until it appears on the screen (numbers will also appear).
6.1. Entering Letters
When you want to add new names or when you view names in the Phone Book, your
phone automatically switches to the ABC mode and displays the ABC icon.
Page 18

14
Key Characters Key Characters
G
. , ? !1 P Q R S 7
A B C 2 T U V 8
D E F 3 W X Y Z 9
G H I 4 9 (space),0
J K L 5 ,.’?!”@Ƹ_NjġģěĴį^[ ] ڷęʿ&/ ( )
M N O 6
Change input ways
Press a key once or several times to enter the letter(s) you want. For example, press
G three times to enter the letter C. The selection displays.
6.1.1. Editing name or phone number
To edit a name already stored in the Phone Book:
z From the Phone Book list, select the name you want to edit.
z Select the name or the phone number you want to change.
z To edit, press the left soft key and scroll down to the edit option.
z Press the left soft key to enter edit mode.
z Press
left to scroll the cursor to the left.
z Press
right to scroll the cursor to the right.
z Press to correct any mistakes.
z Press the left soft key to save changes or the right soft key to cancel.
6.1.2. Changing the case of letters and numbers
You can switch the mode among uppercase and lowercase letters and numbers by
pressing
. G
7. SEND AND RECEIVE TEXT MESSAGES
You can send or receive text messages with your phone. Text messages that you receive
Page 19

15
can contain ring tones that you can store on your phone.
After complete a message’s contents, you can choose to send it out right away, or to save
it as a draft.
z Read message
z Write message
z Out box
z Draftbox
z Voice mail
z Message setup
z Broadcast message
z Delete all
z SMS Template
7.1 Send a Text Message
You can send a text message to one or more recipients. You can manually enter each
recipient’s phone number, or you can select the numbers from the phonebook.
Note: The maximum length of a text message differs depending on the capabilities
of the network from which it originated. Also, text messages may appear
different at different times because messages can originate in networks other
than your own.
Contact your service provider for more information about this feature.
ཛ Press Menu > Short Messages.
ཛྷ Scroll to the Write Message and press Ok.
ཝ You can create the message.
ཞ When you press , you can scroll to one of the following message options:
z Only send Send message to only one number.
z Only save Save a message as a draft.
z Send and Save Save and send message to only one number.
z Insert SMS Template Use stored message.
Page 20

16
- Merry Christmas!
- Happy birthday!
- Thank you!
- Good night!
- Sorry!
- Call me back please!
- Best wishes!
- Call you back later!
- Your message has arrived!
- Wait for me!
ཟ Input language Input other language.
7.2 Outbox
When a message arrived, a pop-up message displays and a new message icon appears.
You can read it right away, or ignore it and later check it in Inbox.
Outbox stores messages sent and saved.
ཛ Press Menu > Short Message
ཛྷ Scroll to the Outbox and press Ok.
ཝ From the list, highlight the one you need and press Ok
ཞ When you press , you can scroll to one of the following message options:
z Delete Delete the chosen message.
z Forward Forward the chosen message.
z Edit Edit the chosen message.
z Dial back Call the number of the short message.
z Extract number Extract the number to SIM or phone.
7.3 Draftbox
This menu shows the preset message list.
7.4 Voice mail
You can listen to your voicemail messages by calling your network voicemail phone
number. Voicemail messages are stored on the network voicemail box, not on your
phone.
Page 21

17
ཛ Press Menu > Short Messages
ཛྷ Scroll to Voice mail and press Ok.
ཝ From the list, select one option you need and press Ok
z Listen to voice Mail messages Dial the network service number and
connects you to the voice mail service.
z Voice mailbox number Enter or modify the network service number.
7.5 Message Setup
The configure settings of message include: Profile Setting, Common Setting and
Memory status.
ཛ Press Menu > Short Message.
ཛྷ Scroll to the Message Setup and press Ok.
7.6 Broadcast Message
You can receive broadcast message regularly from your service provider.
ཛ Press Menu > Short Message
ཛྷ Scroll to the Broadcast Message and press Ok.
ཝ From the list, select one option you need and press Ok or Change
z Topic You can either Select, Add, Edit or Delete broadcast channels.
z Language Select the languages of the broadcast message.
z Service Status On/Off
7.7 Delete all
You can delete all messages.
7.8 SMS Template
The template consists of predefined or self-edit canned messages.
ཛ Press Menu > Short Message.
ཛྷ Scroll to the SMS Template and press Ok.
You have 10 text templates.
z Profile Setting Each profile has a unique set of settings: Profile Name,
Message Center (network service), Valid Period (Set the duration that
Page 22

18
your message is stored at the message center. Select 1 hour, 12
hours, 1 day, 1 week or maximum) and Message Type Text / Fax /
Page / E-mail).
9 MSC (Message Service Center) phone number: The SMS Center
Number is required to send messages. Ask your service provider for
this number.
9 Validity: Set the period of time the message is stored in the service
center. You can set the period for 1 hour, 12 hours, 1 day, 1 week,
maximum. When the set period expires, the service center will delete
all messages, even if the user does not receive the message.
9 Type: When you set the message type, the network will convert the
message to the type you have set.
z Common Setting Delivery Report (to receive the delivery report informing
you when a message is delivered) and Reply Path (lets the
recipient of your message send you a reply message through your
message center if provided by your network.).
z Memory Status Check out memory status in SIM and in Phone. It shows
percentage for used memory. For example, SIM : 30%
means 30% used in SIM card out of 100%.
Note: After SMS memory in SIM card is full, the phone starts to use memory in the
phone.
8. PHONE BOOK
8.1 About the phone book
New entries can be stored in SIM card or in your handy.
You can store up to 100 entries in the phone and additional 200 in SIM depending on
SIM limitation.
Page 23

19
Entries stored in Phone allow numbers of up to 41 digits, and names of up to 28
characters.
In standby mode, you can press
Name to enter immediately Phone Book List.
When the number is found pressing Name, you can select it and choose to Browse, Creat
e, SIM phone book, ME Phonebook ,storage status, Abbs.dial, Fixed dial, Enable
FDN, Copy, Delete all entries, SDN Phonebook and Group.
8.2 Use phone book menus
The phone book has several menus to select from. These menus appear when you press
Name and select number. Press G option to select menu. Use to scroll to the
menu you want to use.
8.3 Browse
You can see the detail information of this record.
1) Press the left soft key
in the idle screen
2) Select Contact and press
OK
3) Select one record and select to Detail/Edit and press
OK
Get the detail information of this record which you want to see
8.4 Create
To create a phonebook entry:
ཛ Press Menu > Phonebook.
ཛྷ Scroll to Create and press Ok.
ཝ Press Save to SIM or Save to NVM depending on where you want to store the
phone entry.
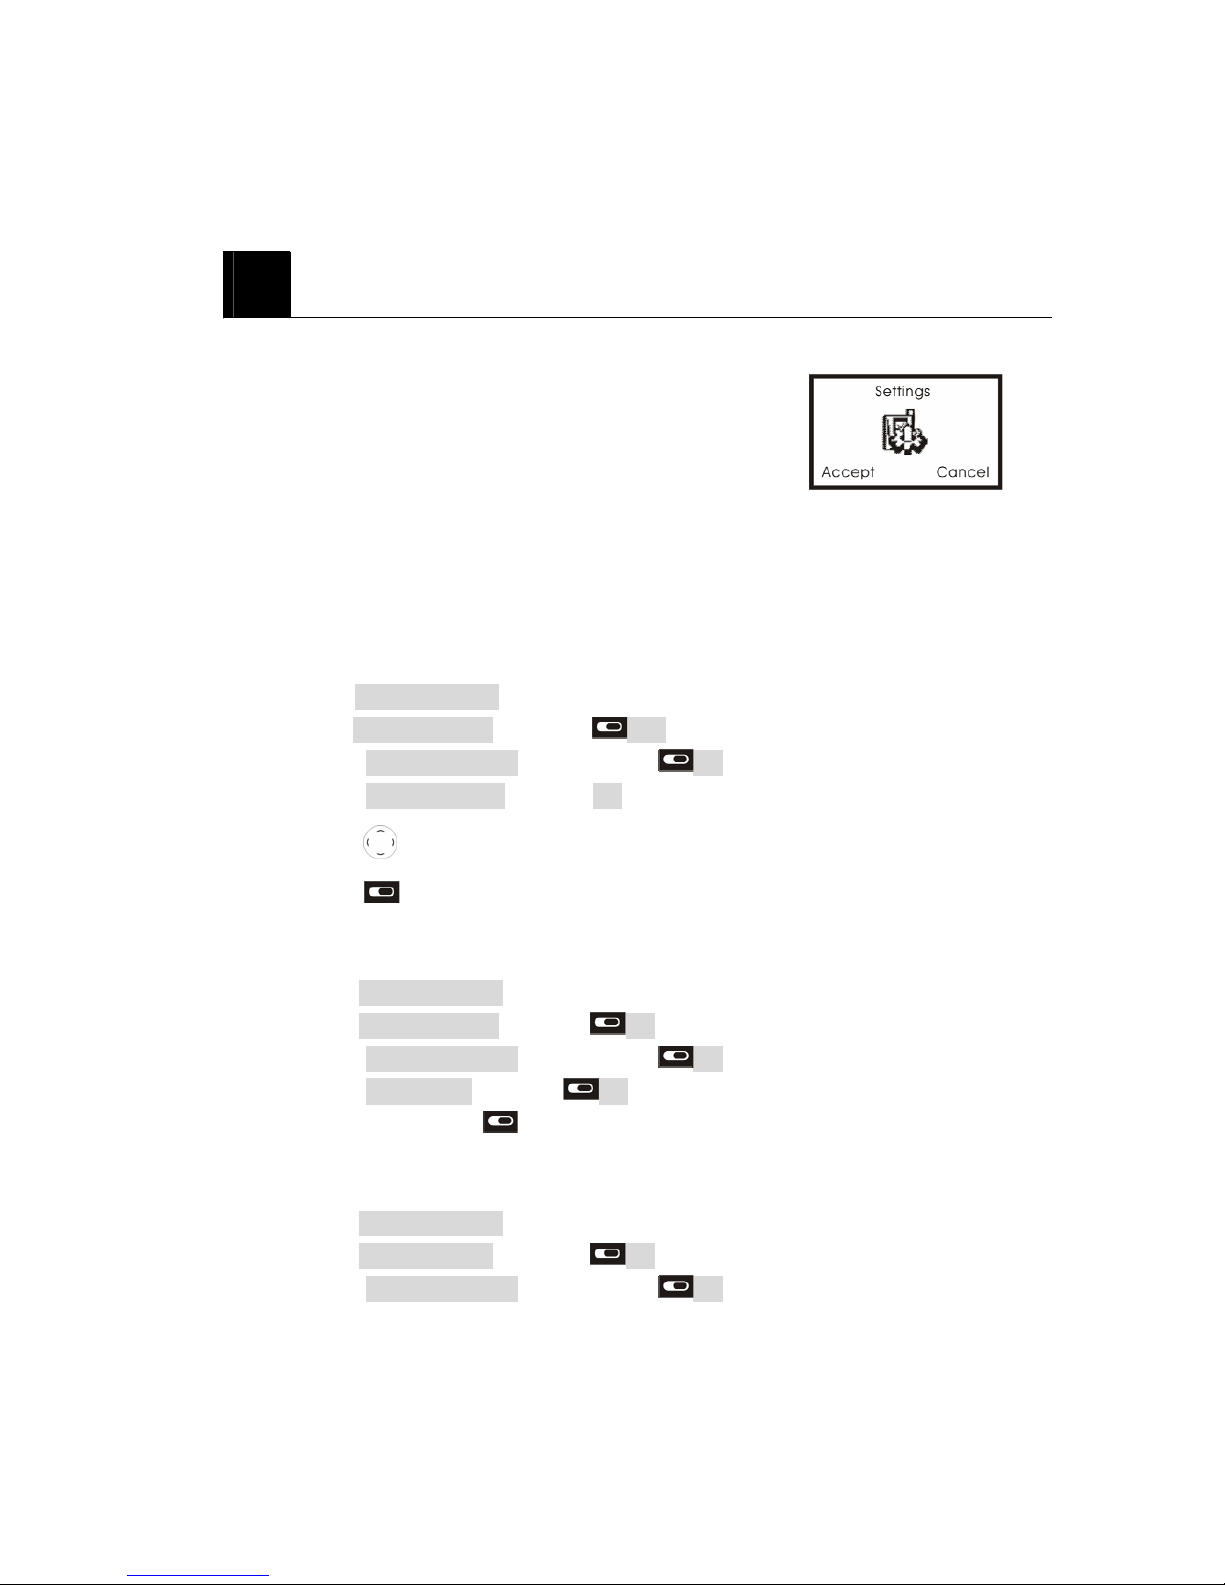
ཞ Press Accept to save the change.
8.5 SIM phonebook
You can browse SIM card phonebook.
Page 24

20
ཛ Press Menu > Phonebook.
ཛྷ Scroll to SIM phonebook and press Ok.
8.6 ME phonebook
You can browse ME phonebook.
ķ Press Menu > Phonebook.
ĸ Scroll to ME phonebook and press Ok.
8.7 Storage status
You can check out memory status for phone book:
Ĺ Press Menu > Phonebook.
ĺ Scroll to Storage status and Press Ok.
Ļ Check the memory status. For example, if you see “36/100”, it means the
capacity is 100 entries and there are 36 entries saved.
ļ Press to return to Storage status .
8.8 Abbr.dial
6HOHFWLQJWKHGLJLW\RXFDQVHWWKHGLJLWFRUUHVSRQGWRDSKRQHQ
XPEHULQWKHSKRQHERRNWKHQ\RXFDQGLDOVRORQJDV\RXSUHVVWKHGLJ
LWDQGSUHVVWKHVHQGNH\
8.9 Fixed dial
$OORZWRVWLUWRPDNHWHOHSKRQHQXPEHUIRUIL[FDOO
8.9 Enable FDN
2SHQ)'1
8.6 Copy
You can use this function to Copy numbers in the SIM card to your fixed phone, or vice
versa:
ཛ Press Menu > Phonebook
ཛྷ Scroll to Copy and press Ok.
Page 25

21
ཝ Press From SIM or From Phone where you want to copy all phone book entries
from.
ཞ Press Ok
8.7 Delete All entries
You can delete all phonebook entries:
ཝ Press Menu > Phonebook.
ཞ Scroll to Delete All entries and press Ok.
ཟ Select Delete all ME entries or Delete all SIM entries.
འ Press Ok.
Caution: Note that this action cannot be undone once you perform this feature, all
the stored information in your phonebook is deleted.
8.8 SDN phone book
8.9 Group
ķ Press Menu > Phonebook.
ĸ Scroll to Group and press Ok.
Ĺ Select IDPLO\IULHQGFRPSDQ\DQGRWKHU.
ĺ Press Ok.
9. Call Records
9. 1 Incoming Call
z This menu shows recently received numbers.
9. 2 Outgoing Call
z This menu shows recently dialed numbers.
9. 3 Missed Call
z This menu shows recently missed numbers.
9. 4 Call Duration
z This function allows you to view the duration of your last Call, All Calls,
Received calls and Dialed calls in hours, minutes and seconds.
Page 26
22
10. SETTINGS
Setting menu includes:
z Phone settings
z Network settings
z Call settings
z Shortcut settings
z Profiles
10.1 Phone settings
10.1.1 Display settings
LCD contrasW
ཛ Press Menu > Setting.
ķ Press Phone settings and press Ok.
ĸ Select Display settings and then press Ok.
Ĺ Select LCD contrast and press Ok.
ĺ Press
left/right adjust.
Ļ Press
OK.
Back light:
ķ Press Menu > Setting.
ĸ Press Phone settings and press Ok.
Ĺ Select Display settings and then press Ok.
ĺ Select Back light and press Ok.
Ļ &KRRVHSUHVV
2.
Greeting note:
ķ Press Menu > Setting.
ĸ Press Phone settings and press Ok.
Ĺ Select Display settings and then press Ok.
Page 27

23
ĺ Select Greeting note and press Ok.
Ļ Select Enable or Disable ,Press Ok.
Language
You can select the language you need.
ཛ Press Menu > Setting.
ཛྷ Press Phone settings and press Ok.
ཝ Select Display settings and then press Ok.
ཞ Select Language and then press Ok.
ཟ Select the language you need and press Ok.
Date Time display:
You can choose whether to display date and time in Standby screen or not.
ཛ Press Menu > Setting.
ཛྷ Press Phone settings and press Ok.
ཝ Select Display settings and then press Ok. Toggle Date Time display and
press Ok
10.1.2 Security settings
There are 3 options available:
z Power on PIN1 Prevent unauthorized use of the phone.
z Change PIN2 Change PIN2 passwords.
z Phone code Select ON , OFF or Change Phone Code and then press
Ok.
10.1.3 Clock settings
ķ Press Menu > Setting.
ĸ Press Phone settings and press Ok.
Ĺ Select Clock settings and then press Ok.
ĺ Select Date˂ Time settings, Date display format, Date separator or Ti
me display format and press Ok.
Ļ After finishing, press OK.
Page 28

24
10.1.4 Own number
You can choose whether to display your phone number (or name) in Standby screen
or not.
ķ Press Menu > Setting
ĸ Press Phone settings and press Ok.
Ĺ Select Own number and then press Ok.
ĺ Toggle Own Number and press Ok.
10.1.5 Keypad Locking Settings
If you don’t press the key for a certain period of time (default time or set by the user),
keys are automatically locked in order to prevent accidentally pressing keys.
ķ Press Menu > Setting.
ĸ Press Phone settings and press Ok.
Ĺ Press Keypad Locking settings and press Ok.
ĺ Select timer duration: 30 sec., 60 sec or Disable and press Ok
10.1.6 Factory Default
This feature resets the current settings to factory default values. The default
password is “0000”.
ķ Press Menu > Setting.
ĸ Press Phone settings and press Ok..
Ĺ Press Factory Default and press Ok.
ĺ Press Password and enter the 4 digit password and press Ok.
10.2 Network settings
10.2.1 Call waiting
Call Waiting is a network or subscription dependent service.
If set to Activate, Call Waiting feature enables the network to remind you other
incoming calls during a call in progress.
ķ Press Menu > Setting.
Page 29

25
ĸ Press Network settings and press Ok.
Ĺ Press Call Waiting and press Ok.
ĺ Select Interrogate or Activate, or Deactivate and then press Ok.
z Interrogate Check current Call Waiting setting status.
z Active Activate Call Waiting function.
z Deactivate Deactivate Call Waiting function.
10.2.2 Call forwarding
Call Divert is a network or subscription dependent service. It allows you to forward a
call to another number, based on different conditions.
ķ Press Menu > Setting.
ĸ Press Network settings and press Ok.
Ĺ Press Call forwarding and press Ok.
ĺ Select one of options below and then press Ok.
z Unconditional divert Forward all incoming calls to designated number.
z Busy divert Forward all incoming calls when there is at least one
call in progress.
z No answer divert Forward the incoming call if it is not answered.
z No service divert Forward the incoming calls if it is not service.
10.2.3 Call barring
Call Barring is a network or subscription dependent service.
This feature allows you to restrict or bar certain or all types of calls to and from your
phone.
ķ Press Menu > Setting.
ĸ Press Network settings and press Ok.
Ĺ Press Call barring and press Ok.
ĺ Select one of options below and then press Ok.
All outgoing Calls: Bar all outgoing calls.
All int’l call: Bar all outgoing international calls.
Int’l except to home: Prevent users from making any international calls
other than to home PLMN.
Page 30

26
All incoming call: Bar all incoming calls.
Incoming while roam: Bar all incoming calls when the phone is roaming.
Note: To activate and Deactivate Outgoing, Incoming, and cancel calls, the SIM
password is required. Contact your cellular phone provider.
10.2.4 Network Select mode
You can set the phone to automatically search the most suitable network to camp on;
or to manually select the network you need.
ķ Press Menu > Setting.
ĸ Press Network settings and press Ok.
Ĺ Press Network select mode and press Ok.
ĺ Select Automatic selection or Manual selection and press Ok. If Manual is
selected, the phone starts searching available networks. Use the up and down
key to browse the network list, and press Ok to set the highlighted network.
10.3 Call settings
10.3.1 CLIR
ķ Press Menu > Setting.
ĸ Press Call settings and press Ok.
Ĺ Press CLIR and press Ok.
ĺ Select the option you need and press Ok
10.3.2 Auto redial
ķ Press Menu > Setting.
ĸ Press Call settings and press Ok.
Ĺ Select Auto redial and then press Ok.
ĺ Select Enable or Disable and press Ok.
10.3.3 Any key answer
ķ Press Menu > Setting.
ĸ Press Call settings and press Ok.
Ĺ Select Any key answer and then press Ok.
ĺ Select Enable or Disable and press Ok.
Page 31

27
10. 4 Shortcut settings
10.4.1 Left key
ķ Press Menu > Setting.
ĸ Press Shortcut settings and press Ok.
Ĺ Select Left key and then press Ok.
ĺ Select Call records , Alarm , Inbox or Phonebook and press Ok.
10.4.2 Right key
ķ Press Menu > Setting.
ĸ Press Shortcut settings and press Ok.
Ĺ Select Right key and then press Ok.
ĺ Select Call records , Alarm , Inbox or Phonebook and press Ok.
10.4.3 Up key
ķ Press Menu > Setting.
ĸ Press Shortcut settings and press Ok.
Ĺ Select Up key and then press Ok.
ĺ Select Call records , Alarm , Inbox or Phonebook and press Ok.
10.4.4 Down key
ķ Press Menu > Setting.
ĸ Press Shortcut settings and press Ok.
Ĺ Select Down key and then press Ok.
ĺ Select Call records , Alarm , Inbox or Phonebook and press Ok.
10.5 Profiles
10.5.1 Ringing tone
ķ Press Menu > Setting.
ĸ Select Profiles and press Ok.
Ĺ Select Ringing tone and press Ok.
Page 32

28
ĺ Select the Ringing tone you need and press Ok.
10.5.2 SMS alert tone
ķ Press Menu > Setting.
ĸ Select Profiles and press Ok.
Ĺ Select SMS alert tone and press Ok.
ĺ Select the SMS alert tone you need and press Ok.
10.5.3 Call alert
ķ Press Menu > Setting.
ĸ Select Profiles and press Ok.
Ĺ Select Call alert and press Ok.
ĺ Select Ring once or Repeat ring and press Ok.
10.5.4 Ringing volume
ķ Press Menu > Setting.
ĸ Select Profiles and press Ok.
Ĺ Select Ringing volume and press Ok.
ĺ Press the left and right-direction key to select proper ringing volume.
10.5.4 Key volume
ķ Press Menu > Setting.
ĸ Select Profiles and press Ok.
Ĺ Select Key volume and press Ok.
ĺ You can adjust the volume of Key volume.
10.5.5 Alarm tone
ķ Press Menu > Setting.
ĸ Select Profiles and press Ok.
Ĺ Select Alarm tone and press Ok.
ĺ Select the Alarm tone you need and press Ok.
11. Alarm
Page 33

29
When Alarm is set, the icon
appears on Standby screen.
You can set up to 3 alarm clocks to go off at a specified time.
ķ Press Menu > Alarm and press Ok.
ĸ Select Alarm 1 , Alarm 2 or Alarm 3 and press Ok.
12. Tools
Organizer includes:
z Calculator
z Calendar
12.1 Calculator
You can calculate up to 9 digits.
ķ Press Menu > Tools.
ĸ Select Calculator and press Ok.
Ĺ Start calculation.
12.2 Calendar
When you enter this menu a Calendar will show up.
ķ Press Menu > Tools.
ĸ Select Calendar and press Ok.
13. SIM TOOL KIT (NETWORK PROVIDER OPTION)
SIM Application Toolkit has been agreed and incorporated within the Global System for
Mobiles (GSM) standard.
Page 34

30
SIM Application Toolkit is designed as service application. Some services that the
customer can have: Phone banking, information service, stock trading, mobile data and
fax, etc.
Further details please contact with your network service provider.
14. REFERENCE INFORMATION
14.1 Emergency Calls
IMPORTANT!
This phone, like any wireless phone, operates using radio signals, wireless and landline
networks, and user-programmed functions. Because of this, connections in all conditions
cannot be guaranteed. Therefore, you should never rely solely on any wireless phone for
essential communications (e.g. medical emergencies).
Remember, to make or receive any calls, the phone must be switched on and be used in a
service area that has adequate signal strength. Emergency calls might not be possible on
all wireless phone networks or when certain network services and/or phone features are
in use. Check with local service providers.
14.1.1 Make an emergency call
ཛ Enter the emergency number for your present location (for example, 911 or any
other official emergency number emergency numbers vary by location).
ཛྷ Press
.
If certain features are in use (Key guard, restrict calls, and so on), you might first
need to turn those features off before you can make an emergency call. Consult this
guide and your local cellular service provider.
When making an emergency call, remember to give all of the necessary information
as accurately as possible. Remember that your wireless phone might be the only
means of communication at the scene of an accident do not terminate the call until
given permission to do so.
Page 35

31
14.2 Troubleshooting
14.2.1 No service
If you are outside the wireless service area, No service will display on your phone.
No calls can be made or received, however, emergency calls may still be possible.
14.2.2 What if the call does not go through?
Your phone can make and receive calls only when it is switched on and in the
wireless network’s service area.
No service means that you are probably outside the wireless service area. No calls
can be made or received.
This number is restricted means calls to the phone number you tried to call are
restricted
14.2.3 Check these points to ascertain if the phone is broken or not.
Symptoms How to Solve the problem
Phone does not immediately turn
on after plugging in charger after
extended period of non-use.
It may be necessary to charger for up to 4 hours
to recharge the battery enough to turn the phone
on.
Charge battery as long as needed until phone
turns on.
SIM Invalid Check whether you have inserted the SIM card in
the phone, and whether you have inserted it
correctly.
Enter PIN PIN is set by the user to prevent others from
using this phone. In this case, enter your PIN.
When this
message
appears
on the
screen
Enter PUK This message appears when the PIN is incorrectly
entered three times in a row. At this time, enter
the PUK you received when you purchased the
SIM card in order to use your phone again. If the
Page 36

32
PUK is incorrectly entered more than 10 times,
your SIM card will be permanently blocked, and
you need to purchase a new SIM card.
Message “Searching”
is displayed along
with “No Network or
mark.
z When this happens in a service area, turn off
the unit for 2~3 minutes, and then turn the
power back on.
z If this continues for some time without no
reason, contact the nearest network service
center.
You cannot make a call even
though you have entered the
number and pressed the Send
button
z Check whether you are in a service area. (If
you are not in a service area, will be displayed
on the screen)
z Check whether you have set Outgoing Calls to
be barred. If this function is set, you cannot
make a call. (You can check All Outgoing
menu in the Call Barring menu of the Security
menu)
No Incoming Calls from others
z Check whether you area in a service area. (If
you are not in a service area, will be displayed
on the screen).
z Check whether you have set Incoming Calls to
be barred. If this function is set, you cannot
receive calls. (You can check the option “All
Incoming” in the Call Barring menu of the
Security menu)
Page 37

33
15. TECHNICAL INFORMATION
15.1 RF EXPOSURE INFORMATION
To maintain compliance with FCC RF exposure requirements, use handset that
maintain a 2cm separation distance between the user's body and the host. MPE lim
it for RF exposure at prediction frequency is 0.558mW/cm2 for GSM850MHz and 1
mW/cm for GSM1900MHz. The MPE for this device is 0.433 mW/cm2 in GSM85
0MHz and 0.184 mW/cm2 in GSM1900MHz. It satisfy RF exposure compliance.
15.2 Statement
Changes or modifications not expressly approved by the party responsible for co
mpliance could void the user's authority to operate the equipment.
 Loading...