

Page 1
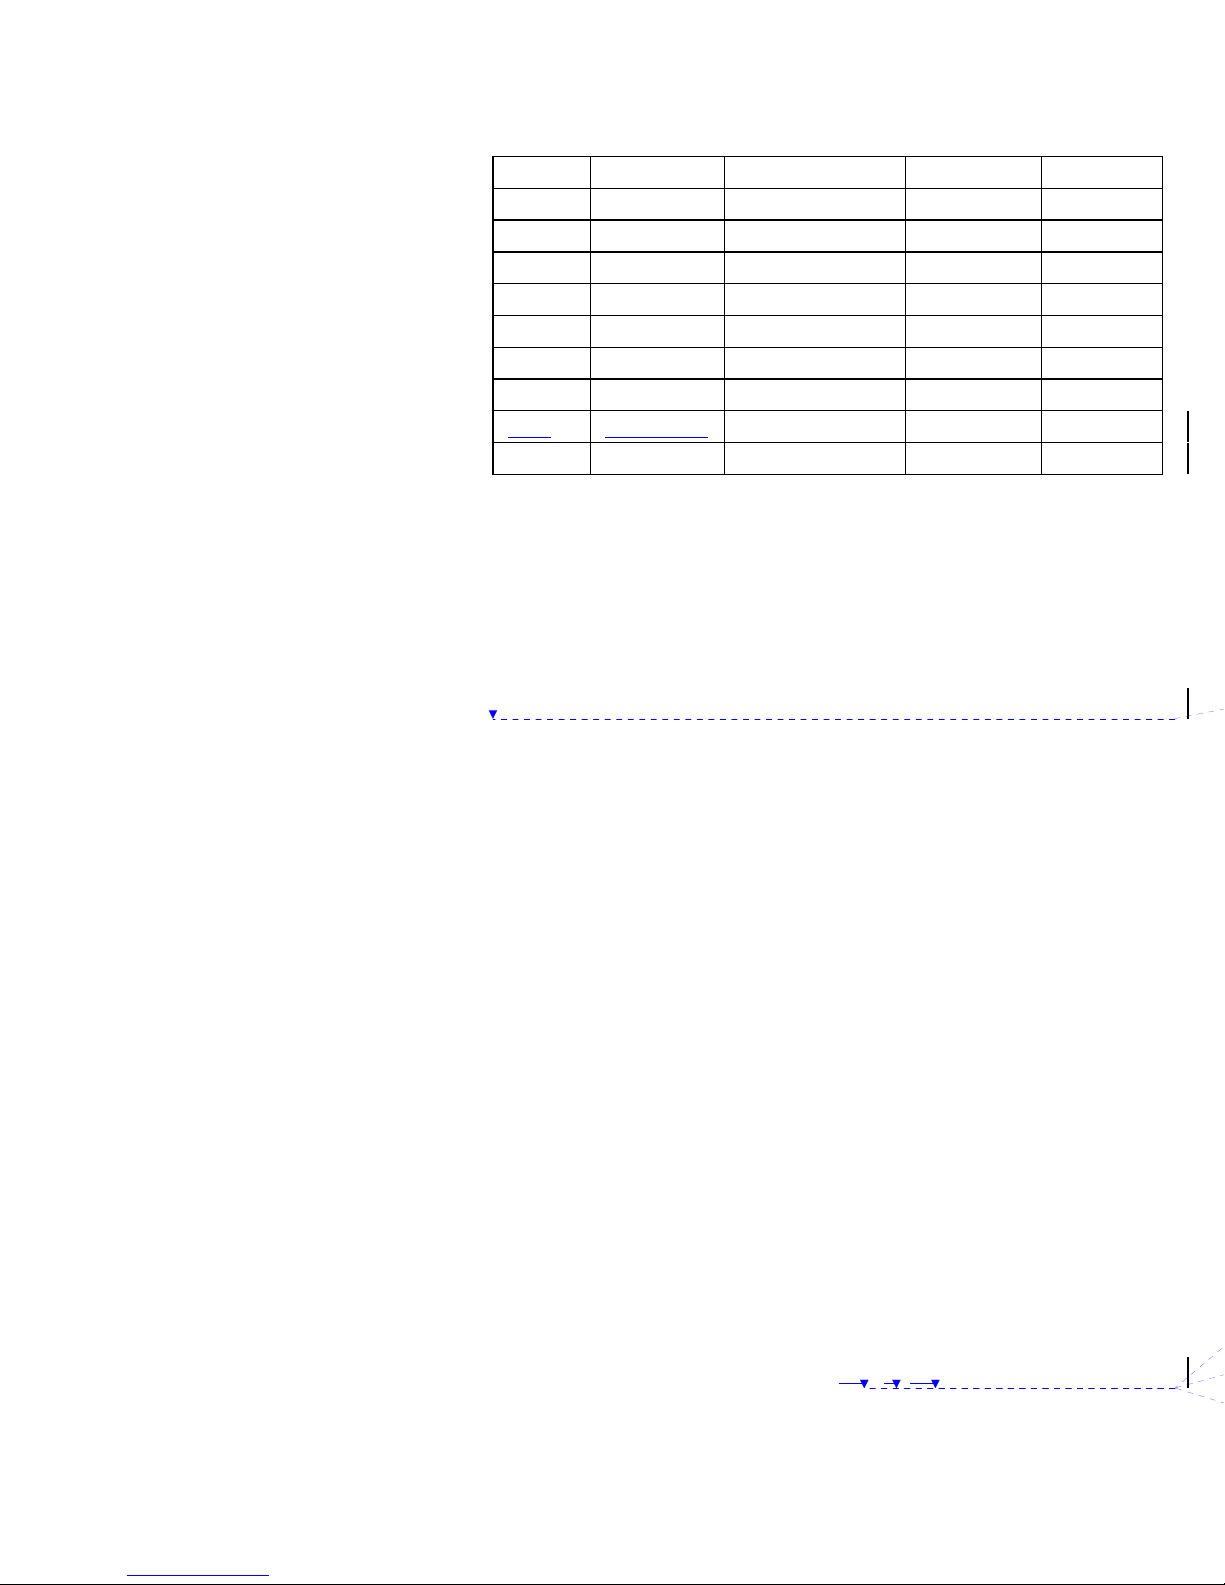
FX1900xg User’s Guide Revision History
Rev Date Description Draft ECO
0.1 06/29/04 First draft JME None
0.2 07/07/04 Second draft JME None
0.3 07/12/04 Third draft JME None
0.4 07/15/04 Fourth draft JME None
0.41 07/21/04 Fourth draft JME None
0.5 08/09/04 Fifth draft JME None
0.51 08/10/04 Fifth draft JME
0.64 09/21/04
(Back Cover)
MOTOROLA and the Stylized M Logo are registered in the US
Patent & Trademark Office. All other product or service names
are the property of their respective owners.
The information contained in Motorola’s user’s guides is
believed to be correct at the time of printing. Motorola reserves
the right to change or modify any information or specifications
without notice. The contents of Motorola’s user’s guides are
provided “as is.” Except as required by applicable law, no
warranties of any kind, either express or implied, including, but
not limited to, the implied warranties of merchantability and
fitness for a particular purpose, are made in relation to the
accuracy, reliability, or contents of this guide.
FX1900xg User Guide version 0.64
09/21/04
© Copyright 2004, CSI Wireless Inc., All rights reserved.
Page 2

FX1900xg
Dual Band GSM Phone
USER’S GUIDE
Page 3

This page is intentionally left blank
Page 4

Welcome
Congratulations on your purchase of a Motorola product!
Online Product Registration:
http://www.motorola.com/warranty
Product registration is an important step toward enjoying your
new Motorola product. Registering helps us facilitate warranty
service, and permits us to contact you should your product
require an update or other service. Registration is for U.S.
residents only and is not required for warranty coverage.
Please retain your original dated sales receipt for your records.
For warranty service of your Motorola Personal
Communications Product you will need to provide a copy of
your dated sales receipt to confirm warranty status.
Thank you for choosing a Motorola product.
Please read Important safety instructions
on page 59 before use.
Read and understand all instructions before
use.
Please retain this guide for future reference.
ii
Page 5

This page is intentionally left blank
Page 6

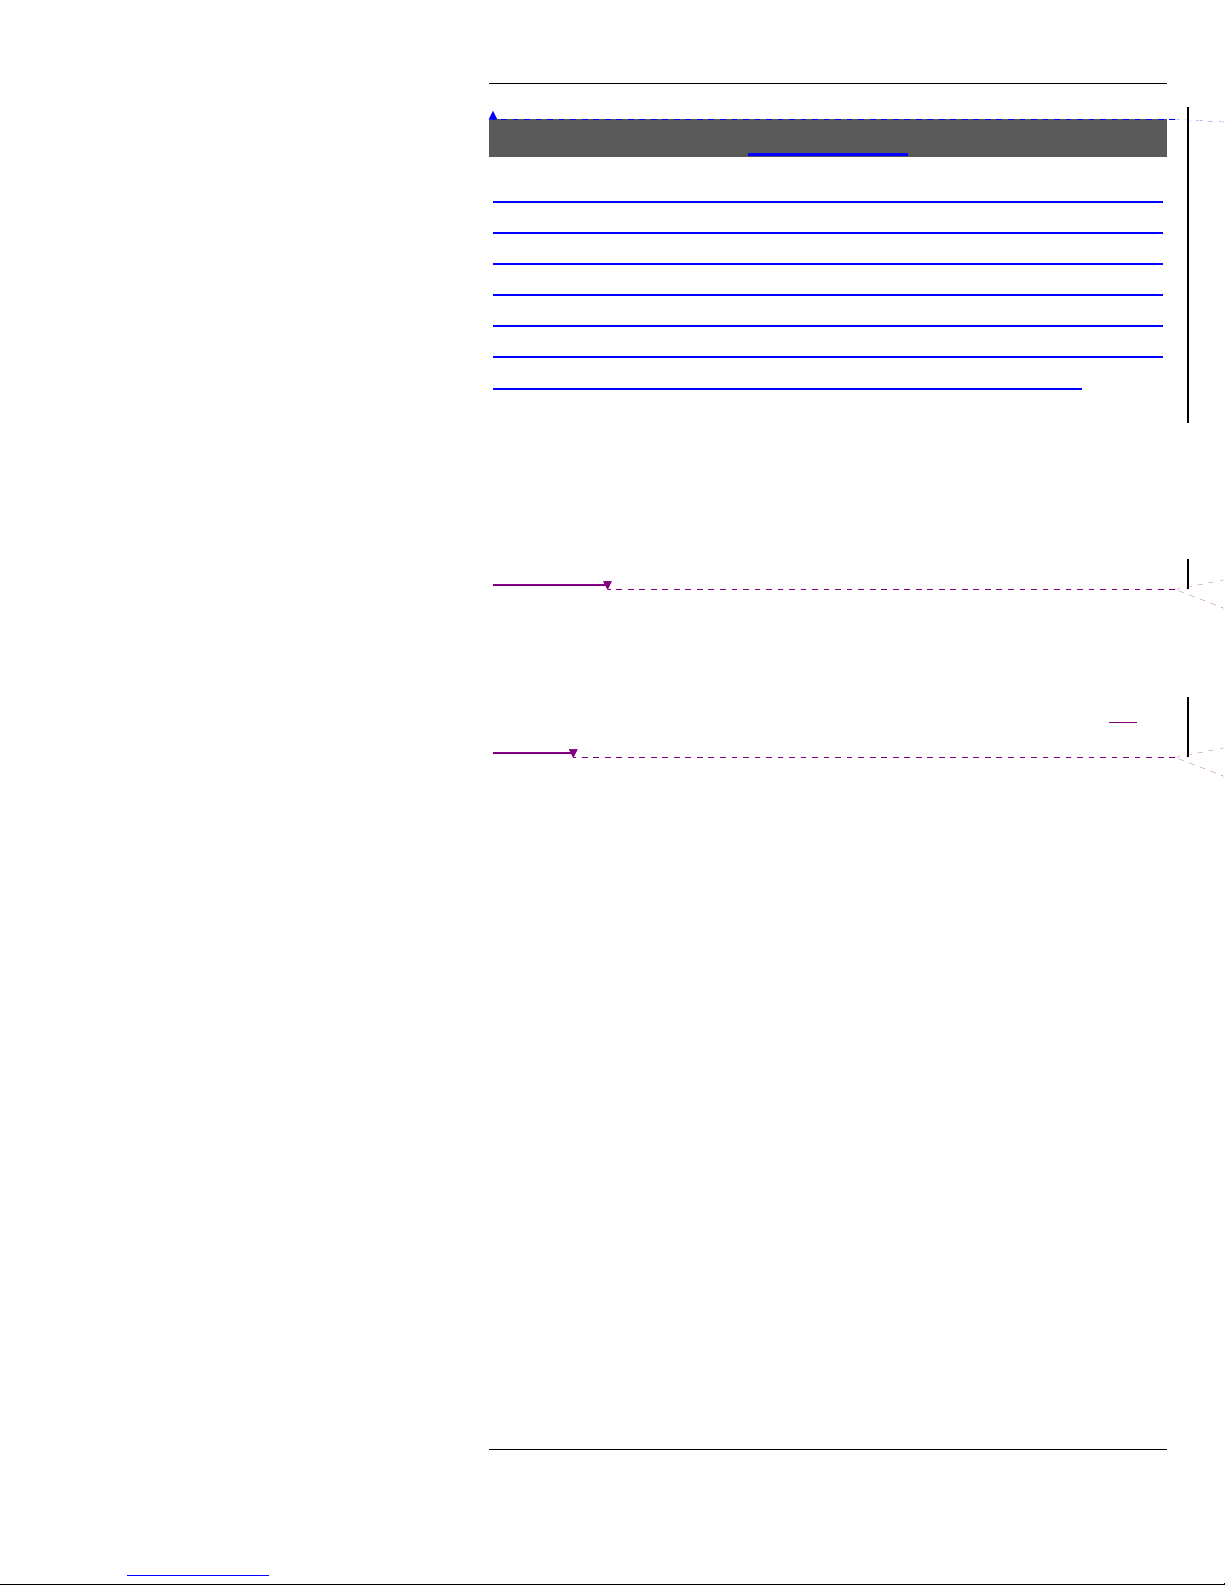
Table of contents
Features.............................................................. 1
Getting started ...................................................3
Installation.......................................................................3
Location of controls......................................................5
Display .............................................................................7
Initial setup......................................................................9
Navigating the menu system........................................10
Basic operations................................................. 12
Placing a call....................................................................12
When the phone rings...................................................12
In-call display..................................................................13
Status indicator light......................................................13
Volume control ..............................................................13
Send key...........................................................................14
Setting ringer tone..........................................................14
Calling voicemail ............................................................14
Redialing the last dialed number(s) .............................14
In-call features ................................................... 16
Call hold...........................................................................16
Mute .................................................................................16
Place an additional call ..................................................16
Answer an additional call..............................................17
Call swap..........................................................................18
Conference calling .........................................................18
End call(s)........................................................................18
Advanced features.............................................. 20
One-touch dialing ..........................................................20
Dialing from the phone book......................................20
Phone book search ........................................................20
International dialing.......................................................20
Alarm clock button........................................................21
Text messaging button..................................................21
Text entry ........................................................................21
Display the phone’s number ........................................23
System dependant features...........................................23
iv
Page 7

Phone book ........................................................ 25
Create a new phone book entry ..................................25
Create international phone book entry ......................26
Pause symbol ..................................................................26
Dial a number from the phone book .........................26
Delete phone book entries ...........................................27
Edit phone book entries ...............................................27
Assign ring tone to a number ......................................28
Remove ring tone from a number ..............................28
Assign one-touch dialing keys .....................................28
Check phone memory capacity ...................................29
Display the phone’s number ........................................29
Call logs..............................................................31
View or dial a number from a call log ........................31
Delete an individual entry.............................................31
Copy to phone book .....................................................32
View or reset totals ........................................................32
Delete call logs................................................................33
Text messaging.................................................. 34
Create and send new messages....................................34
Inbox................................................................................35
Draft messages ...............................................................36
Sent messages .................................................................38
Alarm clock ........................................................ 40
Set alarm time .................................................................40
Set alarm tone.................................................................40
When alarm rings ...........................................................41
Security............................................................... 42
Security codes .................................................................42
Lock the phone ..............................................................44
Unlock the phone ..........................................................44
Change the lock code ....................................................44
Change the PIN code....................................................45
Change the PIN2 code..................................................45
Set PIN lock on or off ..................................................46
Set automatic lock..........................................................46
v
Page 8

Settings...............................................................47
Display settings...............................................................47
Program left and right soft-keys..................................48
Date and time settings...................................................48
Tones................................................................................50
Set auto redial .................................................................51
System dependant services ...........................................51
Restore phone default settings.....................................53
Network settings ............................................................53
Quick reference guide ....................................... 54
Menu conventions .........................................................54
Menu ................................................................................54
Glossary of Terms.............................................. 57
Specifications.....................................................58
Important safety instructions............................ 59
Warranty.............................................................66
vi
Page 9

Features
Features
• Intuitive user interface
• Four way menu navigation key
• Three soft menu selection keys
• Multi-language support
• Easy to read back-lit graphical LCD display with:
• Easy read clock (analog or digital) and date
• Voice and text message waiting indicator *
• Voice message waiting icon *
• Text message waiting icon *
• Call forwarding enabled icon *
• Signal strength indicator
• No AC power warning
• Low battery warning
• Ringer off icon
• Alarm set indication
• Network operator
• Call timer
• Multi-state indicator light
• Voicemail message waiting *
• Text message waiting *
• Phone ringing
• Alarm
• Dedicated text messaging button
• Dedicated alarm clock button
• Battery backup in case of temporary AC supply failure
• Phone lock to prevent unauthorized use
• Handset and ringer volume control
• Microphone mute
• Hold feature *
• One-touch dialing to voicemail *
1
Page 10

Features
• 8 user programmable one-touch dial keys
• Up to 250 numbers stored in phone memory
• Speed dialing from phone memory
• Call log with number, time, date, and duration for:
• Last 20 dialed calls
• Last 20 received calls
• Last 20 missed calls
• Automatic number redial
• 25
ring tones
• Ability to assign ring tones to numbers
• Call timer and optional 1 minute warning tone
• Multi-party conference calling, up to 6 parties *
• Voicemail *
• Caller ID *
• Call forwarding *
• Call waiting *
• Call transfer *
• Call barring *
* Wireless carrier dependent
2
Page 11

Getting started
Getting started
The following items are included in the box.
Telephone base unit
Antenna
AC adapter
Rechargeable battery pack (optional)
Handset
Coiled handset cord
Installation
Before using your new phone, follow these steps:
1. Connect the coiled cord to the handset and to the
telephone base unit. Place the handset in the cradle on the
base unit.
2. Connect the telephone to the AC adapter and plug the AC
adapter into a nearby wall socket.
3. Attach the antenna to the mating connector on the base, if
it is not already attached.
4. With the telephone upright, place the antenna in a vertical
position. Check that there is power to the telephone, if
not check all connections above. If there is power to the
telephone continue to the next step.
5.
Turn the phone upside down and remove the battery
cover. If the phone was supplied with a rechargeable
battery pack.
a. Insert the battery pack ( 2 ) in the cover door ( 1 ).
b. Connect the battery pack connector ( 4 ) to the
mating connector ( 3 ).
c. The battery will need to charge for 15 hours before it
will yield full capacity.
3
Page 12

Getting started
If a rechargeable battery pack was not supplied insert four
new AA alkaline batteries. Be sure to match the positive
and negative terminals.
Replace the battery cover, return the unit to an upright
6.
position, and place the antenna in a vertical position.
7.
The phone is now ready for use.
CAUTION
NEVER attempt to remove the antenna while the phone
is in use or switched on. Always disconnect the AC
supply and remove the batteries before disconnecting
the antenna. Failure to take this precaution may result
in damage to the phone and void the warranty.
WARNING
The batteries are for emergency backup only. Connect
the AC supply and confirm that the telephone is working
normally before installing the batteries. This phone is
not intended for use without the AC adapter.
4
Page 13

Getting started
ATTENTION
If the phone is using alkaline batteries, replace the
batteries every six months to ensure proper service in
the event of power failure.
WARNING
In the event of power failure you may be disconnected
from your current call.
Location of controls
1. Soft-keys
Provide access to the menu and sub-menu options. See
Navigating the menu system on page 10.
5
Page 14

Getting started
2. Status indicator light
Visual indication of various states of the phone, including:
message waiting, ringing, and alarm. See Status indicator
light on page 13
for more information.
3. 4 – way navigator key
Allows navigation of the menu and other features. See
Navigating the menu system on page 10 for more
information.
4. Text messaging button
Allows direct access to the text messaging menu. See Text
messaging button on page 21
and Text messaging on page
34 for more information.
5. Volume control
Used to adjust the ring and earpiece volume levels. See
Volume control on page 13
for more information.
6. Send key
Used to dial or redial a number previously entered. See
Send key on page 14
for more information.
7. Keypad numeric keys
Numeric keys 1 through 0, and # and *. Used to enter
telephone numbers, program the phone, etc.
8. One touch voicemail key
Numeric key 1 on the keypad is a one-touch dial to
voicemail. See Calling voicemail on page 14
for more
information.
9. Alarm clock button
Allows direct access to the alarm clock menu. See Alarm
clock button on page 21
and Alarm clock on page 40 for
more information.
6
Page 15

Getting started
Display
1. Alarm set time
In standby mode, the display shows that the alarm is set
and the time it is set for. If the alarm is not set this area is
blank. See Alarm clock on page 40
this area is used to display other information.
. In all other modes
2. Text message waiting icon
In standby mode, the display shows an icon if there is a
new text message(s) waiting. If there is no message(s)
waiting the area is blank. See Text messaging on page 34
for more information. In all other modes this area is used
to display other information.
3. Voicemail waiting icon
In standby mode, the display shows an icon if there is a
new voicemail message(s) waiting. If there is no
message(s) waiting the area is blank. See Calling voicemail
on page 14
for more information. In all other modes this
area is used to display other information.
4.
Call forwarding icon
This indicates that call forwarding is enabled. See Setup
call forwarding on page 52 for more information. In all
other modes this area is used to display other information.
5. Soft-key action indicator
The soft-keys provide access to the menus and sub-menus.
The actions of the soft-keys will change and will be shown
at the bottom of the display.
7
Page 16

Getting started
6. Time
In standby mode, the display shows the current time,
digital or analog. See Setting date and time on page 9. In
all other modes this area is used to display other
information.
7.
Phone locked icon
This indicates that the phone is locked. When the phone is
locked no features are allowed except emergency calling.
See Security on page 42
for more information.
8. Silent mode icon
This indicates that the ringer is off and the phone will not
ring. See Set ring tone on page 50
for more information.
In all other modes this area is used to display other
information.
Date
9.
In standby mode, the display shows the current date. See
Setting date and time on page 9. In all other modes this
area is used to display other information.
10. Antenna icon / signal strength indicator
The antenna icon represents signal available and the one to
five bars indicate signal strength.
11. Roaming icon
The triangle next to the signal strength indicator shows
that phone is in roaming mode.
12. Service provider indicator
The service provider indicator displays the current service
provider. If there is no signal this will be blank.
8
Page 17
Getting started
CAUTION
Do not operate your telephone when a person is within
8 inches (20 centimeters) of the antenna. A person or
object within 8 inches (20 centimeters) of the antenna
could impair call quality and may cause the phone to
operate at a higher power level than necessary and
expose that person to RF energy in excess of that
established by the FCC RF Exposure Guidelines.
Initial setup
If the phone requests a PIN code
The PIN code is a four to eight-digit code. See PIN code PIN1
on page 43
for more information.
If the phone requests an unlock code
The lock code is used to prevent unauthorized use of the
phone. The lock code is a four-digit code. See Lock code on
page 42 for more information.
Set display language
1. Press the middle soft-key to enter the menu screen.
2. Using the 4-way navigation key highlight the Menu:
Settings icon and press OK.
3. Using the 4-way navigation key highlight Display and
press OK.
4. Using the 4-way navigation key highlight Language and
press OK.
5. Using the 4-way navigation key highlight the language of
choice from the list and press OK.
Setting date and time
The date and time will normally be updated automatically*. In
the event that this does not happen the date and time will need
to be set manually.
1. Press the middle soft-key to enter the menu screen.
9
Page 18

Getting started
2. Using the 4-way navigation keys highlight the Menu:
Settings icon and press OK.
3. Using the 4-way navigation key highlight Time and Date
and press OK
4. Using the 4-way navigation key highlight Set Time and
press OK
5. Using the 4-way navigation keys set the current time: hour,
minute, and am or pm. Press OK.
6. Using the 4-way navigation key highlight Set Date and
press OK
7. Using the 4-way navigation keys set the current date:
month, day, and year. Press OK.
* See System dependant features on page 23
. See Set auto
clock update on page 49, and Date and time settings on page
48.
Navigating the menu system
To enter the menu system
From the idle screen (display shows an analog or digital clock),
either press the middle soft-key or any of the four navigation
keys.
To exit the menu system
From the menu screen (display shows the six sub-menu icons:
Phone Book, Call Logs, Messaging, Alarm Clock,
Security, and Settings), press the left soft-key Back
(unlabeled).
10
Page 19

Getting started
Menu system conventions
While navigating the phone menus, unless otherwise indicated,
the left soft-key is Back and the right soft-key is OK.
Using the 4-way navigation key
Use the 4-way navigation key to scroll up, scroll down, scroll
left, or scroll right through the menu system, and to highlight
menu items.
11
Page 20

Basic operations
Basic operations
Placing a call
1. To place a call lift the handset, key in the number and
press the green send key, or wait 5 seconds for the
number to be automatically dialed.
2. The phone will display the message Connecting and the
dialed number.
3. When the call is answered the phone will display the
number and a call timer.
See International dialing on page 20
and Call logs on page 31 for more dialing options.
, Phone book on page 25
When the phone rings
When the phone rings (unless the phone is set to silent mode,
see Set ring tone on page 50
or name (if entered in the phone book) of the person calling
and the indicator light will flash red. Here are the options:
1. Answer the call by raising the handset.
2. If the handset is already of the base, it is possible to answer
the call by pressing Answer or the send key.
3. Silence the ringer by pressing Silence.
4. Divert caller to voicemail * by pressing Reject. See
Calling voicemail on page 14
5. Do not answer. The phone will either go to voicemail * or
to a preprogrammed forward number if call forwarding * is
enabled. See Setup call forwarding on page 52
information.
) the display will show the number
for more information.
for more
* See System dependant features on page 23
.
12
Page 21

Basic operations
In-call display
When on a call the display will show the number* or name of
the person (if entered in the phone book) and a call timer.
When the phone is ringing the display will show the number*
or name of the person (if entered in the phone book) and a call
timer. See Phone book on page 25
for more information.
If an additional call* is received the display will show the
number or name (if entered in the phone book) of the person
calling. See In-call features on page 16
for more information.
* See System dependant features on page 23.
Status indicator light
The visual status indicator light provides additional emphasis to
the existing audible (ringer) and visual indicators (display).
Here is a list of the states and their meaning:
Status indicator light Phone state
Off Normal (power on)
Flashing green New unread message waiting
(voice or text) *
Flashing red Alarm clock
Fast flashing red Ringing
* See System dependant features on page 23
.
Volume control
The volume adjustment keys will change the volume level of
the phone ringer or handset speaker depending upon the
current state.
1. When the phone is in standby mode or ringing, the volume
controls will increase or decrease the ringing volume.
2. When the handset is off-hook (not in the cradle) the
volume controls will change the handset speaker volume.
13
Page 22

Basic operations
Send key
The send key will dial the number currently displayed on the
screen, whether from the phone book or just keyed in.
Setting ringer tone
1. Press the middle soft-key to enter the menu screen.
2. Using the 4-way navigation key, select the Menu:
Settings icon and press OK.
3. Using the 4-way navigation key highlight Ring and Alarm
and press OK.
4. Using the 4-way navigation key highlight Ring Tone and
press OK.
5. Using the 4-way navigation key select the desired ring tone
and press OK.
See Tones on page 50
for more information.
Calling voicemail
Voicemail * is an answering machine where messages can be
left if the phone is in use or there is no answer.
1. To access voicemail press and hold the numeric key
number 1 for 1.5 seconds or more.
2. The phone will dial the voicemail number.
* See System dependant features on page 23
forwarding on page 52.
. See Setup call
Redialing the last dialed number(s)
1. Press the green send key to view the last 20 numbers
dialed.
14
Page 23

Basic operations
2. Using the 4-way navigation key highlight the number to
dialed, select Dial, and lift the handset.
3. The phone will display a message Connecting and the
number.
See Call logs on page 31
for more information.
15
Page 24

In-call features
In-call features
The following options are only available once in a call and some
only become available in specific circumstances, for example:
the conferencing option does not exist until there are two or
more calls.
Call hold
While on a call it is possible to place a call on hold*.
1. To place a call on hold press Hold.
2. The phone will momentarily display Call Held.
3. The display will then display the number of the caller and
On Hold.
4. To revert to normal operation press Unhold.
5. The phone will momentarily display Call Retrieved.
* See System dependant features on page 23
.
Mute
1. To mute the microphone press Mute.
2. The phone will display a circle with a line through it in the
lower right corner to indicate that the phone microphone
is muted.
3. To revert to normal operation press Unmute.
Place an additional call
While on a call it is possible to place an additional call*.
1. While on a call press Opt.
2. Using the 4-way navigation key highlight New Call and
press OK.
16
Page 25

In-call features
3. The phone will place the existing call on hold and display a
popup window in which to dial a new number.
4. Key in the number and press Dial / send key or:
a. Press Opt to enter the phone book search menu.
b. Using the 4-way navigation key highlight the number
to be dialed and press Select.
c. Press Dial / send key.
5. The phone will display the message Connecting and the
number dialed.
6. When the call is answered the display will show both calls.
The initial call will display the message on hold, while the
new call will show the number or name (if entered in the
phone book) and a call timer. See Call swap on page 18
for more information.
* See System dependant features on page 23
.
Answer an additional call
If Call Waiting* is enabled it is possible to answer an additional
call. See Setup call waiting on page 52
1. When on a call the phone will sound an alert, the status
indicator light will flash red, and the display will show the
number or name (if entered in the phone book) of the
person calling.
2. To answer the call and place the existing call on hold, press
Answer.
3. To divert the call to voicemail press Reject.
4. Once there are two callers it is possible to swap calls by
pressing Swap.
See Call swap on page 18
, Conference calling on page 18, End
active call, on page 18, and End all calls on page 19 for more
information.
for more information.
* See System dependant features on page 23
17
.
Page 26

In-call features
Call swap
When there are two calls or there is a conference and a call (one
active and one on hold), it is possible to swap calls*.
1. To swap calls press Swap.
2. The caller on hold will become active and the active caller
will be put on hold.
* See System dependant features on page 23
.
Conference calling
When there are more than two parties it is possible to
conference* the calls.
1. To Conference the calls press Opt.
2. Using the 4-way navigation key, highlight Conference
and press OK.
It is possible to have up to 6 parties* in a conference. See Place
an additional call on page 16
page 17 for more information.
* See System dependant features on page 23.
and Answer an additional call on
End call(s)
To end a single call, replace the handset in the base.
If there is more than one call then there is the option to either
end the active call or end all calls.
End active call
1. To end the active call press Opt.
2. Using the 4-way navigation key highlight End Active Call
and press OK.
18
Page 27

In-call features
End all calls
1. To end all calls press Opt.
2. Using the 4-way navigation key highlight End All Calls
and press OK.
19
Page 28

Advanced features
Advanced features
One-touch dialing
There are 8 One Touch Dialing locations. Using One-Touch
Dialing it is possible to dial a number just by pressing and
holding a single numeric key.
1. Press and hold one numeric key (2 through 9) for 1.5
seconds.
2. The display will confirm that the number is being dialed.
See Assign one-touch dialing keys on page 28
information.
for more
Dialing from the phone book
Up to 250 numbers may be stored in the phone memory
(phone book). It is possible to dial these numbers directly from
the phone book. See Dial a number from the phone book on
page 26 for more information.
Phone book search
The list of phone book entries will be displayed in alphabetical
order. To narrow the search, enter the first letter of the name
using the number keys. See Dial a number from the phone
book on page 26
on text entry see Text entry on page 21.
for more information. For more information
International dialing
1. To place a call, lift the handset.
2. Enter the + character by pressing and holding the 0 key
for more than 1.5 seconds.
20
Page 29

Advanced features
3. Enter the country code followed by phone number and
press send, or wait 5 seconds for the number to be
automatically dialed.
4. The phone will display the message Connecting and the
dialed number.
5. When the call is answered the phone will display the
number of the person dialed and a call timer.
See Create international phone book entry on page 26
.
Alarm clock button
Select this button to set the alarm time or turn the alarm on or
off. See Location of controls on page 5 and Alarm clock on
page 40 for more information.
Text messaging button
When there are unread text message(s)* in the inbox, the text
message button will go directly to the inbox.
When there are no new text message(s), the text message
button will go directly to the messaging menu. From here it is
possible to send a message, reply to a message, etc.
When there is a number displayed (either from the phone book
or a call log) pressing the text messaging button will initiate a
text message to that number.
* See System dependant features on page 23
controls on page 5 and Text messaging on page 34 for more
information.
. See Location of
Text entry
Either to send a message or simply enter a name in the phone
book, the method to enter text will be the same.
Alphanumeric text entry is accomplished using the “multi-tap”
method.
21
Page 30

Advanced features
1. Using the [ * ] key, select the entry mode, either: Abc, abc,
ABC, or 123. At the start of a new entry Abc is the
default, as soon as one character has been entered it
changes to abc. Thereafter the first character following
either a ‘.’, ‘!’ or a ‘?’ is capitalized.
2. The cursor will blink on the screen at the point of text
entry. Using the 4-way navigation key move the cursor to
the desired location. Pressing > on the 4-way navigation
key at the end of the line will insert a space.
3. Press a keypad key repeatedly to cycle through its
characters. When the key is not pressed for more than 1.5
seconds that character will hold. Pressing and holding a
numeric key for more than two seconds will insert the
number associated with that key.
Refer to the table below specific to the language in use on the
phone for details of the characters associated with each key.
When the language is set to English the phone supports these
characters:
Numeric Key Upper Case Lower Case
[ 1 ] <space> <CRLF> 1 * # $ @
[ 2 ] A B C 2 a b c 2
[ 3 ] D E F 3 d e f 3
[ 4 ] G H I 4 g h i 4
[ 5 ] J K L 5 j k l 5
[ 6 ] M N O 6 m n o 6
[ 7 ] P Q R S 7 p q r s 7
[ 8 ] T U V 8 t u v 8
[ 9 ] W X Y Z 9 w x y z 9
[ 0 ] . , ? ! - : ; <sgl-quote> <dbl-quote> 0
[ * ] <case switch: ‘abc’, ‘Abc’, ‘ABC’, ‘123’>
[ # ] symbol menu
When the language is set to Spanish the phone supports these
characters:
Numeric Key Upper Case Lower Case
[ 1 ] <space> <CRLF> 1 * # $ @
[ 2 ] A B C Á 2 a b c á 2
[ 3 ] D E F É 3 d e f é 3
22
Page 31

Advanced features
[ 4 ] G H I Í 4 g h i í 4
[ 5 ] J K L 5 j k l 5
[ 6 ] M N O Ñ Ó 6 m n o ñ ó 6
[ 7 ] P Q R S 7 p q r s 7
[ 8 ] T U V Ú Ü 8 t u v ú ü 8
[ 9 ] W X Y Z 9 w x y z 9
[ 0 ] . , ? ¿ ! ¡ - : ; <sgl-quote> <dbl-quote> 0
[ * ] <case switch: ‘abc’, ‘Abc’, ‘ABC’, ‘123’>
[ # ] symbol menu
The symbol menu offers the following additional characters:
* # $ @ % & ( )
+ - / \ < > = ^
{ } [ ] ~ | _ !
£ ¥ ß ¤ § © ® ¶
Display the phone’s number
This option will display the telephone number or numbers. See
Display the phone’s number on page 29
.
System dependant features
The following features are system dependant, this means their
functionality is controlled by your wireless carrier or network
service provider.
• Text messaging
• Voicemail
• Call waiting
• Caller Id
• Conferencing
• Call forwarding
• Call barring
• Call transfer
• Call hold
• Call swap
• Place an additional call
23
Page 32

Advanced features
• Automatic clock update
If these features do not appear to be working, they may not be
enabled, see System dependant services on page 51
or contact
your wireless carrier / network service provider.
24
Page 33

Phone book
Phone book
Press the middle soft-key to enter the menu. Select the Phone
Book icon and press OK.
In phone book you can store and manage contact information,
such as name, number, and one-touch dialing. For
information on text entry see Text entry
or
If either the right or left soft-keys have been programmed for
the phone book (soft-key action indicator display’s Book), it is
possible to enter the search sub-menu of phone book by
pressing this soft-key. For information on programming the
soft-keys see Program left and right soft-keys on page 48
on page 21.
.
Create a new phone book entry
1. Press the middle soft-key to enter the menu.
2. Using the 4-way navigation key select the Phone Book
icon and press OK.
3. Using the 4-way navigation key highlight New Entry and
press OK.
4. Using the 4-way navigation key highlight Phone Number
and press OK. An empty record appears.
5. Using the 4-way navigation key select Name, Number or
Location, then select Change.
25
Page 34

Phone book
6. Fill in the required information and press OK.
7. Then press Done and the phone will confirm that the
entry has been saved.
Create international phone book entry
Follow the instructions on page 25 to Create a new phone book
entry except at the beginning of the number press and hold the
0 key for more than 1.5 seconds to enter the international
access code. This will be displayed at a + sign. Enter the
country code and local telephone number.
Pause symbol
This allows programming of automatic number sequences. For
example: to enter a password for third party voicemail,
inserting the pause symbol once will tell the system to wait 2
seconds. A phone book entry could be programmed to dial
408-555-1234 ppp 1234#, the system would wait 6
before entering the password.
To enter the pause press and hold the [ * ] key for 1.5 seconds.
seconds
Dial a number from the phone book
1. Select soft-key Book or
a. Press the middle soft-key to enter the menu.
b. Using the 4-way navigation key select the Phone
Book icon and press OK.
c. Using the 4-way navigation key highlight Search and
press OK.
2. The list of phone book entries will be displayed in
alphabetical order. To narrow the search, enter the first
letter of the name using the number keys. For more
information on text entry see Text entry on page 21
.
26
Page 35

Phone book
3. Using the 4-way navigation key highlight the number to be
dialed and press Select.
4. Press Dial or send key, and the phone will dial the
number.
Delete phone book entries
1. Select soft-key Book or
a. Press the middle soft-key to enter the menu.
b. Using the 4-way navigation key select the Phone
Book icon and press OK.
c. Using the 4-way navigation key highlight Search and
press OK.
2. Using the 4-way navigation key highlight the number to be
deleted and select Opt.
3. Using the 4-way navigation key highlight Delete Entry
and select OK.
Edit phone book entries
1. Select soft-key Book or
a. Press the middle soft-key to enter the menu.
b. Using the 4-way navigation key select the Phone
Book icon and press OK.
c. Using the 4-way navigation key highlight Search and
press OK.
2. Using the 4-way navigation key highlight the number to be
edited and select Opt.
3. Using the 4-way navigation key highlight Edit Entry and
press OK.
4. Using the 4-way navigation key select Name, Number or
Location, then select Change and OK for each one.
27
Page 36

Phone book
5. Then press Done and the phone will display Record
Saved to confirm that the changes have been saved.
6. The entry is now displayed in Detail View. Using the < >
keys on 4-way navigation key it is possible to select other
entries.
Assign ring tone to a number
1. Select soft-key Book or
a. Press the middle soft-key to enter the menu.
b. Using the 4-way navigation key select the Phone
Book icon and press OK.
c. Using the 4-way navigation key highlight Search and
press OK.
2. Using the 4-way navigation key select the entry to assign a
ring tone to. Press Select.
3. Confirm that the correct record has been selected and
press Opt. Using the 4-way navigation key it is possible to
scroll through the records from this screen.
4. Using the 4-way navigation key select Set Ring Tone and
press OK.
5. Using the 4-way navigation key highlight the preferred
tone and press OK.
Remove ring tone from a number
To remove a previously assigned ring tone, follow the
instructions above to assign a ring tone, except at number 5
select Clear instead of OK.
Assign one-touch dialing keys
1. Select soft-key Book or
a. Press the middle soft-key to enter the menu.
28
Page 37

Phone book
b. Using the 4-way navigation key select the Phone
Book icon and press OK.
c. Using the 4-way navigation key highlight Search and
press OK.
2. Using the 4-way navigation key select the entry to assign a
one-touch dial key to. Press Select.
3. Confirm that the correct record has been selected and
press Opt. Using the 4-way navigation key it is possible to
scroll through the records from this screen.
4. Using the 4-way navigation key highlight Edit Entry and
press OK.
5. Using the 4-way navigation key select Location and press
Change.
6. Enter a number (2 through 9) at the prompt and press OK.
7. If the number is already in use the phone will ask for
confirmation to overwrite that entry.
Check phone memory capacity
1. Press the middle soft-key to enter the menu.
2. Using the 4-way navigation key select the Phone Book
icon and press OK.
3. Using the 4-way navigation key highlight Check Memory
and press OK.
4. Using the 4-way navigation key highlight Phone
Capacity and press OK.
5. The phone will momentarily display the total records In
Use and the total records Free.
Display the phone’s number
1. Press the middle soft-key to enter the menu.
29
Page 38

Phone book
2. Using the 4-way navigation key select the Phone Book
icon and press OK.
3. Using the 4-way navigation key highlight My Numbers
and press OK.
4. Using the 4-way navigation key highlight My Phone # and
press View.
5. The phone will display the telephone number(s) of the
phone.
30
Page 39

Call logs
Call logs
Press the middle soft-key to enter the menu. Select the Call
Logs icon and press OK.
The call logs menu option lists the last 20 numbers dialed,
missed, and received by this phone.
or
If either the right or left soft-keys have been programmed for
the call logs (soft-key action indicator displays Logs), press this
key to enter call logs. For information on programming the
soft-keys see Program left and right soft-keys on page 48
.
View or dial a number from a call log
1. Enter the call log menu; using the 4-way navigation key
select the desired call log and press OK.
a. To view a number press View.
b. To dial a number press Dial, lift the handset and the
phone will dial the number.
Delete an individual entry
1. Enter the call log menu; using the 4-way navigation key
select the desired call log and press OK.
2. Select the number to delete and press View.
31
Page 40

Call logs
3. Confirm this is the number and press Opt.
4. Using the 4-way navigation key highlight Delete Entry
and press OK.
Copy to phone book
This feature allows the transfer of entries from one of the call
logs to the phone book.
1. Enter the call log menu; using the 4-way navigation key
select desired call log and press OK.
2. Select the number to copy and press View.
3. Confirm this is the number and press Opt.
4. Using the 4-way navigation key highlight Copy to Phone
Book and press OK.
5. Using the 4-way navigation key select Name, Number or
Location, then select Change.
6. Make the changes and press OK.
7. Then press Done and the phone will confirm that the
changes have been saved.
View or reset totals
View or reset call timer totals
1. Enter the call log menu; using the 4-way navigation key
select Call Totals and press OK.
2. Select Call Timer Totals and press OK.
3. The phone will display totals for: last call, last call dialed,
and last call received.
4. To reset the timers, press Reset.
View or reset total text messages sent
1. Enter the call log menu; using the 4-way navigation key
select Call Totals and press OK.
32
Page 41

Call logs
2. Select SMS Counter and press OK.
3. The phone will display total for: SMS messages sent.
4. To reset the total, press Reset.
Delete call logs
1. Enter the call log menu; using the 4-way navigation key
select Delete All Calls and press OK.
2. Using the 4-way navigation key highlight a call log and
press OK.
3. The phone will request confirmation.
33
Page 42

Text messaging
Text messaging
If there are one or more unread (new) text message(s) in inbox
pressing the text messaging button will go directly to inbox. If
there are no unread (new) messages in inbox the text message
button will go to the text messaging menu. If there is a number
displayed (either from the phone book or a call log) pressing
the text messaging button will initiate a text message to that
number.
See Location of controls on page 5 and Text messaging button
on page 21
Press the middle soft-key to enter the menu. Select the
Messaging icon and press OK.
for more information.
In text messaging it is possible to create, edit, and reply to text
messages sent to the phone. Messages can be up to 160
characters in length. For information on text entry see Text
entry on page 21.
Create and send new messages
1. Enter the text messaging menu; using the 4-way navigation
key highlight Create New Message and Press OK.
5. Using the 4-way navigation key highlight New Text
Message and press OK.
34
Page 43

Text messaging
2. Enter text using the numeric keys or select Opt to enter
predefined messages or symbols. See Text entry on page
21 for more information.
3. When the message is complete, press OK.
4. Either enter a telephone number and press Send or press
Opt to select a number from the phone book.
5. Using the 4-way navigation key highlight Get From
Phone Book and press OK.
6. Using the 4-way navigation key highlight the name or
number of the person and press Select.
7. If the number is correct press Send, if not select Opt to
re-enter the number.
Inbox
Read a new message in inbox
Press the text messaging button.
Read a message in inbox
1. Enter the text messaging menu; using the 4-way navigation
key highlight Inbox and press OK.
2. Using the 4-way navigation key highlight the message to be
read and press Read.
Reply to a message in inbox
1. Enter the text messaging menu; using the 4-way navigation
key highlight Inbox and Press OK.
2. Using the 4-way navigation key highlight the message to
send a reply to and press Opt.
3. Using the 4-way navigation key highlight Reply and press
OK.
4. Enter text using the numeric keys or select Opt to enter
predefined messages or symbols.
5. When the message is complete, press OK.
35
Page 44

Text messaging
Delete a message
1. Enter the text messaging menu; using the 4-way navigation
key highlight Inbox and press OK.
2. Using the 4-way navigation key highlight the message to be
deleted and press Opt.
3. Using the 4-way navigation key highlight Delete and press
OK.
Call back
1. Enter the text messaging menu; using the 4-way navigation
key highlight Inbox and press OK.
2. Using the 4-way navigation key highlight the message to
call back and press Opt.
3. Using the 4-way navigation key highlight Call Back and
press OK.
4. Confirm the number is correct and press OK.
Details of message received
1. Enter the text messaging menu; using the 4-way navigation
key highlight Inbox and press OK.
2. Using the 4-way navigation key highlight the message and
press Opt.
3. Using the 4-way navigation key highlight Details and press
OK.
Draft messages
Edit and save draft message
1. Enter the text messaging menu; using the 4-way navigation
key highlight Drafts and press OK.
2. Using the 4-way navigation key highlight the draft message
to be edited and press Opt.
36
Page 45

Text messaging
3. Using the 4-way navigation key highlight Edit and press
OK.
4. Enter text using the numeric keys or select Opt to enter
predefined messages or symbols.
5. When the message is complete, press OK.
6. Press Opt.
7. Using the 4-way navigation key highlight Exit and press
OK.
8. Using the 4-way navigation key highlight Save in Drafts.
Edit and send draft message
1. Enter the text messaging menu; using the 4-way navigation
key highlight Drafts and Press OK.
2. Using the 4-way navigation key highlight the draft message
to be edited and press Opt.
3. Using the 4-way navigation key highlight Edit and press
OK.
4. Enter text using the numeric keys or select Opt to enter
predefined messages or symbols.
5. When the message is complete, press OK.
6. Either enter a telephone number and press Send or press
Opt to select a number from the phone book.
7. Using the 4-way navigation key highlight Get From
Phone Book and press OK.
8. Using the 4-way navigation key highlight the name or
number of the person and press Select.
9. If the number is correct, press Send. If not select Opt to
re-enter the number.
Delete draft message
1. Enter the text messaging menu; using the 4-way navigation
key highlight Drafts and press OK.
37
Page 46

Text messaging
2. Using the 4-way navigation key highlight the draft message
to be deleted and press Opt.
3. Using the 4-way navigation key highlight Delete and press
OK.
Sent messages
Read sent message
1. Enter the Text messaging menu, using the 4-way
navigation key highlight Sent and press OK.
2. Using the 4-way navigation key highlight the message to be
read and press Read.
Forward sent message
1. Enter the text messaging menu; using the 4-way navigation
key highlight Sent and press OK.
2. Using the 4-way navigation key highlight the message to be
forwarded and press Read.
3. Press Opt.
4. Using the 4-way navigation key highlight Forward and
press OK.
5. Enter text using the numeric keys or select Opt to enter
predefined messages or symbols.
6. When the message is complete, press OK.
7. Either enter a telephone number and press Send or press
Opt to select a number from the phone book.
8. Using the 4-way navigation key highlight Get From
Phone Book and press OK.
9. Using the 4-way navigation key highlight the name or
number of the person and press Select.
10. If the number is correct, press Send. If not select Opt to
re-enter the number.
38
Page 47

Text messaging
Delete sent message
1. Enter the text messaging menu; using the 4-way navigation
key highlight Sent and press OK.
2. Using the 4-way navigation key highlight the message to be
deleted and press Read.
3. Press Opt.
4. Using the 4-way navigation key highlight Delete and press
OK.
Details of sent message
1. Enter the text messaging menu; using the 4-way navigation
key highlight Sent and press OK.
2. Using the 4-way navigation key highlight the message to be
viewed and press Read.
3. Press Opt.
4. Using the 4-way navigation key highlight Details and press
OK.
5. The phone will display the time, date and number the
message was sent to.
39
Page 48

Alarm clock
Alarm clock
Press the alarm clock button. See Location of controls on page
5 for more information.
or
Press the middle soft-key to enter the menu. Highlight the
Alarm Clock icon and press OK.
In the alarm clock menu you can set the time and tone of the
alarm built into your phone.
Set alarm time
This feature allows the alarm time to be set, and for the alarm
to be switched on or off. When the alarm is on it will repeat
daily.
1. Enter the alarm clock menu; using the 4-way navigation
keys set the alarm time: hour, minute, and am or pm.
a. Press Set On to turn the alarm on.
b. Press Set Off to turn the alarm off.
2. The phone will confirm the status of the alarm.
Set alarm tone
1. Enter the alarm clock menu, press Opt.
40
Page 49

Alarm clock
2. Using the 4-way navigation key highlight Alarm Tone and
press OK.
3. Using the 4-way navigation key highlight the preferred
tone and press OK.
When alarm rings
When the alarm rings there are two options, Off and Snooze.
Select Off to turn off the alarm.
Select Snooze and the alarm will ring again in 5 minutes.
41
Page 50

Security
Security
Press the middle soft-key to enter the menu. Select the
Security icon and press OK.
In Security it is possible to lock the phone, change the lock
code, and change the PIN numbers.
Security codes
The phone supports various security codes, some are user
changeable and some are not. See summary below with details
following:
Code Details
Lock Code 4 numeric digits, user changeable, factory
default 1234
Security Code 6 numeric digits, fixed, used to unlock the
lock code
PIN (PIN1) 4-8 numeric digits, user changeable
PIN2 4-8 numeric digits, user changeable
PUK (PUK1) 8 numeric digits, fixed, used to unlock PIN1
PUK2 8 numeric digits, fixed, used to unlock PIN2
Lock code
When the phone is locked it is not possible to receive calls or to
dial numbers except emergency numbers, for example: 911,
066, 112, 999, 08, etc.
• This code is user changeable provided the existing code is
known.
42
Page 51

Security
• If this code is entered incorrectly 5 times consecutively the
phone will lock for 5 minutes.
• The security code is required to unlock the phone.
Contact your dealer or network service provider.
Security code
The security code is required to unlock the lock code in case
this code is lost. Contact your dealer or network service
provider.
PIN code PIN1
With PIN lock enabled the phone will request this PIN code
each time the phone is powered up. This code is set by the
network service provider and may or may not be supplied.
• This code is user changeable provided the existing code is
known.
• If this code is entered incorrectly 3 times consecutively the
phone will lock. When the phone is locked only
emergency calls may be placed.
• The PIN Unblocking Key (PUK1) is required to unlock
the phone. Contact your network service provider.
PIN code PIN2
The PIN code PIN2 is required to access some advanced
features. This code is set by the network service provider and
may or may not be supplied.
• This code is user changeable provided the existing code is
known.
• If this code is entered incorrectly 3 times consecutively the
phone will lock. When the phone is locked only
emergency calls may be placed.
• The PIN Unblocking Key (PUK2) is required to unlock
the phone. Contact your network service provider.
Code PUK1
The code PIN Unblocking Key 1 (PUK1) is required to unlock
code PIN1. Contact your network service provider.
43
Page 52

Security
Code PUK2
The code PIN Unblocking Key 2 (PUK2) is required to unlock
code PIN2. Contact your network service provider.
Lock the phone
When the phone is locked it is not possible to dial numbers
except emergency numbers, for example: 911, 066, 112, 999, 08,
etc. It is, however possible to receive calls, as the phone will
still ring but it is necessary to enter the lock code first.
1. Enter the Security menu, using the 4-way navigation key
highlight Lock Phone and press OK.
2. Enter the unlock code at the prompt and press OK.
3. The phone will display a message that the phone is locked
and then return to the standby screen. A key icon will be
displayed above the left soft-key where it will say Unlock.
See Lock code on page 42
for more information.
Unlock the phone
1. Select the left soft-key, Unlock.
2. Enter the 4 digit unlock code at the prompt and press OK.
The factory default is 1234.
3. The phone will return to the standby screen.
See Lock code on page 42
for more information.
Change the lock code
1. Enter the security menu; using the 4-way navigation key
highlight Change Codes and press OK.
2. Using the 4-way navigation key highlight Change Unlock
Code and press OK.
3. Enter the four-digit unlock code and press OK.
44
Page 53

Security
4. If the code is correct the phone will display the existing
code with the soft-keys Delete and OK. Make the
necessary changes and press OK.
5. The phone will momentarily display a message showing the
new code and then return to the menu.
See Lock code on page 42
for more information.
Change the PIN code
Note: The PIN lock must be set to on in order to change the
PIN code. See Set PIN lock on or off on page 46
information.
1. Enter the security menu; using the 4-way navigation key
highlight Change Codes and press OK.
for more
2. Using the 4-way navigation key highlight Change PIN
and press OK.
3. Enter the four to eight-digit code and press OK.
4. If the code is correct the phone will request a new code,
press OK, and again for confirmation, press OK.
See PIN code PIN1 on page 43
for more information.
Change the PIN2 code
1. Enter the security menu; using the 4-way navigation key
highlight Change Codes and press OK.
2. Using the 4-way navigation key highlight Change PIN2
and press OK.
3. Enter the four to eight-digit code and press OK.
4. If the code is correct the phone will request a new code,
press OK, and again for confirmation, press OK.
See PIN code PIN2 on page 43
for more information.
45
Page 54

Security
Set PIN lock on or off
With PIN lock enabled the phone will request the PIN code
PIN1 each time the phone is powered up.
1. Enter the security menu; using the 4-way navigation key
highlight Set PIN Lock and press OK.
2. Using the 4-way navigation key highlight On or Off and
press OK.
3. The phone will request the PIN code PIN1.
4. Enter the four to eight-digit code and press OK.
See PIN code PIN1 on page 43
for more information.
Set automatic lock
With automatic lock enabled the phone will automatically lock
after the phone has been idle for a predetermined number of
minutes. The number of minutes is user selectable.
1. Enter the security menu; using the 4-way navigation key
highlight Auto Lock and press OK.
2. Using the 4-way navigation key highlight On or Off and
press OK.
3. The phone will request the lock code.
4. Enter the four-digit code and press OK.
5. Enter the auto lock time in minutes from 1 – 999, and
press OK.
See Lock code on page 42
for more information.
46
Page 55

Settings
Settings
Press the middle soft-key to enter the menu. Select the
Settings icon and press OK.
In settings you can set the display language, clock, ring tone,
and more.
Display settings
Set display language
1. Enter the settings menu; using the 4-way navigation key
highlight Display and press OK.
2. Using the 4-way navigation key highlight Language and
press OK.
3. Using the 4-way navigation key select the language of
choice from the list and press OK.
Set display contrast
1. Enter the settings menu; using the 4-way navigation key
highlight Display and press OK.
2. Using the 4-way navigation key highlight Contrast and
press OK.
3. Use the 4-way navigation key to move the bars on the bar
graph and press Done.
47
Page 56

Settings
Display backlight
1. Enter the settings menu; using the 4-way navigation key
highlight Display and press OK.
2. Using the 4-way navigation key highlight Backlight and
press OK.
3. Using the 4-way navigation key highlight either Off When
Idle or Always On and press OK.
Program left and right soft-keys
1. Enter the settings menu; using the 4-way navigation key
highlight Display and press OK.
2. Using the 4-way navigation key highlight Shortcut Keys
and press OK.
3. Using the 4-way navigation key highlight either Left Soft
Key or Right Soft Key and press OK.
4. Using the 4-way navigation key highlight the preferred
option and press OK.
Date and time settings
Set clock display format
1. Enter the settings menu; using the 4-way navigation key
highlight Time and Date and press OK.
2. Using the 4-way navigation key highlight Clock Display
and press OK.
3. Using the 4-way navigation key highlight the preferred
format and press OK.
Set time
1. Enter the settings menu; using the 4-way navigation key
highlight Time and Date and press OK.
48
Page 57

Settings
2. Using the 4-way navigation key highlight Set Time and
press OK.
3. Using the 4-way navigation key set the current time: hour,
minute and am or pm. Press OK.
Set date
1. Enter the settings menu; using the 4-way navigation key
highlight Time and Date and press OK.
2. Using the 4-way navigation key highlight Set Date and
press OK.
3. Using the 4-way navigation key set the current date:
month, day, and year. Press OK.
Set time format
1. Enter the settings menu; using the 4-way navigation key
highlight Time and Date and press OK.
2. Using the 4-way navigation key highlight Time Format
and press OK.
3. Using the 4-way navigation key highlight either 24 hour or
am/pm, and press OK.
Set date format
1. Enter the settings menu; using the 4-way navigation key
highlight Time and Date and press OK.
2. Using the 4-way navigation key highlight Date Format
and press OK.
3. Using the 4-way navigation key highlight preferred date
format, and press OK.
Set auto clock update
1. Enter the settings menu; using the 4-way navigation key
highlight Time and Date and press OK.
2. Using the 4-way navigation key highlight Auto Clock
Update and press OK.
49
Page 58

Settings
3. Using the 4-way navigation key highlight On and press
OK.
Tones
Set ring tone
1. Enter the settings menu; using the 4-way navigation key
highlight Ring and Alarm and press OK.
2. Using the 4-way navigation key highlight Ring Tone and
press OK.
3. Using the 4-way navigation key highlight preferred tone
and press OK.
Set alarm tone
1. Enter the settings menu; using the 4-way navigation key
highlight Ring and Alarm and press OK.
2. Using the 4-way navigation key highlight Alarm Tone and
press OK.
3. Using the 4-way navigation key highlight preferred tone
and press OK.
Set new voicemail or text message tone
1. Enter the settings menu; using the 4-way navigation key
highlight Ring and Alarm and press OK.
2. Using the 4-way navigation key highlight New Message
Tone and press OK.
3. Using the 4-way navigation key highlight New Voicemail
or New Text Message and press OK.
4. Using the 4-way navigation key highlight preferred tone
and press OK.
Set keypad tone
1. Enter the settings menu; using the 4-way navigation key
highlight Ring and Alarm and press OK.
50
Page 59

Settings
2. Using the 4-way navigation key highlight Keybeep Tones
and press OK.
3. Using the 4-way navigation key highlight On or Off and
press OK.
Set minute minder
When on a call, a short tone will be heard every 60 seconds.
1. Enter the settings menu; using the 4-way navigation key
highlight Ring and Alarm and press OK.
2. Using the 4-way navigation key highlight Minute Minder
and press OK.
3. Using the 4-way navigation key highlight On or Off and
press OK.
Set auto redial
1. Enter the settings menu; using the 4-way navigation key
highlight Call Control and press OK.
2. Using the 4-way navigation key highlight Automatic
Redial and press OK.
3. Using the 4-way navigation key highlight Off or Prompt
and press OK.
System dependant services
Setup send caller-ID
1. Enter the settings menu; using the 4-way navigation key
highlight Call Control and press OK.
2. Using the 4-way navigation key highlight Send Caller ID
and press OK.
3. Using the 4-way navigation key highlight Default or Off
or On and press OK.
51
Page 60

Settings
Setup call waiting
1. Enter the settings menu; using the 4-way navigation key
highlight Call Control and press OK.
2. Using the 4-way navigation key highlight Call Waiting
and press OK.
3. Using the 4-way navigation key highlight On or Off and
press OK.
Setup call forwarding
1. Enter the settings menu; using the 4-way navigation key
highlight Call Control and press OK.
2. Using the 4-way navigation key highlight Call Forwarding
and press OK.
3. Using the 4-way navigation key highlight the preferred
option and press OK.
4. Using the 4-way navigation key highlight Activate or
Cancel or Check Status and press OK.
5. If check status is selected the phone will return the current
status.
6. Otherwise the phone will request a number to Forward
To. Enter the number and press OK.
Setup call barring
1. Enter the settings menu; using the 4-way navigation key
highlight Call Control and press OK.
2. Using the 4-way navigation key highlight Call Barring and
press OK.
3. Using the 4-way navigation key highlight the preferred
option and press OK.
4. Using the 4-way navigation key highlight Activate or
Cancel or Check Status and press OK.
5. When selecting either Activate or Cancel to activate or
deactivate all or part of call barring the network service
52
Page 61

Settings
provider will request a 4-digit password. Enter the number
and press OK.
Restore phone default settings
1. Enter the settings menu; using the 4-way navigation key
highlight Restore All Settings and press OK.
2. The phone will request the phone lock code. Enter the
four-digit code and press OK.
3. If the code is correct the phone will ask for confirmation:
Confirm?
Network settings
WARNING
Making changes to the network settings section may
prevent the phone from functioning normally.
53
Page 62

Quick reference guide
Quick reference guide
Here are some of the most popular menu items.
Menu conventions
Unless otherwise indicated the left soft-key is Back and the
right soft-key is OK. In the following list it is assumed that OK
and Back will be selected as required.
Menu
Press the middle soft-key to enter the menu.
Phone book
Create a new phone book entry 25
Ö Phone Book
Ö New Entry
Ö Phone Number
Ö Change
Dial a number from the phone book 25
Ö Phone Book
Ö Search
Ö Select
Ö Dial
Delete phone book entries 27
Ö Phone Book
Ö Search
Ö Opt
Ö Delete Entry
Edit phone book entries 27
Ö Phone Book
Ö Search
Ö Opt
Ö Edit Entry
Ö Change
54
Page 63

Quick reference guide
Assign ring tone to a number 28
Ö Phone Book
Ö Search
Ö Select
Ö Opt
Ö Set Ring Tone
Assign one-touch dialing keys 28
Ö Phone Book
Ö Search
Ö Select
Ö Opt
Ö Edit Entry
Call logs
View or dial a number from a call log 31
Ö Call Logs
Ö Dialed Calls, Received Calls, or Missed Calls
Ö View or Dial
Copy to phone book 32
Ö Call Logs
Ö View
Ö Opt
Ö Copy to Phone Book
Ö Change
Text messaging
Create and send new message 34
Ö Messaging
Ö Create New Message
Ö New Text Message
Ö Opt
Ö Get From Phone Book
Ö Select
Ö Send
Read a message in inbox 35
Ö Messaging
Ö Inbox
Ö Read
55
Page 64

Quick reference guide
Reply to a message in inbox 35
Ö Messaging
Ö Inbox
Ö Opt
Ö Reply
Ö Send
Ö Get From Phone Book
Ö Select
Ö Send
Delete a message 36
Ö Messaging
Ö Inbox
Ö Opt
Ö Delete
Call back 36
Ö Messaging
Ö Inbox
Ö Opt
Ö Call Back
Alarm clock
Set alarm time 40
Ö Alarm Clock
Set alarm tone 40
Ö Alarm Clock
Ö Opt
Ö Alarm Tone
Settings
Set time 48
Ö Settings
Ö Time and Date
Ö Set Time
Set date 49
Ö Settings
Ö Time and Date
Ö Set Date
Set ring tone 50
Ö Settings
Ö Ring and Alarm
Ö Ring Tone
56
Page 65

Glossary of Terms
Glossary of Terms
CSD Circuit Switched Data – allows dial-up data
communications.
GPRS General Packet Radio Service – packet switched
(always on) data communication protocol.
GSM originally stood for Groupe Speciale Mobile, but
now it is known as Global System for Mobile
communications
LCD Liquid Crystal Display
LED Light Emitting Diode
SIM Subscriber Identity Module
PIN Personal Identification Number
PUK PIN Unblocking Key
57
Page 66

Specifications
Specifications
GSM Wireless Frequencies Supported
2W 850 MHz (Class 4)
W 1900 MHz (Class3)
1
Languages
English and Spanish
Physical
Size: 8.75"D x 6.75"W x 1.75"H, 223mm x 173mm x 50mm
(antenna adds 2", 50mm to width)
Weight: 1.75
lbs (795 g) without batteries
Environmental
Operating Temperature: 0°C to +50°C
Storage Temperature: -20°C to +85°C
Antenna
TNC antenna connector, 50 ohms
Power
Voltage Input: 100 – 240VAC, 50/60Hz, and 10W max. input
Backup battery
Model supplied with AAA NiMH (rechargeable) battery pack
Supports 90 minutes (min) talk time, 15 hours (min) standby
Note: The battery will need to charge for 15 hours before it will
yield full capacity.
Model with support for four AA alkaline batteries
Supports 20 minutes (min) talk time, 8 hours (min) standby
58
Page 67

Important safety instructions
Important safety instructions
When using this phone, basic safety precautions should always
be followed to reduce the risk of fire, electric shock, or personal
injury. Read this information before using your phone.
1. Read and understand all instructions.
2. Follow all warnings and instructions marked on this unit.
3. Unplug this unit from AC outlets before cleaning. Do not
use liquid or aerosol cleaners. Use a damp cloth for
cleaning.
4. Do not use this unit near water, for example, near a
bathtub, washbowl, kitchen sink, or similar.
5. Place this unit securely on a stable surface. Serious damage
and / or injury may result if the unit falls.
6. Do not cover the slots and openings on the unit. They are
provided for ventilation against overheating. Never place
the unit near radiators, or other sources of heat, or in a
place where proper ventilation is not provided.
7. Use only the power source marked on the unit. If you are
not sure of the type of power supplied to your home or
office, consult your dealer or local power company.
8. Do not place objects on the power cord. Install the unit
where no one can step on or trip on the cord.
9. Do not overload wall outlets and extension cords. This
can result in the risk of fire or electric shock.
10. Never push any objects through the slots in the unit. This
can result in the risk of fire or electric shock. Never spill
any liquid on the unit.
11. To reduce the risk of electric shock, do not disassemble
this unit. Take the unit to an authorized dealer when
service is required. Opening or removing covers may
expose you to dangerous voltages or other risks and may
void the warranty. Incorrect reassembly can result in
electric shock when the unit is subsequently used.
12. Unplug the unit from the wall outlet and refer to a
authorized dealer when the following conditions occur:
59
Page 68

Important safety instructions
a. If liquid has been spilled into the unit.
b. If the unit has been exposed to rain or water.
c. If the unit does not work normally by following the
operating instructions. Adjust only the controls
covered by the operating instructions. Improper
adjustments may damage the unit.
d. If the unit has been dropped or is physically
damaged.
e. If the unit exhibits a distinct change in performance.
f. When the power cord or plug is damaged or frayed.
13. Do not use this unit to report a gas leak when in the
vicinity of the leak.
14. NEVER attempt to remove the antenna while the phone is
in use or switched on. Always disconnect the AC supply
and remove the batteries before disconnecting the antenna.
Failure to take this precaution may result in damage to the
phone and void the warranty.
15. The batteries are for emergency backup only. Connect the
AC supply and confirm that the telephone is working
normally before installing the batteries. This phone is not
intended for use without the AC adapter.
16. In the event of power failure the call may be disconnected.
17. Replace the batteries every six months to ensure proper
service in the event of power failure.
18. Making changes to the Network Settings section may
prevent the phone from functioning normally.
Exposure to radio frequency signals
Your wireless telephone is a low power radio transmitter and
receiver. When it is ON, it receives and also sends out radio
frequency (RF) signals.
International agencies have set standards and recommendations
for the protection of public exposure to RF electromagnetic
energy.
60
Page 69

Important safety instructions
• International Commission on Non-Ionizing Radiation
Protection (ICNIRP)1996
• Verband Deutscher Elektrotechniker (VDE) DIN-0848
• United States Federal Communications Commission,
Radio Frequency Exposure Guidelines (1996)
• National Radiological Protection Board of the United
Kingdom, GS 11, 1988
• American National Standards Institute (ANSI) IEEE. C95.
1-1992
• National Council on Radiation Protection and
Measurements (NCRP). Report 86
• Ministry of Health (Canada), Safety Code 6
These standards are based on extensive scientific review. For
example, over 120 scientists, engineers, and physicians from
universities, government health agencies, and industry reviewed
the available body of research to develop the updated ANSI
standard.
The design of your phone complies with these standards when
used as described under "Telephone Operation."
Operational precautions
To assure optimal phone performance and make sure human
exposure to RF energy is within the guidelines set forth in the
relevant standards, always adhere to the following procedures.
Antenna care
Use only the supplied Motorola approved replacement antenna.
Unauthorized antennas, modifications, or attachments could
damage the phone.
Do NOT hold the antenna when the phone is IN USE.
Holding the antenna affects call quality and may cause the
phone to operate at a higher power level than needed. In
addition, use of unauthorized antennas may result in noncompliance with the local regulatory requirements.
61
Page 70

Important safety instructions
Telephone operation
Do not operate your telephone when a person is within 8
inches (20 centimeters) of the antenna. A person or object
within 8 inches (20 centimeters) of the antenna could impair
call quality and may cause the phone to operate at a higher
power level than necessary and expose that person to RF
energy in excess of that established by the FCC RF Exposure
Guidelines.
Data operation
When using any data feature of the phone, with or without an
accessory cable, position the phone and its antenna at least 8
inches (20 centimeters) from your body.
Approved accessories
Use of accessories not approved by Motorola, including but not
limited to antennas, may cause your phone to exceed RF energy
exposure guidelines. For a list of approved Motorola
accessories, visit our website at: www.Motorola.com.
RF energy interference/compatibility
Note: Nearly every electronic device is susceptible to RF
energy interference from external sources if inadequately
shielded, designed, or otherwise configured for RF energy
compatibility. In some circumstances your phone may cause
interference.
Facilities
Turn off your phone in any facility where posted notices
instruct you to do so. These facilities may include hospitals or
health care facilities that may be using equipment that is
sensitive to external RF energy.
Medical devices
Pacemakers
Pacemaker manufacturers recommend that a minimum
separation of 6 inches (15 centimeters) be maintained between
the phone antenna and a pacemaker.
62
Page 71

Important safety instructions
Persons with pacemakers should:
• ALWAYS keep the phone antenna more than 6 inches (15
centimeters) from the pacemaker.
• Turn OFF the phone immediately if you have any reason
to suspect that interference is taking place.
Hearing aids
Some digital wireless phones may interfere with some hearing
aids. In the event of such interference, you may want to consult
your hearing aid manufacturer to discuss alternatives.
Other medical devices
If you use any other personal medical device, consult the
manufacturer of your device to determine if it is adequately
shielded from RF energy. Your physician may be able to assist
you in obtaining this information.
Potentially explosive atmospheres
Turn your phone OFF, do not remove your battery when you
are in any area with a potentially explosive atmosphere, and
obey all signs and instructions. Sparks from your battery in such
areas could cause an explosion or fire resulting in bodily injury
or even death.
Areas with a potentially explosive atmosphere are often but not
always clearly marked. They include: fueling areas such as
gasoline stations; below deck on boats; fuel or chemical transfer
or storage facilities; areas where fuel odors are present (for
example, if a gas/propane leak occurs in a car or home); areas
where the air contains chemicals or particles, such as grain,
dust, or metal powders; and any other area where you normally
would be advised to turn off your vehicle engine.
Blasting caps and areas
To avoid interfering with blasting operations, turn your phone
OFF when in a "blasting area" or in areas posted: "Turn off
two-way radio." Obey all signs and instructions.
63
Page 72

Important safety instructions
Using external antennas
Your FX1900xg digital telephone is equipped with an antenna
which screws onto the transceiver. This antenna is intended for
internal use, and will provide adequate operation under normal
circumstances. If you elect to install an external antenna (not
supplied by Motorola), you must take precautions to provide
adequate lightning protection for the external antenna.
Motorola assumes no liability if you elect to install an external
antenna.
External antenna installation
IMPORTANT:
To comply with the FCC RF exposure limits and satisfy the
categorical exclusion requirements for mobile transmitters, the
following requirements must be met:
1. A minimum separation distance of 20 cm must be
maintained between the antenna and all persons.
2. The transmitter effective radiated power must be less than
1.5 Watts ERP (2.46 Watts or 33.9 dBm EIRP). This
requires that the combination of antenna gain and feed line
loss does not exceed 10 dBi.
Caution: Changes or modifications made in the radio phone,
not expressly approved by Motorola, will void the user’s
authority to operate the equipment.
FDA consumer information on wireless phones
The U.S. Food and Drug Administration (FDA) provides
consumer information on wireless phones at:
http://www.fda.gov/cellphones/qa.html
64
Page 73

Important safety instructions
FCC RF energy interference
This device complies with Part 15 of the FCC Rules. Operation
is subject to the following two conditions:
1. This device may not cause harmful interference.
2. This device must accept any interference received,
including interference that may cause undesired operation.
This equipment has been tested and found to comply with the
limits for a Class B digital device, pursuant to Part 15 of the
FCC Rules. These limits are designed to provide reasonable
protection against harmful interference in a residential
installation.
65
Page 74

Warranty
Warranty
The Motorola FX1900xg is built to the highest standards by
CSI Wireless, LLC for Motorola Corporation. CSI Wireless
warrants the product to the original retail purchaser for one
year from the date of purchase for defects in materials or
workmanship (except as listed below) under normal use and
conditions. Such defects will be repaired or replaced at the
company's option, without charge for parts or labor directly
related to the defect(s). The following items are similarly
warranted for a period of 90 days: antenna and AC wall charger.
THE EXTENT OF THE COMPANY'S LIABILITY
UNDER THIS WARRANTY IS LIMITED TO THE
REPAIR OR REPLACEMENT PROVIDED ABOVE AND,
IN NO EVENT, SHALL THE COMPANY'S LIABILITY
EXCEED THE PURCHASE PRICE OF THE PRODUCT.
CSI Wireless, LLC disclaim liability for cellular coverage,
inadequate signal, communications range and operation of the
Cellular networks as a whole.
66
 Loading...