

Mortara H12+ Quick Start Manual
H12
+
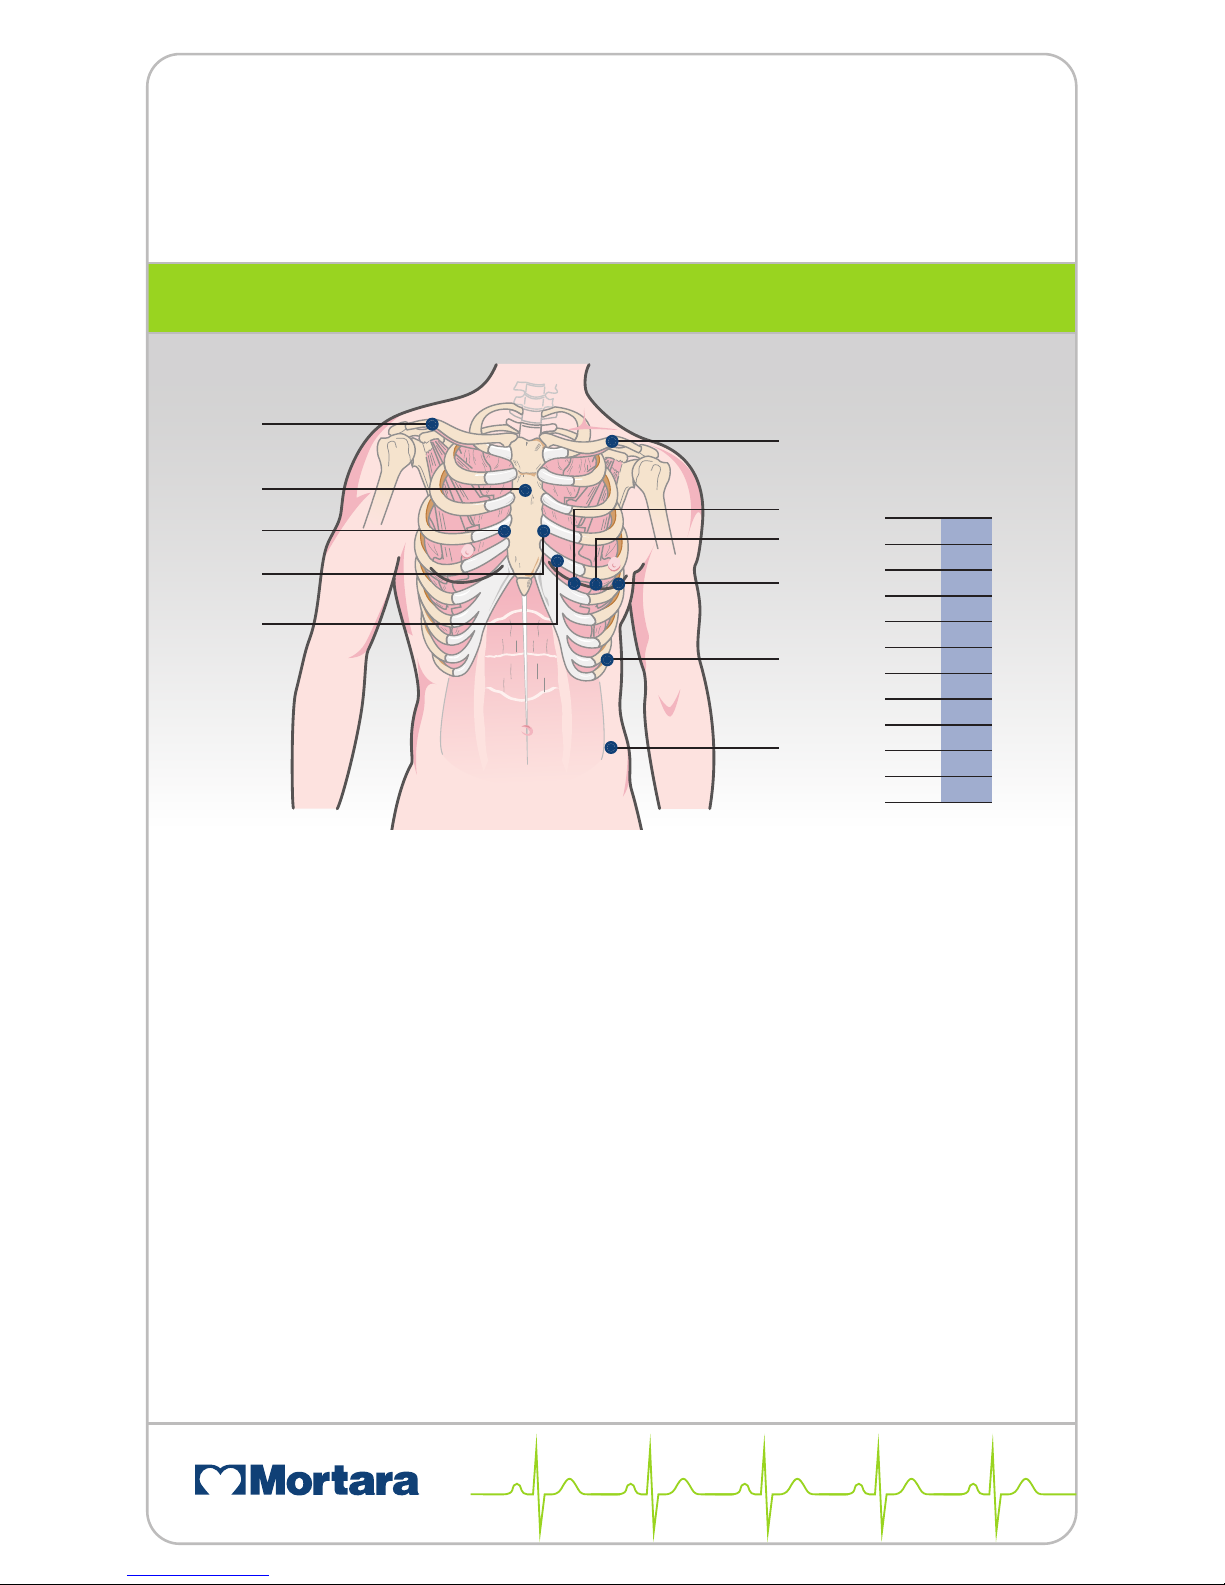
12-LEAD HOLTER ELECTRODE PL ACEMENT
LEAD PLACEMENT
•
V 1 – Fourth intercostal space at the right sternal border.
•
V2 – Fourth intercostal space at the left sternal border.
•
V3 – Midway between V2 and V4.
•
V4 – Fifth intercostal space at the left midclavicular line.
•
V5 – Anterior axillary line on same horizontal level as V4.
•
V6 – Mid-axillary line on same horizontal level as V4 and V5.
•
RA – Right clavicle as shown.
•
LA – Left clavicle as shown.
•
RL – Reference or ground lead, placed to maximize patient comfort.
•
LL – Lower left side of body, as close to hip as possible, on the iliac crest
(original Mason-Likar position) or
lowest rib on the left side of chest (modified Mason-Likar position).
*Note and Caution: Placement of the Left Leg (LL) electrode in the original Mason-Likar
position increases the similarity of the acquired ECG with a standard 12-lead ECG and is
therefore recommended; however, clothing may interfere with this position and increase the
amount of artifact. The modified position may decrease the sensitivity of inferior ECG leads
and cause axis shift with respect to the standard 12-lead ECG. Accurate skin preparation
and suitable clothing are the most important factors in excessive artifact prevention.
The Right Leg (RL) electrode may be positioned in any location least subject to motion
artifact according to clinician preference and specific test requirements.
IEC AAMI
C1●V1
●
C2●V2
●
C3●V3
●
C4●V4
●
C5●V5
●
C6●V6
●
R
●RA●
L
●LA●
N●RL
●
F
●LL●
RA
RL
V1
V2
V3
LA
V4
V5
V6
LL*
LL*
12-LEAD DIGITAL HOLTER RECORDER
Ref: 9503-039-01 Rev K1
www.mortara.com
ISO 13485 CERTIFIED
H12+™is a trademark of Mortara Instrument, Inc.
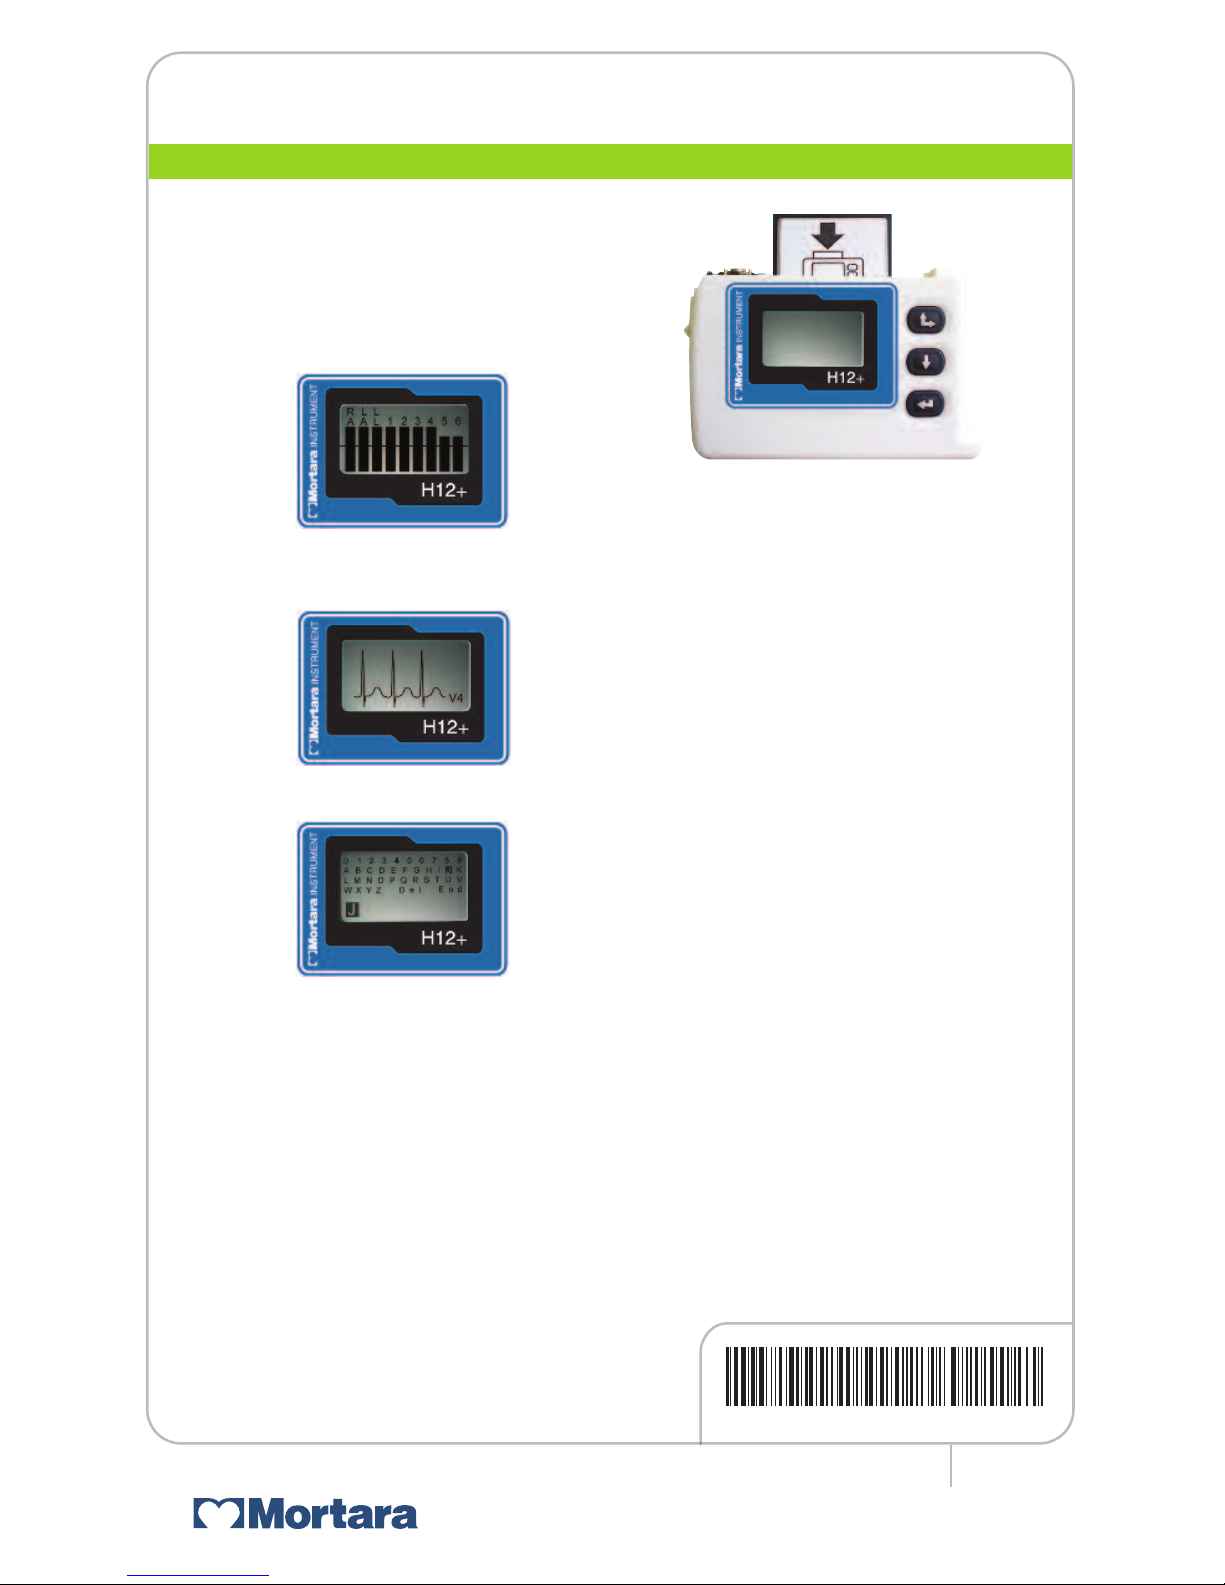
To Begin a Recording Session
1.
Remove the battery door and insert a
formatted flash card into the card slot.
2.
Insert a new AA battery in the
battery compartment.
3.
Select LEAD CHECK to check electrode
impedance levels.
4.
Select DISPLAY ECG to view each lead.
5.
Select ENTER ID to enter the patient ID.
6.
Select RECORD to begin the
recording session.
Set Date and Time
H12+™ has an internal back-up battery for
date and time, with autonomy of between
three and five years.
To set the date and time, follow
instructions below:
1.
Select CONFIGURE by pressing the
Enter key and then DATE & TIME.
2.
Navigate to SET MINUTE, SET HOUR,
SET DAY, SET MONTH or SET YEAR by
pressing the DOWN key and then press
the ENTER key.
3.
Press the UP/RIGHT key to increase the
value, Down key to decrease the value.
Press ENTER to store the updated value.
4. Navigate to DONE by pressing the
Up/Right or Down key and then
press the Enter key.
An ambulatory 12-lead ECG obtained with torso-located limb electrodes is not equivalent to a conventional
diagnostic ECG.
9503-039-01 Rev K1
 Loading...