

Mortara Ambulo 2400 User Manual
Ambulo 2400
AMBUL ATORY BLOOD PRESSURE MONITORING SYSTEM
Thank you for purchasing the Ambulo™2400 ABPM system. This guide will show
you how to configure and conduct a successful 24-hour ABPM procedure on a patient
using the Ambulo 2400 device, its accessories and software. Please consult the
Ambulo 2400 User Manaul for more detailed instructions, as well as other important
information and helpful tips.
Start Here
Open and inspect the contents of your system, including all accessories and
documentation. Install the Hypertension Diagnostics Suite software on a Microsoft
®
Windows®-based PC using the CD included with the ABPM sytem.
Install the Batteries
•
Always use fully charged NiMH rechargeable AA batteries.
•
Make sure that the batteries are installed according to the correct polarity.
•
Once powered, the LCD will turn on and the device will beep. Close the battery
compartment by replacing the cover.
Configure the Ambulo 2400 for Each Patient
•
The Ambulo 2400 must be programmed for each patient using the PC software.
This process requires only a few minutes.
•
Connect the Ambulo 2400 to your PC using the included USB cable.
•
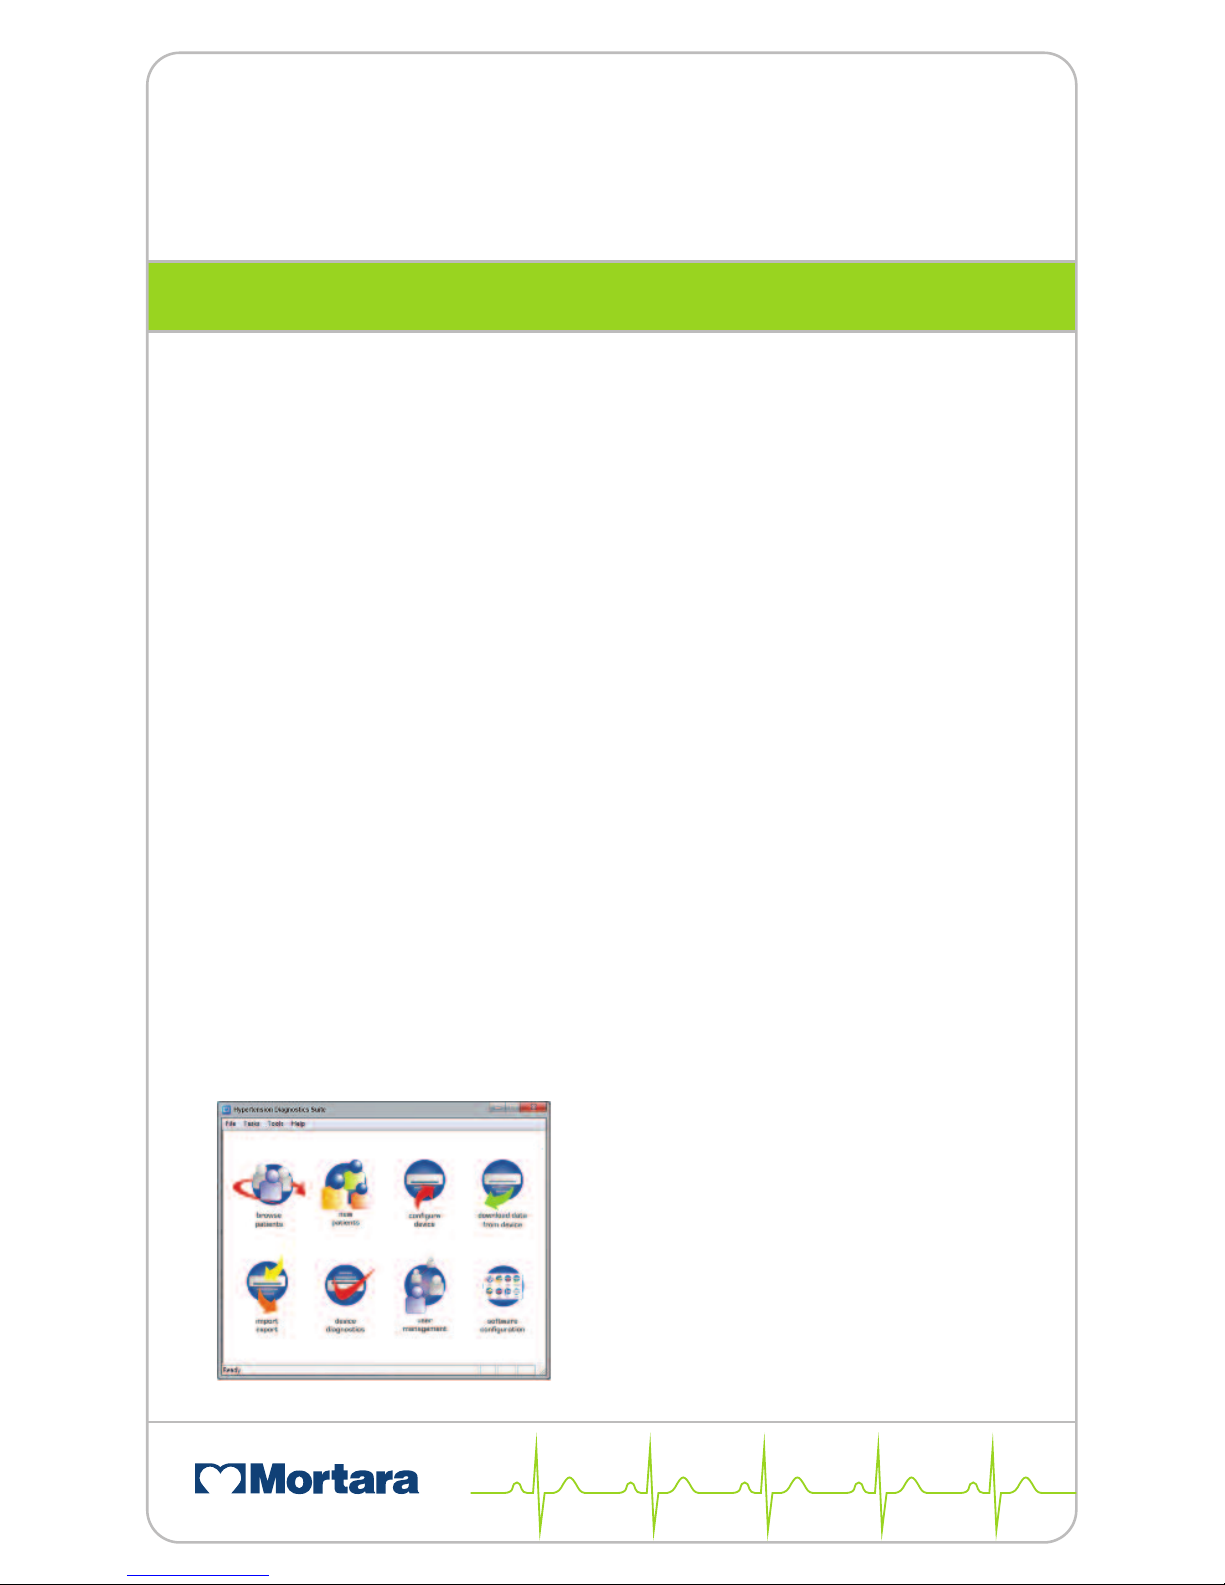
Open the Hypertension Diagnostics Suite software.
•
Select an existing patient from the Browse Patients item or create a new one from
the New Patient item - including all relevant information.
•
Click on the Configure Device button.
•
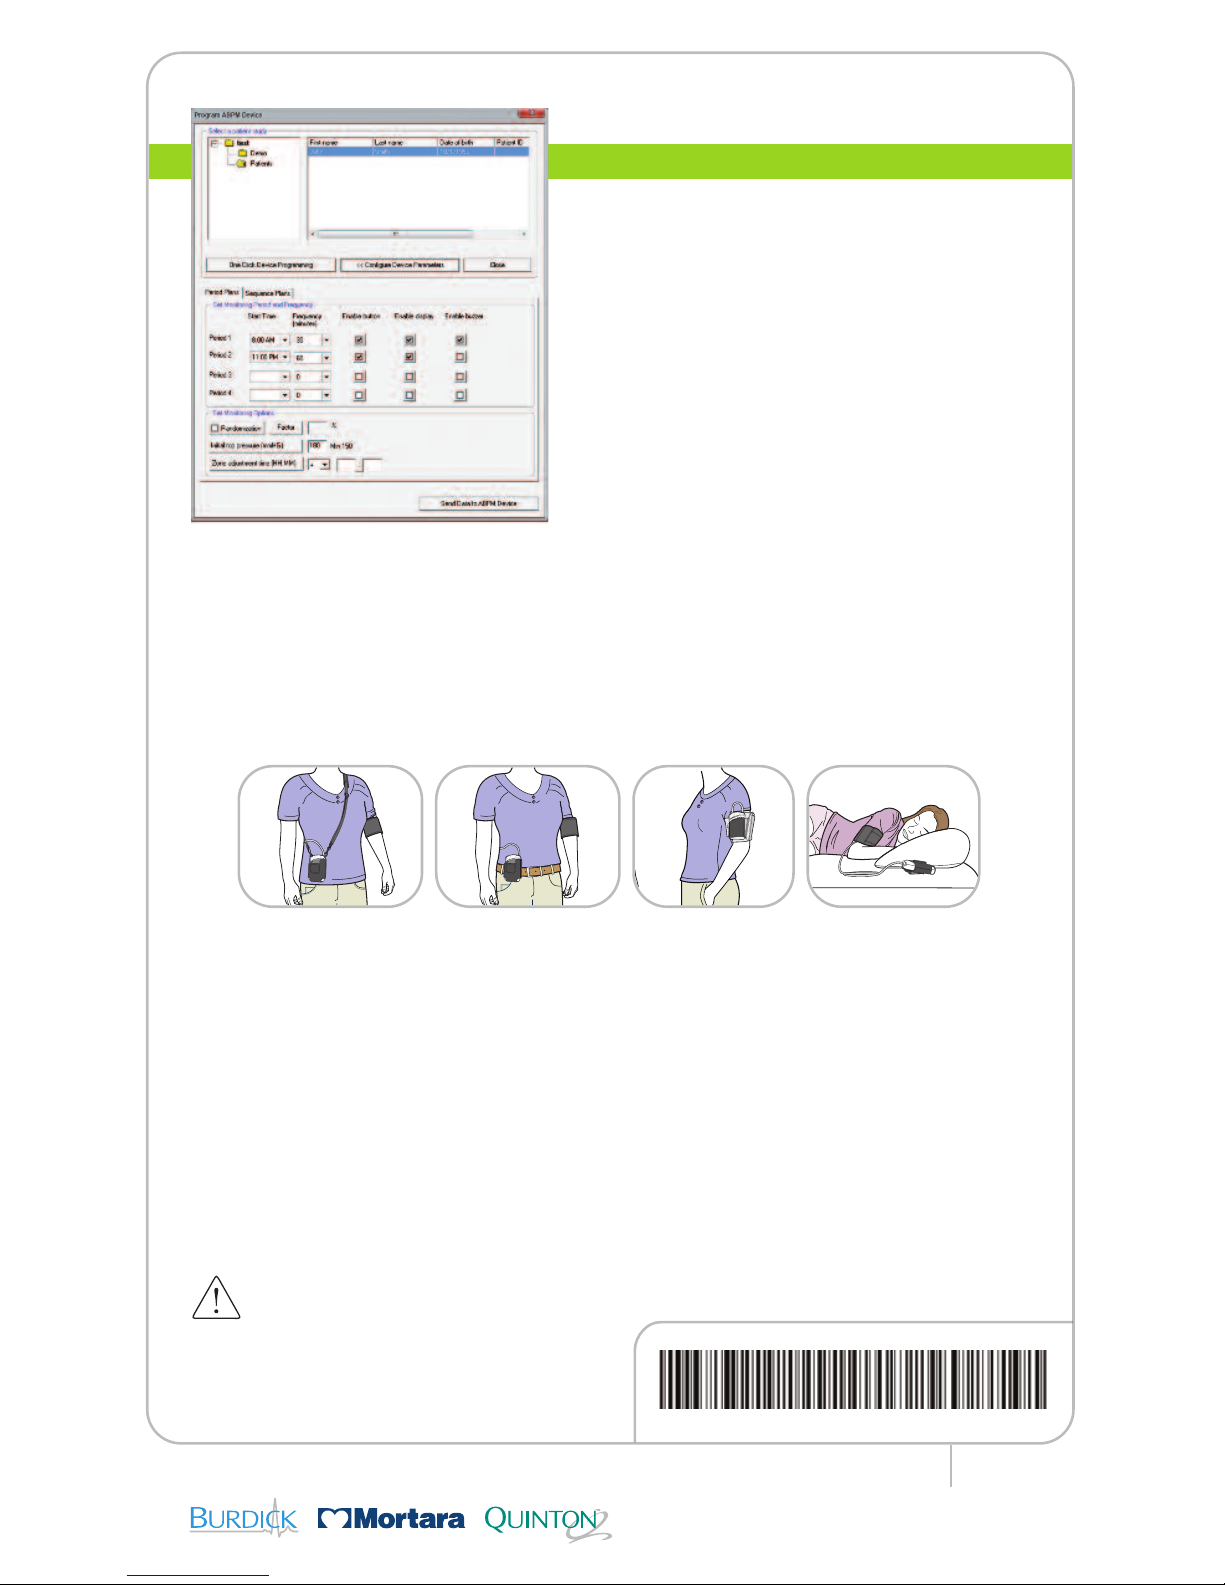
Select the One Click Programming button
if a Default Monitoring Plan has been
defined. Alternatively, select Configure
Device Parameters. As shown on the left,
this will allow for entry of all measurement
parameters, including monitoring periods
and frequencies.
•
Once ready, send this data to the device by
clicking on the Send Data to ABPM Device
button. Configuration is now complete.
AMBULO™2400 BP MONITORING SYSTEM
Ref: 9503-182-01-ENG Rev B1
•
Disconnect the USB cable and begin
patient set-up. The Ambulo 2400
will
restart into PAUSE mode and should
display the correct time.
•
Press and hold the START/STOP button
for five seconds to change the device mode
from PAUSE to AUTOMATIC. Once in
AUTOMATIC mode, the device may display
a countdown in addition to the time.
Patient Set-up
•
Select an appropriate-sized cuff, depending
upon the size of the patient’s non-dominant
arm. Each cuff is labeled with range markers to indicate the minimum and maximum
circumference that can be accommodated by the particular cuff.
•
Place the cuff on the patient’s non-dominant arm such that the artery indicator rests
on the brachial artery. Do not tighten the cuff too firmly; allow a finger’s worth of slack
between the cuff and the arm.
•
The Ambulo 2400 can be worn in four distinct positions, depending upon patient
comfort and anticipated activity:
Obtaining Measurements and Reporting
•
Connect the Ambulo 2400 to your PC using the USB cable included with the ABPM
system. Run the software.
•
From the Main menu, click the ‘Download Data from Device’ icon.
•
Access the available views as needed: Table, Graphical, Actigraphy, Histogram,
Statistical, Comparison and Report.
•
Enter free text notes (pertaining to the patient’s condition, a particular episode, diagnosis,
etc.) in order to make them part of the patient’s record. To enter notes for a patient, select
the “Browse Patients” icon, select the appropriate patient and click the ‘Edit’ button.
•
Print an ABPM data report by selecting the ‘Report View’ function. The format of the
report can be determined in the Software Configuration menu.
www.mortara.com
ISO 13485 CERTIFIED
Ambulo™is a trademark of Mortara Instrument, Inc.
Microsoft
®
and Windows®are registered trademarks
of Microsoft Corp.
9503-182-01-ENG Rev B1
Attention, consult accompanying documents.
 Loading...