

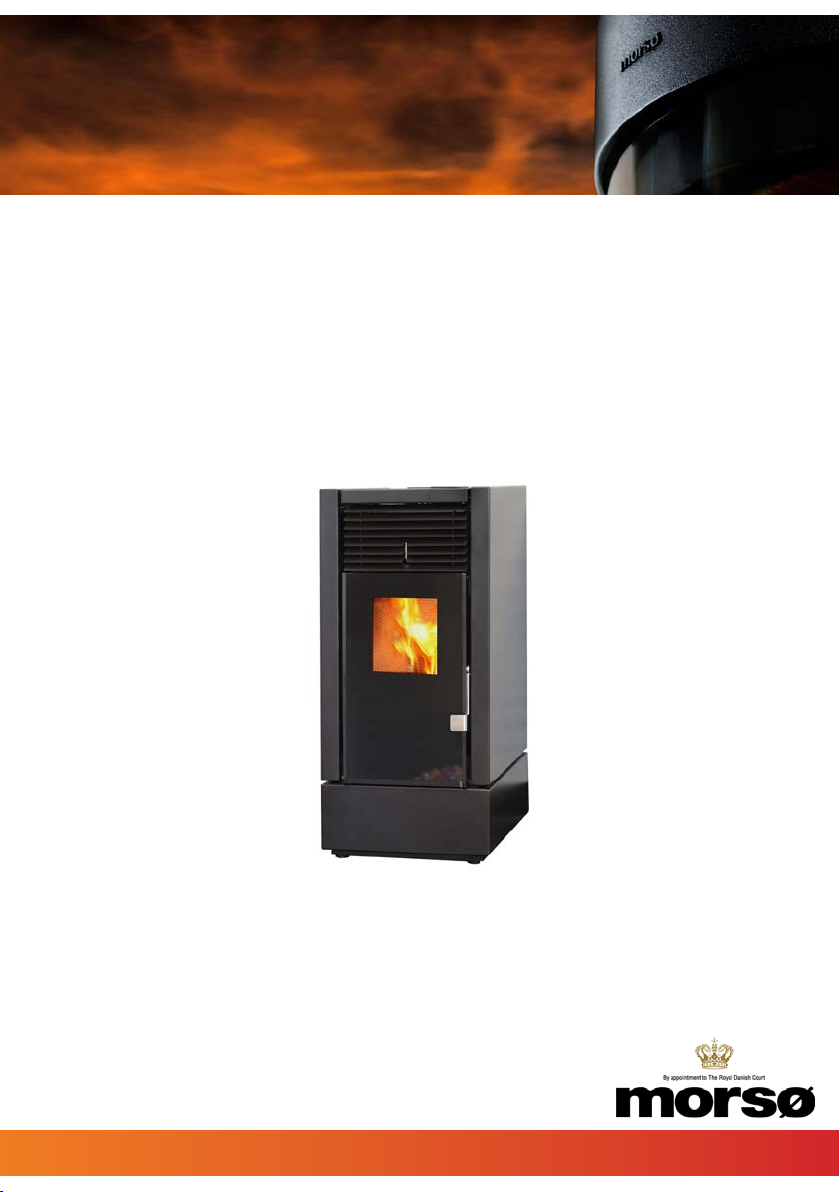
Morsø P30/31
Instructions for installation and use
www.morsoe.com

CONTENTS
1.0 Installation of your morsø stove .. .. .. .. .. .. .. .. .. .. .. .. .. .. 5
2.0 Stoking technique/ Use of your stove......................13
3.0 Regular maintenance of the stove .. .. .. .. .. .. .. .. .. .. .. .. . 27
4.0 Technical data ..............................................38
Instructions for installation and use
Morsø P30/31
EN 14 785
MORSØ JERNSTØBERI A/S . DK-7900 NYKØBING MORS
2
E-Mail: stoves@morsoe.com · Website: www.morsoe.com
3

Congratulations on the purchase af your new Morsø pellet stove!
Morsø, the largest supplier of the Danish market, has produced
wood-burning stoves of the highest quality since 1853. If you just
follow these instructions, we are sure that you will enjoy and
make good use of your new stove for many years.
Page no.
1.0 Installation of your morsø pellet stove 5
1.1 Before installation 5
1.2 Location, assembly and installation 5
1.3 Stove location/ Offsets 6
1.4 The chimney 7
1.5 Chimney sweep 7
1.6 Example of chimney installations 7
2.0 Stoking technique/ Use of your stove 13
2.1 General 13
2.2 Construction of the pellet stove 13
2.3 Timber (white) pellets 14
2.4 Safety equipment 14
2.5 Operating display and Operating keys 16
2.6 Operation and programming your pellet stove 16
2.7 Functions and operation of your stove 22
3.0 Regular maintenance of the stove 27
3.1 Cleaning 27
3.2 Description of alarms 29
3.3 Information and problems 30
3.4 Guarantee conditions 31
3.5 Liability 32
3.6 Spare parts 33
3.7 Electrical diagram 33
4.0 Technical data 34
Test certificates - must accompany the stove
The Danish Wood Burning Stove Act came into force on 1 January 2008. In connection with the
introduction of the Danish Wood Burning Stove Act there is a requirement for pelleted fuel burners to be accompanied by a test certificate issued by an accredited testing institution that has
carried out environmental tests on the stove.
The test certificate is enclosed with the stove and must be retained by the owner and accompany the stove for its lifetime.
The instalation of your Morsø Pellet stove must be approved by a suitable qualified fitter or local building control.
Extra accessories
An extensive range of chimney, floor plates and accessories is available for your Morsø stove,
to ease the day-to-day operation and maintenance of your Morsø stove.
1.0 Installation of your morsø stove
Before installation
Please direct any queries to your Morsø dealer.
• Prepare the location where the pellet stove is to be installed in accordance with local, national and European legal requirements.
• Incorrect installation or poor maintenance (not in accordance with that described in this
guidance) can result in injury or damage to persons or objects. Morsø accepts no civil or
criminal liability in such an event.
• The chimney system must be connected before the electrical pellet stove is connected to
the power supply.
• The protection grille fitted inside the pellet hopper must never be removed.
• There must be sufficient ventilation in the room where the pellet stove is to be installed.
• The installation, electrical connection,functional check and maintenance must be carried
out by qualified and authorised persons.
Location, assembly and installation
The location of the pellet stove in a habitable room is critical for heating the room uniformly.
Before deciding where to fit the pellet stove, you should take account of the following:
• Combustion air may not be supplied from a garage or room without ventilation or extraction, but must be drawn from an open space or from outside.
• Installation of a pellet stove in a bedroom, bathroom or wet room, or in which another
heater without a separate air supply (fireplace, wood-burning stove, etc.) is already installed, is prohibited.
• Installation of a stove surroundings with an explosive atmosphere is prohibited.
• It is beneficial to install the pellet stove in a central location within the room to ensure
maximum circulation of heat.
• The power supply must be provided with an earth connection (if the cable supplied is not
long enough to reach the socket, an extension cable laid on the floor must used).
• The pellet stove must be placed where there Is sufficient air supply for pellet combustion
(approx. 50m3/h of air must be available) in accordance with the installation requirements
and the current provisions of the country concerned.
• The volume of the room may not be below 30 m3.
IMPORTANT!
THE PELLET STOVE MUST BE INSTALLED AND ASSEMBLED BY QUALIFIED PERSONS
4
5
The room must be:
• prepared so that conditions are appropriate for operation of the pellet stove
• provided with an appropriate flue gas chimney system
• provided with a 230V 50Hz (EN 73-23) power supply
• Provided with permanent ventilation complying with national building regulation for solid
fuel appliances (or a direct air supply from outside to the pellet stove not less than 80 mm
diameter.
• provided with a CE compliant earth connection.
The pellet stove must be connected to a SINGLE exhaust duct (chimney) or a vertical internal or
external duct in accordance with current provisions.
Combustion of timber (white) pellets causes smoke, which can deposit soot if it comes in contact
with walls.
Fitting a grille to the end of the chimney that may lead to poor operation of the stove is strictly
prohibited.
Approved flues and joints with appropriate silicone seals must always be used to ensure the
tightness of the flue.
No more than 3 no. 90° bends may be used to connect the chimney, and they may not be used
more than 2-3 m horizontally.
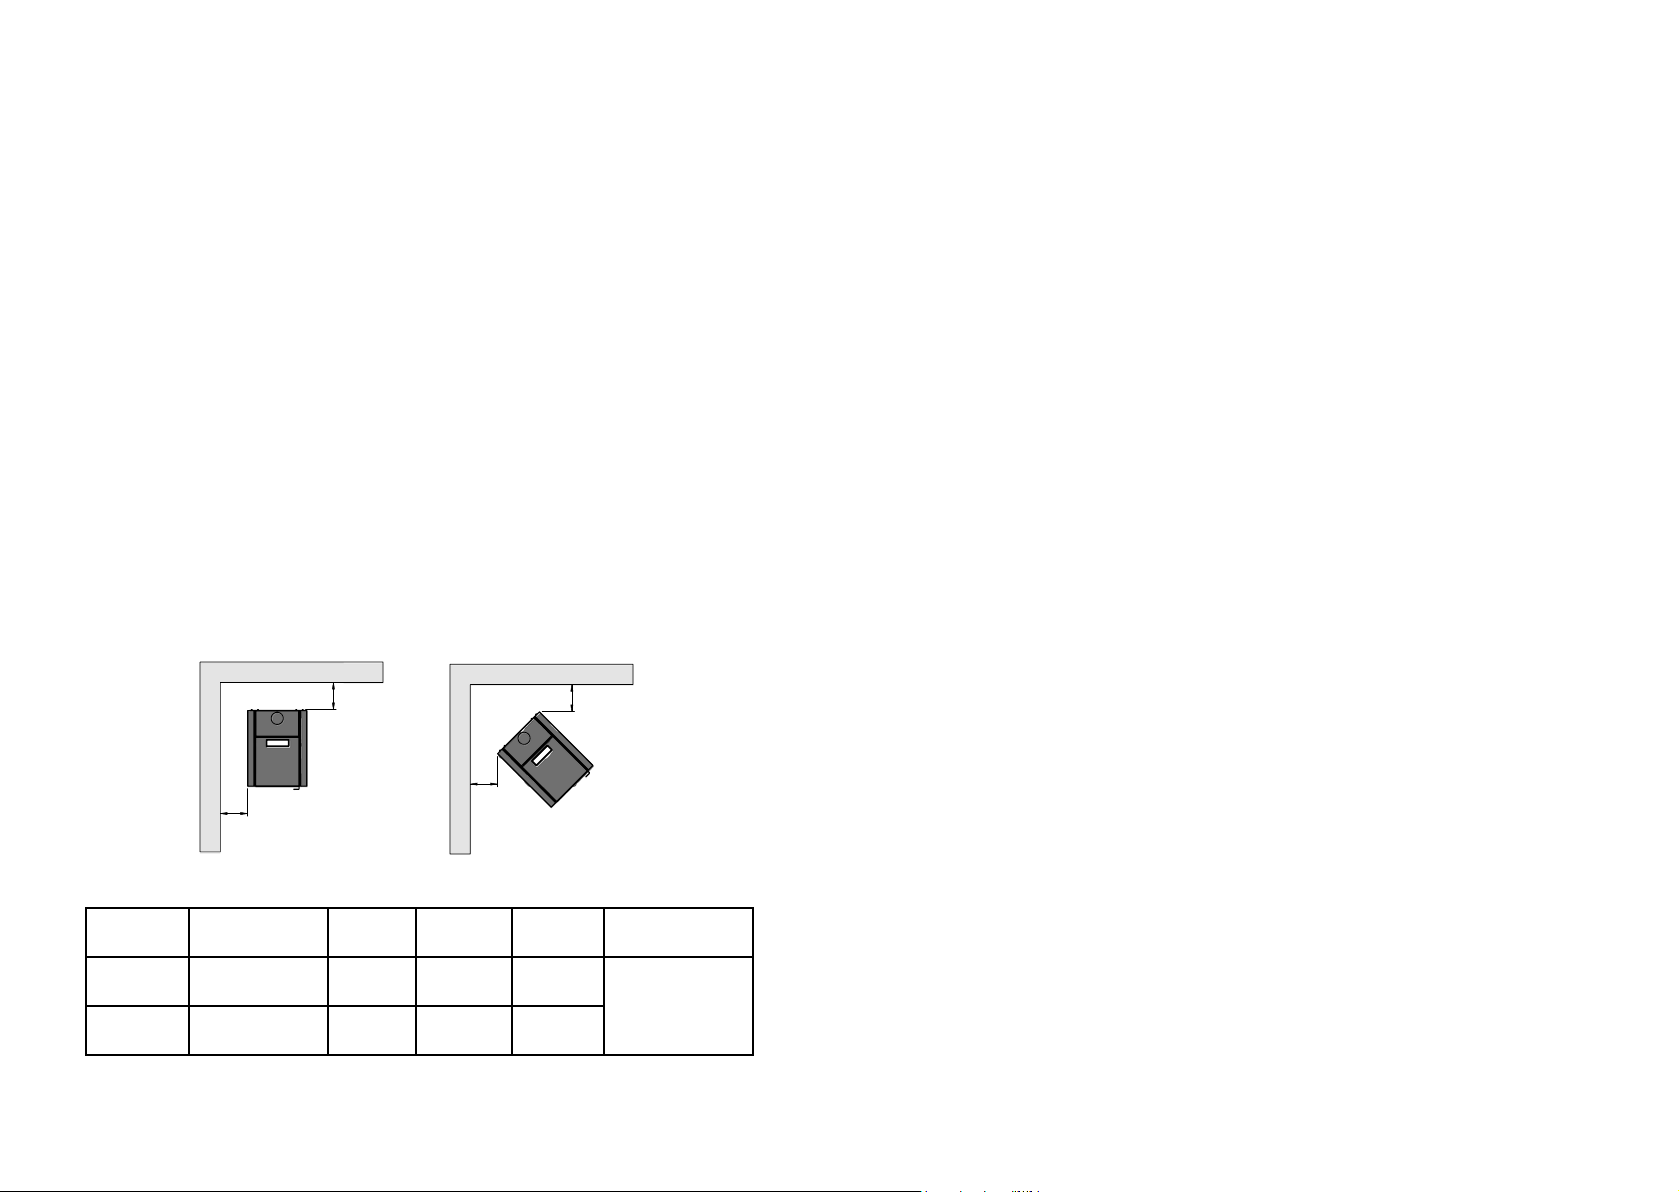
Stove location/ Clearance
Clearances only apply when the stove is to be placed near flammable materials. Your new stove may be located as stated on the approval sign on the rear of the stove if the walls made of
flammable material.
Distance to furniture
The clearance to flammable material in front of the stove is 700 mm. With regard to positioning
furniture, the clearance to flammable material must be complied with, but you should consider
whether furniture and other items would be dried out so near the stove.
A pellet stove becomes hot when lit. You should therefore take the necessary care, especially
with regard to children coming into contact with the stove.
On the floor
If the stove is fitted on a combustible floor, the national and local provisions must be complied
with regard to the size of incombustible hearth required to cover the floor below the stove. You
should naturally ensure that the sheet can support the weight of the stove and possibly the
steel chimney. (The hearth temperature beneath the P30 and P31 pellet stove does not excede
100°)
The chimney
A modern efficient stove imposes greater requirements on your chimney. Therefore, you
should let the chimney sweep assess the chimney.
The chimney opening must comply with national and local provisions.
Too large a chimney opening leads to too much energy being used to heat the chimney to obtain an acceptable draught. A brick chimney with a large opening must have an insulated lining
of the right diameter. This results in increased draught and better fuel economy.
There are no particular requirements for chimney height, but it must be high enough to obtain
a good draught and avoid smoke nuisance. As a general rule, a satisfactory draught is achieved
if the chimney is 4 metres above the stove and no less than 80 cm above the ridge. If the chimney is on the side of the building, the top of the chimney should never be lower than the ridge
or the highest point on the roof. Morsø recommends a minimum draught in the chimney of 10
pa.
A
C
B
Min. clearance to flammable material:
Installation Stove type Distance ADistance B Distance C Distance in front
Normal
right-angled
Corner
installation
With regard to heat circulation, cleaning and possible internal cleaning of the stove, the recommended distance to walls is 10-15cm.
6
Morsø P30/31
uninsulated flues
Morsø P30/31
uninsulated flues
200 mm. 200 mm. - 700 mm
- - 200 mm.
C
of stove
Chimney sweep
As mentioned, it may be wise to consult the local chimney sweep before installing the stove.
In any case, the chimney sweep must be informed when the pellet stove is fitted. If the chimney has not been used for some time, it should be checked for cracks, birds’ nests etc. before
being used again.
7
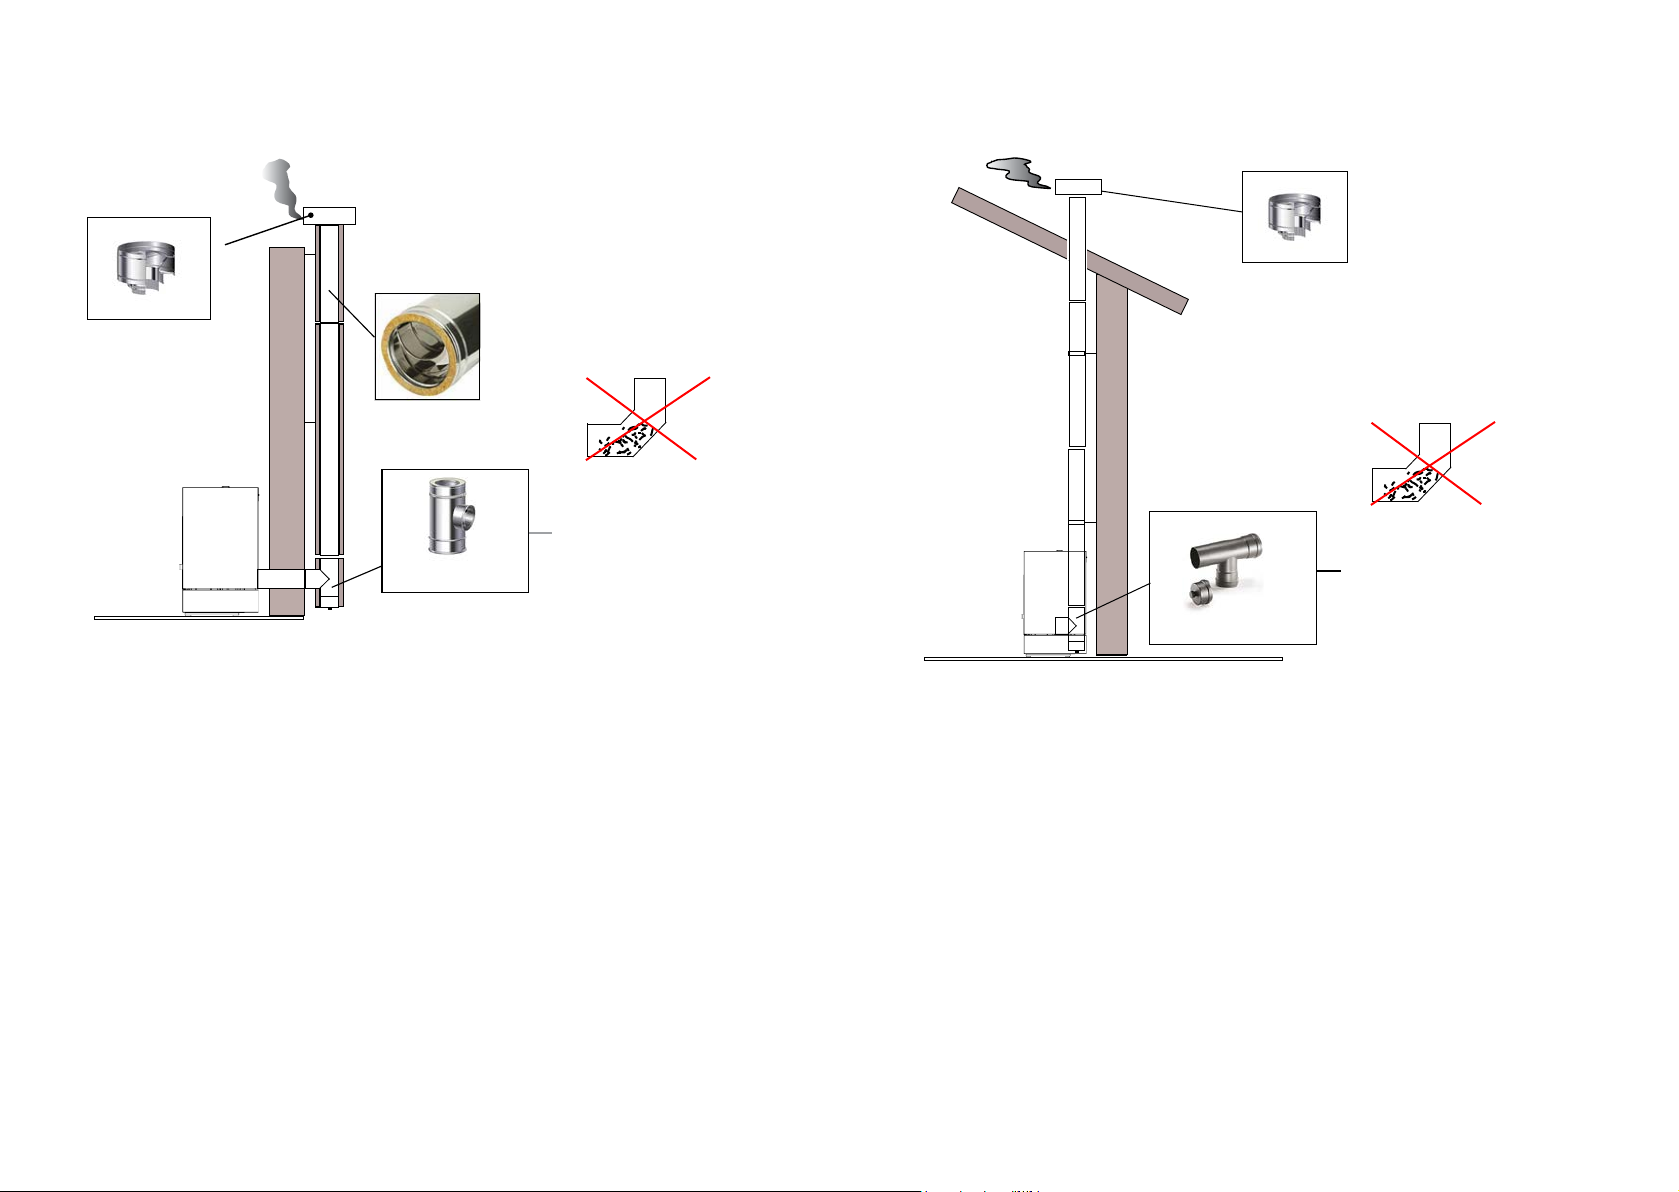
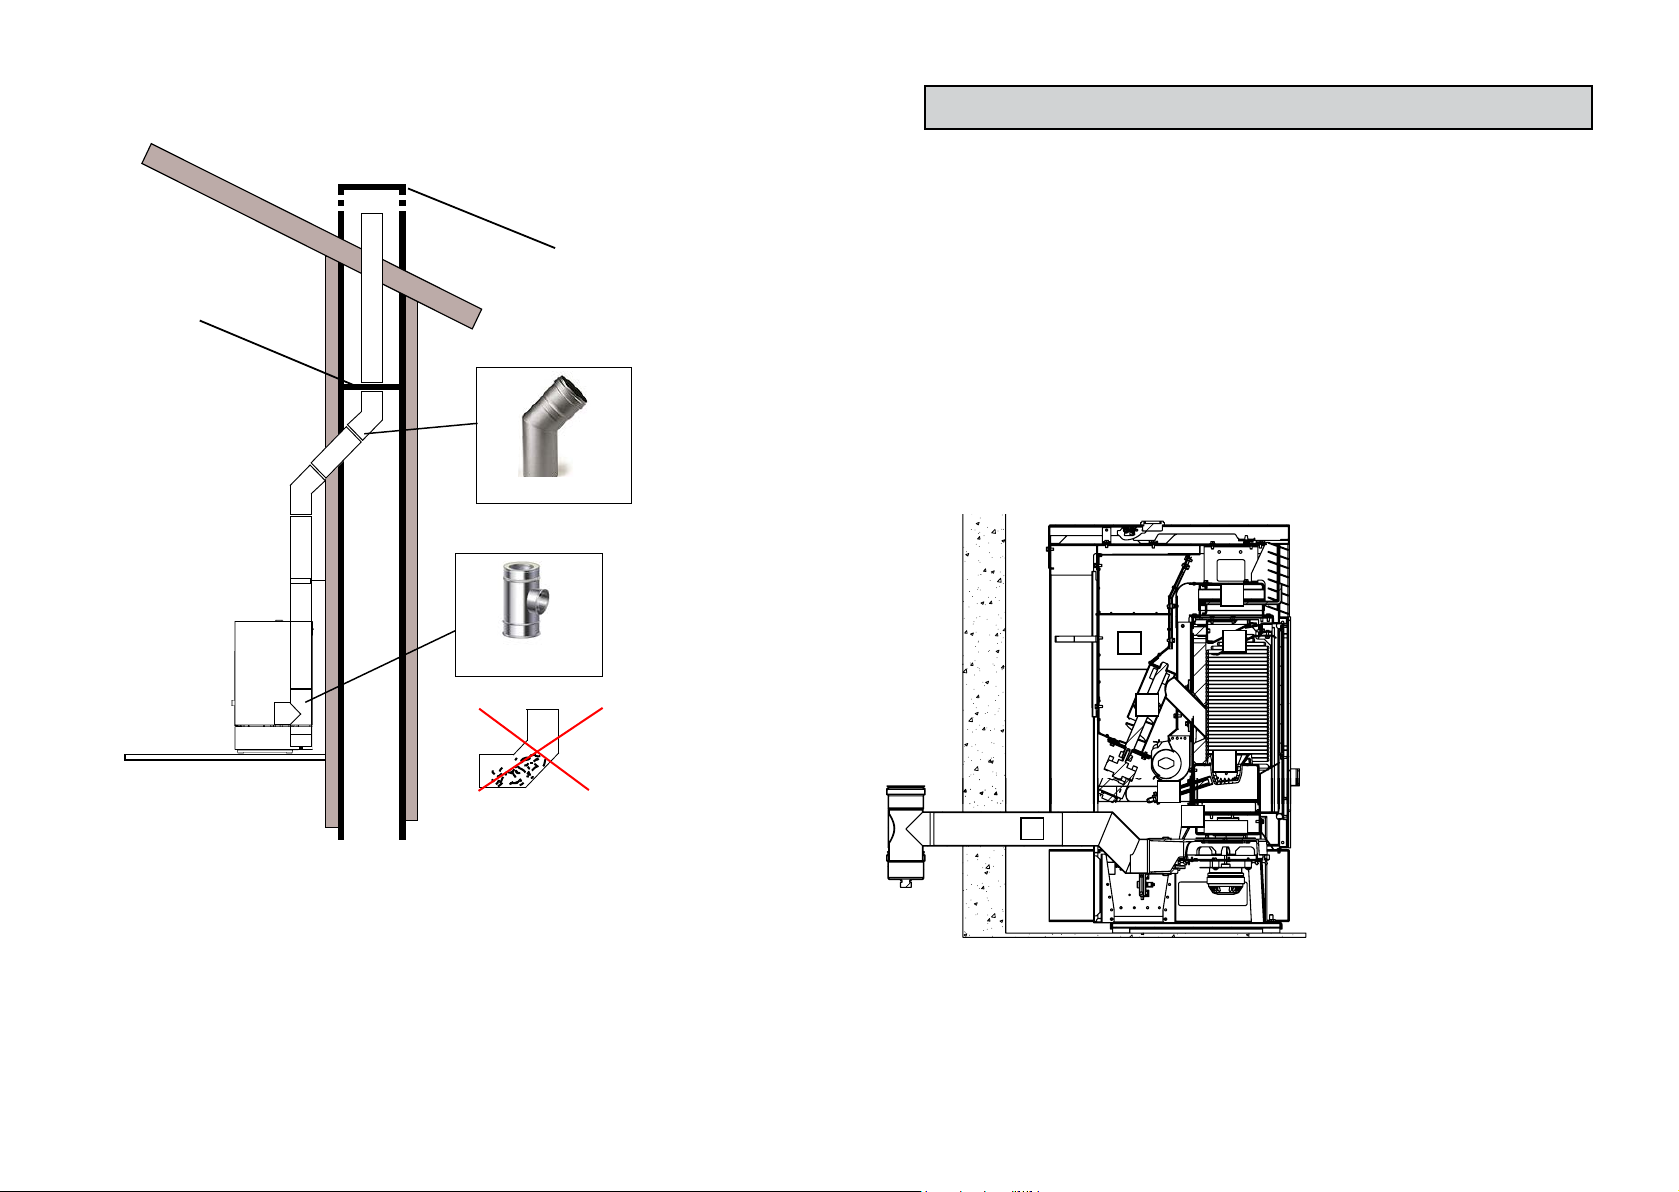
Examples of chimney installations:
A
A
B
B-B
(1 : 10)
A
A
B
B-B
(1 : 10)
Chimney installation, Example 1
Insulated chimney
Cowl
Installing a 90° bend is
not recommended, as
over a short time ash will
hinder smoke flow and
T-piece for condensate
thus create problems for
the draught to the stove.
In this case, the chimney must be insulated, as the whole of the chimney is outside the house. A
T-piece with built-in inspection cover must be fitted at the base of the chimney.
Chimney installation, Example 2
Cowl
Installing a 90° bend is
not recommended, as
over a short time ash will
hinder smoke flow and
T-piece for condensate
thus create problems for
the draught to the stove.
This type of installation requires an insulated chimney on the external part of the chimney. Internally, both insulated and uninsulated chimneys can be used. Note, however, the spacing to
combustible material. If an insulated chimney is used, it and therefore the stove can be placed
closer to a flammable wall.
A T-piece with built-in inspection cover must be fitted at the base of the chimney.
8
9
Chimney installation, Example 3
A
A
B
B-B
(1 : 10)
A
A
B
B-B
(1 : 10)
Chimney installation, Example 4
insulated chimney
Cowl
Insulated chimney
Non-insulated pipes
T-piece for condensate
Installing a 90° bend is
not recommended, as
over a short time ash will
hinder smoke flow and
thus create problems for
T-piece for condensate
the draught to the stove.
With this type of installation, there is no need for an insulated chimney inside the house. An
insulated pipe is required for the external section. A T-piece with built-in inspection cover must
be fitted at the base of the chimney inside the building.
Maks. 2-3 m
3-5% slope
H > 4 mt
T-piece for condensate
H > 1,5 mt
Installing a 90° bend is
not recommended, as
T-piece for condensate
over a short time ash will
hinder smoke flow and
thus create problems for
the draught to the stove.
With this type of installation, there is no need for an insulated chimney inside the house. An
insulated pipe is required for the external section. A T-piece with built-in inspection cover must
be fitted at the base of the chimney inside the house, with another T-piece outside to allow this
stretch to be inspected. Installing a 90° bend as the first piece is not recommended, as over a
short time ash will hinder smoke flow and thus create problems for the draught to the stove.
10
11
A
Chimney installation, Example 5
A
A
B
B-B
(1 : 10)
A
B
Support plate
Cowl
45° bend
T-piece for condensate
2.0 Stoking technique/ Use of your stove
2.1 General
The pellet stove must be installed in a dry environment. As it is controlled by an electronic printed circuit board, combustion is completely automatic and controlled.
The printed circuit board regulates the lighting phases, 5 power steps, extinguishing and thus
guarantee safe function.
The majority of the ash created during combustion of the pellets drops into the ash drawer via
the burn pot used for combustion.
In any event, check the burn pot daily, as not all pellets are of a high standard and can therefore
leave remnants that can be difficult to remove.
The glass is provided with a special self-cleaner. A slight greyish patina is, however, unavoidably
formed on the glass after some hours’ operation.
2.2 Construction of the pellet stove.
1. Pellet auger
2. Ignition tube
5
6
1
7
3. Burn pot
4. Exhaust flue
5. Heat-resisting steel heat exchanger
6. Pellet hopper
7. Smoke deflector
8. Flue gas outlet
Installing a 90° bend is
not recommended, as
over a short time ash will
hinder smoke flow and
thus create problems for
the draught to the stove.
This type of installation does not need an insulated chimney, as part of the flue is fitted internally
in the house, and the other part is inside an existing chimney. Remember to only use approved
duct tubes.
A T-piece with built-in inspection cover must be fitted at the base of the chimney. Installing a 90°
bend as the first piece is not recommended, as over a short time ash will hinder smoke flow and
thus create problems for the draught to the stove. Note here the use of 2 no. 45° bends to ensure
that ash drops into the T-piece with an inspection cover.
12
3
2
8
The drawing above shows the internal parts of a pellet stove. After filling the hopper (7), timber
pellets are transferred by the auger (1) to the burn pot (3). Ignition is initiated by the ignition
tube (2), which heats the air.
4
13
 Loading...