

Page 1
f
g
p
t
k
≈
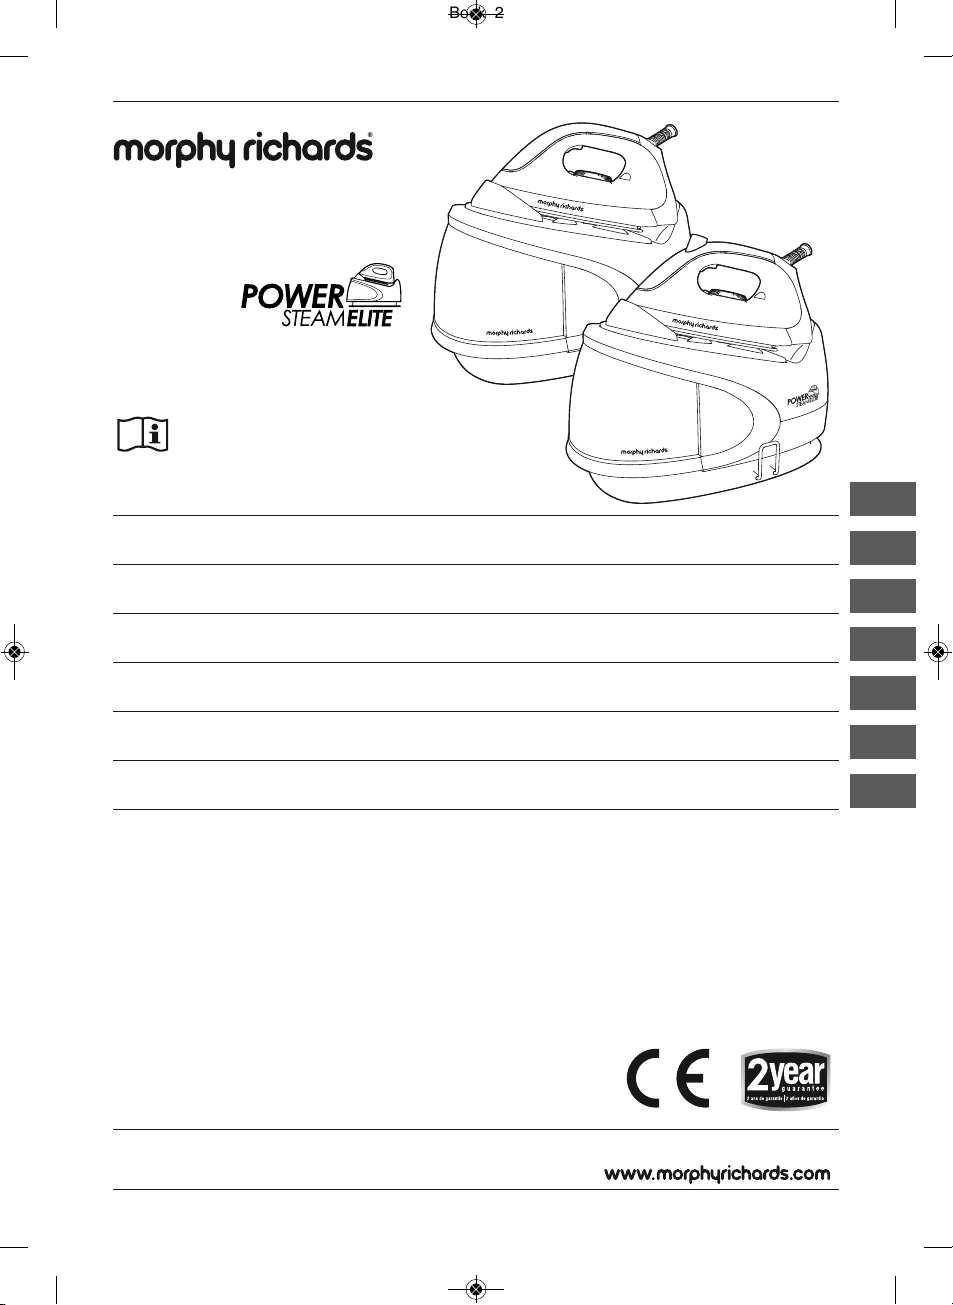
Steam Generator
Please read and keep these instructions
Centrale vapeur
Merci de bien vouloir lire et conserver ces instructions
Gerador de Vapor
Leia e guarde estas instruções
Generatore di vapore
Leggere e conservare le presenti istruzioni
Парогенератор
Внимательно изучите и сохраните данное руководство
Buhar Jeneratörü
Lütfen bu talimatları okuyun ve saklayın
Γεννήτρια ατμού
Διαβάστε και φυλάξτε αυτές τις οδηγίες
i
RN42221MEE Rev8.qxp_Morphy Richards Instruction Book 23/07/2015 19:38 Page 1
Page 2
2
• This appliance can be used by children aged from 8 years and
above and persons with reduced physical, sensory or mental
capabilities or lack of experience or knowledge if they have been
given supervision or instruction concerning use of the appliance in a
safe way and understand the hazards involved. Children shall not
play with the appliance. Cleaning and user maintenance shall not be
made by children without supervision.
• Keep the steam generator and its cord out of reach of children less
than 8 years of age at all times.
• The steam generator must not be left unattended while it is
connected to the supply mains.
• The plug must be removed from the socket before being filled with
water.
• The steam generator must be used and rested on a stable surface.
• When placing the iron on the steam generator base or on its heel,
ensure that the surface on which the heel or base is placed is
stable.
• The steam generator is not to be used if it has been dropped, if
there are visible signs of damage or it is leaking.
• The filling aperture may be opened during use, due to the design of
the pressurised system.
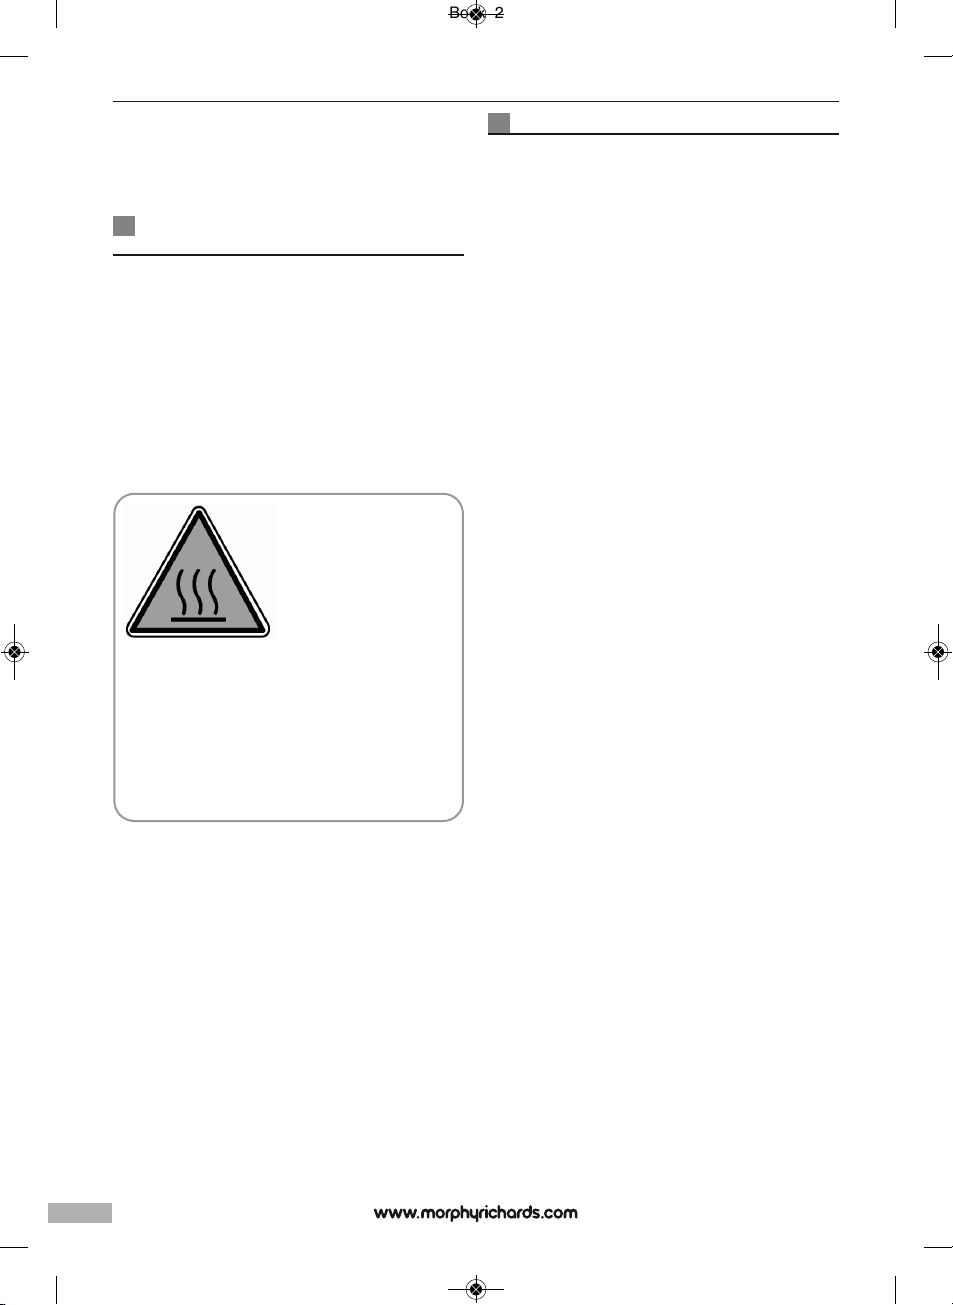
g
WARNING: Burns can occur from touching hot metal, hot
water or steam.
• WARNING: To avoid electric shock, do not immerse appliance
in water / liquid.
Electrical requirements and mains cable
• Check that the voltage on the rating plate of your appliance
corresponds with your house electricity supply which must be
A.C. (Alternating current).
• Do not operate with a damaged supply cord or grommet, it must
be replaced by the manufacturer, its service agent or similarly
qualified person in order to avoid a hazard.
• Do not let the mains lead come into contact with the hot
soleplate of the iron.
PLEASE READ ALL INSTRUCTIONS AND KEEP
FOR REFERENCE
CAUTION!
HOT SURFACE
PLEASE BE AWARE
OF HOT SURFACES
HANDLE WITH CARE
Treating scalds
• Run cold water over the affected areaimmediately.
• Do not stop to remove clothing.
• Seek medical advice quickly.
RN42221MEE Rev8.qxp_Morphy Richards Instruction Book 23/07/2015 19:38 Page 2
Page 3
3
f
g
p
t
k
i
≈
2
3
4
5
6
7
8
9
10
11
12
15
13
14
1
17
18
19
20
21
22
16
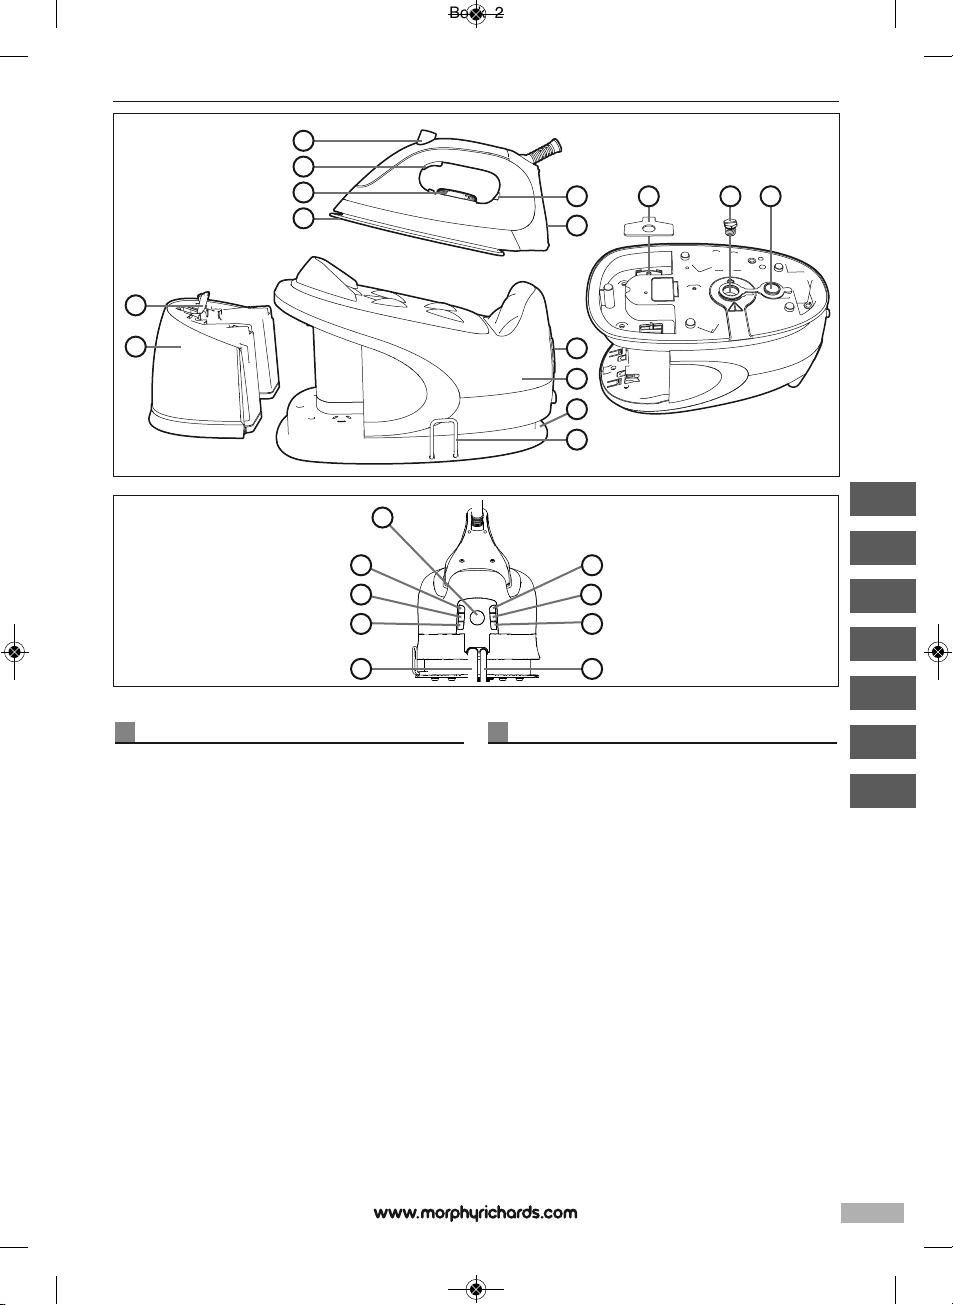
Low steam level button
Medium steam level button
High steam level button
On/Off button
Power indicator light
Low water level indicator light
Descaling indicator light
24
Power cord
23
Steam supply cord
Steam generator overview
(1) Steam boost button (certain models only)
(2) Steam trigger
(3) Temperature dial
(4) Soleplate
(5) Temperature indicator light
(6) Iron
(7) Filling cap
(8) Detachable water tank
(9) Control panel (see below)
(10) Base unit
(11) Cord storage groove
(12) Cord clamp
(13) Boiler key
(14) Boiler screw
(15) Boiler cap
Control panel (8) overview
On/Off button (16) and Power indicator light (17)
Connect to a mains outlet and press the On/Off Button (16).
The power indicator light (17) will illuminate and the low steam
level button (20) will flash. To turn off, press and hold the On/Off
Button (16) for 3 seconds. All indicator lights will go out.
Low water level indicator light (18)
If the water level is too low, the low water level indicator light
(18) will illuminate. See ‘Filling’.
Descaling indicator light (19)
If the boiler requires descaling, the descaling indicator light (19)
will illuminate. If this happens, see ‘Cleaning the boiler’.
Steam level buttons (Low 20 / Med 21 / High 22)
Press the relevant button to select your desired steam level:
low (20), medium (21) or high (22). See ‘Using the Steam
Generator for steam ironing’.
RN42221MEE Rev8.qxp_Morphy Richards Instruction Book 23/07/2015 19:38 Page 3
Page 4
4
2
4
2
1
3
1
5
6
7
2 1
8
9
RN42221MEE Rev8.qxp_Morphy Richards Instruction Book 23/07/2015 19:38 Page 4
Page 5
5
p
t
k
i
≈
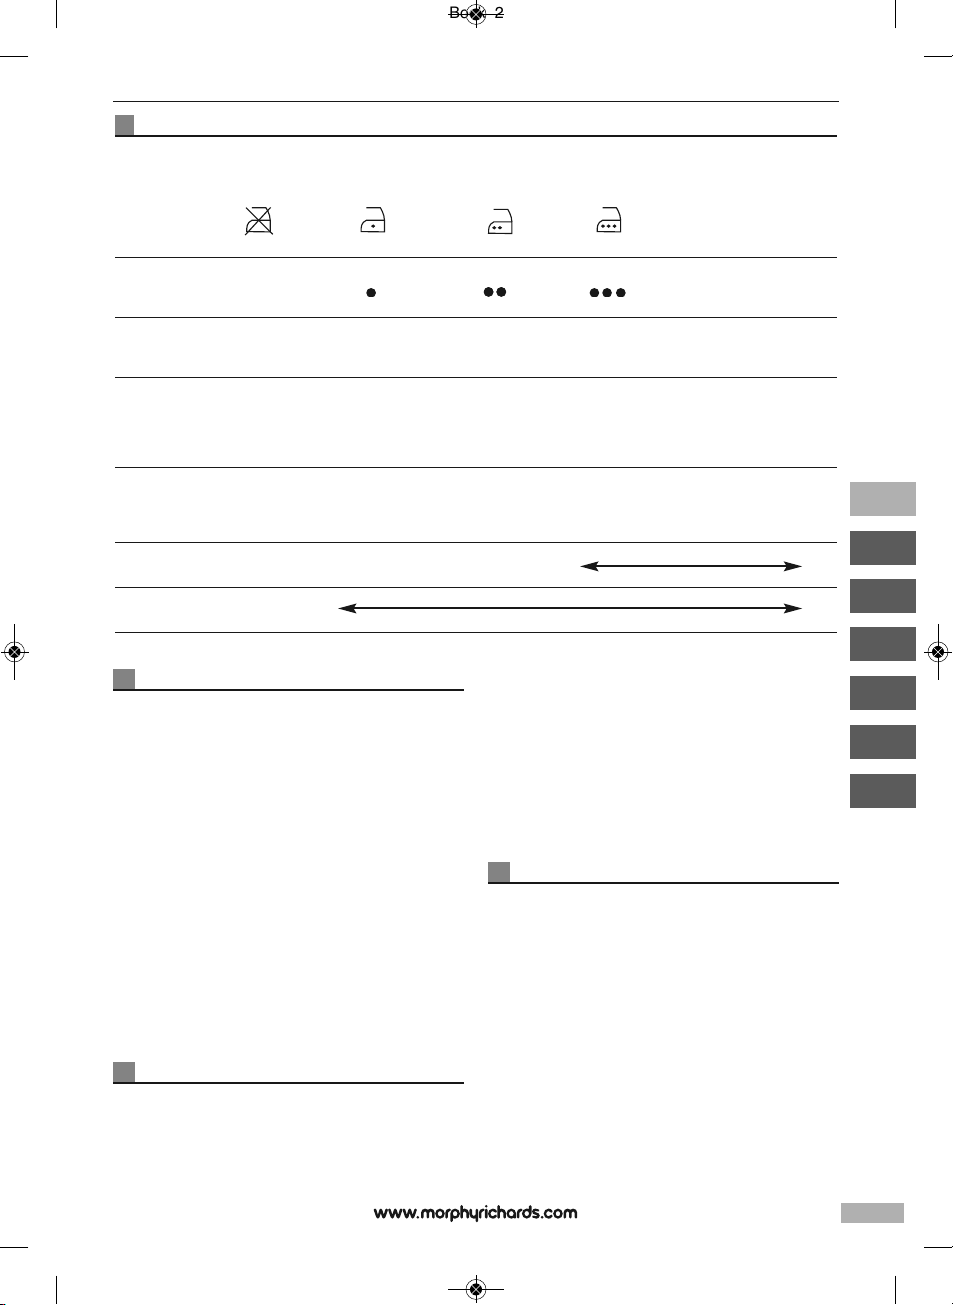
Temperature guide
Heat setting markings on the adjustable control dial of all Morphy Richards irons match those of the International Textile Care Labelling
Code.
(120˚C Max) Cool (160˚C Max) Warm (210˚C Max) Hot MAX setting
Symbol
Control dial Do not
positions iron at all
Steam level
setting Low Medium/High High
Fabric Nylon, Acetates Wool, Polyester Cotton, Linen
synthetic fabrics mixtures Rayon, Rayon
mixtures
Ironing Iron on wrong side Fabrics requiring this
if moisture required setting usually require
use damp cloth steam pressing
(Not Acetate)
Steaming
Without Steam
Using the Steam Generator for steam ironing
1
If steam ironing, remove the detachable water tank (8), lift the
filling cap (7), and fill with water to the max fill line. Replace the
water tank.
2
Plug the appliance into a mains outlet and press the On/Off
button (16) to activate the unit.
3
Turn the temperature dial (3) to suit the garment (see Temperature
guide). The temperature indicator light (5) illuminates until the
temperature is reached. Begin ironing when the temperature
indicator light (5) goes out. If you turn the temperature dial (3)
down, wait until the temperature indicator light (5) illuminates and
then goes off again.
4
Press the relevant steam button (20/21/22) to select desired steam
level. The steam button will stop flashing and illuminate constantly
when the steam level is reached.
For a strong, continuous flow of steam during ironing, press
and hold the steam trigger (2) to deliver steam through the
soleplate.
WARNING: The steam supply cord (23) will get hot during use.
Steam boost button
(certain models only)
5
The steam boost function is ideal for relaxing the fibres of
tougher fabrics (like jeans and linen) and getting rid of those
stubborn, hard to reach creases.
To produce a quick, powerful shot of steam during ironing,
simply press and release the steam boost button (1).
NOTE: After using the steam boost function, your steam
generator iron will require up to 5 seconds to reheat before it
can produce a second boost of steam. If you require a high
level of constant steam, choose the appropriate steam level and
use the steam trigger (2) as instructed above.
Do not combine the two steam functions. Using the two
buttons together will interrupt the flow of steam and may result
in the constant steam cutting out completely. For optimum
steam output, use each steam function separately and as
detailed above.
Filling
6
• IN HARD WATER AREAS, WE RECOMMEND A MIX OF 50%
TAP WATER AND 50% DISTILLED OR DEMINERALISED
WATER.
• Never use battery topping up fluid or water containing any
substances like starch, sugar, fragrant additives or defrosted
water from a refrigerator.
Re-filling during use
• If the water level is too low, the low water level indicator light (18)
will illuminate, a buzzer will sound, and the unit will not produce
steam. If this happens, disconnect the water tank and refill with
water.
g
f
RN42221MEE Rev8.qxp_Morphy Richards Instruction Book 23/07/2015 19:38 Page 5
Page 6

6
Features
Dry ironing
To use your steam generator as a dry iron only, follow steps 2
and 3 of ‘Using the Steam Generator for steam ironing’ on page
5. You do not need to put water in the tank or select a steam
level. Press either the steam boost button (1) (certain models
only) or the steam trigger (2) at least once every 10 minutes, or
the product will automatically turn off.
Auto shut-off (certain models only)
If either the steam boost button (1) (certain models only) or the
steam trigger (2) is unused for 10 minutes, the product will
automatically turn off, both for safety and to save energy.
To restart, press the On/Off button (16) (see step 2 of ‘Using the
Steam Generator for steam ironing’ on page 5) and wait for the
temperature to rise again.
Steam function
During steaming, small amounts of water may be ejected from
the soleplate. This is normal and can be avoided by using the
steam for short amounts of time and only when the iron is at
the correct temperature (the temperature indicator light (5) on
the iron goes out when ready).
Sudden jolts of the boiler unit can also cause water droplets on
the soleplate; therefore, do not move the base unit during
ironing. We recommend for first time ironing that you iron over
an old towel.
NOTE: The product may occasionally produce a pumping sound
during steam ironing. This is normal and is caused by water
being pumped through the steam generator.
Vertical steam
7
Vertical steam is useful for removing creases from hanging
clothes, curtains, wall hangings, etc. Hold the iron between
1cm and 2cm away from the item and press either the steam
boost button (1) (certain models only) or the steam trigger (2).
WARNING: Do not use the vertical steam feature on clothes
that are being worn.
Before use
• Remove any protective cover from the soleplate (3) and the base
unit, if any.
• Unwind and straighten the power cord (23) and steam supply cord
(22).
• Textiles and clothes should carry ironing instructions. If not, follow
the temperature guide on page 4, but test the temperature by
ironing the hem of the garment or similar discreet area first.
• It is advised to begin with ‘cool’ fabrics and work up to higher
settings. An iron heats up quicker than it cools down so you’ll
save time and electricity.
• If you turn the temperature dial down from a hot setting to a
cooler setting, wait until the iron temperature has stabilised before
you continue ironing.
NOTE: Hold the base with both hands when handling and moving
the unit, as the water tank is detachable.
Maintenance
Cleaning the boiler
When the boiler requires descaling, the descaling indicator light
(19) will illuminate. When this happens, the boiler must be
manually rinsed out with clean water until all the scale is removed.
The indicator light will go out only after the scale has been
removed.
WARNING: Never remove the boiler screw (14) when the
steam generator is hot.
1 Unplug the appliance from the mains outlet and leave to cool for
two hours.
2 Remove the detachable water tank (8) and rest the iron (6) on its
heel on a firm surface next to a sink.
3 Hold the base unit (10) firmly with both hands and shake well.
4 Turn the base unit (10) upside-down and pull back the boiler cap
(15). Unscrew the boiler screw (14) with the boiler key (13), which
is attached to the underside of the base unit. If the screw is a bit
too tight to undo, try using a large screwdriver or a socket and
wrench set for more leverage.
5 Hold the base unit (10) over the sink, turn the unit the correct way
up to empty all water and loose scale from the boiler into the sink.
8
6 Using clean water, refill and empty the boiler repeatedly until all
scale has been rinsed out.
7 Replace the boiler screw, ensuring it is tightened fully. Replace the
boiler cap, boiler key, water tank and iron to the base unit.
WARNING: Ensure the boiler is empty before replacing the
boiler screw (14).
8 The descaling indicator light (19) will extinguish the next time you
use the product. Please wait for up to one minute whilst it pumps
water and registers that the boiler has been cleaned.
To clean a coated soleplate
Do not use scouring powder or solution as this could cause
damage to the coating.
If any man-made fibres fuse to the soleplate (4), set the iron at the
MAX position and pass it over a clean piece of cotton to draw the
deposit off the surface.
To clean the exterior
Allow the unit to cool and wipe over with a damp cloth and mild
detergent, then wipe dry.
Emptying and storing
9
Allow the appliance to cool. Empty the water from the water
tank (8) by removing it from the base unit (10) and opening the
filling cap (7). Once the water tank is empty, re-attach it to the
base unit.
If the steam generator is not going to be used for a long time,
also empty the boiler as instructed, see ‘Cleaning the boiler’.
To store, pull the cord clamp (12) outwards. Wrap the power
cord (24) and steam supply cord (23) around the base unit in
the cord storage groove (11). Secure the cord in place with the
cord clamp (12). Avoid kinking of cables, particularly at the exit
from the base unit.
RN42221MEE Rev8.qxp_Morphy Richards Instruction Book 23/07/2015 19:38 Page 6
Page 7
7
Contact us
Helpline
If you are having a problem with your appliance, please call our
Helpline, as we are more likely to be able to help than the store
you purchased the item from. Please have the product name,
model number and serial number to hand when you call to help
us deal with your enquiry quicker.
UK Helpline: 0844 871 0960
IRE Helpline: 1800 409 119
Spares: 0844 873 0726
Talk To Us
If you have any questions or comments, or want some great
tips to help you get the most out of your products, join us
online:
Blog: www.homeofthehouseproud.com
Facebook: www.facebook.com/morphyrichardsuk
Twitter: www.twitter.com/loveyourmorphy
Website: www.morphyrichards.com
THIS SECTION IS ONLY APPLICABLE FOR
CUSTOMERS IN UK AND IRELAND
REGISTERING YOUR TWO YEAR GUARANTEE
Your standard one year guarantee is extended for an additional
12 months when you register the product within 28 days of
purchase with Morphy Richards. If you do not register the
product with Morphy Richards within 28 days, your product is
guaranteed for 1 year. To validate your 2 year guarantee register
with us online at www.morphyrichards.co.uk
N.B. Each qualifying product needs to be registered with
Morphy Richards individually. Please refer to the one year
guarantee for more information.
YOUR ONE YEAR GUARANTEE
It is important to retain the retailer’s receipt as proof of
purchase. Staple your receipt to this back cover for future
reference. Please quote the following information if the product
develops a fault. These numbers can be found on the base of
the product.
Model no.
Serial no.
All Morphy Richards products are individually tested before
leaving the factory. In the unlikely event of any appliance
proving to be faulty within 28 days of purchase, it should be
returned to the place of purchase for it to be replaced. If the
fault develops after 28 days and within 12 months of original
purchase, you should contact the Helpline number quoting
Model number and Serial number on the product, or write to
Morphy Richards at the address shown. You may be asked to
return a copy of proof of purchase. Subject to the exclusions
set out below (see Exclusions), the faulty appliance will then be
repaired or replaced and dispatched usually within 7 working
days of receipt. If, for any reason, this item is replaced during
the 1 year guarantee period, the guarantee on the new item will
be calculated from original purchase date. Therefore it is vital to
retain your original till receipt or invoice to indicate the date of
initial purchase. To qualify for the 1 year guarantee, the
appliance must have been used according to the instructions
supplied. For example, crumb trays should have been emptied
regularly.
EXCLUSIONS
Morphy Richards shall not be liable to replace or repair the
goods under the terms of the guarantee where:
1 The fault has been caused or is attributable to accidental use,
misuse, negligent use or used contrary to the manufacturer’s
recommendations or where the fault has been caused by power
surges or damage caused in transit.
2 The appliance has been used on a voltage supply other than that
stamped on the products.
3 Repairs have been attempted by persons other than our service
staff (or authorised dealer).
4 The appliance has been used for hire purposes or non domestic
use.
5 The appliance is second hand.
6 Morphy Richards are not liable to carry out any type of servicing
work, under the guarantee.
7 Plastic filters for all Morphy Richards kettles and coffee makers
are not covered by the guarantee.
8 Batteries and damage from leakage are not covered by the
guarantee.
9 The filters have not be cleaned and replaced as instructed.
This guarantee does not confer any rights other than those
expressly set out above and does not cover any claims for
consequential loss or damage. This guarantee is offered as an
additional benefit and does not affect your statutory rights as a
consumer.
YOUR INTERNATIONAL TWO YEAR
GUARANTEE
This appliance is covered by two-year repair or replacement
warranty.
It is important to retain the retailers receipt as proof of
purchase. Staple your receipt to this back cover for future
reference.
Please quote the following information if the product develops a
fault. These numbers can be found on the base of the product.
Model no.
Serial no.
All Morphy Richards products are individually tested before
leaving the factory. In the unlikely event of any appliance
proving to be faulty within 28 days of purchase it should be
returned to the place of purchase for it to be replaced.
If the fault develops after 28 days and within 24 months of
original purchase, you should contact your local distributor
quoting Model number and Serial number on the product, or
write to your local distributor at the addresses shown.
You will be asked to return the product (in secure, adequate
packaging) to the address below along with a copy of proof of
g
RN42221MEE Rev8.qxp_Morphy Richards Instruction Book 23/07/2015 19:38 Page 7
Page 8
purchase.
Subject to the exclusions set out below (1-9) the faulty
appliance will then be repaired or replaced and dispatched
usually within 7 working days of receipt.
If for any reason this item is replaced during the 2-year
guarantee period, the guarantee on the new item will be
calculated from original purchase date. Therefore it is vital to
retain your original till receipt or invoice to indicate the date of
initial purchase.
To qualify for the 2-year guarantee the appliance must have
been used according to the manufacturers instructions. For
example, appliances must have been descaled and filters must
have been kept clean as instructed.
The local distributor shall not be liable to replace or repair the
goods under the terms of the guarantee where:
1 The fault has been caused or is attributable to accidental
use, misuse, negligent use or used contrary to the manufacturers
recommendations or where the fault has been caused by power
surges or damage caused in transit.
2 The appliance has been used on a voltage supply other than that
stamped on the products.
3 Repairs have been attempted by persons other than our service
staff (or authorised dealer).
4 Where the appliance has been used for hire purposes or non
domestic use.
5 The appliance is second hand.
6 The local distributor are not liable to carry out any type of
servicing work, under the guarantee.
7 The guarantee excludes consumables such as bags, filters and
glass carafes.
8 Batteries and damage from leakage are not covered by the
guarantee.
9 The filters have not be cleaned and replaced as instructed.
This guarantee does not confer any rights other than those
expressly set out above and does not cover any claims for
consequential loss or damage. This guarantee is offered as an
additional benefit and does not affect your statutory rights as a
consumer.
AUSTRALIAN WARRANTY
This appliance is guaranteed for 2 years against faulty material,
components and workmanship.
This warranty is in addition and does not affect your statutory rights.
Proof of purchase must be produced for any warranty benefit.
In the unlikely event of any appliance proving to be faulty, securely
pack and return the item to the place of purchase accompanied by
the original receipt or invoice.
Our goods come with guarantees that cannot be excluded under
the Australian Consumer Law. You are entitled to a replacement or
refund for a major failure and for compensation for any other
reasonably foreseeable loss or damage. You are also entitled to
have the goods repaired or replaced if the goods fail to be of
acceptable quality and the failure does not amount to a major
failure.
NOT COVERED BY THIS WARRANTY
(Australian only)
• If the appliance has not been used in accordance with the
manufacturers’ recommendations or Instructions.
• If the fault is deemed to be caused by abuse, misuse, neglect,
modifications or in proper use and or care
Eg: Kettles: Excessive build up of scale.
Toasters: Excessive build up of crumbs or foreign matter etc.
• Connection to incorrect voltage to that stamped on the product.
• Unauthorised repairs.
• Appliance used other than for domestic purposes.
• Excluding bags, filters, glass, carafes, and cutting blades.
• Freight and insurance costs.
If for any reason this item is replaced during the 2 year
guarantee period, the guarantee on the new item will be
calculated from original purchase date. Therefore it is vital to
retain your original receipt or invoice to indicate the date of
original purchase.
Morphy Richards’s policy is to continually improve quality
design and product quality. The company therefore reserves the
right to change any specifications or to carry out modifications
as deemed worthy at any time.
The Australian supplier ASKO Appliances reserves the right to
repair, modify, exchange or replace the faulty appliance with the
same or similar model or product of equivalent value.
8
RN42221MEE Rev8.qxp_Morphy Richards Instruction Book 23/07/2015 19:38 Page 8
Page 9
9
• Cet appareil peut être utilisé par des enfants âgés d’au moins 8
ans et par des personnes ayant des capacités physiques,
sensorielles ou mentales réduites ou un manque d’expérience
et de connaissance, s’ils sont surveillés ou s’ils ont reçu des
instructions concernant l’utilisation en toute sécurité de
l’appareil et comprennent les dangers que cela implique. Les
enfants ne doivent pas jouer avec l’appareil. Le nettoyage et
l’entretien courant ne doivent pas être effectués par des
enfants sans surveillance.
• Tenez la centrale vapeur et son cordon hors de portée des
enfants de moins de 8 ans.
• La centrale vapeur ne doit pas être laissée sans surveillance
lorsqu’elle est raccordée à l’alimentation secteur.
• Débranchez la centrale vapeur avant de la remplir d’eau.
• La centrale vapeur doit être utilisée et posée sur une surface
stable.
• Lorsque vous posez le fer sur la base de la centrale vapeur ou
sur son talon, vérifiez que la surface sur laquelle il est posé est
stable.
• N’utilisez pas la centrale vapeur si elle a subi un choc, si elle
présente des dégâts visibles ou si elle fuit.
• L’orifice de remplissage ne doit pas être ouvert en cours
d’utilisation en raison de la conception du système sous
pression.
f
f
g
RN42221MEE Rev8.qxp_Morphy Richards Instruction Book 23/07/2015 19:38 Page 9
Page 10
10
DANGER : Vous risquez de vous brûler si vous touchez des
pièces métalliques chaudes, de l’eau chaude ou de la vapeur
chaude.
• DANGER : Pour éviter tout choc électrique, ne plongez pas
l’appareil dans l’eau ni dans tout autre liquide.
Alimentation électrique et cordon
d’alimentation
• Vérifiez que la tension indiquée sur la plaque signalétique de
l’appareil correspond à l’alimentation électrique de votre domicile,
qui doit être en courant alternatif (CA).
• N’utilisez pas l’appareil si le cordon d’alimentation est
endommagé. Il doit être remplacé par le fabricant, son agent de
service ou une personne qualifiée afin d’éviter tout risque.
• Ne laissez pas le cordon d’alimentation entrer en contact avec la
semelle chaude du fer.
VEUILLEZ LIRE TOUTES LES INSTRUCTIONS ET LES
CONSERVER POUR POUVOIR LES CONSULTER
ULTERIEUREMENT
Description de la centrale vapeur
(1) Bouton de jet de vapeur (uniquement sur certains modèles)
(2) Bouton vapeur
(3) Bouton du thermostat
(4) Semelle
(5) Voyant indicateur de température
(6) Fer
(7) Bouchon de remplissage
(8) Réservoir d’eau amovible
(9) Panneau de commande (voir ci-dessous)
(10) Socle
(11) Glissière de rangement du cordon
(12) Clip de fixation du cordon
(13) Clé de la centrale vapeur
(14) Vis de la centrale vapeur
(15) Bouchon de la centrale vapeur
DANGER !
SURFACE CHAUDE
ATTENTION
SURFACES CHAUDES
MANIPULER AVEC
PRÉCAUTION
Traitement des brûlures
• Faites couler immédiatement de l’eau froide sur la zone touchée.
• Ne prenez pas le temps de retirer les vêtements.
• Consultez un médecin rapidement.
RN42221MEE Rev8.qxp_Morphy Richards Instruction Book 23/07/2015 19:38 Page 10
Page 11

11
Description du panneau de commande (8)
Bouton Marche/Arrêt (16) et voyant d’alimentation (17)
Branchez-la sur une prise d’alimentation secteur et appuyez sur
le bouton Marche/Arrêt (16). Le voyant d’alimentation (17)
s’allume et le bouton de niveau de vapeur bas (20) clignote.
Pour éteindre, maintenez appuyé le bouton Marche/Arrêt (16)
pendant 3 secondes. Tous les voyants indicateurs s’éteignent.
Voyant indicateur de niveau d’eau bas (18)
Si le niveau d’eau est trop bas, le voyant indicateur de niveau
d’eau bas (18) s’allume. Voir « Remplissage ».
Voyant indicateur de détartrage (19)
Si la centrale vapeur nécessite un détartrage, le voyant
indicateur de détartrage (19) s’allume. Si cela arrive, voir
« Nettoyage de la centrale vapeur ».
Boutons de niveau de vapeur (Bas 20 / Moyen 21 / Haut 22)
Appuyez sur le bouton approprié pour sélectionner votre niveau
de vapeur souhaité : bas (20), moyen (21) ou haut (22). Voir
« Utilisation de la centrale vapeur pour le repassage à la
vapeur ».
f
Guide des températures
Les réglages du thermostat de tous les fers à repasser Morphy Richards correspondent à ceux du code international des étiquettes
d’entretien des textiles.
(120˚C Max) Froid (160˚C Max) Chaud (210˚C Max) Très chaud Réglage MAX
Symbole
Positions du Ne pas
thermostat repasser
Réglage du
niveau de vapeur Bas Moyen/Haut Haut
Tissu Nylon, acétates Laine, mélanges de Coton, lin
tissus synthétiques polyester rayonne, mélanges
avec rayonne
Repassage Repasser à l’envers Les tissus à repasser sur
si une humidification est nécessaire cette position exigent généralement
utiliser une pattemouille un repassage à la vapeur
(pas les acétates).
Vapeur
Sans vapeur
Utilisation de la centrale vapeur pour le
repassage à la vapeur
1
En cas de repassage à la vapeur, retirez le réservoir d’eau
amovible (8), levez le bouchon de remplissage (7) et remplissez
d’eau jusqu’à la ligne max. Replacez le réservoir d’eau.
2
Branchez-la sur une prise d’alimentation secteur et appuyez sur
le bouton Marche/Arrêt (16) pour activer l’appareil.
3
Réglez le bouton du thermostat (3) en fonction du tissu (voir le
Guide des températures). Le voyant indicateur de température
s’allume tant que la température n’est pas atteinte Commencez le
repassage avant que le voyant indicateur de température (5) ne
s’éteigne. Baissez le thermostat (3), attendez que le voyant de
température (5) s’allume et s’éteigne à nouveau.
4
Appuyez sur le bouton de vapeur approprié (20/21/22) pour
sélectionner le niveau de vapeur souhaité. Le bouton de vapeur
s’arrête de clignoter et s’allume en continu lorsque le niveau de
vapeur est atteint.
Pour obtenir un fort débit de vapeur continu pendant le
repassage, maintenez appuyé le bouton vapeur (2) pour libérer
la vapeur par la semelle.
DANGER : Le cordon d’alimentation vapeur (23) chauffe
pendant le repassage.
Bouton de jet de vapeur
(uniquement sur certains
modèles)
5
La fonction jet de vapeur est idéale pour détendre les fibres de
tissus plus résistants (comme les jeans et le lin) et se
débarrasser de ces faux plis tenaces.
Pour obtenir un jet de vapeur rapide et puissant pendant le
repassage, appuyez et relâchez simplement le bouton de jet de
vapeur (1).
RN42221MEE Rev8.qxp_Morphy Richards Instruction Book 23/07/2015 19:38 Page 11
Page 12
12
REMARQUE : après avoir utilisé la fonction de jet de vapeur, le
fer de votre centrale vapeur nécessitera jusqu’à 5 secondes
pour chauffer à nouveau avant de déclencher un second jet de
vapeur. Si vous souhaitez un niveau élevé de vapeur continue,
choisissez le niveau de vapeur approprié et utilisez le bouton
vapeur (2) selon les instructions ci-dessus.
Ne combinez pas les deux fonctions de vapeur. L’utilisation
simultanée des deux boutons interrompra le débit de vapeur et
entraînera un arrêt complet du débit continu. Pour produire un
débit optimal, utilisez séparément chaque fonction de vapeur
comme cela est détaillé ci-dessus.
Remplissage
6
• DANS LES RÉGIONS D’EAU DURE, NOUS RECOMMANDONS
UN MÉLANGE DE 50 % D’EAU DU ROBINET ET 50 % D’EAU
DISTILLÉE OU EAU DÉMINÉRALISÉE.
• N’utilisez jamais de liquide pour batteries ni d’eau contenant
des substances comme de l’amidon, du sucre, des additifs
parfumés, ou encore de l’eau de dégivrage de votre
réfrigérateur.
Reremplissage pendant le repassage
• Si le niveau d’eau est trop bas, alors le voyant indicateur de niveau
d’eau bas (18) s’allumera, un signal sonore sera émis et l’appareil
ne produira pas de vapeur. Si cela arrive, enlevez le réservoir d’eau
et reremplissez-le d’eau.
Caractéristiques
Repassage à sec
Pour utiliser votre centrale vapeur pour le repassage à sec
uniquement, suivez les étapes 2 et 3 de la partie « Utilisation de
la centrale vapeur pour le repassage à la vapeur » à la page 5.
Vous n’avez pas besoin de remplir le réservoir d’eau ou de
sélectionner un niveau de vapeur. Appuyez au moins une fois
toutes les 10 minutes sur le bouton jet de vapeur (1) (sur
certains modèles uniquement) ou sur le bouton de vapeur (2)
sinon l’appareil s’arrêtera automatiquement.
Arrêt automatique (uniquement sur certains modèles)
Si le bouton jet de vapeur (1) (sur certains modèles uniquement)
ou le bouton de vapeur (2) n’est pas utilisé pendant 10 minutes,
l’appareil s’arrêtera automatiquement pour des raisons de
sécurité et d’économie d’énergie.
Pour redémarrer, appuyez sur le bouton Marche/Arrêt (16) (voir
étape 2 de la partie « Utilisation de la centrale vapeur pour le
repassage à la vapeur » à la page 5) et attendez que la
température monte à nouveau.
Fonction vapeur
Pendant l’utilisation de la vapeur, de petites gouttes d’eau
peuvent jaillir de la semelle. Ceci est normal. Pour éviter que ce
problème ne se produise, utilisez la vapeur pendant de courtes
périodes, et uniquement lorsque le fer a atteint la température
correcte (le voyant indicateur de température (5) sur le fer
s’éteint lorsque ce dernier est prêt).
Si vous secouez brusquement la centrale, des gouttelettes
apparaîtront au niveau de la semelle du fer. Il est donc
important de ne pas déplacer la centrale pendant que vous
repassez. Lorsque vous utilisez le fer pour la première fois,
nous vous recommandons de repasser une vieille serviette
éponge.
REMARQUE : l’appareil peut parfois émettre un son de
pompage pendant le repassage à la vapeur. Ceci est normal et
dû au pompage de l’eau par la centrale vapeur.
Vapeur verticale
7
La vapeur verticale est utile pour défroisser des vêtements
suspendus, des rideaux, des tentures murales etc. Tenez le fer à
une distance de 1 cm à 2 cm du tissu et appuyez sur le bouton
jet de vapeur (1) (sur certains modèles uniquement) ou le
bouton vapeur (2).
DANGER : N’utilisez jamais la fonction « vapeur verticale » sur
des vêtements que quelqu’un est en train de porter.
Avant la première utilisation
• Enlevez le film de protection qui pourrait se trouver sur la semelle
(3) du fer et sur le socle.
• Déroulez et redressez le cordon d’alimentation (23) et le cordon
d’alimentation vapeur (22).
• Les textiles et vêtements doit comporter des instructions de
repassage. Si ce n’est pas le cas, utilisez le guide des
températures à la page 4, mais vérifiez la température en
repassant d’abord l’intérieur de l’ourlet du vêtement ou une autre
zone discrète similaire.
• Il est recommandé de commencer par repasser les tissus
exigeant un fer « doux » avant de passer aux tissus exigeant un
fer plus chaud. Comme un fer à repasser chauffe plus vite qu’il ne
refroidit, vous gagnerez ainsi du temps et vous économiserez de
l’électricité.
• Si vous tournez le thermostat pour passer d’une température plus
élevée à une température moins élevée, attendez que la
température du fer se soit stabilisée avant de continuer votre
repassage.
REMARQUE : Tenez le socle à deux mains lorsque vous
manipulez et déplacez la centrale vapeur car le réservoir d’eau est
amovible.
Entretien
Nettoyage de la centrale vapeur
Lorsque la centrale vapeur nécessite un détartrage, le voyant
indicateur de détartrage (19) s’allume. Si cela arrive, la centrale
vapeur doit être rincée à l’eau propre à la main jusqu’à ce que
tout le tartre soit éliminé. Le voyant indicateur ne s’éteindra
qu’après l’élimination du tartre.
DANGER : n’enlevez jamais la vis de la centrale vapeur (14)
lorsque celle-ci est chaude.
1 Débranchez la centrale vapeur de la prise d’alimentation secteur
et laissez-la refroidir pendant deux heures.
2 Enlevez le réservoir d’eau amovible (8) et posez le fer (6) sur son
talon sur une surface solide à proximité d’un évier.
3 Tenez fermement le socle (10) à deux mains et secouez-le bien.
4 Retournez le socle (10) et retirez le bouchon de la centrale vapeur
(15). Dévissez la vis de la centrale vapeur (14) avec le clé (13) qui
est fixée au dessous du socle. Si la vis est un peu trop serrée,
RN42221MEE Rev8.qxp_Morphy Richards Instruction Book 23/07/2015 19:38 Page 12
Page 13

13
utilisez un grand tournevis ou un ensemble de clés et douilles
pour avoir plus de prise.
5 Tenez le socle (10) au-dessus de l’évier, tournez-le correctement
pour vider toute l’eau et déverser le tartre de la centrale vapeur
dans l’évier.
8
6 Remplissez et videz plusieurs fois la centrale vapeur avec de l’eau
propre jusqu’à ce que tout le tartre soit éliminé.
7 Replacez la vis de la centrale vapeur en vous assurant qu’elle est
complètement serrée. Replacez le bouchon de la centrale vapeur,
la clé, le réservoir d’eau et le fer sur le socle.
DANGER : Assurez-vous que la centrale vapeur est vide avant
de replacer la vis de la centrale vapeur (14).
8 Le voyant indicateur de détartrage (19) s’éteindra la prochaine fois
que vous utiliserez l’appareil. Attendez une minute pendant qu’il
pompe l’eau et indiquez que la centrale vapeur a été nettoyée.
Pour nettoyer une semelle avec revêtement
N’utilisez pas de poudre à récurer ou de solution décapante qui
pourrait endommager le revêtement.
Si des fibres synthétiques ont fondu sur la semelle (4), réglez le fer
sur la position MAX et repassez un morceau de coton propre pour
décoller les fibres de la semelle.
Pour nettoyer l’extérieur
Laissez refroidir le fer et essuyez-le avec un chiffon humide et un
détergent doux, puis séchez-le avec un chiffon sec.
Vidange et rangement
9
Laissez l’appareil refroidir. Videz le réservoir d’eau (8) en
l’enlevant du socle (10) et en ouvrant le bouchon de
remplissage (7). Une fois le réservoir d’eau vidé, fixez-le à
nouveau sur le socle.
Si vous ne devez pas utiliser la centrale vapeur pendant un
certain temps, videz-la également en suivant les instructions du
« Nettoyage de la centrale vapeur ».
Pour le rangement, tirez le clip de fixation du cordon (12) vers
l’extérieur. Enroulez le cordon d’alimentation (24) et le cordon
d’alimentation vapeur (23) autour du socle dans la glissière (11)
prévue à cet effet. Attachez bien le cordon à l’aide du clip de
fixation du cordon (12). Évitez d’entortiller les cordons,
notamment à la sortie du socle.
Nous contacter
Service d’assistance
Si vous rencontrez un problème avec votre appareil, veuillez
appeler notre service d’assistance. Nous pourrons certainement
vous aider plus efficacement que le magasin où vous avez
acheté l’article. Munissez-vous du nom de produit, du numéro
de modèle et du numéro de série de l’appareil lorsque vous
nous appelez. Cela nous aidera à traiter plus rapidement votre
demande.
Dialoguer avec nous
Si vous avez des questions ou des commentaires à formuler ou
si vous voulez bénéficier de conseils judicieux pour vous aider
à tirer le meilleur parti de vos appareils, retrouvez-nous en
ligne :
Blog : www.homeofthehouseproud.com
Facebook : www.facebook.com/morphyrichardsuk
Twitter : www.twitter.com/loveyourmorphy
Site Internet : www.morphyrichards.com
VOTRE GARANTIE DE DEUX ANS
Pour la clientèle en France
Il est important de conserver le ticket de caisse comme preuve
d’achat. Agrafez votre ticket de caisse à cette notice
d'utilisation; vous pourrez ainsi l’avoir sous la main
ultérieurement.
Merci de donner les informations ci-dessous si votre appareil
tombe en panne. Vous trouverez ces références à la base de
l’appareil.
Numéro du modèle
Numéro de série
Tous les produits Morphy Richards sont testés individuellement
avant de quitter l’usine.
Si un problème survient dans les 24 mois qui suivent l’achat
d’origine, vous devez contacter le magasin où vous avez
acheté votre appareil muni de votre ticket de caisse, celui ci le
renverra à Glen Dimplex France pour expertise.
Sous réserve des exclusions indiquées ci-dessous (1 à 9),
l’appareil défectueux sera alors réparé ou remplacé et
réexpédié dans un délai de 15 jours ouvrables maximum à
compter de son arrivée.
Si, pour quelque raison que ce soit, l’article est remplacé
pendant la période de garantie de deux ans, la période de
garantie du nouvel article sera calculée à partir de la date
d’achat d’origine. Vous devez donc absolument conserver votre
ticket de caisse ou votre facture d’origine pour indiquer la date
d’achat.
Pour bénéficier de la garantie de deux ans, l’appareil doit avoir
été utilisé conformément aux instructions du fabricant. Par
exemple, les fers doivent avoir été détartrés et les filtres doivent
avoir été nettoyés selon les instructions.
Morphy Richards ne sera pas dans l’obligation de remplacer ou
réparer les articles aux termes de la garantie dans les
circonstances suivantes :
1 Si le problème provient d’une utilisation accidentelle, d’une
f
RN42221MEE Rev8.qxp_Morphy Richards Instruction Book 23/07/2015 19:38 Page 13
Page 14

14
utilisation abusive ou négligente, ou si l’appareil a été utilisé de
manière contraire aux recommandations du fabricant, ou encore
lorsque le problème provient de sautes de puissance ou de
dégâts occasionnés en transit.
2 Si l’appareil a été utilisé sur une alimentation électrique dont la
tension est différente de celle qui est indiquée sur l’appareil.
3 Si des personnes autres que nos techniciens (ou l’un de nos
revendeurs agréés) ont tenté de faire des réparations.
4 Si l’appareil a été loué ou utilisé dans un contexte non
domestique.
5 Si l’appareil est d’occasion.
6 Morphy Richards n’est pas dans l’obligation de réaliser des
travaux d’entretien, quels qu’ils soient, aux termes de la garantie.
7 La garantie exclut les consommables tels que les sacs, les filtres
et les carafes en verre.
8 Les batteries et les dégâts provoqués par leur fuite ne sont pas
couverts par la garantie.
9 Les filtres n’ont pas été nettoyés ou remplacés suivant les
instructions.
Cette garantie ne confère aucun droit à l’exception de ceux qui
sont expressément indiqués ci-dessus, et ne couvre aucune
réclamation pour dommages immatériels ou indirects. Cette
garantie est offerte comme avantage supplémentaire et n’a
aucune incidence sur vos droits légaux en tant que
consommateur.
Pour la clientèle en Belgique
Les produits de Morphy Richards sont produits conformément
les normes de qualité, agrée international. Au-dessus vos droits
légaux, Morphy Richards vous garantit qu’à partir d’achat ce
produit sera sans défauts de fabrication ou de matériels
pendant une période de deux ans.
Il est important de conserver votre bon d’achat comme preuve.
Agrafez votre ticket à cette notice d’installation.
Veuillez mentionner ces informations ci-dessous si votre
appareil tombe en panne. Vous trouverez ces informations sur la
base de l’appareil.
Numéro du modèle
Numéro de série
Si, pour quelque raison que ce soit, l’article est remplacé
pendant la période de garantie (deux ans), la période de
garantie du nouvel article sera calculée à partir de la date
d’achat d’origine. Il est donc très importants de conserver votre
bon d’achat original afin de connaître la date initiale d’achat.
Cette garantie vaut uniquement quand l’appareil a été utilisé
conformément aux instructions du fabricant. Par exemple, les
appareils doivent être détartrés et les filtres doivent être tenus
propre selon le mode d’emploi.
Morphy Richard ne sera pas dans l’obligation de remplacer ou
réparer les articles aux termes de la garantie dans les
circonstances suivantes
1 Si le problème, prévient d’une utilisation accidentelle, d’une
utilisation abusive ou négligente, ou si l’appareil a été utilisé de
manière contraire aux recommandations du fabricant, ou encore
lorsque le problème provient de source de puissance ou de
dégâts occasionnés en transit.
2 Si l’appareil a été utilisé sur une alimentation électrique dont la
tension est différente de celle qui est indiquée sur l’appareil.
3 Si des personnes, autres que nos techniciens (ou revendeurs
agrées) ont tenté de faire des réparations.
4 Si l’appareil a été loué ou utilisé dans un contexte non
domestique.
5 Si l’appareil est d’occasion.
6 Morphy Richards n’est pas dans l’obligation de réaliser des
travaux d’entretien, quels qu’ils soient, aux termes de la garantie.
7 La garantie ne couvre pas les sachets, filtres et brocs en verre.
8 Les batteries et les dégâts provoqués par leur fuite ne sont pas
couverts par la garantie.
9 Les filtres n’ont pas été nettoyés ou remplacés suivant les
instructions.
Cette garantie ne confère aucun droit à l’exception de ceux qui
sont expressément indiqués ci-dessus, et ne couvre aucune
réclamation pour dommages immatériels ou indirects. Cette
garantie est offerte comme avantage supplémentaire et n’a
aucune incidence sur vos droits légaux en tant que
consommateur.
RN42221MEE Rev8.qxp_Morphy Richards Instruction Book 23/07/2015 19:38 Page 14
Page 15

15
• Este aparelho pode ser utilizado por crianças com 8 ou
mais anos de idade e pessoas cujas capacidades físicas,
sensoriais ou mentais sejam reduzidas ou que não
possuam os conhecimentos e a experiência necessários, se
as mesmas forem vigiadas e instruídas acerca da utilização
do aparelho de forma segura e compreenderem os perigos
envolvidos. As crianças não devem brincar com o aparelho.
As tarefas de limpeza e manutenção pelo utilizador não
devem ser realizadas por crianças sem supervisão.
• Mantenha sempre o gerador de vapor e o respectivo cabo
fora do alcance de crianças com menos de 8 anos de
idade.
• Certifique-se de que o gerador de vapor não fica sem
qualquer supervisão enquanto se encontra ligado à tomada
de alimentação.
• O cabo deve ser retirado da tomada de alimentação antes
de encher com água.
• O gerador de vapor deve ser utilizado e colocado sobre
uma superfície estável.
• Ao colocar o ferro na base do gerador de vapor ou no
descanso, certifique-se de que a superfície sobre a qual o
descanso ou a unidade da base está assente é estável.
• O gerador de vapor não deve ser utilizado se tiver caído ou
se existirem sinais visíveis de danos ou fugas.
• A abertura de enchimento poderá estar aberta durante a
utilização, devido ao design do sistema pressurizado.
p
p
f
RN42221MEE Rev8.qxp_Morphy Richards Instruction Book 23/07/2015 19:38 Page 15
Page 16

16
AVISO: Pode sofrer queimaduras se tocar em peças de metal
quentes, água quente ou vapor.
• AVISO: Para evitar choque eléctrico, não submerja o aparelho
em água ou outro líquido.
Requisitos eléctricos e cabo de alimentação
• Verifique se a voltagem indicada na placa de características do
aparelho corresponde à rede eléctrica da sua habitação, que deve
ser CA (corrente alterna).
• Não utilize o aparelho se o cabo de alimentação ou o fixador do
cabo estiver danificado; solicite a substituição ao fabricante, a um
agente de assistência ou a um técnico igualmente qualificado
para evitar acidentes.
• Não permita que o cabo de alimentação entre em contacto com a
base quente do ferro.
LEIA TODAS AS INSTRUÇÕES E GUARDE-AS PARA
FUTURA REFERÊNCIA
Perspectiva geral do gerador de vapor
(1) Botão de impulso de vapor (apenas em alguns modelos)
(2) Gatilho de vapor
(3) Botão de temperatura
(4) Placa base
(5) Luz indicadora de temperatura
(6) Ferro
(7) Tampão de enchimento
(8) Depósito de água amovível
(9) Painel de controlo (ver em baixo)
(10) Unidade da base
(11) Arrumação do cabo
(12) Grampo do cabo
(13) Chave da caldeira
(14) Parafuso da caldeira
(15) Tampa da caldeira
Perspectiva geral do painel de controlo (8)
Botão ligado/desligado (16) e luz indicadora de alimentação
(17)
Ligue a uma tomada de alimentação eléctrica e prima o botão
ligado/desligado (16). A luz indicadora de alimentação (17)
acende-se e o botão de baixo nível de vapor (20) apresenta-se
intermitente. Para desligar, prima e mantenha sob pressão o
botão ligado/desligado (16) durante 3 segundos. Todas as luzes
indicadoras apagam-se.
Luz indicadora de baixo nível de vapor (18)
Se o nível da água estiver demasiado baixo, a luz indicadora de
nível da água baixo (18) acende-se. Consulte “Enchimento”.
Luz indicadora de descalcificação (19)
Se a caldeira necessitar de descalcificação, a luz indicadora de
descalcificação (19) acende-se. Se visto acontecer, consulte
“Limpar a caldeira”.
Botões de nível de vapor (Baixo 20 / Médio 21 / Alto 22)
Prima o botão relevante para seleccionar o nível de vapor
desejado: baixo (20), médio (21) ou alto (22). Consulte “Utilizar
o Gerador de Vapor para engomar com vapor”.
CUIDADO!
SUPERFÍCIE QUENTE
TENHA CUIDADO
COM AS
SUPERFÍCIES
QUENTES MANUSEIE
COM CUIDADO
Tratamento de queimaduras
• Passe imediatamente água fria pela área afectada.
• Não pare para despir a roupa.
• Procure assistência médica rapidamente.
RN42221MEE Rev8.qxp_Morphy Richards Instruction Book 23/07/2015 19:38 Page 16
Page 17

17
Utilizar o Gerador de Vapor para engomar com
vapor
1
Se engomar com vapor, retire o depósito de água amovível (8),
levante o tampão de enchimento (7) e encha com água até ao nível
de enchimento máximo. Coloque novamente o depósito de água
2
Ligue o aparelho à tomada de alimentação eléctrica e prima o
botão ligado/desligado (16) para activar a unidade.
3
Rode o botão de temperatura (3) para de adaptar à peça a
engomar (consulte o guia de Temperaturas). A luz indicadora da
temperatura (5) acende-se quando a temperatura é alcançada.
Comece a engomar quando a luz indicadora da temperatura (5)
se apagar. Se rodar o botão de temperatura (3) para baixo, espere
que a luz indicadora de temperatura (5) se acenda e se apague
novamente.
4
Prima o botão de vapor relevante (20/21/22) para seleccionar o
nível de vapor pretendido. O botão de vapor deixa de piscar e
apresenta uma luz fixa quando o nível de vapor for atingido.
Para um fluxo forte e continuo ao engomar, prima e mantenha
o gatilho de vapor (2) para fornecer vapor através da placa
base.
AVISO: O cabo de fornecimento de vapor (23) fica quente
durante a utilização.
Botão de impulso de vapor
(apenas em alguns modelos)
5
A função de impulso de vapor é ideal para relaxar as fibras de
tecidos mais duros (como jeans e algodão) e para eliminar os
sulcos duros e teimosos.
Para produzir um jacto poderoso e rápido de vapor ao
engomar, basta premir e soltar o botão de impulso de vapor (1).
NOTA: Após utilizar a função de impulso de vapor, o seu ferro
gerador de vapor vai precisar de até 5 segundos para voltar a
aquecer antes de produzir um segundo impulso de vapor. Se
precisar de um elevado nível de vapor constante, escolha o
nível apropriado de vapor e utilize o gatilho de vapor (2)
conforme indicado acima.
Não combine as duas funções de vapor. Ao utilizar os dois
botões em simultâneo vai interromper o fluxo de vapor e pode
causar num corte completo do vapor constante. Para uma
saída perfeita de vapor, utilize cada função de vapor em
separado e conforme indicado acima.
Enchimento
6
• EM ZONAS DE ÁGUA DURA, RECOMENDAMOS UMA
MISTURA DE 50% ÁGUA DA TORNEIRA E 50% DE ÁGUA
DISTILADA OU DESMINERALIZADA.
• Nunca utilize fluido para baterias, água com substâncias tais
como goma ou açúcar, aditivos perfumados ou água
descongelada de um frigorífico.
p
Guia de temperatura
As marcações de definição de temperatura no botão de regulação ajustável de todos os ferros de engomar Morphy Richards
correspondem às do Código Internacional para Etiquetagem de Cuidados Têxteis.
(120 ºC Máx.) Frio (160ºC Máx.) Quente (210 ºC Máx.) Quente Regulação MÁX
Símbolo
Posições do Não
botão engoma
de regulação
Nível de vapor
regulação Baixa Média/Alta Alta
Tecido Nylon, acetatos Misturas de lã, Algodão, linho
tecidos sintéticos misturas seda artificial, misturas de seda
misturas
Engomagem Engomar pelo avesso, Nos tecidos em que é necessária
se for necessária humidade, esta definição, deverá
utilizar um pano humedecido. engomar com vapor
(não acetatos)
Vapor
Sem vapor
RN42221MEE Rev8.qxp_Morphy Richards Instruction Book 23/07/2015 19:38 Page 17
Page 18

18
Novo enchimento durante a utilização
• Se o nível da água estiver demasiado baixo, a luz indicadora de
nível baixo da água (18) acende-se, é emitido um sinal sonoro e a
unidade deixa de produzir vapor. Se isto acontecer, desligue o
depósito da água e encha novamente com água.
Características
Engomagem a seco
Para utilizar o seu gerador de vapor como um ferro a seco, siga
os passos 2 e 3 de “Utilizar o Gerador de Vapor para engomar
com vapor”, na página 5. Não tem de colocar águia no
depósito nem seleccionar um nível de vapor. Prima o botão de
impulso de vapor (1) (apenas em alguns modelos) ou o gatilho
de vapor (2) pelo menos uma vez a cada 10 minutos ou o
produto vai-se desligar automaticamente.
Desactivação automática (apenas para certos modelos)
Se o botão do impulso do vapor (1) (apenas para certos
modelos) ou o gatilho de vapor (2) não for utilizado durante 10
minutos, o produto vai automaticamente desligar-se, para
segurança e para poupar energia.
Para reiniciar, prima o botão ligado/desligado (16) (consulte o
passo 2 de “Utilizar o Gerador de Vapor para engomar com
vapor”, na página 5) e espere que a temperatura aumente
novamente.
Função de vapor
Durante o processo de vaporização, pequenas quantidades de
água podem ser expelidas da placa base. Isto é normal e pode
ser evitado utilizando o vapor por curtos períodos de tempo e
apenas quando o ferro de engomar se encontrar à temperatura
correcta (a luz indicadora da temperatura (5) do ferro de
engomar apaga-se quando este se encontrar pronto).
Movimentos bruscos na unidade da caldeira podem também
fazer com que seja expelida água da placa base, pelo que não
deve movimentar bruscamente a unidade da base enquanto
engoma. Recomendamos que, para engomar pela primeira vez,
utilize uma toalha velha.
NOTA: O produto poderá produzir ocasionalmente um som de
bombeamento durante a engomagem com vapor. Este ruído é
normal e é provocado pela água que é bombeada através do
gerador de vapor.
Vaporização vertical
7
A vaporização vertical é útil para remover vincos de peças de
vestuários penduradas, cortinados, têxteis de parede, etc..
Segure o ferro a 1 cm a 2 cm do artigo e prima o botão de
impulso de vapor (1) (apenas em alguns modelos) ou o gatilho
de vapor (2).
AVISO: Não utilize a funcionalidade de vaporização vertical
em peças de vestuário que se encontrem vestidas.
Antes de utilizar
• Retire, se existir, qualquer película de protecção da placa base (3)
e da unidade da base.
• Desenrole e endireite o cabo de alimentação (23) e o cabo de
fornecimento de vapor (22).
• Os têxteis e peças de vestuário deverá incluir instruções para
engomar. Se não incluírem, siga o guia de temperaturas na página
4, mas teste a temperatura engomando primeiro a bainha de uma
peça ou outra área mais discreta semelhante.
• É recomendável começar pelos “tecidos frios”, passando depois
para definições mais elevadas. O aquecimento do ferro de
engomar é mais rápido do que o arrefecimento para que poupe
no tempo e na electricidade.
• Se rodar o botão de temperatura para baixo, a partir de uma
regulação mais fria, aguarde que a temperatura do ferro de
engomar estabilize antes de continuar a engomar.
NOTA: Segure a base com ambas as mãos ao manusear e
movimentar a unidade, uma vez que o depósito da água é
amovível.
Manutenção
Limpar a caldeira
Quando a caldeira necessitar de descalcificação, a luz indicadora
de descalcificação (19) acende-se. Quando isto acontecer, a
caldeira tem de ser enxaguada manualmente com água limpa até
que todo o calcário seja removido. A luz indicadora apaga-se
apenas depois do calcário ter sido removido.
AVISO: Nunca retire o parafuso da caldeira (14) enquanto o
gerador de vapor estiver quente.
1 Desligue o aparelho da corrente eléctrica e deixe arrefecer
durante duas horas.
2 Retire o depósito de água amovível (8) e repouse o ferro (6) no
respectivo descanso numa superfície firme junto a um lava-louça.
3 Segure firmemente a unidade da base (10) com ambas as mãos e
agite bem.
4 Volte a unidade da base (10) para baixo e retire a tampa da
caldeira (15). Desaparafuse o parafuso da caldeira (14) com a
chave da caldeira (13), que se encontra no painel inferior da
unidade da base. Se o parafuso estiver um pouco demasiado
apertado, tente utilizar uma chave de fendas grande ou uma
chave de bocas e de porcas para maior alavancagem.
5 Segure a unidade da base (10) sobre o lava-louça, volte a unidade
para esvaziar toda a água e calcário solto da caldeira para o lavalouça.
8
6 Utilizando água limpa, encha e esvazie novamente a caldeiras até
eliminar todo o calcário.
7 Coloque novamente o parafuso da caldeira, certificando-se de
que está bem apertado. Coloque novamente a tampa da caldeira,
a chave da caldeira, o depósito de água e o ferro na unidade da
base.
AVISO: Certifique-se de que a caldeira está vazia antes de
colocar novamente o parafuso da caldeira (14).
8 A luz indicadora de descalcificação (19) vai apagar-se da próxima
RN42221MEE Rev8.qxp_Morphy Richards Instruction Book 23/07/2015 19:38 Page 18
Page 19

19
vez que utilizar o produto. Aguarde até um minuto enquanto
bombeia a água e regista a limpeza da caldeira.
Para limpar uma placa base revestida
Não utilize qualquer pó ou solução abrasivos, pois poderia
danificar o revestimento.
Se alguma fibra sintética derreter na placa base (4), coloque o
ferro na posição “MAX” e passe-o sobre uma peça limpa de
algodão para retirar os detritos da superfície.
Para limpar o exterior
Permita que a unidade arrefeça e limpe-a com um pano húmido e
detergente suave e, em seguida, limpe com um pano seco.
Esvaziamento e armazenamento
9
Deixe o aparelho arrefecer. Esvazie a água do depósito (8)
removendo-o da unidade da base (10) e abrindo o tampão de
enchimento (7). Depois de esvaziar o depósito da água,
coloque-o novamente na unidade da base.
Se o gerador de vapor não for utilizado durante um período de
tempo prolongado, esvazie também a caldeira de acordo com
as instruções, consulte “Limpar a caldeira”.
Para arrumar, puxe o grampo do cabo (12) para fora. Enrole o
cabo de alimentação (24) e o cabo de fornecimento de vapor
(23) em torno da unidade da base na ranhura de arrumação do
cabo (11). Fixe o cabo na respectiva posição com o grampo do
cabo (12). Evite dobrar os cabos, em particular na saída da
unidade de base.
Contacte-nos
Linha de atendimento
Se tiver qualquer problema com o seu aparelho, contacte a
nossa Linha de Atendimento. Provavelmente, poderemos ajudálo mais do que a loja onde adquiriu o aparelho. Para que
possamos lidar com a sua questão mais rapidamente,
certifique-se de que dispõe do nome do produto, do número
do modelo e do número de série.
Fale connosco
Se tiver quaisquer questões ou comentários ou se desejar obter
dicas para tirar o maior partido dos nossos produtos, visite-nos
online:
Blogue: www.homeofthehouseproud.com
Facebook: www.facebook.com/morphyrichardsuk
Twitter: www.twitter.com/loveyourmorphy
Website: www.morphyrichards.com
A SUA GARANTIA DE DOIS ANOS
Este aparelho tem uma garantia de reparação ou substituição
de 2 anos.
É importante guardar o talão de compra como comprovativo de
compra. Agrafe-o ao verso deste folheto para referência futura.
Mencione a seguinte informação se o produto apresentar uma
avaria. Estes números podem ser encontrados na base do
artigo.
N.º do modelo
N.º de série
Todos os artigos Morphy Richards são testados
individualmente antes de saírem da fábrica. No caso improvável
de algum produto apresentar uma avaria no prazo de 28 dias
após a compra, o mesmo deverá ser devolvido ao local de
compra, para a sua substituição.
Se a avaria surgir passados 28 dias e dentro dos 24 meses a
partir da data de aquisição do aparelho, deverá contactar o seu
distribuidor local e referir o número do modelo e de série do
produto ou escrever ao seu distribuidor local para o endereço
abaixo citado.
Ser-lhe-á solicitado que devolva o produto (numa embalagem
segura e apropriada) para o endereço apresentado, juntamente
com uma cópia do talão de compra.
Tirando as excepções abaixo referenciadas (1-9), o artigo
avariado será reparado ou substituído e enviado, normalmente
no prazo de 7 dias úteis a contar da data de recepção.
Se por qualquer razão, este artigo for substituído durante o
período de garantia de 2 anos, a garantia do novo artigo será
calculada a partir da data original de compra. Por esta razão, é
importante guardar o talão ou factura originais de modo a
indicar a data inicial de compra.
Para ser abrangido pela garantia de 2 anos, o artigo deverá ter
sido utilizado de acordo com as instruções do fabricante. Por
exemplo, os artigos têm de ter sido escamados e os filtros
mantidos limpos, tal como indicado nas instruções.
A Morphy Richards ou o distribuidor local não serão obrigados
a substituir ou reparar artigos sob os termos da garantia
quando:
1 A avaria tiver sido provocada ou for atribuída a uma utilização
inadvertida, indevida, negligente, contrária às recomendações do
fabricante ou no caso de ter sido causada por oscilações de
corrente ou danos provocados pelo transporte.
2 O aparelho tiver sido utilizado com uma voltagem diferente da
recomendada.
3 Tiverem sido efectuadas tentativas de reparação por pessoas que
não os técnicos da Morphy Richards (ou o seu representante
autorizado).
4 O aparelho tiver sido utilizado com fins de aluguer ou utilização
não doméstica.
5 O aparelho foi adquirido em segunda mão.
6 A Morphy Richards ou o distribuidor local não são responsáveis
pela execução de qualquer tipo de trabalho de manutenção, ao
abrigo da garantia.
7 A garantia não abrange consumíveis, tais como sacos, filtros e
garrafas de vidro
8 Baterias e danos causados por derrame não estão abrangidos
pela garantia.
9 Os filtros não foram limpos e substituídos de acordo com as
instruções.
Esta garantia não confere quaisquer direitos para além dos
expressamente definidos anteriormente e não abrange
quaisquer reclamações por danos ou perdas sucessivos. Esta
garantia é um benefício adicional e não afecta quaisquer
direitos estatutários do consumidor.
p
RN42221MEE Rev8.qxp_Morphy Richards Instruction Book 23/07/2015 19:38 Page 19
Page 20

20
• Questo elettrodomestico può essere utilizzato dai bambini a
partire da 8 anni e da persone con ridotte capacità fisiche,
sensoriali o mentali, o prive di esperienza e familiarità con il
prodotto, posto che siano sempre sotto supervisione,
ricevano adeguate istruzioni su come adoperare
l’elettrodomestico in sicurezza e siano consapevoli dei pericoli
correlati. Evitare che i bambini giochino con
l’elettrodomestico. Manutenzione e pulizia non devono essere
fatte da bambini senza la supervisione di un adulto.
• Mantenere il generatore di vapore e il relativo cavo fuori dalla
portata di bambini di età inferiore agli 8 anni in ogni momento.
• Il generatore di vapore non deve essere lasciato incustodito
quando è collegato alla corrente elettrica.
• La spina deve essere rimossa dalla presa prima del
riempimento con acqua.
• Il generatore di vapore deve essere usato e riposto su una
superficie stabile.
• Quando si posiziona il ferro sulla base o in verticale,
assicurarsi che la superficie sulla quale è appoggiato sia
stabile.
• Il generatore di vapore non deve essere utilizzato se è stato
fatto cadere, se vi sono segni di danni visibili o se perde.
• L’apertura per il riempimento può essere aperta durante l’uso,
a causa del design del sistema pressurizzato.
i
RN42221MEE Rev8.qxp_Morphy Richards Instruction Book 23/07/2015 19:38 Page 20
Page 21

21
AVVERTENZA: il contatto con il metallo rovente, l’acqua calda
o il vapore può provocare ustioni.
• AVVERTENZA: per evitare scariche elettriche, non immergere
l’elettrodomestico in acqua o liquido.
Requisiti elettrici e cavo di alimentazione
• Controllare che la tensione indicata sulla targhetta dei dati
dell’elettrodomestico corrisponda a quella dell’alimentazione
elettrica dell’abitazione, che deve essere a corrente alternata.
• Se il cavo di alimentazione è danneggiato, per evitare rischi, si
raccomanda di richiederne la sostituzione al produttore, al servizio
di assistenza autorizzato o a personale similmente qualificato.
• Il cavo di alimentazione non deve entrare in contatto con la piastra
rovente del ferro.
SI RACCOMANDA DI LEGGERE TUTTE LE ISTRUZIONI E DI
CONSERVARLE PER RIFERIMENTO FUTURO
Panoramica del ferro da stiro con caldaia
(1) Pulsante extra vapore (solo alcuni modelli)
(2) Attivazione vapore
(3) Regolazione della temperatura
(4) Piastra
(5) Spia della temperatura
(6) Ferro da stiro
(7) Tappo serbatoio
(8) Serbatoio estraibile per l’acqua
(9) Pannello di controllo (vedi sotto)
(10) Unità base
(11) Scanalatura per il cavo
(12) Morsetto per il cavo
(13) Chiave della caldaia
(14) Vite della caldaia
(15) Tappo della caldaia
Panoramica del pannello di controllo (8)
Pulsante di accensione/spegnimento (16) e Spia di
alimentazione (17)
Collegare alla rete elettrica e premere il pulsante di
accensione/spegnimento (16). La spia di alimentazione (17) si
accende e il pulsante livello di vapore basso (20) lampeggia. Per
spegnere, premere e tenere premuto il pulsante di
accensione/spegnimento (16) per 3 secondi. Tutte le spie si
spengono.
Spiga livello dell’acqua basso (18)
Se il livello dell’acqua è troppo basso (18), si illumina la spia
livello dell’acqua basso. Vedi “riempimento”.
Spia decalcificazione (19)
Se la caldaia necessita una decalcificazione, la spia
decalcificazione (19) si illumina. Se questo accade, vedi “Pulizia
della caldaia”.
Pulsanti livello di vapore (basso 20 / medio 21 / alto 22)
Premere il pulsante per selezionare il livello di vapore
desiderato: basso (20), medio (21) o alto (22). Vedi “Usare il
Generatore di vapore per stirare al vapore”
i
ATTENZIONE
SUPERFICIE ROVENTE
ATTENZIONE ALLE
SUPERFICI ROVENTI
MANEGGIARE CON
CAUTELA
Trattamento delle scottature
• Far scorrere immediatamente acqua fredda sull’area interessata.
• Non interrompere l’operazione per rimuovere gli indumenti.
• Cercare rapidamente assistenza medica.
RN42221MEE Rev8.qxp_Morphy Richards Instruction Book 23/07/2015 19:38 Page 21
Page 22

22
Utilizzo del Generatore di vapore per la
stiratura a vapore
1
Se si stira a vapore, rimuovere il serbatoio estraibile dell’acqua (8),
sollevare il tappo (7) e riempire con acqua fino alla linea di livello
max. Riposizionare il serbatoio dell’acqua.
2
Collegare il dispositivo a una presa di corrente e premere il pulante di
accensione/spegnimento (16) per attivare l’unità.
3
Girare la manopola della temperatura (3) per adattare al tessuto (vedi
guida alla temperatura). La spia della temperatura (5) si illumina
fino a quando non è raggiunta la temperatura. Iniziare a stirare
quando la spia della temperatura (5) si spegne. Se si abbassa la
temperatura (3), attendere che la spia della temperatura (5) si
illumini e che si spenga nuovamente.
4
Premere il pulsante del vapore adatto (20/21/22) per selezionare il
livello di vapore desiderato. Il pulsante del vapore smette di
lampeggiare e si illumina fisso quando il livello di vapore è
raggiunto.
Per un flusso di vapore forte e continuo durante la stiratura,
premere e tenere premuto l’attivatore di vapore (2) per far
passare vapore attraverso la piastra.
AVVERTENZA: Il cavo di alimentazione del vapore (23) diventa
caldo durante l’uso.
Pulsante extra vapore
(solo alcuni modelli)
5
La funzione extra vapore è l’ideale per rilassare le fibre di
tessuti rigidi (come jeans e lino) ed eliminare le pieghe più
difficili da raggiungere.
Per produrre un getto di vapore rapido e potente durante la
stiratura, premere e rilasciare il pulsante extra vapore (1).
NOTA: Dopo l’uso della funzione extra vapore, il generatore di
vapore necessiterà di circa 5 secondi per riscaldarsi prima che
possa produrre un secondo getto di vapore extra. Se si richiede
un elevato livello di vapore costante, scegliere il livello di vapore
appropriato e usare l’attivatore del vapore (2) come indicato
sopra.
Non abbinare le due funzioni vapore. L’uso dei due pulsanti
insieme interrompe il flusso di vapore e può provocare
l’interruzione del vapore costante. Per un uso ottimale del
vapore, usare ciascuna funzione vapore separatamente e come
indicato sopra.
Riempimento
6
• IN ZONE CON ACQUA DURA, SI CONSIGLIA DI MISCELARE
IL 50% DI ACQUA DI RUBINETTO E IL 50% DI ACQUA
DISTILLATA O DEMINERALIZZATA.
• Non utilizzare mai liquido per batterie o acqua contenente
sostanze come amido, zucchero, profumo o acqua scongelata
dal freezer.
Guida alle temperature
I valori di impostazione indicati sulla manopola di tutti i ferri Morphy Richards corrispondono a quelli del codice di etichettatura
internazionale per i tessuti.
(Max. 120° C) Freddo (Max. 160° C) Caldo (Max. 210° C) Caldissimo MAX
Simbolo
Posizioni Non
della stirare
regolazione
Impostazione
livello di vapore Basso Medio/Alto Alto
Tessuti Nylon, acetati Lana, poliestere Cotone, lino
tessuti sintetici rayon Rayon, combinazioni
rayon
Stiratura Stirare al rovescio. Tessuti che lo richiedono
Se è necessario inumidire di solito
utilizzare un panno umido richiedono la pressatura con vapore
(non acetato)
Stiratura a vapore
Senza vapore
RN42221MEE Rev8.qxp_Morphy Richards Instruction Book 23/07/2015 19:38 Page 22
Page 23

23
Riempimento durante l’uso
• Se il livello dell’acqua è troppo basso, la spia del livello dell’acqua
(18) si illumina, si attiva un segnale acustico e l’unità non produce
vapore. Se questo accade, scollegare il serbatoio dell’acqua e
riempirlo.
Funzioni
Stiratura a secco
Per usare il generatore di vapore come un ferro a secco, seguire
i passi 2 e 3 di “Utilizzo del Generatore di vapore per la stiratura
a vapore” a pagina 5. Non è necessario mettere acqua nel
serbatoio né selezionare un livello di vapore. Premere il pulsante
extra vapore (1) (solo alcuni modelli) o l’attivatore del vapore (2)
almeno ogni 10 minuti, in caso contratio il prodotto si spegne
automaticamente.
Spegnimento automatico (solo alcuni modelli)
Se il pulsante extra vapore (1) (solo alcuni modelli) o l’attivatore
del vapore (2) sono inutilizzati per 10 minuti, il prodotto si
spegne automaticamente, sia per la sicurezza sia per il
risparmio energetico.
Per riniziare, premere il pulsante di accensione/spegnimento
(16) (vedi passo 2 di “Utilizzo del Generatore di vapore per la
stiratura a vapore” a pagina 5) e attendere che la temperatura
salga nuovamente.
Funzione vapore
Durante la stiratura a vapore, è possibile che piccole quantità di
acqua fuoriescano dalla piastra. Questo è normale e può essere
evitato usando il vapore per brevi periodi di tempo e soltanto
quando il ferro ha raggiunto la temperatura selezionata (la spia
della temperatura (5) sul ferro si spegne quando è pronto).
Colpi e urti improvvisi alla caldaia possono determinare la
formazione di gocce sulla piastra; pertanto non muovere l’unità
base durante l’operazione di stiratura. Quando si stira per la
prima volta, si raccomanda di provare con un panno vecchio.
NOTA: Il prodotto può occasionalmente produrre un suono di
pompaggio durante la stiratura a vapore. Questo è normale ed
è causato dall’acqua che viene pompata attraverso il
generatore di vapore.
Vapore verticale
7
Il vapore verticale è utile per rimuovere le pieghe dagli abiti
appesi, dalle tende, ecc. Tenere il ferro a 1cm-2cm di distanza
dal capo da stirare e premere il pulsante extra vapore (1) (solo
alcuni modelli) o l’attivatore del vapore (2).
AVVERTENZA: Non utilizzare la funzione di stiratura a vapore
verticale per stirare indumenti quando sono indosso.
Prima dell’utilizzo
• Rimuovere eventuali adesivi di protezione dalla piastra (3) e
dall’unità base.
• Svolgere e raddrizzare il cavo di alimentazione (23) e il cavo di
alimentazione del vapore (22).
• Solitamente, gli indumenti e le stoffe recano le indicazioni per la
stiratura. In caso contrario, seguire la guida alle temperature a
pagina 4, ma provare la temperatura stirando l’orlo dell’indumento
o una zona nascosta per prima.
• Si consiglia di iniziare con i tessuti “freddi” e andare a salire verso
temperature più elevate. In questo modo si risparmia tempo e
energia elettrica, poiché un ferro da stiro si scalda più
velocemente di quanto si raffreddi.
• Se la manopola della temperatura passa da un’impostazione ad
alta temperatura ad una temperatura più bassa, attendere che il
ferro si stabilizzi sulla nuova temperatura prima di continuare a
stirare.
NOTA: Mantenere la base con due mani quando si manovra o si
sposta l’unità, in quanto il serbatoio dell’acqua è estraibile.
Manutenzione
Pulizia della caldaia
Quando la caldaia necessita la decalcificazione, la spia
decalcificazione (19) si illumina. Quando questo avviene, la caldaia
deve essere risciacquata a mano con acqua pulita fino a quando
non è rimosso le incrostazioni non sono rimosse. La spia si
spegne solo quando le incrostazioni sono rimosse.
AVVERTENZA: Non rimuovere mai la vite della caldaia (14)
quando il generatore di vapore è caldo.
1 Scollegare l’elettrodomestico dalla presa di corrente e lasciar
raffreddare per due ore.
2 Rimuovere il serbatoio estraibile dell’acqua (8) e poggiare il ferro
(6) in verticale su una superficie stabile vicino al lavandino.
3 Mantenere l’unità base (10) saldamente con due mani e scuotere
bene.
4 Girare l’unità base (10) al contrario e ritirare all’indietro il tappo
della caldaia (15). Svitare la vite della caldaia (14) con la chiave
(13), che è attacata alla parte inferiore dell’unità base. Se la vite è
troppo stretta per essere svitata, provare a utilizzare un cacciavite
grande o una chiave a tubo per fare più leva.
5 Mantenere l’unità base (10) sul lavandino, girare l’unità per
espellere tutta l’acqua e le incrostazioni dalla caldaia nel
lavandino.
8
6 Usando acqua pulita, riempire e svuotare la caldaia più volte
finché tutte le incrostazioni non siano state eliminate.
7 Riposizionare la vite della caldaia, assicurandosi che sia
completamente serrata. Riposizionare il tappo della caldaia, la
chiave della caldaia, il serbatoio dell’acqua e il ferro sull’unità
base.
AVVERTENZA: Assicurarsi che la caldaia sia vuota prima di
riposizionare la vite della caldaia (14).
8 La spia decalcificazione (19) si spegnerà la volta successiva che si
utilizza il prodotto. Attendere un minuto mentre pompa acqua e
registra che la caldaia è stata pulita.
Per pulire una piastra con rivestimento antiaderente
Non utilizzare polvere o soluzione abrasiva per non danneggiare il
rivestimento.
Se delle fibre si dovessero attaccare alla piastra (4), impostare il
ferro alla posizione MAX e passarlo su un pezzo di cotone pulito
per eliminare il deposito dalla superficie.
Per pulire il ferro esternamente
Attendere che l’unità si raffreddi e passarvi sopra un panno umido
e un detergente delicato, quindi asciugare.
i
RN42221MEE Rev8.qxp_Morphy Richards Instruction Book 23/07/2015 19:38 Page 23
Page 24

24
Svuotamento e conservazione
9
Lasciar raffreddare l’elettrodomestico. Svuotare il serbatoio
dell’acqua (8) rimuovendolo dall’unità base (10) e aprendo il
tappo (7). Una volta che il serbatoio è vuoto, riattaccarlo
all’unità base.
Se il generatore di vapore non sarà utilizzato per un periodo
lungo, svuotare anche la caldaia come indicato, vedi “Pulizia
della caldaia”.
Per conservare, tirare il morsetto del cavo (12) verso fuori.
Avvolgere il cavo di alimentazione (24) e il cavo di alimentazione
vapore (23) attorno all’unità base nella scanalatura per il cavo
(11). Fissare il cavo in posizione con il morsetto (12). Evitare
pieghe dei cavi, in particolare all’uscita dall’unità base.
Contattateci
Servizio di assistenza telefonica
In caso di problemi col vostro elettrodomestico, vi invitiamo a
contattare il nostro Servizio di assistenza telefonica, in quanto
saremo in grado di fornirvi un’assistenza più mirata rispetto a
quella fornita dal punto vendita. Vi consigliamo di tenere a
portata di mano il nome del prodotto, il numero del modello e il
numero di matricola per consentirci di gestire la vostra
chiamata nel minor tempo possibile.
Parlatene con noi
Per eventuali domande o commenti, o semplicemente se volete
dei suggerimenti per sfruttare al meglio il vostro
elettrodomestico, seguiteci online:
Blog: www.homeofthehouseproud.com
Facebook: www.facebook.com/morphyrichardsuk
Twitter: www.twitter.com/loveyourmorphy
Website: www.morphyrichards.com
GARANZIA DI DUE ANNI
Questo elettrodomestico è coperto da una garanzia di due anni
per la riparazione o la sostituzione.
È importante conservare la ricevuta del rivenditore a titolo di
prova di acquisto. Appuntare la ricevuta sulla retrocopertina del
presente manuale per futuro riferimento.
Indicare le informazioni riportate di seguito se si verifica
un’anomalia sul prodotto. Questi numeri sono riportati sulla
base del prodotto.
N. modello
N. di serie
Tutti i prodotti Morphy Richards sono testati singolarmente
prima di lasciare lo stabilimento. Nell’improbabile eventualità
della comparsa di un difetto entro 28 giorni dall’acquisto, si
consiglia di restituire il prodotto dove è stato acquistato per
richiederne la sostituzione.
Se il problema si manifesta dopo 28 giorni ed entro 24 mesi
dall’acquisto, contattare il rivenditore più vicino, citando il
numero di modello e il numero di matricola riportati sul
prodotto oppure scrivergli all’indirizzo indicato.
Verrà richiesto di rispedire il prodotto (in un imballaggio idoneo
e sicuro) unitamente alla copia della prova d’acquisto.
Fatte salve le esclusioni sotto riportate (1-9), l’elettrodomestico
difettoso viene riparato o sostituito e spedito di solito entro 7
giorni lavorativi dal ricevimento.
Se per qualsiasi motivo questo articolo viene sostituito entro il
periodo di garanzia di 2 anni, la garanzia sul nuovo prodotto
sarà calcolata a decorrere dalla data dell’acquisto iniziale. È
pertanto importante conservare la ricevuta o fattura originale
per poter dimostrare la data dell’acquisto.
Per usufruire della garanzia di due anni, l’elettrodomestico deve
essere stato usato nel modo indicato dal produttore. Ad
esempio, è necessario disincrostare l’elettrodomestico e tenere
puliti i filtri nel modo indicato.
Morphy Richards o il rivenditore di zona non sono tenuti a
sostituire o riparare i prodotti, come indicato dalle disposizioni
di garanzia, se:
1 Il guasto è stato causato o è attribuibile a un uso accidentale,
improprio, negligente o contrario alle istruzioni del produttore
oppure il guasto è stato causato da sovratensioni momentanee o
dal trasporto.
2 L’elettrodomestico è stato utilizzato a una tensione diversa da
quella indicata su di esso.
3 Le riparazioni sono state eseguite da persone diverse dal
personale tecnico Morphy Richards (o rivenditori autorizzati).
4 L’elettrodomestico è stato noleggiato oppure non impiegato per
uso domestico.
5 L’elettrodomestico è di seconda mano.
6 Morphy Richards o il rivenditore di zona non sono tenuti ad
eseguire alcun tipo di intervento di assistenza ai sensi della
garanzia.
7 I sacchetti, i filtri e le caraffe di vetro non sono coperti dalla
garanzia.
8 Le batterie e i danni dovuti a perdite non sono coperti dalla
garanzia.
9 I filtri non sono stati puliti e sostituiti come da istruzioni.
La presente garanzia non conferisce alcun diritto diverso da
quelli sopra elencati e non copre alcuna richiesta di danni o
perdite consequenziali. La presente garanzia viene offerta a titolo
di vantaggio aggiuntivo e non incide sui diritti del consumatore
previsti dalla legge.
RN42221MEE Rev8.qxp_Morphy Richards Instruction Book 23/07/2015 19:38 Page 24
Page 25

25
i
≈
• Этот прибор может использоваться детьми старше 8 лет и
лицами с ограниченными физическими, сенсорными или
умственными способностями, а также лицами с недостаточным
опытом и знаниями под присмотром ответственного лица или
при получении ими указаний относительно безопасного
использования прибора и осознании сопутствующих опасностей.
Не позволяйте детям играть с прибором. Не позволяйте детям
без присмотра выполнять очистку и обслуживание прибора.
• Всегда храните парогенератор и шнур питания в месте,
недоступном для детей младше 8 лет.
• Запрещается оставлять без присмотра парогенератор во
включенном состоянии.
• Перед наливанием воды необходимо извлечь вилку из розетки.
• Парогенератор следует использовать и устанавливать на
устойчивой поверхности.
• При установке утюга на основание парогенератора или на пятку
убедитесь в устойчивости поверхности, на которую
устанавливается основание или пятка.
• Запрещается использовать парогенератор после падения, если
он имеет видимые признаки повреждения или протекает.
• Из-за конструктивных особенностей герметичной системы
наливное отверстие в процессе использования может быть
открыто.
≈
ПРЕДУПРЕЖДЕНИЕ. Прикосновение к горячим
металлическим частям, попадание горячей воды и пара
может вызвать ожоги.
• ПРЕДУПРЕЖДЕНИЕ. Чтобы избежать электрического
удара, не погружайте прибор в воду или другие
жидкости.
Электротехнические требования и шнур
питания
• Убедитесь, что напряжение на табличке с паспортными
данными прибора соответствует параметрам электросети в
вашем доме (переменное напряжение).
• В случае повреждения шнура питания или изолирующей
втулки обратитесь для замены к производителю, в
фирменный сервисный центр или к специалисту
соответствующей квалификации.
• Следите, чтобы шнур питания не касался подошвы утюга.
ПРОЧИТАЙТЕ ВСЕ ИНСТРУКЦИИ И СОХРАНИТЕ
ИХ ДЛЯ ИСПОЛЬЗОВАНИЯ В БУДУЩЕМ
RN42221MEE Rev8.qxp_Morphy Richards Instruction Book 23/07/2015 19:38 Page 25
Page 26

Обзор парогенератора
(1) Кнопка нагнетания пара (имеется только на некоторых
моделях)
(2) Кнопка подачи пара
(3) Регулятор температуры
(4) Подошва утюга
(5) Индикатор температуры
(6) Утюг
(7) Крышка наливного отверстия
(8) Съемный резервуар для воды
(9) Панель управления (см. ниже)
(10) Основание
(11) Выемка для шнура
(12) Зажим для шнура
(13) Ключ для бойлера
(14) Винт бойлера
(15) Пробка бойлера
Обзор панели управления (8)
Кнопка включения/выключения (16) и индикатор питания
(17)
Подключите прибор к розетке и нажмите кнопку
включения/выключения (16). Загорится индикатор питания
(17) и начнет мигать кнопка слабого уровня пара (20). Чтобы
выключить прибор, нажмите кнопку включения/выключения
(16) и удерживайте ее 3 секунды. Все индикаторы погаснут.
Индикатор низкого уровня воды (18)
Если уровень воды слишком низкий, загорается индикатор
низкого уровня воды (18). См. раздел «Наливание воды».
Индикатор удаления накипи (19)
Если необходимо очистить бойлер от накипи, загорается
индикатор удаления накипи (19). См. раздел «Чистка
бойлера».
Кнопки уровня пара (слабый 20/средний 21/сильный 22)
Для выбора требуемого уровня пара нажмите
соответствующую кнопку: слабый (20), средний (21) или
сильный (22). См. раздел «Использование парогенератора
для глажения с паром».
26
ОСТОРОЖНО!
ГОРЯЧАЯ ПОВЕРХНОСТЬ
ГОРЯЧИЕ
ПОВЕРХНОСТИ
ТРЕБУЮТ
ОСТОРОЖНОГО
ОБРАЩЕНИЯ
При ошпаривании
• Немедленно подставьте пораженный участок под
холодную воду.
• Снимите одежду.
• Быстро обратитесь за медицинской помощью.
RN42221MEE Rev8.qxp_Morphy Richards Instruction Book 23/07/2015 19:38 Page 26
Page 27

27
Использование парогенератора для глажения
с паром
1
Перед началом глажения с паром отсоедините съемный
резервуар для воды (8), откройте крышку наливного отверстия
(7) и налейте воду до линии максимального уровня. Снова
присоедините резервуар для воды.
2
Присоедините прибор к сети и включите его, нажав кнопку
включения/выключения (16).
3
Установите регулятор температуры (3) с учетом типа одежды (см.
раздел «Руководство по установке температур»). До достижения
заданной температуры будет светиться индикатор температуры
(5). Когда индикатор температуры (5) погаснет, начинайте
глажение. Если вы повернули регулятор температуры (3) вниз,
подождите, по индикатор температуры (5) загорится, а затем
снова погаснет.
4
Выберите требуемый уровень пара с помощью соответствующей
кнопки уровня пара (20/21/22). После достижения заданного
уровня пара кнопка уровня пара перестанет мигать и будет
гореть непрерывно.
Чтобы во время глажения пар через подошву подавался
интенсивно и непрерывно, нажмите и удерживайте кнопку
подачи пара (2).
ОСТОРОЖНО! В процессе использования паровой шланг
(23) сильно нагревается.
Кнопка нагнетания пара
(только на некоторых моделях)
5
Функция нагнетания пара идеально подходит для смягчения
нитей твердых тканей (таких как джинсовая ткань и лен) и
устранения трудноудаляемых, труднодоступных складок.
Чтобы во время глажения на короткое время создать мощную
струю пара, просто нажмите и отпустите кнопку нагнетания пара
(1).
ПРИМЕЧАНИЕ. После использования функции нагнетания пара
парогенератору потребуется до 5 секунд на повторный разогрев.
Только после этого нагнетание пара можно будет выполнить еще
раз. Если постоянно требуется сильный пар, выберите
соответствующий уровень пара и воспользуйтесь кнопкой
подачи пара (2) в соответствии с инструкциями, изложенными
выше.
Не комбинируйте эти две функции пара. Совместное
использование этих двух кнопок приведет к прерыванию потока
пара и может вызвать его полное отключение. Чтобы выход пара
был оптимальным, используйте каждую функцию пара отдельно,
как указано выше.
Наливание воды
6
• ВРЕГИОНАХ ЖЕСТКОЙ ВОДОЙ РЕКОМЕНДУЕТСЯ
ИСПОЛЬЗОВАТЬ СМЕСЬ, СОДЕРЖАЩУЮ
ВОДОПРОВОДНУЮ И ДИСТИЛЛИРОВАННУЮ (ИЛИ
ДЕМИНЕРАЛИЗОВАННУЮ) ВОДУ В РАВНЫХ ПРОПОРЦИЯХ.
Руководство по установке температур
Отметки температуры на дисковых регуляторах всех утюгов компании Morphy Richards соответствуют отметкам
Международного кода на этикетках текстильных изделий.
Холодно (макс. 120˚C) Тепло (макс. 160˚C) Горячо (макс. 210˚C) Отметка МАХ
Символ
Положение Не
регулятора гладить
Настройка
уровня пара Слабый Средний/сильный Сильный
Ткань Синтетические ткани: Шерсть, ткани с Хлопок, лен,
нейлон, ацетатная вискозой вискоза, смеси с
ткань вискозой
Глажение Гладить с изнанки, Ткани, нуждающиеся в такой
если необходимо увлажнение, обработке, обычно требуют
используйте влажную ткань отпаривания
(не ацетатную)
Отпаривание
Без пара
≈
RN42221MEE Rev8.qxp_Morphy Richards Instruction Book 23/07/2015 19:38 Page 27
Page 28

28
• Запрещается использовать электролит для батарей или воду,
содержащую такие примеси, как крахмал, сахар и
ароматизаторы, а также размороженную воду из
холодильника.
Добавление воды во время использования
• Если уровень воды слишком низкий, загорается индикатор
низкого уровня воды (18), раздается звуковой сигнал и прибор
перестает вырабатывать пар. В таком случае отсоедините
резервуар для воды и наполните его.
Технические характеристики
Сухое глажение
Чтобы использовать парогенератор для сухого глажения,
выполните действия 2 и 3 из раздела «Использование
парогенератора для глажения с паром» на стр. 5. Заливать воду в
резервуар и выбирать уровень пара не нужно. Нажимайте кнопку
нагнетания пара (1) (имеется только на некоторых моделях) или
кнопку подачи пара (2) не реже одного раза в 10 минут, в
противном случае изделие автоматически выключится.
Автоматическое выключение (только на некоторых
моделях)
Из соображений безопасности и для экономии энергии изделие
автоматически выключится, если в течение 10 минут не будет
использована ни кнопка нагнетания пара (1) (имеется только на
некоторых моделях), ни кнопка подачи пара (2).
Чтобы возобновить работу, нажмите кнопку
включения/выключения (16) (см. действие 2 в разделе
«Использование парогенератора для глажения с паром» на стр.
5) и подождите, пока температура снова поднимется.
Функция пара
В процессе подачи пара из подошвы утюга может выделяться
небольшое количество воды. Это нормальное явление, которого
можно избежать, используя пар в течение непродолжительного
времени и только тогда, когда утюг нагрелся до правильной
температуры (о готовности к использованию свидетельствует
погасший индикатор температуры (5) на утюге).
Внезапное встряхивание бойлера также может вызвать
протекание воды на подошву; не двигайте основание во время
глаженья. Мы рекомендуем первое глаженье начать со старого
полотенца.
ПРИМЕЧАНИЕ. В ходе глажения с паром из прибора могут
раздаваться звуки перетекания воды. Это нормальное явление
— звук возникает при прокачивании воды через парогенератор.
Вертикальное отпаривание
7
Функция вертикального отпаривания предназначена для
удаления складок на висящей одежде, шторах, настенных
драпировках и т. п. Нажмите кнопку нагнетания пара (1) (имеется
только на некоторых моделях) или кнопку подачи пара (2),
удерживая утюг на расстоянии от 1–2 см от изделия.
ОСТОРОЖНО! Не используйте функцию вертикального
отпаривания для разглаживания одежды, находящейся на
теле человека.
Перед применением
• Полностью снимите защитную пленку (если есть) с подошвы
утюга (3) или с основания прибора.
• Размотайте и расправьте шнур питания (23) и паровой шланг (22).
• На ткани и одежде обычно имеются этикетки с указаниями по
глаженью. Если они отсутствуют, используйте руководство по
установке температур на стр. 4, однако обязательно проверьте
температуру, вначале прогладив рубец или другую невидимую
часть одежды.
• Рекомендуется начинать глаженье с тканей, требующих меньшей
температуры, постепенно переходя к более высоким значениям.
Поскольку утюг нагревается быстрее, чем охлаждается, то вы
сэкономите время и электроэнергию.
• Понизив температуру утюга с помощью регулятора, подождите
некоторое время перед продолжением глаженья, чтобы заданная
температура стабилизировалась.
ПРИМЕЧАНИЕ. При перемещении прибора и обращении с ним
держите основание обеими руками, поскольку резервуар для
воды может отсоединиться.
Уход
Чистка бойлера
Когда необходимо очистить бойлер от накипи, загорается
индикатор удаления накипи (19). Для удаления накипи вручную
промойте бойлер чистой водой. Индикатор погаснет только после
удаления накипи.
ОСТОРОЖНО! Ни в коем случае не выкручивайте винт
бойлера (14), когда парогенератор горячий.
1 Отсоедините прибор от сети и оставьте его на два часа для
остывания.
2 Отсоедините съемный резервуар для воды (8) и поставьте утюг
(6) на пятку на твердой поверхности рядом с раковиной.
3 Крепко удерживая основание (10) обеими руками, хорошо
встряхните его.
4 Переверните основание (10) вверх дном и извлеките пробку
бойлера (15). Отверните винт бойлера (14) с помощью ключа для
бойлера (13), который закреплен снизу на основании. Если
отворачивание дается с трудом, попробуйте воспользоваться
отверткой большего размера или применить вороток с насадкой,
чтобы увеличить усилие.
5 Над раковиной поверните основание (10) в правильное
положение, чтобы слить всю воду и отслоившуюся накипь из
бойлера.
8
6 Наполните бойлер чистой водой, а затем слейте ее. Повторяйте
процедуру до полного удаления накипи.
7 Вставьте и полностью закрутите винт бойлера. Вставьте пробку
бойлера, закрепите ключ для бойлера и резервуар для воды,
поставьте утюг на основание.
ОСТОРОЖНО! Перед вкручиванием винта бойлера (14)
убедитесь, что бойлер пуст.
8 Когда изделие будет использовано в следующий раз, индикатор
удаления накипи (19) погаснет. Подождите, пока изделие
накачает воду и зарегистрирует, что бойлер очищен – это может
занять до одной минуты.
RN42221MEE Rev8.qxp_Morphy Richards Instruction Book 23/07/2015 19:38 Page 28
Page 29

29
Очистка загрязнившейся подошвы
Не используйте для этой цели чистящие порошки и растворы,
так как это может привести к повреждению покрытия.
В случае, если к поверхности подошвы (4) прилипли
расплавленные искусственные волокна, установите регулятор
нагрева утюга на MAX и проведите им по чистой х/б ткани, чтобы
удалить загрязнения с поверхности.
Очистка наружной поверхности
Дайте прибору остыть, протрите его тряпкой, смоченной мягким
моющим средством, а затем вытрите сухой тряпкой.
Слив воды и хранение
9
Дайте прибору остыть. Чтобы слить воду из резервуара (8),
снимите его с основания (10) и откройте крышку наливного
отверстия (7). После сливания воды снова присоедините
резервуар к основанию.
Если вы не собираетесь пользоваться парогенератором на
протяжении длительного времени, то необходимо также слить
воду из бойлера, инструкции см. в разделе «Чистка бойлера».
Оттяните зажим для шнура (12) наружу. Намотайте шнур питания
(24) и паровой шланг (23) вокруг основания вдоль выемки для
шнура (11). Зафиксируйте шнур с помощью зажима (12).
Избегайте образования перегибов кабелей, особенно на выходе
из основания.
Контакты
Служба поддержки
При возникновении проблем с прибором обращайтесь в службу
поддержки по телефону, поскольку мы, скорее всего, сможем
оказать вам более эффективную помощь, нежели магазин, в
котором вы приобрели прибор. При обращении в службу
поддержки нужно указать название изделия, номер модели и
серийный номер. Эта информация позволит нам быстрее
обработать ваш запрос.
Поговорите с нами
Если у вас возникли вопросы и комментарии или вы хотите
получить развернутые советы, позволяющие с максимальной
эффективностью использовать приобретенные вами приборы,
обращайтесь к нам через Интернет:
Блог: www.homeofthehouseproud.com
Facebook: www.facebook.com/morphyrichardsuk
Twitter: www.twitter.com/loveyourmorphy
Веб-сайт: www.morphyrichards.com.
ПРЕДОСТАВЛЯЕМАЯ ДВУХЛЕТНЯЯ ГАРАНТИЯ
Очень важно сохранять товарный чек,который является
подтверждением покупки.Cоветуем прикрепить
стэплеромтоварный чек к задней обложке данного руководства
(к гарантийному талону).
Все изделия MorphyRichards перед отправкой с завода проходят
индивидуальную проверку.
Гарантийный срок начинается со дня покупки и действует в
течение 24 месяцев (2 года). Подтверждением права на
гарантийное обслуживание является предоставление
покупателем чека на покупку и гарантийного талона,
заполненного и подписанного продавцом. Серийный номер
прибора должен соответствовать номеру, указанному в
гарантийном талоне.
В течение гарантийного срока осуществляется гарантийная
замена (если неисправность допущена по вине заводаизготовителя).
Если по каким-либо причинам в течение двухлетнего
гарантийногопериода данное изделие было заменено новым,
гарантия на новое изделие будет исчисляться с момента
первоначальнойпокупки прибора. В связи с этим, очень важно
сохранять квитанцию или счет-фактуру, подтверждающие дату
первоначальной покупки.
Двухлетняя гарантия распространяется только на те изделия,
которые эксплуатируются в соответствии с указаниями
производителя. Например, изделия должны очищаться от
накипи,фильтры должны поддерживаться в чистом состоянии.
КомпанияMorphyRichardsвправе отказать в гарантийной замене в
следующих случаях:
1 Поломка была вызвана или связана с использованием прибора
не по назначению, неправильнымприменением, неаккуратным
использованием или использованием с несоблюдением
рекомендацийпроизводителя, поломка явилась следствием
перепадов напряжения в электросети или нарушений правил
транспортировке.
2 Изделие использовалось поднапряжением, отличающимся от
указанного на изделии.
Предпринимались попытки ремонта изделия лицами, которые не
являются нашим обслуживающим персоналом
(или персоналом официальногодилера).
3 Прибор использовался на условиях аренды или применялся
дляне бытовых целей.
4 Отсутствуют основания для проведения какого-либо
гарантийного ремонта компаниейMorphyRichards.
5 Прибор приобретён подержанным.
6 Отсутствуют основания для проведения какого-либо
гарантийного ремонта компанией Morphy Richards.
7 Гарантия не распространяется на расходные материалы, такие
как пакеты, фильтры и стеклянные сосуды.
8 Гарантия не распространяется на батарейки и повреждения от
утечки электролита.
9 Очистка и замена фильтров проводились с нарушением
инструкции.
Гарантия не распространяется на расходные материалы, такие
какпакеты, фильтры и стеклянные сосуды.
Данная гарантия не предоставляет каких-либо других прав,
кроме тех, которые четко изложены выше, при этом
изготовитель не принимает каких-либо претензий, связанных с
косвенными ущербами и убытками. Данная гарантия
предлагается в качестве дополнительной льготы и не
ограничивает ваших правпотребителя.
≈
RN42221MEE Rev8.qxp_Morphy Richards Instruction Book 23/07/2015 19:38 Page 29
Page 30

• Bu cihazın güvenli bir şekilde kullanımıyla ilgili bilgilerin
verilmesi ve mevcut tehlikeleri anlamaları koşuluyla, bu
cihaz, 8 yaşından büyük çocuklar tarafından ve düşük
fiziksel, duyusal ve zihinsel kabiliyetleri olan veya deneyim
veya bilgi eksikliği bulunan kişilerce kullanılabilir. Çocuklar
cihazla oynamamalıdır. Gözetim altında bulunmadıkları
sürece temizlik ve kullanıcı bakımı çocuklar tarafından
yapılamaz.
• Buhar jeneratörünü ve kordonunu 8 yaşından küçük
çocukların erişiminden daima uzak tutun.
• Elektrik hattına bağlıyken buhar jeneratörü tek başına
bırakılmamalıdır.
• Suyla doldurulmadan önce fiş prizden çıkartılmalıdır.
• Buhar jeneratörü sağlam bir yüzey üzerinde kullanılmalı ve
bırakılmalıdır.
• Ütüyü, buhar jeneratörü tabanı veya arka tarafı üzerine
yerleştirirken, arka tarafın veya tabanın konulduğu yüzeyin
sağlam olduğundan emin olun.
• Buhar jeneratörü yere düşürülmüşse, belirgin hasar
emareleri varsa veya sızıntı yapıyorsa kullanılmamalıdır.
• Doldurma deliği basınçlı sistemin tasarımı nedeniyle
kullanım sırasında açılabilir.
t
30
UYARI: Sıcak metale, sıcak suya veya buhara dokunmayla
yanıklar oluşabilir.
• UYARI: Elektrik çarpmasına maruz kalmamak için, cihazı su /
sıvı içine daldırmayın.
Elektrik gereksinimleri ve elektrik kablosu
• Cihazınızın etiketinde yazan voltajın evinizde bulunması gereken
A.C. (Alternatif akım) elektrik şebekesine uygun olduğunu kontrol
edin.
• Hasarlı bir elektrik kablosu veya gromet ile çalıştırmayın; tehlike
oluşmaması için üretici, servis temsilcisi veya benzer nitelikte
kişiler tarafından kablo değiştirilmelidir.
• Elektrik kablosunun ütünün sıcak taban plakasına temas etmesini
önleyin.
LÜTFEN TÜM TALİMATLARI OKUYUN VE
İLERİDE BAŞVURMAK ÜZERE SAKLAYIN
DİKKAT!
SICAK YÜZEY
LÜTFEN SICAK
YÜZEYLERE DİKKAT
EDİN
DİKKATLİ KULLANIN
Yanıklara müdahale
• Etkilenen bölge üzerinden derhal soğuk su akıtın.
• Giysilerinizi çıkartmak için durmayın.
• Zaman kaybetmeden tıbbi yardım alın.
RN42221MEE Rev8.qxp_Morphy Richards Instruction Book 23/07/2015 19:38 Page 30
Page 31

31
t
Buhar jeneratörü genel görünümü
(1) Buhar püskürtme düğmesi (sadece belirli modeller)
(2) Buhar tetiği
(3) Sıcaklık ayar düğmesi
(4) Taban plakası
(5) Sıcaklık gösterge ışığı
(6) Ütü
(7) Doldurma kapağı
(8) Çıkarılabilir su deposu
(9) Kontrol paneli (aşağıya bakın)
(10) Taban ünitesi
(11) Kablo saklama oluğu
(12) Kablo kelepçesi
(13) Kazan anahtarı
(14) Kazan vidası
(15) Kazan kapağı
Kontrol paneli (8) genel görünümü
Açma/Kapama düğmesi (16) ve Güç gösterge ışığı (17)
Bir elektrik prizine takın ve Açma/Kapama Düğmesine (16)
basın. Güç gösterge ışığı (17) yanacak ve düşük buhar seviyesi
düğmesi (20) yanıp sönecektir. Kapatmak için, Açma/Kapama
Düğmesine (16) 3 saniye süreyle basın. Tüm gösterge ışıkları
sönecektir.
Düşük su seviyesi gösterge ışığı (18)
Su seviyesi çok düşükse, düşük su seviyesi gösterge ışığı (18)
yanacaktır. Bkz. ‘Doldurma’.
Kireç çözme gösterge ışığı (19)
Kazandaki kirecin çözülmesi gerekiyorsa, kireç çözme gösterge
ışığı (19) yanacaktır. Eğer bu olursa, bkz. ‘Kazanın temizlenmesi’.
Buhar seviye düğmeleri (Düşük 21 / Orta 20 / Yüksek 22)
İstediğiniz buhar seviyesini seçmek için ilgili düğmeye basın:
düşük (20), orta (21) veya yüksek (22). Bkz. ‘Buhar
Jeneratörünün buharlı ütüleme için kullanılması’.
Sıcaklık kılavuzu
Tüm Morphy Richards ütülerinin ayarlanabilir kontrol düğmesi üzerindeki ısı ayarı işaretleri, Uluslararası Tekstil Bakımı Etiketleme Kodu ile
uyumludur.
(120˚C Maks.) Soğuk (160˚C Maks.) Ilık (210˚C Maks) Sıcak MAKSİMUM ayar
Simge
Kontrol Ütüleme
düğmesi yapmayın
konumları
Buhar seviyesi
ayarı Düşük Orta/Yüksek Yüksek
Kumaş Naylon, Asetatlar Yün, Polyester Pamuklu, Keten
sentetik kumaşlar karışımları Suni ipek, Suni ipek
karışımları
Ütüleme Ters taraftan ütüleyin Bu ayarı gerektiren
nem gerekiyorsa kumaşlar genellikle
nemli bez kullanın buharlı presleme gerektirir
(Asetat değil)
Buharlama
Buharsız
Buhar Jeneratörünün buharlı ütüleme için
kullanılması
1
Buharlı ütüleme için, çıkarılabilir su deposunu (8) sökün, doldurma
kapağını (7) kaldırın ve suyu maksimum doldurma çizgisine kadar
doldurun. Su deposunu yerine takın.
2
Cihazı bir elektrik prizine takın ve üniteyi çalıştırmak için
Açma/Kapama düğmesine (16) basın.
3
Sıcaklık düğmesini (3) giysiye uygun şekilde (Sıcaklık kılavuzuna
bakın) çevirin. Sıcaklık gösterge ışığı (5) sıcaklığa ulaşılana kadar
yanar. Sıcaklık gösterge ışığı (5) söndüğünde ütülemeye başlayın.
Sıcaklık düğmesini (3) sıcaklığı azaltma yönünde çevirirseniz,
sıcaklık gösterge ışığı (5) yanana ve ardından tekrar sönene kadar
bekleyin.
4
İstenen buhar seviyesini seçmek için ilgili buhar düğmesine
(20/21/22) basın. Buhar seviyesine erişildiğinde buhar düğmesinin
yanıp sönmesi duracak ve sürekli olarak yanacaktır.
RN42221MEE Rev8.qxp_Morphy Richards Instruction Book 23/07/2015 19:38 Page 31
Page 32

32
Ütüleme sırasında güçlü, sürekli bir buhar akışı için, taban
plakasından buharı sevk etmek üzere buhar tetiğine (2) basın ve
basılı tutun.
UYARI: Buhar besleme kordonu (23) kullanım sırasında sıcak
hale gelir.
Buhar püskürtme düğmesi
(sadece belirli modeller)
5
Buhar püskürtme fonksiyonu daha sert kumaşların (kot ve keten
gibi) ipliklerini gevşetmek ve inatçı, erişmesi güç kırışıklıkların
giderilmesi için idealdir.
Ütüleme sırasında hızlı, güçlü bir buhar çıkışı üretmek için,
buhar püskürtme düğmesine (1) basın ve bırakın.
NOT: Buhar püskürtme fonksiyonunu kullandıktan sonra, ikinci
bir buhar çıkışını üretebilmesi için buhar üreteci ütünüz 5
saniyeye ihtiyaç duyacaktır. Daha yüksek düzeyde sürekli
buhara ihtiyaç duyarsanız, uygun buhar seviyesini seçin ve
buhar tetiğini (2) yukarıda açıklandığı şekilde kullanın.
İki buhar fonksiyonunu bir arada kullanmayın. İki düğmenin
birlikte kullanılması buhar akışını kesebilir ve sürekli buharın
tamamen kapatılmasına yol açabilir. En uygun buhar çıkışı için,
her buhar fonksiyonunu ayrı olarak ve yukarıda açıklandığı
şekilde kullanın.
Doldurma
6
• SU SERTLİĞİNİN YÜKSEK OLDUĞU BÖLGELERDE, %50
MUSLUK SUYU VE %50 SAF VEYA ARITILMIŞ SU
KARIŞIMININ KULLANILMASINI ÖNERİRİZ.
• Akü seviye tamamlama sıvısını veya kola, şeker, kokulu katkılar
gibi maddeleri içeren suyu veya bir buzdolabından alınmış
donmuş suyu kullanmayın.
Kullanım sırasında yeniden dolum
• Su seviyesi çok düşükse, düşük su seviyesi gösterge ışığı (18)
yanar, bir sesli ikaz verilir ve ünite buhar üretmez. Bu durumda, su
deposunu sökün ve suyla doldurun.
Özellikler
Kuru ütüleme
Buhar jeneratörünüzü sadece bir kuru ütü olarak kullanmak için,
sayfa 5’te ‘Buhar Jeneratörünün buharlı ütüleme için
kullanılması’ bölümündeki adım 2 ve 3’e bakın. Depo içine su
koymanız veya bir buhar seviyesi seçmeniz gerekmez. Ya buhar
püskürtme düğmesine (1) (sadece belirli modeller) ya da buhar
tetiğine (2) her 10 dakikada en az bir defa basın, aksi taktirde
ürün otomatik olarak kapanacaktır.
Otomatik kapatma (sadece belirli modeller)
Buhar püskürtme düğmesi (1) (sadece belirli modeller) ya da
buhar tetiği (2) 10 dakika süresince kullanılmazsa, güvenlik ve
enerji tasarrufu amacıyla ürün otomatik olarak kapanacaktır.
Yeniden çalıştırmak için, Açma/Kapama düğmesine (16) basın
(sayfa 5’te ‘Buhar Jeneratörünün buharlı ütüleme için
kullanılması’ bölümünde adım 2’ye bakın) ve sıcaklığın tekrar
yükselmesini bekleyin.
Buhar fonksiyonu
Buharlama sırasında, az miktarda su taban plakasından
püskürtülebilir. Bu normaldir ve buharın kısa sürelerle ve sadece
ütü doğru sıcaklıkta iken (hazır olduğunda ütü üzerindeki
sıcaklık gösterge ışığı (5) söner) kullanılmasıyla bu durum
önlenebilir.
Kazan ünitesinin ani olarak sarsılması da taban plakasında su
damlacıklarına neden olabilir; bu yüzden, ütüleme sırasında
taban ünitesini hareket ettirmeyin. İlk ütülemenizi eski bir havlu
üzerinde yapmanızı tavsiye ederiz.
NOT: Ürün, buharlı ütüleme sırasında ara sıra bir pompalama
sesi çıkartabilir. Bu normaldir ve suyun buhar jeneratöründen
pompalanıyor olmasından kaynaklanır.
Dikey buhar
7
Dikey buhar askıda duran giysilerdeki, perdelerdeki, duvar
kumaşlarındaki vb. kırışıklıkların giderilmesinde özellikle
yararlıdır. Ütüyü eşyadan 1 - 2 cm uzakta tutun ve ya buhar
püskürtme düğmesine (1) (sadece belirli modeller) ya da buhar
tetiğine (2) basın.
UYARI: Giyilmekte olan giysiler üzerinde dikey buhar özelliğini
kullanmayın.
Kullanmadan önce
• Taban plakası (3) ve taban ünitesinden varsa her türlü koruyucu
örtüyü kaldırın.
• Elektrik kablosunu (23) ve buhar besleme kordonunu (22) açın ve
düzleştirin.
• Kumaş ve giysilerde ütüleme talimatlarının bulunması gerekir.
Ütüleme talimatlarını içermiyorlarsa, sayfa 4’te yer alan sıcaklık
kılavuzunu takip edin, ancak öncelikle giysinin kıvrım veya benzeri
makul bir bölgesini ütüleyerek sıcaklığı test edin.
• ‘Soğuk’ kumaşlarla başlamak ve sonrasında daha yüksek ayarlara
geçmek önerilir. Ütü soğuduğundan daha hızlı ısınır böylece
zaman ve elektrikten tasarruf edersiniz.
• Sıcaklık düğmesini sıcak bir ayardan daha soğuk bir ayara
getirirseniz, ütüleme işlemine devam etmeden önce ütü
sıcaklığının düşmesini bekleyin.
NOT: Su deposu çıkarılabilir olduğundan, üniteyi taşırken ve
hareket ettirirken tabanı iki elle tutun.
Bakım
Kazanın temizlenmesi
Kazandaki kirecin çözülmesi gerektiğinde, kireç çözme gösterge
ışığı (19) yanacaktır. Bu olduğunda, kazanın tüm kireç giderilene
kadar temiz su kullanılarak elle yıkanması gerekir. Gösterge ışığı
ancak kireç giderildiğinde sönecektir.
UYARI: Buhar jeneratörü sıcak iken kazan vidasını (14) asla
sökmeyin.
1 Cihazı elektrik prizinden çıkartın ve iki saat boyunca soğumaya
bırakın.
2 Çıkarılabilir su deposunu (8) sökün ve ütüyü (6) arka tarafı üzerinde
bir lavabonun yanındaki sağlam bir yüzey üzerine koyun.
3 Taban ünitesini (10) iki elle sıkıca tutun ve iyice sallayın.
4 Taban ünitesini (10) baş aşağı çevirin ve kazan kapağını (15) geri
çekin. Kazan vidasını (14), taban ünitesinin alt tarafında bulunan
kazan anahtarı (13) ile gevşetin. Vida sökülemeyecek ölçüde
RN42221MEE Rev8.qxp_Morphy Richards Instruction Book 23/07/2015 19:38 Page 32
Page 33

33
sıkıysa, daha fazla kuvvet almak için büyük bir tornavida veya bir
lokma ve anahtar seti kullanmayı deneyin.
5 Taban ünitesini (10) lavabonun üzerinde tutun, tüm suyu ve
çözülmüş kireci kazandan lavaboya boşaltmak için üniteyi doğru
bir şekilde çevirin.
8
6 Temiz su kullanarak, tüm kireç giderilene kadar kazanı ardı ardına
doldurun ve boşaltın.
7 Tam olarak sıkıldığından emin olarak kazan vidasını yerine takın.
Kazan kapağını, kazan anahtarını, su deposunu ve ütüyü taban
ünitesine takın.
UYARI: Kazan vidasını (14) takmadan önce kazanın boş
olduğundan emin olun.
8 Kireç çözme gösterge ışığı (19) ürünü bir sonraki kullanışınızda
sönecektir. Suyu pompalayana ve kazanın temizlenmiş olduğunu
bildirene kadar bir dakika süresince bekleyin.
Kaplamalı taban plakasını temizlemek için
Kaplamaya zarar verebileceğinden ovma tozu veya çözeltisi
kullanmayın.
Herhangi bir yapay fiberin taban plakasına (4) yapışması
durumunda, ütüyü MAX konumuna ayarlayın ve kalıntıyı yüzeyden
çekecek temiz bir parça pamuk üzerinden geçirin.
Dış kısmın temizlenmesi
Ünitenin soğumasını bekleyin ve ıslak bir bez ve yumuşak
deterjanla sildikten sonra kurulayın.
Boşaltılması ve saklanması
9
Cihazın soğumasını bekleyin. Taban ünitesinden (10) sökerek ve
doldurma kapağını (7) açarak su deposundan (8) suyu boşaltın.
Su deposu boşaldığında, taban ünitesine yeniden takın.
Buhar jeneratörü uzun bir süre kullanılmayacaksa, kazanı da
belirtildiği şekilde boşaltın, bkz. ‘Kazanın temizlenmesi’.
Saklamak için, kablo kelepçesini (12) dışa doğru çekin. Elektrik
kablosunu (24) ve buhar besleme kordonunu (23) kablo saklama
oluğunda (11) taban ünitesi etrafına sarın. Kabloyu, kablo
kelepçesiyle (12) yerine sabitleyin. Özellikle taban ünitesinin
çıkışında kabloların bükülmemesine dikkat edin.
Bizimle irtibata geçin
Yardım hattı
Cihazınızla ilgili herhangi bir sorununuz varsa, cihazı satın
aldığınız mağazadan daha fazla yardım sağlayabileceğimizden
lütfen Yardım Hattımızı arayın. Sorularınıza daha hızlı yanıt
verebilmemize yardımcı olmak için bizi aradığınızda, lütfen ürün
adı, model numarası ve seri numarasını hazır bulundurun.
Bize Danışın
Sorularınız ve yorumlarınız veya ürünlerinizden etkili şekilde
yararlanmanızı sağlayacak ilginç ipuçları için bize çevrimiçi
ulaşın:
Blog: www.homeofthehouseproud.com
Facebook: www.facebook.com/morphyrichardsuk
Twitter: www.twitter.com/loveyourmorphy
Web sitesi: www.morphyrichards.com
İKİ YILLIK GARANTİNİZ
Bu cihaz, iki yıllık onarım ya da deŘifltirme garantisi kapsamı
altındadır.
Satın alma kanıtı olarak perakende fiflinin saklanması önemlidir.
Fiflinizi ileride kullanmak için bu arka kısma zımbalayın.
Üründe bir arıza oluflursa lütfen aflaŘıdaki bilgileri belirtin. Bu
numaralar ürünün tabanında bulunabilir.
Model no.
Seri no.
Tüm Morphy Richards ürünleri fabrikadan çıkmadan önce tek tek
test edilmektedir. Cihazın satın alındıktan sonraki 28 gün içinde
arızalı olduŘu belirlenmesi durumunda, deŘifltirilmesi için satın
alındıŘı yere iade edilmelidir.
28 gün sonra veya satın alma iflleminden sonraki 24 ay içinde arıza
oluflursa, ürünün üzerindeki Model numarası ve Seri numarasını
belirterek bölgenizdeki distribütör ile iletiflim kurmalı ya da aflaŘıda
verilen adresten bölgenizdeki distribütöre yazmalısınız.
Ürünü, satın alma kanıtının bir kopyasıyla birlikte aflaŘıdaki adrese
geri göndermeniz (güvenli, yeterli düzeyde paketlenmifl olarak)
istenecektir.
AflaŘıda belirtilen garanti harici durumlara (1-9) tabi olarak, arızalı
cihaz tamir edilecek veya deŘifltirilecek ve genellikle alındıktan
sonra 7 ifl günü içinde gönderilecektir.
Herhangi bir nedenle bu ürün 2 yıllık garanti döneminde
deŘifltirilirse, yeni ürünün garantisi orijinal satın alma tarihinden
itibaren hesaplanacaktır. Bu nedenle ilk satın alma tarihini belirtmek
için faturanızı saklamanız önemlidir.
2 yıllık garantinin geçerli olması içifln cihazın, üreticinin talimatlarına
uygun olarak kullanılmıfl olması gerekmektedir. ÖrneŘin, cihazda
kireç çözücü ifllemlerinin uygulanması ve filtrelerin belirtildiŘi gibi
temiz tutulması gerekmektedir.
Morphy Richards ya da yerel distribütörünüz aflaŘıdaki durumlarda
cihazı garanti kapsamında deŘifltirmek veya tamir etmek zorunda
olmayacaktır:
1 Arıza yanlıfl kullanım, ihmal veya üretici tavsiyelerine ters
kullanımdan kaynaklanıyorsa veya arıza güç yüklenmeleri ya da
taflıma sırasında oluflan hasardan kaynaklanıyorsa.
2 Cihaz, ürüne belirtilen dıflında bir besleme voltajıyla kullanıldıysa.
3 Servis personeli (veya yetkili bayi) dıflında kifliler tarafından tamir
yapılmaya çalıflılmıflsa.
4 Cihaz kiralama amacıyla veya ev dıflında kullanıldıysa.
5 Cihaz ikinci eldir.
6 Morphy Richards ya da bölgenizdeki distribütör, garanti kapsamında
herhangi bir tür servis ifllemi gerçeklefltirmek zorunda deŘildir.
7 Garanti çantalar, filtreler ve cam sürahiler gibi sarf malzemelerini
kapsamaz.
8 Piller ve sızıntı hasarı garanti kapsamında deŘildir.
9 Filtrelerin belirtildiği şekilde temizlenmemesi ve değiştirilmemesi.
Bu garanti yukarıda açık olarak belirtilen dıflında herhangi bir hak
vermemektedir ve nihai hasardan dolayı tazminat taleplerini
kapsamamaktadır. Bu garanti ek bir fayda olarak sunulmaktadır ve
tüketici olarak yasal haklarınızı etkilememektedir.
t
RN42221MEE Rev8.qxp_Morphy Richards Instruction Book 23/07/2015 19:38 Page 33
Page 34

34
• Η παρούσα συσκευή μπορεί να χρησιμοποιηθεί από παιδιά ηλικίας από 8
ετών και άνω και από άτομα με μειωμένες σωματικές, αισθητήριες ή
διανοητικές ικανότητες ή χωρίς την απαραίτητη εμπειρία ή γνώσεις, σε
περίπτωση που επιβλέπονται ή έχουν εκπαιδευτεί στην ασφαλή χρήση
της συσκευής και κατανοούν τους εμπλεκόμενους κινδύνους. Τα παιδιά
δεν πρέπει να παίζουν με τη συσκευή. Ο καθαρισμός και η συντήρηση
δεν πρέπει να γίνονται από παιδιά χωρίς επίβλεψη.
• Διατηρείτε πάντοτε τη γεννήτρια ατμού και το καλώδιό της μακριά από
παιδιά κάτω των 8 ετών.
• Η γεννήτρια ατμού πρέπει να είναι υπό διαρκή επιτήρηση όταν είναι
συνδεδεμένη με την κεντρική παροχή ρεύματος.
• Το φις πρέπει να αφαιρείται από την πρίζα πριν από την πλήρωση με
νερό.
• Η γεννήτρια ατμού πρέπει να χρησιμοποιείται και να τοποθετείται πάνω
σε σταθερή επιφάνεια.
• Όταν τοποθετείτε το σίδερο στη βάση της γεννήτριας ατμού ή όταν το
στηρίζετε όρθιο, βεβαιωθείτε ότι η επιφάνεια πάνω στην οποία είναι
τοποθετημένη η βάση ή στηρίζεται όρθιο είναι σταθερή.
• Δεν πρέπει να χρησιμοποιείτε τη γεννήτρια ατμού σε περίπτωση πτώσης,
αν υπάρχουν ορατές ενδείξεις βλάβης ή αν παρουσιάζει διαρροή.
• Το άνοιγμα πλήρωσης πρέπει να είναι ανοικτό κατά τη διάρκεια της
χρήσης λόγω του σχεδιασμού του υπό πίεση συστήματος.
k
ΠΡΟΕΙΔΟΠΟΙΗΣΗ: Η επαφή με καυτά μεταλλικά μέρη, καυτό
νερό ή ατμό μπορεί να προκαλέσει εγκαύματα.
• ΠΡΟΕΙΔΟΠΟΙΗΣΗ: Για την αποφυγή ηλεκτροπληξίας, μην
βυθίζετε τη συσκευή σε νερό/υγρό.
Ηλεκτρικές απαιτήσεις και καλώδιο ρεύματος
• Ελέγξτε εάν η τάση που αναγράφεται στην πινακίδα
τεχνικών χαρακτηριστικών της συσκευής αντιστοιχεί στην
ηλεκτρική παροχή του σπιτιού σας, η οποία πρέπει να είναι
εναλλασσόμενου ρεύματος (A.C.).
• Μην θέσετε σε λειτουργία τη συσκευή εάν υπάρχει βλάβη
στο καλώδιο τροφοδοσίας ή στο δακτύλιο. Πρέπει να γίνει
αντικατάσταση από τον κατασκευαστή, τον αντιπρόσωπο
σέρβις ή από άλλο εξειδικευμένο άτομο για την αποφυγή
κινδύνου.
• Το καλώδιο τροφοδοσίας δεν πρέπει να έρχεται σε επαφή με
τη ζεστή πλάκα του σίδερου.
ΔΙΑΒΑΣΤΕ ΟΛΕΣ ΤΙΣ ΟΔΗΓΙΕΣ ΚΑΙ ΦΥΛΑΞΤΕ ΤΙΣ
ΓΙΑ ΑΝΑΦΟΡΑ
ΠΡΟΣΟΧΗ!
ΘΕΡΜΗ ΕΠΙΦΑΝΕΙΑ
ΠΡΟΣΕΞΤΕ
ΤΙΣ ΘΕΡΜΕΣ ΕΠΙΦΑΝΕΙΕΣ
ΧΕΙΡΙΣΤΕΙΤΕ ΤΙΣ ΜΕ ΠΡΟΣΟΧΗ
Αντιμετώπιση εγκαυμάτων
• Ξεπλύνετε αμέσως την περιοχή του εγκαύματος με κρύο νερό.
• Μην χάνετε χρόνο προσπαθώντας να βγάλετε τα ρούχα σας.
• Ζητήστε γρήγορα ιατρικές συμβουλές.
RN42221MEE Rev8.qxp_Morphy Richards Instruction Book 23/07/2015 19:38 Page 34
Page 35

35
k
Επισκόπηση γεννήτριας ατμού
(1) Κουμπί ενίσχυσης ατμού (μόνο ορισμένα μοντέλα)
(2) Σκανδάλη παροχής ατμού
(3) Επιλογέας θερμοκρασίας
(4) Πλάκα
(5) Ενδεικτική λυχνία θερμοκρασίας
(6) Σίδερο
(7) Καπάκι πλήρωσης
(8) Αποσπώμενο δοχείο νερού
(9) Πίνακας ελέγχου (βλ. πιο κάτω)
(10) Μονάδα βάσης
(11)Εγκοπή αποθήκευσης καλωδίου
(12)Σφιγκτήρας καλωδίου
(13)Κλειδί μπόιλερ
(14) Βίδα μπόιλερ
(15) Καπάκι μπόιλερ
Επισκόπηση πίνακα ελέγχου (8)
Κουμπί On/Off (16) και ενδεικτική λυχνία λειτουργίας (17)
Συνδέστε τη συσκευή σε πρίζα ρεύματος και πατήστε το
κουμπί On/Off (16). Η ενδεικτική λυχνία λειτουργίας (17) θα
ανάψει και το κουμπί χαμηλής στάθμης ατμού (20) θα αρχίσει
να αναβοσβήνει. Για να απενεργοποιήσετε τη συσκευή,
πατήστε παρατεταμένα το κουμπί On/Off (16) επί 3
δευτερόλεπτα. Όλες οι ενδεικτικές λυχνίες θα σβήσουν.
Ενδεικτική λυχνία χαμηλής στάθμης νερού (18)
Αν η στάθμη νερού είναι πολύ χαμηλή, θα ανάψει η
ενδεικτική λυχνία χαμηλής στάθμης νερού (18). Βλ.
«Πλήρωση».
Ενδεικτική λυχνία αφαλάτωσης (19)
Αν το μπόιλερ χρειάζεται αφαλάτωση, θα ανάψει η ενδεικτική
λυχνία αφαλάτωσης (19). Στην περίπτωση αυτή, ανατρέξτε
στην ενότητα «Καθαρισμός του μπόιλερ».
Κουμπιά στάθμης ατμού (Χαμηλή 20 / Μεσαία 21 / Υψηλή 22)
Πατήστε το αντίστοιχο κουμπί για να επιλέξετε την
επιθυμητή στάθμη ατμού: χαμηλή (20), μεσαία (21) ή υψηλή
(22). Βλ. «Χρήση της γεννήτριας ατμού για σιδέρωμα με
ατμό».
Οδηγός θερμοκρασίας
Οι επισημάνσεις των ρυθμίσεων θερμοκρασίας στο ρυθμιζόμενο κουμπί ελέγχου είναι ίδιες με τις επισημάνσεις του διεθνούς
κώδικα ετικετών φροντίδας υφασμάτων σε όλα τα σίδερα της Morphy Richards.
(έως 120˚C) Χαμηλή (έως 160˚C) Μέτρια (έως 210˚C) Υψηλή Ρύθμιση MAX
Σύμβολο
Θέσεις Μη
κουμπιού σιδερώνετε
ελέγχου καθόλου
Ρύθμιση στάθμης
ατμού Χαμηλή Μεσαία/Υψηλή Υψηλή
Υφάσματα Νάιλον, ασετάτ Μάλλινα, μίγματα Βαμβακερά, λινά,
συνθετικά υφάσματα πολυεστέρα Ρεγιόν, μίγματα
ρεγιόν
Σιδέρωμα Σιδερώστε από την ανάποδη Για τα υφάσματα που απαιτείται αυτή η ρύθμιση,
αν απαιτείται υγρασία απαιτείται συνήθως
χρησιμοποιήστε νωπό πανί σιδέρωμα με ατμό
(εκτός από ασετάτ)
Ατμός
Χωρίς ατμό
RN42221MEE Rev8.qxp_Morphy Richards Instruction Book 23/07/2015 19:38 Page 35
Page 36

36
Χρήση της γεννήτριας ατμού για σιδέρωμα με
ατμό
1
Για σιδέρωμα με ατμό, αφαιρέστε το αποσπώμενο δοχείο
νερού (8), ανασηκώστε το καπάκι πλήρωσης (7) και γεμίστε
με νερό μέχρι τη γραμμή μέγιστης πλήρωσης. Βάλτε ξανά το
δοχείο νερού στη θέση του.
2
Συνδέστε τη συσκευή σε πρίζα ρεύματος και πατήστε το
κουμπί On/Off (16) για να ενεργοποιήσετε τη μονάδα.
3
Στρέψτε τον επιλογέα θερμοκρασίας (3) στην κατάλληλη
θέση ανάλογα με το ύφασμα (βλ. Οδηγός θερμοκρασίας). Η
ενδεικτική λυχνία θερμοκρασίας (5) παραμένει αναμμένη
μέχρι να επιτευχθεί η σωστή θερμοκρασία. Ξεκινήστε το
σιδέρωμα όταν σβήσει η ενδεικτική λυχνία θερμοκρασίας (5).
Αν επιλέξετε χαμηλότερη θερμοκρασία με τον επιλογέα
θερμοκρασίας (3), περιμένετε να ανάψει η ενδεικτική λυχνία
θερμοκρασίας (5) και μετά να σβήσει ξανά.
4
Πατήστε το αντίστοιχο κουμπί ατμού (20/21/22) για να
επιλέξετε την επιθυμητή στάθμη ατμού. Το κουμπί ατμού θα
σταματήσει να αναβοσβήνει και θα ανάψει σταθερά όταν
επιτευχθεί η επιλεγμένη στάθμη ατμού.
Για ισχυρή, σταθερή ροή ατμού κατά τη διάρκεια του
σιδερώματος, πιέστε παρατεταμένα τη σκανδάλη παροχής
ατμού (2) ) για να εξέλθει ατμός από την πλάκα του σίδερου.
ΠΡΟΕΙΔΟΠΟΙΗΣΗ: Το καλώδιο παροχής ατμού (23)
θερμαίνεται κατά τη διάρκεια της χρήσης.
Κουμπί ενίσχυσης ατμού
(μόνο ορισμένα μοντέλα)
5
Η λειτουργία ενίσχυσης ατμού είναι ιδανική για τη χαλάρωση
των ινών των σκληρότερων υφασμάτων (όπως τα τζιν και τα
λινά) καθώς και για να αφαιρείτε τις επίμονες ζάρες
δύσκολης προσέγγισης.
Για να παραγάγετε μια γρήγορη, ισχυρή ριπή ατμού κατά τη
διάρκεια του σιδερώματος. απλώς πατήστε στιγμιαία το
κουμπί ενίσχυσης ατμού (1).
ΣΗΜΕΙΩΣΗ: Μετά τη χρήση της λειτουργίας ενίσχυσης
ατμού, η γεννήτρια ατμού χρειάζεται έως και 5
δευτερόλεπτα για να επαναθερμανθεί προτού μπορέσει να
παραγάγει μια δεύτερη ριπή ατμού. Αν επιθυμείτε μια συνεχή
υψηλή στάθμη ατμού, επιλέξτε την κατάλληλη στάθμη ατμού
και χρησιμοποιήστε τη σκανδάλη παροχής ατμού (2)
σύμφωνα με τις οδηγίες παραπάνω.
Μη συνδυάζετε τις δύο λειτουργίες ατμού. Η χρήση των δύο
κουμπιών ταυτόχρονα θα διακόψει τη ροή ατμού και μπορεί
να έχει ως αποτέλεσμα την ολική διακοπή του συνεχούς
ατμού. Για μέγιστη παροχή ατμού, χρησιμοποιείτε την κάθε
λειτουργία ατμού ξεχωριστά και όπως περιγράφεται
παραπάνω.
Πλήρωση
6
• ΣΕ ΠΕΡΙΟΧΕΣ ΜΕ ΣΚΛΗΡΟ ΝΕΡΟ, ΣΥΝΙΣΤΟΥΜΕ ΤΗ ΧΡΗΣΗ
ΜΙΓΜΑΤΟΣ 50 % ΝΕΡΟΥ ΒΡΥΣΗΣ ΚΑΙ 50 % ΑΠΟΣΤΑΓΜΕΝΟΥ
Ή ΑΠΙΟΝΙΣΜΕΝΟΥ ΝΕΡΟΥ.
• Μη χρησιμοποιείτε ποτέ υγρό συμπλήρωσης μπαταριών ή
νερό που περιέχει ουσίες όπως άμυλο, ζάχαρη, αρωματικά
πρόσθετα ή αποψυγμένο νερό από καταψύκτη.
Επαναπλήρωση κατά τη χρήση
• Αν η στάθμη νερού είναι πολύ χαμηλή, η ενδεικτική λυχνία
χαμηλής στάθμης ατμού (18) θα ανάψει, ο βομβητής θα
ηχήσει και η μονάδα δεν θα παράγει ατμό. Στην περίπτωση
αυτή, αποσυνδέστε το δοχείο νερού και γεμίστε το ξανά με
νερό.
Χαρακτηριστικά
Στεγνό σιδέρωμα
Για να χρησιμοποιήσετε τη γεννήτρια ατμού μόνο για στεγνό
σιδέρωμα, ακολουθήστε τα βήματα 2 και 3 της ενότητας
«Χρήση της γεννήτριας ατμού για σιδέρωμα με ατμό» στη
σελίδα 5. Δεν χρειάζεται να βάλετε νερό στο δοχείο ούτε να
επιλέξετε κάποια στάθμη ατμού. Πατήστε είτε το κουμπί
ενίσχυσης ατμού (1) (μόνο ορισμένα μοντέλα) ή τη σκανδάλη
παροχής ατμού (2) τουλάχιστον μία φορά κάθε 10 λεπτά,
διαφορετικά το προϊόν θα απενεργοποιηθεί αυτόματα.
Αυτόματη απενεργοποίηση (μόνο ορισμένα μοντέλα)
Εάν είτε το κουμπί ενίσχυσης ατμού (1) (μόνο ορισμένα
μοντέλα) ή η σκανδάλη παροχής ατμού (2) δεν
χρησιμοποιηθούν για 10 λεπτά, το προϊόν θα
απενεργοποιηθεί αυτόματα τόσο για λόγους ασφάλειας όσο
και για εξοικονόμηση ενέργειας.
Για επανεκκίνηση, πατήστε το κουμπί On/Off (16) (βλ. βήμα 2
ενότητας «Χρήση της γεννήτριας ατμού για σιδέρωμα με
ατμό» στη σελίδα 5) και περιμένετε να αυξηθεί ξανά η
θερμοκρασία.
Λειτουργία ατμού
Κατά τη διάρκεια του σιδερώματος με ατμό, ενδέχεται να
εκτοξεύονται μικρές ποσότητες νερού από την πλάκα του
σίδερου. Αυτό είναι φυσιολογικό, και μπορεί να αποφευχθεί
αν η λειτουργία ατμού χρησιμοποιείται για μικρά χρονικά
διαστήματα και μόνο όταν το σίδερο βρίσκεται στη σωστή
θερμοκρασία (η ενδεικτική λυχνία θερμοκρασίας (5) στο
σίδερο σβήνει όταν είναι έτοιμο).
Επίσης, τυχόν απότομα τινάγματα του μπόιλερ είναι δυνατό
να δημιουργήσουν σταγόνες νερού στην πλάκα του σίδερου.
Επομένως, μη μετακινείτε τη βάση κατά τη διάρκεια του
σιδερώματος. Σας συνιστούμε να χρησιμοποιήσετε μια παλιά
πετσέτα την πρώτη φορά που θα σιδερώσετε.
ΣΗΜΕΙΩΣΗ: Ενδέχεται να ακούγεται ενίοτε ένας ήχος
άντλησης από τη συσκευή κατά τη διάρκεια του σιδερώματος
με ατμό. Αυτό είναι φυσιολογικό και οφείλεται στην άντληση
νερού από τη γεννήτρια ατμού.
RN42221MEE Rev8.qxp_Morphy Richards Instruction Book 23/07/2015 19:38 Page 36
Page 37

37
Κάθετο σιδέρωμα με ατμό
7
Το κάθετο σιδέρωμα με ατμό είναι χρήσιμο για να αφαιρείτε
τις ζάρες από ρούχα που ήταν κρεμασμένα, κουρτίνες,
υφάσματα τοίχου κ.λπ. Κρατήστε το σίδερο σε απόσταση 1
έως 2 εκατ. από το ύφασμα και πατήστε είτε το κουμπί
ενίσχυσης ατμού (1) ή τη σκανδάλη παροχής ατμού (2).
ΠΡΟΕΙΔΟΠΟΙΗΣΗ: Μη χρησιμοποιείτε τη λειτουργία κάθετου
σιδερώματος με ατμό σε ρούχα όταν φοριούνται.
Πριν από τη χρήση
• Αφαιρέστε τυχόν προστατευτικά καλύμματα από την πλάκα
(3) και τη μονάδα βάσης, εφόσον υπάρχουν.
• Ξετυλίξτε και ισιώστε το καλώδιο ρεύματος (23) και το
καλώδιο παροχής ατμού (22).
• Τα υφάσματα και τα ρούχα θα πρέπει να φέρουν οδηγίες
σιδερώματος. Αν δεν συμβαίνει αυτό, ακολουθήστε τον
οδηγό θερμοκρασίας της σελίδας 4, δοκιμάστε όμως τη
θερμοκρασία σιδερώνοντας το εσωτερικό στρίφωμα του
υφάσματος ή κάποιο άλλο μη εμφανές σημείο.
• Συνιστάται να αρχίζετε το σιδέρωμα με ενδύματα που
σιδερώνονται σε χαμηλή θερμοκρασία και να συνεχίζετε με
υψηλότερες θερμοκρασίες. Ένα σίδερο ζεσταίνεται πιο
γρήγορα από ό,τι κρυώνει και για το λόγο αυτό, θα
εξοικονομήσετε χρόνο και ηλεκτρικό ρεύμα.
• Αν μειώσετε τη θερμοκρασία σιδερώματος με τον επιλογέα
θερμοκρασίας, περιμένετε να σταθεροποιηθεί η
θερμοκρασία του σίδερου πριν συνεχίσετε το σιδέρωμα.
ΣΗΜΕΙΩΣΗ: Κρατάτε τη βάση με τα δύο χέρια σας όταν
χειρίζεστε και κινείτε τη συσκευή, επειδή το δοχείο νερού
είναι αποσπώμενο.
Συντήρηση
Καθαρισμός του μπόιλερ
Όταν το μπόιλερ χρειάζεται αφαλάτωση, θα ανάψει η
ενδεικτική λυχνία αφαλάτωσης (19). Όταν συμβεί αυτό, το
μπόιλερ πρέπει να ξεπλυθεί στο χέρι με καθαρό νερό μέχρι
να αφαιρεθούν όλα τα άλατα. Η ενδεικτική λυχνία θα σβήσει
μόνο όταν έχουν αφαιρεθεί όλα τα άλατα.
ΠΡΟΕΙΔΟΠΟΙΗΣΗ: Μην αφαιρείτε ποτέ τη βίδα (14) του
μπόιλερ όταν η θερμοκρασία της γεννήτριας ατμού είναι
υψηλή.
1 Αποσυνδέστε τη συσκευή από την πρίζα ρεύματος και
αφήστε την να κρυώσει για δύο ώρες.
2 Αφαιρέστε το αποσπώμενο δοχείο νερού (8) και στηρίξτε
όρθιο το σίδερο (6) πάνω σε σταθερή επιφάνεια, δίπλα σε
ένα νεροχύτη.
3 Κρατήστε σταθερά τη μονάδα βάσης (10) με τα δύο χέρια
σας και ανακινήστε καλά.
4 Γυρίστε ανάποδα τη μονάδα βάσης (10) και τραβήξτε προς τα
πίσω το καπάκι (15) του μπόιλερ. Ξεβιδώστε τη βίδα (14) του
μπόιλερ με το κλειδί μπόιλερ (13), το οποίο είναι στερεωμένο
στην κάτω πλευρά της μονάδας βάσης. Αν η βίδα είναι πολύ
σφιχτή για να ξεβιδωθεί, δοκιμάστε να χρησιμοποιήσετε ένα
μεγάλο κατσαβίδι ή ένα σετ σωληνωτών κλειδιών για
περισσότερη μόχλευση.
5 Κρατήστε τη μονάδα βάσης (10) πάνω από το νεροχύτη,
στρέψτε τη μονάδα προς τη σωστή φορά για να αδειάσει όλο
το νερό και τα άλατα από το μπόιλερ μέσα στο νεροχύτη.
8
6 Γεμίστε ξανά και αδειάστε επανειλημμένα το μπόιλερ
χρησιμοποιώντας καθαρό νερό, μέχρι να απομακρυνθούν
όλα τα άλατα.
7 Επανατοποθετήστε τη βίδα του μπόιλερ και βεβαιωθείτε ότι
την έχετε σφίξει καλά. Βάλτε ξανά στη θέση τους το καπάκι
του μπόιλερ, το κλειδί του μπόιλερ, το δοχείο νερού και το
σίδερο στη μονάδα βάσης.
ΠΡΟΕΙΔΟΠΟΙΗΣΗ: Βεβαιωθείτε ότι το μπόιλερ είναι άδειο
πριν επανατοποθετήσετε τη βίδα (14) του μπόιλερ.
8 Η ενδεικτική λυχνία αφαλάτωσης (19) θα σβήσει την επόμενη
φορά που θα χρησιμοποιήσετε το προϊόν. Περιμένετε έως και
ένα λεπτό ενώ αντλεί νερό και διαπιστώνει ότι το μπόιλερ
έχει καθαριστεί.
Καθαρισμός πλάκας με επίστρωση
Μη χρησιμοποιήσετε σκόνη ή διάλυμα καθαρισμού διότι θα
προκαλέσετε φθορά στην επίστρωση.
Για να καθαρίσετε τυχόν λιωμένες τεχνητές ίνες που έχουν
κολλήσει στην επιφάνεια της πλάκας (4), ρυθμίστε το σίδερο
στη θέση MAX και περάστε το πάνω από ένα καθαρό κομμάτι
βαμβακερού υφάσματος, για να αφαιρεθούν οι λιωμένες ίνες
από την επιφάνεια.
Καθαρισμός εξωτερικής επιφάνειας
Αφήστε τη μονάδα να κρυώσει και σκουπίστε την επιφάνειά
της με υγρό πανί και ήπιο απορρυπαντικό. Στη συνέχεια,
σκουπίστε για να στεγνώσει.
Άδειασμα και αποθήκευση
9
Αφήστε τη συσκευή να κρυώσει. Αδειάστε το δοχείο νερού
(8) αφαιρώντας το από τη μονάδα βάσης (10) και ανοίγοντας
το καπάκι πλήρωσης (7). Μόλις αδειάσει το δοχείο νερού,
τοποθετήστε το ξανά στη μονάδα βάσης.
Αν δεν πρόκειται να χρησιμοποιήσετε τη γεννήτρια ατμού για
μεγάλο χρονικό διάστημα, αδειάστε και το μπόιλερ σύμφωνα
με τις οδηγίες, βλ. «Καθαρισμός του μπόιλερ».
Για να αποθηκεύσετε τη συσκευή, τραβήξτε το σφιγκτήρα
καλωδίου (12) προς τα έξω. Τυλίξτε το καλώδιο ρεύματος (24)
και το καλώδιο παροχής ατμού (23) γύρω από τη μονάδα
βάσης στην εγκοπή αποθήκευσης καλωδίου (11). Στερεώστε
το καλώδιο στη σωστή θέση με το σφιγκτήρα καλωδίου (12).
Αποφύγετε τη στρέβλωση των καλωδίων, ιδιαίτερα στην
έξοδο από τη μονάδα βάσης.
k
RN42221MEE Rev8.qxp_Morphy Richards Instruction Book 23/07/2015 19:38 Page 37
Page 38

38
Επικοινωνία
Γραμμή βοήθειας
Αν αντιμετωπίζετε κάποιο πρόβλημα με τη συσκευή σας,
καλέστε τη Γραμμή Βοήθειας, καθώς θα μπορέσουμε να σας
εξυπηρετήσουμε καλύτερα από το κατάστημα από το οποίο
αγοράσατε τη συσκευή. Όταν μας τηλεφωνείτε,
παρακαλούμε να έχετε διαθέσιμο το όνομα του προϊόντος,
τον αριθμό μοντέλου και τον αριθμό σειράς, ώστε να
μπορέσουμε να απαντήσουμε στο ερώτημά σας ταχύτερα.
Μιλήστε μας
Αν έχετε ερωτήσεις ή σχόλια ή θέλετε χρήσιμες συμβουλές
ώστε να απολαμβάνετε όσο το δυνατόν περισσότερο τις
συσκευές σας, επισκεφθείτε μας online:
Blog: www.homeofthehouseproud.com
Facebook: www.facebook.com/morphyrichardsuk
Twitter: www.twitter.com/loveyourmorphy
Ιστοσελίδα: www.morphyrichards.com
Η ΔΙΕΘΝΗΣ διετής εγγύηση
Η συσκευή αυτή καλύπτεται από διετή εγγύηση
επιδιόρθωσης ή αντικατάστασης.
Πρέπει να φυλάξετε την απόδειξη λιανικής πώλησης ως
απόδειξη αγοράς. Συρράψτε την απόδειξη στο οπισθόφυλλο
του παρόντος εγχειριδίου για μελλοντική αναφορά.
Σε περίπτωση βλάβης του προϊόντος, πρέπει να παρέχετε τις
παρακάτω πληροφορίες. Οι αριθμοί αυτοί αναγράφονται στη
βάση του προϊόντος.
Αριθμός μοντέλου
Αριθμός σειράς
Όλα τα προϊόντα Morphy Richards υποβάλλονται
μεμονωμένα σε ελέγχους πριν από την παράδοσή τους από
το εργοστάσιο. Εάν μια συσκευή αποδειχτεί ελαττωματική
εντός 28 ημερών από την αγορά, θα πρέπει να επιστραφεί
στο κατάστημα πώλησης για αντικατάσταση.
Εάν η βλάβη εμφανιστεί ύστερα από 28 ημέρες και εντός 24
μηνών από την αρχική αγορά, θα πρέπει να επικοινωνήσετε
με τον τοπικό αντιπρόσωπο αναφέροντας τον αριθμό
μοντέλου και τον αριθμό σειράς που αναγράφονται στο
προϊόν ή να στείλετε μια επιστολή στον τοπικό αντιπρόσωπο
στις διευθύνσεις που αναφέρονται.
Θα σας ζητηθεί να επιστρέψετε το προϊόν (σε ασφαλή και
κατάλληλη συσκευασία) μαζί με αντίγραφο της απόδειξης
αγοράς στην παρακάτω διεύθυνση.
Εφόσον δεν συντρέχει λόγος εξαίρεσης, όπως ορίζεται
παρακάτω (1-9), η ελαττωματική συσκευή στη συνέχεια
επισκευάζεται ή αντικαθίσταται και αποστέλλεται συνήθως
εντός 7 εργάσιμων ημερών από την παραλαβή.
Αν για οποιονδήποτε λόγο το προϊόν αντικατασταθεί κατά τη
διάρκεια της διετούς εγγύησης, η περίοδος εγγύησης του
καινούριου προϊόντος υπολογίζεται από την ημερομηνία της
αρχικής αγοράς. Συνεπώς, είναι σημαντικό να φυλάξετε την
αρχική απόδειξη ή τιμολόγιο, για να δηλώσετε την
ημερομηνία της αρχικής αγοράς.
Για να πληρούνται οι προϋποθέσεις διετούς εγγύησης, η
συσκευή θα πρέπει να έχει χρησιμοποιηθεί σύμφωνα με τις
οδηγίες του κατασκευαστή. Για παράδειγμα, θα πρέπει να
εκτελείται αφαλάτωση της συσκευής και τα φίλτρα να
διατηρούνται καθαρά σύμφωνα με τις οδηγίες που
παρέχονται.
Ο τοπικός διανομέας δεν φέρει καμία ευθύνη όσον αφορά
στην αντικατάσταση ή την επισκευή των προϊόντων στο
πλαίσιο της εγγύησης εάν:
1 Η βλάβη έχει προκληθεί ή οφείλεται σε ακούσια χρήση, κακή
χρήση, αμέλεια ή χρήση αντίθετη προς τις συστάσεις του
κατασκευαστή ή εάν η βλάβη έχει προκληθεί από υπέρταση
ή κατά τη διάρκεια μεταφοράς.
2 Η συσκευή έχει χρησιμοποιηθεί σε παροχή τάσης
διαφορετική από αυτήν που αναγράφεται στα προϊόντα.
3 Έχουν εκτελεστεί επισκευές από άλλα άτομα, πέρα από το
προσωπικό συντήρησης που διαθέτουμε (ή τον
εξουσιοδοτημένο αντιπρόσωπο).
4 Η συσκευή έχει χρησιμοποιηθεί για ενοικίαση ή μη οικιακή
χρήση.
5 Η συσκευή αγοράστηκε μεταχειρισμένη.
6 Ο τοπικός διανομέας δεν είναι υπεύθυνος για την εκτέλεση
εργασιών συντήρησης στο πλαίσιο της εγγύησης.
7 Από την εγγύηση εξαιρούνται αναλώσιμα είδη, όπως
σακούλες, φίλτρα και γυάλινες καράφες.
8 Οι μπαταρίες και τυχόν ζημίες από διαρροή δεν καλύπτονται
από την εγγύηση.
9 Τα φίλτρα δεν καθαρίστηκαν και αντικαταστάθηκαν σύμφωνα
με τις οδηγίες.
Η παρούσα εγγύηση δεν παραχωρεί άλλα δικαιώματα εκτός
από αυτά που αναφέρονται ρητά παραπάνω και δεν καλύπτει
τυχόν αξιώσεις για επακόλουθη απώλεια ή ζημία. Η εγγύηση
παρέχεται ως πρόσθετη παροχή και δεν επηρεάζει τα
νομοθετικά κατοχυρωμένα δικαιώματά σας ως καταναλωτές.
RN42221MEE Rev8.qxp_Morphy Richards Instruction Book 23/07/2015 19:38 Page 38
Page 39

39
k
RN42221MEE Rev8.qxp_Morphy Richards Instruction Book 23/07/2015 19:38 Page 39
Page 40

RN42221MEE Rev 8 7/15
g Morphy Richards products are intended for household use only.
Morphy Richards has a policy of continuous improvement in product quality and design.
The Company, therefore, reserves the right to change the specification of its models at any
time.
The After Sales Division,
Morphy Richards Ltd, Mexborough, South Yorkshire, England, S64 8AJ
Helpline (office hours) UK 0845 871 0960 Republic of Ireland 1800 409119
o Glen Dimplex Australia
Unit 1, 21 Lionel Road, Mount Waverley, Victoria 3149
T : 1300 556 816
E : sales@glendimplex.com.au
Glen Dimplex New Zealand
38 Harris Road, East Tamaki, Auckland, New Zealand
T : 09 2748265
E : sales@glendimplex.co.nz
f Les produits Morphy Richards sont conçus pour unusage exclusivement domestique.
Morphy Richards s’engage à mener une politique d’amélioration continue en termes de qualité
et de conception. Le fabricant se réserve donc le droit de modifier sans préavis la spécification
de ses modèles.
Glen Dimplex France
Zl Petite Montagne Sud
12 rue des Cevennes
91017 EVRY - LISSES Cedex
www.glendimplex.fr
T : + 33 (0)1 69 11 11 91 F : + 33 (0)1 60 86 15 24
p Os produtos Morphy Richards foram concebidos apenas para utilizaçãodoméstica.
A Morphy Richards respeita uma política de aperfeiçoamento contínuo daqualidade e design
do produto. Desta forma, a companhia reserva-se o direitode alterar as especificações destes
modelos a qualquer momento.
Imporaudio Lda
Rua D. Marcos Da Cruz 1281
4455-482 Perafita
Portugal
T : +351 22 996 67 40 F : +351 22 996 67 41
i I prodotti Morphy Richards sono concepiti esclusivamente per uso domestico. Vedere le limitazioni
d’uso nel sottotitolo delle impor tanti istruzioni di sicurezza. Morphy Richards è costantemente
impegnata a migliorare la qualità e il design dei propri prodotti, pertanto si riserva il dir itto di
modificare le specifiche dei diversi modelli in qualunque momento.
PER ASSISTENZA TECNICA:
HELPLINE 199.193.328 LUN-VEN 9,30-13,00 e 14,30-17,30.
Costo della chiamata 14,26 cent. di Euro al minuto IVA inclusa (da rete fissa).
E : assistenza@necchi.it F : +39-0693496270
I prodotti Morphy Richards sono distribuiti in Italia da:
Necchi Spa, Via Cancelliera 60 00040 Ariccia (RM).
≈ Изделия Morphy Richards предназначены только для бытового использования.
Morphy Richards постоянно совершенствует качество и дизайн своей продукции. Таким
образом, компания оставляет за собой право в любое время вносить изменения в
технические характеристики своих изделий.
Technopark Holding
Pr-t Mira 119, VVC EN1, Fl 1, pav. 61
Moscow 129223
Russia
T : 74 957 555777
t Morphy Richards ürünleri sadece ev içi kullanım amaçlıdır.
Morphy Richards, ürün kalitesi ve tasarımında sürekli geliştirme politikasına sahiptir.
Bu nedenle Şirket, modellerinin özelliklerini herhangi bir zamanda değiştirme hakkını saklı tutar.
Gizpa Dayanıkılı Tüketim Mamülleri
Tic. ve Paz. İth. İhr. A.Ş.
Atatürk Cd. 19 Mayıs Mah. Esin Sok. No: 2/2
Koyzyataği-İSTANBUL
T : +90(0216) 411 23 77 F : +90(0216) 369 33 42
k Τα προϊόντα Morphy Richards προορίζονται αποκλειστικά για οικιακή χρήση.
Η Morphy Richards ακολουθεί πολιτική συνεχούς
βελτίωσης της ποιότητας των προϊόντων και του σχεδιασμού.
Ως εκ τούτου, η εταιρεία διατηρεί το δικαίωμα τροποποίησης των προδιαγραφών
των μοντέλων της ανά πάσα στιγμή.
Δεν εντοπίστηκε ιός στο παρόν εισερχόμενο μήνυμα.
Service Center:
Thetaco Traders,
Aradhippou Industrial Area,
Larnaka, Cyprus
g For electrical products sold within the European Community.
At the end of the electrical products useful life it should not be disposed of with
household waste.
Please recycle where facilities exist.
Check with your Local Authority or retailer for recycling advice in your country.
f Pour les appareils électriques vendus dans la Communauté européenne.
Lorsque les appareils électriques arrivent à la fin de leur vie utile, il ne faut pas les jeter
à la poubelle.
Il faut les recycler dans des centres spécialisés, s’ils existent.
Consultez la municipalité ou le magasin où vous avez acheté l’appareil pour obtenir des
conseils sur le recyclage dans votre pays.
p Para produtos eléctricos vendidos na Comunidade Europeia.
Quando os produtos eléctricos atingirem o final da sua vida útil, não devem ser
eliminados juntamente com o lixo doméstico.
Faça a reciclagem nos locais apropriados.
Contacte as autoridades locais ou o revendedor para saber como efectuar a
reciclagem no seu país.
i Per gli elettrodomestici venduti all’interno della Comunità europea.
Al termine della vita utile, non smaltire l’elettrodomestico nei rifiuti domestici.
Riciclarlo laddove esistano le strutture.
Verificare con la Locale Autorità o con il dettagliante in merito alle possibilità di
riciclaggio nel proprio paese.
k
Για ηλεκτρικά προϊόντα τα οποία διατίθενται εντός της
Ευρωπαϊκής Κοινότητας.
Τα ηλεκτρικά προϊόντα, όταν λήξει η διάρκεια ζωής τους, δεν πρέπει να
απορρίπτονται στα οικιακά απορρίΒΒατα.
Ανακυκλώστε τα προϊόντα, εφόσον υπάρχουν οι κατάλληλες εγκαταστάσεις.
Επικοινωνήστε Βε τις τοπικές αρχές ή το κατάστηΒα λιανικής πώλησης σχετικά
Βε τις διαδικασίες ανακύκλωσης στη χώρα σας.T : 24-532220 or 24-531720
F : 24-532221
NZ
RN42221MEE Rev8.qxp_Morphy Richards Instruction Book 23/07/2015 19:38 Page 40
 Loading...