

g
f
d
}
∂
≥
Intellisteam Compact
Please read and keep these instructions
Intellisteam Compact
Veuillez lire et conserver ces instructions
Intellisteam Compact
Lesen Sie diese Bedienungsanleitung, und heben Sie sie gut auf
Intellisteam Compact
Należy zapoznać się z niniejszą instrukcją obsługi i zachować ją na przyszłość
Intellisteam Compact
Přečtěte si tyto pokyny a uschovejte si je
Intellisteam Compact
Prečítajte si tieto pokyny a dodržiavajte ich
FS48775MEE Rev2_9225 47507 MEE pump - Jon 22/08/2012 09:13 Page 1

2
HEALTH AND SAFETY
The use of any electrical appliance requires the following common sense safety rules.
Please read these instructions carefully before using the product.
• This appliance can be used by children aged from 8 years
and above and persons with reduced physical, sensory or
mental capabilites, or lack of experience and knowledge, if
they have been given supervision or instruction concerning
the use of the appliance in a safe way and understand the
hazards involved.
• Children shall not play with the appliance.
• Cleaning and user maintenance shall not be made by
children unless they are older than 8 and supervision.
• Keep the appliance and it’s cord out of reach of children
less than 8 years.
g
Location
• This appliance is intended to be used in household and similar
applications such as:
farm houses;
by clients in hotels, motels and other residential type
environments; bed and breakfast type environments.
It is not suitable for use in staff kitchen areas in shops, offices
and other working environments.
• Do not use outdoors or near water.
• Do not place directly under kitchen wall cupboards when in use,
as it produces large amounts of steam. Avoid reaching over the
steamer when in use.
Mains cable
• The mains cable should reach from the socket to the base unit
without straining the connections.
• Do not let the cable hang over the edge of the table or counter
and keep it away from any hot surfaces.
• Do not let the cable run across an open space e.g. between a low
socket and table.
• If the supply cable is damaged, it must be replaced by the
manufacturer, it’s service agent or similarly qualified persons in
order to avoid a hazard.
FS48775MEE Rev2_9225 47507 MEE pump - Jon 22/08/2012 09:13 Page 2

3
g
Personal safety
• Do not touch hot surfaces. Use oven gloves or a cloth when
removing the lid or handling hot containers as hot steam will
escape.
• WARNING: To protect against fire, electric shock and
personal injury, do not immerse cord, plugs, or appliance in water
or other liquid.
• WARNING: Extreme caution must be used when moving the
steamer when containing hot food, water, or other hot liquids.
• Appliances must not be immersed.
• Unplug from the socket when not in use, before putting on or
taking off attachments, and before cleaning.
• Do not operate any appliance with a damaged lead or plug, or
after an appliance has malfunctioned, or has been dropped or
damaged in any way. Contact Morphy Richards for advice on
examination, repair or electrical or mechanical adjustment.
• Do not fill above the maximum level. If the steamer is over-filled,
boiling water may be ejected which can scald.
Other safety considerations
• Do not use attachments or tools not recommended by Morphy
Richards as this may cause fire, electric shock or injury.
• To open, lift the lids off towards yourself but tilted away from you.
• Do not use any steamer parts in a microwave or on any
cooking/heated surfaces.
• Do not place on or near a hot gas or electric burner, or in a heated
oven.
• Do not leave it in a damp and corrosive environment.
• Do not switch the steamer on unless it contains at least 1 cup of
water, otherwise the steamer may be damaged.
• Always make sure the water does not fall below the minimum
level.
Treating scalds
• Run cold water over the affected area immediately. Do not stop to
remove clothing, get medical help quickly.
Electrical requirements
Check that the voltage on the rating plate of your
appliance corresponds with your house electricity supply which
must be A.C. (Alternating Current).
Should the fuse in the mains plug require changing, a 13 amp
BS1362 fuse must be fitted.
WARNING: This appliance must be earthed.
INTRODUCTION
Thank you for your recent purchase of the Intellisteam
Compact.
Please read this instruction booklet carefully to ensure you get
the best performance from your new product.
Contents
Health and Safety 2
Introduction 3
Product features 7
Control panel features 7
Before first use 7
Using your Intellisteam Compact 7
Dividing Wall 8
Steaming times 8
Preset cooking times 8
Pausing during cooking 8
Removing food from your Intellisteam Compact 8
Cooking rice 8
Cooking eggs 8
Boil dry alarm & auto shut off 8
Refilling the Water Tank during use 9
Hints and Tips 9
Storage 9
Descaling 9
Care and Cleaning 9
Steaming Guide 10
Vegetables 10
Packaged vegetables 11
Fish and Seafood 11
Poultry 12
Rice 12
Recipes 13
Contact us 18
Guarantee 18
FS48775MEE Rev2_9225 47507 MEE pump - Jon 22/08/2012 09:13 Page 3

4
1
2
3
5
4
7
6
8
10
13
12
11
4
9
28
14
15
16
17
18
19
24
20
21
23
25
27
22
24
Steam Icon
key
Stand by Steam Keep Warm
15
Food Icon
key
EggsFishVeg
Meat Poultry Rice
19
26
26
A
B
FS48775MEE Rev2_9225 47507 MEE pump - Jon 22/08/2012 09:13 Page 4
5
g
f
d
}
∂
≥
2
1
33
4
5
6
9
10
7
8
FS48775MEE Rev2_9225 47507 MEE pump - Jon 22/08/2012 09:13 Page 5
6
11
1212
1313
FS48775MEE Rev2_9225 47507 MEE pump - Jon 22/08/2012 09:13 Page 6

7
g
f
d
}
∂
≥
Features
A
(1) Lid
(2) Dividing Wall
(3) Container
(4) Tray Vent
(5) Drip Tray
(6) Steam Vent
(7) Water Tank
(8) Water Inlet Filler
(9) Water Gauge
(10) Main Unit
(11) Control Panel
(12) Left Compartment (with Dividing Wall)
(13) Right Compartment (with Dividing Wall)
(28) Rice Tray
Control Panel Features
B
(14) On/Off Button
(15) Food Icons (Left Compartment)
(16) Timer (Left Compartment)
(17) Refill Icon
(18) Timer (Right Compartment)
(19) Food Icons (Right Compartment)
(20) Increase Button
(21) Decrease Button
(22) Descale Icon
(23) Left Compartment Button
(24) Steam Icon (Left Compartment)
(25) Start/Pause Button
(26) Steam Icon (Right Compartment)
(27) Right Compartment Button
Before first use
It is important to clean your Intellisteam Compact before first
use or if it has not been used for a long period of time. See the
Care and Cleaning section for more information.
It is essential that your Intellisteam Compact is descaled at
regular intervals to maintain optimum steam and extend the life
of the unit. See the Descaling section for more information.
When you first use your Intellisteam Compact, you may notice
some smoke/vapour emitting from the rear of the Main Unit,
this is normal and is simply grease that is used on some parts
of the appliance applied during the manufacturing process.
After using your Intellisteam Compact a few times this will stop.
This is not dangerous and will not contaminate or flavour food
cooked in your Intellisteam Compact.
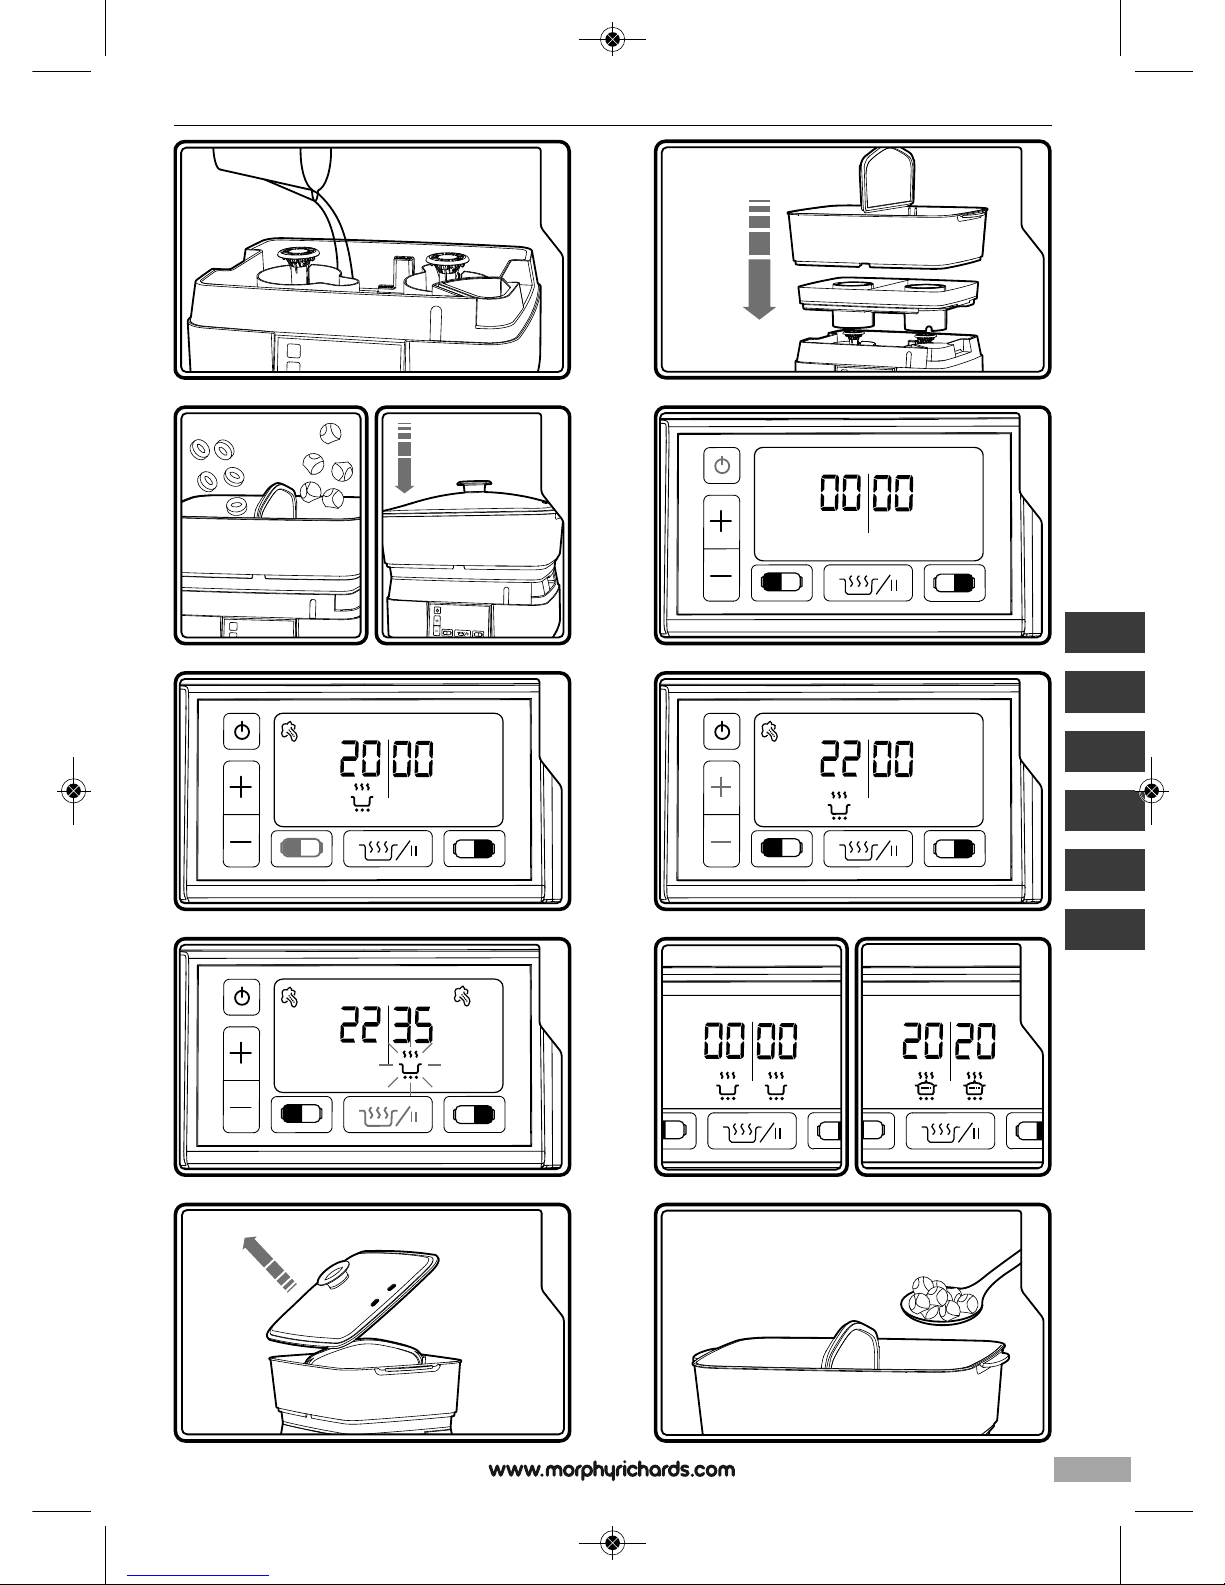
Using your Intellisteam Compact
1
Fill the Water Tank (7) with cold water to the maximum level.
2
Place the Drip Tray (5) and Container (3) with Dividing Wall (2) onto
the Main Unit (10).
3
Place the food in the Compartments (12),(13). Use the Dividing
Wall to ensure foods do not mix. Place the Lid (1) on.
4
Plug your Intellisteam Compact into the mains. Your Intellisteam
Compact will beep and the LCD screen will illuminate.
5
To set the steaming time, press the Left (23) or Right (27)
Compartment Button. Press the button repeatedly to cycle
through the default steaming times and select the required food
group (15) (19).
6
Use the Increase (20) or Decrease (21) Buttons to adjust the
cooking time (if required). Press while the relevant Timer Icon
(16),(18) is flashing (within 3 seconds) or repress the relevant
Compartment Button to adjust the time. Repeat steps 5-6 for the
other Compartment (if required).
7
Press the Start/Pause Button (25). Your Intellisteam Compact will
beep, the Steaming Icon (24) will flash* and the timer will start
counting down.
8
When the timer reaches zero the alarm will sound.
Your Intellisteam Compact will automatically switch to Keep Warm
for 20 minutes.
9
When complete press the On/Off Button (14), and turn your
Intellisteam Compact off at the mains.
Carefully lift the Lid (1) angling it away from you, to release steam
safely. Warning: Steam can burn.
10
Carefully remove the cooked food from your Intellisteam Compact.
Warning: Steam can burn.
Note: If you have selected different times for each
Compartment the steaming icon will flash when each
Compartment begins the steaming process.
g
FS48775MEE Rev2_9225 47507 MEE pump - Jon 22/08/2012 09:13 Page 7
8
Dividing Wall
The Container (3) can be used in one of two ways, as two
individual cooking Compartments or one large single
Compartment.
To use your Intellisteam Compact as a single steaming
Compartment, lift the Dividing Wall (2) out of the Container and set
aside.
Steaming without the Dividing Wall
If using your Intellisteam Compact without the Dividing Wall (2),
you must set both sides to steam for the same amount of time,
otherwise your food will be cooked unevenly.
1. Follow steps 1-6 of ‘Using your Intellisteam Compact’ without
placing the Dividing Wall in place.
3. Press and hold the Left Compartment Button (23) until the time is
displayed for both Compartments.
4. If required, adjust the cooking time for your Intellisteam Compact
using the Increase (20) or Decrease (21) buttons.
6. Follow steps 7-10 of ‘Using your Intellisteam Compact.’
Steaming Times
Your Intellisteam Compact is designed to finish steaming both
Compartments at the same time. When the steaming process
begins, the timer will automatically start counting down from
the longest cooking time so all the food in your Intellisteam
Compact completes cooking at the same time.
Preset cooking times
Your Intellisteam Compact features 7 pre-set cooking times. These
can be adjusted using the Increase (20) and Decrease (21)
Buttons.
To cycle through and select the desired pre-set cooking time for
each Compartment, press the relevant Left or Right Compartment
Button repeatedly.
Pre-set cooking times as follows:
Egg - 12 minutes
Fish - 15 minutes
Vegetables - 20 minutes
Meat - 30 minutes
Rice - 40 minutes
Poultry - 35 minutes
Keep Warm - 10 minutes
Do not use this setting to cook food.
Pausing during cooking
To pause your Intellisteam Compact during the cooking process
press the Start/Pause Button (25). To continue steaming press the
Start/Pause Button again.
Whilst your Intellisteam Compact is paused, it is possible to
amened the cooking times as detailed in steps 5-7 of ‘Using your
Intellisteam Compact’.
Removing food from your
Intellisteam Compact
WARNING: Use oven gloves to remove the Lid (1) and
Container (3), ensure the Lid is tilted to direct the steam away
from you. Do not remove the Drip Tray (5) until it has
completely cooled.
Cooking Rice
1 Set up your Intellisteam Compact as described in ‘Using your
Intellisteam Compact’.
2 Pour 1 cup of uncooked rice and 1½ cups of water into the Rice
Tray (28) and stir well.
3 Place the Rice Tray into the Compartment and place the Lid (1) on
your Intellisteam Compact.
4 Set the cooking time for the Compartment to the ‘Rice’ preset (40
minutes) and press the Start/Pause Button (25).
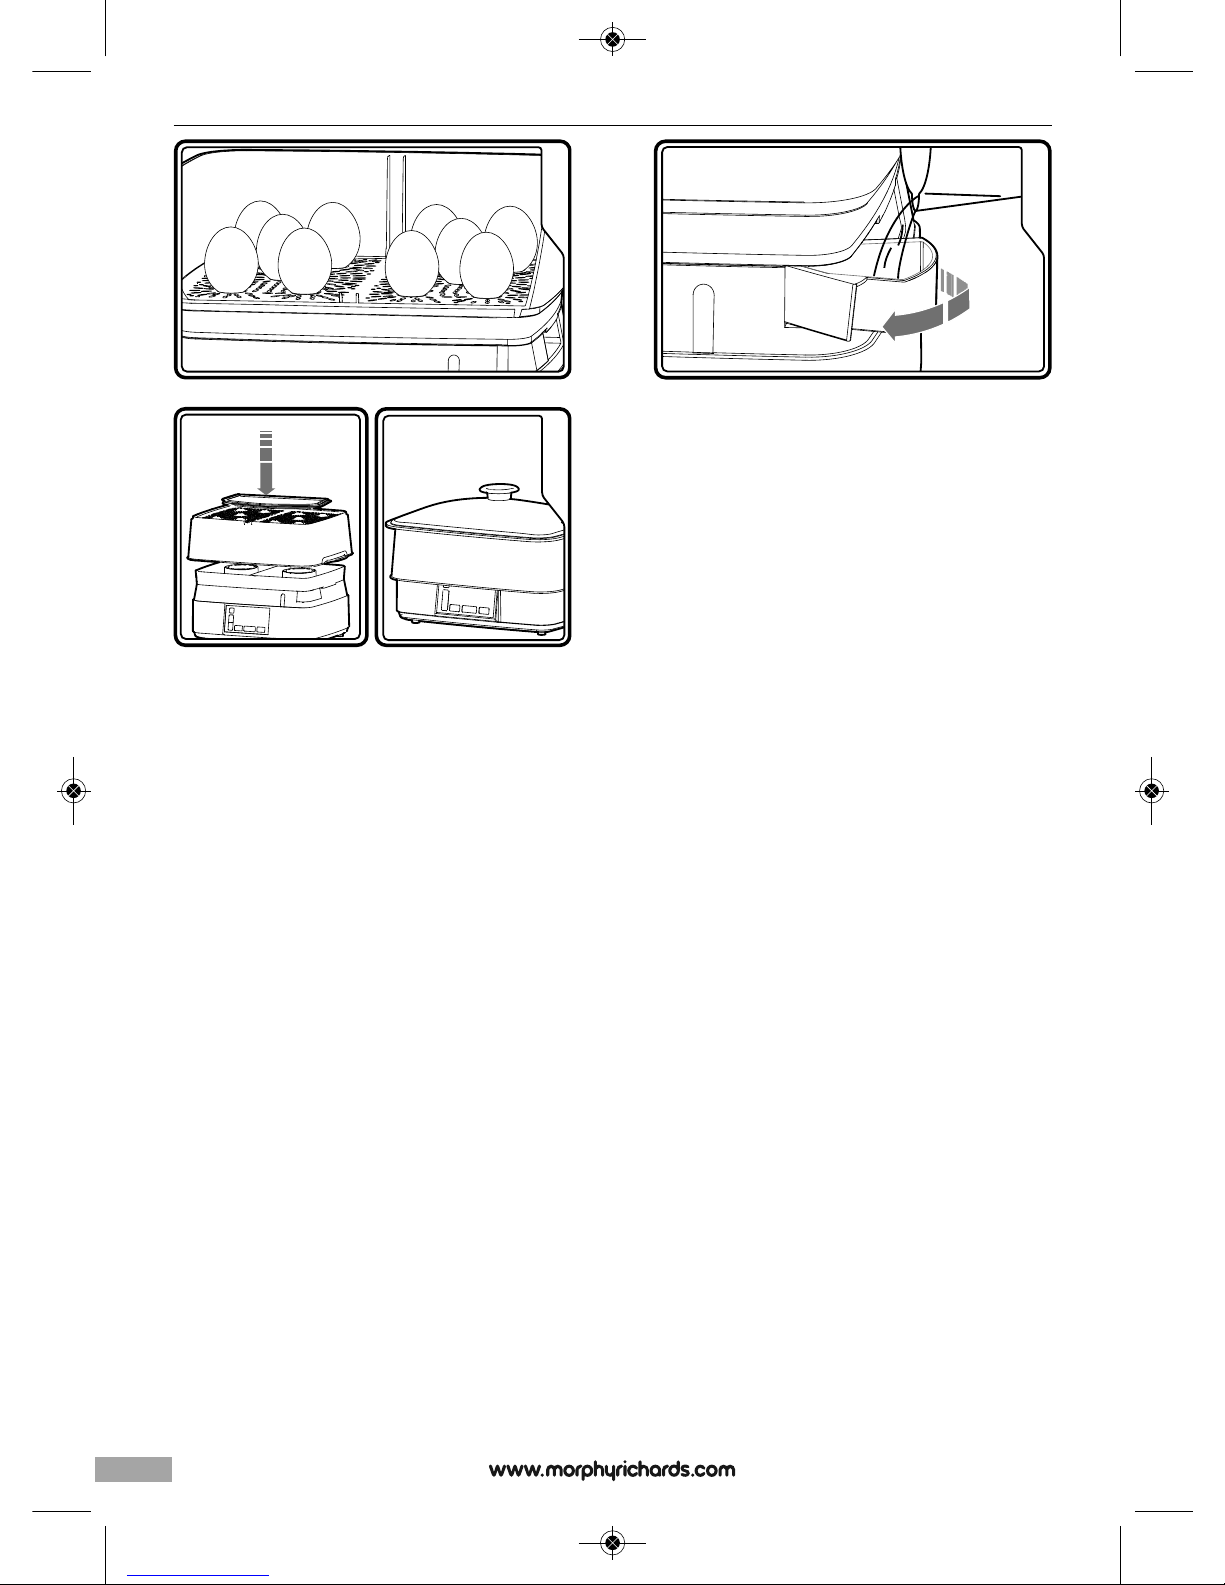
Cooking Eggs
You can use your Intellisteam Compact to cook hard boiled eggs.
1 Follow steps 1-2 of ‘Using your Intellisteam Compact.’
2 Place the eggs individually into the dimples within the Container
(3) as shown above.
3 Replace the Lid (1).
4 Set the cooking time and steam as detailed in steps 4-10 of
‘Using your Intellisteam Compact’. The steamer has a preset
‘Eggs’ setting of 12 minutes. This can be manually adjusted using
the Increase (20) or Decrease (21) buttons for personal taste.
Boil dry alarm & auto shut off
When the water level is lower than the “MIN” level on the Water
Gauge (9) the buzzer will sound continuously and the Refill Icon
(17) will flash continuously. If this occurs you should refill the
Water Tank (7) with water as soon as possible. Use the Water Inlet
Filler (8) to refill the Water Tank as detailed on page 10.
If your Intellisteam Compact boils dry during use, it will beep
continuously and automatically shut off, stopping the cooking
process.
8
FS48775MEE Rev2_9225 47507 MEE pump - Jon 22/08/2012 09:13 Page 8

9
Refiling the Water Tank during use
Use the Water Inlet Filler (8) to refill the Water Tank (7) during
cooking.
Gently pull the Water Inlet Filler out from the side of your
Intellisteam Compact. Refill water through the Water Inlet Filler
carefully using a jug.
The buzzer will stop automatically and the Refill Icon (17) will
disappear.
Hints and Tips
• Steaming times stated in the Steaming Guide (p.10) are only a
guide. Times vary depending on the thickness of food, spacing of
the food inside the Compartments, the freshness of food and
personal preference. As you become familiar with your Intellisteam
Compact, adjust the cooking time to your preference.
• A single layer of food steams faster than multiple layers. Therefore,
cooking times for a larger quantity of food will be extended. For
best results, prepare the food in smaller / thinner pieces and
space evenly in the compartment.
• When cooking large quantities of food, remove the Lid (1) about
halfway through, stir the food carefully using a long handled
utensil to ensure the food is cooked evenly.
Warning: Do not put your hand into the Container.
• Do not crowd food unnecessarily. Arrange the food with space to
help steam flow.
• Do not add salt and seasoning to the Container (3) or Water Tank
(7). These minerals will cause scaling and damage the heating
element.
• The liquid left after cooking in the Drip Tray (5) is ideal for use in
making sauces and gravy.
• Never steam frozen meat, poultry or seafood direct from freezer.
Always thaw thoroughly first.
Storage
For ease of storage, your Intellisteam Compact is designed so the
Main Unit (10) fits into the Container (3). When not in use, your
Intellisteam Compact can be stored as depicted to save space.
Descaling
It is essential that the appliance is descaled regularly to
maintain optimum steam and extend the life of the unit.
After every 15 hours of steaming usage, the Descale Icon (22) will
illuminate to remind you to descale the appliance.
1 Fill the Water Tank (7) to the MAX level with white vinegar (not
brown vinegar).
IMPORTANT: Do not use any other chemical or commercial
descale agent.
2 Place the Drip Tray (5), Container (3) and Lid (1), onto the Water
Tank and then connect your Intellisteam Compact to the Mains.
3 Set the timer for 25 minutes for both Compartments and press
start.
WARNING: If white vinegar begins to boil over the edge of the
Main Unit, switch off the timer and disconnect the mains
supply. Reduce the quantity of white vinegar slightly.
Do not attempt to move your Intellisteam Compact whilst the
vinegar is still hot.
4 When the steaming is completed, unplug the appliance from the
wall socket and allow to cool completely before pouring out
vinegar/water solution.
5 Rinse the Water Tank several times with cold water.
WARNING: Do not attempt to move your
Intellisteam Compact whilst the vinegar is still hot.
6 Fill the Water Tank to the MAX mark with cold water. Place the
Drip Tray, Container and Lid, onto the Water Tank and then
connect your Intellisteam Compact to the Mains.
7 Run your Intellisteam Compact on any setting for 10 minutes.
Switch off and allow to cool completely before pouring out the
remaining water.
Care and Cleaning
WARNING: Never immerse the Main Unit (10), power cord or
mains plug into water.
1 Unplug from the wall socket and leave the appliance to cool
completely before cleaning.
2 Do not clean any part of the unit with abrasive cleaners e.g.
scouring powders, steel wool or bleach.
3 Do not clean clear plastic with the abrasive side of a sponge or
pad.
4 Do not immerse the Main Unit in water. Fill the Water Tank (7) with
warm, soapy water and wipe with a cloth. Empty and rinse
thoroughly, and then wipe with a damp cloth.
5 Wash the Lid (1), Rice Tray (28), Container (3) and Dividing Wall (2)
in warm water and washing-up liquid.
• The Rice Tray, Container and Dividing wall are all dishwasher safe
on the top shelf only on a medium or eco cycle. Dry thoroughly.
• The Lid is not dishwasher safe.
6 Clean your Intellisteam Compact after each use.
g
FS48775MEE Rev2_9225 47507 MEE pump - Jon 22/08/2012 09:13 Page 9

10
Steaming Guide
Steaming times and portion sizes stated below are an approximate guide and are for recommendation only. Times may vary depending on
the size of the food, the spacing of the food in the Container (3), the freshness of food and personal preference. As you become familiar
with the steamer, adjust cooking time as required.
Steaming times are for the quantities stated in the guide, for larger or smaller quantities adjust the time accordingly.
Vegetables
Cut off thick stems from broccoli, cauliflower and cabbage.
Steam leafy, green vegetables for the shortest possible time as they loose colour easily.
For best results, salt and season vegetables after steaming.
Frozen vegetables should not be thawed before steaming.
Food Weight Cooking Time Tip
• Asparagus • 1 portion 60g
• 4 portions 240g
• 15 min • Cross the stalks to let
steam through
• Broccoli • 1 portion 60g • 4 portions 240g • 15-18 min
• Broad Beans • 1 portion 50g
• 4 portions 200g
• 10-15 min • Stir halfway through
cooking
• Carrots
(sliced)
• 1 portion 100g
• 4 portions 400g
• 15-20 min • Stir halfway through
cooking
• Cauliflower • 1 portion 100g
• 4 portions 400g
• 18 min • Stir halfway through
cooking
• Mangetout • 1 portion 50g
• 4 portions 200g
• 10-12 min • Stir halfway through
cooking
• Peas (fresh) • 1 portion 60g
• 4 portions 240g
• 8 min
• 8-12 min
• Stir halfway through
cooking
• Spinach • 1 portion 60g
• 4 portions 240g
• 4-5 min
• 5-8 min
• Stir halfway through
cooking
• Potatoes • 1 portion 180g
• 4 portions 720g
• 25 min
FS48775MEE Rev2_9225 47507 MEE pump - Jon 22/08/2012 09:13 Page 10

11
g
Packaged vegetables
Many supermarkets sell pre-prepared/packaged vegetables for convenience and ease of use. These are ideal when preparing meals as the
leg work is already done for you.
Most packs include steaming instructions for the vegetables; however these times are for steaming on the hob or microwave, but may
need to be adjusted dependant upon weight and personal preference.
Use the times listed below as a rough guide.
Food Weight Cooking Time
• Carrots/Broccoli Sprouts • 480g • 20 min
• Potatoes • 500g • 40 min
• Baby Vegetable Mix • 350g • 15 min
• Mini Carrots • 400g • 20 min
• Babycorn • 170g • 20 min
• Fresh Peas • 170g • 8 min
Fish and seafood
Fish is cooked when it flakes easily with a fork.
Frozen fish may be steamed without thawing, however it must be separated before steaming and the cooking time extended.
Add lemon wedges and herbs whilst steaming to improve flavour
Food Weight / Number Cooking Time
• King Prawns • 100g
• 400g
• 5-7 min
• 7-10
• Salmon Fillets • 1 fillet 140g
• 4 fillets 560g
• 15 min
• Mussels • 200g
• 800g
• 5 min
• 5-8 min
FS48775MEE Rev2_9225 47507 MEE pump - Jon 22/08/2012 09:13 Page 11

12
Poultry
Steaming has the advantage of healthy cooking, due to the low heat used, only choose tender, lean cuts of meat and trim off all fat.
Serve steamed poultry with herbs, flavoured sauces or marinade the meat for a few hours before steaming for flavour.
Thoroughly cook all foods before serving. Pierce with a knife or skewer to check that the center is cooked and juices run clear.
Food Weight / Number Cooking Time Tip
• Chicken breast fillets • 1 fillet 200g
• 4 fillets 800g
• 12-15 min • Remove all fat before
cooking
Rice
Use the rice bowl and add the required quantity of water together with rice
Food Weight Water Cooking Time
• Rice • 1 portion 75g
• 4 portions 300g
• 110ml
• 450ml
• 30 min
• 40 min
FS48775MEE Rev2_9225 47507 MEE pump - Jon 22/08/2012 09:13 Page 12

13
The recipes in this book have been designed and tested by Morphy Richards for use specifically in your Intellisteam Compact.
The cooking times for the following recipes are a guide and will be affected by the size and freshness of the ingredients used.
Always ensure food is throughly cooked before serving.
Recipes are designed for the maximum quantity to serve 4 people. If you are reducing the portion sizes, please adjust the cooking times
as appropriate.
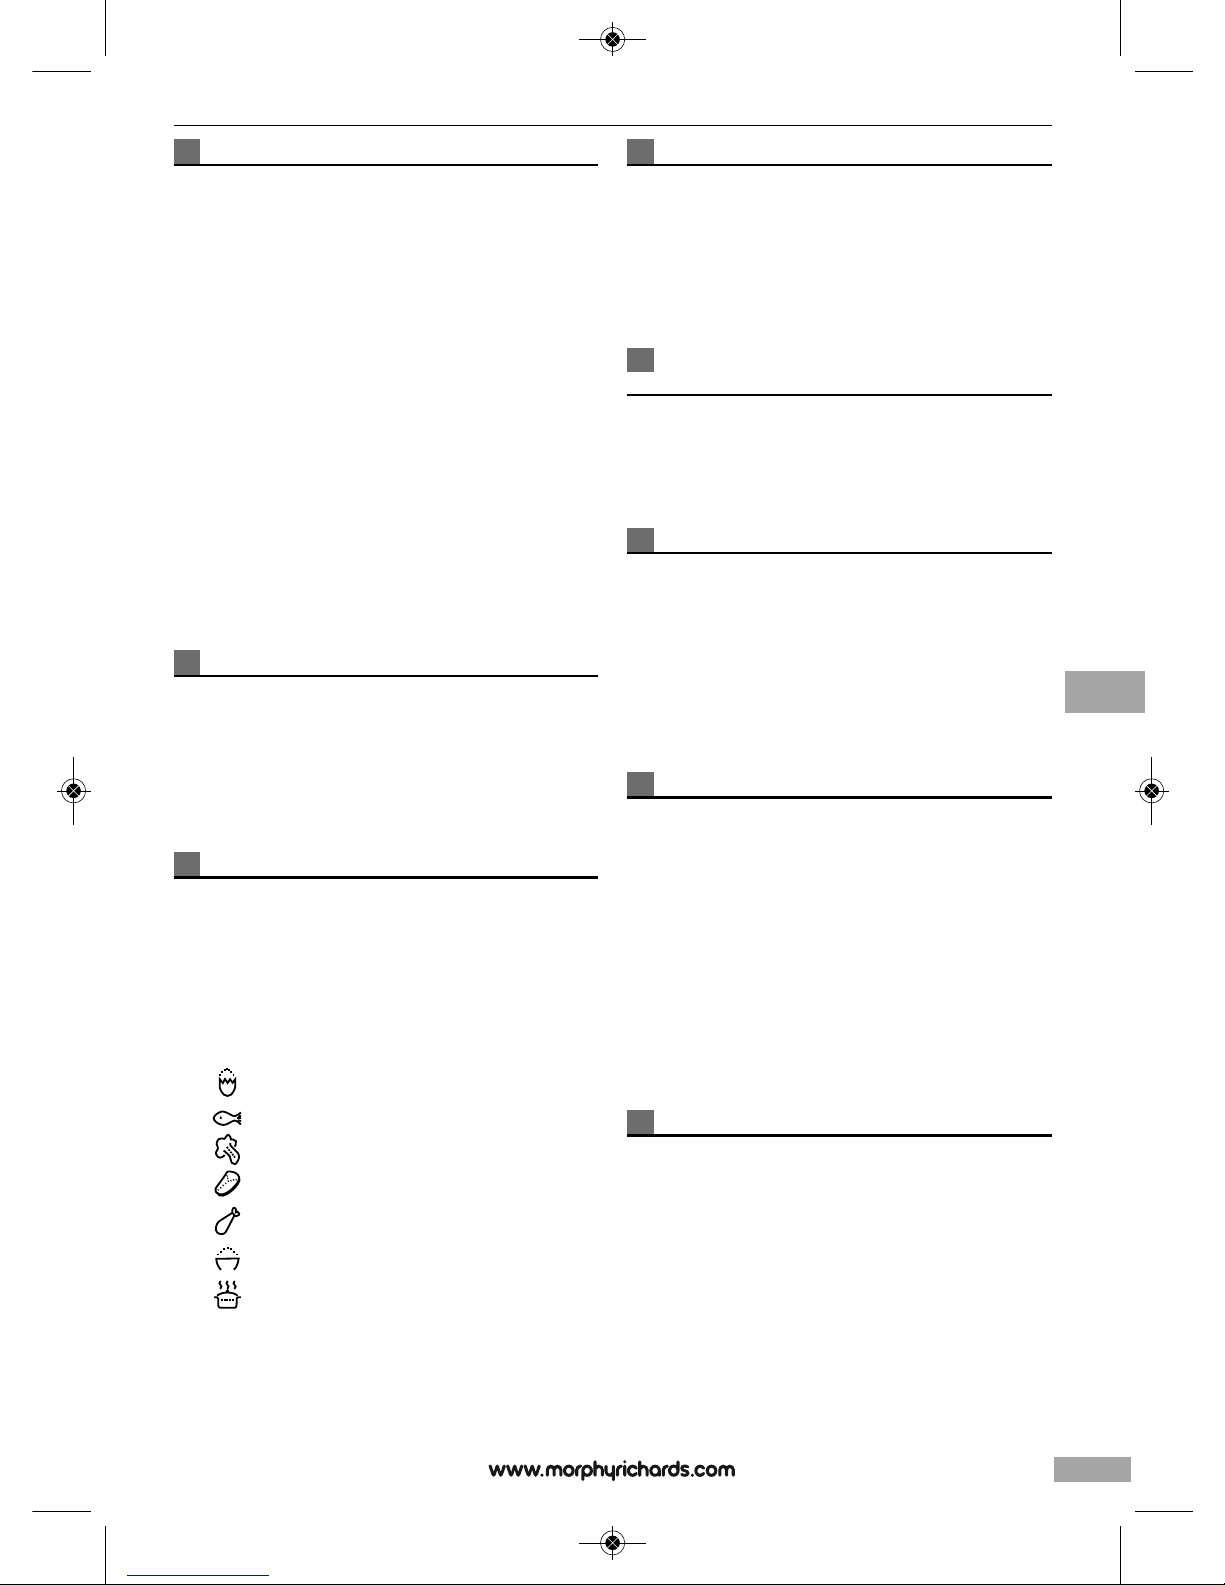
Recipes
g
FS48775MEE Rev2_9225 47507 MEE pump - Jon 22/08/2012 09:13 Page 13

Sweet red peppers stuffed with leeks and feta
cheese served with spring onion and pine nut
couscous
Ingredients:
• 4 sweet (long) red peppers, tops removed
• 1 small leek, finely chopped
• 1 tbsp chopped fresh parsley
• 2 tbsp olive oil
• 25g finely grated parmesan cheese
• 25g fresh bread crumbs
• 100g feta cheese, finely crumbled
• Salt and freshly ground black pepper
Couscous:
• 200g couscous
• 2 tsp vegetable stock powder
• 4 spring onions, finely chopped
• 25g pine nuts
To garnish:
• Parsley sprigs
Method:
1 Split the peppers lengthways, taking care not to cut completely in
half. Remove the core and seeds. Mix together the leek, parsley
and olive oil, then add parmesan cheese and bread crumbs. Mix
in the crumbled feta cheese and season with a little salt and
plenty of black pepper. Stuff the mixture into the peppers.
2 Place the peppers in one Compartment.
3 Place the Rice Tray in the other Compartment.
4 Add couscous and 265ml of cold water to the Rice Tray. Stir in the
stock powder, spring onions and pine nuts.
5 Set time for the couscous to 25 minutes. Set the time for the
peppers to the vegetable preset time (20 minutes).
6 Press the Steam Button.
7 When cooked, allow to stand for 5 minutes.
8 Using a fork fluff up the couscous before serving.
Goats cheese souffle
Ingredients:
• 125g goats cheese, crumbled
• 4 medium eggs, separated
• 2 tbsp finely chopped flat leaf parsley
• 1 tbsp finely chopped fresh
tarragon
• Salt and pepper
• 240g spinach
• Butter for greasing
To serve:
• Baby leaf salad
Method:
1 Grease 4 x 150ml ramekins.
2 Place half the goats cheese in a large bowl and mash with a fork.
3 Stir in the egg yolks, herbs and seasoning.
4 Whisk the egg whites in a separate clean bowl until you can form
soft peaks.
5 Spoon 2 tablespoons of the egg whites into the cheese mixture to
loosen then gently fold in the rest.
6 Spoon the mixture into the ramekins and top with the remaining
cheese. Cover with foil and place 2 ramekins in each side of the
steamer.
7 Steam for 20 minutes until the tops look set but the centers are
still wobbly.
8 Serve immediately with salad.
14
FS48775MEE Rev2_9225 47507 MEE pump - Jon 22/08/2012 09:13 Page 14

15
Chicken tikka masala with
zesty cardamom rice
Ingredients:
• 4 tbsp low fat natural yogurt
• 2 tbsp chicken tikka masala curry paste
• 2 tbsp chopped fresh coriander
• 4 skinless, boneless chicken breasts, chopped into chunks
• Salt and freshly ground black pepper
Rice:
• 300g basmati rice
• 450ml cold water
• 2 tsp vegetable stock powder
• 2 strips pared lemon zest
• 6 green cardamom pods, lightly crushed
To garnish:
• Lime wedges and coriander sprigs
Method:
1 Spoon the yoghurt, curry paste and coriander into a large, non
metallic bowl and mix. Add the chicken and stir to coat. Season
with a little salt and pepper, then cover and refrigerate for at least
30 minutes.
2 Position the Rice Tray in one Container. Add the rice and cold
water. Stir in the stock powder. Place strips of peeled lemon zest
on top and sprinkle in cardamom pods.
3 Place the chicken and marinade into the other Compartment and
make sure the mixture is evenly spread out.
4 Set the time for the rice using the rice pre-set (40 mins). Set time
for the chicken using the meat pre-set (30 mins).
5 Press the Steam Button.
6 Serve garnished with lime wedges and sprigs of coriander.
Note:The spices used in this recipe may stain the plastic parts of
your Intellisteam Compact. To Prevent this, cook the chicken
wrapped in aluminium foil and increase the cooking time by 10
minutes. Always ensure meat is fully cooked before serving.
Maple-glazed chicken with rice
Ingredients:
• 4 skinless, boneless chicken breasts
• Finely grated zest and juice of 1 small orange
• 2 tbsp maple syrup
• ¼ tsp dried chilli flakes
• Salt and freshly ground black pepper
Rice:
• 250g white wild rice
• 1 tsp vegetable stock powder
• 250ml water
Method:
1 Put the chicken breasts into a non-metallic bowl and add the
orange zest, orange juice, maple syrup and chilli flakes. Season
with a little salt and plenty of black pepper. Cover and refrigerate
for at least 30 minutes.
2 Place the chicken breasts in one Compartment.
3 Put the rice and vegetable stock powder into the Rice Tray. Put the
Rice Tray in the other Compartment and add 250ml of cold water
to the rice, stirring to mix.
4 Set time for the chicken to the preset meat time (30 minutes).
Set time for rice to the preset rice time (40 minutes).
5 Press the Steam Button.
g
FS48775MEE Rev2_9225 47507 MEE pump - Jon 22/08/2012 09:13 Page 15

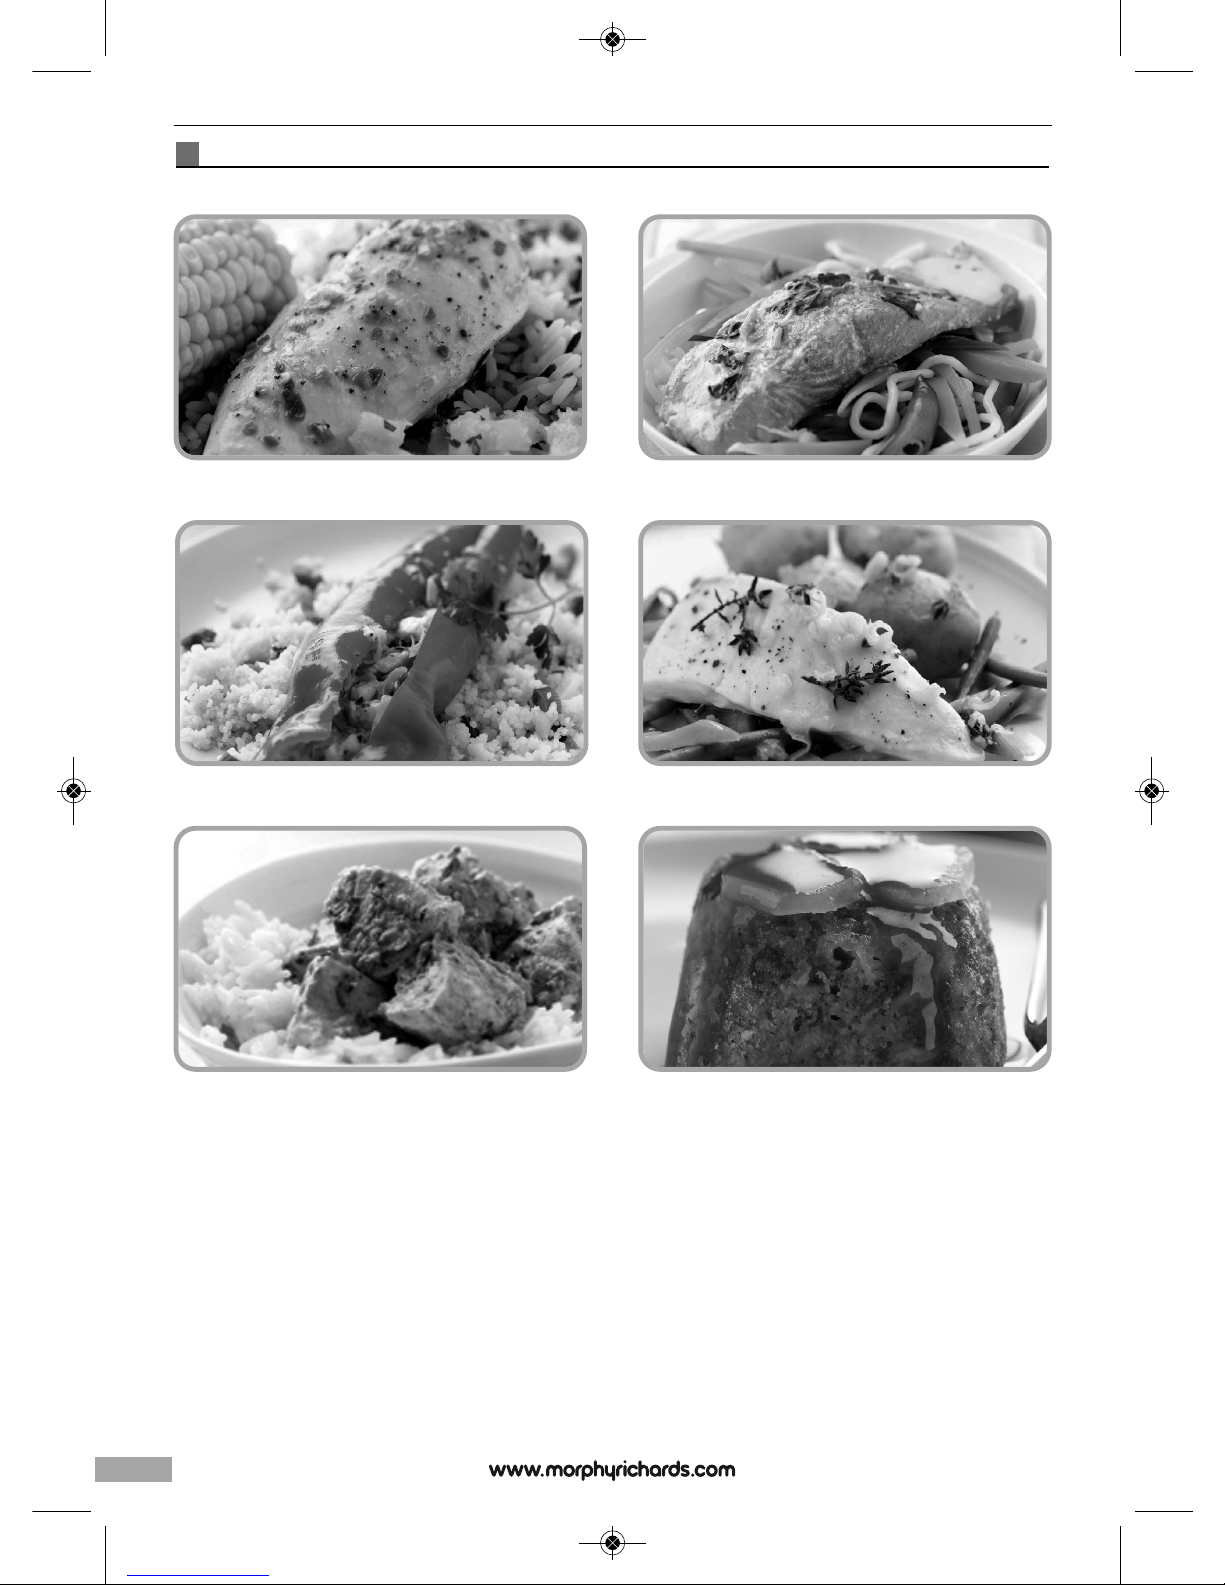
Steamed halibut with lemon
and thyme dressing
Ingredients:
• 4 x 125g halibut fillets, skinned (or use Pacific cod)
• 15g butter
• 4 small thyme sprigs
• Salt and freshly ground black pepper
Vegetables:
• 750g small new potatoes
• 2 leeks, cut into strips
• 1 large carrot, cut into strips
• 150g green beans, trimmed
Dressing:
• 50g butter, melted
• Finely grated zest and juice of 1 lemon
• 1 tbsp fresh thyme leaves
Method:
1 Mix the vegetables together and place in one Compartment.
2 Arrange fish fillets on top of the vegetables.
3 Place a small knob of butter and thyme sprig on top of each fillet.
Season with a little salt and pepper.
4 Put potatoes into the other Compartment.
5 Set time for the fish and vegetables using the fish pre-set plus 5
minutes (20 mins). Set time for the potatoes using the vegetables
pre-set (30 mins).
6 Press the Steam Button
7 For the dressing, mix butter, lemon zest, lemon juice and thyme
leaves and pour over the fish when serving.
Sesame salmon and steamed greens
served with coconut milk and sweet chilli
sauce noodles
Ingredients:
• 4 x 125g salmon fillets
• 4 tsp toasted sesame oil
• 1 tsp sesame seeds
• 300g of medium cooked noodles
Vegetables:
• 150g sugar snap peas or mangetout
• 6 spring onions, cut into strips
• 1 carrot, cut into fine strips
Sauce:
• 300ml coconut milk
• 2 tbsp sweet chilli sauce
• 1 tsp grated fresh root ginger
• 1 tbsp chopped fresh coriander
Method:
1 Mix together the vegetables and place into one Compartment.
2 Brush the salmon fillets with sesame oil and sprinkle with sesame
seeds. Arrange on top of the vegetables in the Compartment.
3 Place the noodles into the rice tray and position in the other
Compartment.
4 Mix together the Sauce ingredients and pour over the noodles.
Stir to combine.
5 Set time for the salmon and vegetables using the fish pre-set plus
5 minutes (20 mins).
6 Set time for the noodles to 20 minutes.
7 Press the Steam Button.
8 Stir noodles 5 minutes before end of cooking time to ensure they
are separated.
16
FS48775MEE Rev2_9225 47507 MEE pump - Jon 22/08/2012 09:13 Page 16

17
Spicy prawns with minted pea couscous
Ingredients:
• 400g raw king prawns
• ½ tsp cayenne pepper
• ½ tsp paprika
• ½ tsp salt
• ¼ tsp garlic powder
Couscous:
• 200g couscous
• 270ml cold water
• 75g frozen peas
• 1 tbsp chopped fresh mint
Method:
1 Mix together the cayenne pepper, paprika, salt and garlic powder
and coat the prawns thoroughly in the mixture.
2 Place the prawns in one Compartment.
3 Place the couscous, water, peas and mint in the Rice Tray and
place in the other Compartment.
4 Set the time for the prawns to 10 minutes and the couscous to 25
minutes.
5 Press the Steam Button.
6 Fork through the couscous to fluff up before serving.
Ginger and banana sponge with toffee sauce
Ingredients:
• 75g butter, plus extra for greasing
• 75g light muscovado sugar
• 2 medium eggs, beaten
• 1/2 tsp vanilla extract
• 75g self-raising flour
• 1/2 tsp ground ginger
• Pinch of salt
• 1 large ripe banana, mashed
• 2 pieces stem ginger in syrup chopped, plus 4 tbsp of syrup from
the jar
Sauce:
• 3 tbsp golden syrup
• 25g butter
• 25g light muscovado sugar
To serve:
• Vanilla ice-cream or custard
Method:
1 In a large mixing bowl, cream the butter and sugar until light and
fluffy. Gradually beat in the eggs, then stir in the vanilla. Sift in the
flour, ground ginger and salt and gently fold in using a large metal
spoon. Stir in the mashed banana.
2 Using butter grease 4 x 150ml individual pudding basins. Slice
stem ginger and place it in the bottom of the basins. Spoon 1
tbsp of syrup into each pudding basin and spoon the creamed
mixture on top of they syrup before levelling. Cover tightly with
pieces of foil greased with butter.
3 Arrange the puddings in one Compartment.
4 Put the sauce ingredients into the Rice Tray, and cover with cling
film and place in the other Compartment.
5 Set time for the puddings using the rice pre-set (40 mins). Set
time for the sauce for 20 minutes.
6 When cooked, run a knife around the basins to release the
puddings. Stir the sauce thoroughly and spoon over each
pudding. Serve with ice-cream or custard.
g
FS48775MEE Rev2_9225 47507 MEE pump - Jon 22/08/2012 09:13 Page 17

Contact us
Helpline
If you are having a problem with your appliance, please call our
Helpline, as we are more likely to be able to help than the
retailer you purchased the item from.
Please have the product name, model number and serial
number to hand when you call to help us deal with your enquiry
quicker.
UK Helpline: 0844 871 0960
IRE Helpline: 1800 409 119
Spares: 0844 873 0726
Talk To Us
If you have any questions or comments, or want some great
tips or recipe ideas to help you get the most out of your
products, join us online:
Blog: www.morphyrichards.co.uk/blog
Facebook: www.facebook.com/morphyrichardsuk
Twitter: www.twitter.com/loveyourmorphy
Website: www.morphyrichards.com
THIS SECTION IS ONLY APPLICABLE FOR
CUSTOMERS IN UK AND IRELAND
REGISTERING YOUR TWO YEAR GUARANTEE
Your standard one year guarantee is extended for an additional
12 months when you register the product within 28 days of
purchase with Morphy Richards. If you do not register the
product with Morphy Richards within 28 days, your product is
guaranteed for 1 year. To validate your 2 year guarantee register
with us online at www.morphyrichards.co.uk
N.B. Each qualifying product needs to be registered with
Morphy Richards individually. Please refer to the one year
guarantee for more information.
YOUR ONE YEAR GUARANTEE
It is important to retain the retailer’s receipt as proof of
purchase. Staple your receipt to this back cover for future
reference. Please quote the following information if the product
develops a fault. These numbers can be found on the base of
the product.
Model no.
Serial no.
All Morphy Richards products are individually tested before
leaving the factory. In the unlikely event of any appliance
proving to be faulty within 28 days of purchase, it should be
returned to the place of purchase for it to be replaced. If the
fault develops after 28 days and within 12 months of original
purchase, you should contact the Helpline number quoting
Model number and Serial number on the product, or write to
Morphy Richards at the address shown. You may be asked to
return a copy of proof of purchase. Subject to the exclusions
set out below (see Exclusions), the faulty appliance will then be
repaired or replaced and dispatched usually within 7 working
days of receipt. If, for any reason, this item is replaced during
the 1 year guarantee period, the guarantee on the new item will
be calculated from original purchase date. Therefore it is vital to
retain your original till receipt or invoice to indicate the date of
initial purchase. To qualify for the 1 year guarantee, the
appliance must have been used according to the instructions
supplied. For example, crumb trays should have been emptied
regularly.
EXCLUSIONS
Morphy Richards shall not be liable to replace or repair the
goods under the terms of the guarantee where:
1 The fault has been caused or is attributable to accidental use,
misuse, negligent use or used contrary to the manufacturer’s
recommendations or where the fault has been caused by power
surges or damage caused in transit.
2 The appliance has been used on a voltage supply other than that
stamped on the products.
3 Repairs have been attempted by persons other than our service
staff (or authorised dealer).
4 The appliance has been used for hire purposes or non domestic
use.
5 The appliance is second hand.
6 Morphy Richards are not liable to carry out any type of servicing
work, under the guarantee.
7 Plastic filters for all Morphy Richards kettles and coffee makers
are not covered by the guarantee.
8 Batteries and damage from leakage are not covered by the
guarantee.
9 The filters have not be cleaned and replaced as instructed.
This guarantee does not confer any rights other than those
expressly set out above and does not cover any claims for
consequential loss or damage. This guarantee is offered as an
additional benefit and does not affect your statutory rights as a
consumer.
YOUR INTERNATIONAL TWO YEAR
GUARANTEE
This appliance is covered by two-year repair or replacement
warranty.
It is important to retain the retailers receipt as proof of
purchase. Staple your receipt to this back cover for future
reference.
Please quote the following information if the product develops a
fault. These numbers can be found on the base of the product.
Model no.
Serial no.
All Morphy Richards products are individually tested before
leaving the factory. In the unlikely event of any appliance
proving to be faulty within 28 days of purchase it should be
returned to the place of purchase for it to be replaced.
If the fault develops after 28 days and within 24 months of
18
FS48775MEE Rev2_9225 47507 MEE pump - Jon 22/08/2012 09:13 Page 18

19
original purchase, you should contact your local distributor
quoting Model number and Serial number on the product, or
write to your local distributor at the addresses shown.
You will be asked to return the product (in secure, adequate
packaging) to the address below along with a copy of proof of
purchase.
Subject to the exclusions set out below (1-9) the faulty
appliance will then be repaired or replaced and dispatched
usually within 7 working days of receipt.
If for any reason this item is replaced during the 2-year
guarantee period, the guarantee on the new item will be
calculated from original purchase date. Therefore it is vital to
retain your original till receipt or invoice to indicate the date of
initial purchase.
To qualify for the 2-year guarantee the appliance must have
been used according to the manufacturers instructions. For
example, appliances must have been descaled and filters must
have been kept clean as instructed.
The local distributor shall not be liable to replace or repair the
goods under the terms of the guarantee where:
1 The fault has been caused or is attributable to accidental use,
misuse, negligent use or used contrary to the manufacturers
recommendations or where the fault has been caused by power
surges or damage caused in transit.
2 The appliance has been used on a voltage supply other than that
stamped on the products.
3 Repairs have been attempted by persons other than our service
staff (or authorised dealer).
4 Where the appliance has been used for hire purposes or non
domestic use.
5 The appliance is second hand.
6 The local distributor are not liable to carry out any type of
servicing work, under the guarantee.
7 The guarantee excludes consumables such as bags, filters and
glass carafes.
8 Batteries and damage from leakage are not covered by the
guarantee.
9 The filters have not be cleaned and replaced as instructed.
This guarantee does not confer any rights other than those
expressly set out above and does not cover any claims for
consequential loss or damage. This guarantee is offered as an
additional benefit and does not affect your statutory rights as a
consumer.
AUSTRALIAN WARRANTY
This appliance is guaranteed for 2 years against faulty material,
components and workmanship.
This warranty is in addition and does not affect your statutory rights.
Proof of purchase must be produced for any warranty benefit.
In the unlikely event of any appliance proving to be faulty, securely
pack and return the item to the place of purchase accompanied by
the original receipt or invoice.
Our goods come with guarantees that cannot be excluded under
the Australian Consumer Law. You are entitled to a replacement or
refund for a major failure and for compensation for any other
reasonably foreseeable loss or damage. You are also entitled to have
the goods repaired or replaced if the goods fail to be of acceptable
quality and the failure does not amount to a major failure.
NOT COVERED BY THIS WARRANTY
(Australian only)
• If the appliance has not been used in accordance with the
manufacturers’ recommendations or Instructions.
• If the fault is deemed to be caused by abuse, misuse, neglect,
modifications or in proper use and or care
Eg: Kettles: Excessive build up of scale.
Toasters: Excessive build up of crumbs or foreign matter etc.
• Connection to incorrect voltage to that stamped on the product.
• Unauthorised repairs.
• Appliance used other than for domestic purposes.
• Excluding bags, filters, glass, carafes, and cutting blades.
• Freight and insurance costs.
If for any reason this item is replaced during the 2 year
guarantee period, the guarantee on the new item will be
calculated from original purchase date. Therefore it is vital to
retain your original receipt or invoice to indicate the date of
original purchase.
Morphy Richards’s policy is to continually improve quality
design and product quality. The company therefore reserves the
right to change any specifications or to carry out modifications
as deemed worthy at any time.
The Australian supplier ASKO Appliances reserves the right to
repair, modify, exchange or replace the faulty appliance with the
same or similar model or product of equivalent value.
g
FS48775MEE Rev2_9225 47507 MEE pump - Jon 22/08/2012 09:13 Page 19

HYGIÈNE ET SÉCURITÉ
Lorsque vous utilisez un appareil électrique, vous devez respecter les règles de sécurité et de bon sens suivantes.
Veuillez lire attentivement ces instructions avant d’utiliser ce produit.
• Cet appareil peut être utilisé par des enfants âgés d’au
moins 8 ans et par des personnes ayant des capacités
physiques, sensorielles ou mentales réduites ou un
manque d’expérience et de connaissances, à condition
d’être surveillés ou d’avoir reçu des instructions concernant
l’utilisation de l’appareil en toute sécurité et de comprendre
les dangers que cela implique.
• Les enfants ne doivent pas jouer avec l’appareil.
• Le nettoyage et l’entretien courant ne doivent pas être
effectués par des enfants de moins de 8 ans et sans
surveillance.
• Tenez l’appareil et son câble hors de portée des enfants de
moins de 8 ans.
f
20
Emplacement
• Cet appareil est conçu pour être utilisé dans un environnement
domestique ou similaire tel que :
les fermes ;
par les clients dans les hôtels, motels et autres environnements
de type
résidentiel ; les environnements de type « Bed and Breakfast ».
Il n’est pas destiné à être utilisé dans les cuisines réservées au
personnel des magasins, bureaux et autres lieux de travail.
• N’utilisez jamais l’appareil à l’extérieur ou près de l’eau.
• Ne le placez pas juste en-dessous des éléments muraux de votre
cuisine, car il produit de grandes quantités de vapeur. Évitez de
vous pencher au-dessus du cuiseur vapeur pendant son
fonctionnement.
Câble d’alimentation électrique
• Positionnez le socle de l’appareil de manière à ce que le câble
d’alimentation puisse atteindre une prise électrique sans forcer
sur les connexions.
• Ne laissez pas le câble pendre au bord d’une table ou d’un plan
de travail, et tenez-le éloigné des surfaces chaudes.
• Ne laissez jamais le câble traverser un espace accessible, par
exemple entre une prise murale basse et une table.
• Si le câble d’alimentation est endommagé, il doit être remplacé
par le fabricant, son atelier d’entretien ou un technicien qualifié
afin d’éviter tout danger.
FS48775MEE Rev2_9225 47507 MEE pump - Jon 22/08/2012 09:13 Page 20

21
Sécurité personnelle
• Ne touchez jamais les surfaces chaudes. Utilisez des gants de
cuisine ou un torchon lorsque vous ouvrez le couvercle ou lorsque
vous manipulez des récipients chauds, car de la vapeur brûlante
s’en échappe.
• AVERTISSEMENT : Pour vous protéger contre les risques
d’incendie, de choc électrique et
de blessure corporelle, ne plongez pas le câble d’alimentation, les
fiches électriques, ni l’appareil dans l’eau ou dans d’autres
liquides.
• AVERTISSEMENT : Soyez extrêmement prudent lorsque vous
déplacez le cuiseur vapeur quand il contient des aliments, de
l’eau ou d’autres liquides chauds.
• Les appareils ne doivent pas être immergés.
• Débranchez l’appareil du secteur lorsque vous ne l’utilisez pas,
avant d’installer ou d’enlever les accessoires et avant de le
nettoyer.
• N’utilisez jamais un appareil si le câble d’alimentation ou la fiche
électrique est endommagé, après un mauvais fonctionnement de
l’appareil, ou encore si l’appareil a été endommagé de quelque
manière que ce soit. Contactez Morphy Richards pour obtenir des
conseils concernant les vérifications, les réparations ou les
réglages électriques ou mécaniques.
• Ne remplissez jamais l’appareil au-delà du niveau maximal. Si le
cuiseur vapeur est trop rempli, de l’eau bouillante peut être
éjectée et vous brûler.
Autres consignes de sécurité
• N’utilisez pas d’accessoires ou outils non recommandés par
Morphy Richards car ils pourraient représenter un risque
d’incendie, de choc électrique ou de dommages corporels.
• Pour ouvrir l’appareil, soulevez les couvercles vers vous en les
inclinant par le côté opposé.
• N’utilisez aucune partie du cuiseur vapeur dans un micro-ondes
ou sur une surface de cuisson ou chaude.
• Ne mettez pas le cuiseur vapeur sur ou près d’une plaque
électrique ou d’un brûleur à gaz chaud, ou dans un four chauffé.
• Ne laissez pas le cuiseur vapeur dans un environnement humide
et corrosif.
• Ne mettez pas le cuiseur vapeur en marche, sauf s’il contient au
moins 1 tasse d’eau, sans quoi vous risqueriez de l’endommager.
• Vérifiez toujours que le niveau d’eau ne tombe pas en-dessous du
niveau minimum.
Traitement des brûlures
• Faites couler immédiatement de l’eau froide sur la zone touchée.
Ne prenez pas le temps de vous changer, appelez rapidement un
médecin.
Exigences électriques
Vérifiez que la tension indiquée sur la plaque signalétique de
l’appareil correspond à l’alimentation électrique de votre domicile,
qui doit être en courant alternatif (CA).
Si le fusible de la prise doit être remplacé, vous devez utiliser un
fusible BS1362 de 13 ampères.
ATTENTION : Cet appareil doit être mis à la terre.
INTRODUCTION
Merci d’avoir choisi l’Intellisteam Compact.
Veuillez lire attentivement cette notice d’utilisation pour obtenir
les meilleures performances possibles.
Table des matières
Hygiène et sécurité 20
Introduction 21
Caractéristiques du produit 22
Caractéristiques du bandeau de commande 22
Avant la première utilisation 22
Utiliser votre Intellisteam Compact 22
Paroi de séparation 23
Temps de cuisson à la vapeur 23
Temps de cuisson prédéfinis 23
Pause durant la cuisson 23
Retrait des aliments de votre Intellisteam Compact 23
Cuisson du riz 23
Cuisson des œufs 23
Alarme de cuisson à sec et arrêt automatique 23
Remplissage du réservoir d’eau en cours d’utilisation 24
Conseils 24
Rangement 24
Détartrage 24
Entretien et nettoyage 24
Guide vapeur 25
Légumes 25
Légumes en sachet 26
Poisson et fruits de mer 26
Volaille 27
Riz 27
Recettes 28
Nous contacter 33
Garantie 33
f
FS48775MEE Rev2_9225 47507 MEE pump - Jon 22/08/2012 09:13 Page 21

22
Caractéristiques
A
(1) Couvercle
(2) Paroi de séparation
(3) Récipient
(4) Conduit de la plaque
(5) Bac récupérateur
(6) Conduit de vapeur
(7) Réservoir d’eau
(8) Orifice de remplissage d’eau
(9) Jauge à eau
(10) Élément principal
(11) Bandeau de commande
(12) Compartiment gauche (avec paroi de séparation)
(13) Compartiment gauche (avec paroi de séparation)
(28) Panier spécial riz
Caractéristiques du bandeau de commande
B
(14) Touche Marche/Arrêt
(15) Symboles des aliments (compartiment gauche)
(16) Minuteur (compartiment gauche)
(17) Symbole de remplissage
(18) Minuteur (compartiment droit)
(19) Symboles des aliments (compartiment droit)
(20) Touche Plus
(21) Touche Moins
(22) Symbole de détartrage
(23) Touche compartiment gauche
(24) Symbole de la vapeur (compartiment gauche)
(25) Touche Départ/Pause
(26) Symbole de la vapeur (compartiment droit)
(27) Touche compartiment droit
Avant la première utilisation
Il est important de nettoyer votre Intellisteam Compact avant la
première utilisation ou après une longue période sans utilisation.
Reportez-vous au chapitre « Entretien et nettoyage » pour plus
d’informations.
Il est important de détartrer régulièrement votre Intellisteam
Compact pour maintenir un niveau de vapeur optimal et prolonger
sa durée de vie. Consultez la section Détartrage pour en savoir
plus.
Lors de la première utilisation de votre Intellisteam Compact, vous
pourrez remarquer de la fumée/vapeur s’échappant de l’arrière de
l’élément principal. Ce phénomène est normal. La fumée/vapeur
provient de la graisse appliquée sur certaines pièces de l’appareil
durant sa fabrication. Cela s’arrêtera après quelques utilisations de
votre Intellisteam Compact. Cette fumée n’est pas dangereuse et
n’altèrera pas les saveurs des aliments préparés dans votre
Intellisteam Compact.
Comment utiliser votre Intellisteam Compact
1
Remplissez le réservoir d’eau (7) avec de l’eau froide jusqu’au niveau
maximal.
2
Installez le bac récupérateur (5) et le récipient (3) avec la paroi de
séparation (2) sur l’élément principal (10).
3
Mettez les aliments dans les compartiments (12), (13). Utilisez la paroi
de séparation pour vous assurer que les aliments ne se mélangent
pas. Placez le couvercle (1) sur l’appareil.
4
Branchez votre Intellisteam Compact à une prise secteur. Votre
Intellisteam Compact émet alors un bip et l’écran LCD s’allume.
5
Pour régler le temps de cuisson à la vapeur, appuyez sur la touche du
compartiment gauche (23) ou droit (27). Appuyez à plusieurs reprises
sur la touche pour passer en revue les temps de cuisson à la vapeur
par défaut, puis sélectionnez le groupe d’aliments requis (15) (19).
6
Utilisez les touches Plus (20) et Moins (21) pour régler le temps de
cuisson (si nécessaire). Appuyez sur le symbole du minuteur
correspondant (16), (18) clignote (dans les 3 secondes) ou appuyez
de nouveau sur la touche du compartiment correspondant pour
régler la durée. Répétez les étapes 5 et 6 pour l’autre compartiment
(si nécessaire).
7
Appuyez sur la touche Départ/Pause (25). Votre Intellisteam Compact
émet alors un bip, le symbole de vapeur (24) clignote* et le minuteur
commence son décompte.
8
Lorsque le minuteur atteint « zéro », l’alarme retentit.
Votre Intellisteam Compact passe automatiquement en mode
Maintien au chaud pendant 20 minutes.
9
Une fois la cuisson terminée, appuyez sur la touche Marche/Arrêt
(14), et débranchez votre Intellisteam Compact.
Soulevez le couvercle (1) avec précautions en l’inclinant par le côté
opposé pour que la vapeur puisse s’échapper librement en toute
sécurité. Avertissement : La vapeur peut brûler !
10
Retirez les aliments cuits de votre Intellisteam Compact en faisant
très attention. Avertissement : La vapeur peut brûler !
Remarque : Si vous avez choisi différentes durées de cuisson
pour chaque compartiment, le symbole de la vapeur clignotera
lorsque chaque compartiment commencera le processus de
cuisson à la vapeur.
FS48775MEE Rev2_9225 47507 MEE pump - Jon 22/08/2012 09:13 Page 22
23
Paroi de séparation
Le récipient (3) peut être utilisé de deux façons différentes, en tant
que deux compartiments de cuisson individuels, ou comme un
unique grand compartiment.
Pour utiliser votre Intellisteam Compact comme un unique grand
compartiment de cuisson vapeur, sortez la paroi de séparation (2)
du récipient et mettez-la de côté.
Cuisson à la vapeur sans paroi de séparation
Si vous utilisez votre Intellisteam Compact sans la paroi de
séparation (2), vous devez régler les deux côtés du compartiment
sur la cuisson à la vapeur et sur la même durée. Sans cela, vos
aliments ne cuiront pas uniformément.
1. Suivez les étapes 1 à 6 du chapitre « Comment utiliser votre
Intellisteam Compact » sans installer la paroi de séparation.
3. Maintenez la touche du compartiment gauche (23) enfoncée
jusqu’à ce que la durée s’affiche pour les deux compartiments.
4. Si nécessaire, ajustez la durée de cuisson de votre Intellisteam
Compact en utilisant les touches Plus (20) ou Moins (21).
6. Suivez les étapes 7 à 10 du chapitre « Comment utiliser votre
Intellisteam Compact ».
Temps de cuisson à la vapeur
Votre Intellisteam Compact est conçu pour terminer
simultanément la cuisson à la vapeur des deux compartiments.
Lorsque le processus de cuisson à la vapeur commence, le
minuteur démarre automatiquement son décompte à partir de
la plus longue durée de cuisson pour que tous les aliments
cuisant dans votre Intellisteam Compact soient prêts en même
temps.
Temps de cuisson prédéfinis
Votre Intellisteam Compact dispose de 7 temps de cuisson
prédéfinis. Elles peuvent être ajustées en utilisant les touches Plus
(20) et Moins (21).
Pour faire défiler et choisir le temps de cuisson prédéfini souhaité
pour chaque compartiment, appuyez sur la touche de
compartiment gauche ou droit à plusieurs reprises.
Les temps de cuisson prédéfinis sont les suivants :
Œuf - 12 minutes
Poisson - 15 minutes
Légumes - 20 minutes
Viande - 30 minutes
Riz - 40 minutes
Volaille - 35 minutes
Maintien au chaud - 10 minutes
N’utilisez pas ce réglage pour cuire des aliments.
Pause durant la cuisson
Pour mettre votre Intellisteam Compact en pause durant la
cuisson, appuyez sur la touche Départ/Pause (25). Pour reprendre
la cuisson à la vapeur, appuyez de nouveau sur la touche
Départ/Pause.
Lorsque votre Intellisteam Compact est en pause, vous pouvez
modifier le temps de cuisson comme indiqué aux étapes 5 à 7 du
chapitre « Comment utiliser votre Intellisteam Compact ».
Retrait des aliments de votre
Intellisteam Compact
ATTENTION : Utilisez des gants de cuisine pour retirer le
couvercle (1) et le récipient (3), en vous assurant que le
couvercle est incliné pour diriger la vapeur du côté qui vous
est opposé. Ne sortez pas le bac récupérateur (5) tant qu’il
n’a pas complètement refroidi.
Cuisson du riz
1 Installez votre Intellisteam Compact comme décrit dans le
chapitre « Comment utiliser votre Intellisteam Compact ».
2 Versez 1 tasse de riz non cuit et 1 tasse et demie d’eau dans la
panier spécial riz (28) et mélangez bien.
3 Placez le panier spécial riz dans le compartiment et installez le
couvercle (1) sur votre Intellisteam Compact.
4 Réglez le temps de cuisson « Riz » prédéfini (40 minutes) de ce
compartiment et appuyez sur la touche Départ/Pause (25).
Cuisson des œufs
Vous pouvez utiliser votre Intellisteam Compact pour cuire des
œufs durs.
1 Suivez les étapes 1 et 2 du chapitre « Comment utiliser votre
Intellisteam Compact ».
2 Placez les œufs un à un dans les creux du récipient (3) comme
indiqué ci-dessus.
3 Refermez le couvercle (1).
4 Réglez le temps de cuisson et la vapeur comme indiqué aux
étapes 4 à 10 du chapitre « Comment utiliser votre Intellisteam
Compact ». Le cuiseur vapeur dispose d’un réglage « Œufs »
prédéfini de 12 minutes. Il peut être ajusté en utilisant les touches
Plus (20) et Moins (21), selon les goûts.
Alarme de cuisson à sec et arrêt automatique
Lorsque le niveau d’eau se trouve sous le repère « MIN » de la
jauge à eau (9), l’alarme retentit en continu et le symbole de
remplissage (17) clignote. Si cela se produit, remplissez le
réservoir d’eau (7) aussi vite que possible. Utilisez l’orifice de
remplissage du réservoir (8) pour remplir le réservoir d’eau,
comme indiqué page 10.
Si votre Intellisteam Compact cuit à sec en cours d’utilisation, il
emet un bip continu et s’éteint automatiquement pour arrêter le
processus de cuisson.
f
FS48775MEE Rev2_9225 47507 MEE pump - Jon 22/08/2012 09:13 Page 23

24
Remplissage du réservoir d’eau en cours
d’utilisation
Utilisez l’orifice de remplissage du réservoir (8) pour remplir le
réservoir d’eau (7) en cours de cuisson.
Sortez doucement l’orifice de remplissage du réservoir du côté de
votre Intellisteam Compact. Utilisez une cruche pour verser
doucement l’eau dans l’orifice de remplissage du réservoir.
L’alarme s’arrête automatiquement et l’icône de remplissage (17)
disparaît.
Conseils
• Les temps de cuisson à la vapeur du guide de cuisson à la vapeur
(p. 10) ne sont indiqués qu’à titre indicatif. Les temps de cuisson
peuvent varier selon l’épaisseur des aliments, l’espace qui les
sépare à l’intérieur des compartiments, leur fraîcheur et les
préférences gustatives. Une fois habitué à cuisiner avec votre
Intellisteam Compact, vous pourrez ajuster les temps de cuisson
selon vos préférences.
• Une seule couche d’aliments cuit plus vite que plusieurs couches.
Pour cette raison, les temps de cuisson pour une plus grande
quantité d’aliments seront allongés. Pour obtenir de meilleurs
résultats, préparez les aliments en plus petits morceaux ou moins
épais, et répartissez-les de façon uniforme dans le compartiment.
• Lorsque vous cuisinez de grandes quantités d’aliments, retirez le
couvercle (1) à la moitié du temps de cuisson, mélangez-les
doucement en utilisant un ustensile de cuisine à manche long
pour vous assurer que les aliments cuisent uniformément.
Avertissement : N’introduisez pas votre main dans le
récipient.
• Ne surchargez pas inutilement l’appareil de nourriture. Espacez
les aliments pour permettre à la vapeur de passer.
• Ne versez pas de sel ni d’assaisonnement dans le récipient (3) ou
le réservoir d’eau (7). Ces minéraux peuvent entartrer et
endommager la résistance.
• Après la cuisson, le liquide restant dans le bac récupérateur (5)
est idéal pour les sauces.
• Ne cuisez jamais de la viande, de la volaille, du poisson ou des
fruits de mer surgelés à la vapeur sans les avoir décongelés au
préalable. Décongelez toujours les aliments d’abord.
Rangement
Pour être facile à ranger, votre Intellisteam Compact est conçu
pour que l’élément principal (10) rentre dans le récipient (3).
Lorsque vous ne l’utilisez pas, votre Intellisteam Compact peut
être rangé comme illustré pour gagner de l’espace.
Détartrage
Il est important de détartrer régulièrement l’appareil pour
maintenir un niveau de vapeur optimal et prolonger sa durée
de vie.
Au bout de 15 heures de cuisson à la vapeur, le symbole de
détartrage (22) s’allume pour vous rappeler qu’il est temps de
détartrer l’appareil.
1 Remplissez le réservoir d’eau (7) de vinaigre blanc jusqu’au repère
MAX (n’utilisez pas de vinaigre coloré).
IMPORTANT : N’utilisez aucun autre produit chimique ou
agent détartrant vendu dans le commerce.
2 Installez le bac récupérateur (5), le récipient (3) et le couvercle (1)
sur le réservoir d’eau puis branchez votre Intellisteam Compact à
une prise secteur.
3 Réglez le minuteur des deux compartiments sur 25 minutes et
appuyez sur la touche Départ/Pause.
ATTENTION : Si le vinaigre blanc commence à déborder de
l’élément principal, arrêtez le minuteur et débranchez
l’appareil. Réduisez légèrement la quantité de vinaigre blanc.
Ne tentez jamais de déplacer votre Intellisteam Compact si le
vinaigre est encore chaud.
4 Lorsque le processus de génération de la vapeur est terminé,
débranchez l’appareil et laissez-le refroidir complètement avant de
vider le vinaigre/la solution aqueuse.
5 Rincez le réservoir d’eau plusieurs fois avec de l’eau froide.
ATTENTION : Ne tentez jamais de déplacer votre
Intellisteam Compact si le vinaigre est encore chaud.
6 Remplissez le réservoir d’eau froide jusqu’au repère MAX. Installez
le bac récupérateur, le récipient et le couvercle sur le réservoir
d’eau puis branchez votre Intellisteam Compact à une prise
secteur.
7 Sélectionnez un programme sur votre Intellisteam Compact et
réglez le minuteur sur 10 minutes. Eteignez l’appareil et laissez-le
refroidir complètement avant de vider l’eau restante.
Entretien et nettoyage
ATTENTION : Ne plongez jamais l’élément principal (10), le
câble d’alimentation ou la fiche dans l’eau.
1 Débranchez l’appareil de la prise secteur et laissez l’appareil
refroidir complètement avant de le nettoyer.
2 Ne nettoyez aucune partie de l’appareil avec un nettoyant abrasif,
par exemple des poudres à récurer, une éponge métallique ou de
l’eau de javel.
3 Ne nettoyez jamais les parties en plastique avec le côté abrasif
d’une éponge ou avec un tampon à récurer.
4 Ne plongez pas l’élément principal dans l’eau Remplissez le
réservoir d’eau (7) avec de l’eau chaud et savonneuse, et essuyezle avec un chiffon. Videz-le et rincez-le soigneusement, puis
essuyez-le avec un chiffon humide.
5 Nettoyez le couvercle (1), le panier spécial riz (28), le récipient (3)
et la paroi de séparation (2) avec de l’eau chaude et du liquide
vaisselle.
• Le panier spécial riz, le récipient et la paroi de séparation sont
tous adaptés à un lavage en lave-vaisselle, uniquement dans le
panier supérieur, sur un cycle moyen ou éco. Rincez-les
soigneusement.
• Le couvercle n’est pas adapté au lave-vaisselle.
6 Nettoyez votre Intellisteam Compact après chaque utilisation.
FS48775MEE Rev2_9225 47507 MEE pump - Jon 22/08/2012 09:13 Page 24

25
Guide vapeur
Les durées de cuisson à la vapeur et les portions indiquées ci-dessous sont approximatives et ne sont données qu’à titre indicatif. Les
temps de cuisson peuvent varier selon la taille des aliments, l’espace qui les sépare à l’intérieur du récipient (3), leur fraîcheur et les
préférences gustatives. Une fois familiarisé avec le cuiseur vapeur, vous pourrez ajuster les temps de cuisson selon vos préférences.
Les temps de cuisson à la vapeur sont adaptés aux quantités d’aliments indiqués dans le guide. Pour de plus grandes ou plus petites
quantités, ajustez les durées.
Légumes
Coupez les tiges épaisses du brocoli, du chou et du chou-fleur.
Faites cuire à la vapeur les légumes verts le moins de temps possible car ils perdent rapidement leurs couleurs.
Pour de meilleurs résultats, salez et assaisonnez les légumes après la cuisson à la vapeur.
Ne décongelez pas les légumes surgelés avant de les cuire à la vapeur.
Plat Poids Temps de cuisson Conseil
• Asperges • 1 portion de 60 g
• 4 portions de 240 g
• 15 min • Croisez les asperges
pour laissez la vapeur
pénétrer
• Brocolis • 1 portion de 60 g • 4 portions de 240 g • 15 à 18 min
• Gros haricots • 1 portion de 50 g
• 4 portions de 200 g
• 10 à 15 min • Remuez à la moitié du
temps de cuisson
• Carottes
(en rondelles)
• 1 portion de 100 g
• 4 portions de 400 g
• 15 à 20 min • Remuez à la moitié du
temps de cuisson
• Chou-fleur • 1 portion de 100 g
• 4 portions de 400 g
• 18 min • Remuez à la moitié du
temps de cuisson
• Mange-tout • 1 portion de 50 g
• 4 portions de 200 g
• 10 à 12 min • Remuez à la moitié du
temps de cuisson
• Petits pois (frais) • 1 portion de 60 g
• 4 portions de 240 g
• 8 min
• 8 à 12 min
• Remuez à la moitié du
temps de cuisson
• Épinards • 1 portion de 60 g
• 4 portions de 240 g
• 4 à 5 min
• 5 à 8 min
• Remuez à la moitié du
temps de cuisson
• Pommes de terre • 1 portion de 180 g
• 4 portions de 720 g
• 25 min
f
FS48775MEE Rev2_9225 47507 MEE pump - Jon 22/08/2012 09:13 Page 25

Poisson et fruits de mer
Le poisson est cuit lorsqu’il s’émiette facilement avec une fourchette.
Le poisson congelé peut être cuit à la vapeur sans décongélation préalable cependant, il doit être séparé avant la cuisson à la vapeur et le
temps de cuisson doit être allongé.
Ajoutez des quartiers de citron et des herbes durant la cuisson à la vapeur pour renforcer les saveurs
26
Légumes en sachet
Certains supermarchés proposent des légumes préparés/emballés en sachet faciles d’utilisation. Ils sont idéaux pour cuisiner des repas
car le plus gros de la préparation est déjà fait.
La plupart des sachets contiennent des instructions de cuisson à la vapeur pour les légumes. Cependant, ces temps de cuisson sont
adaptés aux tables de cuisson ou aux micro-ondes. Ils doivent être ajustés selon le poids et les préférences.
Utilisez les temps de cuisson indiqués ci-dessous à titre de guide.
Plat Poids Temps de cuisson
• Carottes/Brocolis/Choux
de Bruxelles
• 480 g • 20 min
• Pommes de terre • 500 g • 40 min
• Mélange de petits
légumes
• 350 g • 15 min
• Petites carottes • 400 g • 20 min
• Petits épis de maïs • 170 g • 20 min
• Petits pois frais • 170 g • 8 min
Plat Poids / Nombre Temps de cuisson
• Grosses crevettes • 100 g
• 400 g
• 5 à 7 min
• 7-10
• Darnes de saumon • 1 filet 140 g
• 4 filets 560 g
• 15 min
• Moules • 200 g
• 800 g
• 5 min
• 5 à 8 min
FS48775MEE Rev2_9225 47507 MEE pump - Jon 22/08/2012 09:13 Page 26

27
Plat Poids / Nombre Temps de cuisson Conseil
• Escalopes de poulet • 1 filet 200 g
• 4 filets 800 g
• 12 à 15 min • Retirez le gras avant de
cuire
Volaille
La cuisson à la vapeur a l’avantage d’offrir une cuisine saine en raison de la basse chaleur utilisée. Ne choisissez que de la viande
tendre, des morceaux maigres et débarrassés de toute graisse.
Servez la volaille cuite à la vapeur avec des herbes, des sauces savoureuses ou faites mariner la viande quelques heures avant la cuisson
à la vapeur pour obtenir un maximum de saveurs.
Cuisinez entièrement les aliments avant de les servir. Utilisez un couteau ou une broche pour vérifier que le centre de la viande est cuit et
que le jus qui s’en écoule est clair.
Riz
Utilisez le panier spécial riz et ajoutez-y la quantité d’eau nécessaire
Plat Poids Eau Temps de cuisson
• Riz • 1 portion de 75 g
• 4 portions de 300 g
• 110 ml
• 450 ml
• 30 min
• 40 min
f
FS48775MEE Rev2_9225 47507 MEE pump - Jon 22/08/2012 09:13 Page 27
28
Les recettes de cette notice ont été spécialement créées et testées par Morphy Richards pour votre Intellisteam Compact.
Les temps de cuisson des recettes suivantes sont indiqués à titre de guide et varieront selon la taille et la fraîcheur des ingrédients utilisés.
Veillez toujours à ce que la viande soit parfaitement cuite avant de la servir.
Les recettes sont conçues avec la quantité maximale pour 4 personnes. Si vous réduisez les portions, ajustez également les temps de
cuisson comme nécessaire.
Recettes
FS48775MEE Rev2_9225 47507 MEE pump - Jon 22/08/2012 09:13 Page 28

29
Poivrons rouges doux farcis aux poireaux et à
la feta, accompagnés de ciboules et de
semoule aux pignons de pin
Ingrédients :
• 4 poivrons rouges doux (longs), coupés au sommet
• 1 petit poireau finement émincé
• 1 c. à soupe de persil frais haché
• 2 cuillères à soupe d’huile d’olive
• 25 g de parmesan râpé
• 25 g de chapelure
• 100 g de feta finement émiettée
• Sel et poivre noir frais moulu
Semoule :
• 200 g de semoule
• 2 c. à café de bouillon de légumes en poudre
• 4 ciboules finement hachées
• 25 g de pignons de pin
Garniture :
• Brins de persil
Préparation :
1 Fendez les poivrons dans le sens de la longueur en veillant à ne
pas les couper en deux. Enlevez le cœur et les graines. Mélangez
le poireau, le persil et l’huile d’olive, puis ajoutez le parmesan et la
chapelure. Ajoutez la féta émiettée, puis assaisonnez avec un peu
de sel et beaucoup de poivre noir. Farcissez les poivrons avec le
mélange.
2 Placez les poivrons dans un compartiment.
3 Placez le panier spécial riz dans l’autre compartiment.
4 Ajoutez la semoule et 265 ml d’eau froide dans le panier spécial
riz. Puis ajoutez le bouillon en poudre, les ciboules et les pignons.
5 Réglez le temps de cuisson de la semoule sur 25 minutes. Réglez
le temps de cuisson des poivrons
sur la durée prédéfinie pour les légumes (20 minutes).
6 Appuyez sur la touche vapeur.
7 Une fois la cuisson terminée, laissez les aliments reposer
5 minutes.
8 À l’aide d’une fourchette, faites gonfler la semoule avant de la
servir.
Soufflés au fromage de chèvre
Ingrédients :
• 125 g de fromage de chèvre émietté
• 4 œufs moyens, séparés
• 2 cuillères à soupe de persil à feuilles plates, haché
• 1 c. à soupe d’estragon frais
haché
• Sel et poivre
• 240 g d’épinards
• Beurre pour graisser
Pour servir :
• Feuille de salade
Préparation :
1 Graissez 4 ramequins de 150 ml.
2 Placez la moitié du fromage de chèvre dans un grand bol et
écrasez-le avec une fourchette.
3 Ajoutez les jaunes d’œufs, les herbes et assaisonnez.
4 Battez les blancs d’œufs en neige dans un bol séparé jusqu’à ce
que vous puissiez former de petites pointes.
5 Versez 2 cuillères à soupe de blanc d’œuf dans le mélange au
fromage pour le ramollir, puis mélangez délicatement le reste.
6 Versez le mélange dans les ramequins et parsemez le fromage
restant sur le dessus. Couvrez les ramequins et placez
2 ramequins de chaque côté du cuiseur vapeur.
7 Laissez cuire à la vapeur pendant 20 minutes, jusqu’à ce que le
dessus semble cuit mais pas le centre.
8 Servez immédiatement avec une salade.
f
FS48775MEE Rev2_9225 47507 MEE pump - Jon 22/08/2012 09:13 Page 29

30
Poulet tikka masala accompagné
de riz piquant à la cardamome
Ingrédients :
• 4 c. à soupe de yaourt nature maigre
• 2 c. à soupe de pâte de curry tikka masala
• 2 c. à soupe de coriandre fraîche hachée
• 4 escalopes de poulet, désossées et sans peau, coupées en
morceaux
• Sel et poivre noir frais moulu
Riz :
• 300 g de riz basmati
• 450 ml d’eau froide
• 2 c. à café de bouillon de légumes en poudre
• 2 lamelles de zeste de citron pelé
• 6 cosses de cardamome verte, légèrement écrasées
Garniture :
• Quartiers de citron vert et brins de coriandre
Préparation :
1 Mettez le yaourt, la pâte de curry et la coriandre dans un grand
bol non métallique et mélangez. Ajoutez les morceaux de poulet
et mélangez pour les enrober de marinade. Assaisonnez avec un
peu de sel et de poivre, couvrez et mettez au réfrigérateur
pendant au moins 30 minutes.
2 Introduisez le panier spécial riz dans l’un des compartiments.
Ajoutez le riz et l’eau froide. Ajoutez le bouillon en poudre. Placez
les lamelles de zeste de citron pelé par-dessus et saupoudrez des
cosses de cardamome.
3 Placez le poulet avec sa marinade dans l’autre compartiment et
veillez à ce que le mélange soit bien réparti.
4 Réglez le temps pour le riz en utilisant le temps de cuisson
prédéfini du riz (40 minutes). Réglez le temps pour le poulet en
utilisant le temps de cuisson prédéfini pour la viande (30 minutes).
5 Appuyez sur la touche vapeur.
6 Décorez avec les quartiers de citron vert et les brins de coriandre,
et servez.
Remarque : Les épices utilisées dans cette recette peuvent
tacher les parties en plastique de votre Intellisteam Compact.
Pour éviter cela, faites cuire le poulet enveloppé dans du papier
d’aluminium et allongez le temps de cuisson de 10 minutes Veillez
toujours à ce que la viande soit parfaitement cuite avant de la
servir.
Poulet glacé au sirop d’érable
Ingrédients :
• 4 escalopes de poulet, désossées et sans peau
• Zeste finement râpé et jus d’une petite orange
• 2 c. à soupe de sirop d’érable
• ¼ de cuillère à café de piment en poudre
• Sel et poivre noir frais moulu
Riz :
• 250 g de riz blanc sauvage
• 1 c. à café de bouillon de légumes en poudre
• 250 ml d’eau
Préparation :
1 Mettez les escalopes de poulet dans un bol non métallique et
ajoutez le
zeste d’orange, le jus d’orange, le sirop d’érable et la poudre de
piment. Assaisonnez avec un peu de sel et beaucoup de poivre.
Couvrez et mettez au réfrigérateur pendant au moins 30 minutes.
2 Placez les escalopes dans un compartiment.
3 Mettez le riz et le bouillon de légumes en poudre dans le panier
spécial riz. Positionnez le panier spécial riz dans l’autre
compartiment, ajoutez 250 ml d’eau froide au riz et mélangez.
4 Réglez le temps pour le poulet en utilisant le temps de cuisson
prédéfini pour la viande (30 minutes).
Réglez le temps pour le riz en utilisant le temps de cuisson
prédéfini pour le riz (40 minutes).
5 Appuyez sur la touche vapeur
FS48775MEE Rev2_9225 47507 MEE pump - Jon 22/08/2012 09:13 Page 30

31
Flétan vapeur et sauce
au citron et au thym
Ingrédients :
• 4 filets de flétan de 125 g sans la peau (ou utilisez de la morue du
Pacifique)
• 15 g de beurre
• 4 petits brins de thym
• Sel et poivre noir frais moulu
Légumes :
• 750 g de petites pommes de terre nouvelles
• 2 poireaux coupés en fines lamelles
• 1 grosse carotte coupée en rondelles
• 150 g de haricots verts
Sauce :
• 50 g de beurre fondu
• Zeste finement râpé et jus d’un citron
• 1 c. à soupe de feuilles de thym frais
Préparation :
1 Mélangez les légumes et mettez-les dans un compartiment.
2 Placez les filets de poisson par-dessus les légumes.
3 Placez une petite noisette de beurre sur chacun des filets et
disposez les brins de thym par-dessus. Assaisonnez avec un peu
de sel et de poivre.
4 Placez les pommes de terre dans l’autre compartiment.
5 Réglez le temps pour le poisson et les légumes en utilisant le
temps de cuisson prédéfini pour le poisson en ajoutant 5 minutes
(20 minutes). Réglez le temps pour les pommes de terre en
utilisant le temps de cuisson prédéfini pour les légumes
(30 minutes).
6 Appuyez sur la touche vapeur.
7 Pour la sauce, mélangez le beurre, le zeste et le jus de citron, ainsi
que les feuilles de thym, puis versez le tout sur le poisson au
moment de servir.
Saumon au sésame et légumes vapeur
accompagné de lait de coco et de nouilles à la
sauce au piment doux
Ingrédients :
• 4 filets de saumon de 125 g
• 4 c. à café d’huile de sésame grillée
• 1 c. à café de graines de sésame
• 300 g de nouilles mi-cuites
Légumes :
• 150 g de pois « Sugar snap » ou mange-tout
• 6 ciboules coupées en rondelles
• 1 carotte coupée en fines rondelles
Sauce :
• 300 ml de lait de coco
• 2 c. à soupe de sauce au piment
• 1 c. à café de gingembre frais râpé
• 1 c. à soupe de coriandre fraîche hachée
Préparation :
1 Mélangez les légumes et mettez-les dans un compartiment.
2 Enduisez les filets de saumon d’huile de sésame et saupoudrez-
les de graines de sésame. Placez-les sur les légumes dans le
compartiment.
3 Placez les nouilles dans le panier spécial riz et installez-le dans
l’autre
compartiment.
4 Mélangez les ingrédients pour la sauce et versez-la sur les
nouilles. Mélangez le tout.
5 Réglez le temps pour le saumon et les légumes en utilisant le
temps de cuisson prédéfini pour le poisson en ajoutant 5 minutes
(20 minutes).
6 Réglez le temps de cuisson pour les nouilles sur 20 minutes.
7 Appuyez sur la touche vapeur.
8 Remuez les nouilles 5 minutes avant la fin du temps de cuisson
pour vous assurer qu’elles ne collent pas.
f
FS48775MEE Rev2_9225 47507 MEE pump - Jon 22/08/2012 09:13 Page 31

32
Crevettes épicées et semoule aux pois à la
menthe
Ingrédients :
• 400 g de grosses crevettes crues
• ½ cuillère à café de poivre de Cayenne
• ½ cuillère à café de paprika
• ½ cuillère à café de sel
• ¼ de cuillère à café d’ail en poudre
Semoule :
• 200 g de semoule
• 270 ml d’eau froide
• 75 g de pois surgelés
• 1 c. à soupe de menthe fraîche hachée
Préparation :
1 Mélangez le poivre de Cayenne, le paprika, le sel et la poudre
d’ail, puis enrobez les crevettes de ce mélange.
2 Placez les crevettes dans un compartiment.
3 Versez la semoule, l’eau, les pois et la menthe dans le panier
spécial riz, puis installez-le dans l’autre compartiment.
4 Réglez le temps de cuisson des crevettes sur 10 minutes, et le
temps de la semoule sur 25 minutes.
5 Appuyez sur la touche vapeur.
6 À l’aide d’une fourchette, faites gonfler la semoule avant de la
servir.
Génoise au gingembre et à la banane et sauce
au caramel
Ingrédients :
• 75 g de beurre, et beurre supplémentaire pour graisser
• 75 g de sucre muscovado clair
• 2 œufs moyens battus
• 1/2 c. à café d’extrait de vanille
• 75 g de farine à levure incorporée
• 1/2 cuillère à café de poudre de gingembre
• Pincée de sel
• 1 grosse banane mûre écrasée
• 2 morceaux de gingembre en tige au sirop, plus 4 c. à soupe de
sirop de la boîte
Sauce :
• 3 c. à soupe de mélasse claire
• 25 g de beurre
• 25 g de sucre muscovado clair
Pour servir :
• Glace vanille ou crème anglaise
Préparation :
1 Dans un grand bol, fouettez le beurre et le sucre jusqu’à obtenir
un mélange léger et mousseux. Ajoutez progressivement les œufs,
puis incorporez la vanille. Saupoudrez la farine, le gingembre
moulu et le sel, et incorporez-les à l’aide d’une grande cuillère en
métal. Ajoutez la banane écrasée.
2 Beurrez 4 moules à pudding individuels de 150 ml. Coupez les
tiges de gingembre en rondelles et placez-les au fond des
moules. Versez 1 cuillère à soupe de sirop dans chaque moule,
puis couvrez du mélange crémeux. Couvrez bien avec des
morceaux de papier d’aluminimum beurré.
3 Placez les puddings dans un compartiment.
4 Placez les ingrédients pour la sauce dans le panier spécial riz,
couvrez-le de film étirable puis installez-le dans l’autre
compartiment.
5 Réglez le temps pour les puddings en utilisant le temps de
cuisson prédéfini pour le riz (40 minutes). Réglez le temps de
cuisson pour la sauce sur 20 minutes.
6 Une fois la cuisson terminée, décollez les puddings en passant
délicatement un couteau autour
des moules. Mélangez bien la sauce et versez-la sur chaque
pudding. Servez avec de la glace ou de la crème anglaise.
FS48775MEE Rev2_9225 47507 MEE pump - Jon 22/08/2012 09:13 Page 32

33
Nous contacter
Service d’assistance
Si vous rencontrez un problème avec votre appareil, veuillez
appeler notre service d’assistance. Nous pourrons certainement
vous aider plus efficacement que le magasin où vous avez
acheté l’article.
Munissez-vous du nom de produit, du numéro de modèle et du
numéro de série de l’appareil lorsque vous nous appelez. Cela
nous aidera à traiter plus rapidement votre demande.
Dialoguer avec nous
Si vous avez des questions ou des commentaires à formuler ou
si vous souhaitez bénéficier de conseils ou d’idées de recettes
pour vous aider à tirer le meilleur parti de vos appareils,
retrouvez-nous en ligne :
Blog : www.morphyrichards.co.uk/blog
Facebook : www.facebook.com/morphyrichardsuk
Twitter : www.twitter.com/loveyourmorphy
Site Internet : www.morphyrichards.com
VOTRE GARANTIE DE DEUX ANS
Pour la clientèle en France
Il est important de conserver le ticket de caisse comme preuve
d’achat. Agrafez votre ticket de caisse à cette notice
d'utilisation; vous pourrez ainsi l’avoir sous la main
ultérieurement.
Merci de donner les informations ci-dessous si votre appareil
tombe en panne. Vous trouverez ces références à la base de
l’appareil.
Numéro du modèle
Numéro de série
Tous les produits Morphy Richards sont testés individuellement
avant de quitter l’usine.
Si un problème survient dans les 24 mois qui suivent l’achat
d’origine, vous devez contacter le magasin où vous avez
acheté votre appareil muni de votre ticket de caisse, celui ci le
renverra à Glen Dimplex France pour expertise.
Sous réserve des exclusions indiquées ci-dessous (1 à 9),
l’appareil défectueux sera alors réparé ou remplacé et
réexpédié dans un délai de 15 jours ouvrables maximum à
compter de son arrivée.
Si, pour quelque raison que ce soit, l’article est remplacé
pendant la période de garantie de deux ans, la période de
garantie du nouvel article sera calculée à partir de la date
d’achat d’origine. Vous devez donc absolument conserver votre
ticket de caisse ou votre facture d’origine pour indiquer la date
d’achat.
Pour bénéficier de la garantie de deux ans, l’appareil doit avoir
été utilisé conformément aux instructions du fabricant. Par
exemple, les fers doivent avoir été détartrés et les filtres doivent
avoir été nettoyés selon les instructions.
Morphy Richards ne sera pas dans l’obligation de remplacer ou
réparer les articles aux termes de la garantie dans les
circonstances suivantes :
1 Si le problème provient d’une utilisation accidentelle, d’une
utilisation abusive ou négligente, ou si l’appareil a été utilisé de
manière contraire aux recommandations du fabricant, ou encore
lorsque le problème provient de sautes de puissance ou de
dégâts occasionnés en transit.
2 Si l’appareil a été utilisé sur une alimentation électrique dont la
tension est différente de celle qui est indiquée sur l’appareil.
3 Si des personnes autres que nos techniciens (ou l’un de nos
revendeurs agréés) ont tenté de faire des réparations.
4 Si l’appareil a été loué ou utilisé dans un contexte non
domestique.
5 Si l’appareil est d’occasion.
6 Morphy Richards n’est pas dans l’obligation de réaliser des
travaux d’entretien, quels qu’ils soient, aux termes de la garantie.
7 La garantie exclut les consommables tels que les sacs, les filtres
et les carafes en verre.
8 Les batteries et les dégâts provoqués par leur fuite ne sont pas
couverts par la garantie.
9 Les filtres n’ont pas été nettoyés ou remplacés suivant les
instructions.
Cette garantie ne confère aucun droit à l’exception de ceux qui
sont expressément indiqués ci-dessus, et ne couvre aucune
réclamation pour dommages immatériels ou indirects. Cette
garantie est offerte comme avantage supplémentaire et n’a
aucune incidence sur vos droits légaux en tant que
consommateur.
Pour la clientèle en Belgique
Les produits de Morphy Richards sont produits conformément
les normes de qualité, agrée international. Au-dessus vos droits
légaux, Morphy Richards vous garantit qu’à partir d’achat ce
produit sera sans défauts de fabrication ou de matériels
pendant une période de deux ans.
Il est important de conserver votre bon d’achat comme preuve.
Agrafez votre ticket à cette notice d’installation.
Veuillez mentionner ces informations ci-dessous si votre
appareil tombe en panne. Vous trouverez ces informations sur la
base de l’appareil.
Numéro du modèle
Numéro de série
Si, pour quelque raison que ce soit, l’article est remplacé
pendant la période de garantie (deux ans), la période de
garantie du nouvel article sera calculée à partir de la date
d’achat d’origine. Il est donc très importants de conserver votre
bon d’achat original afin de connaître la date initiale d’achat.
Cette garantie vaut uniquement quand l’appareil a été utilisé
conformément aux instructions du fabricant. Par exemple, les
appareils doivent être détartrés et les filtres doivent être tenus
propre selon le mode d’emploi.
Morphy Richard ne sera pas dans l’obligation de remplacer ou
réparer les articles aux termes de la garantie dans les
circonstances suivantes
f
FS48775MEE Rev2_9225 47507 MEE pump - Jon 22/08/2012 09:13 Page 33

34
1 Si le problème, prévient d’une utilisation accidentelle, d’une
utilisation abusive ou négligente, ou si l’appareil a été utilisé de
manière contraire aux recommandations du fabricant, ou encore
lorsque le problème provient de source de puissance ou de
dégâts occasionnés en transit.
2 Si l’appareil a été utilisé sur une alimentation électrique dont la
tension est différente de celle qui est indiquée sur l’appareil.
3 Si des personnes, autres que nos techniciens (ou revendeurs
agrées) ont tenté de faire des réparations.
4 Si l’appareil a été loué ou utilisé dans un contexte non
domestique.
5 Si l’appareil est d’occasion.
6 Morphy Richards n’est pas dans l’obligation de réaliser des
travaux d’entretien, quels qu’ils soient, aux termes de la garantie.
7 La garantie ne couvre pas les sachets, filtres et brocs en verre.
8 Les batteries et les dégâts provoqués par leur fuite ne sont pas
couverts par la garantie.
9 Les filtres n’ont pas été nettoyés ou remplacés suivant les
instructions.
Cette garantie ne confère aucun droit à l’exception de ceux qui
sont expressément indiqués ci-dessus, et ne couvre aucune
réclamation pour dommages immatériels ou indirects. Cette
garantie est offerte comme avantage supplémentaire et n’a
aucune incidence sur vos droits légaux en tant que
consommateur.
FS48775MEE Rev2_9225 47507 MEE pump - Jon 22/08/2012 09:13 Page 34

35
GESUNDHEIT UND SICHERHEIT
Für die Benutzung elektrischer Haushaltsgeräte sind folgende Regeln zur Wahrung der Sicherheit einzuhalten.
Vor der Verwendung des Geräts bitte die Bedienungsanleitung aufmerksam lesen.
• Dieses Gerät kann von Kindern über 8 Jahren, von
Personen, deren körperliche oder geistige Unversehrtheit
oder deren Wahrnehmungsfähigkeit eingeschränkt ist,
sowie von Personen mit mangelnden Kenntnissen oder
Erfahrung benutzt werden. Dies gilt nur unter der
Voraussetzung, dass sie beaufsichtigt werden oder dass sie
eine Einweisung in die sichere Nutzung des Geräts und die
damit verbundenen Gefahren erhalten haben.
• Kinder dürfen mit dem Gerät nicht spielen.
• Reinigung und Wartung dürfen ohne Beaufsichtigung nicht
von Kindern unter 8 Jahren durchgeführt werden.
• Bewahren Sie das Gerät und das dazugehörige Netzkabel
nicht in Reichweite von Kindern unter 8 Jahren auf.
d
d
Aufstellungsort
• Dieses Gerät ist für die Verwendung im Haushalt und ähnliche
Anwendungen vorgesehen, z. B.:
Bauernhöfe;
von Kunden in Hotels, Motels oder anderen wohnungsähnlichen
Räumlichkeiten, Pensionen und vergleichbaren
Unterbringungsmöglichkeiten.
Es eignet sich nicht für Personalküchenbereiche in Geschäften,
Büros und anderen Arbeitsumgebungen.
• Das Gerät darf nicht im Freien oder in der Nähe von Wasser
benutzt werden.
• Bei Betrieb nicht direkt unterhalb von Küchenschränken
aufstellen, da große Mengen Dampf erzeugt werden. Während
des Betriebs nicht mit den Armen über den Dampfgarer reichen.
Netzkabel
• Das Netzkabel muss spannungsfrei von der Steckdose bis zum
Unterteil des Geräts verlegt sein.
• Lassen Sie das Kabel nicht über die Tisch- oder Tresenkante
herabhängen, und halten Sie es fern von heißen Oberflächen.
• Das Kabel nicht über eine offene Fläche verlegen, z. B. zwischen
einer tief angebrachten Steckdose und einem Tisch.
• Wenn das Netzkabel beschädigt ist, muss es vom Hersteller,
seinem Kundenservice oder einer gleichermaßen qualifizierten
Person ausgetauscht werden, um Gefahrenquellen zu vermeiden.
f
FS48775MEE Rev2_9225 47507 MEE pump - Jon 22/08/2012 09:13 Page 35

36
Eigene Sicherheit
• Heiße Flächen nicht berühren. Verwenden Sie zum Abnehmen des
Deckels oder zum Festhalten heißer Behälter Topflappen oder
Handschuhe, da heißer Dampf entweicht.
• WARNUNG: Zum Schutz vor Feuer, elektrischen Schlägen und vor
Verletzungen dürfen weder das Kabel, noch die Stecker oder das
Gerät in Wasser oder andere Flüssigkeiten getaucht werden.
• WARNUNG: Äußerste Vorsicht ist anzuwenden, wenn der
Dampfgarer heiße Zutaten, Wasser oder andere Flüssigkeiten
enthält und an eine andere Stelle befördert werden soll.
• Die Geräte dürfen nicht untergetaucht werden.
• Immer den Netzstecker ziehen, wenn das Gerät nicht benutzt
wird, Zubehörteile eingesetzt bzw. herausgenommen werden oder
das Gerät gereinigt werden soll.
• Geräte mit einem beschädigten Netzkabel oder Netzstecker
dürfen nicht betrieben werden. Dasselbe gilt auch nach einer
Fehlfunktion des Geräts oder wenn das Gerät auf den Boden
gefallen ist oder auf andere Weise beschädigt wurde. Wenden Sie
sich an Morphy Richards, wenn Sie Ratschläge zur Überprüfung,
Reparatur oder zu elektrischen oder mechanischen
Abhilfemaßnahmen benötigen.
• Nicht über das Maximum hinaus befüllen. Wenn der Dampfgarer
mit zuviel Wasser befüllt wird, kann kochendes Wasser austreten,
das starke Verbrennungen hervorruft.
Weitere Sicherheitshinweise
• Benutzen Sie keine Auf- oder Einsätze bzw. Hilfsmittel, die nicht
von Morphy Richards empfohlen wurden. Es besteht Brand-,
Stromschlag- und Verletzungsgefahr.
• Zum Öffnen heben Sie den Deckel nach oben in Ihre Richtung,
aber kippen Sie den Deckel so, dass Sie vom Dampf nicht
angestrahlt werden.
• Verwenden Sie keine Teile des Dampfgarers in einer Mikrowelle
oder auf einer anderen Koch-/Heizfläche.
• Nicht auf einen heißen Gas- oder Elektrobrenner stellen bzw. in
dessen Nähe aufstellen, oder in einen beheizten Ofen stellen.
• Nicht in einer feuchten und korrodierenden Umgebung
aufbewahren.
• Den Dampfgarer erst einschalten, wenn er mindestens 1 Tasse
Wasser enthält. Andernfalls wird der Dampfgarer beschädigt.
• Stellen Sie immer sicher, dass der Wasserstand nicht unter die
Mindestmarke fällt.
Behandlung von Verbrennungen
• Verbrennungen unverzüglich mit kaltem Wasser kühlen. Mit dem
Kühlen der Wunde auch beim Ausziehen von Kleidungsstücken
nicht aufhören und rasch einen Arzt rufen.
Elektrische Anforderungen
Prüfen Sie, ob die auf dem Typenschild angegebene Spannung
mit der Spannung in Ihrem Haushalt übereinstimmt; es muss eine
Wechselspannung (abgekürzt AC) sein.
Falls die Sicherung in dem Sicherungshalter ausgetauscht werden
muss, ist eine Sicherung mit 13 A gemäß BS1362 zu verwenden.
WARNUNG: Dieses Gerät muss an eine geerdete Steckdose
angeschlossen werden.
EINFÜHRUNG
Wir bedanken uns für den Kauf des Intellisteam Compact.
Bitte lesen Sie diese Anleitungen sorgfältig durch, damit Sie Ihr
neues Produkt optimal einsetzen können.
Inhalt
Gesundheit und Sicherheit 35
Einführung 36
Produktmerkmale 37
Bedienfunktionen 37
Vor der ersten Verwendung 37
Verwendung des Intellisteam Compact 37
Trennwand 38
Dampfgarzeiten 38
Voreingestellte Garzeiten 38
Pausen während des Garens 38
Zutaten aus dem Intellisteam Compact entnehmen 38
Kochen von Reis 38
Kochen von Eiern 38
Trockenlaufwarnung & automatische Abschaltung 38
Auffüllen des Wassertanks während der Verwendung 39
Tipps und Empfehlungen 39
Aufbewahrung 39
Entkalken 39
Reinigung und Pflege 39
Dampfgaranweisungen 40
Gemüse 40
Abgepacktes Gemüse 41
Fisch und Meeresfrüchte 41
Geflügel 42
Reis 42
Rezepte 43
Ansprechpartner 48
Garantie 48
FS48775MEE Rev2_9225 47507 MEE pump - Jon 22/08/2012 09:13 Page 36

37
Ausstattung
A
(1) Deckel
(2) Trennwand
(3) Behälter
(4) Schalenauslass
(5) Auffangschale
(6) Dampfauslass
(7) Wassertank
(8) Wassereinlaufstutzen
(9) Wasserstandsanzeige
(10) Gerät
(11) Bedienfeld
(12) Linker Behälter (mit Trennwand)
(13) Rechter Behälter (mit Trennwand)
(28) Reisschale
Bedienfunktionen
B
(14) Ein-/Aus-Taste
(15) Lebensmittelsymbole (Linker Behälter)
(16) Timer (Linker Behälter)
(17) Nachfüllsymbol
(18) Timer (Rechter Behälter)
(19) Lebensmittelsymbole (Rechter Behälter)
(20) Plustaste
(21) Minustaste
(22) Entkalkungssymbol
(23) Taste Linker Behälter
(24) Dampfsymbol (Linker Behälter)
(25) Start-/Pausetaste
(26) Dampfsymbol (Rechter Behälter)
(27) Taste Rechter Behälter
Vor der ersten Verwendung
Es ist wichtig, dass Sie Ihren Intellisteam Compact vor der
ersten Verwendung oder nach längerem Nichtgebrauch reinigen.
Weitere Informationen können Sie dem Abschnitt Reinigung und
Pflege entnehmen.
Eine regelmäßige Entkalkung des Intellisteam Compact ist
immens wichtig, um die Dampfleistung und das Gerät selbst
möglichst lange zu erhalten. Weitere Informationen können Sie
dem Abschnitt Entkalkung entnehmen.
Bei der ersten Verwendung des Intellisteam Compact tritt
möglicherweise aus dem hinteren Geräteteil Rauch- bzw. Dampf
aus. Dieser Vorgang ist normal, da einige Geräteteile während
der Herstellung mit Schmierfett überzogen wurden. Dies gibt
sich nach einigen Einsätzen Ihres Intellisteam Compact. Der
Vorgang ist nicht gefährlich und wird auch Ihre Lebensmittel im
Intellisteam Compact hinsichtlich der Güte oder des
Geschmacks nicht beeinträchtigen.
Verwendung des Intellisteam Compact
1
Füllen Sie kaltes Leitungswasser bis zur Höchstmarke in den
Wassertank (7).
2
Setzen Sie die Auffangschale (5) und den Behälter (3) mit der
Trennwand (2) auf das Gerät (10).
3
Füllen Sie die Zutaten in die Behälter (12),(13). Verwenden Sie die
Trennwand zur Trennung der Zutaten. Setzen Sie den Deckel (1) auf.
4
Stecken Sie den Netzstecker des Intellisteam Compact in eine
Netzsteckdose ein. Der Intellisteam Compact gibt einen Signalton
aus und das LC-Display leuchtet auf.
5
Zum Einstellen der Dampfgarzeit die Linke (23) oder Rechte (27)
Taste des Behälters drücken. Drücken Sie wiederholt diese Taste,
um die Standarddampfgarzeit auszuwählen und die gewünschte
Lebensmittelgruppe einzustellen (15) (19).
6
Drücken Sie die Plus- (20) oder Minustaste (21), um die
Dampfgarzeit zu ändern (falls gewünscht). Drücken Sie die Taste,
während die entsprechenden Timersymbole (16),(18) aufblinken
(innerhalb von 3 Sekunden) oder drücken Sie die entsprechende
Behältertaste, um die Garzeit zu ändern. Wiederholen Sie die
Schritte 5 bis 6 für den anderen Behälter (falls gewünscht).
7
Drücken Sie die Start-/Pausetaste (25). Der Intellisteam Compact
gibt einen Signalton aus, das Dampfgarsymbol (24) blinkt* und der
Timer beginnt mit der Nullzählung.
8
Nach Ablauf der Zeit wird ein Alarmton ausgegeben.
Der Intellisteam Compact schaltet automatisch in die
Warmhaltefunktion für 20 Minuten um.
9
Drücken Sie nach Beendigung die Ein-/Aus-Taste (14) und ziehen
den Netzstecker des Intellisteam Compact aus der Netzsteckdose.
Heben Sie den Deckel (1) vorsichtig an, aber in die andere
Richtung gekippt, um den Dampf entweichen zu lassen. Warnung:
Dampf kann Verbrennungen hervorrufen.
10
Entnehmen Sie die Zutaten vorsichtig aus dem Intellisteam
Compact. Warnung: Dampf kann Verbrennungen hervorrufen.
Hinweis: Bei der Auswahl unterschiedlicher Dampfgarzeiten für
jeden einzelnen Behälter blinkt das Dampfgarsymbol, sobald
der entsprechende Behälter mit dem Dampfgaren beginnt.
d
FS48775MEE Rev2_9225 47507 MEE pump - Jon 22/08/2012 09:13 Page 37

38
Trennwand
Der Behälter (3) kann entweder getrennt als zwei einzelne
Dampfgarbehälter oder zusammen als ein großer
Dampfgarbehälter verwendet werden.
Wenn der Intellisteam Compact als ein großer Dampfgarbehälter
verwendet werden soll, müssen Sie die Trennwand (2) aus dem
Behälter nehmen und sie beiseite legen.
Dampfgaren ohne Trennwand
Bei Verwendung des Intellisteam Compact ohne Trennwand (2),
müssen Sie beide Dampfgarseiten mit identischer Gardauer
betrieben, da die Zutaten andernfalls ungleichmäßig gegart
werden.
1. Wiederholen Sie ohne eingesetzte Trennwand die Schritte 1 bis 6
„Verwendung des Intellisteam Compact“.
3. Drücken Sie die Linke Behältertaste (23) solange, bis die Gardauer
für beide Behälterseiten angezeigt wird.
4. Passen Sie gegebenenfalls die Gardauer des Intellisteam
Compact mithilfe der Plus- (20) oder Minustaste (21) an.
6. Wiederholen Sie die Schritte 7 bis 10 „Verwendung des
Intellisteam Compact“.
Dampfgarzeiten
Ihr Intellisteam Compact kann das Garprogramm für beide
Behälter zur gleichen Zeit fertigstellen. Nach Beginn des
Dampfgarens fängt der Timer, ausgehend von der längsten
Garzeit, automatisch mit der Nullzählung an, so dass alle
Zutaten im Intellisteam Compact zur gleichen Zeit fertig gegart
werden.
Voreingestellte Garzeiten
Der Intellisteam Compact bietet 7 voreingestellte Garzeiten. Die
Garzeiten können mithilfe der Plus- (20) oder Minustaste (21)
geändert werden.
Drücken Sie jeweils die Linke oder Rechte Behältertaste
wiederholt, um die voreingestellten Dampfgarzeiten für jede
Behälterseite anzuzeigen und auszuwählen.
Voreingestellte Dampfgarzeiten:
Eier - 12 Minuten
Fisch - 15 Minuten
Gemüse - 20 Minuten
Fleisch - 30 Minuten
Reis - 40 Minuten
Geflügel - 35 Minuten
Warmhalten - 10 Minuten
Diese Funktion nicht zum Garen verwenden.
Pausen während des Garens
Wenn Sie den laufenden Garvorgang des Intellisteam Compact
unterbrechen möchten, drücken Sie die Start-/Pausetaste (25).
Zum Fortsetzen des Garvorgangs betätigen Sie die Start/Pausetaste erneut.
Sobald der Garvorgang des Intellisteam Compact unterbrochen
ist, kann die Dampfgarzeit, wie in den Schritten 5 bis 7 unter
„Verwendung des Intellisteam Compact“ beschrieben, angepasst
werden.
Zutaten aus dem
Intellisteam Compact entnehmen
WARNUNG: Ziehen Sie Ofenhandschuhe an, bevor Sie den
Deckel (1) abnehmen und den Behälter (3) herausnehmen,
und achten Sie darauf, den Deckel so zu kippen, dass Sie vom
Dampf nicht angestrahlt werden. Warten Sie mit dem
Entnehmen der Auffangschale (5), bis sie vollständig
abgekühlt ist.
Kochen von Reis
1 Bereiten Sie die Verwendung des Intellisteam Compact so vor, wie
unter „Verwendung des Intellisteam Compact“ beschrieben.
2 Geben Sie 1 Tasse ungekochten Reis und 1½ Tasse Wasser in die
Reisschale (28). Gut umrühren.
3 Stellen Sie die Reisschale in den Behälter und setzen den Deckel
(1) auf den Intellisteam Compact.
4 Stellen Sie die Gardauer des Behälters auf die Voreinstellung für
Reis (40 Minuten) und drücken die Start-/Pausetaste (25).
Kochen von Eiern
Mit dem Intellisteam Compact können hartgekochte Eier
zubereitet werden.
1 Wiederholen Sie die Schritte 1 bis 2 „Verwendung des Intellisteam
Compact“.
2 Legen Sie die Eier einzeln, wie oben abgebildet, in die
Aussparungen des Behälters (3).
3 Setzen Sie den Deckel wieder (1) auf.
4 Stellen Sie die Gardauer, wie in den Schritten 4 bis 10 unter
„Verwendung des Intellisteam Compact“ beschrieben, ein. Der
Dampfgarer besitzt eine Voreinstellung für Eier mit einer Gardauer
von 12 Minuten. Die Garzeit kann je nach Geschmack mithilfe der
Plus- (20) oder Minustaste (21) geändert werden.
Trockenlaufwarnung & automatische
Abschaltung
Liegt der Wasserstand der Wasserstandsanzeige (9) unterhalb der
„MIN“ Markierung, wird dauerhaft ein Alarmton ausgegeben und
das Nachfüllsymbol (17) blinkt ebenfalls dauerhaft. In diesem Falle
sollten Sie den Wassertank (7) so schnell wie möglich wieder mit
Wasser auffüllen. Verwenden Sie zum Auffüllen des Wassertanks
den Wassereinlaufstutzen (8) wie auf Seite 10 beschrieben.
Sollte der Intellisteam Compact während der Verwendung
trockenlaufen, wird dauerhaft ein Signalton ausgegeben und das
Gerät automatisch ausgeschaltet, um den Garvorgang
abzubrechen.
FS48775MEE Rev2_9225 47507 MEE pump - Jon 22/08/2012 09:13 Page 38

39
Auffüllen des Wassertanks während der
Verwendung
Verwenden Sie während des Garens zum Auffüllen des
Wassertanks (7) den Wassereinlaufstutzen (8).
Ziehen Sie vorsichtig den Wassereinlaufstutzen aus dem Seitenteil
des Intellisteam Compact. Füllen Sie das Wasser vorsichtig durch
den Wassereinlaufstutzen mithilfe eines Bechers nach.
Der Alarmton verstummt automatisch und das Nachfüllsymbol (17)
erlischt.
Tipps und Empfehlungen
• Die Dampfgarzeiten in den Dampfgaranweisungen (S. 10) sind
lediglich Richtwerte. Je nach Größe der Stücke, nach Abstand
zwischen den Stücken innerhalb des Dampfbehälters, der Frische
der Zutaten sowie abhängig vom eigenen Geschmack können die
Zeiten voneinander abweichen. Je besser Sie sich mit dem
Intellisteam Compact vertraut gemacht haben, desto genauer
können Sie die Garzeiten nach individuellem Bedarf regulieren.
• Eine einzelne Garebene mit Zutaten gart schneller als bei
Befüllung von mehreren Ebenen. Aus diesem Grunde ist die
Gardauer für größere Mengen an Zutaten länger. Optimale
Ergebnisse erzielen Sie, wenn Sie die Zutaten in kleine bzw.
dünne Portionen aufteilen und gleichmäßig im Behälter verteilen.
• Bei der Zubereitung großer Zutatenmengen entfernen Sie den
Deckel (1) nach Ablauf der halben Gardauer und durchrühren die
Zutaten gründlich mit einem langen Kochlöffel, um einen
gleichmäßigen Garvorgang zu gewährleisten.
Warnung: Fassen Sie nicht in den Behälter.
• Überfüllen Sie den Behälter nicht. Lassen Sie etwas Platz
zwischen den Zutatenstücken, damit sie von möglichst viel
Wasserdampf umströmt werden.
• Weder Salz noch Gewürze in den Behälter (3) oder Wassertank (7)
einfüllen. Die Mineralstoffe führen zu einer Kalkbildung, die das
Heizelement beschädigt.
• Die in der Auffangschale (5) aufgefangene Garflüssigkeit kann als
Grundlage für eine Bratensauce verwendet werden.
• Dampfgaren Sie nie tiefgefrorenes Fleisch, Geflügel oder
Meeresprodukte. Die Zutaten müssen vollständig aufgetaut sein.
Aufbewahrung
Für eine einfachere Aufbewahrung wurde der Intellisteam
Compact so konzipiert, dass das Gerät (10) komplett in den
Behälter (3) passt. Ihr Intellisteam Compact kann so bei
Nichtgebrauch platzsparend verstaut werden.
Entkalken
Eine regelmäßige Entkalkung ist immens wichtig, um die
Dampfleistung und das Gerät selbst möglichst lange zu
erhalten.
Das Entkalkungssymbol (22) erinnert Sie nach jeder
Geräteverwendung von 15 Stunden an die Entkalkung des Geräts.
1 Füllen Sie Weißweinessig (keinen Malzessig) bis zur „MAX“
Markierung in den Wassertank (7).
WICHTIG: Keine anderen chemischen oder handelsüblichen
Entkalker benutzen.
2 Setzen Sie die Auffangschale (5), den Behälter (3) und den Deckel
(1) auf den Wassertank und schließen Sie danach den Intellisteam
Compact an die Netzsteckdose an.
3 Stellen Sie den Timer für beide Behälter auf 25 Minuten ein und
drücken Sie auf Start.
WARNUNG: Wenn der Weißweinessig anfängt überzukochen,
schalten Sie den Timer aus und trennen das Gerät von der
Netzsteckdose. Reduzieren Sie etwas die Menge an
Weißweinessig.
Den Intellisteam Compact nicht bewegen, solange der Essig
noch nicht abgekühlt ist.
4 Wenn der Vorgang abgeschlossen ist, ziehen Sie den Netzstecker
aus der Netzsteckdose und lassen das Gerät vollständig
abkühlen, bevor Sie den Essig bzw. die Flüssigkeit entleeren.
5 Spülen Sie den Wassertank mehrmals mit kaltem Wasser gut
durch.
WARNUNG: Den
Intellisteam Compact nicht bewegen, solange der Essig noch
nicht abgekühlt ist.
6 Füllen Sie kaltes Leitungswasser bis zur Markierung MAX in den
Wassertank. Setzen Sie die Auffangschale, den Behälter und den
Deckel auf den Wassertank und schließen Sie danach den
Intellisteam Compact an die Netzsteckdose an.
7 Verwenden Sie den Intellisteam Compact für 10 Minuten auf einer
beliebigen Einstellung. Schalten Sie das Gerät aus und lassen es
vollständig abkühlen, bevor Sie die Flüssigkeit entleeren.
Reinigung und Pflege
WARNUNG: Tauchen Sie das Gerät (10), das Netzkabel oder
den Netzstecker nie in Wasser ein.
1 Ziehen Sie vor einer Reinigung des Geräts den Netzstecker aus
der Netzsteckdose und lassen Sie das Gerät vollständig abkühlen.
2 Keine Scheuermittel, wie z. B. Stahlwolle oder Bleiche, zum
Reinigen der einzelnen Teile am Dampfgarer verwenden.
3 Auf keinen Fall die durchsichtigen Kunststoffteile mit der rauen
Seite eines Schwamms oder Lappens reinigen.
4 Das Gerät darf nicht in Wasser getaucht werden. Füllen Sie den
Wassertank (7) mit warmer Seifenlauge und reinigen ihn mit einem
Lappen. Entleeren Sie den Wassertank gründlich und reinigen Sie
das Gerät mit einem feuchten Lappen.
5 Reinigen Sie Deckel (1), Reisschale (28), Behälter (3) und
Trennwand (2) mit warmer Seifenlauge.
• Reisschale, Behälter und Trennwand sind spülmaschinenfest nur in
der obersten Einschubebene bei einem mittleren bzw. ÖkoSpülprogramm. Gründlich abtrocknen lassen.
• Der Deckel ist nicht spülmaschinenfest.
6 Reinigen Sie den Intellisteam Compact nach jeder Verwendung.
d
FS48775MEE Rev2_9225 47507 MEE pump - Jon 22/08/2012 09:13 Page 39

40
Dampfgaranweisungen
Die unten angegebenen Dampfgarzeiten und Portionsgrößen sind lediglich Richtwerte bzw. Empfehlungen. Je nach Größe der Stücke,
nach Abstand zwischen den Stücken innerhalb des Behälters (3), der Frische der Zutaten sowie abhängig vom eigenen Geschmack
können die Zeiten voneinander abweichen. Je besser Sie sich mit dem Dampfgarer vertraut gemacht haben, desto genauer können Sie die
Garzeiten nach individuellem Bedarf regulieren.
Die Dampfgarzeiten beziehen sich auf die in diesen Anweisungen angegebenen Mengen und müssen für größere oder kleinere Mengen
angepasst werden.
Gemüse
Broccoli, Blumen- oder Weißkohl vom Stamm trennen.
Blättriges und grünes Gemüse mit der kürzesten Garzeiteinstellung zubereiten, damit die Gemüsefarbe erhalten bleibt.
Für beste Ergebnisse Salz und Gewürze erst nach dem Garvorgang zu dem Gemüse hinzugeben.
Gefrorenes Gemüse darf nicht vor dem Garvorgang aufgetaut werden.
Speise Gewicht Garzeit Tipp
• Spargel • 1 Portion 60 g
• 4 Portionen 240 g
• 15 Min. • Spargel für bessere
Dampfzirkulation
überkreuz legen
• Broccoli • 1 Portion 60 g • 4 Portionen 240 g • 15-18 Min.
• Brechbohnen • 1 Portion 50 g
• 4 Portionen 200 g
• 10-15 Min. • Nach Ablauf der halben
Gardauer umrühren
• Karotten
(in Scheiben geschnitten)
• 1 Portion 100 g
• 4 Portionen 400 g
• 15-20 Min. • Nach Ablauf der halben
Gardauer umrühren
• Blumenkohl • 1 Portion 100 g
• 4 Portionen 400 g
• 18 Min. • Nach Ablauf der halben
Gardauer umrühren
• Zuckerschoten • 1 Portion 50 g
• 4 Portionen 200 g
• 10-12 Min. • Nach Ablauf der halben
Gardauer umrühren
• Bohnen (frisch) • 1 Portion 60 g
• 4 Portionen 240 g
• 8 Min.
• 8-12 Min.
• Nach Ablauf der halben
Gardauer umrühren
• Spinat • 1 Portion 60 g
• 4 Portionen 240 g
• 4-5 Min.
• 5-8 Min.
• Nach Ablauf der halben
Gardauer umrühren
• Kartoffeln • 1 Portion 180 g
• 4 Portionen 720 g
• 25 Min.
FS48775MEE Rev2_9225 47507 MEE pump - Jon 22/08/2012 09:13 Page 40

41
Abgepacktes Gemüse
In vielen Supermärkten wird abgepacktes Gemüse zur einfachen Weiterverarbeitung angeboten. Dies ist ideal für die Zubereitung von
Gerichten, da der Hauptteil der Vorbereitungsarbeit schon erledigt wurde.
Auf den meisten Packungsinhalten sind bereits Dampfgaranweisungen für die jeweiligen Gemüsesorten aufgedruckt, jedoch beziehen sich
diese auf das Dampfgaren in der Mikrowelle und müssen somit anhand des Gewichts und abhängig vom eigenen Geschmack angepasst
werden. Orientieren Sie sich grob an den folgenden Garzeiten.
Speise Gewicht Garzeit
• Karotten/ Broccoli/
Sprossen
• 480 g • 20 Min.
• Kartoffeln • 500 g • 40 Min.
• Junge Gemüsemischung • 350 g • 15 Min.
• Mini-Karotten • 400 g • 20 min
• Baby-Mais • 170 g • 20 Min.
• Frische Erbsen • 170 g • 8 Min.
Speise Gewicht Garzeit
• Königskrabben • 100 g
• 400 g
• 5-7 Min.
• 7-10
• Lachfilets • 1 Filetstück 140 g
• 4 Filetstücke 560 g
• 15 Min.
• Muscheln • 200 g
• 800 g
• 5 Min.
• 5-8 Min.
Fisch und Meeresfrüchte
Fisch hat seinen Garpunkt dann erreicht, wenn er sich mit einer Gabel leicht zerteilen lässt.
Gefrorener Fisch muss vorher nicht aufgetaut werden. Dieser muss aber zuvor separiert und die Gardauer anschließend verlängert werden.
Geben Sie Zitronenscheiben und Kräuter während des Garvorgangs zur Geschmacksverstärkung hinzu
d
FS48775MEE Rev2_9225 47507 MEE pump - Jon 22/08/2012 09:13 Page 41

42
Geflügel
Das Dampfgaren bietet Vorteile hinsichtlich der Gesundheit, da zartere und magere Fleischstücke ohne Fettränder verwendet werden
können und dies bei nur geringer Hitzeeinwirkung.
Servieren Sie gegartes Geflügel mit Kräutern oder leckeren Saucen oder marinieren Sie die Fleischstücke vorher für einige Stunden, um
einen noch kraftvolleren Geschmack zu erhalten.
Garen Sie alle Zutaten vollständig vor dem Servieren. Zur Überprüfung des Garzustands das Gargut mit einem Messer oder Spieß
anstechen.
Speise Gewicht Garzeit Tipp
• Hähnchenbrustfilets • 1 Filetstück 200 g
• 4 Filetstücke 800 g
• 12-15 Min. • Fettränder vor dem Garen
entfernen
Speise Gewicht Wasser Garzeit
• Reis • 1 Portion 75 g
• 4 Portionen 300 g
• 110 ml
• 450 ml
• 30 Min.
• 40 Min.
Reis
Verwenden Sie den Reisbehälter und geben die gewünschte Wassermenge zum Reis hinzu
FS48775MEE Rev2_9225 47507 MEE pump - Jon 22/08/2012 09:13 Page 42

43
Rezepte
Die in diesem Handbuch vorgestellten Rezepte wurden von Morphy Richards speziell für den Intellisteam Compact kreiert und
ausprobiert. Die Garzeiten der folgenden Rezepte dienen der Orientierung und hängen von der Größe und dem Frischezustand der
verwendeten Zutaten ab. Vor dem Servieren kontrollieren, ob die Zutaten vollständig gegart sind.
Die Rezepte sind für 4 Personen, also für das maximale Fassungsvermögen, konzipiert. Bei der Reduzierung der Portionsgrößen müssen
die Garzeiten dementsprechend angepasst werden.
d
FS48775MEE Rev2_9225 47507 MEE pump - Jon 22/08/2012 09:13 Page 43

44
Süße rote Paprika gefüllt mit Lauch und
Schafskäse, dazu Frühlingszwiebeln und
Pinienkern-Kuskus
Zutaten:
• 4 süße (längliche) rote Paprika, entstielt
• 1 kleine Lauchstange klein gehackt
• 1 EL frische gehackte Petersilie
• 2 EL Olivenöl
• 25 g fein geriebenen Parmesankäse
• 25 g frische Brotkrümel
• 100 g fein zerkleinerten Schafskäse
• Salz und frisch gemahlenen schwarzen Pfeffer
Kuskus:
• 200 g Kuskus
• 2 TL Gemüsebrühe
• 4 Frühlingszwiebeln, fein gehackt
• 25 g Pinienkerne
Garnierung:
• Petersilienblätter
Anleitung:
1 Die Paprika längs aufschneiden, aber nicht halbieren. Das Innere
und den Samen herausnehmen. Lauch, Petersilie und Olivenöl
vermengen und anschließend den Parmesankäse und die
Brotkrümel zugeben. Mit dem zerkleinerten Schafskäse mischen
und mit etwas Salz und reichlich schwarzem Pfeffer würzen. Die
Mischung in die Paprikateile füllen.
2 Geben Sie die Paprikateile in den einen Behälterteil.
3 Die Reisschale in den anderen Behälterteil stellen.
4 Den Kuskus und 265 ml kaltes Wasser in die Reisschale füllen. Mit
der Gemüsebrühe, den Frühlingszwiebeln und den Pinienkernen
verrühren.
5 Stellen Sie den Timer für den Kuskus auf 25 Minuten ein. Stellen
Sie den Timer für die
Paprikateile auf die Voreinstellung für Gemüse (20 Minuten) ein.
6 Drücken Sie auf die Dampftaste.
7 Nach dem Garen 5 Minuten ziehen lassen.
8 Den Kuskus vor dem Servieren mit einer Gabel auflockern.
Ziegenkäse-Soufflé
Zutaten:
• 125 g Ziegenkäse, zerkleinert
• 4 mittelgroße separierte Eier
• 2 EL fein gehackte Petersilie
• 1 EL frischer und fein gehackter
Estragon
• Salz und Pfeffer
• 240 g Spinat
• Butter zum Einfetten
Zum Servieren:
• Junger Blattsalat
Anleitung:
1 4 x 150 ml Auflaufförmchen einfetten.
2 Die Hälfte des Ziegenkäses in eine große Schüssel geben und mit
einer Gabel zerkleinern.
3 Eigelb, Kräuter und Gewürze einrühren.
4 Eiweiß in einer separaten Schüssel zu Eischnee schlagen.
5 2 EL Eiweiß zur Auflockerung in die Käsemischung einrühren und
danach das restliche Eiweiß hinzugeben.
6 Die Mischung in die Auflaufförmchen füllen und mit dem restlichen
Käse überziehen. Mit Folie abdecken und 2 Auflaufförmchen in
jeweils eine Behälterseite stellen.
7 Für 20 Minuten garen. Der Käse muss gut zerlaufen und das
Innere halbfest sein.
8 Sofort mit einer Salatbeilage servieren.
FS48775MEE Rev2_9225 47507 MEE pump - Jon 22/08/2012 09:13 Page 44

45
Tikka Masala Hähnchen mit
pikantem Kardamom-Reis
Zutaten:
• 4 EL Naturjoghurt mit reduziertem Fettgehalt
• 2 EL Chicken Tikka Masala Curry Paste
• 2 EL gehackten frischen Koreander
• 4 in Stücke geschnittene Hähnchenbrustfilets
• Salz und frisch gemahlenen schwarzen Pfeffer
Reis:
• 300 g Basmatireis
• 450 ml kaltes Wasser
• 2 TL Gemüsebrühe
• In 2 Streifen geschnittene Zitronenschalen
• 6 grüne, leicht zerkleinerte Kardamomfrüchte
Garnierung:
• Zitronenstückchen und Koreander
Anleitung:
1 Den Jogurt, die Curry-Paste und den Koreander mit einem Löffel
in eine große Plastikschüssel füllen und vermengen. Die
Hähnchenstückchen zugeben und bis zum Andicken verrühren.
Mit etwas Salz und Pfeffer würzen, anschließend zudecken und
mindestens 30 Minuten kühl lagern.
2 Die Reisschale in den einen Behälterteil stellen. Den Reis und das
kalte Wasser zugeben. Die Gemüsebrühe einrühren. Die klein
geschnittenen Zitronenschalenstreifen oben drauflegen und mit
Kardamomkapseln bestreuen.
3 Die Hähnchenstücke mit der Marinade in den anderen Behälter
geben und gut verteilen.
4 Als Garzeit für den Reis die Voreinstellung für Reis (40 Min.)
wählen. Als Garzeit für die Hähnchenstücke die Voreinstellung für
Fleisch (30 Min.) wählen.
5 Drücken Sie auf die Dampftaste.
6 Vor dem Servieren mit Zitronenstückchen und Koreander
garnieren.
Hinweis: Die in diesem Rezept verwendeten Gewürze können die
Kunststoffteile des Intellisteam Compact verfärben. Um eine
Verfärbung zu vermeiden, kann das Hähnchenfleisch in
Aluminiumfolie eingepackt und 10 Minuten länger gegart werden.
Vor dem Servieren kontrollieren, ob die Zutaten vollständig gegart
sind.
Hähnchen mit Sirupglasur und Reis
Zutaten:
• 4 Hähnchenbrustfilets
• Fein geriebene Schale und Saft von einer kleinen Orange
• 2 EL Ahornsirup
• ¼ TL getrocknete Chillistückchen
• Salz und frisch gemahlenen schwarzen Pfeffer
Reis:
• 250 g weißer und wilder Reis
• 1 TL Gemüsebrühe
• 250 ml Wasser
Anleitung:
1 Die Hähnchenfilets in eine Plastikschüssel legen und die
Orangenschale, den Orangensaft, den Ahornsirup und die
Chillistückchen hinzugeben. Mit etwas Salz und reichlich
schwarzem Pfeffer würzen. Mindestens 30 Minuten lang abdecken
und kühl lagern.
2 Die Hähnchenfilets in den einen Behälterteil stellen.
3 Den Reis und die Gemüsebrühe in die Reisschale füllen. Die
Reisschale in den anderen Behälterteil stellen, 250 ml kaltes
Wasser auf den Reis gießen und umrühren.
4 Als Garzeit für die Hähnchenstücke die Voreinstellung für Fleisch
(30 Min.) wählen.
Als Garzeit für den Reis die Voreinstellung für Reis (40 Min.)
wählen.
5 Drücken Sie auf die Dampftaste.
d
FS48775MEE Rev2_9225 47507 MEE pump - Jon 22/08/2012 09:13 Page 45

46
Gegarter Heilbutt mit Limonenund Thymiandressing
Zutaten:
• 4 Heilbuttfilets à 125 g (alternativ auch Kabeljau verwendbar)
• 15 g Butter
• 4 kleine Thymianspitzen
• Salz und frisch gemahlenen schwarzen Pfeffer
Gemüse:
• 750 g kleine junge Kartoffeln
• 2 Lauchstangen in feine Streifen geschnitten
• 1 große Karotte in feine Streifen geschnitten
• 150 g grüne parierte Bohnen
Dressing:
• 50 g geschmolzene Butter
• Fein geriebene Schale und Saft von einer Zitrone
• 1 EL frische Thymianblätter
Anleitung:
1 Das Gemüse mischen und in den Behälterteil geben.
2 Die Fischfilets auf das Gemüse legen.
3 Ein kleines Stück Butter und die Thymianspitzen auf jedes
Filetstück legen. Mit etwas Salz und Pfeffer würzen.
4 In den anderen Behälterteil die Kartoffeln legen.
5 Als Garzeit für den Fisch und das Gemüse die Voreinstellung für
Fisch plus 5 Minuten (20 Min.) einstellen. Als Garzeit für die
Kartoffeln die Voreinstellung für Gemüse (30 Min.) wählen.
6 Drücken Sie auf die Dampftaste.
7 Für das Dressing die Butter, Zitronenschale, den Zitronensaft und
die Thymianblätter vermengen und beim Servieren über den Fisch
gießen.
Sesamlachs und Dampfgemüse
mit Kokosnussmilch und süßen
Chillisaucenudeln
Zutaten:
• 4 Lachsfilets à 125 g
• 4 TL geröstetes Sesamöl
• 1 TL Sesamkeime
• 300 g weichgekochte Nudeln
Gemüse:
• 150 g Zuckererbsen oder Zuckerschoten
• 6 Frühlingszwiebeln in feine Streifen geschnitten
• 1 Karotte in feine Streifen geschnitten
Sauce:
• 300 ml Kokosnussmilch
• 2 EL süße Chillisauce
• 1 TL geriebene frische Ingwerwurzel
• 1 EL gehackten frischen Koreander
Anleitung:
1 Das Gemüse vermengen und in den einen Behälterteil geben.
2 Die Lachsfiletstücke mit Sesamöl bestreichen und mit
Sesamkeimen bestreuen. Auf das Gemüse im Behälter legen.
3 Die Nudeln auf die Reisschale in den anderen
Behälterteil stellen.
4 Die Saucenzutaten verrühren und über die Nudeln gießen. Alles
miteinander verrühren.
5 Als Garzeit für den Lachs und das Gemüse die Voreinstellung für
Fisch plus 5 Minuten (20 Min.) einstellen.
6 Stellen Sie den Timer für die Nudeln auf 20 Minuten ein.
7 Drücken Sie auf die Dampftaste.
8 Die Nudeln 5 Minuten vor Ende des Garens umrühren, damit sie
nicht verkleben.
FS48775MEE Rev2_9225 47507 MEE pump - Jon 22/08/2012 09:13 Page 46

47
Würzige Krabben mit Erbsen-Kuskus und
Pfefferminze
Zutaten:
• 400 g rohe Königskrabben
• ½ TL Cayennepfeffer
• ½ TL Paprikapulver
• ½ TL Salz
• ¼ TL Knoblauchpulver
Kuskus:
• 200 g Kuskus
• 270 ml kaltes Wasser
• 75 g Tiefkühlerbsen
• 1 EL frische gehackte Pfefferminze
Anleitung:
1 Cayennepfeffer, Paprikapulver, Salz und Knoblauchpulver
vermengen und die Krabben darin wälzen.
2 Geben Sie die Krabben in den einen Behälterteil.
3 Kuskus, Wasser, Erbsen und die Pfefferminze in die Reisschale
geben und in den anderen Behälterteil stellen.
4 Stellen Sie den Timer für die Krabben auf 10 Minuten und für den
Kuskus auf 25 Minuten ein.
5 Drücken Sie auf die Dampftaste.
6 Den Kuskus vor dem Servieren mit einer Gabel auflockern.
Ingwer-Bananenpudding mit Toffee-Sauce
Zutaten:
• 75 g Butter, plus etwas mehr Butter zum Einfetten
• 75 g heller Muscovado-Zucker
• 2 mittelgroße geschlagene Eier
• 1/2 TL Vanille-Extrakt
• 75 g selbst aufgehendes Mehl
• 1/2 TL gemahlenen Ingwer
• Eine Prise Salz
• 1 große reife Banane, zerdrückt
• 2 Stücke gehackte Ingwerwurzel in Sirup plus 4 EL Sirup aus der
Flasche
Sauce:
• 3 EL goldfarbenen Sirup
• 25 g Butter
• 25 g heller Muscovado-Zucker
Zum Servieren:
• Vanille-Eiskrem oder Pudding
Anleitung:
1 Die Butter und den Zucker in einer großen Rührschüssel leicht
und locker verrühren. Die Eier nach und nach hineinschlagen und
die Vanille unterrühren. Das Mehl über ein Sieb zugeben, den
gemahlenen Ingwer und das Salz hineingeben und mit einem
großen Metalllöffel unterrühren. Die zerdrückte Banane
unterrühren.
2 4 einzelne Puddingformen à 150 ml mit Butter einfetten. Die
Ingwerwurzel zerkleinern und am Behälterboden verteilen. Dazu in
jeden Behälter 1 EL Sirup füllen und die cremige Mischung mit
einem Löffel darüber verteilen und oben glatt streichen. Mit
eingefetteter Folie dicht verschließen.
3 Geben Sie die Puddingportionen in den einen Behälterteil.
4 Die Saucenzutaten in die Reisschale füllen, mit Frischhaltefolie
abdecken und in den anderen Behälterteil stellen.
5 Als Garzeit für den Pudding die Voreinstellung für Reis (40 Min.)
wählen. Stellen Sie den Timer für die Sauce auf 20 Minuten ein.
6 Nach dem Garen mit einem Messer die
Puddingmasse am Rand von den Behältern lösen. Die Sauce gut
durchrühren und mit einem Löffel über die Puddingportionen
geben. Mit Eiskrem oder Vanillesauce servieren.
d
FS48775MEE Rev2_9225 47507 MEE pump - Jon 22/08/2012 09:13 Page 47

48
Ansprechpartner
Helpline
Sollten Sie ein Problem mit Ihrem Gerät haben, wenden Sie sich
bitte telefonisch an unsere Helpline, da wir Ihnen sehr
wahrscheinlich besser helfen können, als der Händler, bei dem Sie
das Gerät erworben haben.
Halten Sie den Gerätenamen sowie die Modell- und Seriennummer
bereit, wenn Sie uns anrufen, damit Ihnen schneller geholfen wird.
Sprechen Sie mit uns
Haben Sie Fragen oder Anregungen oder benötigen Sie großartige
Tipps oder Rezeptideen, um unsere Geräte optimal zu nutzen,
beteiligen Sie sich online:
Blog: www.morphyrichards.co.uk/blog
Facebook: www.facebook.com/morphyrichardsuk
Twitter: www.twitter.com/loveyourmorphy
Website: www.morphyrichards.com
GESETZLICHE GEWÄHRLEISTUNG
Für dieses Gerät gilt eine Gewährleistung von 2 Jahren.
Als Kaufnachweis sollte die Quittung des Fachhändlers
aufgehoben werden. Heften Sie Ihren Beleg an die Rückseite
dieser Unterlagen.
Sollte an diesem Gerät ein Fehler auftreten, sind immer
nachfolgende Angaben mitzuteilen. Diese Angaben sind auf der
Unterseite des Geräts zu finden.
Modellnr.
Seriennr.
Vor dem Verlassen des Werks werden alle Morphy Richards
Produkte geprüft. Sollte einmal der Fall auftreten, dass sich ein
Gerät innerhalb der Gewährleistung als fehlerhaft erweist, wenden
Sie sich bitte an unsere Service-Hotline
Falls das Gerät während der 2-jährigen Gewährleistung aus
welchem Grund auch immer ausgetauscht wird, wird zur
Berechnung der Restgarantie für das neue Gerät das OriginalKaufdatum zugrunde gelegt. Aus diesem Grunde ist es besonders
wichtig, den Original-Kaufbeleg bzw. die Rechnung
aufzubewahren, um das Datum des ursprünglichen Kaufs
nachweisen zu können.
Damit die 2-jährige Gewährleistung geltend gemacht werden kann,
muss das Gerät im Einklang mit den Anweisungen des Herstellers
benutzt worden sein. Beispielsweise muss das Gerät entkalkt
worden sein und gemäß den Anweisungen gereinigt werden.
Morphy Richards übernimmt keine Verpflichtung zur Reparatur
oder zum Austausch der Waren im Rahmen der
Garantiebedingungen, wenn:
1 der Fehler auf einen versehentlich Gebrauch, Missbrauch,
unachtsamen Gebrauch oder auf einen Gebrauch zurückzuführen ist,
der den Empfehlungen des Herstellers entgegenwirkt oder wenn der
Fehler durch Stromspitzen oder durch Transportschäden verursacht
wurde.
2 das Gerät mit einer Spannung versorgt wurde, die nicht auf dem
Typenschild abgedruckt ist.
3 von anderen Personen als unserem Reparatur- und Wartungspersonal
(oder von einem unserer Vertragshändler) Reparaturversuche
unternommen wurden.
4 wenn das Gerät für Vermietungszwecke oder nicht allein für private
Zwecke gebraucht wurde.
5 das Gerät aus zweiter Hand stammt.
6 Morphy Richards kann nicht dafür haftbar gemacht werden,
Reparaturarbeiten im Rahmen der Gewährleistung auszuführen.
7 Verbrauchsmaterialien wie Tüten, Filter und Glaskaraffen sind von der
Gewährleistung ausgeschlossen.
8 Batterien und Schäden aufgrund undichter Batterien sind von der
Gewährleistung ausgeschlossen.
9 die Filter nicht gemäß Anleitung gereinigt und ausgewechselt wurden
Diese Gewährleistung erkennt Ihnen ausschließlich die Rechte zu,
die ausdrücklich in den oben genannten Bestimmungen
niedergelegt sind und erstreckt sich nicht auf Forderungen infolge
eines Verlustes oder einer Beschädigung. Diese Gewährleistung
wird als zusätzliche Leistung angeboten und greift Ihre gesetzlich
zuerkannten Rechte als Verbraucher nicht an.
GARANTIEKARTE
Kauf datum Typen-Nr.
Händlerstempel und Unterschrift Händlerstempel und Unterschrift
Fehler / Mangel
Die zuständige Stelle in allen anderen Ländern ist der jeweilige Fachhändler bzw. die Bezugsquelle.
Deutschland:
Bei Störungen oder Schäden
wenden Sie sich bitte an
unseren Kundenservice unter:
Tel.: 01805 / 398 346
(0,14 / Min. aus dem deutschen Festnetz;
max. 0,42 /Min. aus dem Mobilfunk)
Fax: 01805 / 355 467
eMail: service@glendimplex.de
Österreich:
Bei Störungen oder Schäden
wenden Sie sich bitte an
unseren Kundendienst:
Firma Schurz
Merangasse 17
A-8010 Graz
Tel.: +43 316 32 30 41
Fax: +43 316 38 29 63
eMail: office@schurz.biz
Schweiz:
Kundendienst
SchweizBLUEPOINT
Service SaglVia Cantonale
14C.P. 46CH - 6917
BarbengoTelefon: (+41) 091 980 49 72
Telefax: (+41) 091 605 37 55
E-Mail: info@bluepoint-service.ch
FS48775MEE Rev2_9225 47507 MEE pump - Jon 22/08/2012 09:13 Page 48

49
BEZPIECZEŃSTWO I OCHRONA ZDROWIA
Użytkowanie każdego urządzenia elektrycznego wymaga przestrzegania następujących podstawowych zasad bezpieczeństwa.
Przed użyciem urządzenia należy dokładnie zapoznać się z niniejszą instrukcją obsługi.
• To urządzenie może być używane przez dzieci w wieku od
8 lat oraz przez osoby o ograniczonych zdolnościach
fizycznych, sensorycznych lub umysłowych bądź
nieposiadające odpowiedniego doświadczenia i wiedzy,
pod warunkiem że osoby te są nadzorowane lub zostały
poinstruowane w zakresie bezpiecznej obsługi urządzenia i
rozumieją grożące im niebezpieczeństwa.
• Należy dopilnować, aby dzieci nie używały tego urządzenia
do zabawy.
• Dzieci poniżej 8 roku życia i bez nadzoru nie mogą
wykonywać czyszczenia i konserwacji tego urządzenia.
• Trzymaj urządzenie i jego przewód zasilający z dala od
dzieci poniżej 8 roku życia.
}
}
Umiejscowienie
• Urządzenie to jest przeznaczone do zastosowań domowych i
podobnych:
w gospodarstwach wiejskich;
w hotelach, motelach oraz innych obiektach mieszkalnych i
miejscach zakwaterowania.
Urządzenie nie jest przeznaczone do zastosowań profesjonalnych
ani przemysłowych, tzn. w kuchniach, zakładach, biurach lub
innych placówkach przemysłowych.
• Nie wolno używać urządzenia na wolnym powietrzu ani w pobliżu
wody.
• Podczas gotowania nie należy umieszczać urządzenia
bezpośrednio pod szafkami kuchennymi, ponieważ wytwarza ono
duże ilości pary. Należy unikać wykonywania czynności nad
pracującym urządzeniem do gotowania na parze.
Przewód zasilający
• Po podłączeniu do gniazda elektrycznego przewód zasilający nie
powinien być naprężony.
• Przewód zasilający nie może zwisać na krawędzi stołu lub blatu i
musi znajdować się z dala od gorących powierzchni.
• Nie może też zwisać swobodnie, np. między nisko umieszczonym
gniazdem elektrycznym a stołem.
• Jeśli przewód ulegnie uszkodzeniu, ze względów bezpieczeństwa
musi zostać wymieniony w autoryzowanym punkcie serwisowym
lub przez inną wykwalifikowaną osobę.
d
FS48775MEE Rev2_9225 47507 MEE pump - Jon 22/08/2012 09:13 Page 49

50
Bezpieczeństwo osób
• Nie dotykaj gorących powierzchni. Do zdejmowania pokrywy lub
przenoszenia gorących naczyń należy używać rękawic
kuchennych lub ścierki, ponieważ z urządzenia będzie
wydostawać się gorąca para.
• OSTRZEŻENIE: Aby zminimalizować ryzyko wystąpienia pożaru,
porażenia prądem lub obrażeń ciała, nie wolno zanurzać
przewodu, wtyczki czy urządzenia w wodzie lub innych płynach.
• OSTRZEŻENIE: Należy zachować szczególną ostrożność podczas
przenoszenia urządzenia do gotowania na parze z gorącymi
potrawami, wodą lub innymi płynami.
• Nie wolno zanurzać urządzenia w wodzie lub innych cieczach.
• Gdy urządzenie nie jest używane, przed zdejmowaniem,
zakładaniem lub czyszczeniem elementów należy wyjąć wtyczkę z
gniazda elektrycznego.
• Nie wolno używać urządzenia, które ma uszkodzony przewód
zasilający lub wtyczkę, lub jeśli wcześniej działało niewłaściwie,
zostało upuszczone lub w jakikolwiek inny sposób uszkodzone.
Skontaktuj się z firmą Morphy Richards w celu przeprowadzenia
kontroli, naprawy lub regulacji urządzenia.
• Nie napełniaj urządzenia powyżej maksymalnego poziomu. Jeśli
urządzenie do gotowania na parze jest przepełnione, gotująca
woda może wydostać się na zewnątrz i spowodować oparzenia.
Pozostałe uwagi dotyczące bezpieczeństwa
• Korzystanie z przystawek lub elementów niezalecanych przez
firmę Morphy Richards może wywołać pożar lub spowodować
porażenie prądem albo inne obrażenia ciała.
• Pokrywę należy otwierać ciągnąc do siebie, tak aby otwór nie był
skierowany w przeciwnym kierunku.
• Nie wolno wkładać żadnych elementów urządzenia do kuchenki
mikrofalowej czy stawiać na kuchence elektrycznej/gazowej.
• Nie wolno umieszczać urządzenia w pobliżu włączonej kuchenki
gazowej, elektrycznej płyty grzejnej ani w gorącym piekarniku.
• Nie należy pozostawiać elementów urządzenia w miejscu
wilgotnym lub sprzyjającym wystąpieniu korozji.
• Urządzenie do gotowania na parze można włączyć, gdy jest
napełnione przynajmniej jedną filiżanką wody. W przeciwnym
wypadku może ulec uszkodzeniu.
• Poziom wody nie może nigdy spaść poniżej oznaczenia minimum.
Pierwsza pomoc przy oparzeniach
• Natychmiast umieść poparzone miejsce pod zimną bieżącą wodą.
Nie próbuj zdejmować ubrania i zadzwoń szybko po pomoc
medyczną.
Wymagania elektryczne
Należy upewnić się, że napięcie podane na
tabliczce znamionowej urządzenia odpowiada napięciu w
gniazdku sieciowym doprowadzającym prąd zmienny.
Jeżeli wystąpi konieczność wymiany bezpiecznika we wtyczce,
należy go wymienić na bezpiecznik 13 A o oznaczeniu BS1362.
OSTRZEŻENIE: To urządzenie musi być uziemione.
WSTĘP
Dziękujemy za zakup urządzenia do gotowania na parze
Intellisteam Compact
W celu uzyskania najlepszych wyników należy dokładnie
zapoznać się z niniejszą instrukcją obsługi.
Spis treści
Bezpieczeństwo i ochrona zdrowia 49
Wstęp 50
Funkcje urządzenia 51
Elementy panelu sterowania 51
Przed pierwszym użyciem 51
Korzystanie z urządzenia Intellisteam Compact 51
Ścianka odgradzająca 52
Czasy gotowania na parze 52
Ustawione fabrycznie czasy gotowania 52
Wstrzymanie gotowania 52
Wyjmowanie produktów z urządzenia Intellisteam Compact 52
Gotowanie ryżu 52
Gotowanie jajek 52
Alarm informujący o wygotowaniu się wody i automatyczne
wyłączenie urządzenia 52
Uzupełnianie zbiornika wody w czasie korzystania z urządzenia 53
Wskazówki i porady 53
Przechowywanie 53
Usuwanie kamienia 53
Czyszczenie i konserwacja 53
Przewodnik gotowania na parze 54
Warzywa 54
Warzywa pakowane 55
Ryby i owoce morza 55
Drób 56
Ryż 56
Przepisy 57
Kontakt 62
Gwarancja 62
FS48775MEE Rev2_9225 47507 MEE pump - Jon 22/08/2012 09:13 Page 50

51
Wyposażenie
A
(1) Pokrywa
(2) Ścianka odgradzająca
(3) Pojemnik
(4) Odpowietrznik tacki
(5) Tacka ociekowa
(6) Odpowietrznik pary
(7) Zbiornik wody
(8) Wlew wody
(9) Wodowskaz
(10) Korpus urządzenia
(11) Panel sterowania
(12) Lewa komora (ze ścianką odgradzającą)
(13) Prawa komora (ze ścianką odgradzającą)
(28) Tacka na ryż
Elementy panelu sterowania
B
(14) Przycisk wł./wył.
(15) Ikony produktów (lewa komora)
(16) Zegar (lewa komora)
(17) Ikona uzupełniania wody
(18) Zegar (prawa komora)
(19) Ikony produktów (prawa komora)
(20) Przycisk wydłużania czasu gotowania
(21) Przycisk skracania czasu gotowania
(22) Ikona odkamieniania
(23) Przycisk lewej komory
(24) Ikona gotowania na parze (lewa komora)
(25) Przycisk Start/Pauza
(26) Ikona gotowania na parze (prawa komora)
(27) Przycisk prawej komory
Przed pierwszym użyciem
Przed pierwszym użyciem oraz w przypadku dłuższej przerwy w
użytkowaniu należy koniecznie oczyścić wnętrze urządzenia
Intellisteam Compact. Aby uzyskać więcej informacji, zobacz
pozycję Czyszczenie i konserwacja.
Bardzo ważne jest, aby urządzenie do gotowania na parze
Intellisteam Compact było regularnie odkamieniane w celu
przedłużenia jego żywotności i zapewnienia optymalnego
parowania. Więcej informacji można znaleźć w pozycji
Usuwanie kamienia.
Przy pierwszym użyciu, z tyłu urządzenia Intellisteam Compact
mogą wydobywać się opary. Jest to normalne zachowanie, bo
opary mogą tworzyć się od smaru używanego do natłuszczenia
niektórych elementów urządzenia w procesie produkcji. Po kilku
użyciach przestaną się pojawiać. Nie jest to niebezpieczne i nie
prowadzi do zanieczyszczenia ani zmiany smaku
przygotowywanych potraw.
Korzystanie z urządzenia Intellisteam
Compact
1
Napełnij zbiornik wody (7) zimną wodą do maksymalnego
poziomu.
2
Umieść tackę ociekową (5) i pojemnik (3) ze ścianką odgradzającą
(2) na korpusie urządzenia (10).
3
Umieść produkty w komorach pojemnika (12),(13). Użyj ścianki
odgradzającej, by zapobiec mieszaniu się produktów. Nałóż
pokrywę (1).
4
Podłącz urządzenie Intellisteam Compact do źródła zasilania. Po
podłączeniu zapali się ekran LCD i włączy się sygnał dźwiękowy.
5
Aby ustawić czas gotowania na parze, naciśnij przycisk lewej (23)
lub prawej (27) komory pojemnika. Naciśnij ten przycisk kilka razy,
aby wybrać jeden z ustawionych fabrycznie czasów gotowania
oraz wymaganą grupę produktów (15), (19).
6
Aby skorygować ustawiony fabrycznie czas gotowania (jeśli jest to
konieczne), skorzystaj z przycisków wydłużania (20) lub skracania
(21) czasu gotowania. Aby skorygować czas, użyj tych przycisków,
gdy miga ikona zegara (16),(18) (w ciągu 3 sekund), lub ponownie
naciśnij odpowiedni przycisk komory. Powtórz czynności 5-6 dla
drugiej komory (jeśli masz zamiar z niej korzystać).
7
Naciśnij przycisk Start/Pauza (25). W urządzeniu włączy się
sygnał dźwiękowy, zacznie migać ikona gotowania na parze (24), a
na zegarze rozpocznie się odliczanie czasu.
8
Gdy odliczanie na zegarze dojdzie do zera, włączy się alarm.
Następnie urządzenie Intellisteam Compact automatycznie
przejdzie w tryb podtrzymywania ciepła przez 20 minut.
9
Po zakończeniu gotowania naciśnij przycisk Wł./Wył. (14) i odłącz
urządzenie od zasilania.
Ostrożnie podnieś pokrywę (1), nachylając ją do wewnątrz, aby
bezpiecznie uwolnić parę w przeciwnym kierunku. Ostrzeżenie:
Para może spowodować poparzenia.
10
Ostrożnie wyjmij ugotowane produkty z urządzenia Intellisteam
Compact. Ostrzeżenie: Para może spowodować poparzenia.
Uwaga: Jeśli dla każdej z komór wybrano inny czas, ikona
gotowania na parze zaczyna migać, gdy w odpowiadającej jej
komorze rozpocznie się gotowanie.
}
FS48775MEE Rev2_9225 47507 MEE pump - Jon 22/08/2012 09:13 Page 51

52
Ścianka odgradzająca
Pojemnik (3) można wykorzystać na 2 sposoby: jako jedną dużą
lub dwie oddzielne komory.
Aby skorzystać z jednej dużej komory urządzenia Intellisteam
Compact, należy wyjąć ściankę odgradzającą (2).
Gotowanie na parze bez ścianki odgradzającej
W przypadku gotowania na parze bez ścianki (2) odgradzającej
należy po obu stronach ustawić ten sam czas gotowania. W
przeciwnym razie produkty mogą być nierówno ugotowane.
1. Wykonaj czynności 1-6 z pozycji „Korzystanie z urządzenia
Intellisteam Compact”, nie używając ścianki odgradzającej.
3. Naciśnij i przytrzymaj przycisk lewej komory (23), dopóki nie
wyświetli się czas gotowania dla obu komór.
4. Jeśli jest to konieczne, skoryguj czas gotowania, korzystając z
przycisków wydłużania (20) lub skracania (21) czasu gotowania.
6. Wykonaj czynności 7-10 z pozycji „Korzystanie z urządzenia
Intellisteam Compact”
Czasy gotowania na parze
Urządzenie do gotowania na parze Intellisteam Compact
zostało skonstruowane w taki sposób, aby gotowanie w obu
komorach kończyło się w tym samym czasie. Po rozpoczęciu
gotowania zegar automatycznie rozpocznie odliczanie
dłuższego czasu, tak aby gotowanie w obu komorach
zakończyło się w tym samym czasie.
Ustawione fabrycznie czasy gotowania
Urządzenie Intellisteam Compact zapewnia 7 ustawionych
fabrycznie czasów gotowania, które można korygować,
korzystając z przycisków wydłużania (20) lub skracania (21) czasu
gotowania.
Aby wybrać ustawiony fabrycznie czas gotowania, naciśnij
kilkakrotnie przycisk lewej lub prawej komory.
Poniżej znajduje się lista ustawionych fabrycznie czasów
gotowania:
Jajka - 12 minut
Ryby - 15 minut
Warzywa - 20 minut
Mięso - 30 minut
Ryż - 40 minut
Drób - 35 minut
Podtrzymywanie ciepła - 10 minut
Tego ustawienia nie należy używać do gotowania.
Wstrzymanie gotowania
Aby wstrzymać działanie urządzenia Intellisteam Compact,
naciśnij przycisk Start/Pauza (25). Aby kontynuować, naciśnij
przycisk Start/Pauza ponownie.
Po wstrzymaniu można zmieniać czasy gotowania, wykonując
czynności 5-7 z pozycji „Korzystanie z urządzenia Intellisteam
Compact”.
Wyjmowanie produktów z urządzenia
Intellisteam Compact
OSTRZEŻENIE: Podczas zdejmowania pokrywy (1) i
wyjmowania pojemnika (3) należy zakładać rękawice
kuchenne. Pokrywę należy nachylać do wewnątrz, aby
bezpiecznie uwolnić parę w przeciwnym kierunku. Nie należy
wyjmować tacki ociekowej (5), dopóki nie ostygnie.
Gotowanie ryżu
1 Wprowadź ustawienia zgodnie z opisem w pozycji „Korzystanie z
urządzenia Intellisteam Compact”.
2 Wlej 1½ filiżanki wody oraz wsyp 1 filiżankę ryżu na tackę na ryż
(28) i dobrze wymieszaj.
3 Umieść tackę na ryż w komorze i nałóż pokrywę (1).
4 Wybierz ustawiony fabrycznie czas gotowania ryżu (40 minut) i
naciśnij przycisk Start/Pauza(25).
Gotowanie jajek
Urządzenie Intellisteam Compact można używać do gotowania
jajek na twardo.
1 Wykonaj czynności 1-2 z pozycji „Korzystanie z urządzenia
Intellisteam Compact”
2 Umieść jajka we wgłębieniach pojemnika (3), jak na rysunku
powyżej.
3 Nałóż pokrywę (1).
4 Ustaw czas gotowania, wykonując czynności 4-10 z pozycji
„Korzystanie z urządzenia Intellisteam Compact”. Ustawiony
fabrycznie czas gotowania jajek wynosi 12 minut. Ustawienie to
można skorygować, używając przycisków wydłużania (20) lub
skracania (21) czasu gotowania na parze.
Alarm informujący o wygotowaniu się wody i
automatyczne wyłączenie urządzenia
Jeśli poziom wody na wodowskazie (9) spadnie poniżej minimum,
włączy się sygnał dźwiękowy i zacznie migać ikona uzupełniania
wody (17). W tym przypadku należy jak najszybciej
uzupełnić zbiornik wody (7). Aby to zrobić, skorzystaj z wlewu
wody (8), zgodnie z opisem na stronie 10.
W przypadku wygotowania się wody słychać będzie sygnał
dźwiękowy i urządzenie wyłączy się automatycznie.
FS48775MEE Rev2_9225 47507 MEE pump - Jon 22/08/2012 09:13 Page 52

53
Uzupełnianie zbiornika wody w czasie
korzystania z urządzenia
Aby uzupełnić zbiornik wody (7) w czasie gotowania, skorzystaj z
wlewu wody (8).
Wyciągnij delikatnie wlew wody znajdujący się z boku korpusu
urządzenia Intellisteam Compact. Dolej wody do wlewu, używając
dzbanka.
Po dodaniu wody sygnał dźwiękowy wyłączy się, a ikona
uzupełniania wody (17) przestanie migać.
Wskazówki i porady
• Czasy gotowania na parze podane w przewodniku na stronie 10.
są tylko wskazówkami. Czas gotowania na parze może się różnić
w zależności od grubości i świeżości produktów, ich
rozmieszczenia w komorach oraz osobistych preferencji. Po
dokładniejszym zapoznaniu się z działaniem urządzenia
Intellisteam Compact użytkownik może skorygować czas
gotowania zgodnie z osobistymi preferencjami.
• Pojedyncza warstwa produktów gotuje się szybciej niż kilka
warstw. W związku z tym czas gotowania większej ilości
pożywienia będzie dłuższy. W celu uzyskania najlepszych
rezultatów produkty należy pociąć na mniejsze / cieńsze kawałki i
rozmieścić równo w komorze.
• W przypadku gotowania dużej ilości produktów, aby zapewnić im
równe gotowanie, należy do połowy zdjąć pokrywę (1) i delikatnie
wymieszać zawartość pojemnika, używając długiego przyboru
kuchennego.
Ostrzeżenie: Do pojemnika nie wolno wkładać rąk.
• Produktów nie należy upychać. Najlepiej rozmieścić je luźno, aby
ułatwić przepływ pary.
• Do pojemnika (3) lub zbiornika wody (7) nie należy dodawać soli
ani przypraw, ponieważ mogą one powodować osadzanie się
kamienia i uszkodzenie elementu grzejnego.
• Ciecz pozostała na tacce ociekowej (5) po gotowaniu idealnie
nadaje się do robienia sosów.
• Nigdy nie należy gotować na parze zamrożonego mięsa, drobiu
ani ryb. Zawsze należy najpierw je rozmrozić.
Przechowywanie
Aby ułatwić przechowywanie, korpus urządzenia (10) Intellisteam
Compact jest dopasowany do pojemnika (3). Gdy urządzenie nie
jest używane, aby ograniczyć ilość zajmowanego miejsca, należy
przechowywać je w sposób pokazany na rysunku.
Usuwanie kamienia
Bardzo ważne jest, aby urządzenie było regularnie
odkamieniane w celu przedłużenia jego żywotności i
zapewnienia optymalnego parowania.
Po 15 godzinach gotowania zapali się ikona odkamieniania (22) w
celu przypomnienia użytkownikowi o konieczności usunięcia
kamienia.
1 Napełnij zbiornik wody (7) do maksymalnego poziomu octem (nie
słodowym).
WAŻNE: Nie wolno używać środków do usuwania kamienia
ani żadnych innych środków chemicznych.
2 Umieść tackę ociekową (5), pojemnik (3) i pokrywę (1) na zbiorniku
wody, a następnie podłącz urządzenie do zasilania.
3 Ustaw zegar na 25 minut dla obu komór i naciśnij przycisk Start.
OSTRZEŻENIE: Jeśli ocet zacznie kipieć, wyłącz zegar i
odłącz urządzenie od zasilania. Odlej trochę octu.
Gdy ocet jest gorący, urządzenia Intellisteam Compact nie
wolno przenosić.
4 Po zakończeniu odkamieniania odłącz urządzenie od zasilania i
poczekaj, aż wystygnie, zanim wylejesz ocet lub wodę.
5 Kilka razy wypłucz zbiornik zimną wodą.
OSTRZEŻENIE: Gdy ocet jest gorący, urządzenia
Intellisteam Compact nie wolno przenosić.
6 Napełnij zbiornik wodą do maksymalnego poziomu. Umieść tackę
ociekową, pojemnik i pokrywę na zbiorniku wody, a następnie
podłącz urządzenie do zasilania.
7 Włącz urządzenie na 10 minut na dowolnym ustawieniu. Wyłącz i
poczekaj, aż wystygnie, zanim wylejesz pozostałą w nim wodę.
Czyszczenie i konserwacja
OSTRZEŻENIE: Nie wolno zanurzać w wodzie korpusu
urządzenia (10), przewodu zasilającego ani wtyczki.
1 Przed rozpoczęciem czyszczenia odłącz urządzenie od zasilania i
pozostaw, aby ostygło.
2 Nie należy czyścić urządzenia, używając szorstkich materiałów
czy żrących środków czyszczących, takich jak wełna stalowa,
proszki do szorowania czy rozpuszczalniki.
3 Plastikowych części nie wolno czyścić, używając szorstkiej strony
gąbki czy zmywaka.
4 Nie zanurzać korpusu urządzenia w wodzie. Napełnij zbiornik
wody (7) ciepłą wodą z mydłem i wymyj szmatką. Opróżnij
zbiornik i dokładnie wypłucz, a następnie wytrzyj wilgotną
szmatką.
5 Wymyj pokrywę (1), tackę na ryż (28), pojemnik (3) i ściankę
odgradzającą (2) w ciepłej wodzie i płynie do mycia naczyń.
• Tackę na ryż, pojemnik i ściankę odgradzającą można myć w
zmywarce, umieszczając je na górnej półce i włączając program
dla naczyń średnio zabrudzonych lub Eko. Wytrzyj dokładnie
umyte elementy.
• Pokrywy nie można myć w zmywarce.
6 Po każdym użyciu urządzenie Intellisteam Compact należy
wyczyścić.
}
FS48775MEE Rev2_9225 47507 MEE pump - Jon 22/08/2012 09:13 Page 53

54
Przewodnik gotowania na parze
Czasy gotowania na parze i rozmiary porcji przedstawione poniżej służą tylko jako wskazówki. Czas gotowania na parze może się różnić
w zależności od wielkości i świeżości produktów, ich rozmieszczenia w pojemniku (3) oraz osobistych preferencji kulinarnych. Po
dokładniejszym zapoznaniu się z działaniem urządzenia Intellisteam Compact użytkownik może skorygować czas gotowania zgodnie z
osobistymi preferencjami.
Czasy gotowania na parze dotyczą ilości podanych w przewodniku. W przypadku większych lub mniejszych porcji należy odpowiednio
skorygować czas gotowania.
Warzywa
Odetnij grube łodygi brokuł, kalafiora i kapusty.
Zielone warzywa gotuj możliwie najkrócej, ponieważ łatwo tracą kolor.
Aby uzyskać najlepsze rezultaty, dodaj soli i przypraw po zakończeniu gotowania na parze.
Zamrożonych warzyw nie należy rozmrażać przed gotowaniem na parze.
Produkty Waga Czas gotowania Wskazówka
• Szparagi • 1 porcja 60 g
• 4 porcje 240 g
• 15 minut • Ułóż warzywa na krzyż,
aby umożliwić przepływ
pary
• Brokuły • 1 porcja 60 g • 4 porcje 240 g • 15-18 minut
• Bób • 1 porcja 50 g
• 4 porcje 200 g
• 10-15 minut • Zamieszaj po upływie
połowy czasu gotowania
• Marchew
(plasterki)
• 1 porcja 100 g
• 4 porcje 400 g
• 15-20 minut • Zamieszaj po upływie
połowy czasu gotowania
• Kalafior • 1 porcja 100 g
• 4 porcje 400 g
• 18 minut • Zamieszaj po upływie
połowy czasu gotowania
• Groch cukrowy • 1 porcja 50 g
• 4 porcje 200 g
• 10-12 minut • Zamieszaj po upływie
połowy czasu gotowania
• Groch (świeży) • 1 porcja 60 g
• 4 porcje 240 g
• 8 minut
• 8-12 minut
• Zamieszaj po upływie
połowy czasu gotowania
• Szpinak • 1 porcja 60 g
• 4 porcje 240 g
• 4-5 minut
• 5-8 minut
• Zamieszaj po upływie
połowy czasu gotowania
• Ziemniaki • 1 porcja 180 g
• 4 porcje 720 g
• 25 minut
FS48775MEE Rev2_9225 47507 MEE pump - Jon 22/08/2012 09:13 Page 54

55
Warzywa pakowane
W wielu supermarketach sprzedawane są warzywa pakowane lub wcześniej ugotowane, które idealnie nadają się do przygotowywania
posiłków, ponieważ większość pracy przy ich przygotowaniu została już wykonana.
Na większości opakowań z warzywami znajdują się instrukcje z czasami gotowania na parze, jednak dotyczą one gotowania na płycie
kuchennej lub w kuchence mikrofalowej, dlatego konieczne może być ich skorygowanie w zależności od wagi i osobistych preferencji.
Przedstawione poniżej czasy należy używać jako wskazówek.
Produkty Waga Czas gotowania
• Marchew/Brokuły • 480 g • 20 minut
• Ziemniaki • 500 g • 40 minut
• Mieszanka małych
warzyw
• 350 g • 15 minut
• Mini marchew • 400 g • 20 minut
• Mini kukurydza • 170 g • 20 minut
• Świeży groch • 170 g • 8 minut
Produkty Waga / numer Czas gotowania
• Krewetki królewskie • 100 g
• 400 g
• 5-7 minut
• 7-10
• Filety z łososia • 1 filet 140 g
• 4 filety 560 g
• 15 minut
• Małże • 200 g
• 800 g
• 5 min
• 5-8 minut
Ryby i owoce morza
Ryba jest ugotowana, jeśli można ją łatwo rozdrobnić widelcem.
Zamrożoną rybę można gotować na parze bez rozmrażania, ale należy rozdzielić ją na kawałki i wydłużyć czas gotowania.
Do gotowanej na parze ryby dodaj kawałki cytryny i zioła, by polepszyć jej smak
}
FS48775MEE Rev2_9225 47507 MEE pump - Jon 22/08/2012 09:13 Page 55

56
Drób
Gotowanie na parze to zdrowy sposób przygotowywania posiłków. Ze względu na użycie małej ilości ciepła należy używać tylko miękkich i
chudych kawałków mięsa, oddzielając od nich tłuszcz.
Ugotowany na parze drób należy przyprawić ziołami, polać sosem lub zamarynować na kilka godzin przed gotowaniem.
Przed podaniem wszystkie produkty muszą być całkowicie ugotowane. Aby sprawdzić, czy mięso zostało ugotowane w środku i czy
spływają z niego ugotowane soki, należy przekuć je nożem lub końcówką rożna.
Produkty Waga / numer Czas gotowania Wskazówka
• Filety z piersi kurczaka • 1 filet 200 g
• 4 filety 800 g
• 12-15 minut • Przed gotowaniem usuń
tłuszcz
Produkty Waga Woda Czas gotowania
• Ryż • 1 porcja 75 g
• 4 porcje 300 g
• 110 ml
• 450 ml
• 30 minut
• 40 minut
Ryż
Użyj miseczki do ryżu i dodaj wymaganą ilość wody razem z ryżem
FS48775MEE Rev2_9225 47507 MEE pump - Jon 22/08/2012 09:13 Page 56

57
Przepisy
Przepisy umieszczone w niniejszej instrukcji zostały opracowane i przetestowane przez firmę Morphy Richards w celu użycia w
urządzeniu Intellisteam Compact.
Czasy gotowania podane w poniższych przepisach są tylko wskazówkami i zależą od rozmiaru i świeżości używanych składników.
Przed podaniem sprawdź, czy wszystkie produkty są całkowicie ugotowane.
Ilości składników podane w przepisach dają porcje dla 4 osób. W przypadku zmniejszenia porcji należy odpowiednio skorygować czas
gotowania.
}
FS48775MEE Rev2_9225 47507 MEE pump - Jon 22/08/2012 09:13 Page 57

58
Słodkie czerwone papryki nadziewane porem i
serem feta, podawane z zieloną cebulką i
kuskus z orzeszkami pini
Składniki:
• 4 słodkie (długie) czerwone papryki bez główek
• 1 mały por, pocięty w cienkie plastry
• 1 łyżka stołowa poszatkowanej świeżej pietruszki
• 2 łyżki stołowe oliwy
• 25 g drobno startego sera parmezan
• 25 g świeżego pokruszonego chleba
• 100 g sera feta, drobno pokruszonego
• Sól i świeżo zmielony czarny pieprz
Kuskus:
• 200 g kuskus
• 2 łyżki stołowe bulionu warzywnego w proszku
• 4 drobno posiekane zielone cebulki
• 25 g orzeszków pini
Przybranie:
• Posiekana pietruszka
Sposób przyrządzenia:
1 Rozetnij papryki wzdłuż, zwracając uwagę, aby nie przeciąć ich w
poprzek. Usuń miąższ i nasiona. Zmieszaj por, pietruszkę oraz
oliwę z oliwek, a następnie dodaj parmezan i pokruszony chleb.
Zmieszaj rozdrobniony ser feta, a następnie przypraw odrobiną
soli i dużą ilością czarnego pieprzu. Umieść mieszankę w
paprykach.
2 Umieść papryki w jednej komorze.
3 Umieść tackę na ryż w drugiej komorze.
4 Umieść kuskus i 265 ml zimnej wody na tacce na ryż. Rozmieszaj
wywar z warzyw, dymkę oraz piniolę.
5 Ustaw czas gotowania kuskus na 25 minut. Ustaw czas
gotowania
papryki na ustawiony fabrycznie czas gotowania warzyw (20
minut).
6 Naciśnij przycisk gotowania na parze.
7 Po ugotowaniu odstaw potrawę na 5 minut.
8 Przed podaniem użyj widelca do spulchnienia kuskus.
Suflet z koziego sera
Składniki:
• 125 g pokruszonego koziego sera
• 4 jaja średniej wielkości, z białkami oddzielonymi od żółtek
• 2 łyżki stołowe poszatkowanej pietruszki
• 1 łyżka stołowa poszatkowanego
świeżego estragonu
• Sól i pieprz
• 240 g szpinaku
• Masło do natłuszczenia.
Dodatkowo do podania:
• Mini sałata
Sposób przyrządzenia:
1 Natłuść 4 kokilki o pojemności 150 ml
2 Umieść połowę koziego sera w dużej misce i rozdrobnij widelcem.
3 Dołóż i rozmieszaj żółtka jajek, zioła i przyprawy.
4 Ubijaj białka w oddzielnej misce, dopóki piana nie zacznie robić
się sztywna.
5 Dodaj 2 łyżki stołowe pianki z ubitego białka do mieszanki z
serem, aby ją rozmiękczyć, a następnie delikatnie dołóż resztę.
6 Nałóż mieszankę do kokilek, pokrywając je resztką sera. Przykryj
kokilki folią i umieść je w urządzeniu do gotowania na parze (po
obu stronach).
7 Gotuj przez 20 minut, dopóki górna powierzchnia nie nabierze
stałej konsystencji, a środki będą nadal ruchome.
8 Podawaj z sałatą od razu po przygotowaniu
FS48775MEE Rev2_9225 47507 MEE pump - Jon 22/08/2012 09:13 Page 58

59
Kurczak tikka masala z
ryżem z kardamonem
Składniki:
• 4 łyżki stołowe tłustego naturalnego jogurtu
• 2 łyżki stołowe pasty z kurczaka curry tikka masala
• 2 łyżki stołowe świeżej kolendry
• 4 filety z piersi kurczaka bez kości, pocięte na kawałki
• Sól i świeżo zmielony czarny pieprz
Ryż:
• 300 g ryżu basmati
• 450 ml zimnej wody
• 2 łyżki stołowe bulionu warzywnego w proszku
• 2 paski obranej skórki z cytryny
• 6 zielonych kłączy kardamonu, lekko zgniecionych
Przybranie:
• Plasterki limetki i listki kolendry
Sposób przyrządzenia:
1 Umieść jogurt, pastę curry oraz kolendrę w dużej niemetalowej
misce i wymieszaj. Dodaj kurczaka i zamieszaj, aby nasmarować
go przygotowaną mieszanką. Dopraw odrobiną soli i pieprzu,
następnie przykryj i włóż do lodówki na przynajmniej 30 minut.
2 Umieść tackę na ryż w jednej z komór. Dodaj ryż i zimną wodę.
Dodaj wywar w proszku. Umieść paski skórki cytryny na górze i
posyp kawałkami kardamonu.
3 Umieść kurczaka z marynatą w drugiej komorze i upewnij się, że
mieszanka jest równomiernie rozmieszczona.
4 Ustaw czas dla ryżu korzystając z ustawienia fabrycznego dla ryżu
(40 minut). Ustaw czas dla kurczaka korzystając z ustawienia
fabrycznego dla mięsa (30 minut).
5 Naciśnij przycisk gotowania na parze.
6 Podawaj przybrane plasterkami limetki i listkami kolendry.
Uwaga: Przyprawy używane w tym przepisie mogą poplamić
plastikowe elementy urządzenia Intellisteam Compact. Aby temu
zapobiec, kurczaka należy zawinąć w folię aluminiową i wydłużyć
czas gotowania o 10 minut. Przed podaniem sprawdź, czy mięso
jest całkowicie ugotowane.
Kurczak glazurowany syropem
klonowym z ryżem
Składniki:
• 4 filety z piersi kurczaka bez kości i skóry
• Drobno starta skórka i sok z 1 pomarańczy
• 2 łyżki stołowe syropu klonowego
• ¼ łyżki stołowej wysuszonych płatków chili
• Sól i świeżo zmielony czarny pieprz
Ryż:
• 250 g białego dzikiego ryżu
• 1 łyżka stołowa bulionu warzywnego w proszku
• 250 ml wody
Sposób przyrządzenia:
1 Włóż piersi kurczaka do niemetalowej miski i dodaj skórkę i sok
z pomarańczy, syrop klonowy oraz płatki chili. Natrzyj małą ilością
soli i dużą ilością pieprzu. Zakryj i włóż do lodówki na
przynajmniej 30 minut.
2 Umieść piersi z kurczaka w jednej komorze.
3 Umieść ryż i wywar warzywny w proszku na tacce na ryż. Umieść
tackę na ryż w drugiej komorze, dodaj 250 ml zimnej wody i
zamieszaj.
4 Ustaw czas gotowania kurczaka na ustawiony fabrycznie czas
gotowania mięsa (30 minut).
Ustaw czas gotowania ryżu na ustawiony fabrycznie czas ryżu (40
minut).
5 Naciśnij przycisk gotowania na parze.
}
FS48775MEE Rev2_9225 47507 MEE pump - Jon 22/08/2012 09:13 Page 59

60
Gotowany na parze halibut
z sosem cytrynowo-tymiankowym
Składniki:
• 4 x 125 g filetów z halibuta, bez skóry (lub z dorsza pacyficznego)
• 15 g masła
• 4 małe listki tymianku
• Sól i świeżo zmielony czarny pieprz
Warzywa:
• 750 g małych, młodych ziemniaków
• 2 pory pocięte na paski
• 1 duża marchewka pocięta w plastry
• 150 g oczyszczonej fasolki szparagowej
Sos:
• 50 g stopionego masła
• Drobno starta skórka i sok z 1 cytryny
• 1 łyżka stołowa świeżych listków tymianku
Sposób przyrządzenia:
1 Wymieszaj warzywa i umieść w jednej komorze.
2 Na warzywach rozłóż filety rybne.
3 Na każdy z filetów nałóż małą grudkę masła i listek tymianku.
Dopraw delikatnie solą i pieprzem.
4 Do drugiej komory włóż ziemniaki.
5 Ustaw czas gotowania ryby i warzyw na ustawiony fabrycznie
czas dla ryb plus dodatkowe 5 minut (20 minut). Ustaw czas
gotowania ziemniaków na ustawiony fabrycznie czas dla warzyw
(30 minut).
6 Naciśnij przycisk gotowania na parze
7 Aby przygotować sos, wymieszaj masło, skórki i sos cytryny oraz
liście tymianku. Przed podaniem polej rybę przygotowanym
sosem.
Łosoś w sezamie i i gotowane na parze
zielone warzywa, podawane z makaronem w
sosie z mleka kokosowego i słodkiego chili
Składniki:
• 4 filety z łososia 125 g
• 4 łyżki stołowe prażonego oleju sezamowego
• 1 łyżka stołowa nasion sezamu
• 300 g średniej wielkości gotowanego makaronu
Warzywa:
• 150 g grochu zwyczajnego lub grochu cukrowego
• 6 zielonych cebulek pociętych na plastry
• 1 marchewka pocięta w cienkie plastry
Sos:
• 300 ml mleka kokosowego
• 2 łyżki stołowe słodkiego sosu chili
• 1 łyżka korzennego imbiru
• 1 łyżka stołowa świeżej kolendry
Sposób przyrządzenia:
1 Wymieszaj warzywa i umieść w jednej komorze.
2 Nasmaruj filety z łososia olejem sezamowym i posyp je ziarnami
sezamu. Ułóż filety na warzywach w komorze.
3 Umieść makaron na tacce na ryż w drugiej komorze.
4 Wymieszaj składniki sosu i polej nim makaron. Zamieszaj, by
rozprowadzić sos.
5 Ustaw czas gotowania łososia i warzyw na ustawiony fabrycznie
czas dla ryb plus dodatkowe 5 minut (20 minut).
6 Ustaw czas gotowania makaronu na 20 minut.
7 Naciśnij przycisk gotowania na parze.
8 5 minut przed zakończeniem gotowania zamieszaj makaron, aby
porozdzielać jego nitki.
FS48775MEE Rev2_9225 47507 MEE pump - Jon 22/08/2012 09:13 Page 60

61
Krewetki na ostro i kuskus o smaku
miętowym z groszkiem
Składniki:
• 400 g surowych krewetek królewskich
• ½ łyżki stołowej pieprzu kajeńskiego
• ½ łyżki stołowej papryki
• ½ łyżki stołowej soli
• ¼ łyżki stołowej czosnku sproszkowanego
Kuskus:
• 200 g kuskus
• 270 ml zimnej wody
• 75 g mrożonego groszku
• 1 łyżka stołowa poszatkowanej świeżej mięty
Sposób przyrządzenia:
1 Wymieszaj pieprz kajoński, paprykę, sól i czosnek sproszkowany,
a następnie nasmaruj krewetki przygotowaną mieszanką.
2 Umieść krewetki w jednej komorze.
3 Umieść kuskus, wodę, groszek i miętę na tacce na ryż w drugiej
komorze.
4 Ustaw czas gotowania krewetek na 10 minut, a kuskus na 25
minut.
5 Naciśnij przycisk gotowania na parze.
6 Przed podaniem użyj widelca do spulchnienia kuskus.
Biszkopt imbirowo-bananowy z polewą toffi.
Składniki:
• 75 g masła plus trochę masła do nasmarowania
• 75 g jasnego cukru muscovado
• 2 średnie jajka, ubite
• 1/2 łyżki stołowej ekstraktu waniliowego
• 75 g mąki + proszek do pieczenia
• 1/2 łyżki stołowej mielonego imbiru
• Szczypta soli
• 1 duży dojrzały banan, ugnieciony
• 2 poszatkowane łodygi imbiru w syropie plus 4 łyżki stołowe
syropu ze słoika
Sos:
• 3 łyżki stołowe złotego syropu
• 25 g masła
• 25 g jasnego cukru muscovado
Dodatkowo do podania:
• Lody waniliowe lub słodki sos
Sposób przyrządzenia:
1 W dużej misce utrzyj masło i cukier, tak aby powstała jednolita i
puszysta masa. Stopniowo wbijaj jajka, następnie dodaj wanilię.
Przesiej mąkę, zmiel imbir i sól, a następnie delikatnie zagnieć za
pomocą dużej metalowej łyżki. Dodaj ugniecionego banana.
2 Nasmaruj masłem 4 salaterki o pojemności 150 ml. Pokrój łodygi
imbiru i umieść je na dole salaterek. Do każdej salaterki nałóż po
1 łyżce stołowej syropu, a następnie wypełnij je utartą mieszanką.
Przykryj delikatnie kawałkiem folii nasmarowanej masłem.
3 Umieść desery w jednej komorze.
4 Umieść składniki polewy na tacce na ryż, przykryj je folią
plastikową, a następnie włóż do drugiej komory.
5 Ustaw czas dla deserów korzystając z ustawienia fabrycznego dla
ryżu (40 minut). Ustaw czas gotowania polewy na 20 minut.
6 Gdy gotowanie zakończy się, przejedź nożem wzdłuż wewnętrznej
krawędzi
każdej miseczki, aby deser odkleił się. Wymieszaj dokładnie
polewę i polej nim desery. Podawaj z lodami waniliowymi lub
słodkim sosem.
}
FS48775MEE Rev2_9225 47507 MEE pump - Jon 22/08/2012 09:13 Page 61

62
Kontakt
Infolinia
W przypadku problemów z urządzeniem prosimy o kontakt z
naszą infolinią. Zapewniamy lepszą pomoc i doradztwo niż
sklep, w którym ten produkt został zakupiony.
Przygotuj nazwę produktu, numer modelu oraz numer seryjny
— podanie tych danych podczas rozmowy pomoże nam
szybciej rozwiązać problem.
Porozmawiaj z nami
W przypadku jakichkolwiek pytań lub komentarzy lub w celu
uzyskania wspaniałych porad lub przepisów, umożliwiających
pełne wykorzystanie urządzenia, zapraszamy do kontaktu
online:
Blog: www.morphyrichards.co.uk/blog
Facebook: www.facebook.com/morphyrichardsuk
Twitter: www.twitter.com/loveyourmorphy
Strona WWW: www.morphyrichards.com
DWULETNIA GWARANCJA
Niniejsze urządzenie jest objęte dwuletnią gwarancją,
upoważniającą do naprawy lub wymiany.
Zachowaj paragon ze sklepu jako dowód zakupu. Aby móc
skorzystaç z niego w przyszłości, przymocuj swój paragon do
tylnej okładki tej instrukcji za pomocą zszywacza.
Jeśli urządzenie okaże się wadliwe, prosimy podaç następujące
informacje. Informacje umieszczone poniżej znajdują się na
podstawie obudowy urządzenia.
Model
Numer seryjny
Przed opuszczeniem fabryki wszystkie produkty Morphy
Richards są indywidualnie testowane. Jeżeli urządzenie okaże
się wadliwe, należy je zwróciç do punktu sprzedaży w ciągu 28
dni od daty zakupu, w celu wymiany.
Jeśli urządzenie okaże się wadliwe po 28 dniach, lecz przed
upływem 24 miesięcy od daty zakupu, należy skontaktowaç się
z lokalnym dystrybutorem, podając model i numer seryjny
urządzenia, lub napisaç do lokalnego dystrybutora, wysyłając
list na podany adres.
Zostaniesz poproszony o dostarczenie, na poniższy adres,
urządzenia (w odpowiednim opakowaniu zabezpieczającym)
wraz z kopią dowodu zakupu.
Jeśli powód wystąpienia wady urządzenia jest inny niż podane
poniżej (1-9), zostanie ono naprawione lub wymienione oraz
odesłane w ciągu 7 dni roboczych od daty otrzymania.
Jeśli z jakiegoś powodu urządzenie zostanie wymienione w
ciągu 2 lat gwarancji, gwarancja nowego urządzenia będzie
liczona od momentu nabycia oryginalnego produktu. Dlatego
też należy zachowaç oryginalny paragon lub fakturę z
umieszczoną datą zakupu urządzenia.
Aby dwuletnia gwarancja obowiązywała, urządzenie musi byç
użytkowane zgodnie z instrukcją eksploatacji wydaną przez
producenta. Na przykład niektóre urządzenia muszą byç
regularnie odkamieniane, a filtry należy utrzymywaç w czystości
według zaleceƒ producenta.
Morphy Richards lub lokalny dystrybutor nie dokona naprawy
ani wymiany urządzenia w ramach gwarancji, jeśli:
1 Wada została spowodowana lub jest związana z przypadkową,
niewłaściwą, niedbałą lub niezgodną z zaleceniami producenta
eksploatacją urządzenia albo jest wynikiem skoków napięcia lub
niewłaściwego transportu.
2 Urządzenie zostało podłączone do źródła zasilania o innym
napięciu niż oznaczono na urządzeniu.
3 Dokonano prób naprawy urządzenia przez osoby nienależące do
personelu serwisowego firmy Morphy Richards (lub
autoryzowanego sprzedawcy urządzenia).
4 Urządzenie było przedmiotem wypożyczania lub było użytkowane
w celach innych niż przewidziane w gospodarstwie domowym.
5 Urządzenie pochodzi z wtórnego rynku.
6 Firma Morphy Richards lub lokalny dystrybutor nie wykonuje, w
ramach niniejszej gwarancji, żadnych czynności serwisowych.
7 Gwarancja nie obejmuje materiałów eksploatacyjnych, np.
worków, filtrów czy szklanych karafek.
8 Baterie oraz szkody powstałe w wyniku ich wycieku nie podlegają
gwarancji.
9 Baterie oraz szkody powstałe w wyniku ich wycieku nie podlegają
gwarancji.
Niniejsza gwarancja nie nadaje żadnych praw innych niż te
wyraźnie określone powyżej oraz nie pokrywa roszczeƒ
związanych ze stratami lub uszkodzeniami wynikającymi z
eksploatacji urządzenia. Niniejsza gwarancja stanowi
dodatkową korzyśç i nie narusza praw konsumenckich
użytkownika.
FS48775MEE Rev2_9225 47507 MEE pump - Jon 22/08/2012 09:13 Page 62

63
OCHRANA ZDRAVÍ A BEZPEČNOST
Použití jakéhokoliv elektrického spotřebiče vyžaduje dodržování následujících bezpečnostních opatření.
Před zahájením používání produktu si přečtěte tyto pokyny.
• Tento spotřebič mohou používat děti starší 8 let a osoby se
sníženými fyzickými, senzorickými či mentálními
schopnostmi nebo nedostatkem zkušeností a znalostí
pouze pod dohledem, nebo pokud byli poučeni o
bezpečném použití spotřebiče a rozumí případným rizikům.
• Děti si nesmí se spotřebičem hrát.
• Čištění a a uživatelskou údržbu nesmějí provádět děti
mladší 8 let a bez dozoru.
• Udržujte spotřebič a jeho kabel mimo dosah dětí mladších
8 let.
∂
∂
Umístění
• Tento spotřebič je určen pro použití v domácnostech a
podobnému použití, např.:
ve víkendových domech;
klienty v hotelech, motelech a jiných rezidenčních
prostředích; v ubytovacích zařízeních se snídaní.
Není vhodný pro použití v kuchyňkách pro zaměstnance v
obchodech, kancelářích a jiných pracovních prostředích.
• Nepoužívejte spotřebič venku nebo v blízkosti vody.
• Při vaření jej neumísťujte přímo pod kuchyňské skříňky, protože
dochází k vytváření velkého množství páry. Nenaklánějte se při
vaření přes parní hrnec.
Síťový kabel
• Napájecí kabel by měl dosáhnout od zásuvky k podstavci
spotřebiče, aniž by docházelo k namáhání přípojek.
• Nikdy nenechávejte kabel viset z okraje stolu nebo pultu a držte
jej dále od jakéhokoliv horkého povrchu.
• Nenechávejte kabel vést otevřeným prostorem, např. mezi
zásuvkou u země a stolem.
• Je-li napájecí kabel poškozený, musí být vyměněn výrobcem,
servisním zastoupením nebo osobou s podobnou kvalifikací, aby
se předešlo riziku.
}
FS48775MEE Rev2_9225 47507 MEE pump - Jon 22/08/2012 09:13 Page 63

64
Bezpečnost osob
• Nedotýkejte se horkých povrchů. Při manipulaci s pokličkou nebo
s horkými nádobami používejte chňapky nebo utěrky, protože
dochází k úniku horké páry.
• VAROVÁNÍ: Neponořujte kabel, zástrčku nebo spotřebič
do vody ani jiných tekutin, abyste zabránili požáru, úrazu
elektrickým proudem a zranění.
• VAROVÁNÍ: Při manipulaci s hrncem, který obsahuje horké jídlo,
vodu nebo jiné horké tekutiny, musí být dbáno mimořádné
opatrnosti.
• Spotřebič se nesmí ponořovat.
• Odpojte spotřebič od sítě, když jej nepoužíváte, nebo instalujete,
nebo když odebíráte jeho součásti, případě se jej chystáte vyčistit.
• Nespouštějte spotřebič s poškozeným kabelem či zástrčkou, nebo
pokud je porouchaný, byl upuštěn nebo je jakkoliv poškozený.
Pokud potřebujete poradit s přezkoušením, opravou nebo
elektrickým či mechanickým nastavením, kontaktujte společnost
Morphy Richards.
• Nepřekračujte maximální hladinu plnění. Jestliže se parní hrnec
přeplní, může z něj stříkat voda, která vás může opařit.
Další bezpečnostní pokyny
• Používání nástavců nebo nástrojů, které Morphy Richards
nedoporučuje nebo neprodává, může způsobit požár, úraz
elektrickým proudem nebo zranění.
• Pro otevření nadzvedněte poklici k sobě, ale nakloněnou od sebe.
• Nepoužívejte součásti parního hrnce v mikrovlnné troubě ani na
jiných varných / topných površích.
• Neumisťujte spotřebič na horký plynový nebo elektrický vařič či do
jeho blízkosti, a ani do rozehřáté trouby.
• Nenechávejte jej ve vlhkém nebo korozivním prostředí.
• Nezapínejte parní hrnec, pokud neobsahuje alespoň 1 šálek vody.
Mohlo by dojít k poškození vyvíječe páry.
• Vždy se ujistěte, zda hladina vody není nižší než minimální hladina.
Ošetření opařenin
• Zasažené místo ihned vložte pod tekoucí studenou vodu.
Nezdržujte se svlékáním oděvu, ihned vyhledejte lékařskou
pomoc.
Požadavky na napájení
Zkontrolujte, zda napětí na výkonovém štítku
spotřebiče odpovídá síťovému napětí v domácnosti, které musí
být střídavé.
Když je třeba vyměnit hlavní pojistku, použijte 13A pojistku
BS1362.
VAROVÁNÍ: Tento spotřebič musí být uzemněný.
ÚVOD
Děkujeme Vám za zakoupení parního hrnce Intellisteam
Compact.
Pečlivě si pročtěte tento návod k obsluze, abyste zajistili
nejlepší možné využití svého nového zařízení.
Obsah
Ochrana zdraví a bezpečnost 63
Úvod 64
Charakteristiky produktu 65
Funkce na ovládacím panelu 65
Před prvním použitím 65
Používání parního hrnce Intellisteam Compact 65
Dělicí přepážka 66
Doby vaření 66
Přednastavené doby vaření 66
Přerušení vaření 66
Vyjmutí jídla z parního hrnce Intellisteam Compact 66
Vaření rýže 66
Vaření vajec 66
Alarm nedostatku vody a automatické vypnutí 66
Doplnění nádržky na vodu při provozu 67
Rady a tipy 67
Skladování 67
Odstraňování vodního kamene 67
Péče a čištění 67
Vaření v páře 68
Zelenina 69
Balená zelenina 69
Ryby a plody moře 69
Drůbež 70
Rýže 70
Recepty 71
Kontaktujte nás 76
Záruka 76
FS48775MEE Rev2_9225 47507 MEE pump - Jon 22/08/2012 09:13 Page 64

65
Charakteristiky
A
(1) Víko
(2) Dělicí přepážka
(3) Nádoba
(4) Otvor v misce
(5) Odkapávací miska
(6) Otvor pro únik páry
(7) Nádrž na vodu
(8) Plnicí otvor na vodu
(9) Indikátor vodní hladiny
(10) Tělo spotřebiče
(11) Ovládací panel
(12) Levý oddíl (s dělicí přepážkou)
(13) Pravý oddíl (s dělicí přepážkou)
(28) Miska na rýži
Funkce na ovládacím panelu
B
(14) Tlačítko Zap/Vyp
(15) Ikony potravin (levý oddíl)
(16) Časovač (levý oddíl)
(17) Ikona doplnění
(18) Časovač (pravý oddíl)
(19) Ikony potravin (pravý oddíl)
(20) Tlačítko pro zvýšení
(21) Tlačítko pro snížení
(22) Ikona pro odstranění vodního kamene
(23) Tlačítko levého oddílu
(24) Ikona pro páru (levý oddíl)
(25) Tlačítko Spustit/pozastavit
(26) Ikona pro páru (pravý oddíl)
(27) Tlačítko pravého oddílu
Před prvním použitím
Před prvním použitím a v případě, že nebyl dlouho používán, je
nutné parní hrnec Intellisteam Compact vyčistit. Další informace
naleznete v kapitole Péče a čištění.
Je důležité pravidelně odstraňovat z parního hrnce Intellisteam
Compact vodní kámen, aby zůstalo zachováno optimální
proudění páry, a aby se prodloužila životnost zařízení. Další
informace naleznete v kapitole Odstraňování vodního kamene.
Při prvním použití parního hrnce Intellisteam Compact můžete
pozorovat lehký kouř nebo výpary vystupující ze zadní části těla
spotřebiče. To je normální - jedná se o mazivo, které bylo
naneseno na některé součásti zařízení v průběhu výrobního
procesu. Po několika použitích parního hrnce Intellisteam
Compact tento jev zmizí. Tento jev není nebezpečný a
nezpůsobí ani kontaminaci, ani změnu chuti potravin vařených v
parním hrnci Intellisteam Compact.
Používání parního hrnce Intellisteam Compact
1
Naplňte nádrž na vodu (7) až po ukazatel maximální hladiny.
2
Na tělo spotřebiče (10) položte odkapávací misku (5) a nádobu (3)
s dělicí přepážkou (2).
3
Vložte jídlo do oddílů (12), (13). Pomocí dělicí přepážky zajistěte
oddělení potravin. Nasaďte víko (1).
4
Zapojte parní hrnec Intellisteam Compact do síťové zásuvky.
Parní hrnec Intellisteam Compact zapípá a rozsvítí se LCD displej.
5
Dobu vaření můžete nastavit stisknutím tlačítka levého (23) nebo
pravého (27) oddílu. Opakovaným stisknutím tlačítka vyberte
některou z výchozích dob vaření a vyberte požadovanou skupinu
potravin (15) (19).
6
Pomocí tlačítek Zvýšit (20) nebo Snížit (21) upravte dobu vaření
(je-li to potřeba). Stiskněte tlačítko, dokud bliká příslušná ikona
časovače (16), (18) (do 3 sekund) nebo upravte čas opětovným
stisknutím příslušného tlačítka oddílu. Opakujte kroky 5 - 6 pro
druhý oddíl (je-li to potřeba).
7
Stiskněte tlačítko Spustit/Pozastavit (25). Parní hrnec Intellisteam
Compact pípne, začne blikat* ikona vaření (24) a časovač začne
odpočítávat čas.
8
Jakmile dosáhne časovač hodnoty nula, zazní alarm.
Parní hrnec Intellisteam Compact se na 20 minut automaticky
přepne do režimu udržování tepla.
9
Po skončení stiskněte tlačítko Zapnout/Vypnout (14) a odpojte
parní hrnec Intellisteam Compact ze síťové zásuvky.
Bezpečně vypusťte páru opatrným zdvihnutím víka (1) směrem od
sebe. Varování: Pára může způsobit popáleniny.
10
Opatrně vyjměte uvařené potraviny z parního hrnce Intellisteam
Compact. Varování: Pára může způsobit popáleniny.
Poznámka: Pokud jste vybrali pro jednotlivé oddíly odlišné
časy, ikona vaření se rozbliká, jakmile příslušný oddíl zahájí
proces vaření.
∂
FS48775MEE Rev2_9225 47507 MEE pump - Jon 22/08/2012 09:13 Page 65

66
Dělicí přepážka
Nádobu (3) lze používat dvěma způsoby: buď jako dva
samostatné oddíly nebo jako jeden velký oddíl.
Chcete-li parní hrnec Intellisteam Compact používat jako jeden
oddíl na vaření, vyjměte dělicí přepážku (2) z nádoby a odložte ji.
Vaření bez dělicí přepážky
Používáte-li parní hrnec Intellisteam Compact bez dělicí přepážky
(2), musíte nastavit stejnou dobu vaření na obou stranách, protože
jinak budou potraviny uvařeny nerovnoměrně.
1. Postupujte podle kroků 1 - 6 v kapitole „Používání parního hrnce
Intellisteam Compact“ bez vložení dělicí přepážky.
3. Stiskněte a podržte tlačítko levého oddílu (23), dokud se nezobrazí
čas pro oba oddíly.
4. V případě potřeby upravte dobu vaření v parním hrnci Intellisteam
Compact pomocí tlačítek Zvýšit (20) nebo Snížit (21).
6. Postupujte podle kroků 7 - 10 v kapitole „Používání parního hrnce
Intellisteam Compact“.
Doby vaření
Parní hrnec Intellisteam Compact je navržen tak, aby dokončil
vaření v obou oddílech současně. Po spuštění vaření začne
časovač automaticky odpočítávat od nejdelší doby vaření tak,
aby se vaření veškerých potravin v parním hrnci Intellisteam
Compact dokončilo ve stejnou dobu.
Přednastavené doby vaření
Parní hrnec Intellisteam Compact obsahuje 7 přednastavených
dob vaření. Tyto doby lze upravit pomocí tlačítek Zvýšit (20) a
Snížit (21).
Opakovaným stisknutím tlačítka levého nebo pravého oddílu
můžete vyhledat a vybrat požadovanou dobu vaření pro jednotlivé
oddíly.
Naleznete zde následující přednastavené doby vaření:
Vejce - 12 minut
Ryba - 15 minut
Zelenina - 20 minut
Maso - 30 minut
Rýže - 40 minut
Drůbež - 35 minut
Udržování tepla - 10 minut
Toto nastavení nepoužívejte k vaření potravin.
Přerušení vaření
Chcete-li přerušit proces vaření v parním hrnci Intellisteam
Compact, stiskněte tlačítko Spustit/Pozastavit (25). Opětovným
stisknutím tlačítka Spustit/Pozastavit můžete proces vaření
obnovit.
Po dobu přerušení činnosti parního hrnce Intellisteam Compact
můžete upravit doby vaření tak, jak je uvedeno v krocích 5 - 7 v
kapitole „Používání parního hrnce Intellisteam Compact“.
Vyjmutí jídla z parního hrnce
Intellisteam Compact
VAROVÁNÍ: Při snímání víka (1) a nádoby (3) používejte
ochranné rukavice a víko naklopte tak, aby pára směřovala od
vás. Nevyjímejte odkapávací misku (5) do doby, než zcela
vychladne.
Vaření rýže
1 Nastavte parní hrnec Intellisteam Compact tak, jak je popsáno v
kapitole „Používání parního hrnce Intellisteam Compact“.
2 Do misky na rýži (28) přidejte 1 šálek nevařené rýže a 1½ šálku
vody a vše řádně promíchejte.
3 Vložte misku na rýži do oddílu a uzavřete parní hrnec Intellisteam
Compact víkem (1).
4 Nastavte dobu vaření pro daný oddíl na přednastavenou hodnotu
„Rýže“ (40 minut) a stiskněte tlačítko Spustit/Pozastavit (25).
Vaření vajec
Parní hrnec Intellisteam Compact lze používat k vaření vajec
natvrdo.
1 Postupujte podle kroků 1 - 2 v kapitole „Používání parního hrnce
Intellisteam Compact“.
2 Vložte vejce do důlků v nádobě (3) tak, jak vidíte na obrázku
nahoře.
3 Nasaďte víko (1).
4 Nastavte dobu vaření a páru tak, jak je uvedeno v krocích 4 - 10 v
kapitole „Používání parního hrnce Intellisteam Compact“. Produkt
má přednastavenou volbu „Vejce“ o délce 12 minut. Tuto dobu lze
ručně upravit pomocí tlačítek Zvýšit (20) a Snížit (21) podle vlastní
chuti.
Alarm nedostatku vody a automatické vypnutí
Když vodní hladina na indikátoru (9) poklesne pod úroveň „MIN“,
rozezní se bzučák a rozbliká se ikona doplnění (17). V takovém
případě byste měli co nejdříve doplnit vodu do
nádrže s vodou (7). Pomocí plnicího otvoru na vodu (8) naplňte
nádrž na vodu tak, jak je uvedeno na straně 10.
Pokud by při vaření v parním hrnci Intellisteam Compact zcela
došla voda, bude zařízení neustále pípat a automaticky se vypne,
čímž dojde k zastavení procesu vaření.
FS48775MEE Rev2_9225 47507 MEE pump - Jon 22/08/2012 09:13 Page 66

67
Doplnění nádržky na vodu při provozu
Pomocí plnicího otvoru na vodu (8) naplňte nádrž na vodu (7) v
průběhu vaření.
Opatrně vytáhněte plnicí otvor na vodu z boku parního hrnce
Intellisteam Compact. Pomocí džbánku opatrně dolijte vodu do
plnicího otvoru na vodu.
Bzučák i ikona doplnění (17) se automaticky vypnou.
Rady a tipy
• Doby vaření uvedené v příručce (str. 10) jsou pouze orientační. Tyto
doby se mohou lišit v závislosti na velikosti kusů potravin, jejich
rozmístění v oddílech, na stavu potravin a na osobních
preferencích. Jakmile se s vařením v parním hrnci Intellisteam
Compact seznámíte, můžete si nastavit dobu vaření podle vlastní
potřeby.
• Jedna vrstva potravin se uvaří rychleji než více vrstev. Doba vaření
většího množství potravin bude proto delší. Lepších výsledků
dosáhnete, budete-li připravovat potraviny v menších / tenčích
dávkách, rovnoměrně rozmístěných v oddíle.
• Při vaření velkého množství potravin sejměte přibližně v polovině
doby vaření víko (1) a pořádně potraviny promíchejte pomocí
dlouhého nástroje tak, aby došlo k rovnoměrnému uvaření.
Varování: Nestrkejte do nádoby ruku.
• Jídlo by nemělo být zbytečně nahromaděné na jednom místě.
Uspořádejte jídlo rovnoměrně tak, aby kolem něj mohla volně
proudit pára.
• Do nádoby (3) ani do nádrže na vodu (7) nepřidávejte sůl ani
koření. Tyto minerály způsobí usazování vodního kamene a
poškodí topný článek.
• Tekutina, která po vaření zbude v odkapávací misce (5), je vhodná
pro přípravu omáček.
• Nikdy nevařte v páře zmrazené maso, drůbež nebo mořské plody.
Vždy je nejprve důkladně rozmrazte.
Skladování
Za účelem usnadnění skladování je parní hrnec Intellisteam
Compact navržen tak, aby se tělo spotřebiče (10) vešlo do nádoby
(3). Když parní hrnec Intellisteam Compact nepoužíváte, můžete
jej uložit složený tak, jak vidíte na obrázku.
Odstraňování vodního kamene
Je důležité pravidelně odstraňovat ze zařízení vodní kámen,
aby zůstalo zachováno optimální proudění páry, a aby se
prodloužila životnost zařízení.
Po každých 15 hodinách vaření se rozsvítí ikona pro odstranění
vodního kamene (22), která vám připomene nutnost odstranění
vodního kamene ze spotřebiče.
1 Naplňte nádrž na vodu (7) bílým octem (nikoli hnědým octem) až
po hladinu MAX.
DŮLEŽITÉ: Nepoužívejte žádnou jinou chemickou látku nebo
přípravek na odstranění vodního kamene.
2 Nasaďte odkapávací misku (5), nádobu (3) a víko (1) na nádržku
na vodu a poté připojte parní hrnec Intellisteam Compact do
síťové zásuvky.
3 Nastavte časovač obou oddílů na 25 minut a stiskněte tlačítko
Start.
VAROVÁNÍ: Pokud začne ocet při vaření přetékat přes okraj
těla spotřebiče, vypněte časovač a odpojte zařízení ze sítě.
Odeberte trochu octa.
Nepokoušejte se pohybovat parním hrncem Intellisteam
Compact, dokud je ocet ještě horký.
4 Po dokončení vaření odpojte zařízení ze síťové zásuvky a před
vylitím roztoku octa a vody jej nechte zcela vychladnout.
5 Několikrát vypláchněte nádržku na vodu studenou vodou.
VAROVÁNÍ: Nepokoušejte se pohybovat parním hrncem
Intellisteam Compact, dokud je ocet ještě horký.
6 Naplňte nádržku na vodu studenou vodou až po značku MAX.
Nasaďte odkapávací misku, nádobu a víko na nádržku na vodu a
poté připojte parní hrnec Intellisteam Compact do síťové zásuvky.
7 Spusťte parní hrnec Intellisteam Compact na 10 minut s jakýmkoli
nastavením. Před vylitím zbývající vody jej vypněte a nechte zcela
vychladnout.
Péče a čištění
VAROVÁNÍ: Nikdy neponořujte tělo spotřebiče (10), napájecí
kabel nebo zástrčku do vody.
1 Před čištěním odpojte zařízení ze síťové zásuvky a nechte jej zcela
vychladnout.
2 Nečistěte žádnou část zařízení abrazivními čističi, například
odstraňovačem skvrn, drátěnkou nebo bělidlem.
3 Nečistěte průhledné plasty drsnou stranou houbičky.
4 Neponořujte tělo spotřebiče do vody. Naplňte nádržku na vodu (7)
teplou saponátovou vodou a otřete ji hadříkem. Vylijte ji, řádně
vypláchněte a poté otřete vlhkým hadříkem.
5 Víko (1), misku na rýži (28), nádobu (3) a dělicí příčku (2) omyjte v
teplé vodě a tekutém prostředku na mytí nádobí.
• Misku na rýži, nádobu a dělicí příčku můžete mýt v myčce na
nádobí, ovšem pouze na horní polici a s použitím středního nebo
eko cyklu. Vše řádně osušte.
• Víko není vhodné pro mytí v myčce.
6 Po každém použití parní hrnec Intellisteam Compact vyčistěte.
∂
FS48775MEE Rev2_9225 47507 MEE pump - Jon 22/08/2012 09:13 Page 67

68
Vaření v páře
Níže uvedené doby vaření a velikosti porcí jsou pouze orientační. Tyto doby se mohou lišit podle velikosti kusů potravin, rozmístění v
nádobě (3), stavu potravin a osobních preferencí. Jakmile se s vařením v parním hrnci seznámíte, nastavíte si dobu vaření podle vlastní
potřeby.
Doby vaření jsou určeny pro množství potravin uvedená v příručce. V případě větších nebo menších množství tyto doby odpovídajícím
způsobem upravte.
Zelenina
Odřízněte silné části brokolice, květáku a zelí.
Zelené listy vařte co nejkratší dobu, protože rychle ztrácejí barvu.
Nejlepších výsledků dosáhnete, osolíte-li a okořeníte-li zeleninu až po uvaření.
Zmrazenou zeleninu před vařením v páře nerozmrazujte.
Potravina Hmotnost Doba vaření Tip
• Chřest • 1 porce 60 g
• 4 porce 240 g
• 15 minut • Stonky pokládejte křížem,
aby se mezi ně dostala
pára
• Brokolice • 1 porce 60 g • 4 porce 240 g • 15 -18 minut
• Široké fazole • 1 porce 50 g
• 4 porce 200 g
• 10 - 15 minut • V polovině doby vaření
promíchat
• Mrkve
(nakrájené)
• 1 porce 100 g
• 4 porce 400 g
• 15 - 20 minut • V polovině doby vaření
promíchat
• Květák • 1 porce 100 g
• 4 porce 400 g
• 18 min • V polovině doby vaření
promíchat
• Sladký hrášek • 1 porce 50 g
• 4 porce 200 g
• 10 - 12 minut • V polovině doby vaření
promíchat
• Hrášek (čerstvý) • 1 porce 60 g
• 4 porce 240 g
• 8 minut
• 8 - 12 minut
• V polovině doby vaření
promíchat
• Špenát • 1 porce 60 g
• 4 porce 240 g
• 4 - 5 minut
• 5 - 8 minut
• V polovině doby vaření
promíchat
• Brambory • 1 porce 180 g
• 4 porce 720 g
• 25 minut
FS48775MEE Rev2_9225 47507 MEE pump - Jon 22/08/2012 09:13 Page 68

69
Balená zelenina
V mnoha supermarketech můžete nakoupit připravenou/balenou zeleninu, se kterou se mnohem lépe pracuje. Taková zelenina je při
přípravě pokrmů ideální, protože tu nejhorší práci už udělal někdo za vás.
Na většině balení najdete pokyny k vaření zeleniny v páře, ale tyto údaje se vztahují k vaření na sporáku nebo v mikrovlnné troubě a může
být nutné je upravit jak podle hmotnosti, tak podle osobních preferencí.
Jako vodítko můžete použít níže uvedené doby.
Pokrm Hmotnost Doba vaření
• Mrkev/brokolice,
růžičková kapusta
• 480 g • 20 minut
• Brambory • 500 g • 40 minut
• Směs malých kousků
zeleniny
• 350 g • 15 minut
• Malé mrkvičky • 400 g • 20 minut
• Malá kukuřice • 170 g • 20 minut
• Čerstvý hrášek • 170 g • 8 minut
Pokrm Hmotnost / Počet Doba vaření
• Velké krevety • 100 g
• 400 g
• 5 - 7 minut
• 7-10
• Lososové filety • 1 filet 140 g
• 4 filety 560 g
• 15 minut
• Mušle • 200 g
• 800 g
• 5 minut
• 5 - 8 minut
Ryby a plody moře
Ryba je uvařená, když lze maso snadno oddělovat vidličkou.
Zmrazenou rybu není nutné před vařením na páře rozmrazovat, ale je nutné jednotlivé kusy od sebe oddělit a prodloužit dobu vaření.
Pro zlepšení chuti můžete při vaření přidat plátky citrónu a bylinky
∂
FS48775MEE Rev2_9225 47507 MEE pump - Jon 22/08/2012 09:13 Page 69

70
Drůbež
Vaření na páře je zdravé, protože vaření probíhá při nízké teplotě, vybírejte proto libové kousky masa a ořízněte veškerý tuk.
Drůbež vařenou na páře podávejte s bylinkami, omáčkami nebo maso před vařením několik hodin marinujte.
Před podáváním je nutné maso důkladně uvařit. Propíchněte maso nožem nebo vidlicí a zkontrolujte, že i střed masa je dobře uvařený a že
veškeré šťávy jsou čiré.
Pokrm Hmotnost / Počet Doba vaření Tip
• Kuřecí prsní plátky • 1 filet 200 g
• 4 filety 800 g
• 12 - 15 minut • Před vařením odstraňte
veškerý tuk
Pokrm Hmotnost Voda Doba vaření
• Rýže • 1 porce 75 g
• 4 porce 300 g
• 110 ml
• 450 ml
• 30 minut
• 40 minut
Rýže
Použijte misku na rýži a přilijte do rýže požadované množství vody
FS48775MEE Rev2_9225 47507 MEE pump - Jon 22/08/2012 09:13 Page 70

71
Recepty
Recepty uvedené v této příručce byly navrženy a vyzkoušeny společností Morphy Richards speciálně pro používání v parním hrnci
Intellisteam Compact. Doby vaření uvedené v následujících receptech jsou pouze orientační a je nutné je upravit podle množství a stavu
používaných přísad. Před podáváním vždy zkontrolujte, zda je pokrm pořádně uvařený.
Recepty jsou navrženy pro získání maximálních porcí pro 4 osoby. Pokud budete zmenšovat velikost porce, upravte odpovídajícím
způsobem také dobu vaření.
∂
FS48775MEE Rev2_9225 47507 MEE pump - Jon 22/08/2012 09:13 Page 71

72
Sladké červené papriky plněné pórkem a
sýrem feta s jarní cibulkou a kuskusem
Přísady:
• 4 sladké (dlouhé) červené papriky s oříznutými horními konci
• 1 malý pórek, jemně nasekaný
• 1 polévková lžíce čerstvého koriandru
• 2 polévkové lžíce olivového oleje
• 25 g jemně strouhaného parmezánu
• 25 g čerstvé chlebové strouhanky
• 100 g sýru feta, jemně nalámaného
• Sůl a čerstvě drcený černý pepř
Kuskus:
• 200 g kuskusu
• 2 čajové lžičky práškové zeleninové přísady
• 4 jarní cibulky, jemně nasekané
• 25 g borových semínek
Pro ozdobení:
• Výhonky petržele
Postup:
1 Rozřízněte papriky podélně, dbejte však, abyste je zcela
nerozdělili na poloviny. Vyjměte jádro a semínka. Smíchejte pórek,
petržel a olivový olej a pak přidejte parmezán a strouhanku.
Smíchejte sýr feta, osolte a okořeňte dostatkem černého pepře.
Naplňte směsí papriky.
2 Vložte papriky do jednoho oddílu.
3 Vložte misku na rýži do druhého oddílu.
4 Do misky na rýži přidejte kuskus a 265 ml studené vody.
Zamíchejte zeleninový prášek, jarní cibulku a borová semínka.
5 Nastavte čas pro kuskus na 25 minut. Nastavte čas pro papriku
na přednastavenou dobu vaření zeleniny (20 minut).
6 Stiskněte tlačítko Vaření.
7 Když je vše uvařeno, ponechte odstát 5 minut.
8 Před podáváním promíchejte kuskus vidličkou.
Nákyp z kozího sýru
Přísady:
• 125 g kozího sýru, nalámaného
• 4 střední vejce, rozdělená
• 2 polévkové lžíce jemně nakrájené petržele
• 1 polévková lžíce jemně nařezaného čerstvého estragonu
• Sůl a pepř
• 240 g špenátu
• Máslo pro omaštění
Servírování:
• Salát z mladého salátu
Postup:
1 Vymazejte 4 kulaté zapékací misky o objemu 150 ml.
2 Vložte polovinu kozího sýra do velké mísy a rozmačkejte jej
vidličkou.
3 Vmíchejte vaječné žloutky, bylinky a koření.
4 Z vaječných bílků v jiné míse vyšlehejte sníh.
5 Opatrně zamíchejte 2 lžíce vaječných bílků do sýrové směsi a poté
přidejte zbytek vaječných bílků.
6 Lžící přendejte směs do kulatých zapékacích misek a posypejte
zbývajícím sýrem. Přikryjte fólií a na každou stranu parního hrnce
vložte 2 zapékací misky.
7 Vařte 20 minut, dokud horní části neztuhnou, ale středy jsou stále
měkké.
8 Okamžitě podávejte se salátem.
FS48775MEE Rev2_9225 47507 MEE pump - Jon 22/08/2012 09:13 Page 72

73
Kuře Tikka Masala s kardamomovou rýží
Přísady:
• 4 polévkové lžíce nízkotučného přírodního jogurtu
• 2 polévkové lžíce kari pasty Tikka Masala
• 2 polévková lžíce čerstvého koriandru
• 4 kuřecí prsa, vykostěná, zbavená kůže, nařezaná na kousky
• Sůl a čerstvě drcený černý pepř
Rýže:
• 300 g rýže basmati
• 450 ml studené vody
• 2 čajové lžičky práškové zeleninové přísady
• 2 dílky citrónu
• 6 zelených lusků kardamomu, lehce rozmačkaných
Pro ozdobení:
• Limetkové dílky a výhonky koriandru
Postup:
1 Vložte jogurt, pastu kari a koriandr do velké nekovové misky a vše
promíchejte. Přidejte kuře a znovu promíchejte. Osolte a okořeňte
pepřem, pak zakryjte a alespoň na 30 minut uložte do ledničky.
2 Vložte misku na rýži do jedné nádoby. Přidejte rýži a studenou
vodu. Přimíchejte práškovou zeleninu. Položte nahoru dílky citrónu
a posypte kardamomem.
3 Vložte kuře a marinádu do druhého oddílu a směs dobře rozložte.
4 Nastavte čas vaření rýže podle předvoleb pro rýži (40 minut).
Nastavte čas vaření kuřete podle předvoleb pro maso (30 minut).
5 Stiskněte tlačítko Vaření.
6 Podávejte ozdobené limetkovými dílky a výhonky koriandru.
Poznámka: Koření používané v tomto receptu může udělat skvrny
na plastových dílech parního hrnce Intellisteam Compact. Můžete
tomu zabránit tak, že budete kuře vařit v alobalu a prodloužíte
dobu vaření o 10 minut. Před podáváním vždy zkontrolujte, zda je
maso pořádně uvařené.
Kuře s javorovou omáčkou a rýží
Přísady:
• 4 kuřecí prsa, vykostěná, zbavená kůže
• Jemně nastrouhaná kůra a šťáva z 1 malého pomeranče
• 2 polévkové lžíce javorového sirupu
• ¼ čajové lžičky sušených chilli paprik
• Sůl a čerstvě drcený černý pepř
Rýže:
• 250 g bílé divoké rýže
• 1 čajová lžička práškové zeleninové přísady
• 250 ml vody
Postup:
1 Vložte kuřecí prsa do nekovové misky a přidejte pomerančovou
kůru, šťávu, javorový sirup a chilli papriku. Osolte a okořeňte
dostatečným množstvím černého pepře. Zakryjte a uložte na 30
minut do ledničky.
2 Vložte kuřecí prsa do jednoho oddílu.
3 Vložte rýži a zeleninový prášek do misky na rýži. Vložte misku na
rýži do druhého oddílu, do rýže přidejte 250 ml vody a vše
promíchejte.
4 Nastavte čas pro kuře na přednastavenou dobu pro maso (30
minut).
Nastavte čas pro rýži na přednastavenou dobu pro rýži (40 minut).
5 Stiskněte tlačítko Vaření.
∂
FS48775MEE Rev2_9225 47507 MEE pump - Jon 22/08/2012 09:13 Page 73

74
Propařovaný halibut s citrónovým
a tymiánovým dresinkem
Přísady:
• 4 x 125 g filety z halibuta, bez kůže (nebo Pacifická treska)
• 15 g másla
• 4 malé výhonky tymiánu
• Sůl a čerstvě drcený černý pepř
Zelenina:
• 750 g malých nových brambor
• 2 pórky, nakrájené na proužky
• 1 velká mrkev, nakrájená na plátky
• 150 g zelených fazolí, nakrájených
Dressing:
• 50 g másla, rozpuštěného
• Jemně nastrouhaná kůra a šťáva z 1 citrónu
• 1 polévková lžíce čerstvých tymiánových lístků
Postup:
1 Smíchejte zeleninu a vložte ji do jednoho oddílu.
2 Na zeleninu narovnejte rybí filety.
3 Na každý filet položte malý kousek másla a snítku tymiánu. Osolte
a opepřete.
4 Vložte brambory do druhého oddílu.
5 Nastavte čas vaření ryby a zeleniny podle předvoleb pro ryby plus
5 minut (20 minut). Nastavte čas vaření brambor podle předvoleb
pro zeleninu (30 minut).
6 Stiskněte tlačítko Vaření
7 Dresink zhotovíte tak, že smícháte máslo, citrónovou kůru a šťávu
a výhonky tymiánu a při podávání přelijete tento dresink přes rybu.
Sezamový losos s nudlemi a napařovanou
zeleninou, kokosovým mlékem a sladkou chilli
omáčkou
Přísady:
• 4 x 125 g lososových filetů
• 4 čajové lžičky sezamového oleje
• 1 čajová lžička sezamových semen
• 300 g středně uvařených nudlí
Zelenina:
• 150 g sladkého hrášku
• 6 jarních cibulek, nakrájených na plátky
• 1 mrkev, nakrájená na tenké plátky
Omáčka:
• 300 ml kokosového mléka
• 2 čajové lžičky sladké chilli omáčky
• 1 čajová lžička čerstvého kořenového zázvoru
• 1 polévková lžíce čerstvého koriandru
Postup:
1 Smíchejte zeleninu a vložte ji do jednoho oddílu.
2 Vetřete do lososových filetů sezamový olej a pak posypte
sezamovými semínky. Narovnejte je na zeleninu.
3 Vložte nudle do misky na rýži a tu vložte do druhého
oddílu.
4 Smíchejte přísady na omáčku a tu přelijte přes nudle. Vše
promíchejte.
5 Nastavte čas vaření lososa a zeleniny podle předvoleb pro ryby
plus 5 minut (20 minut).
6 Nastavte čas pro nudle na 20 minut.
7 Stiskněte tlačítko Vaření.
8 5 minut před koncem vaření nudle promíchejte, aby se vzájemně
oddělily.
FS48775MEE Rev2_9225 47507 MEE pump - Jon 22/08/2012 09:13 Page 74

75
Pikantní krevety s kuskusem a
mátovým hráškem
Přísady:
• 400 g velkých krevet
• ½ kávové lžičky kajenského pepře
• ½ kávové lžičky mleté papriky
• ½ kávové lžičky soli
• ¼ kávové lžičky sušeného česneku
Kuskus:
• 200 g kuskusu
• 270 ml studené vody
• 75 g zmrazeného hrachu
• 1 polévková lžíce nakrájené čerstvé máty
Postup:
1 Smíchejte kajenský pepř, papriku, sůl a sušený česnek a v této
směsi obalte krevety.
2 Vložte krevety do jednoho oddílu.
3 Vložte kuskus, vodu, hrášek a mátu do misky na rýži a tu vložte
do druhého oddílu.
4 Nastavte čas pro krevety na 10 minut a pro kuskus na 25 minut.
5 Stiskněte tlačítko Vaření.
6 Před podáváním promíchejte kuskus vidličkou.
Zázvorový a banánový pudink s
karamelovou omáčkou
Přísady:
• 75 g másla, plus kousek navíc pro omaštění
• 75 g přírodního cukru Muscovado
• 2 střední vejce, šlehaná
• 1/2 čajové lžičky vanilkového extraktu
• 75 g mouky s kypřicím prostředkem
• 1/2 čajové lžičky drceného zázvoru
• Špetka soli
• 1 velký banán, rozmačkaný
• 2 kusy nakrájeného zázvoru v sirupu, plus 4 polévkové lžíce sirupu
z láhve
Omáčka:
• 3 polévkové lžíce zlatého sirupu
• 25 g másla
• 25 g přírodního cukru Muscovado
Servírování:
• Vanilková zmrzlina nebo vaječný krém
Postup:
1 Do velké misky pro míchání vložte máslo s cukrem a třete, dokud
nebude směs řádně provzdušněná. Postupně přidávejte šlehaná
vejce, pak přimíchejte vanilku. Přidejte mouku, drcený zázvor a
sůl, promíchejte velkou kovovou lžící. Přimíchejte rozmačkaný
banán.
2 Máslem vymažte 4 misky na pudink o objemu 150 ml. Nakrájejte
kořen zázvoru a vložte jej na dno misek. Do každé misky přidejte
1 polévkovou lžíci sirupu a před zarovnáním naneste lžící navrch
krémovou směs. Důkladně zakryjte fólií namazanou máslem.
3 Vložte pudinkové misky do jednoho oddílu.
4 Vložte jednotlivé přísady do misky na rýži, přikryjte plastovou fólií
a misku vložte do druhého oddílu.
5 Nastavte čas vaření pudinku podle předvoleb pro rýži (40 minut).
Nastavte čas pro omáčku na 20 minut.
6 Po uvaření nožem odřízněte pudink okolo okraje a uvolněte
jej. Omáčku dokonale promíchejte a nalijte lžící na každý pudink.
Podávejte se zmrzlinou nebo vaječným krémem.
∂
FS48775MEE Rev2_9225 47507 MEE pump - Jon 22/08/2012 09:13 Page 75

76
Kontaktujte nás
Linka podpory
Pokud máte se svým přístrojem problémy, kontaktujte nás na
lince podpory, budeme vám patrně schopni pomoci lépe, než v
obchodu, kde jste přístroj zakoupili.
Před telefonátem si připravte název výrobku, modelové číslo a
sériové číslo, urychlíte tak vyřízení svého dotazu.
Promluvte si s námi
Pokud máte nějaké dotazy nebo komentáře, nebo chcete získat
některé vhodné tipy či recepty, abyste svůj produkt mohli
využívat co nejlépe, spojte se s námi online:
Blog: www.morphyrichards.co.uk/blog
Facebook: www.facebook.com/morphyrichardsuk
Twitter: www.twitter.com/loveyourmorphy
Webové stránky: www.morphyrichards.com
DVOULETÁ ZÁRUKA
Na tento spotřebič se vztahuje dvouletá záruka opravy nebo
výměny.
Musíte si uschovat stvrzenku od prodejce jako doklad o
nákupu. Stvrzenku připevněte sešívačkou na zadní obal pro
budoucí referenční účely.
Pokud se výrobek porouchá, poznamenejte si následující
informace. Tato čísla najdete na základně výrobku.
Č. modelu
Sériové číslo
Všechny výrobky Morphy Richards procházejí před opuštěním
továrny individuální kontrolou. V nepravděpodobném případě,
že se prokáže závada, se musí výrobek do 28 dnů od data
koupě vrátit do místa, kde byl zakoupen, aby se mohl vyměnit.
Pokud dojde k závadě po 28 dnech a do 24 měsíců od data
původní koupě, musíte kontaktovat místního prodejce a uvést
číslo modelu a sériové číslo výrobku nebo napsat místnímu
prodejci na uvedené adresy.
Budete požádáni, abyste vrátili výrobek (v náležitém,
bezpečném balení) společně s kopií dokladu o nákupu na níže
uvedenou adresu.
S výjimkou níže uvedených případů (1-9) bude vadný výrobek
obvykle během sedmi pracovních dnů od data přijetí opraven
nebo vyměněn a odeslán zpět.
Pokud bude výrobek z jakéhokoliv důvodu během dvouleté
záruční lhůty vyměněn, záruka na nový výrobek se bude počítat
od data původní koupě. Proto je velmi důležité, abyste
uschovali původní stvrzenku nebo fakturu s vyznačeným datem
původní koupě.
Platnost dvouleté záruky na spotřebič je podmíněna používáním
podle pokynů výrobce. Například spotřebiče se musí zbavovat
vodního kamene a filtry se musí udržovat v čistém stavu podle
pokynů.
Společnost Morphy Richards nebo místní prodejce nebudou
povinni opravit nebo vyměnit výrobek podle záručních
podmínek v následujících případech:
1 Závada byla způsobena nebo zaviněna nevhodným, chybným
nebo nedbalým používáním nebo používáním způsobem, který je
v rozporu s doporučeními výrobce, nebo proudovými nárazy v
síti či poškozením při přepravě.
2 Spotřebič byl napájen jiným napětím, než jaké je uvedeno na
výrobku.
3 Došlo k pokusu o opravu jinými osobami než naším servisním
personálem (nebo autorizovaným prodejcem).
4 Spotřebič se pronajímal nebo používal k jiným účelům než v
domácnosti.
5 Spotřebič je z druhé ruky.
6 Společnost Morphy Richards ani místní prodejce neodpovídají za
žádné opravy prováděné v záruční lhůtě.
7 Záruka se nevztahuje na spotřební zboží jako sáčky, filtry a
skleněné karafy.
8 Baterie a poškození způsobené jejich vytečením není zárukou
pokryto.
9 Filtry nebyly čištěny a měněny podle pokynů.
Tato záruka nepropůjčuje žádná jiná než výše uvedená práva a
nevztahuje se na žádné reklamace týkající se následných ztrát
nebo škod. Tato záruka je nabízena jako další výhoda a nemá
vliv na vaše zákonná práva spotřebitele.
≥∂
FS48775MEE Rev2_9225 47507 MEE pump - Jon 22/08/2012 09:13 Page 76

77
ZDRAVIE A BEZPEČNOSŤ
Používanie akéhokoľvek elektrického spotrebiča si vyžaduje dodržiavanie nasledovných bezpečnostných opatrení.
Pred použitím tohto výrobku si dôkladne prečítajte tieto pokyny.
• Tento spotrebič môžu používať deti staršie ako 8 rokov a
osoby so zníženými fyzickými, zmyslovými alebo
psychickými schopnosťami alebo nedostatkom skúseností
a znalostí, iba ak sú pod dozorom inej osoby, alebo ak boli
inou osobou poučené o bezpečnom používaní spotrebiča a
ak rozumejú prípadným rizikám.
• Deti sa nesmú hrať so spotrebičom.
• Čistenie a používateľskú údržbu by nemali vykonávať deti
bez dohľadu a mladšie ako 8 rokov.
• Spotrebič a jeho kábel uskladnite mimo dosahu detí
mladších ako 8 rokov.
≥
≥
Umiestnenie
• Tento spotrebič je určený na použitie v domácnosti a podobnom
prostredí, ako sú napr.:
hospodárske budovy;
klientmi v hoteloch, moteloch,
ubytovacích zariadeniach, ktoré poskytujú raňajky a v ďalších
typoch ubytovacích zariadení.
Nie je vhodný na použitie v kuchyniach pre zamestnancov v
obchodoch, kanceláriách a iných pracovných prostrediach.
• Tento spotrebič nepoužívajte vonku ani v blízkosti vody.
• Spotrebič počas prevádzky neumiestňujte priamo pod kuchynskú
linku, pretože vytvára veľké množstvo pary. Nedávajte ruky nad
parný hrniec, keď je v prevádzke.
Sieťový kábel
• Sieťový kábel musí viesť od zásuvky k základni bez napínania.
• Nenechávajte kábel prevísať cez okraj stola alebo pultu a udržujte
ho mimo všetkých horúcich povrchov.
• Nenechávajte kábel prechádzať otvoreným priestorom, napr.
medzi zásuvkou pri zemi a stolom.
• Poškodený elektrický prívod musí v záujme bezpečnosti vymeniť
výrobca, jeho servisný zástupca alebo osoba s podobnou
kvalifikáciou.
∂
FS48775MEE Rev2_9225 47507 MEE pump - Jon 22/08/2012 09:13 Page 77

78
Osobná bezpečnosť
• Nedotýkajte sa horúcich povrchov. Pri snímaní pokrievok alebo
manipulácii s horúcimi nádobami používajte chňapku alebo
utierku, aby ste sa chránili pred unikajúcou horúcou parou.
• VAROVANIE: V záujme ochrany pred požiarom, zásahom
elektrickým prúdom a
zranením neponárajte elektrickú šnúru, zástrčku ani prístroj do
vody ani inej kvapaliny.
• VAROVANIE: Mimoriadne opatrne postupujte pri prenášaní
parného hrnca, v ktorom sú horúce suroviny, voda alebo iné
horúce kvapaliny.
• Elektrické spotrebiče sa nesmú ponárať.
• Spotrebič odpojte od sieťovej zásuvky vždy, keď ho prestanete
používať, pred vkladaním alebo vyberaním príslušenstva a pred
čistením.
• Spotrebič nepoužívajte, ak má poškodený sieťový prívod alebo
zástrčku, ak má poruchu, spadol na zem, alebo sa inak poškodil.
V prípade potreby preskúšania, opravy alebo nastavenia
elektrických či mechanických súčastí kontaktujte spoločnosť
Morphy Richards.
• Nelejte vodu nad značku maximálnej hladiny. Pri prekročení
maximálnej hladiny môže vriaca voda vystrekovať a obariť vás.
Ďalšie bezpečnostné pokyny
• Nepoužívajte príslušenstvo ani pomôcky, ktoré neodporučila
spoločnosť Morphy Richards, aby nedošlo k požiaru, zásahu
elektrickým prúdom alebo zraneniu.
• Pri otváraní pokrievky nakláňajte vždy tak, aby para unikala
smerom od vás.
• Žiadnu časť parného hrnca neumiestňujte do mikrovlnnej rúry ani
na žiadnu varnú/horúcu plochu.
• Spotrebič neumiestňujte do blízkosti alebo na horúcu plynovú či
elektrickú varnú dosku alebo do horúcej rúry.
• Prístroj nenechávajte vo vlhkom a korozívnom prostredí.
• Parný hrniec nezapínajte, ak neobsahuje aspoň 1 šálku vody; inak
by sa parný hrniec mohol poškodiť.
• Nikdy nedovoľte, aby voda klesla pod minimálnu hladinu.
Ošetrenie popálenín
• Postihnuté miesto okamžite dajte pod tečúcu studenú vodu.
Nezdržujte sa odstraňovaním odevu, okamžite vyhľadajte lekársku
pomoc.
Elektrické požiadavky
Skontrolujte, či napätie na typovom štítku
spotrebiča zodpovedá napätiu vo vašej domácej elektrickej sieti,
ktoré musí byť so striedavým prúdom.
Ak je potrebné vymeniť poistku v elektrickej zástrčke, je nutné
použiť 13 ampérovú poistku BS1362.
VAROVANIE: Tento spotrebič musí byť uzemnený.
ÚVOD
Ďakujeme Vám, že ste si zakúpili Intellisteam Compact.
Podrobne si prečítajte tento návod na používanie, aby ste mali
čo najväčší úžitok z vášho nového produktu.
Obsah
Zdravie a bezpečnosť 77
Úvod 78
Popis produktu 79
Popis ovládacieho panela 79
Pred prvým použitím 79
Používanie vášho Intellisteam Compact 79
Deliaca stena 80
Doby varenia v pare 80
Predvolené nastavenie dôb varenia 80
Pozastavenie varenia 80
Vybratie pokrmu z vášho Intellisteam Compact 80
Varenie ryže 80
Varenie vajec 80
Výstražný signál nízkej hladiny vody a automatické vypnutie 80
Napĺňanie nádoby na vodu počas používania 81
Rady a tipy 81
Skladovanie 81
Odstraňovanie vodného kameňa 81
Ošetrovanie a čistenie 81
Návod na varenie v pare 82
Zelenina 82
Balená zelenina 83
Ryby a morské plody 83
Hydina 84
Ryža 84
Recepty 85
Kontaktujte nás 90
Záruka 90
FS48775MEE Rev2_9225 47507 MEE pump - Jon 22/08/2012 09:13 Page 78

79
Komponenty
A
(1) Pokrievka
(2) Deliaca stena
(3) Nádoba
(4) Vývody odkvapkávacej podložky
(5) Odkvapkávacia podložka
(6) Vývod pary
(7) Nádoba na vodu
(8) Filter prítoku vody
(9) Vodoznak
(10) Hlavná jednotka
(11) Ovládací panel
(12) Ľavá priehradka (s deliacou stenou)
(13) Pravá priehradka (s deliacou stenou)
(28) Nádobka na ryžu
Popis ovládacieho panela
B
(14) Tlačidlo Zap./Vyp.
(15) Ikony pokrmu (ľavá priehradka)
(16) Časovač (ľavá priehradka)
(17) Ikona napĺňania
(18) Časovač (pravá priehradka)
(19) Ikony pokrmu (pravá priehradka)
(20) Tlačidlo Pridať
(21) Tlačidlo Ubrať
(22) Ikona odstraňovania vodného kameňa
(23) Tlačidlo ľavej priehradky
(24) Ikona pary (ľavá priehradka)
(25) Tlačidlo Štart/Prestávka
(26) Tlačidlo pary (pravá priehradka)
(27) Tlačidlo pravej priehradky
Pred prvým použitím
Intellisteam Compact treba pred prvým použitím alebo po dlhej
dobe nepoužívania vyčistiť. Bližšie informácie nájdete v časti
Ošetrovanie a čistenie.
Pre zachovanie optimálnej tvorby pary a predĺženia životnosti
jednotky je nevyhnutné, aby ste z hrnca Intellisteam Compact
pravidelne odstraňovali vodný kameň. Ďalšie informácie nájdete
v časti Odstraňovanie vodného kameňa.
Pri prvom použití Intellisteam Compact si môžete všimnúť
dym/výpary vychádzajúce zo zadnej časti hlavnej jednotky. Je
to normálne a ide jednoducho o mazivo, ktoré sa používa u
niektorých dielov spotrebiča počas výrobného procesu. Tieto
výpary po niekoľkých použitiach Intellisteam Compact zmiznú.
Nie je to nebezpečné a nedôjde ku kontaminácii ani zmene
chuti pokrmov uvarených v Intellisteam Compact.
Používanie vášho Intellisteam Compact
1
Nádobu na vodu (7) naplňte studenou vodou až po značku
maximálnej hladiny.
2
Odkvapkávaciu podložku (5) a nádobu (3) s deliacou stenou (2)
položte na hlavnú jednotku (10).
3
Suroviny vložte do priehradiek (12),(13). Aby sa suroviny
nezmiešali, použite deliacu stenu. Nasaďte pokrievku (1).
4
Zastrčte Intellisteam Compact do elektrickej zásuvky. Intellisteam
Compact zapípa a rozsvieti sa LCD obrazovka.
5
Čas varenia v pare nastavíte stlačením tlačidla ľavej (23) alebo
pravej (27) priehradky. Opakovaným stláčaním tlačidla prepnite
medzi predvolenými dobami varenia v pare a vyberte požadovanú
skupinu surovín (15) (19).
6
Dobu varenia upravte tlačidlami Pridať (20) alebo Ubrať (21) (v
prípade potreby). Stlačte príslušnú ikonu časovača (16), (18) začne
blikať (do 3 sekúnd) alebo stlačením príslušného tlačidla
priehradky nastavte čas. Zopakujte kroky 5-6 pre druhú
priehradku (v prípade potreby).
7
Stlačte tlačidlo Štart/Prestávka (25). Váš Intellisteam Compact
zažne pípať, ikona varenia v pare (24) zabliká* a časovač spustí
odpočítavanie.
8
Keď odpočítavanie časovača dosiahne nulu, zaznie zvukový
signál.
Váš Intellisteam Compact sa automaticky na 20 minút prepne do
režimu prihrievania.
9
Po dokončení stlačte tlačidlo Zap./Vyp. (14) a vytiahnite zástrčku
Intellisteam Compact zo sieťovej zásuvky.
Paru bezpečne vypustíte opatrným nadvihnutím pokrievky (1) tak,
aby bola naklonená smerom od vás. Varovanie: Para môže
spôsobiť popáleniny.
10
Uvarené suroviny opatrne vyberte z Intellisteam Compact.
Varovanie: Para môže spôsobiť popáleniny.
Poznámka: Ak ste pre jednotlivé priehradky nastavili rôzne
doby, začne blikať ikona varenia v pare, keď jednotlivá
priehradka spustí proces varenia v pare.
≥
FS48775MEE Rev2_9225 47507 MEE pump - Jon 22/08/2012 09:13 Page 79

80
Deliaca stena
Nádoba (3) sa používa dvomi rôznymi spôsobmi - ako dve
samostatné varné priehradky alebo jedna veľká priehradka.
Ak chcete váš Intellisteam Compact použiť ako jednu veľkú
priehradku, vytiahnite deliacu stenu (2) z nádoby a odložte ju
nabok.
Varenie v pare bez deliacej steny
Ak používate Intellisteam Compact bez deliacej steny (2), musíte
obe strany nastaviť na rovnaký čas, inak sa váš pokrm uvarí
nerovnomerne.
1. Vykonajte kroky 1-6 z časti ‘Používanie vášho Intellisteam
Compact’, pričom nezakladajte deliacu stenu na jej miesto.
3. Stlačte a podržte tlačidlo ľavej priehradky (23), kým sa nezobrazí
doba na oboch priehradkách.
4. V prípade potreby upravte dobu varenia vo vašom Intellisteam
Compact pomocou tlačidiel Pridať (20) alebo Ubrať (21).
6. Vykonajte kroky 7-10 z časti ‘Používanie vášho Intellisteam
Compact.’
Doby varenia v pare
Váš Intellisteam Compact je navrhnutý tak, aby ukončil varenie v
pare v oboch priehradkách naraz. Keď sa spustí proces varenia
v pare, časovač začne automaticky odpočítavať od najdlhšej
doby varenia, takže varenie všetkých surovín vo vašom
Intellisteam Compact sa skončí naraz.
Predvolené nastavenie dôb varenia
Váš Intellisteam Compact disponuje siedmymi predvolene
nastavenými dobami varenia. Môžete ich upraviť pomocou
tlačidiel Pridať (20) a Ubrať (21).
Ak chcete prepínať medzi prednastavenými dobami varenia a
zvoliť požadovanú dobu varenia, opakovane stláčajte príslušné
tlačidlo ľavej alebo pravej priehradky.
Doby varenia prednastavte nasledovne:
Vajce - 12 minút
Ryba - 15 minút
Zelenina - 20 minút
Mäso - 30 minút
Ryža - 40 minút
Hydina - 35 minút
Prihrievanie - 10 minút
Toto nastavenie nepoužívajte na varenie pokrmov.
Pozastavenie varenia
Ak chcete prerušiť proces varenia na Intellisteam Compact, stlačte
tlačidlo Štart/Prestávka (25). Ak chcete znovu spustiť proces
varenia v pare, opäť stlačte tlačidlo Štart/Prestávka.
Keď je prerušený proces varenia na Intellisteam Compact, môžete
upraviť doby varenia podľa podrobného popisu v krokoch 5-7 v
časti ‘Používanie vášho Intellisteam Compact’.
Vybratie pokrmu z vášho
Intellisteam Compact
VAROVANIE: Pri otváraní pokrievky (1) a vyberaní nádoby (3)
používajte chňapky. Pokrievku otvárajte tak, aby unikajúca
para smerovala od vás. Odkvapkávaciu podložku (5)
nevyberajte, kým úplne nevychladne.
Varenie ryže
1 Intellisteam Compact nastavte podľa popisu v časti ‘Používanie
vášho Intellisteam Compact’.
2 Do nádobky na ryžu (28) nasypte 1 šálku neuvarenej ryže a nalejte
1½ šálky vody a dobre zamiešajte.
3 Nádobku na ryžu vložte do priehradky a nasaďte na Intellisteam
Compact pokrievku (1).
4 Nastavte dobu varenia pre priehradku na predvolené nastavenie
‘Ryža’ (40 minút) a stlačte tlačidlo Štart/Prestávka (25).
Varenie vajec
Intellisteam Compact môžete používať na uvarenie vajec natvrdo.
1 Vykonajte kroky 1-2 z časti ‘Používanie vášho Intellisteam
Compact.’
2 Vajcia vložte oddelene do jamiek v nádobe (3) podľa hore
zobrazeného obrázku.
3 Nasaďte pokrievku (1).
4 Nastavte dobu varenia a paru podľa popisu v krokoch 4-10 časti
‘Používanie vášho Intellisteam Compact’. Parný hrniec má
predvolené nastavenie ‘Vajcia’ na 12 minút. Môžete ho upraviť
manuálne podľa vašich osobných preferencií tlačidlami Pridať (20)
a Ubrať (21).
Výstražný signál nízkej hladiny vody a
automatické vypnutie
Keď hladina vody klesne pod značku “MIN” na vodoznaku (9),
zapne sa bzučiak a začne nepretržite blikať ikona napĺňania (17). V
takomto prípade by ste mali čo najskôr naplniť
nádobu na vodu (7). Na napĺňanie nádoby na vodu použite filter
prítoku vody (8) podľa popisu na strane 10.
Ak pri používaní Intellisteam Compact vyvrie všetka voda, spustí
sa nepretržité pípanie a spotrebič sa automaticky vypne, pričom
sa ukončí proces varenia.
FS48775MEE Rev2_9225 47507 MEE pump - Jon 22/08/2012 09:13 Page 80

81
Napĺňanie nádoby na vodu počas používania
Na napĺňanie nádoby na vodu (7) počas používania použite filter
prítoku vody (8).
Jemne vytiahnite filter prítoku vody z bočnej časti Intellisteam
Compact. Pomocou hrnčeka opatrne dolejte vodu cez filter
prítoku vody.
Bzučiak sa vypne automaticky a ikona dopĺňania (17) zmizne.
Rady a tipy
• Doby varenia v pare uvedené v Návode na varenie v pare (str.10)
sú iba orientačné. Doby sa líšia v závislosti od hrúbky potravín, ich
rozloženia vnútri priehradiek, čerstvosti potravín a osobných
preferencií. Keď sa oboznámite s Intellisteam Compact,
prispôsobte si doby varenia podľa vašich preferencií.
• Jedna samostatná vrstva sa v pare uvarí rýchlejšie ako viacero
vrstiev. Preto bude trvať varenie väčšieho množstva potravín
dlhšie. Najlepšie výsledky dosiahnete, keď suroviny nakrájate na
menšie/tenšie kúsky a rovnomerne ich rozložíte v priehradke.
• Keď varíte veľké množstvá surovín, odoberte pokrievku (1) do
polovice a opatrne premiešajte suroviny pomocou dlhej varešky,
aby boli rovnomerne uvarené.
Varovanie: Do nádoby nedávajte ruku.
• Nádobu zbytočne neprepĺňajte surovinami. Kúsky surovín uložte s
dostatočnými medzerami, aby medzi nimi mohla voľne prúdiť
para.
• Do nádoby (3) alebo nádoby na vodu (7) nepridávajte soľ ani
prísady. Tieto minerály spôsobia tvorbu vodného kameňa a
poškodenie ohrevného článku.
• Tekutina, ktorá zostane v odkvapkávacej podložke (5) po varení, je
ideálna na prípravu rôznych omáčok.
• V pare nikdy nevarte mäso, hydinu ani morské plody priamo z
mrazničky. Vždy ich nechajte najprv dôkladne rozmraziť.
Skladovanie
Pre jednoduché skladovanie je váš Intellisteam Compact
navrhnutý tak, aby sa hlavná jednotka (10) zmestila do nádoby (3).
Keď Intellisteam Compact nepoužívate, môžete ho skladovať ako
je zobrazené na obrázku.
Odstraňovanie vodného kameňa
Pre zachovanie optimálnej tvorby pary a predĺženia životnosti
jednotky je nevyhnutné, aby ste zo spotrebiča pravidelne
odstraňovali vodný kameň.
Po každých 15 hodinách používania pary sa rozsvieti ikona
odstraňovania vodného kameňa (22), aby ste nezabudli odstrániť
vodný kameň zo spotrebiča.
1 Nádobu na vodu (7) naplňte octom po značku MAX (nie
balzamikovým octom).
DÔLEŽITÉ: Nepoužívajte žiadny iný chemický ani voľne
predajný prostriedok na odstraňovanie vodného kameňa.
2 Položte odkvapkávaciu podložku (5), nádobu (3) a pokrievku (1) na
nádobu na vodu a zapojte hrniec Intellisteam Compact do
elektrickej siete.
3 Časovač nastavte na 25 minút pre obe priehradky a stlačte
tlačidlo Štart.
VAROVANIE: Ak začne ocot vrieť a vytekať cez okraj hlavnej
jednotky, vypnite časovač a odpojte spotrebič z elektrickej
siete. Mierne znížte množstvo octu.
Intellisteam Compact sa nepokúšajte premiestňovať, kým je
ocot horúci.
4 Po skončení varenia v pare odpojte spotrebič zo sieťovej zásuvky
a nechajte ho pred vyliatím octového roztoku úplne vychladnúť.
5 Nádobu na vodu niekoľkokrát vypláchnite studenou vodou.
VAROVANIE:
Intellisteam Compact sa nepokúšajte premiestňovať, kým je
ocot horúci.
6 Nádobu na vodu naplňte studenou vodou po značku MAX.
Položte odkvapkávaciu podložku, nádobu a pokrievku na nádobu
na vodu a zapojte hrniec Intellisteam Compact do elektrickej siete.
7 Spustite hrniec Intellisteam Compact pri ľubovoľnom nastavení na
10 minút. Skôr ako vylejete zvyšnú vodu, hrniec vypnite a nechajte
ho úplne vychladnúť.
Ošetrovanie a čistenie
VAROVANIE: Hlavnú jednotku (10), sieťový kábel ani sieťovú
zástrčku nikdy neponárajte do vody.
1 Spotrebič odpojte zo sieťovej zásuvky a nechajte ho pred
vyčistením úplne vychladnúť.
2 Žiadnu časť jednotky nesmiete čistiť abrazívnymi čistiacimi
prostriedkami, napr. prostriedkami na drhnutie, oceľovou vlnou na
riad alebo bielidlom.
3 Plastové časti nečistite drsnou stranou špongie alebo drôtenky.
4 Hlavnú jednotku neponárajte do vody. Nádobu na vodu (7) naplňte
teplou mydlovou vodou a utrite handričkou. Nádobu vyprázdnite a
dôkladne vypláchnite a potom utrite vlhkou handričkou.
5 Pokrievku (1), nádobku na ryžu (28), nádobu (3) a deliacu stenu (2)
umyte teplou vodou a tekutým umývacím prostriedkom.
• Nádobku na ryžu, nádobu a deliacu stenu môžete umývať iba na
hornej polici umývačky pri strednom alebo ekologickom cykle.
Dôkladne vysušte.
• Pokrievka nie je vhodná do umývačky.
6 Intellisteam Compact po každom použití vyčistite.
≥
FS48775MEE Rev2_9225 47507 MEE pump - Jon 22/08/2012 09:13 Page 81

82
Návod na varenie v pare
Doby varenia v pare a veľkosti porcií uvedené nižšie sú iba orientačné a slúžia iba ako odporúčanie. Môžu sa líšiť v závislosti od veľkosti
surovín, rozmiestnenia surovín v nádobe (3), čerstvosti surovín a osobných preferencií. Keď sa oboznámite s parným hrncom, upravte
doby varenia podľa potreby.
Doby varenia v pare sú určené pre množstvá uvedené v návode na varenie v pare. Pri väčších alebo menších množstvách ich upravte.
Zelenina
Odrežte hrubé stonky brokolice, karfiolu a hlávkovej kapusty.
Listovú zelenú zeleninu varte v pare čo najkratšie, pretože môže rýchlo stratiť farbu.
Najlepší výsledok dosiahnete, keď zeleninu po varení v pare osolíte a okoreníte.
Mrazenú zeleninu pred varením v pare nerozmrazujte.
Pokrm Hmotnosť Doba varenia Tip
• Špargľa • 1 porcia 60 g
• 4 porcie 240 g
• 15 min • Prekrížte stopky špargle,
aby mohla vychádzať
para nahor
• Brokolica • 1 porcia 60 g • 4 porcie 240 g • 15-18 min
• Bôb • 1 porcia 50 g
• 4 porcie 200 g
• 10-15 min • Uprostred varenia
premiešajte
• Mrkva
(nakrájaná na plátky)
• 1 porcia 100 g
• 4 porcie 400 g
• 15-20 min • Uprostred varenia
premiešajte
• Karfiol • 1 porcia 100 g
• 4 porcie 400 g
• 18 min • Uprostred varenia
premiešajte
• Cukrový hrach • 1 porcia 50 g
• 4 porcie 200 g
• 10-12 min • Uprostred varenia
premiešajte
• Hrášok (čerstvý) • 1 porcia 60 g
• 4 porcie 240 g
• 8 min
• 8-12 min
• Uprostred varenia
premiešajte
• Špenát • 1 porcia 60 g
• 4 porcie 240 g
• 4-5 min
• 5-8 min
• Uprostred varenia
premiešajte
• Zemiaky • 1 porcia 180 g
• 4 porcie 720 g
• 25 min
FS48775MEE Rev2_9225 47507 MEE pump - Jon 22/08/2012 09:13 Page 82

83
Balená zelenina
Mnohé supermarkety pre väčšie pohodlie a jednoduché použitie predávajú vopred pripravenú/balenú zeleninu. Táto je ideálna pri príprave
jedál, keďže už bola značná časť práce vopred urobená za vás.
Na väčšine balení sú uvedené pokyny pre varenie zeleniny v pare, tieto časy sú však určené pre varenie na varnom paneli alebo v
mikrovlnnej rúre a môže byť potrebné ich upraviť v závislosti od hmotnosti a osobných preferencií.
Dole uvedené časy použite iba ako približné odporúčania.
Pokrm Hmotnosť Doba varenia
• Mrkva/výhonky brokolice • 480 g • 20 min
• Zemiaky • 500 g • 40 min
• Zmes mladej zeleniny • 350 g • 15 min
• Mini mrkvičky • 400 g • 20 min
• Mladá kukurica • 170 g • 20 min
• Čerstvý hrášok • 170 g • 8 min
Pokrm Hmotnosť / Číslo Doba varenia
• Krevety • 100 g
• 400 g
• 5-7 min
• 7-10
• Lososové filety • 1 fileta 140 g
• 4 filety 560 g
• 15 min
• Mušle • 200 g
• 800 g
• 5 min
• 5-8 min
Ryby a morské plody
Ryba je hotová, keď sa dá jednoducho oddeliť vidličkou.
Zamrazenú rybu môžete variť v pare bez rozmrazenia, musíte ju však variť oddelene a musíte predĺžiť dobu varenia.
Vylepšite chuť pridaním kúskov citróna a byliniek počas varenia v pare
≥
FS48775MEE Rev2_9225 47507 MEE pump - Jon 22/08/2012 09:13 Page 83

84
Hydina
Varenie v pare má výhodu zdravej prípravy pokrmov. Kvôli malému množstvu tepla však používajte iba jemné, tenké kúsky mäsa bez tuku.
Hydinu uvarenú v pare podávajte s bylinkami, ochutenými omáčkami alebo namarinádujte mäso niekoľko hodín pred varením v pare pre
lepšiu chuť.
Pred podávaním všetky pokrmy dôkladne uvarte. Prepichnutím mäsa nožom alebo ihlicou skontrolujte, či je vnútro uvarené a či vyteká
šťava.
Pokrm Hmotnosť / Číslo Doba varenia Tip
• Filety z kuracích pŕs • 1 fileta 200 g
• 4 filety 800 g
• 12-15 min • Pred varením odstráňte
všetok tuk
Pokrm Hmotnosť Voda Doba varenia
• Ryža • 1 porcia 75 g
• 4 porcie 300 g
• 110 ml
• 450 ml
• 30 min
• 40 min
Ryža
Použite misku na ryžu a spolu s ryžou pridajte požadované množstvo vody
FS48775MEE Rev2_9225 47507 MEE pump - Jon 22/08/2012 09:13 Page 84

85
Recepty
Recepty uvedené v tejto knihe boli navrhnuté a vyskúšané spoločnosťou Morphy Richards špeciálne pre použitie vo vašom Intellisteam
Compact. Doby varenia pre nasledovné recepty sú orientačné a budú ovplyvnené veľkosťou a čerstvosťou používaných prísad.
Pred podávaním vždy skontrolujte, či je pokrm úplne uvarený.
Recepty sú navrhnuté pre maximálne 4 ľudí. Ak znížite veľkosti porcií, náležite upravte doby varenia.
≥
FS48775MEE Rev2_9225 47507 MEE pump - Jon 22/08/2012 09:13 Page 85

86
Sladké červené papriky plnené pórom a syrom
feta s mladou cibuľkou a kuskusom s
píniovými orieškami
Prísady:
• 4 sladké (dlhé) červené papriky, bez vrškov
• 1 malý pór, najemno nakrájaný
• 1 PL čerstvej nasekanej petržlenovej vňate
• 2 PL olivového oleja
• 25 g najemno nastrúhaného parmezánu
• 25 g čerstvej strúhanky
• 100 g najemno nadrobeného syru feta
• Soľ a čerstvo pomleté čierne korenie
Kuskus:
• 200 g kuskusu
• 2 ČL sušeného zeleninového vývaru
• 4 mladé cibuľky, najemno nakrájané
• 25 g píniových orieškov
Obloha:
• Petržlenová vňať
Príprava:
1 Nakrojte papriky po dĺžke tak, aby sa úplne nerozpolili. Vyberte z
nich jadrá so zrnkami. Zmiešajte pór, petržlenovú vňať a olivový
olej, potom pridajte parmezán a strúhanku. Do zmesi vmiešajte
syr feta a dochuťte malým množstvom soli a väčším množstvom
čierneho korenia. Naplňte papriky zmesou.
2 Papriky vložte do jednej priehradky.
3 Nádobku na ryžu vložte do druhej priehradky.
4 Do nádobky na ryžu pridajte kuskus a 265 ml studenej vody.
Vmiešajte sušený vývar, mladú cibuľku a píniové oriešky.
5 Čas varenia kuskusu nastavte na 25 minút. Nastavte čas varenia
papriky s využitím predvoleného nastavenia pre zeleninu (20
minút).
6 Stlačte tlačidlo varenia v pare.
7 Po uvarení nechajte postáť 5 minút.
8 Kuskus pred podávaním premiešajte a prevzdušnite vidličkou.
Suflé z kozieho syra
Prísady:
• 125 g kozieho syra, nadrobeného
• 4 stredne veľké vajcia, oddelené
• 2 PL najemno nasekaného petržlenu s plochými listami
• 1 PL najemno narezaného čerstvého
estragónu
• Soľ a čierne korenie
• 240 g špenátu
• Maslo na vymastenie
Podávanie:
• Šalát s mladými listami
Príprava:
1 Potrite 4 x 150 ml formy.
2 Polovicu kozieho syra vložte do veľkej misky a pomliaždite ho
vidličkou.
3 Vmiešajte vaječné žĺtky, bylinky a prísady.
4 Vaječné bielky vyšľahajte v samostatnej čistej miske, až kým sa pri
vyberaní šľahača nevytvoria jemné kopčeky.
5 Do syrovej zmesi pridajte 2 PL vaječných bielok a následne
premiešajte, aby zmes zmäkla.
6 Zmes naberte lyžicou do foriem a zakryte zostávajúcim syrom.
Prikryte fóliou a 2 formy umiestnite po stranách parného hrnca.
7 Varte v pare 20 minút, kým budú vršky vyzerať pevné ale okraje sa
budú ešte triasť.
8 Podávajte okamžite so šalátom.
FS48775MEE Rev2_9225 47507 MEE pump - Jon 22/08/2012 09:13 Page 86

87
Kura Tikka Masala s pikantnou
kardamómovou ryžou
Prísady:
• 4 PL nízkotučného bieleho jogurtu
• 2 PL pasty karí tikka masala
• 2 PL čerstvého nasekaného koriandra
• 4 kuracie prsia bez kože a kosti, nakrájané na kocky
• Soľ a čerstvo pomleté čierne korenie
Ryža:
• 300 g ryže basmati
• 450ml studenej vody
• 2 ČL sušeného zeleninového vývaru
• 2 prúžky citrónovej kôry
• 6 zelených kardamómových strukov, mierne pomliaždených
Obloha:
• Mesiačiky limetky a vňať koriandra
Príprava:
1 Do veľkej nekovovej misy vložte jogurt, karí pastu a koriander a
premiešajte ich. Pridajte kurča a premiešajte, aby sa mäso pokrylo
zmesou. Dochuťte trochou soli a korenia, zakryte a nechajte
postáť v chladničke aspoň 30 minút.
2 Nádobku s ryžou vložte do nádoby. Pridajte ryžu a studenú vodu.
Vmiešajte sušený vývar. Navrch položte prúžky citrónovej kôry a
posypte kardamómovými strukmi.
3 Do ďalšej priehradky vložte kura aj s marinádou a zmes
rovnomerne rozložte.
4 Nastavte dobu varenia ryže s využitím predvoleného nastavenia
pre ryžu (40 min). Nastavte dobu varenia kurčaťa s využitím
predvoleného nastavenia pre mäso (30 min).
5 Stlačte tlačidlo varenia v pare.
6 Podávajte ozdobené mesiačikmi limetky a koriandrovou vňaťou.
Poznámka: Koreniny použité v tomto recepte môžu zafarbiť
plastové diely vášho Intellisteam Compact. Aby ste tomu predišli,
varte kura zabelené v alobale a predĺžte dobu varenia o 10 minút.
Pred podávaním vždy skontrolujte, či je mäso úplne uvarené.
Kura s marinádou z javorového sirupu s ryžou
Prísady:
• 4 kuracie prsia bez kože a kosti
• Najemno nastrúhaná kôra a šťava z 1 malého pomaranča
• 2 PL javorového sirupu
• ¼ ČL sušených čili vločiek
• Soľ a čerstvo pomleté čierne korenie
Ryža:
• 250 g bielej divej ryže
• 1 ČL sušeného zeleninového vývaru
• 250 ml vody
Príprava:
1 Vložte kuracie prsia do nekovovej misy a pridajte
pomarančovú kôru, pomarančovú šťavu, javorový sirup a čili
vločky. Ochuťte malým množstvom soli a väčším množstvom
čierneho korenia. Zakryte a nechajte postáť v chladničke aspoň
30 minút.
2 Kuracie prsia vložte do jednej priehradky.
3 Do nádobky na ryžu nasypte ryžu a sušený zeleninový vývar.
Nádobku na ryžu vložte do druhej priehradky a k ryži prilejte
250 ml studenej vody a riadne premiešajte.
4 Nastavte dobu varenia kurčaťa s využitím predvoleného
nastavenia pre mäso (30 minút).
Nastavte dobu varenia ryže s využitím predvoleného nastavenia
pre ryžu (40 minút).
5 Stlačte tlačidlo varenia v pare.
≥
FS48775MEE Rev2_9225 47507 MEE pump - Jon 22/08/2012 09:13 Page 87

88
Halibut varený na pare s citrónovo
-tymianovým dressingom.
Prísady:
• 4 x 125 g filety z halibuta, bez kože (alebo tichomorská treska)
• 15 g masla
• 4 malé vetvičky tymianu
• Soľ a čerstvo pomleté čierne korenie
Zelenina:
• 750 g malých nových zemiakov
• 2 póry, nakrájané na prúžky
• 1 veľká mrkva, nakrájaná na prúžky
• 150 g zelenej fazuľky, struky zbavené koncov
Dressing:
• 50 g roztopeného masla
• Najemno nastrúhaná kôra a šťava z 1 citróna
• 1 PL čerstvých lístkov tymianu
Príprava:
1 Všetku zeleninu zmiešajte a vložte do jedného priečinka.
2 Rybie filety uložte na zeleninu.
3 Navrch každej filety položte malý kúsok masla a vetvičku tymianu.
Ochuťte trochou soli a korenia.
4 Do druhého priečinka vložte zemiaky.
5 Nastavte dobu varenia ryby a zeleniny s využitím predvoleného
nastavenia pre ryby plus 5 minút (20 min). Nastavte dobu varenia
zemiakov s využitím predvoleného nastavenia pre zeleninu (30
min).
6 Stlačte tlačidlo varenia v pare
7 Pred podávaním rybu polejte dressingom. Dressing pripravíte
zmiešaním masla, citrónovej kôry, citrónovej šťavy a lístkov
tymianu.
Losos so sezamom a dusenou zeleninou
podávaný s kokosovým mliekom a rezancami
v sladkej čili omáčke
Prísady:
• 4 x 125 g lososových filiet
• 4 ČL tmavého sezamového oleja
• 1 ČL sezamových semiačok
• 300 g stredne uvarených rezancov
Zelenina:
• 150 g strukov cukrového hrášku
• 6 mladých cibuliek, nakrájaných na prúžky
• 1 mrkva, nakrájaná na jemné prúžky
Omáčka:
• 300 ml kokosového mlieka
• 2 PL sladkej čili omáčky
• 1 ČL čerstvého strúhaného ďumbieru
• 1 PL čerstvého nasekaného koriandra
Príprava:
1 Všetku zeleninu zmiešajte a vložte do jedného priečinka.
2 Lososové filety potrite sezamovým olejom a posypte sezamovými
semiačkami. Uložte ich na zeleninu v priehradke.
3 Rezance vložte do nádobky na ryžu a umiestnite do druhej
priehradky.
4 Zmiešajte suroviny omáčky a omáčkou polejte rezance. Dobre
premiešajte.
5 Nastavte dobu varenia lososa a zeleniny s využitím predvoleného
nastavenia pre ryby plus 5 minút (20 min).
6 Dobu varenia rezancov nastavte na 20 minút.
7 Stlačte tlačidlo varenia v pare.
8 Rezance 5 minút pred koncom varenia premiešajte, aby boli
pekne oddelené.
FS48775MEE Rev2_9225 47507 MEE pump - Jon 22/08/2012 09:13 Page 88

89
Pikantné krevety s kuskusom s hráškom
a mätou
Prísady:
• 400 g surových kreviet
• ½ ČL mletých červených čili papričiek
• ½ ČL papriky
• ½ ČL soli
• ¼ ČL cesnakového prášku
Kuskus:
• 200 g kuskusu
• 270 ml studenej vody
• 75 g mrazeného hrášku
• 1 PL nasekanej čerstvej mäty
Príprava:
1 Zmiešajte mleté čili papričky, mletú papriku, soľ a cesnakový
prášok a dôkladne obaľte krevety touto zmesou.
2 Krevety vložte do jednej priehradky.
3 Kuskus, vodu, hrášok a mätu vložte do nádobky na ryžu a tú
vložte do druhej priehradky.
4 Nastavte dobu varenia pre krevety na 10 minút a pre kuskus na 25
minút.
5 Stlačte tlačidlo varenia v pare.
6 Kuskus pred podávaním premiešajte a prevzdušnite vidličkou.
Ďumbierovo-banánový piškótový múčnik s
karamelovou polevou
Prísady:
• 75 g masla plus maslo navyše na vymastenie
• 75 g svetlohnedého trstinového cukru
• 2 stredne veľké vajcia, rozšľahané
• 1/2 ČL vanilkového extraktu
• 75 g múky s kypriacim práškom
• 1/2 ČL mletého ďumbieru
• Štipka soli
• 1 veľký zrelý banán, rozmliaždený
• 2 kúsky zaváraného koreňa ďumbieru v sirupe a 4 PL sirupu zo
zaváraninového pohára.
Omáčka:
• 3 PL melasového sirupu
• 25g masla
• 25g svetlohnedého trstinového cukru
Podávanie:
• Vanilková zmrzlina alebo puding
Príprava:
1 Vo veľkej mise na miešanie šľahajte maslo s cukrom, kým
nevznikne ľahká, nadýchaná hmota. Pomaly vmiešajte vajcia,
potom vmiešajte vanilku. Vsypte múku, mletý ďumbier a soľ a
jemne vmiešajte veľkou lyžicou. Vmiešajte roztlačený banán.
2 Maslom potrite vnútro múčnikových foriem s objemom 4 x 150 ml.
Pokrájajte konzervovaný ďumbier a uložte ho na dná foriem. Do
každej pudingovej formy pridajte 1 PL sirupu a nalejte vymiešanú
zmes na sirup pred zarovnaním. Pevne zakryte maslom potretou
hliníkovou fóliou.
3 Múčniky vložte do jednej priehradky.
4 Suroviny omáčky vložte do nádobky na ryžu, prikryte ich
potravinovou fóliou a následne vložte do druhej priehradky.
5 Nastavte dobu varenia múčnika s využitím predvoleného
nastavenia pre ryžu (40 min). Dobu varenia omáčky nastavte na 20
minút.
6 Po uvarení prejdite nožom po obvode foriem, aby sa dal
múčnik ľahšie vybrať. Polevu dôkladne premiešajte a polejte ňou
obe porcie múčnika. Podávajte s vanilkovou zmrzlinou alebo
pudingom.
≥
FS48775MEE Rev2_9225 47507 MEE pump - Jon 22/08/2012 09:13 Page 89

90
Kontaktujte nás
Linka pomoci
Ak máte problém so svojim spotrebičom, obráťte sa na našu
telefonickú linku pomoci, keďže vám budeme skôr vedieť
poradiť ako maloobchodný predajca, u ktorého ste spotrebič
zakúpili.
Pred telefonátom majte pripravený názov výrobku, číslo modelu
a sériové číslo, aby sme vám mohli pomôcť rýchlejšie.
Komunikujte s nami
Ak máte akékoľvek otázky alebo pripomienky, alebo ak sa
chcete dozvedieť skvelé tipy alebo recepty, aby ste svoj
spotrebič mohli využiť na maximum, pridajte sa k našej online
komunite:
Blog: www.morphyrichards.co.uk/blog
Facebook: www.facebook.com/morphyrichardsuk
Twitter: www.twitter.com/loveyourmorphy
Webová stránka: www.morphyrichards.com
DVOULETÁ ZÁRUKA
Na tento spotřebič se vztahuje dvouletá záruka opravy nebo
výměny.
Musíte si uschovat stvrzenku od prodejce jako doklad o
nákupu. Stvrzenku připevněte sešívačkou na zadní obal pro
budoucí referenční účely.
Pokud se výrobek porouchá, poznamenejte si následující
informace. Tato čísla najdete na základně výrobku.
Č. modelu
Sériové číslo
Všechny výrobky Morphy Richards procházejí před opuštěním
továrny individuální kontrolou. V nepravděpodobném případě,
že se prokáže závada, se musí výrobek do 28 dnů od data
koupě vrátit do místa, kde byl zakoupen, aby se mohl vyměnit.
Pokud dojde k závadě po 28 dnech a do 24 měsíců od data
původní koupě, musíte kontaktovat místního prodejce a uvést
číslo modelu a sériové číslo výrobku nebo napsat místnímu
prodejci na uvedené adresy.
Budete požádáni, abyste vrátili výrobek (v náležitém,
bezpečném balení) společně s kopií dokladu o nákupu na níže
uvedenou adresu.
S výjimkou níže uvedených případů (1-9) bude vadný výrobek
obvykle během sedmi pracovních dnů od data přijetí opraven
nebo vyměněn a odeslán zpět.
Pokud bude výrobek z jakéhokoliv důvodu během dvouleté
záruční lhůty vyměněn, záruka na nový výrobek se bude počítat
od data původní koupě. Proto je velmi důležité, abyste
uschovali původní stvrzenku nebo fakturu s vyznačeným datem
původní koupě.
Platnost dvouleté záruky na spotřebič je podmíněna používáním
podle pokynů výrobce. Například spotřebiče se musí zbavovat
vodního kamene a filtry se musí udržovat v čistém stavu podle
pokynů.
Společnost Morphy Richards nebo místní prodejce nebudou
povinni opravit nebo vyměnit výrobek podle záručních
podmínek v následujících případech:
1 Závada byla způsobena nebo zaviněna nevhodným, chybným
nebo nedbalým používáním nebo používáním způsobem, který je
v rozporu s doporučeními výrobce, nebo proudovými nárazy v
síti či poškozením při přepravě.
2 Spotřebič byl napájen jiným napětím, než jaké je uvedeno na
výrobku.
3 Došlo k pokusu o opravu jinými osobami než naším servisním
personálem (nebo autorizovaným prodejcem).
4 Spotřebič se pronajímal nebo používal k jiným účelům než v
domácnosti.
5 Spotřebič je z druhé ruky.
6 Společnost Morphy Richards ani místní prodejce neodpovídají za
žádné opravy prováděné v záruční lhůtě.
7 Záruka se nevztahuje na spotřební zboží jako sáčky, filtry a
skleněné karafy.
8 Baterie a poškození způsobené jejich vytečením není zárukou
pokryto.
9 Filtry nebyly čištěny a měněny podle pokynů.
Tato záruka nepropůjčuje žádná jiná než výše uvedená práva a
nevztahuje se na žádné reklamace týkající se následných ztrát
nebo škod. Tato záruka je nabízena jako další výhoda a nemá
vliv na vaše zákonná práva spotřebitele.
∂ ≥
FS48775MEE Rev2_9225 47507 MEE pump - Jon 22/08/2012 09:13 Page 90

91
g
f
d
}
∂
g Morphy Richards products are intended for household use only.
See usage limitations within the location sub-heading in the important safety instructions.
Morphy Richards has a policy of continuous improvement in product quality and design.
The Company, therefore, reserves the right to change the specification of its models at any time.
The After Sales Division,
Morphy Richards Ltd, Mexborough, South Yorkshire, England, S64 8AJ
Helpline (office hours) UK 0845 871 0960 Republic of Ireland 1800 409119
o Head Office
Asko Appliances (Australia) Pty Ltd.
35 Sunmore Close
Moorabbin
Victoria 3189
T: 1300 002 756
f Les produits Morphy Richards sont conçus pour unusage exclusivement domestique. Voir les limitations
d’usage dans le sous-titre Positionnement des Consignes de sécurité importantes. Morphy Richards
s’engage à mener une politique d’amélioration continue en termes de qualité et de conception. Le fabricant
se réserve donc le droit de modifier sans préavis la spécification de ses modèles.
Glen Dimplex France
Z.l de l'Eglantier
20, rue des Cerisiers
91028 Evry cedex 2851
T: + 33 (0)1 69 11 11 91 F: + 33 (0)1 60 86 15 24
d Morphy Richards Produkte sind nur für den Einsatz im Haushalt vorgesehen. Lesen Sie dazu die
Einschränkungen bezüglich der Nutzung, die in der Zweitüberschrift der wichtigen Sicherheitshinweise
erläutert werden. Ständige Verbesserungen an der Produktqualität und dem Design gehören zur Philosophie
von Morphy Richards. Aus diesem Grunde behält sich die Firma das Recht vor, die Angaben zu ihren
Modellen jederzeit zu ändern.
Glen Dimplex Deutschland GmbH
Service-Hotline: +49(0) 1805/398 346
(0,14 / Min. aus dem deutschen Festnetz;
max. 0,42 /Min. aus dem Mobilfunk)
Service-Fax: +49(0) 1805/355 467
email: service@glendimplex.de
Österreich
Kundendienst
Merangasse 17
A-8010 Graz
Telefon : +43(0) 316/323-041 Telefax: +43(0)316/382-963
} Produkty Morphy Richards są przeznaczone wyłącznie do użytku domowego. Zapoznaj się z informacjami
na temat ograniczonego uźytkowania urzàdzenia, które znajdujà się w podrozdziale instrukcji dotyczàcych
bezpieczeňstwa. Morphy Richards prowadzi politykę ciągłej poprawy jakości i wzoru produktów. Firma
zastrzega sobie prawo zmiany specyfikacji modeli w dowolnej chwili.
Proteas Sp. Z o.o.
Ul Sarmacka 9/45
02-972 Warsaw
Poland
T: 0048 666 555603
∂≥ Výrobky Morphy Richards jsou určeny pouze k použití v domácnostech. Podívejte se na omezení použití v
podtitulku umístění v důležitých bezpečnostních pokynech.
Morphy Richards usiluje o neustálé zdokonalování kvality a provedení.
Proto si vyhrazuje právo kdykoliv změnit specifikace svých modelů.
Tauer Elektro a.s.
Milady Horákové 4
568 02 Svitavy
T: +420 461 540 130 F: +420 461 540 133
g For electrical products sold within the European Community.
At the end of the electrical products useful life it should not be disposed of with
household waste.
Please recycle where facilities exist.
Check with your Local Authority or retailer for recycling advice in your country.
f Pour les appareils électriques vendus dans la Communauté européenne.
Lorsque les appareils électriques arrivent à la fin de leur vie utile, il ne faut pas les jeter
à la poubelle.
Il faut les recycler dans des centres spécialisés, s’ils existent.
Consultez la municipalité ou le magasin où vous avez acheté l’appareil pour obtenir des
conseils sur le recyclage dans votre pays.
d Für elektrische Artikel, die in der europäischen Gemeinschaft verkauft werden.
Am Ende der Nutzungsdauer sollte das Gerät nicht im regulären Hausmüll entsorgt
werden.
Bitte einer Recycling-Sammelstelle zuführen.
Informationen über geeignete Recycling-Annahmestellen erhalten Sie bei Ihrer Stadtbzw. Ortsverwaltung.
} Dla produktów elektrycznych sprzedawanych na terenie Wspólnoty Europejskiej.
Po zakończeniu okresu uźywalności produktów elektrycznych, nie naleźy ich wyrzucać
wraz z odpadkami pochodzącymi z gospodarstwa domowego.
Jeźeli istnieją odpowiednie zakłady zajmujące się utylizacją, produkty naleźy poddać
recyklingowi.
W celu uzyskania porady na temat recyklingu w Twoim kraju zwróć się do miejscowych
władz lub lokalnego sprzedawcy.
∂≥ Pro elektrické výrobky prodávané v Evropském společenství.
Elektrické výrobky se po skončení životnosti nesmí vyhazovat do domovního odpadu.
Nechte je recyklovat v příslušných zařízeních.
Informace o recyklaci ve vaší zemi si zjistěte od místních úřadů nebo prodejce.
≥
FS48775MEE Rev2_9225 47507 MEE pump - Jon 22/08/2012 09:13 Page 91

FS48775MEE Rev 2 08/12
FS48775MEE Rev2_9225 47507 MEE pump - Jon 22/08/2012 09:13 Page 92
 Loading...