

Page 1
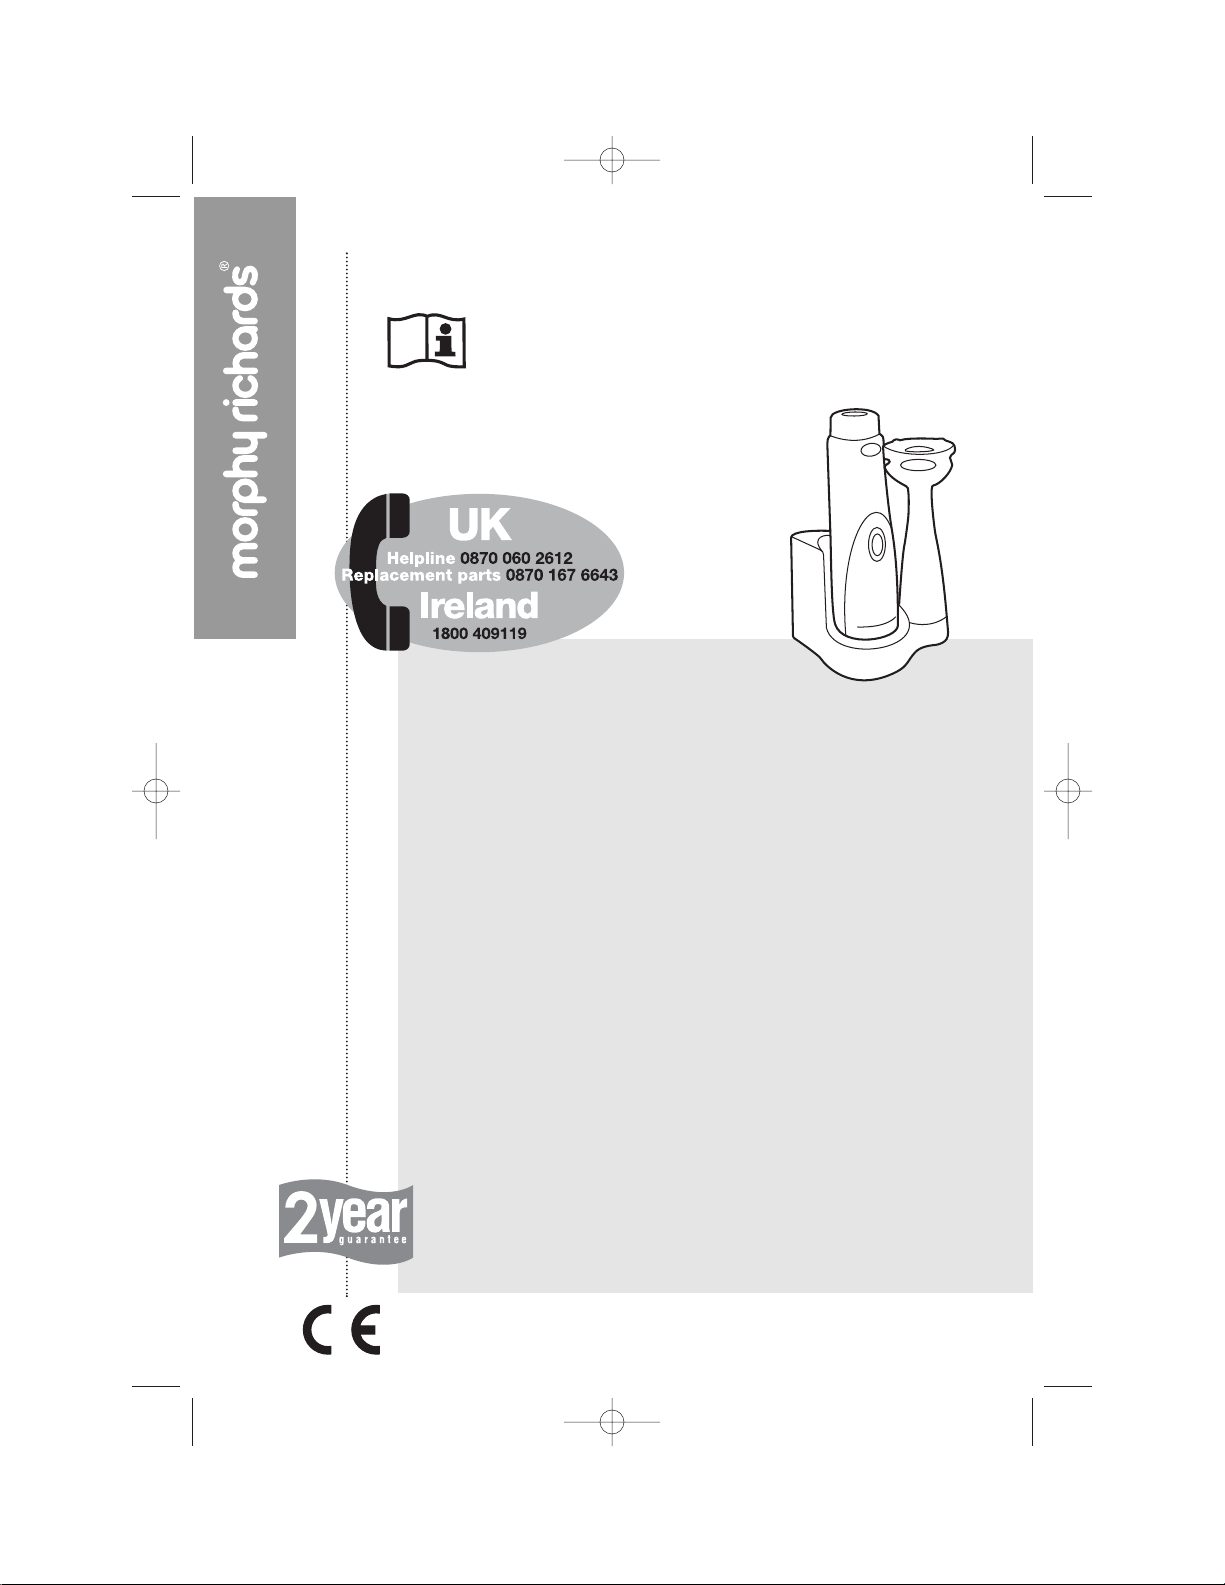
Cordless hand blender
Please read and keep these instructions
getting the best from your
new cordless hand blender...
Battery
• Ensure the battery is fully charged before using the product. The
battery is not covered by the guarantee.
Safety
• The blade is very sharp, handle with care, do not touch the blade
or hold the leg at the blade end when fitting to the body.
• The hand blender is designed for intermittent use.
Do not use non-stop for more than 1 minute at a time.
Allow to cool down for a minimum of 5 minutes before
further use.
• Never use your hand blender in a bowl or saucepan whilst it is
cooking.
• Never short out the contacts on the motor body or blender unit.
www.morphyrichards.co.uk
48965 Rev 1 13/4/04 3:47 PM Page 1
Page 2

2
Important safety
instructions
The use of any electrical appliance
requires the following of basic common
sense safety rules.
Primarily there is danger of injury or death
and secondly the danger of damage to the
appliance. These are indicated in the text by
the following two conventions:
WARNING: Danger to the person!
IMPORTANT: Damage to the appliance!
In addition we offer the following
essential safety advice.
Location
• Do not use outdoors.
Charger lead
• The charger lead should reach without
straining the connections.
• Do not let the charger lead hang over the
edge of a worktop where a child could
reach it.
• Do not let the charger lead run across an
open space e.g. between a low socket
and table.
• Do not let the charger lead run across a
cooker or toaster or other hot areas which
might damage the cable.
Personal safety
•Unplug from outlet when not in use and
before cleaning or removing parts.
•WARNING: Do not touch moving
parts. Keep hands, hair, clothing as
well as utensils away from the hand
blender blades.
•WARNING: Take care when handling
metal blades as they are very sharp.
Do not touch the blade or hold the
leg at this end when fitting to the
body.
•WARNING: To remove the blender
leg, hold blender in a position so you
cannot press the operating button,
grip shaft of blender leg, press the
release button and pull apart.
•WARNING: Always remove the
blender leg before cleaning, this will
reduce accidental operation of the
blender.
• Don’t clean the blender leg under running
water while still attached to the main
housing.
• Do not use during cooking processes or
with boiling liquids.
•WARNING: To protect against fire,
electric shock and personal injury do
not immerse charger, base or
blender in water or other liquid.
Children
• Do not allow children to use this blender.
Children are vulnerable in the kitchen
particularly when unsupervised and if
appliances are being used or cooking is
being carried out.
•Teach children to be aware of dangers in
the kitchen, warn them of the dangers of
reaching up to areas where they cannot
see properly or should not be reaching.
Other safety considerations
• Do not operate any appliance with a
damaged charger lead or after the
appliance malfunctions or has been
damaged in any manner. Contact our
helpline for advice on examination and
repair.
• Do not use accessories not
recommended by the manufacturer as
there is the danger of fire, electric shock
or personal injury.
• Do not place on or near a hot gas or
electric burner or in an heated oven.
• Do not allow metal objects to touch the
charging contacts on the motor body or
blender base unit. Damage to the
batteries and charger will result.
Electrical requirements
Check that the voltage on the rating plate
of your charger corresponds with your house
electricity supply which must be A.C.
(Alternating Current).
Use only the charger unit supplied.
48965 Rev 1 13/4/04 3:47 PM Page 2
Page 3
¤
›
fi
3
‰
fl
⁄
‡
Battery disposal
This product contains a sealed Nickel
cadmium battery. When it reaches the end
of its useful life it must not be disposed of in
the normal household waste. The battery
must be removed and disposed of at an
authorised recycling plant. Your local
authority will have a centre which accepts
such waste for recycling.
To r emove the battery see battery
replacement page 6.
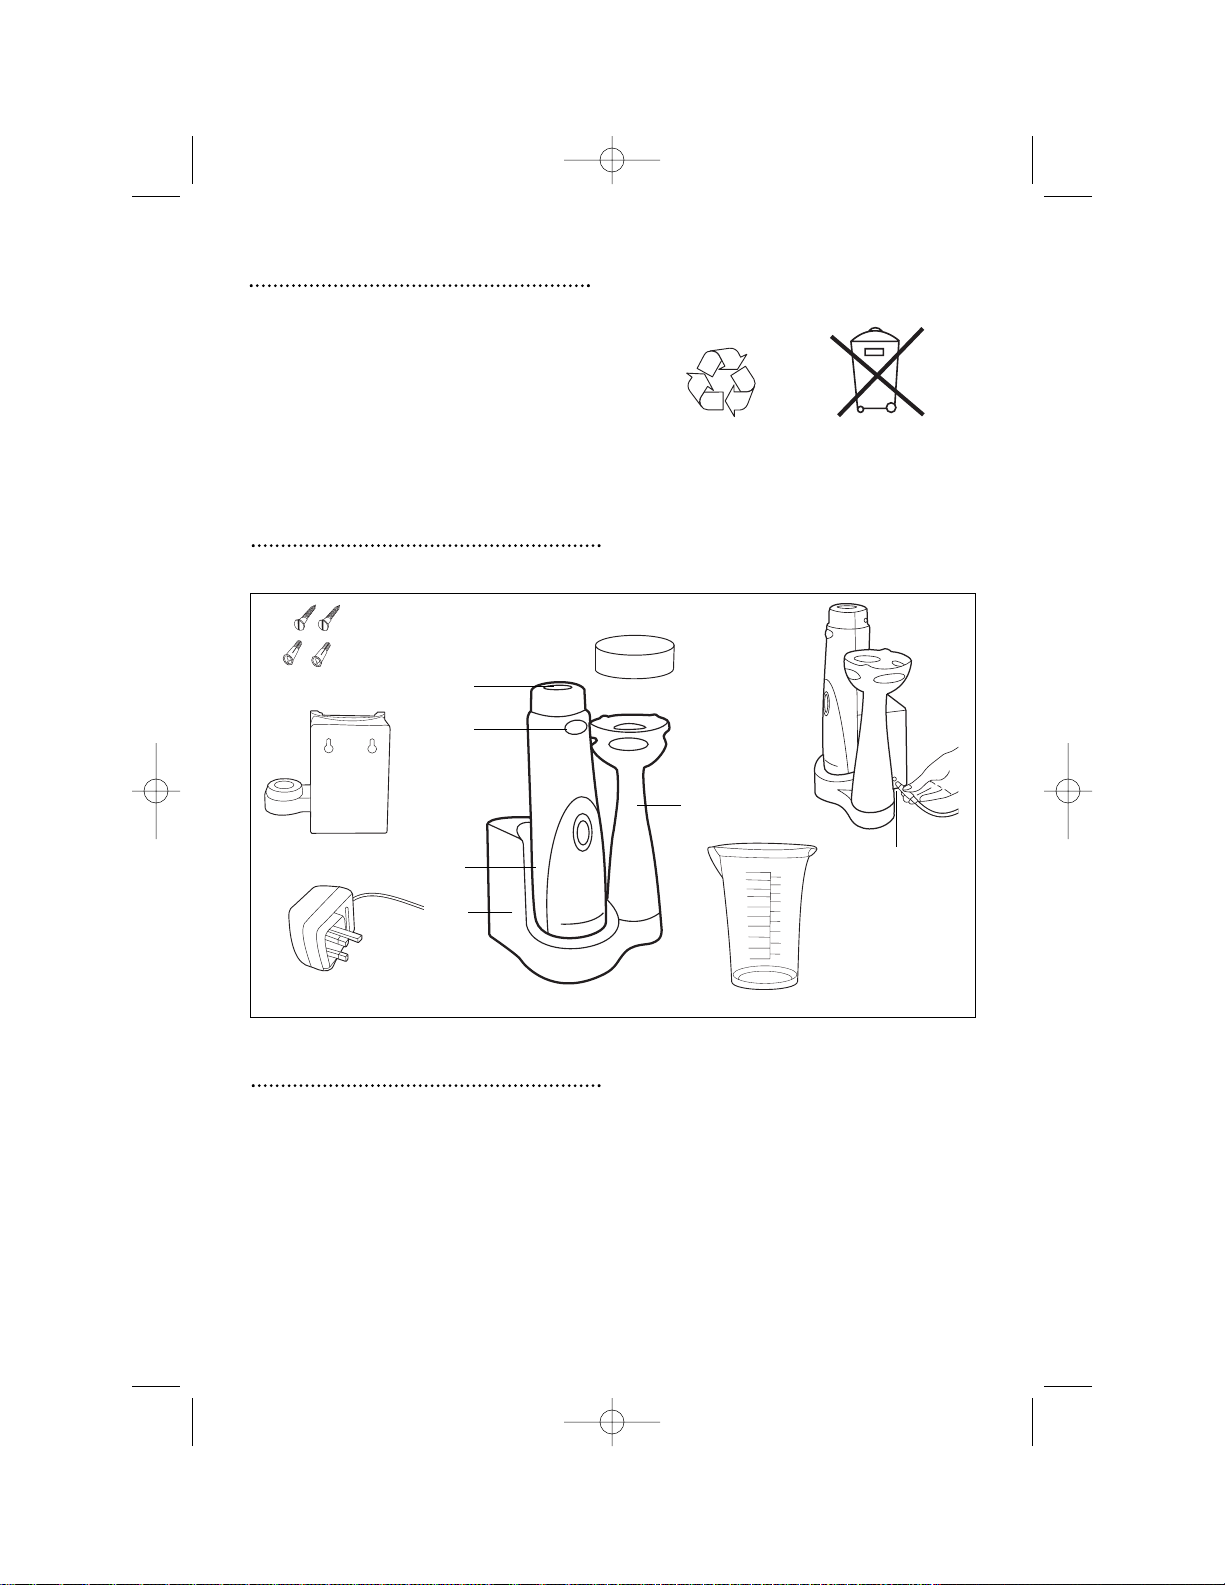
⁄ Blender base unit
¤ Motor body
‹ On/off control switch
› Blender leg
fi Charging socket
fl Blender leg location slot
‡ Blender leg release button
· Charging adaptor
‚ Measuring beaker
„ Wall mounting holes
‰ Screws and wall plugs x 2
 Blade cover
Illustration
Features
·
„
‹
‚
Your hand blender is designed to help you prepare everything from soups to chocolate
mousse quickly and with minimal effort.
Â
48965 Rev 1 13/4/04 3:47 PM Page 3
Ni-Cd
Ni-Cd
Page 4
Unpacking your cordless
hand blender
WARNING: Carefully unpack your
hand blender as blades are very sharp.
Wash all parts before first use, see
cleaning instructions page 10.
Assembly
1 Fit the blender body and blender leg
onto the base unit as shown. A
2 Attach the charging adaptor plug into
the socket on the base unit. B
3 Plug the adaptor into a suitable 13A
socket outlet and switch on.
Charging
1 Attach the blender to the base unit as
described in assembly. The red light will
illuminate to show that the body is
correctly located in the base and that it
is accepting a charge.
• If the red light is not illuminated, lift up
the blender body and relocate in the
base.
• The unit is designed to be left on
continuous charge. The ‘smart’ charger
fully charges and maintains the charge
ready for use. A full charge can be
reached in 3 hours, in normal use
recharging is 1 to 2 hours.
• Leaving the unit on continuous charge is
inexpensive in terms of the amount of
electricity being used.
• When the unit is fully charged the red
light will go out and green will illuminate
to show it is fully charged and
maintained.
IMPORTANT: When new and charging for
the first time or the blender has not been on
charge for a long period the battery will be
discharged.
• The green light may illuminate within 15
minutes, this is a false indication which
is common with discharged batteries.
Switch off at the mains then switch back
on, this will reactivate the charging cycle.
Red light will illuminate to show charging
has started.
• Repeat this procedure if it happens
again. Charging will now revert to normal
and take approx 3 hours to fully charge.
4
B
A
A
48965 Rev 1 13/4/04 3:47 PM Page 4
Page 5

5
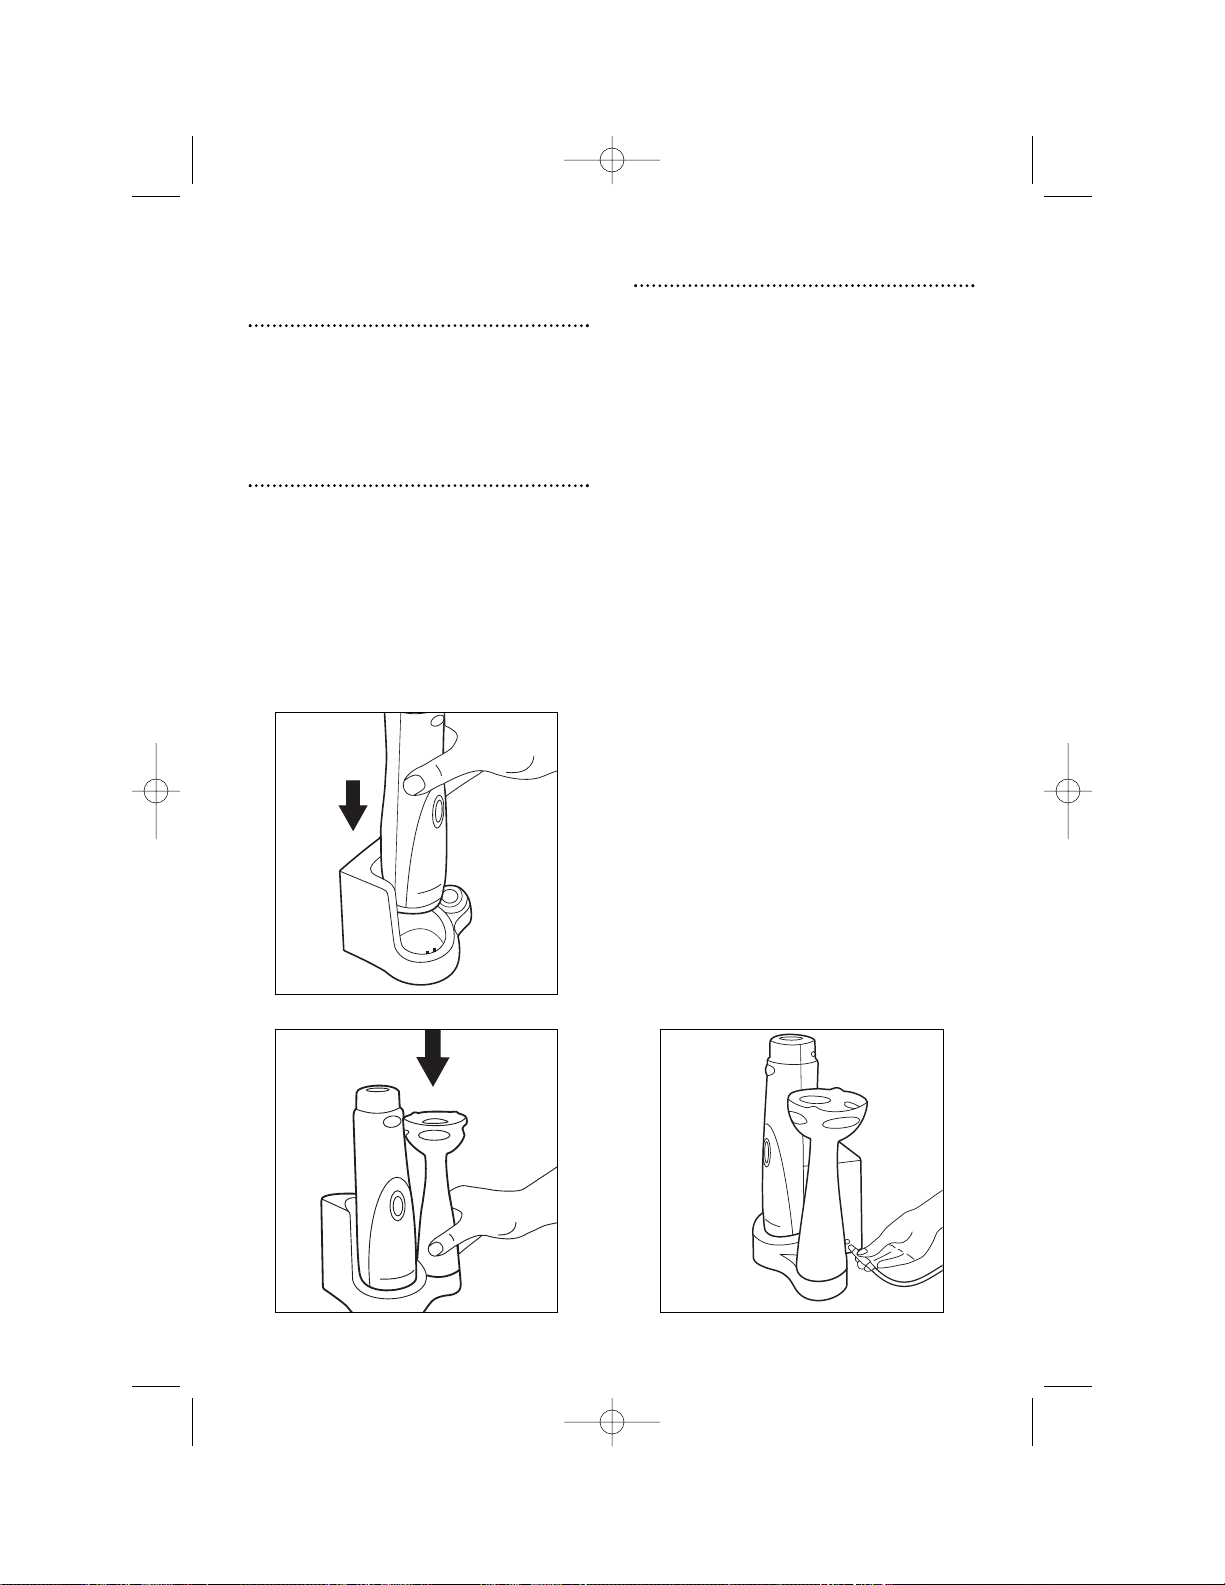
Assembling the blender
1 Once the blender is charged, fit the
blender leg by attaching it into the
location slot on the blender body.
C
Press until it clicks into place.
• If the leg is not fully engaged, rotate it
round and try again.
WARNING: Do not touch the blade
or hold the blender leg at this end
when fitting to the body.
WARNING: To remove the blender
leg, hold blender in a position so you
cannot press the operating button, grip
shaft of blender leg, press the release
button and pull apart.
To disassemble hand
blender
1 To remove the blender leg, hold the
blender in a position so that you cannot
press the operating button. Grip shaft of
blender leg, press the release button and
pull apart.
D
WARNING: When the blender is not
in use, fit the blade cover to the leg for
safety.
Using the blender
1 To operate press the on/off button and
begin to blend. E
• For perfect blending use a ‘plunging
action’ this will allow the food to be
pulled into the blade and dispersed
through the exit vents.
• Keep the head of the blender beneath
the food surface to prevent splashing.
• The hand blender can be used with a
beaker or a bowl.
WARNING: Never use your appliance
in a hot saucepan transfer to a bowl,
allow to cool before blending.
IMPORTANT: Your hand blender is
designed for intermittent use only. Do not
use non-stop for more than 1 minute. Allow
to cool down for a minimum of 5 minutes
before further use.
CE
D
48965 Rev 1 13/4/04 3:47 PM Page 5
Page 6

6
Hints for blending
• The blender is perfectly suited for
preparing dips, sauces, soups,
mayonnaise, milkshakes and baby food.
• The blender can be used to purée
cooked vegetables, tinned tomatoes and
any soft or pre-cooked food etc. It is
ideal to turn a cooked broth or stew into
a smooth soup and to prepare baby
food. You may need to add a little water
to cooked vegetables when blending to
encourage a puree to form.
• For milkshakes, cut soft fruit or bananas
in 1.5cm cube size pieces for easy
blending, add milk and icecream a little
at a time during blending.
• If food has been cooked in a saucepan
transfer to a cooler bowl, this will protect
the leg from heat distortion. For smaller
quantities use the measuring beaker
provided.
• Blending results will be better in the
beaker provided as this allows control of
the food being blended.
Blender rest position
Whilst not blending temporarily, lay the
blender down on the work top as shown. F
Battery removal and
disposal
To r emove the Ni-Cd battery for
replacement or disposal.
1 Remove the 2 screws from the end of
the battery cap, using a small phillips
screwdriver and lift off the cap. G
2 Remove the connector from the end of
the battery and pull out the battery. H
• Replace with an approved battery pack,
contact Morphy Richards replacement
parts 0870 167 6643.
3 Replace the battery, (terminal to be in
position shown) connect the terminal,
replace battery cover ensuring it is
correctly located and replace the 2
screws. Do not overtighten.
IMPORTANT: The battery must be
removed before the product is disposed of.
The battery is to be disposed of safely, it
must not be incinerated or composted.
Contact your local authority for advice on
disposal.
F
G
H
battery terminal
in lower left
hand corner
48965 Rev 1 13/4/04 3:47 PM Page 6
Page 7

7
Wall mounting
The charging stand can be wall mounted
or free standing. To wall mount find a
suitable position on the wall away from
concealed pipes and electricity cables.
Use the stand with blender in place to
determine the position most suitable, mark
a line on the wall across the top of the
charger stand. From this line mark a
horizontal line 15mm below, now mark 2
holes 40mm apart. I
Using wall plugs and screws provided,
fix so screw heads are 5mm from the
surface. Hang the charger base and adjust
the depth position of the screws if required
to improve the fit.
Tips for blending
When processing foods with strong
colour (eg. carrots) the plastic parts of the
appliance may become discoloured. Use
cooking oil to clean any discoloured parts.
Permanent discolouration may happen, this
is acceptable.
Trouble shooting
• If the blender is not charging, red or
green light is not illuminated on charger.
Check the following:
• The charger adaptor · is fitted into the
charging socket fi.
• The motor body is correctly located on
the blender base unit.
I
Template Not to scale
48965 Rev 1 13/4/04 3:47 PM Page 7
Page 8

Recipes
Warm citrus chicken & avocado salad
Serves 2
Dressing
Juice of 1 lemon
1 tbsp wholegrain mustard
1 tbsp honey
5 tbsp olive oil
2 tbsp coriander leaf
Salt and black pepper
1 tbsp oil
2 boneless, skinless chicken breasts, sliced
250g bag crispy leaf salad
1 avocado, diced
Place all the dressing ingredients in the
beaker and blend together using the hand
blender until thick.
Meanwhile, heat the oil in a frying pan
and fry the chicken for 4-5 minutes until
browned. Stir in the dressing and heat
through. Toss into the salad and avocado.
Serve immediately.
Spicy hummus
Serves 4
4 tbsp olive oil
1 clove garlic, roughly chopped
1 tsp pureed chilli
1
/
2
tsp ground coriander
Salt and black pepper
400g tin chick peas, drained and rinsed
Juice of 1 lemon
Heat the oil in a frying pan with the
garlic, chilli, coriander, salt and pepper. Add
the chick peas and fry for 1-2 minutes.
Transfer to the beaker and add the
lemon juice. Blend using the hand blender
until smooth. Chill.
Serve with toasted pitta bread, tortilla
chips or vegetable crudités.
Coriander and lime chicken kebabs
Serves 4
Marinade
2 cloves garlic, roughly chopped
2cm piece ginger, roughly chopped
4 tbsp chopped coriander leaf
1
/
2
tsp black pepper
2 tsp caster sugar
Juice of 2 limes
2 tsp thai fish sauce
1 tbsp light soy sauce
1 tbsp oil
4 boneless, skinless chicken breasts, cubed
1
/
2
tsp cornflour
Place all the marinade ingredients in the
beaker and blend together using the hand
blender. Pour over the chicken and
marinate for 1-2 hours.
Thread the chicken onto 8 satay sticks
and grill for 15-20 minutes or until cooked
throughout, turning occasionally.
Blend the cornflour with remaining
marinade in the beaker then transfer to a
small saucepan and bring to the boil,
stirring. Serve with the kebabs.
Jamaican jerk chicken
Serves 4
Marinade
1 bunch spring onions, roughly chopped
1 red chilli, roughly chopped
2 cloves garlic, roughly chopped
1
/
2
tsp ground allspice
3 tbsp oil
3 tbsp fresh thyme leaves, (stripped off the
stalks)
1 tsp sugar
Salt and black pepper
4 boneless, skinless chicken breasts
Place all the marinade ingredients in the
beaker and blend using the hand blender
until smooth. Spread over the chicken and
marinate for 1-2 hours.
Fry the chicken gently using a griddle
pan for 15-20 minutes until browned and
cooked throughout.
8
48965 Rev 1 13/4/04 3:47 PM Page 8
Page 9

Roasted pepper and olive sauce
with salmon
Serves 4
3 red peppers, diced
1 red onion, diced
2 cloves garlic
4 tbsp olive oil
Salt and black pepper
200ml creme fraiche
50g sliced black olives
2 tbsp capers
4 salmon fillets
Preheat oven to 200˚C, gas 6.
Place peppers, onion and garlic on a
baking tray and coat in oil. Season. Roast
for 30 minutes.
Transfer to a small saucepan and add
the crème fraîche. Purée using the hand
blender to give a coarse texture. Add the
olives and capers and season well. Heat
through.
Meanwhile heat a little oil in a frying pan
and fry the salmon for 5-6 minutes until
cooked through and browned. Serve with
pepper and olive sauce.
Tomato and pancetta sauce for pasta
Serves 4
1 tbsp oil
1 onion, diced
130g pack diced pancetta
1 red pepper, diced
1kg tomatoes, diced
1 tbsp balsamic vinegar
1 tsp sugar
1 vegetable stock cube
Salt and black pepper
20g bag basil
Heat the oil in a large saucepan and fry
onion and pancetta until browned. Add the
pepper and fry for 1-2 minutes. Add the
tomatoes, vinegar, sugar and stock cube
and season well.
Cover and simmer for 10 minutes,
stirring occasionally. Remove lid and cook
for a further 5 minutes. Add the basil,
transfer to a bowl and purée using the hand
blender to give a coarse pulpy texture.
Stir into hot cooked pasta.
Welsh rarebit
Serves 4
125g cheddar cheese, grated
1 medium egg
1 tsp dijon mustard
2 tsp worcestershire sauce
Salt and black pepper
2 tbsp milk
1 tbsp chopped chives
4 thick slices bread
Place all the ingredients except bread in
the beaker and blend together using the
hand blender.
Toast 1 side of the bread and spread the
rarebit over the untoasted side. Place under
a pre-heated grill until golden and set.
Salsa verde with butter roasted cod
Serves 4
4 skinless cod loins
25g butter
Sea salt and black pepper
1 clove garlic, roughly chopped
3 anchovy fillets
1 tbsp capers
1 tsp Dijon mustard
5 tbsp roughly chopped basil
1 tbsp roughly chopped mint
8 tbsp roughly chopped parsley
4 tbsp olive oil
Juice of
1
/
2
lemon
Preheat oven to 200˚C, gas 6.
Place cod in a small roasting tin and dot
with butter. Season. Roast for 15 minutes.
Meanwhile, place remaining ingredients
in the beaker and blend using the hand
blender until smooth and creamy. Season to
taste.
Serve the cod drizzled with the butter
juices and salsa verde.
9
48965 Rev 1 13/4/04 3:47 PM Page 9
Page 10

Peach melba smoothie
Serves 1
4 tinned peach halves
75g fresh raspberries
4 tbsp natural yoghurt
1 tbsp honey
150ml cranberry and raspberry juice.
Place all ingredients in the beaker and
blend using the hand blender until thick.
Pour into a tall sundae glass and serve.
Quick strawberry ripple brulée
Serves 4
175g strawberries, roughly chopped
2 tbsp honey
350g greek yoghurt
8 tbsp brown sugar
Purée the strawberries and honey and
gently stir into the yoghurt to give a ripple
effect. Divide between 4 ramekins.
Sprinkle 2 tbsp sugar over each ramekin
and place under a pre-heated grill until
sugar has melted and browned slightly. Chill
well before serving.
Cleaning
Before cleaning and maintenance,
switch the charger off and unplug it.
1 Remove the blending leg. Take care not
to touch the blade.
2 Clean the blending leg and measuring
beaker in warm soapy water and dry
thoroughly.
3 Clean the blender body and base unit
with a damp cloth and dry thoroughly.
10
48965 Rev 1 13/4/04 3:47 PM Page 10
Page 11

Helpline
If you have any difficulty with your
appliance, do not hesitate to call us. We’re
more likely able to help than the store from
where you bought it.
Please have the following information
ready to enable our staff to deal with your
query quickly:
• Name of the product
• Model number as shown on the
underside of the appliance.
11
48965 Rev 1 13/4/04 3:47 PM Page 11
Page 12

FP48965M UK Rev 1 0304
The After Sales Division,
Registered address,
Morphy Richards Ltd, Mexborough,
South Yorkshire, England, S64 8AJ
Helpline (office hours)
UK 0870 060 2612
Republic of Ireland 1800 409119
Morphy Richards products are intended for
household use only
Morphy Richards has a policy of continuous
improvement in product quality and design.
The Company, therefore, reserves the right
to change the specification of its models at
any time.
Your two year guarantee
It is important to retain the retailers
receipt as proof of purchase. Staple your
receipt to this back cover for future
reference.
Please quote the following information if
the product develops a fault. These numbers
can be found on the base of the product.
Model no. Serial no.
All Morphy Richards products are
individually tested before leaving the factory.
In the unlikely event of any appliance proving
to be faulty within 28 days of purchase it
should be returned to the place of purchase
for it to be replaced.
If the fault develops after 28 days and
within 24 months of original purchase, you
should contact the Helpline number quoting
Model number and Serial number on the
product, or write to Morphy Richards at the
address shown.
You will be asked to return the product (in
secure, adequate packaging) to the address
below along with a copy of proof of
purchase.
Subject to the exclusions set out below
(see Exclusions) the faulty appliance will then
be repaired or replaced and dispatched
usually within 7 working days of receipt.
If for any reason this item is replaced
during the 2 year guarantee period, the
guarantee on the new item will be calculated
from original purchase date. Therefore it is
vital to retain your original till receipt or
invoice to indicate the date of initial
purchase.
To qualify for the 2 year guarantee the
appliance must have been used according to
the manufacturers instructions.
EXCLUSIONS
Morphy Richards shall not be liable to
replace or repair the goods under the terms
of the guarantee where:
1 The fault has been caused or is
attributable to accidental use, misuse,
negligent use or used contrary to the
manufacturers recommendations or where
the fault has been caused by power
surges or damage caused in transit.
2 The appliance has been used on a voltage
supply other than that stamped on the
products.
3 Repairs have been attempted by persons
other than our service staff (or authorised
dealer).
4 Where the appliance has been used for
hire purposes or non domestic use.
5 Morphy Richards are not liable to carry
out any type of servicing work, under the
guarantee.
6 Batteries are not covered by the
guarantee. Contact replacement parts
department on 0870 1676643.
This guarantee does not confer any rights
other than those expressly set out above and
does not cover any claims for consequential
loss or damage. This guarantee is offered as
an additional benefit and does not affect your
statutory rights as a consumer.
• This guarantee is valid in the UK and
Ireland only.
48965 Rev 1 13/4/04 3:47 PM Page 12
 Loading...