

Coffee Maker with Milk Frother
Please read and keep these instructions
g
CM172251MMY Rev1.qxp_Morphy Richards - Instruction Book 18/08/2017 16:13 Page 1
2
Health and Safety
T
he use of any electrical appliance requires the following common sense safety rules.
P
lease read these instructions carefully before using the product.
• This appliance can be used by children aged from 8 years and
above and persons with reduced physical, sensory or mental
capabilites, or lack of experience and knowledge, if they have
been given supervision or instruction concerning the use of the
appliance in a safe way and understand the hazards involved.
• Children shall not play with the appliance.
• Cleaning and user maintenance shall not be made by children
without supervision.
• Keep the appliance and it’s cord out of reach of children.
g
Location
• This appliance is intended to be used in household and similar
applications such as:
farm houses;
by clients in hotels, motels and other residential type environments;
bed and breakfast type environments.
It is not suitable for use in staff kitchen areas in shops,offices and
other working environments.
• Always locate your appliance away from the edge of the worktop.
• Ensure that the appliance is used on a firm, flat surface.
• Do not use the appliance outdoors or near water.
•
WARNING: Do not place the appliance onto a metal tray or
metal surface whilst in use.
Mains cable
• Do not let the mains cable hang over the edge of the worktop
where a child could reach it.
• Do not let the mains cable run across an open space e.g. between
a low socket and a table.
• Do not let the mains cable run across a cooker or other hot area
which might damage the cable.
• The mains cable should reach from the socket to the base unit
without straining the connections.
• If the mains cable is damaged, it must be replaced by the
manufacturer, it’s service agent or similarly qualified person in
order to avoid a hazard.
Personal safety.
•
WARNING: To protect against fire, electric shock and personal
injury do not immerse cord, plug and appliance in water or
any other liquid.
• Unplug from the outlet before cleaning.
• Allow to cool before putting on or taking off parts and before
cleaning.
• Do not move the coffee maker while switched on.
Other safety considerations
• The use of attachments or tools not recommended or sold by
Morphy Richards, may cause fire, electric shock or injury.
• Do not use the appliance for any use other than its intended
purpose.
• Do not place the appliance on or near a hot gas or electric burner
or in a heated oven.
• WARNING: The appliance must not be immersed for cleaning.
• CAUTION: To prevent damage to the appliance, do not use alkaline
cleaning agents when cleaning. Use a soft cloth and detergent.
Electrical requirements
Check that the voltage on the rating plate of your appliance
corresponds with your house electricity supply which must be A.C.
(Alternating Current).
Should the fuse in the mains plug require changing, a 13 amp
BS1362 fuse must be fitted.
WARNING: This appliance must be earthed.
CM172251MMY Rev1.qxp_Morphy Richards - Instruction Book 18/08/2017 16:13 Page 2
3
g
123
4
56
A
B
7
⁄
¤
fl
‹
›
fi
‡
·‚
„
Ê
Â
Á
Ë
Í
ÎÏ
È
‰
8
CM172251MMY Rev1.qxp_Morphy Richards - Instruction Book 18/08/2017 16:13 Page 3
4
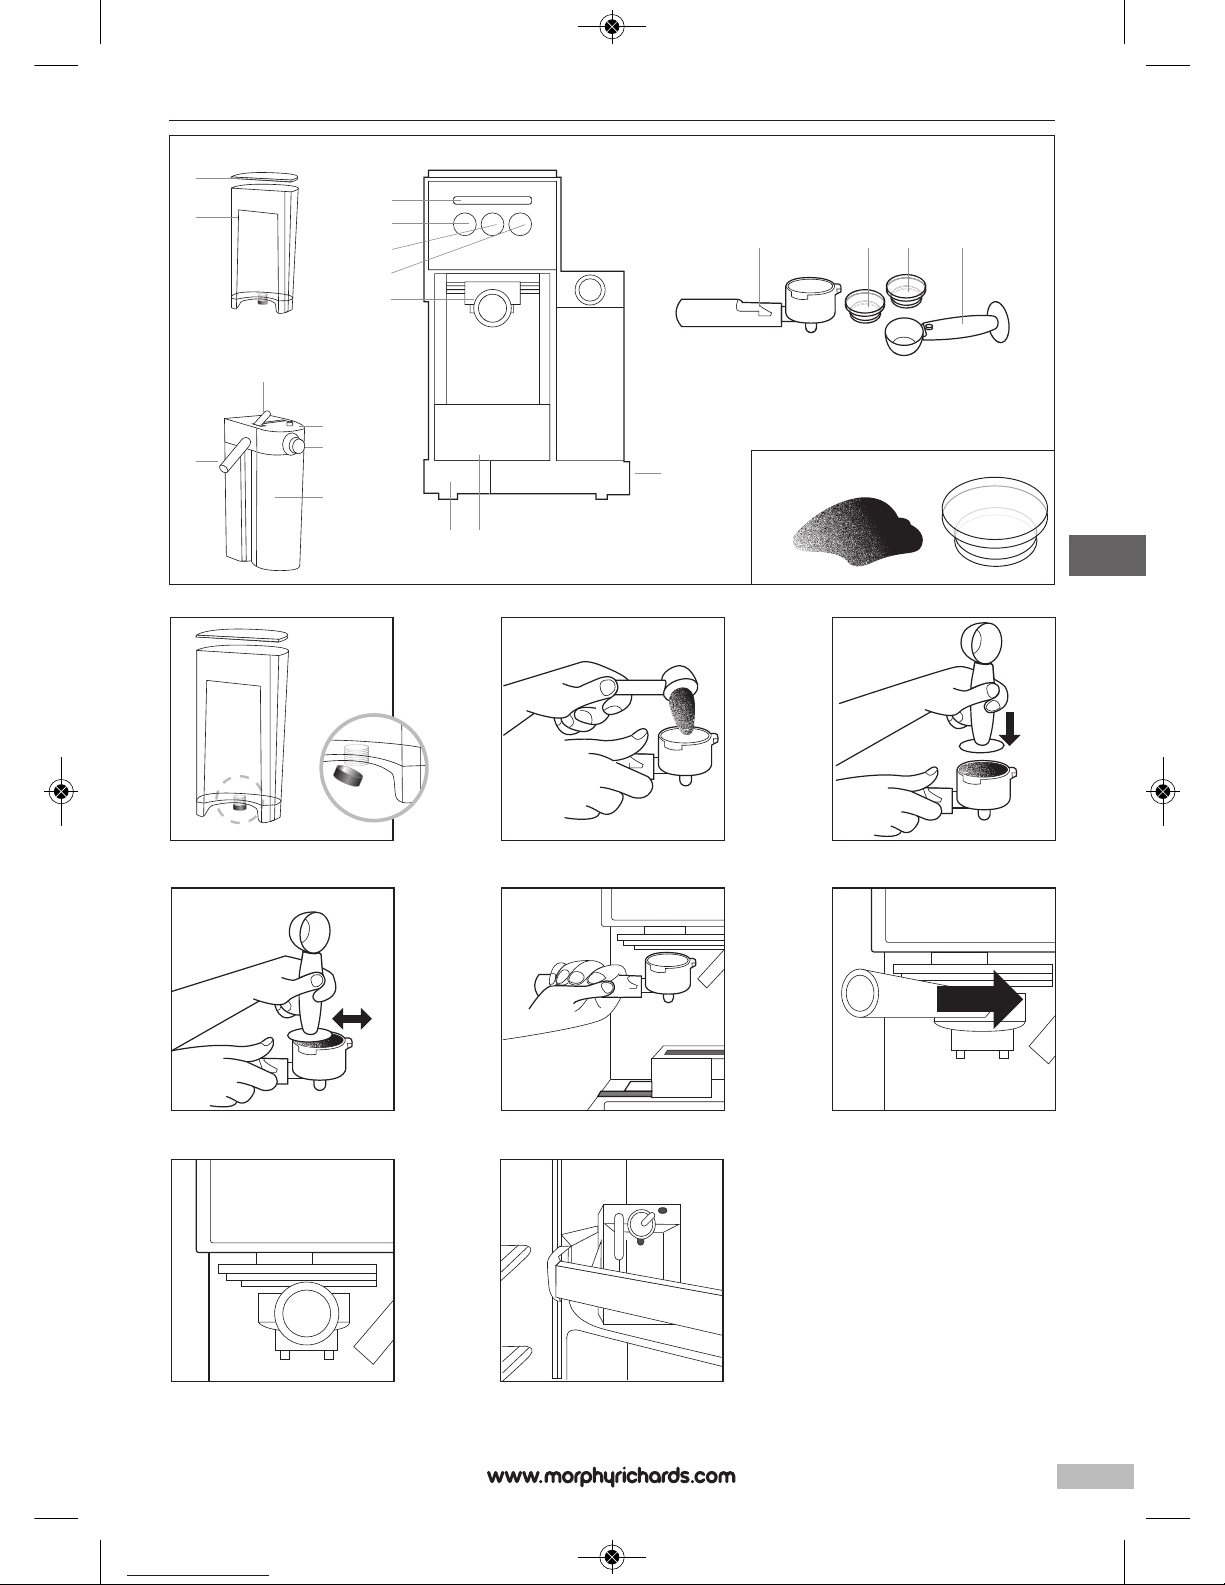
Features
A
⁄
W
ater Tank Lid
¤
Removable Water Tank
‹
Ready Indicator light
›
Espresso Button with Indicator
fi
Cappuccino / Froth Button with Indicator
fl
L
atte Button with Indicator
‡
A
Brew Head
‡
B
Filter Holder
·
Cup Height Adjustment
‚
Drip Tray
„
Milk Tank
‰
Power On/Off Switch O/I
Â
M
ilk Frothing Direction Lever
Ê
M
ilk Dispensing Nozzle
Á
M
ilk Frother Control Knob
Ë
Milk Tank Lid
È
Filter Retention Clip
Í
Filter – single shot
Î
Filter – double shot
Ï
Measuring spoon / tamper
Before first use
Clean and prime the unit prior to first use.
1 Remove orange cap from the base of the water tank before first use.
1 Please make sure the unit is off by pressing the power switch (11)
located on the side of the unit to ‘O’. Make sure it is unplugged
from the socket.
2 Remove and wash in a mixture of mild detergent and water the
water tank (2), milk tank (10), filter holder (7), filters (17 & 18) and
measuring spoon (19). Rinse thoroughly before placing them back
into the unit.
DO NOT
immerse the appliance in water.
To prime unit.
Run the steam cycle for 90 seconds as follows: 1 Fill the removable water tank (2) (see using your coffee maker).
2 Fill the milk tank (15) with water.
3 Select one of the filters (18 & 19) and place it in the filter holder
(7). Locate the filter holder in the unit ensuring it is properly locked
and place a cup underneath.
Note:
Ensure the angle of the milk dispensing nozzle (13) is
directed at the cup.
4 Plug the appliance into the socket.
5 Turn the power button (11) on.
6 The four control panel lights will flash (3,4,5 & 6). When the lights
remain solid, press the cappuccino button twice in quick
succession.
7 Steam will be emitted from the nozzle followed by water flow from
the filter.
8 When the process is complete, the three control panels will turn on
solid.
The product is now ready to be used.
Using your coffee maker
F
illing the water tank (2)
• Remove the water tank lid (1) and fill the water tank (2), use either
a jug to fill while the tank is in situ or remove the tank from the
u
nit and fill under the tap with the desired amount of water within
t
he“MIN” and “MAX” markings on the tank.
N
ever use warm or hot water to fill the water reservoir
• Close the water tank lid (1) and place it back in the unit ensuring it
i
s located correctly.
Filling the milk tank (15)
• To prepare cappuccino or latte, remove the milk tank (15) from the
unit and open the lid (16).
• Pour the quantity of cold milk you estimate you will need into the
tank within the “Min” and “Max” levels.
• Replace the lid and the milk tank onto the unit ensuring it is
located correctly.
Note:
Whole milk, low fat milk, organic or soy milk are all suitable
for use in this product.
Choosing the filter
B
Select the filter to be used as follows:
For a single shot
– use the single shot filter (17) of espresso
coffee
For a double shot or two single shots
- use the double shot
filter (18) of espresso coffee.
Filling with coffee
Place the selected filter in the filter holder (7) as follows:
2 Fill the filter with fresh, fine ground espresso coffee to the MAX line
inside the filter (do not overfill).
3 Tamp and compress firmly.
4 Clean any excess coffee from the rim to ensure a proper fit of the
filter holder under brew head.
5 Position the filter holder underneath the brew head and attach the
filter holder by first moving retainer clip (16) back.
6 Position the filter holder so that the handle lines up with the open
lock icon on the unit and fits into the groove.
7 Slowly turn it to the right until the retainer clip (16) is aligned with
the closed lock symbol on the unit.
Locating the Cup/s
a Pull out the height adjustment tray (8) if you are using a small
demitasse cup for espresso.
b Leave the height adjustment tray inside its compartment if you are
using a larger cup to brew cappuccino.
c Keep the height adjustment tray inside its compartment if you are
using a larger cup to brew latte.
NOTE: When making cappuccino or latte, adjust the milk
dispensing nozzle (13) until it is directed towards the cup.
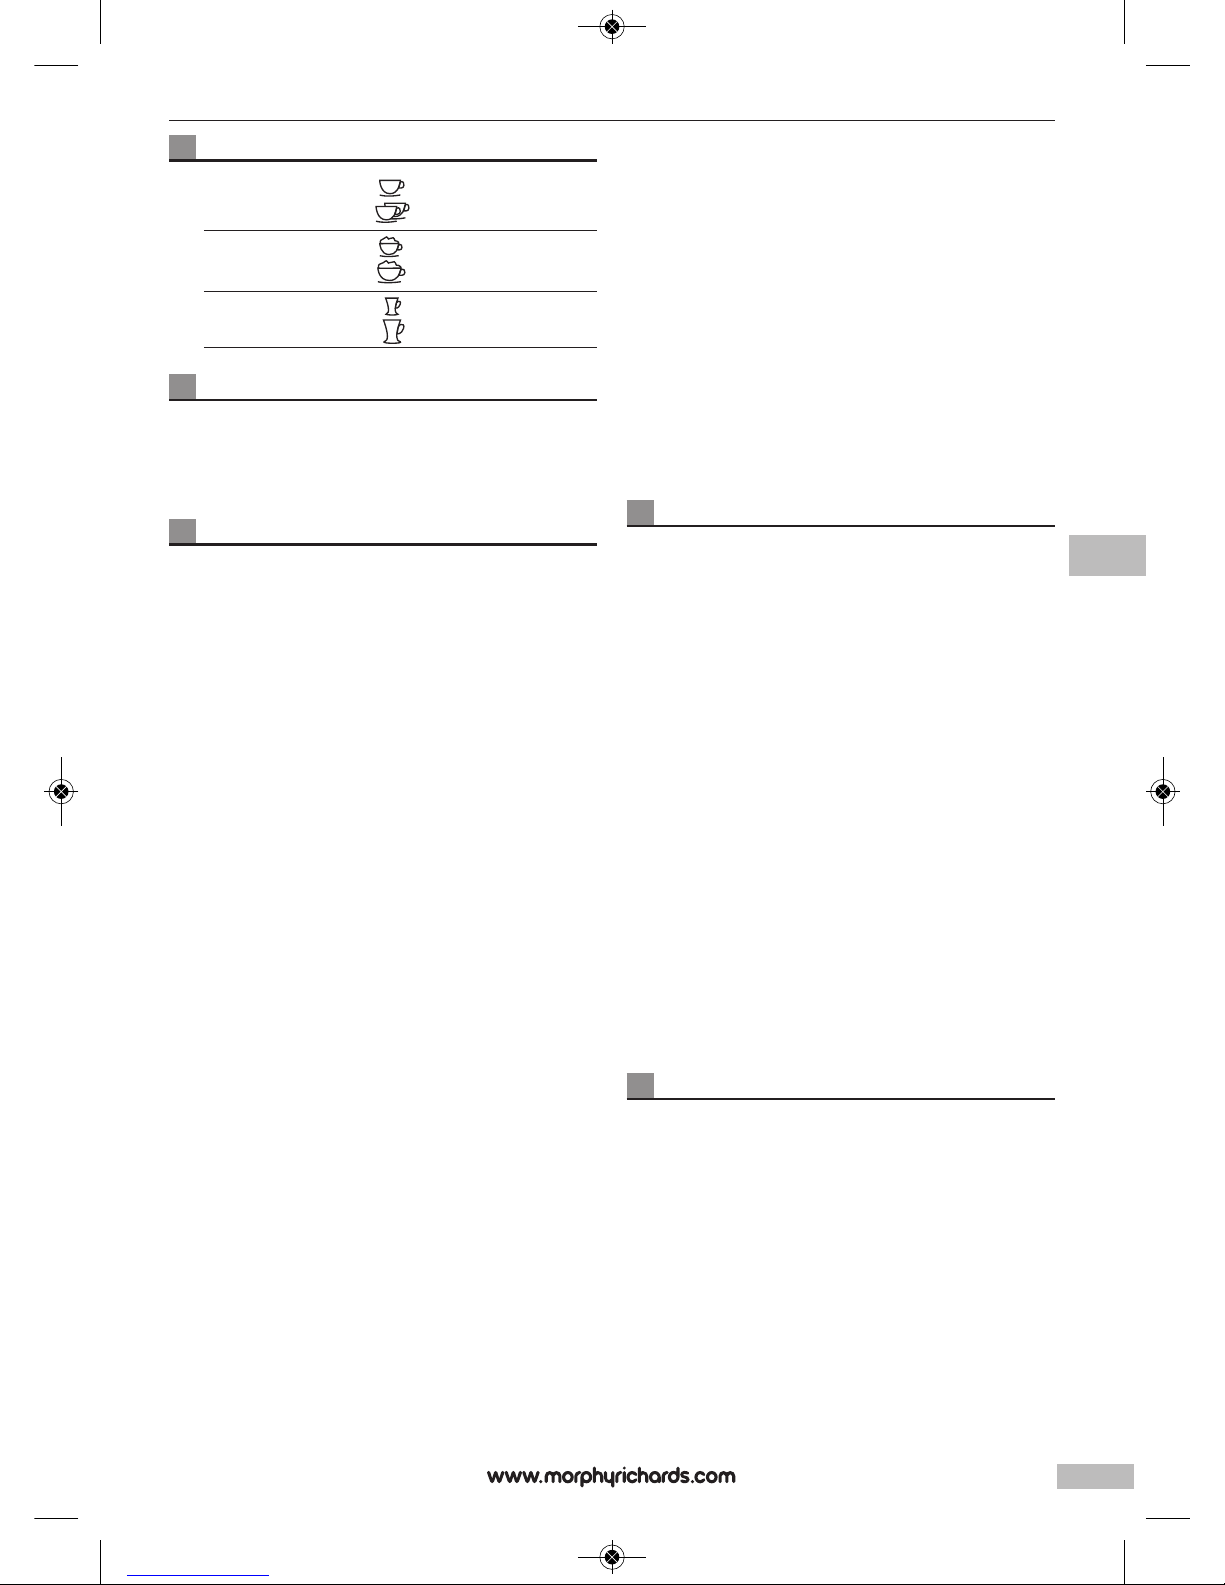
Selecting the Right Cup
Before preparing your beverage, please make sure to select the
correct cup size.
CM172251MMY Rev1.qxp_Morphy Richards - Instruction Book 18/08/2017 16:13 Page 4
5
Caffé Barista Ratios
Espresso Single 60ml (2oz)
D
ouble 119ml (4oz)
C
appuccino Single 178ml (6oz)
D
ouble 355ml (12oz)
Latte Single 296ml (10oz)
Double 474ml (16oz)
Turning the unit on
1 Make sure unit is plugged in.
2 Turn unit on (11). The three control panel lights will start flashing
until the water reaches temperature. When the lights become solid,
the unit is ready to use.
Select the function
Preparing espresso
a Press the Espresso Button (4) once to brew one single shot.
b Press the Espresso Button (4) twice to brew a double shot.
c Press and hold the Espresso Button for 3 seconds to increase the
quantity of coffee dispensed according to personal preference.
The unit will turn off automatically and the lights will become solid
indicating that the cycle has been completed.
NOTE: To brew less coffee than the pre-set serving, press the
function button to stop the brewing process when the amount of
coffee desired is reached.
Preparing cappuccino
Prior to preparing your cappuccino, adjust the quantity of frothed
milk according to your preference by turning the Froth Control
Knob (14) to the right for more foam and to the left for less foam.
Note: The foam intensity can be adjusted during the brewing cycle.
a Press the Cappuccino Button (5) once to brew a small cup of
cappuccino.
b Press the Cappuccino Button twice to brew a large cup of
cappuccino.
The unit will start brewing the cappuccino according to your
selection.
Preparing Latte
Prior to preparing your latte, adjust the quantity of frothed milk
according to your preference by turning the Froth Control Knob
(14) to the right for more foam and to the left for less foam.
a Press the Latte Button (6) once to brew a small cup of latte.
b Press the Latte Button twice to brew a large cup of latte.
Preparing frothed milk
The unit also allows you to froth milk only. Press and hold the
Cappuccino Button (5) for 3 seconds if you wish to add more foam
to your beverage or to prepare frothed milk for any other beverage,
e.g. macchiato, hot chocolate, chai latte etc. When finished, press
the Cappuccino Button again to stop.
After preparing your beverages with milk
7
When you have finished preparing your beverage with milk, you
can either store the milk reservoir directly in the refrigerator or
d
ispose of the leftover milk.
Espresso
A unique method of coffee brewing in which hot water is forced
through finely ground coffee. Because of its richness, espresso is
usually served in 44 to 59 ml (1.5 to 2 oz.) portions, in demitasse
c
ups.
Cappuccino
A
drink made with about 1/3 espresso, 1/3 steamed milk, and
1
/3 frothed milk.
Latte
A
drink made with about 1/4 espresso and 3/4 steamed milk.
Care and Cleaning
It is important to clean the milk tank and frothing tube
regularly to avoid clogging.
To clean the milk tank:
1 Remove the milk tank from the unit
2 Remove the lid of the tank.
3 Pour away any milk in the tank and rinse the milk reservoir and its
lid thoroughly with warm soapy water. Rinse and dry well.
4 Place a large empty cup under the frothing tube ensuring the end
of the tube is inside the cup.
5 Fill the milk tank with water.
6 Press and hold the Latte/clean button for 3 seconds and then
release it. Turn froth nozzle to 'Clean'. The unit will start to release
steam through the frothing tube, let it run for a few seconds until
the steam / water runs clear. When completed the Latte/ clean
button can be pressed once to stop the process or allow to auto
stop.
7 Dispose any water left in the milk tank and place it back in the
unit.
Note:
Do not use abrasive cleaners and scouring pads. The milk
tank is dishwasher safe (top rack). The lid of the milk tank is NOT
dishwasher safe.
Cleaning the brew head, filter holder and filter
1 Remove the filter holder and discard the coffee grounds or used
pod. Wash both the filter holder and filter with warm soapy water
and rinse well.
2 Wipe lower part of the brew head inside the unit with a damp cloth
or paper towel to remove any coffee grounds.
3 Place the filter holder (without a filter) back into the brew head
attaching securely.
4 Place an empty large cup under filter holder.
5 Press the espresso button once and let the unit brew with water
only until it stops automatically.
Caution:
Some of the metal parts may still be hot.
Note:
The filter holder and the filters are NOT dishwasher safe.
g
CM172251MMY Rev1.qxp_Morphy Richards - Instruction Book 18/08/2017 16:13 Page 5

6
Cleaning the water tank
1 Discard all remaining water by removing the water tank from the
unit and emptying it into the sink. It is recommended to empty the
water tank between uses.
2 Wash the water tank with soapy water, rinse well and wipe dry.
Note:
The water tank is dishwasher safe.
Cleaning the unit
1
Wipe housing with a soft wet cloth. Do not use abrasive cleaners
or scouring pads.
2 Do not store the filter holder in the brew head. This can affect the
seal between the brew head and the filter holder.
C
AUTION: Do not immerse appliance in water.
Descaling
Type of water Cleaning frequency
Soft water (Filtered Water) Every 80 brew cycles
Hard water (Tap Water) Every 40 brew cycles
To descale the appliance
1 Disconnect the appliance from the mains supply.
2
Remove the Water Tank and Drip Tray from the appliance.
3
Fill the water tank with dissolved citric acid solution, up to the max
l
evel marked on the side of the tank.
4
Re-fit the Water Tank and Drip Tray to the appliance.
5 Place an empty container under the brewing head to gather the
d
escaled hot boiled water.
6 Connect the appliance to the mains supply.
7
Press the power button to switch the unit on, when the 3 control
p
anel lights turn blue, press the Espresso/Custom Button twice.
The solution will flow through the unit and stop automatically.
8 Place a jug or large cup (with at least 325 mL/ 11-ounce capacity)
u
nder the milk frothing nozzle.
9 Fill the milk reservoir with water and place it back on the unit.
10 Turn the Froth control knob clockwise to the clean position “ ”,
then press the latte/clean button for 3 seconds to start the clean
function, allow the unit to dispense the water through the tube for
approximately 30 seconds and then press the Latte button once to
stop..
11 Repeat Steps 1 to 10 as necessary using only tap water to rinse
any remaining traces of cleaning solution from the machine.
Problems and causes
PROBLEM CAUSES SOLUTIONS
Coffee is not dispensing 1. No water in tank 1. Add water
2. Coffee grind is too fine 2. Grind medium ground coffee
3. Too much coffee in the filter 3. Fill filter with less coffee
4. Appliance was not turned on or plugged in 4. Plug unit into electrical outlet and turn it on
5. Coffee has been tamped/compressed too much 5. Refill filter with coffee, do not tamp too much
Coffee leaks over the filter holder 1. Filter holder is not rotated to full lock position 1. Rotate filter holder to full lock position
2. Coffee grounds have not been cleaned from 2. Wipe off coffee grounds
around the filter / holder rim
3. Too much coffee in the filter 3. Fill with less coffee.
Milk is not foamy after frothing or it is 1. Not enough steam 1. Ensure there is enough water in the reservoir
not coming out of the milk 2. Milk is not cold enough 2. Chill milk and frothing pitcher prior to use
dispensing / frothing nozzle 3. Frothing nozzle is blocked 3. Follow the instructions to clean the milk reservoirs
& frothing nozzle
Coffee dispensing too quickly 1. Ground coffee is too coarse 1. Use a finer grind
2. Not enough coffee in filter 2. Use more coffee
Coffee is too weak 1. Using small filter for double shot 1. Use large filter for double shot
2. Ground coffee is too coarse 2. Use a finer grind
The three control panel lights are Water tank is out of water Add water to reservoir
flashing individually
CM172251MMY Rev1.qxp_Morphy Richards - Instruction Book 18/08/2017 16:13 Page 6

7
YOUR INTERNATIONAL
TWO YEAR GUARANTEE
This appliance is covered by two-year repair or replacement
warranty.
It is important to retain the retailers receipt as proof of
purchase. Staple your receipt to this back cover for future
reference.
Please quote the following information if the product develops a
fault. These numbers can be found on the base of the product.
Model no.
Serial no.
All Morphy Richards products are individually tested before
leaving the factory. In the unlikely event of any appliance proving
to be faulty within 28 days of purchase it should be returned to
the place of purchase for it to be replaced.
If the fault develops after 28 days and within 24 months of
original purchase, you should contact your local distributor
quoting Model number and Serial number on the product, or
write to your local distributor at the addresses shown.
You will be asked to return the product (in secure, adequate
packaging) to the address below along with a copy of proof of
purchase.
Subject to the exclusions set out below (1-9) the faulty
appliance will then be repaired or replaced and dispatched
usually within 7 working days of receipt.
If for any reason this item is replaced during the 2-year
guarantee period, the guarantee on the new item will be
calculated from original purchase date. Therefore it is vital to
retain your original till receipt or invoice to indicate the date of
initial purchase.
To qualify for the 2-year guarantee the appliance must have
been used according to the manufacturers instructions. For
example, appliances must have been descaled and filters must
have been kept clean as instructed.
The local distributor shall not be liable to replace or repair the
goods under the terms of the guarantee where:
1 The fault has been caused or is attributable to accidental use,
misuse, negligent use or used contrary to the manufacturers
recommendations or where the fault has been caused by power
surges or damage caused in transit.
2 The appliance has been used on a voltage supply other than that
stamped on the products.
3 Repairs have been attempted by persons other than our service
staff (or authorised dealer).
4 Where the appliance has been used for hire purposes or non
domestic use.
5 The appliance is second hand.
6 The local distributor are not liable to carry out any type of servicing
work, under the guarantee.
7 The guarantee excludes consumables such as bags, filters and
glass carafes.
8 Batteries and damage from leakage are not covered by the
guarantee.
9 The filters have not be cleaned and replaced as instructed.
This guarantee does not confer any rights other than those
expressly set out above and does not cover any claims for
consequential loss or damage. This guarantee is offered as an
a
dditional benefit and does not affect your statutory rights as a
c
onsumer.
g
CM172251MMY Rev1.qxp_Morphy Richards - Instruction Book 18/08/2017 16:13 Page 7

The After Sales Division,
Morphy Richards Ltd,
Mexborough, South Yorkshire, England, S64 8AJ
H
elpline (office hours)
U
K 0845 871 0960
R
epublic of Ireland 1800 409119
Glen Dimplex Malaysia
S
dn Bhd Unit 1001, Level 10, Menara PJ,
P
usat Perdangangan Amcorp no18,
Persiaran Barat, 46050 Petaling Jaya,
Selangor, Malaysia
T : +603 7960 1314
F : +603 7932 1315
CM172251MMY Rev1 08/17
CM172251MMY Rev1.qxp_Morphy Richards - Instruction Book 18/08/2017 16:13 Page 8
 Loading...