

Mopar 82208655AB Installation Instructions Manual
DVD REAR SEAT VIDEO SYSTEM
MINI-VANS (RG)
INSTALLATION INSTRUCTIONS
Read entire instructions thoroughly before starting.
TOOLS REQUIRED:
• Marker • Utility knife • Drill motor • 8mm socket • Socket wrench • Non-metal trim stick
• Phillips screwdriver • 10mm socket • Wire pulling tool • 7mm socket • 3/8" Drill Bit
• Foam tape • 2 1/4 " Holesaw
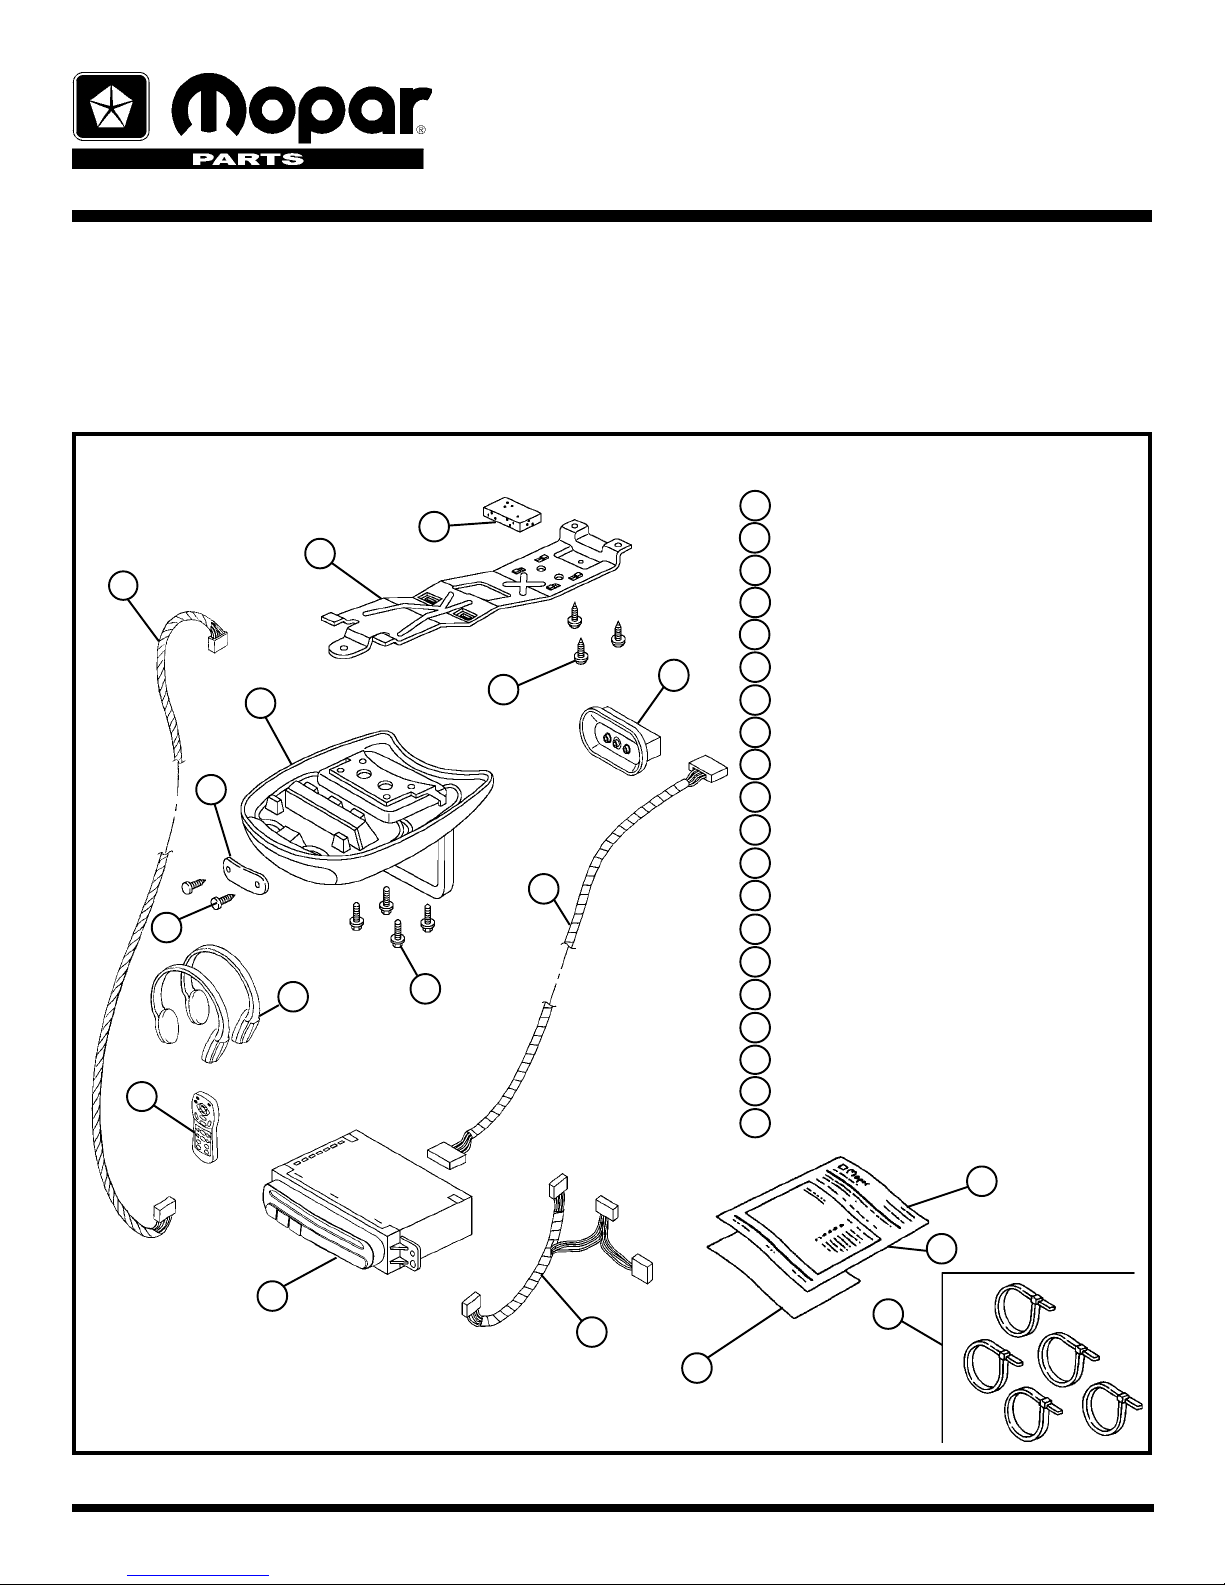
Item Qty. Description
CONTENTS:
2
1
4
19
15
8
6
7
14
9
3
11
1 1 Mounting Bracket
2 1 Foam Block
3 3 Self Drilling Screw
4 1 Overhead Harness
5 12 Tie Strap
6 1 Climate Control Cover
7 2 Climate Control Screws
8 1 Screen Console
9 4 Hex Screw
10 1 Power Harness
11 1 Aux. Harness
12 1 DVD Player
13 4 AAA Batteries (not shown)
14 2 Headphones
15 1 DVD Remote
16 1 Owners Manual (not shown)
17 1 Installation Instructions
18 1 Paper Template
19 1 Aux. Module
20 2 Aux. Module Template
12
VP2DJF-19A016-EB 4/30/04 Page 1 of 7
17
20
5
10
18
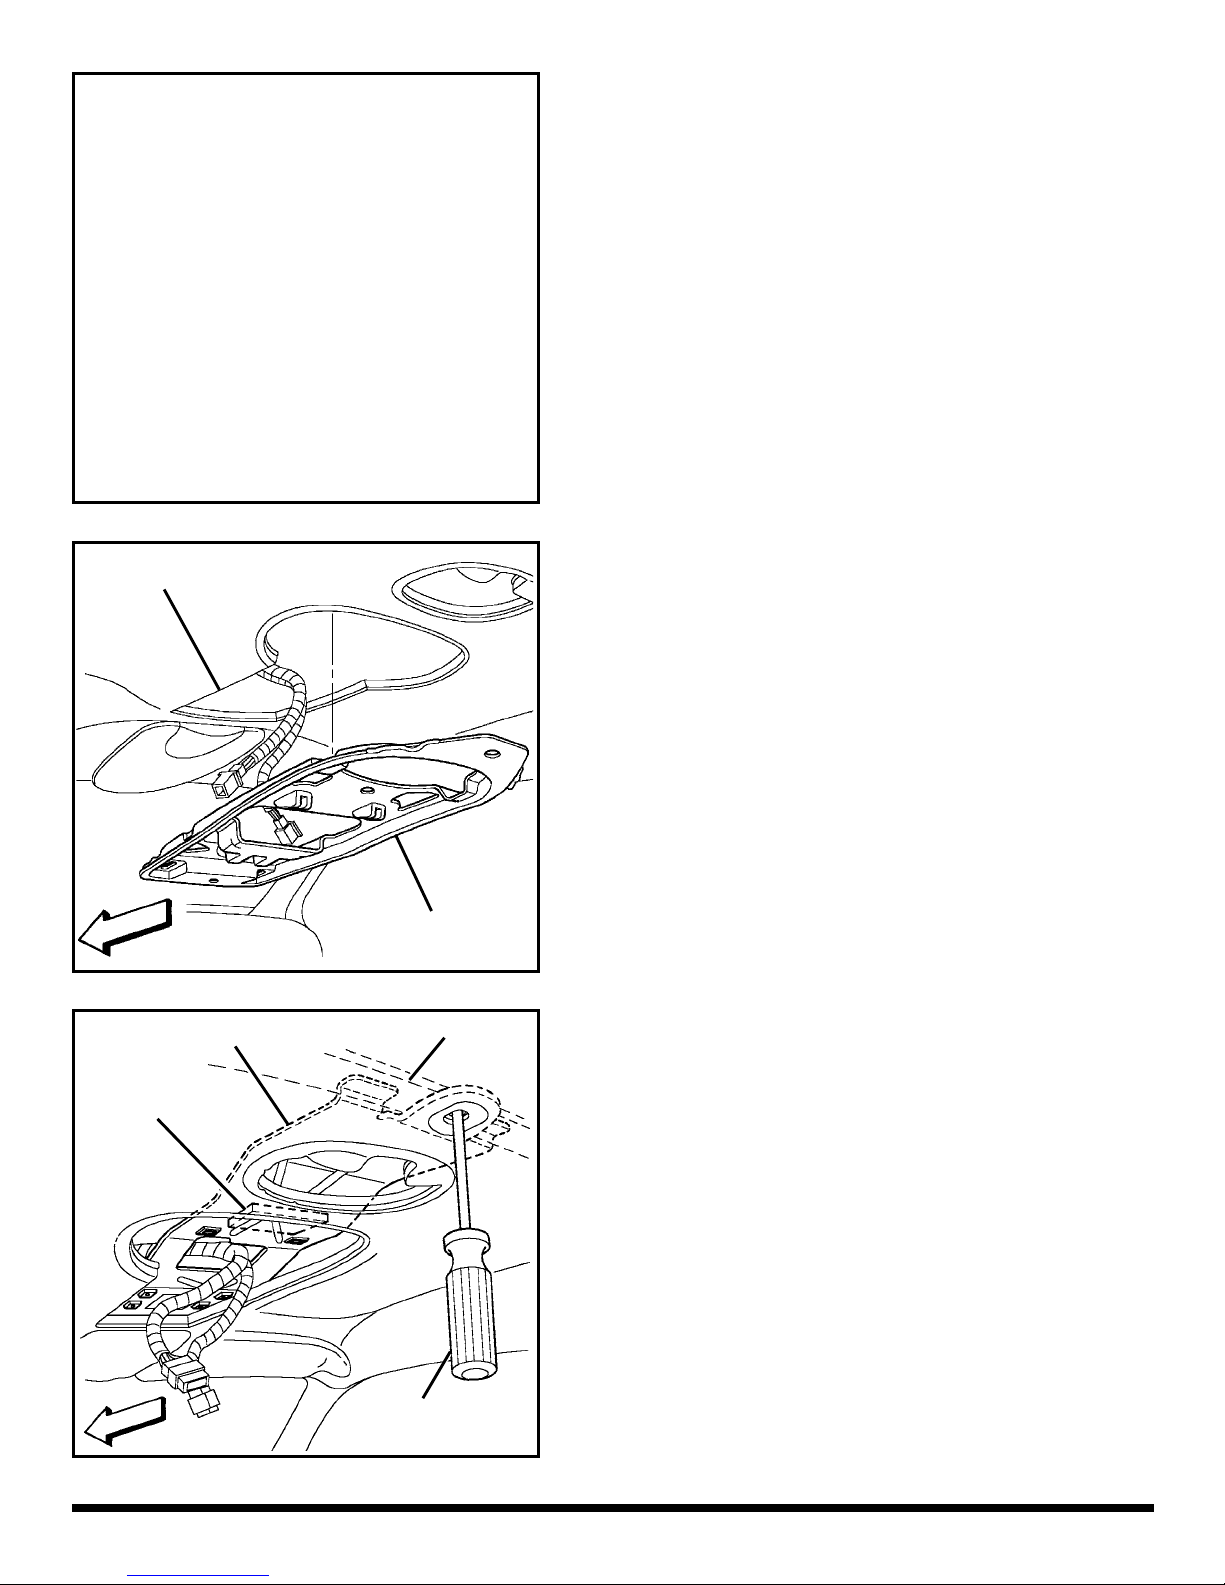
Locate and use the
Paper Template (Item
#18) to carefully mark
and cut the
headliner opening.
Trim Out
A – Mounting Bracket Installation:
1) Disconnect negative battery cable and isolate.
2) Remove climate control head, if equipped.
3) Remove center dome light, if equipped. Using a
flat bladed tool, pry off the lamp lens. Remove
lens and dome light carefully to avoid damage to
the headliner.
4) Remove two headliner retaining clips.
5) Using the installation template provided (Item 18)
secure it to the headliner using retaining clips in
referenced locations.
6) Following the instructions on the template, mark
and cut opening in headliner.
7) Using hands, separate headliner from plastic
headliner bracket. Remove headliner bracket.
It will not be re-used. Remove the center 1/4"
screw from the existing overhead bracket.
Front
Mounting Bracket
Foam Block
Headliner Bracket
Roof Bow
8) Position foam block (Item 2) to mounting
bracket as shown.
9) Fit rear end of mounting bracket into roof bow
behind headliner. Use screwdriver to confirm
hole alignment. Lightly tap the bracket
rearward to ensure fit to roof bow.
10) Install three self drilling screws (Item 3) through
forward most mounting bracket holes, into front
roof bow.
11) Install rear headliner retaining clip into rear hole,
through bracket.
Screwdriver
Front
VP2DJF-19A016-EB 4/30/04 Page 2 of 7
Information
Center Bezel
Radio
B - Radio and Trim Removal:
1) Remove the I/P center stack cubby bin.
2) Remove lower radio panel using a non-metal
trim stick.
3) Remove and disconnect the HVAC switch bezel.
Bin or CD
Player
Front
Black
Connector
HVAC
Bezel
Lower Radio
Panel
Overhead
Harness
4) Remove and disconnect the radio.
5) Remove the under the radio bin or CD player.
ADVERTENCIA:
WARNING:
DUE TO THE SIDE CURTAIN AIR BAG OPTION IN 2005+
MY RG MINIVAN, PLEASE FOLLOW INSTRUCTIONS TO
PROPERLY ROUTE WIRING OF THE REAR SEAT VIDEO
SYSTEM. FAILURE TO FOLLOW INSTRUCTIONS MAY
CAUSE MALFUNCTION OF SIDE CURTAIN AIRBAG AND
OCCUPANT INJURY DURING VEHICLE IMPACT.
C - Overhead Wiring Harness Routing:
1) Remove left (driver’s side) A-pillar trim.
2) Disconnect and remove left sun visor (two T25
screws).
3) Remove left sun visor clip (one T20
screw).
4) Carefully disconnect and remove
overhead console or dome lamp.
Left A-Pillar
VP2DJF-19A016-EB 4/30/04 Page 3 of 7
NOTE:
Make sure the overhead harness remains clear of visor/
clip fasteners. The use of a metal wire to help with
harness routing may be needed.
Overhead
Harness
5) Route Overhead Wiring Harness
(item 4) with all black overhead connector over
top of headliner as shown.
6) Route harness rearward to screen mounting
bracket opening leaving approx. 4” (100mm).
 Loading...