

Page 1
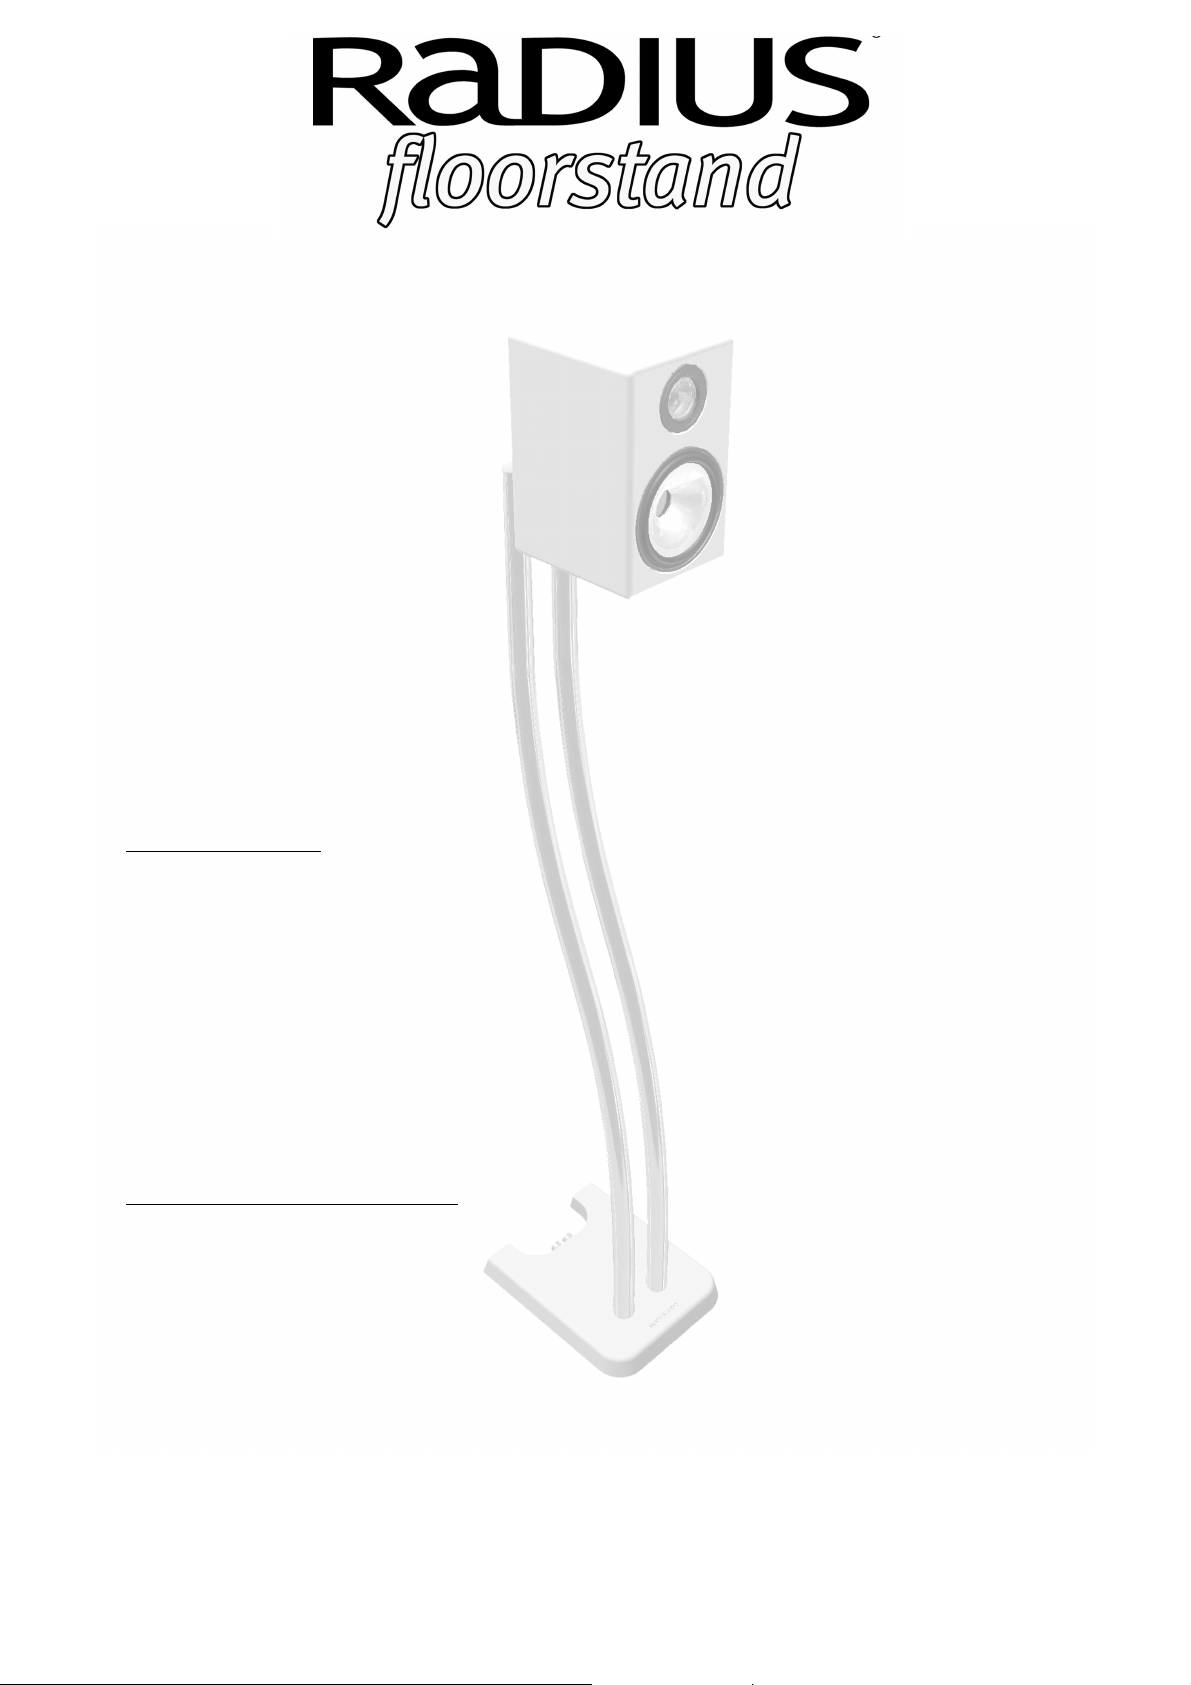
Thank you and congratulations on purchasing our bespoke Monitor Audio Radius
Floorstand. This product has been designed using the most up-to-date computer
technology to provide you with an aesthetically pleasing stand foryour loudspeakers, and
also to ensure that the exceptional sound quality is maintained. The stand incorporates a
heavy cast metalalloy basewhichoffersgreat balance andstability.
With Radius comes simplicity, and it couldn’t be more simple to connect your speakers to
the stand. The stand comes fully assembled with our very own ‘Pure Flow’ loudspeaker
cable internally within the stand so that there is no awkward threading of cables. Simply
follow the step by step instructions below and then sit back and enjoy the big sound from
little speakers…
Please remember to always read the instructions first as they are sequenced to
provide a safe way of working.
This stand has been designed to be used with either the Radius 90 or the Radius 180
loudspeakers.
DO NOT CONNECT YOUR SPEAKER CABLES TO THE AMPLIFIER BEFORE ASSEMBLY.
CONTENTS LIST
Within thiscarton youwill have:
2x Radius Floorstands.
8x Spikes.
4x Radius loudspeakerfixing screws.
1x Hex key
1x Warranty card. Please note: When filling in the warranty card, there is no
serial number on the floorstand. Simply leave the serial number section blank and
fill inthe model name/numbersection with‘Radius Floorstand’
ASSEMBLY INSTRUCTIONS
1. Now that you have removed the carton, remove the polystyrene end-caps to reveal
your RadiusFloorstands.
2. While the Floorstands are lying on the floor, now is the time to put the spikes in (if
you decide to use them), if you aren’t using the spikes move on to Step 3. This is
done byscrewing them all theway into theirthreaded holes. Position the standsin
their desired locations to see if they are level. If the stand does not appear to be
level, unscrew one of the spikes slightly until the stand is level and tighten up the
lock nut. You arenow readyto fixyour RadiusLoudspeakers tothe stand.
Radius Floor Stand Fixing Instructions
Monitor Audio 2004
1
Page 2
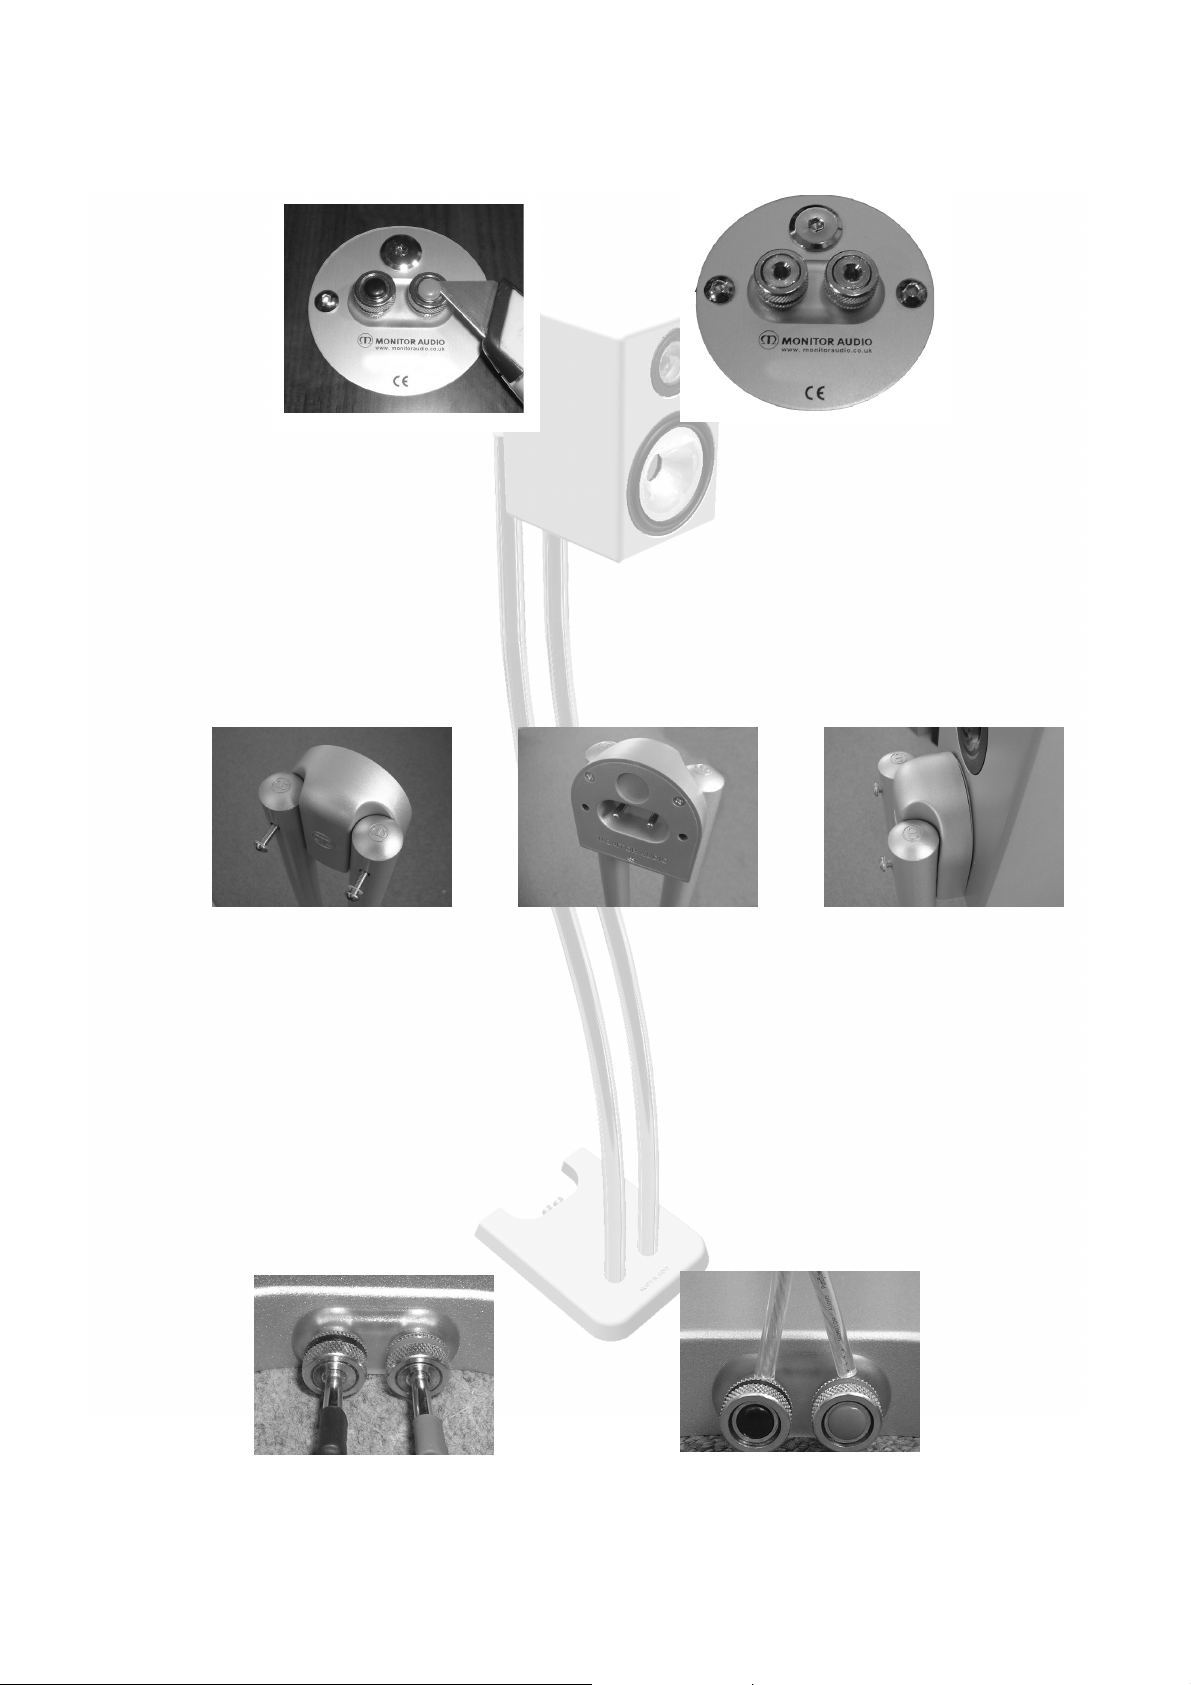
3. Take either your Radius 90 or Radius 180, remove the small red and black plastic
caps from the terminals. A knife or fine blade screwdriver may be required to lever
theseout (Fig. 1).
Fig. 1
A
Fig. 2
B
4. Remove the screws located either side of the terminal on the back (labelled ‘A’ and
‘B’ in fig. 2), from your loudspeaker. These can be removed with the hex key
providedwith your stand.
5. Place the Radius loudspeaker fixing screws into their holes in the back ofthe stand
(Fig. 3). Carefully push your loudspeaker on to the terminals in the floorstand
terminal housing (Fig. 4), and while supporting the weight of the speaker, start to
tighten the screws untilthey arefinger tightand bear the weight ofthe cabinet
(Fig. 5).
Fig. 3
Fig. 4
Fig. 5
6. Take the hex key (included in the packaging), and tighten the screw so that your
loudspeaker isheld firmlyin place.
7. If you intend touse 4mm banana plug terminationswith your floorstandremove the
small red and black plastic terminal caps from the terminals on the base of the
floorstand (this is done in the sameway as described in section 3). If you are using
bare wire terminations, leave these in place. If you choose to use banana plugs,
simply plug them straight into their correct terminal’s (Fig. 6), or if you are using
bare wire terminations, unscrew the terminal slightly and placing your cable into
thethrough hole andthen tightenthe terminal up again tohold thecable inplace
(Fig. 7).
Fig. 6 Fig. 7
8. Connect thespeaker cable toyour amplifier.
Radius Floor Stand Fixing Instructions
Monitor Audio 2004
2
 Loading...