

Monitor Audio Radius HD, Radius 45HD, Radius 90HD, Radius 180HD, Radius 225HD Owner's Manual
...
Owners Manual
Radius HD Manual ~ Greyscale Rev5,1.indd 1 01/10/2008 16:24:31
monitoraudio.co.uk
1
Contents Page
Important Safety Instructions 2
Safety Instructions For Fixing Your Radius
HD
Loudspeakers to a Wall 3
Re-cycling 3
RoHS Declaration of Conformity 3
Background 3
Introduction 4
Setting up and Positioning 5
Positioning - Front Speakers 5
Positioning - Surround Speakers 5
Optimum Speaker Placement 6
Fixing to the Wall 7
Fixing the R45
HD
/ R90HD to a Wall 8
Fixing the R180
HD
/ R225HD/ R250HD/ R oneHD to a Wall 9
R270
HD
Feet and Spikes 10
Specifications 11
Guarantee and Service 12
Claims under this Guarantee 12
Data Protection 13
Owner Information 13
EC Declaration of Conformity 14
Radius HD Manual ~ Greyscale Rev5,1.indd 2-1 01/10/2008 16:24:31
Safety Instructions For Fixing Your Radius Loudspeakers to a
Wall
WARNING: For safety reasons do not attempt to fix these speakers to your wall
if you are unsure of your ability to provide a secure and safe fixing. You will need to
determine where to fit the bracket and the structure of the wall. If unsure, please
obtain the services of a competent qualified trades-person.
WARNING: Ensure that there are no water pipes, or electricity cables running
behind where the wall bracket is going to be secured. Work from secure steps
and avoid trailing wires.
Radius
HD
2
Important Safety Instructions
Please read these instructions1. .
Please keep these instructions.2.
Heed all warnings.3.
Follow all instructions.4.
Do not use this apparatus with water.5.
Clean only with a dry cloth.6. Great care and attention has gone into the materials
chosen to produce the Radius HD Series. A gentle wipe with a dry, clean cloth is all
that is required to remove any dust. Treat them as you would a fine piece of furniture
because that is how they have been designed.
Do not install near any heat source7. , such as radiators, heat registers, stoves, or
other apparatus (including amplifiers) that produce heat.
Only use attachments/ accessories specified by Monitor Audio.8.
Use only with the cart9. , stand, tripod, bracket, or table specified by monitor Audio
or sold with the apparatus. When a cart is used, use caution when moving the cart/
apparatus combination to avoid injury from tip-over.
Refer all servicing to qualified service personnel.10. Servicing is required when
the apparatus has been damaged in any way, such as power supply cord or plug
is damaged, liquid has been spilled or objects have fallen onto the apparatus, the
apparatus has been exposed to rain or moisture, does not operate normally or has
been dropped.
This apparatus shall not be exposed to dripping or splashing water 11. and that no
object filled with liquids such as vases shall be placed on the apparatus.
This exclamation point within an equilateral triangle 12. is intended to alert the user
to the presence of important maintenance (servicing) instructions in the literature
accompanying the appliance.
Re-cycling
Correct Disposal of Waste Electrical and Electronic Equipment (WEEE) by User in Private
Households in the EU.
This symbol on the product or accessories indicates that they must not be
disposed of with your household wastes throughout the EU. To prevent
possible harm to the environment or human health from uncontrolled
waste disposal, recycle it responsibly to promote the sustainable reuse of
material resources. Instead it is your responsibility to dispose of your waste
equipment by handing it over to a designated WEEE collection point for
recycling. The separate collection and recycling of your waste equipment
will help conserve natural resources and ensure that it is recycled in a
manner that protects human health and the environment.
For more specific information about where you can take your equipment for recycling please
contact your local city/council office, your local waste disposal service or the outlet where
you purchased your RadiusHD product.
RoHS Declaration of Conformity
Directive 2002/95/EC of the European Parliament and of the Council on
the reduction of the use of certain hazardous substances in electrical and
electronic equipment, January2003.
Background
The RoHS directive restricts the use of Lead (Pb), Cadmium (Cd), Mercury (Hg), hexavalent
Chromium (CrVI), polybrominated biphenyl (PBB) compounds, and polybrominated diphenyl
ether (PBDE) compounds in electrical and electronic equipment sold in the European
Union.
HD
monitoraudio.co.uk
3
Radius HD Manual ~ Greyscale Rev5,1.indd 2-3 01/10/2008 16:24:32
Setting up and Positioning
Although position and suitability will have been considered prior to purchasing your
Radius
HD
, this section will guide you through the optimum positioning and setting up of your
loudspeakers. An illustration is provided on page 6 to assist you in ensuring your speakers
are placed in the optimum positions. For instructions on fitting your RadiusHD speakers
to a wall, please go to pages 7,8 & 9. Self adhesive rubber feet are provided to prevent
movement due to vibration when using the RadiusHD on a table/ equipment stand. The
R270HD comes supplied with rubber feet fitted into the plinth. Further details on these can
be found on page 10.
R one
HD
This cabinet simply needs to be placed either just below or just above your TV/ projector
screen. Ideally, it should be angled towards your listening position.
Positioning - Front Speakers
With the centre channel the tweeter is best pointed towards the listener’s ears to help direct
the sound and should be the first speaker you place in your home theatre room. The centre
channel’s job is to anchor dialogue and other on-screen sounds to the screen. Typically, As
much as 60% of a movie soundtrack comes through the centre channel .
The centre channel can be placed either above or below your TV screen, and as close as
possible. If positioned in a cabinet or sitting on top of the TV ensure that the front edge
is aligned with the front edge of the TV or shelf. Where possible, the height of the centre
channel’s tweeter should be close to the height of your front speakers’ tweeter — ideally,
within about 600mm.
When placing your Radius
HD
loudspeakers on the wall, around a plasma/ LCD TV, the left
and right speakers need to be between 22 & 30° to the left and right of the seating position,
with the tweeters at approximate ear level.
Positioning - Surround Speakers
Ideally, your primary pair of surround speakers should be placed to the left and right of
your listening position — either in line with it, or just behind it (90 - 110°). If you have a 6.1
channel or 7.1 channel system with more than two surround speakers, or if side placement
isn’t available in a 5.1 channel system, consider placement behind your listening position,
facing the front of the room (135 - 150°).
Surround speakers should be placed high enough so that the drivers do not fire directly at
your ears when you’re sitting down — one rule of thumb is to place them at ear level while
standing. If your surround speakers fire directly at your ears, they can overpower your front
speakers.
If your surrounds are mounted on the side walls on brackets (R45
HD
& R90HD), experiment
with aiming them. You may get good results from pointing them at the ceiling or toward the
rear corners of the room.
Surround speaker placement which is ideal for home theatre may not necessarily be perfect
for multichannel music listening, where a precisely focused rear soundstage is best. If both
types of listening are important to you, then you can position your surround speakers for a
compromise between the two.
Radius
HD
4
monitoraudio.co.uk
5
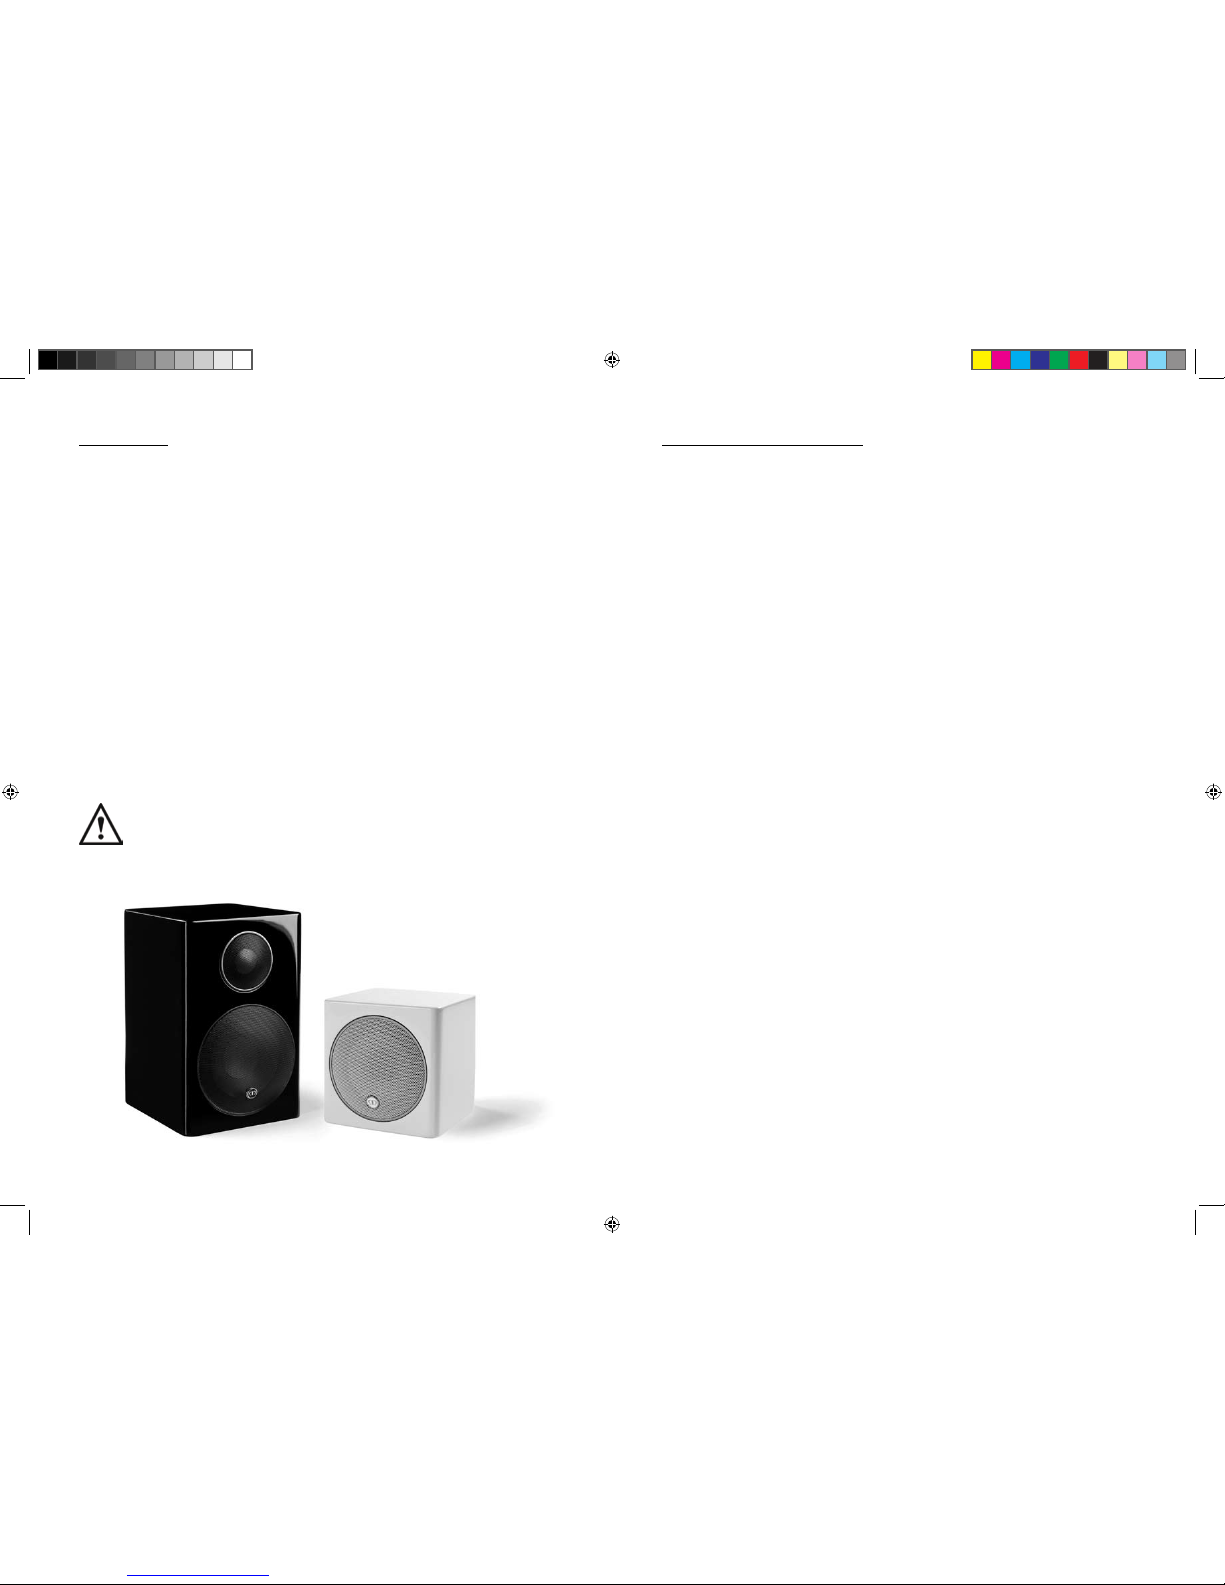
Introduction
Congratulations and thank you for your purchase of the RadiusHD loudspeakers. We are
confident they will provide years of enjoyment and pleasure as only high quality components
have been used throughout.
Building on the overwhelming success of the original Radius Series, Radius
HD
brings
redesigned cabinet profiles, enhanced cabinet structure, improved aesthetics and improved
sonic balance and response.
The R270
HD
has received major performance enhancements in every area. We have
increased the cabinet volume, added an additional rear firing port and also added ballast
in the bottom of the cabinet. All of these new features combined to offer improved, tighter,
punchier bass response and extra cabinet stability.
The R45
HD
and R90HD come supplied with a wall fixing bracket. This enable upto 18 degrees
of movement in all directions.
We have also introduced a new product to the Radius
HD
Series, the R oneHD. The R oneHD
is a left, centre, right in one cabinet. Each channel is enhanced with it’s own braced
compartment and individually specified crossovers. Designed to fit below/ above your
TV where the centre channel would normally sit, additional left and right speakers are not
needed as the R oneHD houses all three in one.
Please follow this user manual carefully as it contains important information about positioning
and set up procedures. For further advanced information on system set-up, FAQ’s and
multi-lingual support please refer to our web site at: www.monitoraudio.co.uk
The R45
HD
has a thermal protection device in it. This helps to protect the drive unit
and tweeter from permanent damage. If the speaker stops working after a long
period of play, turn off the source for about 10 minutes, and retry.
Radius HD Manual ~ Greyscale Rev5,1.indd 4-5 01/10/2008 16:24:34
 Loading...