

Page 1
MONARCH INSTRUMENT
Instruction Manual
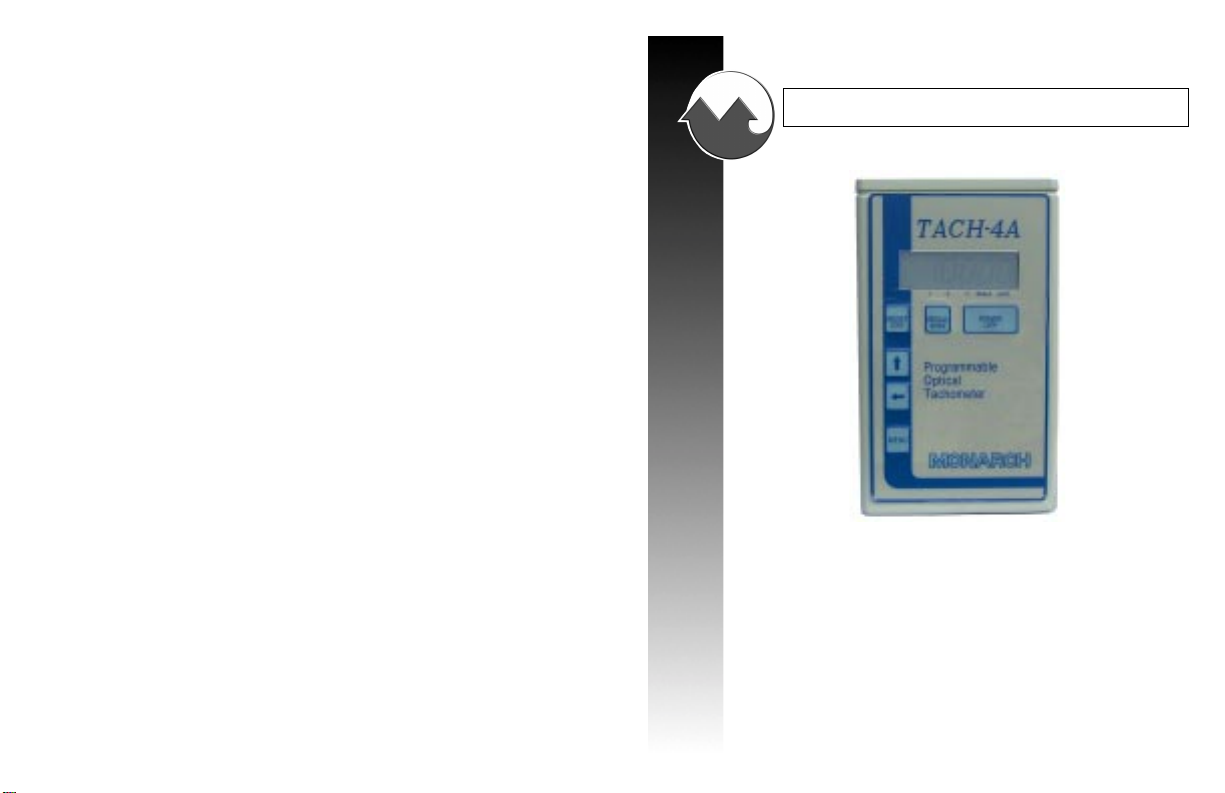
TACH-4A / TACH-4AR
Programmable Optical T achometer
1071-4850-001
Rev 2.0
15 Columbia Drive • Amherst, NH 03031• E-Mail: Support@MonarchInstrument.com
Phone: (603) 883-3390 • Fax: (603) 886-3300
Page 2

OVERVIEW
The TACH-4A has 6 control buttons. Several have more than one function.
POWER (LOCK) - Used to turn the instrument on, and in some cases off.
It is used to initiate the timer and counter operations and to control the
RPM measurement function.
RECALL (STORE) - Used to recall the maximum and minimum values in
RPM and SCALE modes, temporarily hold the display in the Totalize
mode, and “save” (store) new setups in the MENU mode.
RESET (LOCK) - Resets all stored measurements in all modes back to
zero. Holding RESET and pressing POWER on start-up “locks on” the unit
in RPM and Scale modes. RESET returns scale factor to “00001” from a
previously selected scale factor.
UP ARROW (!) - Advances Menu mode selections. Increments the value
of the selected digit when setting scale factors.
LEFT ARROW (") - Turns LCD back light on for 60 seconds in any mode.
Selects menu item options in menu mode. Selects the digit to be edited
when setting a scale factor.
MENU - Pressing MENU then POWER will shut the instrument off.
Pressing MENU then UP ARROW will enter the menu mode and display
the current Menu selection.
POWER ON/OFF
The unit can be powered up by pressing the POWER (LOCK) button. When
turning the unit on, it can be “locked on” by pressing and holding the
RESET (LOCK) button then pressing the POWER(LOCK) button. Locking
the unit on allows it to make continuous readings without holding the
POWER button.
When the unit is powered up, it will operate in the last mode selected prior
to turn off. The TACH-4A is shipped from the factory in the RPM mode.
The unit can be shut off in any mode by pressing the MENU button then
POWER button. When the Lock Chevron is not displayed and no button is
pressed for 60 seconds, the unit will automatically shut off.
Page 3

SPECIFICATIONS
OPERATING MODES Push-button selectabe Menu: RPM
Scale, Total, Count, Timer, Decimal,
Point (Fixed or Floating), Backlight
(On-Off), Serial Number, Test
SPEED RANGE (RPM) 5.0 RPM to 500,000 RPM
Fixed Decimal or Auto-Ranging
N.I.S.T Calibration Certificate is supplied.
Range (RPM) Accuracy (RPM) Resolution
5.0000- 9.9999 ± 0.0001 0.0001
10.000-99.999 ±0.001 0.001
100.00-999.99 ±0.01 0.01
1000.0-9999.9 ±0.1 0.1
10,000-99,999 ±1.0 1.0
100,000-500,000 ±0.001% of the reading
FREQUENCY RANGE: 0.08 Hz to 10,000 Hz
DISPLAY: 6 digit alphanumeric 0.44 inch high
backlighted LCD updated twice per
second
INDICATORS: On Targe t, Low Battery, Mo de, Max,
Min, Instrument “Locked On”, Scale
and Error
POWER: 4 “AA” Alkaline batteries.
Rechargeable NiCad batteries optional
SIZE: 6.2” x 3.74” x 1.3”
WEIGHT 14 oz.
PREPARATION FOR USE
The TACH-4A is a multi-function instrument which can be utilized as a wide
range Tachometer, multi-funtion Totalizer/Counter, and a Timer (Stopwatch).
The scale mode allows the instrument to be used as a Ratemeter and to
scale in real engineering units for RPM and linear speed measurements.
The Totalizer mode has an independent scaling capability. The TACH-4A
has powerful internal optics while the TACH-4AR has identical internal
optics and the capability to operate with a Remote Optical Sensor,
Infrared Sensor, or Remote Laser Sensor.
TACH-4A measures RPM directly without contacting the rotating object. A
portion of the circumference of the rotating object is prepared by cleaning a
small area and applying Reflective Tape (T-5) approximately 1/2" square.
For small diameter shafts, a smaller reflective marker may be used on the
circumference, but in no application should the reflective marker cover more
than half the circumference of the shaft. Also, a measurement can be made
on the end of the shaft by applying a small piece of Reflective Tape (T-5)
along a radial line (slightly less than 1/2 of the shaft should be covered).
RANGE AND ACCURACY
TACH-4A measures rotational speed from 5 RPM to 500,000 RPM. The
decimal point can be programmed for fixed or floating operation to provide
the maximum resolution and accuracy for the speed being measured.
Below 10 RPM, when in the floating decimal mode, TACH-4A will read to
four decimal places. Above 100,000 RPM, the display reads to six digits.
CALIBRATION
The instrument is factory calibrated, traceable to NIST. The calibration
system complies with MIL-STD-45662A. The accuracy of the Tachometer
can be checked at any time by aiming it at an old style fluorescent light and
observing 7200 + 2 counts.
NOTE: In countries with a 50 Hz. power line frequency, the Tachometer
will read 6000 + 2 counts.
A N.I.S.T. (National Institute of Standards and Technology) Certificate of
Calibration is supplied with each instrument and is valid for 12 months.
Page 4

OPERATING DISTANCE AND ANGLE
Measurements can be made up to 36 inches and at angles of up to 45° from
the reflective tape (T-5). When measuring shiny surfaces, a 20° angle is
recommended. The TACH-4A has exceptional accuracy, and for very low or
very high speed measurements, it is desirable to hold the instrument against
a steady rest, or mount it on a Tripod or bracket using the 1/4 - 20 UNC
mounting bushing on the back side of the instrument. This ensures that
slight hand motion will not influence the time interval between pulses,
giving erroneous readings. For most measurements, it is not necessary to
mount the instrument in this manner. The TACH-4AR with RLS-5P Laser
Sensor can be used up to 50 feet and 45° from the reflective tape (T-5).
CHANGING THE MODE
To change the operating mode of the unit, press the MENU button so that
“MENU” is displayed. Pressing the UP ARROW (!) button once will
display the current mode. Keep pressing the UP ARROW (!) button until
the desired mode is displayed. Press the LEFT ARROW (") button to
change an option of that mode, i.e. to select MANUAL or AUTO for the
Timer mode. Finally, press the RECALL (STORE) button to “save” the
new mode. To set the scale factor for Scale or Totalize modes see Setting
the Scale Factor section.
MENU SELECTIONS
Pressing the MENU button causes the word “Menu” to be displayed. Pressing
the UP ARROW (!) button displays the current mode. Pressing the UP
ARROW (!) button again displays the RPM mode. Press the UP
ARROW (!) button again to display the next mode. TEST loops around
back to RPM. Pressing the LEFT ARROW (") button will perform the
function stated in the following table or display the current option setting.
Pressing the LEFT ARROW (") button again allows selection of either of
the two options shown.
Do not forget to Press the RECALL (STORE) button to save the selected
mode or value. Pressing the MENU button returns to the “MENU”
function. Pressing the RESET button returns to the operating mode
without changing the unit.
ACCESSORIES
MODEL DESCRIPTION
ROS-5P Remote Optical Sensor with an 8 foot cable and
a mounting bracket
RLS-5P Remote Laser Sensor with an 8 foot cable and a
mounting bushing on a base Infrared Sensor with
an 8 foot cable
IRS-5P Infrared sensor with an 8 foot cable
MT-190P Magnetic Trigger Sensor/Amplifier with an 8 foot
cable
EC-25P 25 foot extension cable for remote sensors with
male/female 1/8 inch phone plug connectors
R-5B Recharger, 115 Vac - 50/60 Hz, with 4 “AA” Nicad
Batteries
R-6B Recharger, 230Vac - 50/60 Hz, with 4 “AA” Nicad
Batteries
B-4 Four “AA” Rechargeble NiCad Batteries
CC-3 Plastic Latching Carrying Case
T-5 Reflective Tape - 5 foot roll, 0.5 inch wide
T-5WP Waterproof Reflective Tape (honeycomb pattern)
5 foot roll, 1 inch wide
CAL-N.I.S.T N.I.S.T. Traceable Certificate of Calibration and
Re-Calibration
Page 5

LCD AND PANEL DISPLAY SYMBOLS
&&
& On Target Indicator - In RPM and Scale modes. The ‘On
&&
Target Indicator’ blinks at a signal input frequency to indicate
that the light is reflected back from the target .
1 “Max” - Indicates a maximum reading in the RPM and Scale
modes. Indicates the first lap time in the Timer mode.
2 “Min” - Indicates the minimum reading in the RPM and Scale
modes. Indicates the second lap time in Timer mode.
3 Indicates the third lap time in Timer mode.
SCALE Indicates the instrument is in scale mode.
LOCK Indicates the unit is “locked on”. The TACH-4A will not shut
off automatically when the lock chevron is displayed.
‘--------’ Indicates the input frequency exceeds the limit of the TACH-4A.
OVFLOW “Overflow” indicates the count has exceeded 999,999.
# " " " TABLE READS FROM THE BOTTOM TO THE TOP
% OPTION OPTION/FUNCTION MENU ITEMS DESCRIPTIONS/RANGES
%
% Perform Self test " TEST Displays all LCD segments
% !
% View Serial number " SERIAL Displays Serial Number
% !
% ON " OFF " LIGHT Select Back light On/Off
% !
% FIXED " FLOAT " DEC PT Select Fixed or Floating
% ! Decimal Point.
% AUTO " MANUAL " TIMER 0 to 1 hour (.01 sec)
% ! 1 to 100 hours (1 sec)
% COUNT Count from 1 to 999,999
% !
% Set Totalize Scale Factor " TOTAL Totalize from 1 to 999,999
% !
% Set Scale Factor " SCALE Scale from 0.0001 to 99,999
% !
% RPM 5 RPM to 500,000 RPM
% !
Pressing the MENU button starts here “MENU”
MODE DESCRIPTIONS
RPM MODE - Revolutions Per Minute
The RPM mode is used for measuring the speed of rotating objects by
reflecting a beam of light off a piece of reflective tape (T-5). The Tachometer
requires one pulse per revolution. For other than one pulse per revolution,
use the SCALE mode. When turning the unit on, it can be “locked on” by
pressing and holding the RESET /LOCK button, then pressing the POWER/
LOCK button. The unit will indicate the mode, followed by “READY”, and
will then begin taking readings. The LOCK chevron will indicate that
the unit is “locked on”. The TACH-4AR version will automatically
turn on the external sensor if it is plugged in, else the internal optics
will be turned on. It is necessary to aim the light at the reflective tape
(T-5) in order to take readings.
Page 6

POWER/LOCK When the instrument is “locked on”, the POWER
button will turn the unit off. When not “locked
on” the POWER button must be depressed and
held to take a reading. Each time POWER is
pressed, the previous Minimum and Maximum
value is cleared, and the optics are turned on to
take the next reading. When the POWER button is
released, the Tachometer holds the last reading for
60 seconds, then automatically shuts off.
NOTE: None of the following buttons will function when the POWER
button is being held.
RECALL/STORE Used to display the stored Maximum or Minimum
value. When pressed, the unit will display “MAX”
or “MIN”, then the value. The reading alternates
between the Maximum and Minimum values each
time this button is pressed. The value is displayed
for 2 seconds, then the display returns to the last
measurement.
RESET/LOCK Resets the minimum, maximum, and last measure
ment to Zero.
LEFT ARROW (") Turns the LCD back light on for 60 seconds
(assuming the backlight is not already on)
SCALE MODE
Operation is the same as for the RPM mode, except that the measurement
is scaled. In the RPM mode, the input frequency is automatically
multiplied by 60 to display in Revolutions Per Minute. In the scale mode,
the input frequency (pulses per second) is multiplied by a user defined
scale factor. As an example: for two pulses per revolution and a desired
readout in RPM, the Scale Factor is 30. (60 / pulses per rev = Scale
Factor) The scale factor can range from 0.0001 to 99999. This allows the
user to display data in real engineering units.
REMOTE SENSORS (TACH-4AR ONLY)
The remote sensors plug into the stereo phone socket on the end panel
of the unit . The unit automatically detects the remote sensor at ‘turn on’
time and powers the remote sensor on as needed. If you plug a remote
sensor in while in the middle of a measuring operation, the unit will not
recognize the remote sensor. It is then necessary to turn the TACH-4A
off, then on again. Remember to press and hold the POWER button
or ‘lock-on’ the unit to take a reading with a remote sensor.
It is often useful to turn the TACH-4A on in the “LOCK” mode when using
remote sensors. Plug the sensor in, then press and hold the RESET/
LOCK button and press the POWER button to turn the unit on and
permanently power the sensor. Refer to individual modes for further
instruction.
PO, PULSE OUTPUT (OPTIONAL)
The Pulse Output is an option for both the TACH-4A and TACH-4AR. This
option includes a 2.5mm phone socket installed on the lens panel of the
Tachometer and a six foot cable with mating 2.5mm phone plug to male
BNC connector enabling the user to interface with a standard BNC cable.
The Pulse Output is a 0 to 5 Volt TTL compatible output. Every input
pulse gives an output pulse. Normally, the Tachometer is used with one
pulse per revolution, therefore the output would be one pulse per revolution.
If the Tachometer is used with more than one pulse per revolution, the
output will echo the input, thus providing more than one pulse per
revolution.
Page 7

SELF TEST
To run the self test, press the UP ARROW (!) button in the MENU mode
until “TEST” is displayed. Press the LEFT ARROW (") button. The unit
will display the current software revision as “Rev x.x”. The unit will then
automatically proceed with the self test. All segments of the display will
be on, as will the back light, the internal optics, and the remote sensor
(TACH-4AR only). They will remain on for about 5 seconds while the
unit performs other internal tests. If the tests pass, the unit will return
to the MENU. Otherwise an error message (ERR x) will be displayed for
about 5 seconds before returning to “MENU” display. Pressing RESET
at this point returns to the current mode of operation.
BATTERIES
The TACH-4A and TACH-4AR are supplied with four “AA” alkaline
batteries unless ordered with the optional Recharger and NiCad rechargeable
batteries. The instrument will operate continuously in excess of 8 hours
on fully charged batteries.
RECHARGER AND RECHARGEABLE BATTERIES
(OPTIONAL ACCESSORY)
The RECHARGER AND NICAD RECHARGEABLE BATTERIES
allow recharging without removing the batteries from the instrument.
Insert the Recharger plug into the 5.5mm DC charger jack on the lens
panel. Total recharge time is approximately 16 hours. THE INSTRUMENT
MAY BE OPERATED WITH THE RECHARGER. The instrument will
operate continuously in excess of 8 hours on fully charged batteries.
LOW BATTERY INDICATION
When the batteries are low, the display blinks every 0.5 seconds. Once
the display starts to blink, the Tachometer can be operated for an
additional 10 to 15 minutes. Should the battery get too low to operate
the instrument correctly, the display will indicate “LO BAT” for 5
seconds and the instrument will automatically shut off.
SETTING THE SCALE FACTOR
SCALE and TOTALIZE modes have independent scale factors. To change
the scale factor, press the MENU button then press the UP ARROW (!)
until either “SCALE” or “TOTAL” is displayed. Press the LEFT
ARROW (") button to change the scale factor. This will display the
current scale factor with the right most digit blinking. The blinking digit
is the one to be changed. This digit can be increased with the UP
ARROW (!) button. After the digit gets to 9, it will return to 0. Select
the digit to be changed with the LEFT ARROW (") button. Move the
decimal point with the POWER button. The RESET button sets the
scale factor to 1. Pressing the MENU button returns to the “MENU”
without changing the scale factor. Save the new value with the RECALL
(STORE) button.
TOTALIZER MODE
This mode is used to totalize an input from either the internal optics or
the remote sensor (TACH-4AR only). Each time the unit receives an
input from the reflective tape (T-5), for example, it increments the
display by the value set in the Scale Factor. Note that this is not the
same scale factor as in the scale mode. Once this mode is selected, the
unit remains on permanently until turned off by the user, or 60 seconds
passes with a display of zero. The unit can be turned off at any time by
pressing the POWER button. Readings can be stopped or started by
moving the optics away from the reflective tape (T-5) or by blocking the
optics. If the displayed value exceeds 999,999, the unit will show
“OVFLOW”. Note that the unit will remain in this condition until
cleared by the user. (Press RESET button)
POWER/LOCK Turns the unit off.
RECALL/STORE Holds the display for four seconds while totalizing
continues.
RESET/LOCK Sets the reading back to zero
LEFT ARROW (") Turns the LCD back light on for 60 seconds
(assuming the back light is not already on)
Page 8

COUNT MODE
This is a basic counter mode. Each time the POWER button is pressed,the
value displayed is incremented by 1. The display is reset to zero with the
RESET button.
POWER/LOCK Increments the count by one.
RESET/LOCK Resets the counter to 0.
LEFT ARROW (") Turns the LCD back light on for 60 seconds
(assuming the back light is not already on)
TIMER MODE
This is the Stopwatch mode. There are two basic modes of operation,
“Auto” and “Manual”, selected in the MENU. To change between Auto
and Manual operation, press the MENU button so “MENU” is displayed.
Press the UP ARROW (!) until “TIMER” is displayed. Press the LEFT
ARROW (") to show the current option. Press the LEFT ARROW (")
again to change to the other option. Finally, press the RECALL (STORE)
button the save the change.
The MANUAL mode functions like a Stopwatch. When TIMER mode is
selected, the display shows 00:00:00. The timing is started and stopped
by the POWER button. Up to three Lap times may be stored using the
RECALL (STORE) button while the timer is running. Lap times may be
recalled by pressing the RECALL button when the timer has stopped.
The timer may be reset to 00:00:00 with the RESET button. When the
timing is started or the RESET button is pressed, the memory values are
cleared. When the Lock Chevron is not displayed and no button is pressed
for 60 seconds, the unit will automatically shut off.
The AUTO mode functions similarly to the MANUAL mode with the
exception that the internal optics (or Remote Sensor with the
TACH-4AR) can be used to start and stop the Timing function. The
POWER button is also operational in this mode so that the user can start
the timer by pressing the POWER button, then have the timer stopped
when an item passes through the light beam. Similarly, the timer can be
started by beam interruption and ended by the POWER button.
POWER/LOCK Starts and stops the timer.
RECALL/STORE While Timer is running, pressing RECALL will
store lap times up to a maximum of three laps.
When the Timer is stopped, pressing RECALL will
display stored lap times.
RESET/LOCK Resets the timer to 00:00:00 and clears the stored
lap times.
LEFT ARROW (") Turns the LCD back light on for 60 seconds
(assuming the backlight is not already on)
CHANGING THE DECIMAL POINT
The instrument can work with either a fixed or floating decimal point.
The fixed decimal point always displays the value to the nearest whole
number and is right justified. The floating point mode always displays
with at least 5 digits of accuracy. To change the current setting, go into
the MENU mode by pressing the MENU button. Press the UP ARROW
(!) button until “DEC PT” is displayed. Press the LEFT ARROW (")
button to show the current setting. Press the LEFT ARROW (") button
again to change the decimal point mode. Press the RECALL (STORE)
button to “save” the selected mode.
BACK LIGHT OPERATION
The back light can be turned on for 60 seconds by pressing the LEFT
ARROW (") button in most modes. It can also be programmed to be on
permanently by selecting the MENU mode with the MENU button. Press
the UP ARROW (!) button until “LIGHT” is displayed. Press the LEFT
ARROW (") button to show the current status of the back light. Press
the LEFT ARROW (") button one more time to change it, then press the
RECALL (store) button to save it.
SERIAL NUMBER
Press the MENU button, then press the UP ARROW (!) button until
“SERIAL” is displayed. Press the LEFT ARROW (") button to display
the serial number.
 Loading...