

Page 1
OPERATING INSTRUCTIONS
The Monarch® 9464 Four Station Battery Charger is
designed for the Monarch® Sierra Sport 2 9460
portable printer. It can charge the individual batteries
or the printer with a battery installed. Full charging of a
battery takes approximately 1.5 hours to 3 hours.
You must charge a battery before using it.
These instructions explain important battery and safety
information and how to
u
read the display.
u
install the charger.
u
install and remove the adapters.
u
charge the battery.
You will need to install either a printer
adapter or a battery adapter on the
charger base before charging batteries.
Battery and Safety Information
u
The charger is designed to charge the Monarch®
battery pack (part number 120095).
WARNINGS
Use only Monarch® lithium-ion battery packs in
the charger. The battery could be damaged or
explode if placed on a different charger.
Do not charge non-rechargeable batteries in this
charger.
TC9464OI Rev. AA 5 /00 ©2000 Monarch Marking Systems, Inc. All righ ts reserved.
Page 2

u
Charging time is approximately 1.5 to 3 hours.
u
Take the battery out of the printer when storing the
printer for long periods of time.
u
The battery storage temperature is 40°F to 104°F
(-40°C to 40°C). Do not store a fully charged
battery at temperatures greater than 104°F (40°C)
for long periods of time. The battery may
permanently lose charge capacity.
u
Disposal information - Do not throw in trash.
Dispose according to your local regulations.
CAUTION
Do not disassemble, short circuit, heat above
80°C, or incinerate, the battery may explode.
u
The recommended temperature for charging is 20°C
(68°F) to 25°C (77°F).
2
Page 3
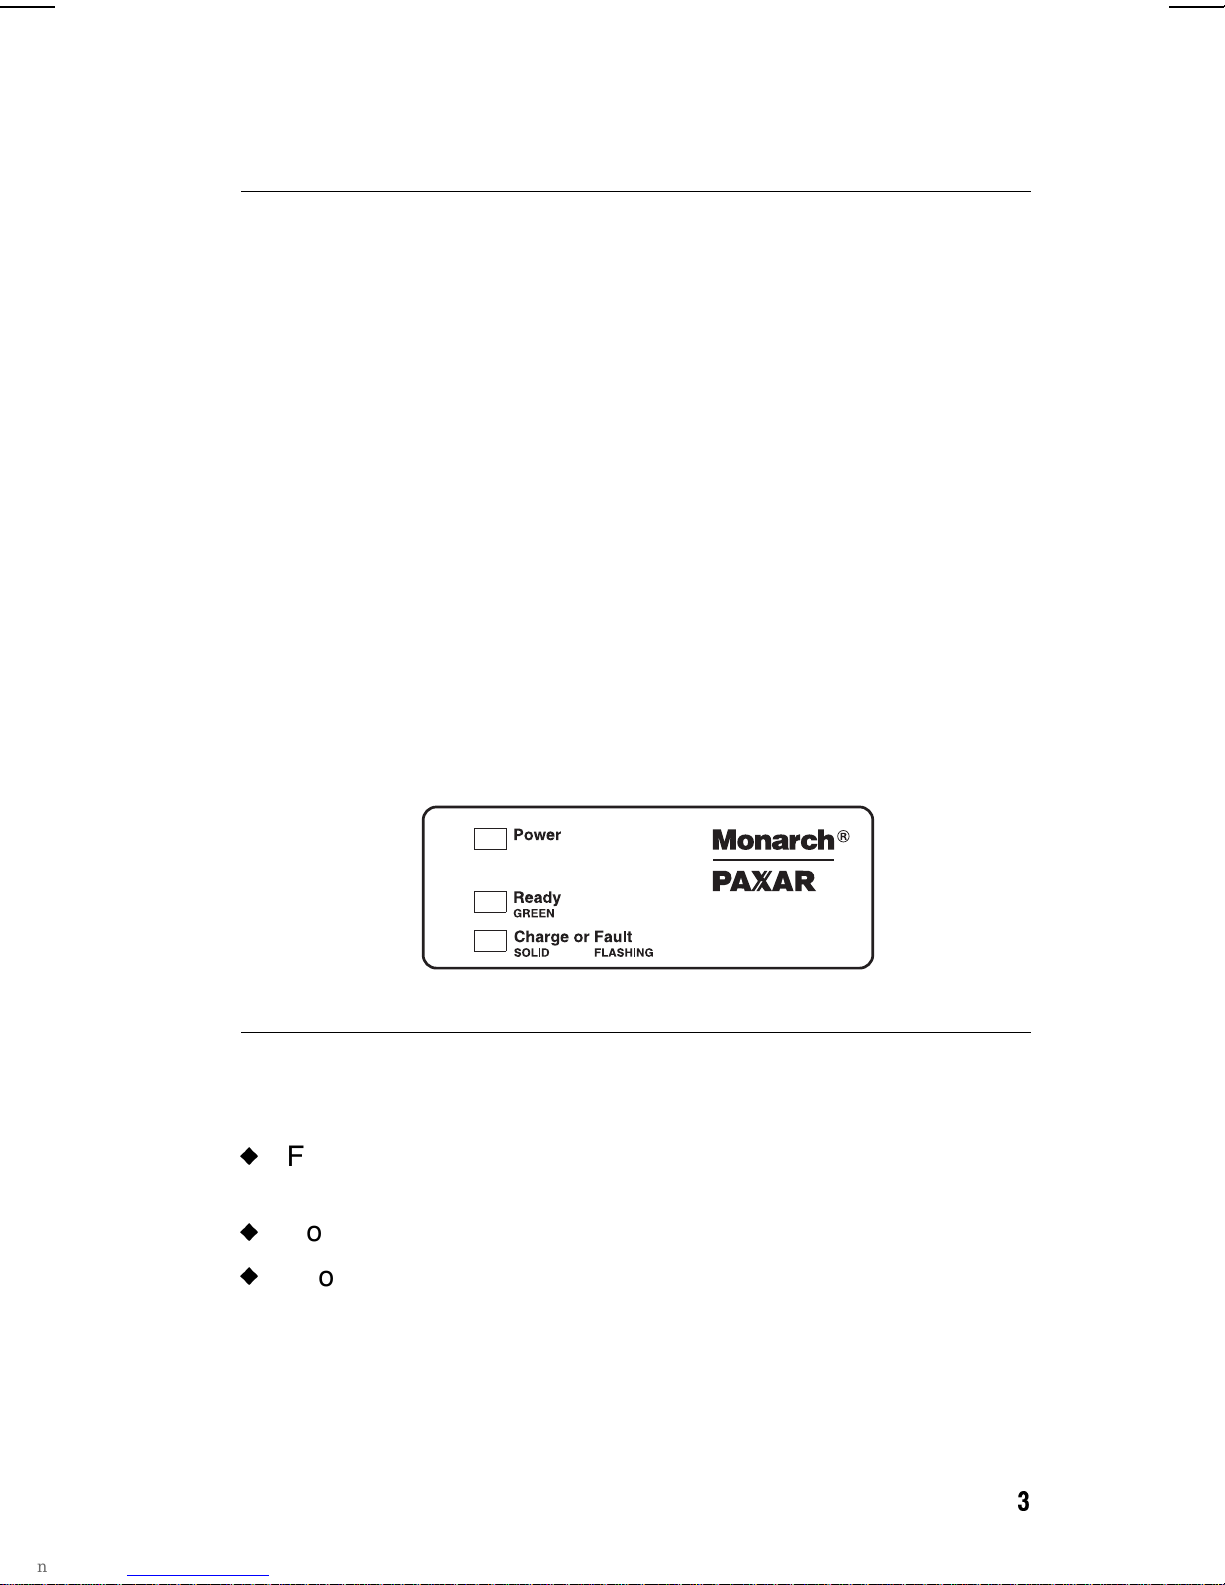
Reading the Display
Power The charger is on when the Power
LED is solid green.
Ready The battery is charged when the
Ready LED is solid green
Charge or
Fault
The battery is charging when the
Charge LED is solid yellow.
The battery has a charge pending
or fault when the Fault LED flashes
yellow.
If the Charge LED continues to
flash yellow after five (5) hours, call
Monarch® Service at
1-800-543-6650. The battery may
be deeply discharged or has been
unused for an extended period of
time. You may need a new battery.
Installing the Charger
After you unpack the charger, you may have
(depending on your order):
u
Four Station Battery Charger Base
(part number 120286)
u
Power Supply (part number 120287)
u
two printer adapters, or one printer adapter and two
battery adapters, or four battery adapters.
Additional adapters can be purchased separately:
printer adapter (part number 120291) or
battery adapter (part number 120290).
3
Page 4

To in s t a l l :
1. Place the charger base and power supply in a
suitable location, preferably on a table, near an
electrical outlet.
2. Plug the power supply cable into the socket located
on the side of the charger as shown.
PowerSupply
PowerSupply
Cable
3. Plug the other end of the power supply into a
grounded electrical outlet.
Installing and Removing the Adapters
There are several adapter combinations for the charger
base. You can have:
u
two printer adapters
u
one printer adapter and two battery adapters
u
four battery adapters
4
Page 5

To i n s t a l l :
1. Align any adapter with the side slots and insert it
into the charger base.
ChargerBase
SideSlot
If the adapter has rubber feet installed,
remove the rubber feet before inserting
the adapter into the charger base.
2. Slide forward until the adapter locks into place.
To r e m o v e :
Adapter
1. Pull up on the
locking tab on the
back of the adapter
and slide the
adapter backwards.
2. Lift the adapter up
and out of the
charger base.
LockingTab
5
Page 6

Charging the Battery
The battery can be charged on the adapter or in the
printer.
To charge a battery:
1. Insert the battery adapter into an available slot on
the charger base. See "Installing and Removing
the Adapters", for more information.
2. Insert the battery into the adapter.
u
The Charge LED flashes and then turns solid yellow,
starting the charging process.
u
If the Charge LED continues to flash yellow after
five (5) hours, call Monarch® Service at
1-800-543-6650. The battery may be deeply
discharged or has been unused for an extended
period of time. You may need a new battery.
u
The Ready LED turns green when the charging
process is finished.
6
Page 7

To charge a battery in the printer:
1. Insert the printer adapter into an available slot on
the charger base. See "Installing and Removing
the Adapters", for more information.
2. Tu r n off the printer.
3. Insert the printer (with the battery installed) into the
adapter by lining up the three connectors on the
bottom of the printer with the prongs on the adapter
base.
You cannot use the printer while the
battery is charging.
Prong
7
Page 8

Charger Specifications
Base Length: 12.75" (324 mm)
Base Width: 7.0" (178 mm)
Height w/o
1.75" (44 mm)
Adapters:
Weight: 4 lbs. (1.5 kg)
Shipping Weight: 5 lbs. (2.25 kg)
Power: Input: Universal 90V-230 VAC,
50/60 Hz
Output: 15 VDC, 5A or
24 VDC, 4.5A
Operating Limits: 32° to 104°F (0° to 40°C)
Storage -40° to 104°F
(-40° to 40°C)
Humidity: 95% non-condensing
8
 Loading...