

ASSEMBLY INSTRUCTIONS
FURNITURE PART LIST
ITEM DESCRIPTION
QTY
A
HEADBOARD 1 PC
B
SUPPORT BOARD 2 PCS
HARDWARE PART LIST
ITEM DESCRIPTION
QTY
1
JCBB BOLT M8 x 40mm 4 PCS
2
M8 FLAT WASHER 4 PCS
3
M5 ALLEN KEY
1 PC
MOD - 5149
STEP 2
2
STEP 1
1
3
STEP 3
B
A
Read instructions carefully. See furniture and hardware part
list on the right for guidance.
Have all parts ready before assembly. Place all wooden furniture
parts on a clean and flat soft surface to prevent scratching.
Before you start, here are some words of caution:
1. Do not FULLY - TIGHTEN nuts and bolts until all nuts and bolts are partially tightened.
2. Do not FULLY - TIGHTEN nuts and bolts to avoid causing damage to the threading.
3. Keep all hardware parts out of reach of children.
NOTE : THE LIST AND QUANTITY SHOWN ARE FOR 1 UNIT ASSEMBLY.
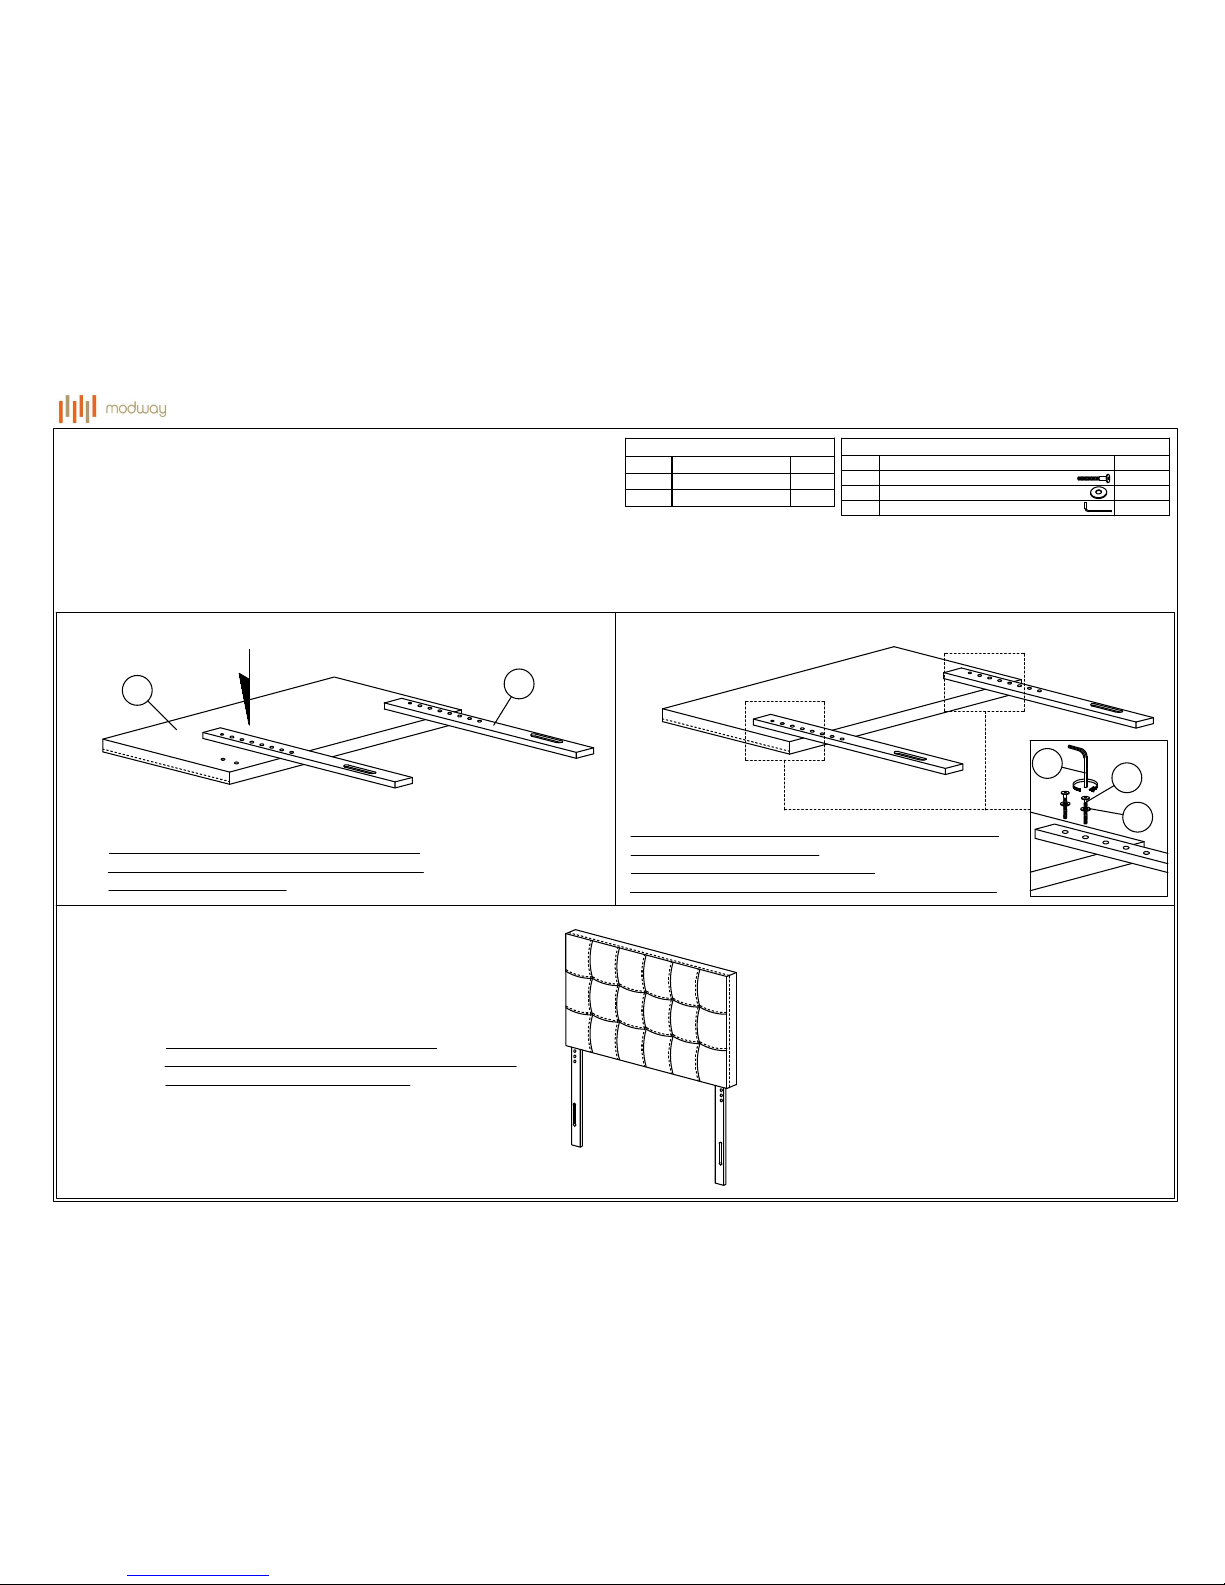
Align pre-drilled support stand holes over the
pre-drilled headboard holes according to your
desired headboard height
Secure each support stand by using 2x JCBB Bolt [1]
and 2x M8 Flat Washer [2].
Tighten with supplied Allen Key [3].
Repeat the same procedure to secure the other side.
Your headboard assembly is complete.
Note: Hardware may loosen over time. Periodically
check that all connections are tight.
ASSEMBLY INSTRUCTIONS (BED FRAME)
FURNITURE PART LIST
ITEM DESCRIPTION
QTY
A
HEADBOARD 1 PC
B
BED FRAME 1 PC
HARDWARE PART LIST
ITEM DESCRIPTION
QTY
1
JCBB BOLT M6 x 60mm 4 PCS
2
JCBB BOLT M6 x 35mm 4 PCS
3
M6 FLAT WASHER 8 PCS
4
M6 SPRING WASHER 4 PCS
5
M6 HEX NUT 4 PCS
6
M4 ALLEN KEY 1 PC
STEP 1
STEP 2
B
A
A
B
5
3
3
4
1
6
MOD - 5149
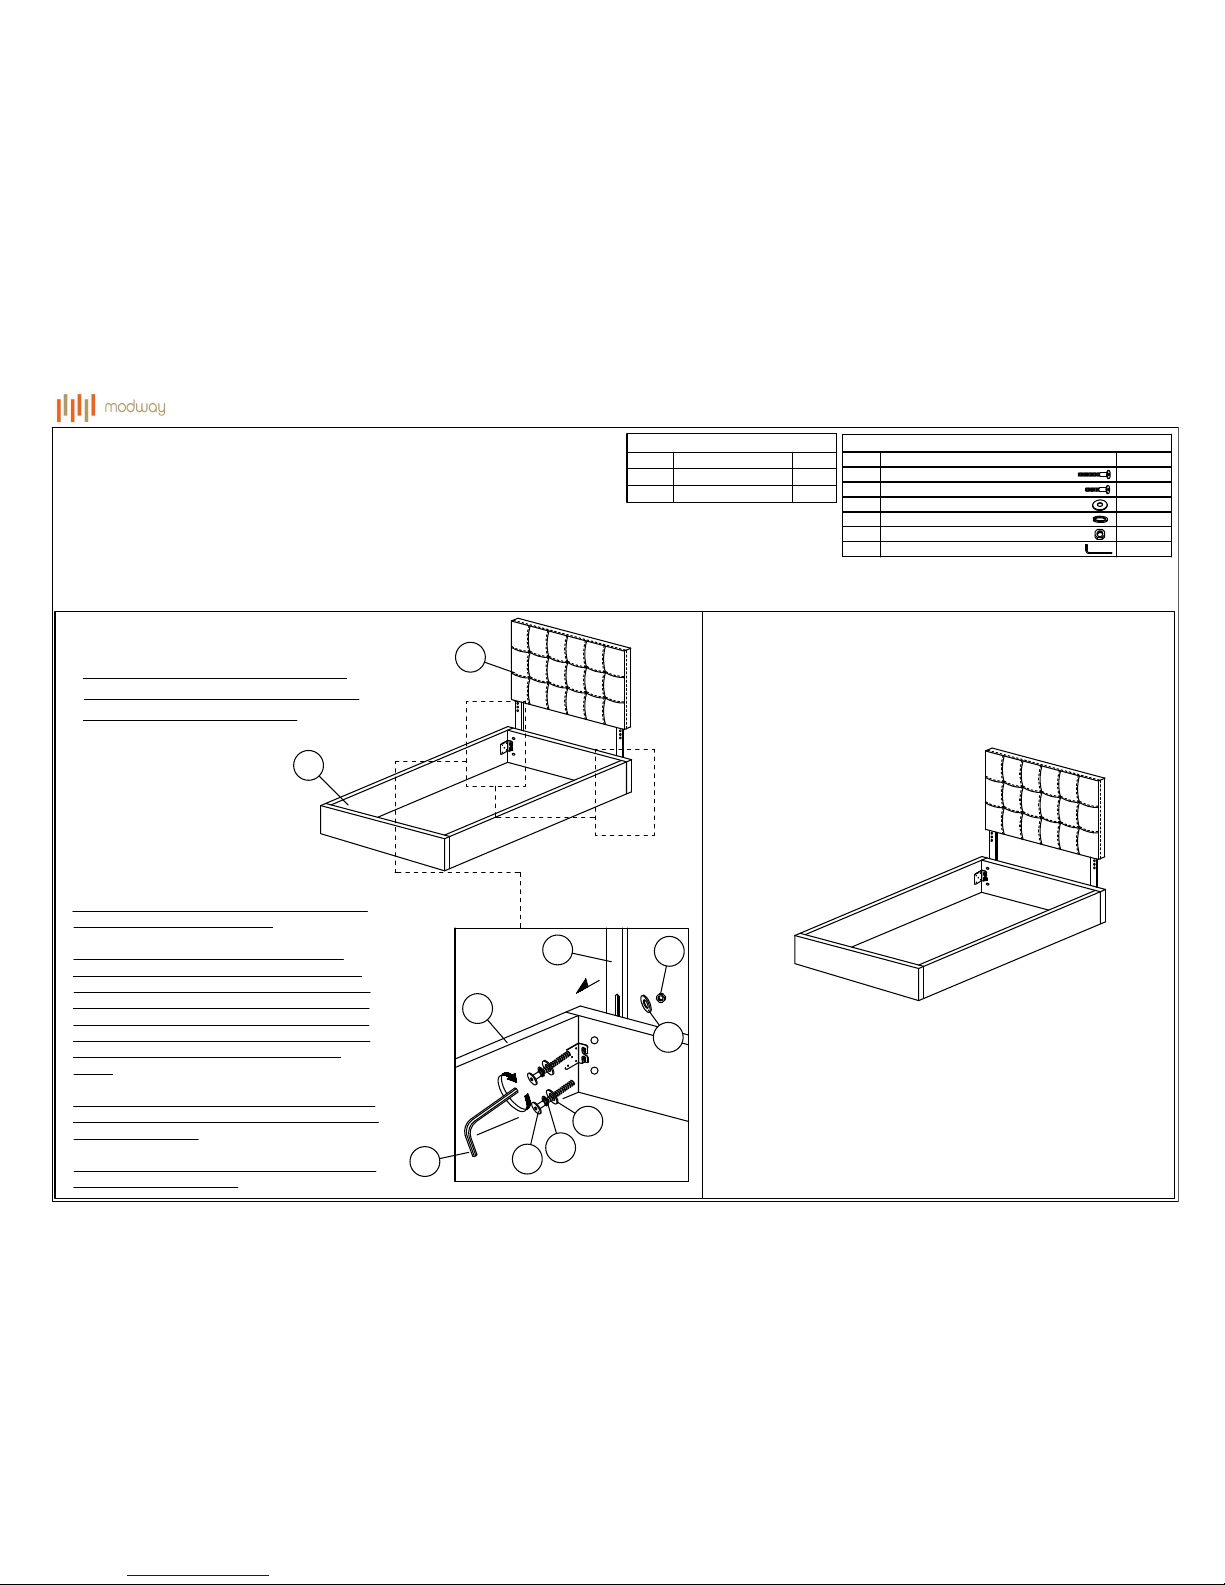
Note: Extra screws were provided
for attaching the headboard to your
bed frame (use is optional).
1. Line up the bed frame board's pre-drilled holes
to match those of the headboard.
2. Secure the headboard to the bed frame by
using 2x JCBB bolt 60mm (1) for the thicker bed
frame, and 2x JCBB bolt 35mm (2) for the thinner
bed frame. Before inserting each bolt, place a M6
spring washer (4) and M6 flat washer (3) on each
bolt. Then fit a M6 flat washer (3) on the screw as
it protrudes through the other side of the bed
frame.
3. Place a M6 Hex Nut (5) after the M6 flat washer
(3) at the end of each screw. Then tighten by using
the M4 Allen key (6).
4) Repeat the same procedure for each screw and
each side of the bed frame.
Read instructions carefully. See furniture and hardware part
list on the right for guidance.
Have all parts ready before assembly. Place all wooden furniture
parts on a clean and flat soft surface to prevent scratching.
Before you start, here are some words of caution:
1. Do not FULLY - TIGHTEN nuts and bolts until all nuts and bolts are partially tightened.
2. Do not FULLY - TIGHTEN nuts and bolts to avoid causing damage to the threading.
3. Keep all hardware parts out of reach of children.
NOTE : THE LIST AND QUANTITY SHOWN ARE FOR 1 UNIT ASSEMBLY.
 Loading...