

Page 1
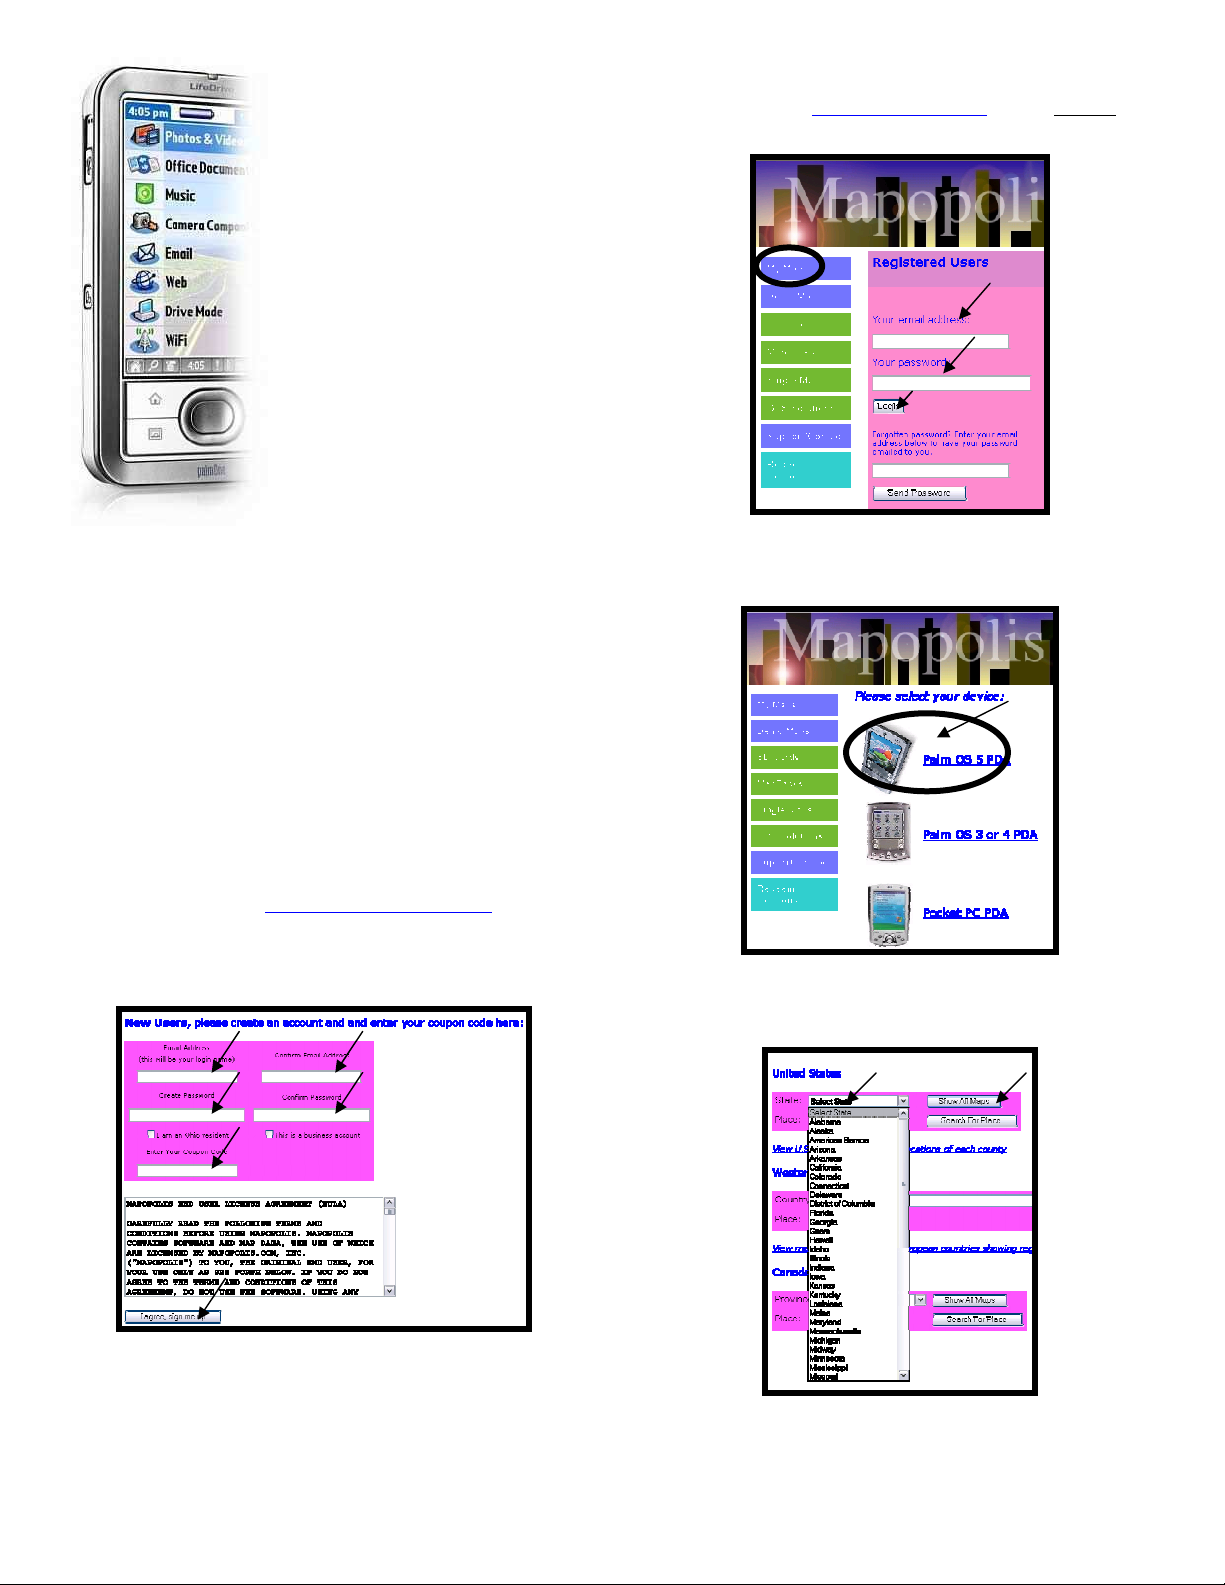
Upgrade your Palm
LifeDrive into a
Portable Navigation
System
Welcome to the world of GPS
navigation! Thanks to Mobile
Crossing, your Palm OS 5
LifeDrive can now be upgraded
into a fully featured portable
navigation system that fits into
your pocket.
You’re just a few steps away from
having it running.
Prerequisites
Before beginning the activation step the following requirements should be
met:
• Read and understand the Palm LifeDrive Reference Guide
• Have installed Palm desktop on your PC or Mac computer.
• Your computer will need to have an online connection to the
Internet to download maps and the navigation application.
• Have the Mapopolis activation code available. (It is in an envelope
in the box.)
• You will need an SD card if you wish to use more than a few
maps. (One map usually covers one county.) A recommendation
would be at least 128 Megabytes for map memory.
(1) Activate Mapopolis Navigator
To activate Mapopolis: go to http://www.mapopolis.com/redeem and fill in
the account form by scrolling to the bottom of the screen (Figure 1). You may
use your login and password to obtain and re-download maps.
Note: The Activation Code in the envelope is the coupon code on the web site.
(2) Download Mapopolis Navigator
After activating, go to http://www.mapopolis.com and click My Maps as
shown in Figure 2. Then enter your email address and password from Step 1.
Figure 2. Access My Maps
If asked, you choose Palm OS 5 PDA as the type of device you own. You
must download Palm specific maps.
Figure 3. Indicate Palm OS 5 PDA
Next, select the state (for the US), province (for Canada) or country (for
Europe). See Figure 4 and then click Show All Maps.
Figure 1. Activate Mapopolis Navigator
Figure 4. Choose your maps
Select an individual map, an entire state, a province or a country all at once.
1
Page 2
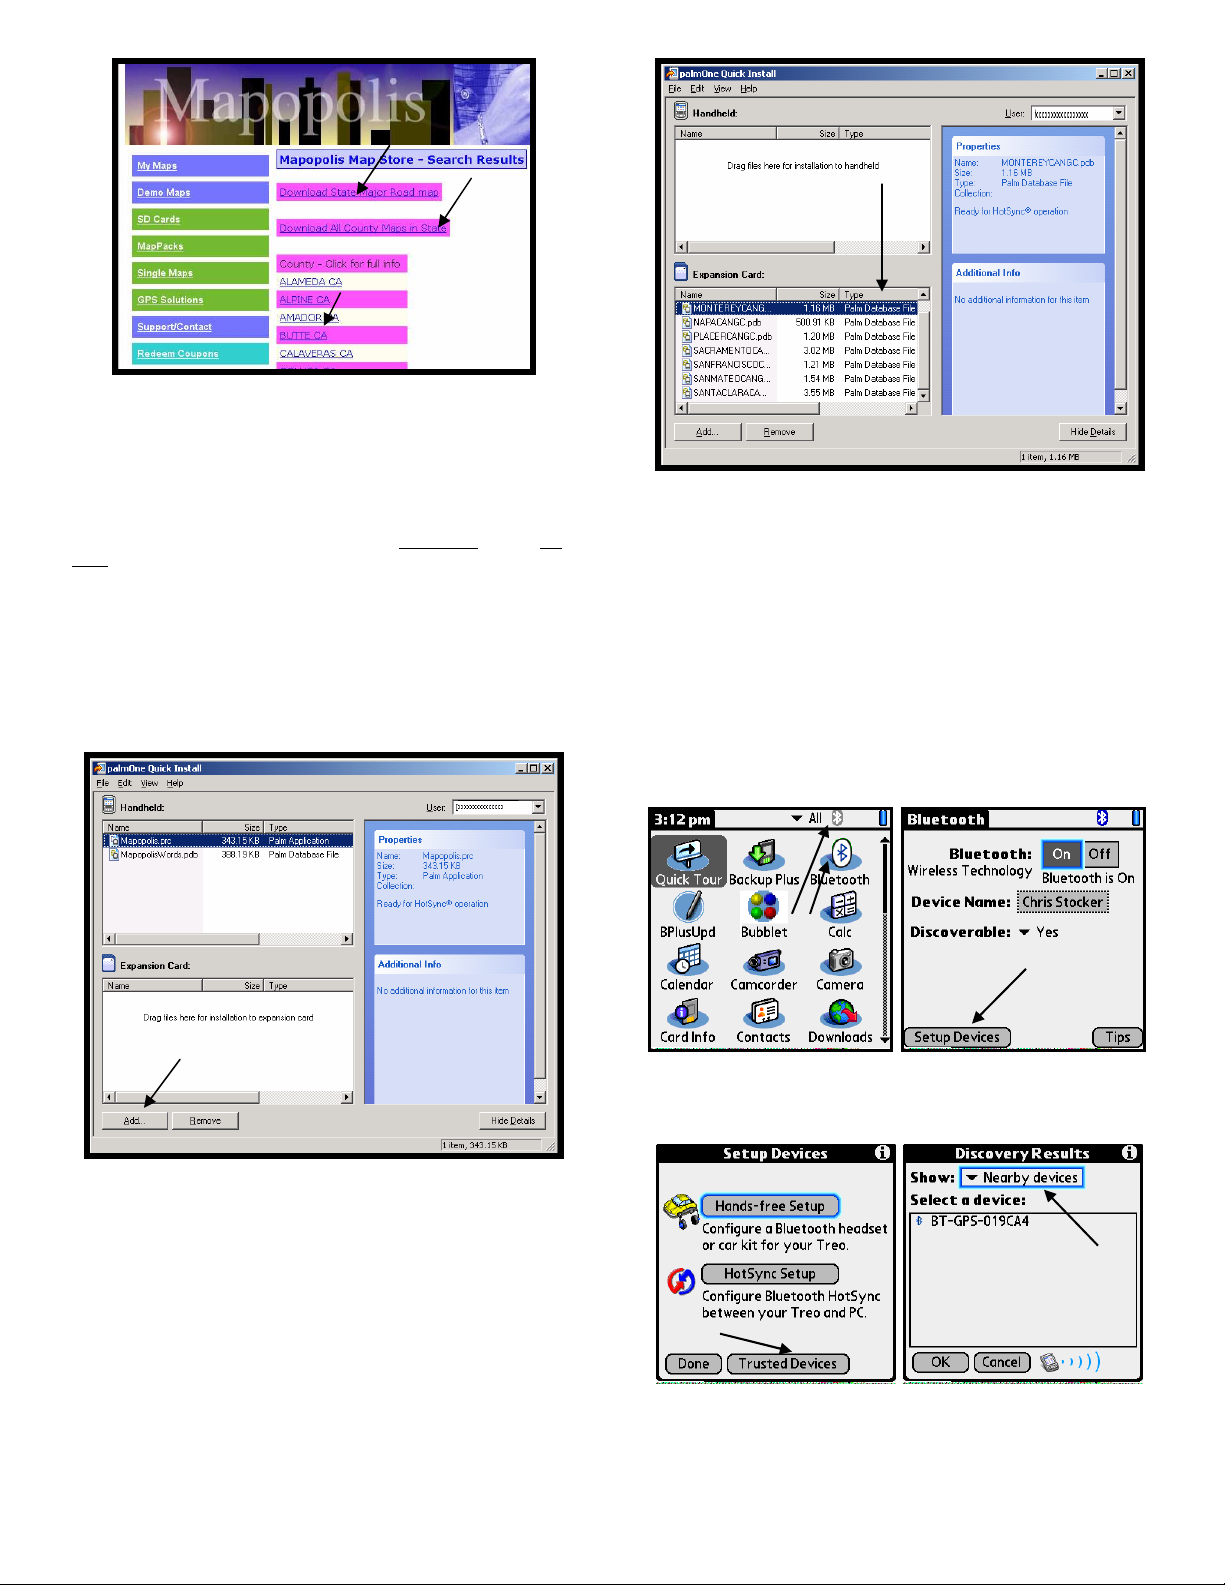
Figure 5. Select map set(s) to download
Finally, click the map in the row that you want. On the next screen, you will
be given the option to download the Mapopolis Navigator application and the
maps you selected. Save these to a known location, such as your Desktop.
(3A) Install Mapopolis Navigator
Mapopolis Navigator can be downloaded from the Demo Maps (beneath My
Maps) if you’ve forgotten to download it. Don’t forget where you saved it. It
must be unzipped prior to use. Remove any earlier versions prior to
installation. Cradle your Palm.
If the Palm Desktop is configured correctly you can just double click the
Mapoplis files to place them in the Quick Install Tool. Otherwise, launch the
Quick Install Tool from the Palm Desktop and Add the files. (Figure 6).
Figure 6 shows an installation with the standard voice. See the readme.txt file
in the zip archive for installation choices.
Figure 7. Choose a location to install
Drag the maps from the Handheld area to the Expansion card area. The maps
will work from the Handheld area but you will soon run out of space. Use
hotsync to perform the install.
(4) Connecting your GPS
The following steps can be used to connect your Mobile Crossing GPS to your
Palm LifeDrive. Note these pictures are from another Palm unit, the LifeDrive
will be similar. From the home screen you will see the Bluetooth icon at the
top of the screen and you may also see in the icon list in the main screen. Tap
either place to launch the Bluetooth Manager as shown in Figure 8. Be sure
the GPS Bluetooth receiver is turned on. Tap Setup Devices from the
Bluetooth Manager Screen.
Figure 8. Home screen Figure 9. Bluetooth Manager
The image shown in Figure 10 will appear. Tap Trusted Devices to bring up
the next screen.
Page 9
Figure 6. Quick Install
Press your hotsync button on the cradle (cable) to install the application.
(3B) Install Mapopolis Maps
If you have downloaded a zip file you will need to expand it to install the
maps. It is a good idea to have one directory that contains all of your maps. If
you double click a few maps a screen similar to the one in figure 7 with
appear.
This technique is good for a few maps but it you have a lot of maps to install
you may prefer to purchase a card reader and copy the maps directly to the SD
card without using HotSync. This will be quite a bit faster.
Figure 10. New Connection Figure 11. Nearby Devices
The screen in Figure 11 will appear. Use the Show pull down menu to select
Nearby devices. It should find your Bluetooth GPS which will look similar
to the screen. If it fails the first time a More button will appear. Tap this
2
Page 3
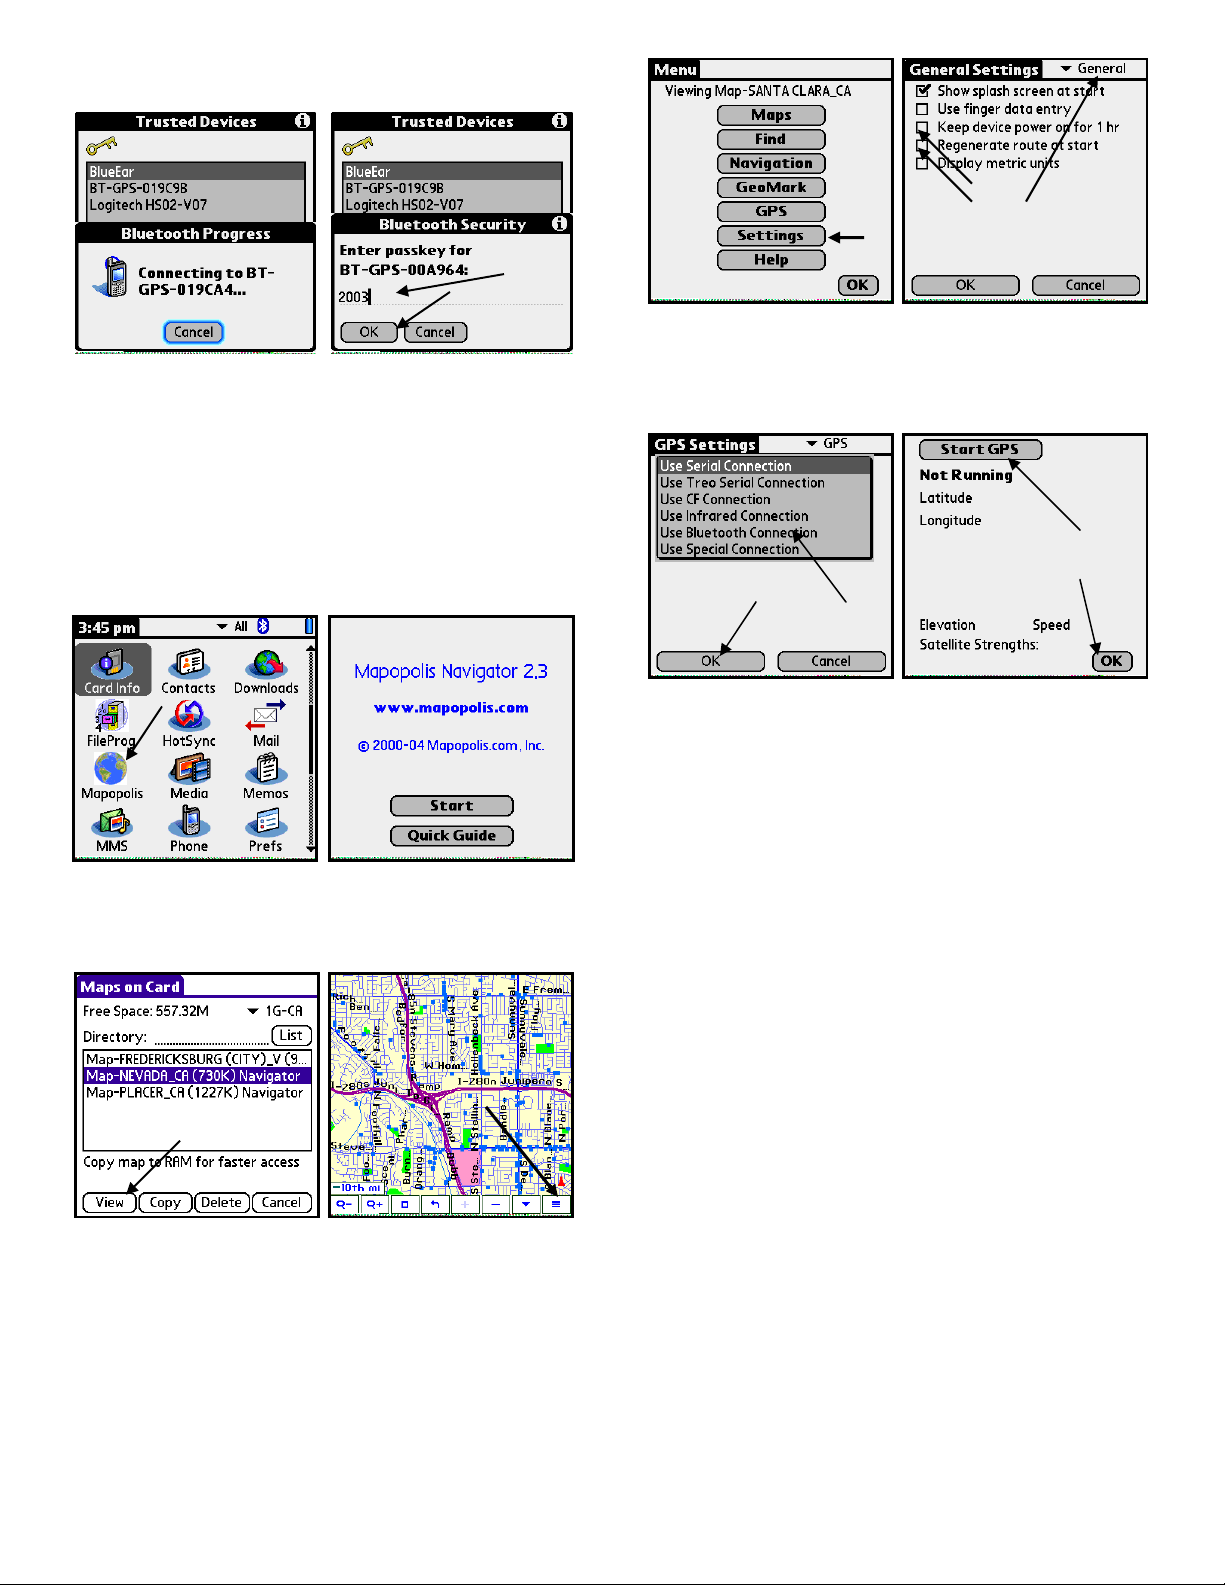
button. The number at the end will be unique to your unit. Tap the device
name to select it.
Figure 12. Connecting Figure 13. Passkey
The connecting menu will appear briefly which will be replaced with the
security menu. Enter the passkey which is 2003. Tap OK to complete the
process. At this point you have created a trusted device that can be used by
your navigation application.
(5) Running Mapopolis Navigation
Tap the Home menu item to return to Home screen display and select
Mapopolis as shown in Figure 14. This is how you will normally start the
navigation application. Tap Start on the opening screen to begin.
Figure 14. Home Screen Figure 15. Opening screen
You will likely see the Map selection screen as shown in Figure 16. Tap a
map and then tap View. From the Map screen you can tap the menu button on
the far right or use the main menu button provided on the Palm silkscreen.
Figure 16. Map selection Figure 17. Map screen
The main menu is shown in figure 18. You will need to tap settings to
configure the GPS settings. In the General Settings check the Box titled Keep
device power on for one hr. This will ensure that the unit doesn’t power
down when you least expect it. You may also wish to check Regenerate
route on start. Checking this box will permit restarting Mapopolis and
continuing the route if you need to run another program which would exit
navigation.
Use the category entry at the top right to bring up the GPS settings. Check the
box to enable starting the GPS when Mapopolis starts if you wish.
2
3
Figure 18. Main Menu Figure 19. Settings
On the GPS settings screen you will need to tap the drop down menu to reveal
the Use Bluetooth Connection entry. Select this entry and then tap OK. From
the main menu (figure 18) you will need to select GPS. Tap Start GPS. The
display will change to show the GPS is connected. Tap OK.
Figure 20. Connecting Figure 21. GPS Status
(6) Congratulations!
You have now completed the installation and setup of your GPS navigation
system. The next steps include:
1. Getting a GPS fix. Take your GPS receiver outside and set it down
where it has a clear view of the sky. It will find itself in 5 to 10
minutes. After the first time it will generally take less that a
minute. The yellow light on the GPS receiver will flash when it has
a fix. Keep your phone within 30 feet of the GPS to maintain the
Bluetooth connection.
2. Once you have a fix the GPS location will be shown on the map.
As you travel the data will update automatically.
3. Find a suitable place in your car to mount the phone and the GPS.
Safety must be considered. Do not block an airbag or the driver’s
view of the road. The GPS needs a good sky view, so placing it
near the front of the windshield is usually a good spot. The phone
should be placed where the driver can see it clearly.
4. You may wish to consider an external amplified speaker to
In the future you will not need to reestablish your GPS receiver in Bluetooth.
You can just turn on the GPS in Mapopolis and select the BT-GPS in your list
of trusted devices. Be sure the GPS receiver is in range and turned on.
increase the volume of the voice prompts.
(7) Read the manuals
A user’s manual is in the zip file or may be downloaded from the Mapopolis
web site. From the main page click Support and then click the manual you
wish to download. You will need a copy of Acrobat reader to read the file.
The Mapopolis manual covers the operation of Mapopolis Navigator.
Specific details on your Mobile Crossing Bluetooth GPS receiver will be
found in the included GPS manual.
Your Palm Users Guide has more information on Bluetooth operations.
Page 4

(8) Known Problems and Solutions
The Palm LifeDrive is a new generation of PDA. The disk drive is a new
feature and it is designed for some specific purposes. There are some
limitations inherent in the design of LifeDrive.
1. The maps should be loaded onto an SD card and not on the hard
drive. These maps are referenced continuously by Mapopolis and
will overheat the LifeDrive disk drive due to constant heavy use.
2. This device uses non-volatile RAM which means it won’t lose any
data even if the power runs down. However the current
implementation means that a copy of maps and programs reside in
a RAM scratch area. This area is only about 16 Megs which
means that a large area map search may overflow the memory limit
since, on a search, many maps may have to be loaded and
searched. The LifeDrive uses the disk drive to handle the overflow
so a large search can take a very long time. It will eventually
complete if the user is patient. To avoid this problem, if you have
many maps loaded, you should not use the search command for 50
miles of your current location or search anywhere. Restrict your
searches to a specific city or zip code for best results. You can use
the 10 mile and 5 mile radius commands for searches. The 25 mile
radius generally works but may overflow.
3. There have been some problems reported with using the address
book database for navigation while also using it for other tasks can
cause the real address book and the scratch RAM address book to
get out of sync. Until Palm fixes this you need to do hotsyncs often
to keep the address book synced up.
4
 Loading...