

Page 1
SAW ASSEMBLY INSTRUCTIONS
The MK Diamond Saw Tent is designed to
contain the spray and debris when cutting tile or
masonry material. You can cut anywhere without
the worry of your surroundings. It is easy to
assemble and retracts into a small storage bag.
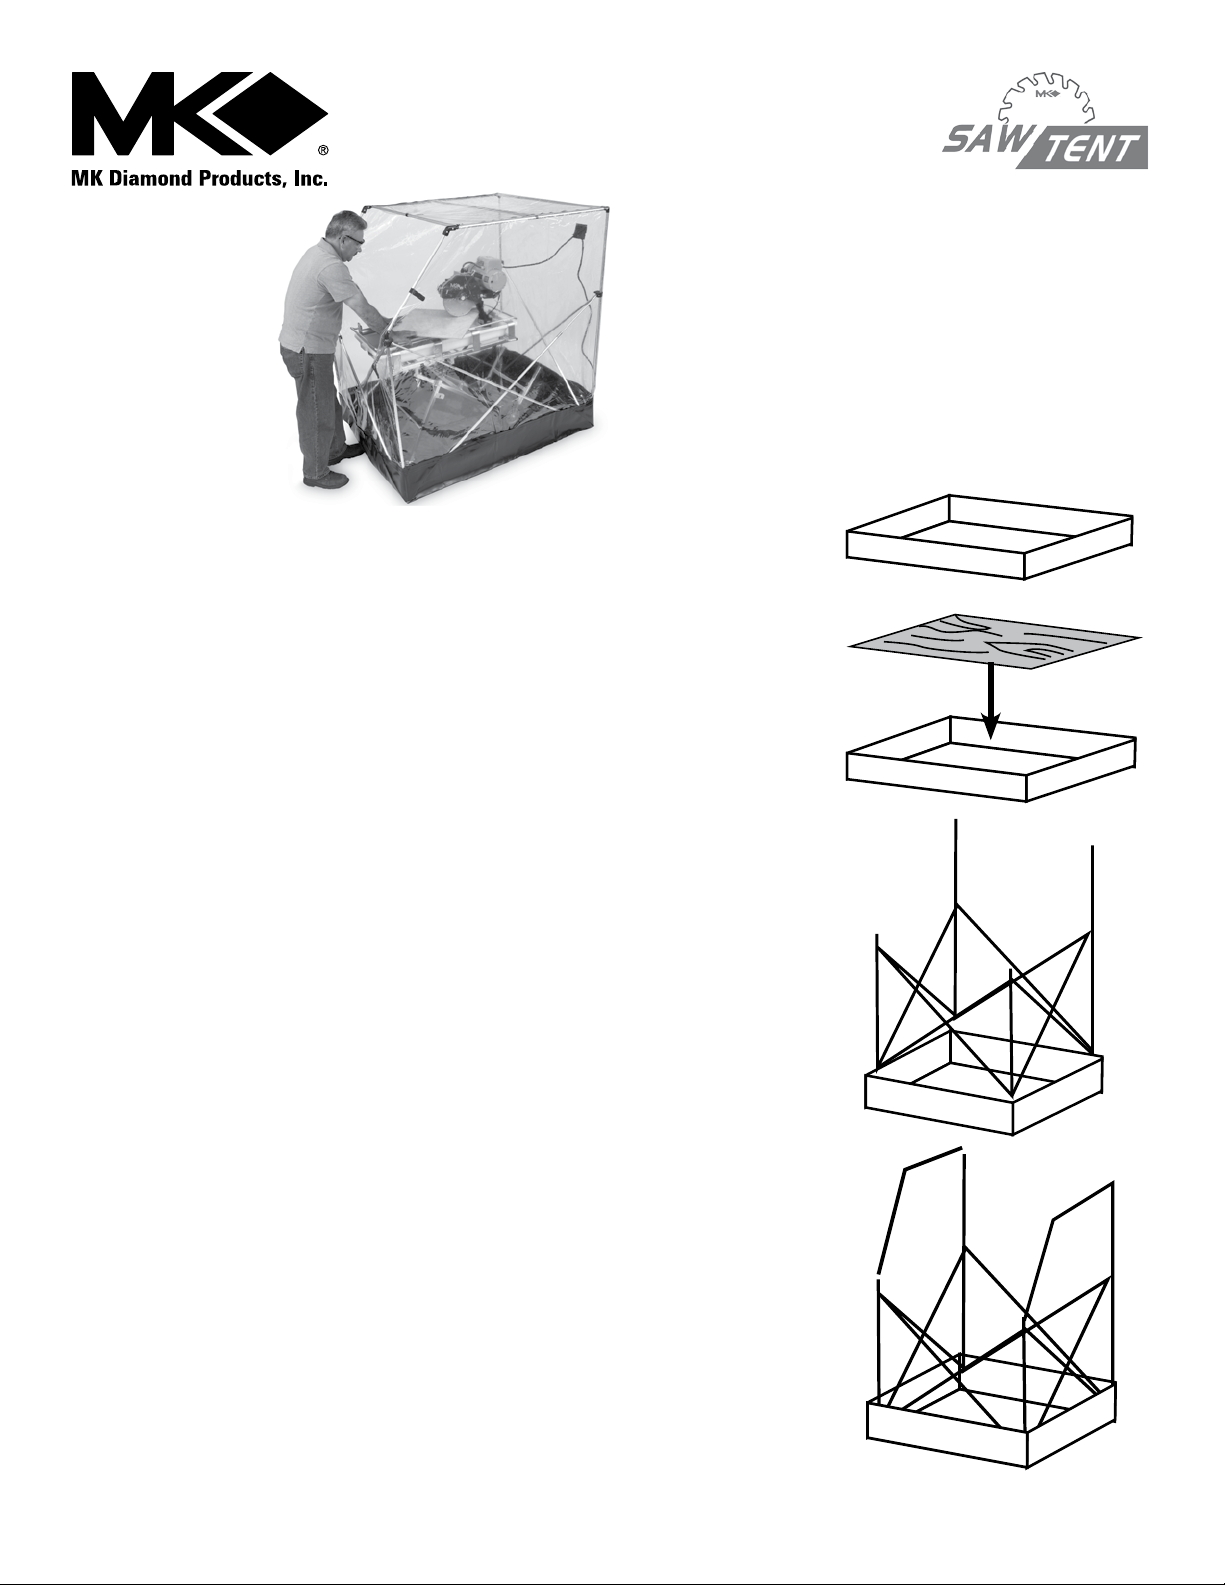
Step (1) Always check the oor for high nail heads, screws, and
other sharp objects before setting up your SAW TENT. Lay down
a sheet of plastic to protect the oor and then lay out the black
plastic pan.
Step (2) Cut a piece of ¼ ” Backer Board 46.5” X 59.5” to install
inside the black pan. The Backer Board will give the Saw Tent
aluminum structure a rm base to stand on. The Backer Board
will also protect the black pan from being punctured by sharp
pieces of tile falling off the tile saw.
Step (3) Take the aluminum structure and press it until it extends
fully and locks open. Pull the aluminum frame into the four corners
of the pan until it is fully extended and tight. The pan will now be
open and the perimeter will be standing up, ready to receive the
clear plastic cover.
Step (4) Install supports for both sides. Now would be a good
time to set up your saw stand and the saw, both inside the
Saw Tent.
1315 Storm Parkway, Torrance, CA 90501 |
P 800.421.5830 | www.mkdiamond.com | F 310.539.5158
Page 2

SAW ASSEMBLY INSTRUCTIONS
Step (5) Install top supports as shown in the drawing, one in the
back, middle, and the third against the 45 degree elbow. These
three supports help keep the plastic enclosure away from the
saw and bring strength to the whole structure.
Step (6) Pre-set your hood by closing the two zippers creating
the hood shape. Make sure the Velcro, at the base, is on the
outside. This Velcro will later attach to the Velcro that is sewn
on the inside of the black pan. Grab the hood and approach the
Saw Tent from the rear of the unit. Envelope the tubular frame
structure with the clear plastic hood and make it tight. Now come
around to the front and attach the Velcro strap to the front cross
member in the middle. Next, work the plastic sheeting around
the frame, leaving the perimeter, with the Velcro outside of the
black pan. After you have attached all other Velcro pieces to the
aluminum frame, work your way around the perimeter pushing
the clear plastic sheeting (with the Velcro attached) to the inside
of the black pan. As you work your way around, you will be joining the two horizontal strips of Velcro together. What this does is
make sure the water spray will run down the vertical walls and
drip inside the pan, thus containing the water. Use the handy
plug opening in the back.
Storing
Reverse these instructions to take the Saw Tent apart. After you remove the saw and stand, use a
sponge to remove any water that has accumulated from use. Take care to clean all parts and roll up
the Saw Tent, put it into the storage case, and it will be ready to use on the next job.
1315 Storm Parkway, Torrance, CA 90501 |
© 2012 MK Diamond Products, Inc. All Rights Reserved. Images and specifications are subject to change without notice. Saw Assembly Instruction Sheet Part # 169658-IS (07/12)
P 800.421.5830 | www.mkdiamond.com | F 310.539.5158
 Loading...