

Page 1

www.mkdiamond.com
MK-3000 SERIES
CONCRETE SAW
OPERATOR’S MANUAL
Revision 300
Manual Part No. 166447-OM
Caution: Read all safety and operating instructions
before using this equipment. This parts list MUST
accompany the equipment at all times.
05.2014
Page 2

INTRODUCTION
Congratulations on your purchase of a Walk-Behind Concrete Saw. We are certain that you will be
pleased with your purchase of your MK-3000 Concrete Saw. MK Diamond takes pride in producing
the finest construction power tools and diamond blades in the industry.
Operated correctly, your MK-3000 Series should provide you with years of service. In order to help
you, we have included this manual. This owners manual contains information necessary to operate
and maintain this machine safely and correctly. Please take a few minutes to familiarize yourself
with the machine by reading and reviewing this manual.
If you should have questions concerning your MK-3000 Series please feel free to call our friendly
customer service department at 800 421-5830
Regards,
MK Diamond
NOTE THIS INFORMATION FOR FUTURE USE:
MODEL NUMBER:
SERIAL NUMBER:
PURCHASE PLACE:
PURCHASE DATE:
NOTE: For your (1) one year warranty to be effective, complete the warranty card
(including the Serial Number) and mail it in as soon as possible.
22
Page 3

TABLE OF CONTENTS
SAFETY
Safety Message 4
Safety Precautions 4-7
Silica Dust Warning 8
Saw Blade Safety 9-10
Gas Engine Safety 11
Operation & Safety Decals 12
Safety Decal Locations 13
Console Decal Locations 14
Console Control Descriptions 15
PRODUCT SPECIFICATIONS
Saw Features 16
Engine Specications 17
Model Specications 18
Blade Speed 19
INSPECTION & START-UP
Pre-Operation Checklist, Schedule Maintenance Quick Reference 20
OPERATION
Blade Mounting Instructions 21-22
Starting Engine, Starting Instructions 23
Saw Guide Alignment and Adjustment, Pointer Alignment 24
Maneuvering the Saw, Dry Cutting, Wet Cutting, Speed Control-Lever 25
Water Hook Up and Depth Indicator 26
MAINTENANCE
Engine, Hydrostatic Drive Unit, Air Cleaner, Bearings and Hydrostatic Drive Unit 26-27
Maintenance Schedule 28
Troubleshooting 29
GENERAL PRODUCT INFORMATION
Accessories, Ordering and Return Information 30
Contact Information and Limited Warranty 31
3
Page 4
MK-3000 SERIES SAFETY
ON
(
(
)
)
ON
(
(
)
)
ON
(
(
)
)
ON
(
(
)
)
Read and follow all safety, operating and maintenance instructions. Failure to read and follow
these instructions could result in injury or death to you or others. Failure to read and follow these
instructions could also result in damage and/or reduced equipment life. Safety warnings and
guidelines do not by themselves eliminate danger. They are not substitutes for proper accident
prevention procedures and good judgement.
SAFETY MESSAGES
A safety message alerts you to potential hazards that could hurt you or others. Each safety message is
preceded by a safety alert symbol ( ) and one of three words: DANGER, WARNING, or CAUTION.
DANGER You WILL be KILLED or SERIOUSLY INJURED if you DO NOT follow directions.
WARNING
You CAN be KILLED or SERIOUSLY INJURED if you DO NOT follow directions.
You CAN be INJURED if you DO NOT follow directions. It may also be used to
CAUTION
alert against unsafe practices.
DAMAGE PREVENTION AND INFORMATION MESSAGES
A Damage Prevention Message is to inform the user of important information and/or instructions that
could lead to equipment or other property damage if not followed. Information Messages convey
information that pertains to the equipment being used. Each message will be preceded by the word
NOTE, as in the example below.
NOTE:
Equipment and/or property damage may result if these instructions are not followed.
GENERAL SAFETY PRECAUTIONS AND HAZARD SYMBOLS
In order to prevent injury, the following safety precautions and symbols should be followed at all times!
SAFETY PRECAUTIONS
ALWAYS read this Owner’s Manual before operating the machine. DO NOT operate or
service this equipment before reading this entire manual. Read and understand all warnings, instructions and controls on the machine. Know how to stop the equipment quickly in
case of emergency. It is the operators responsibility to use this machine under safe work-
ing conditions and conform with federal, state and local codes or regulations pertaining to
safety, air, pollution, noise etc...
ALWAYS keep the Blade and Belt Guards in place. DO NOT operate this machine with any
guard or safety device removed. A Guard, or any damaged part should be repaired or
replaced immediately.
NEVER operate this equipment without proper protective clothing, shatterproof
glasses, steel-toed boots and other protective devices required by the job. Non-slip
foot wear is recommended.
4
Page 5
MK-3000 SERIES SAFETY
ON
(
(
)
)
ON
(
(
)
)
ON
(
(
)
)
(
(
)
)
(
(
)
)
ON
(
(
)
)
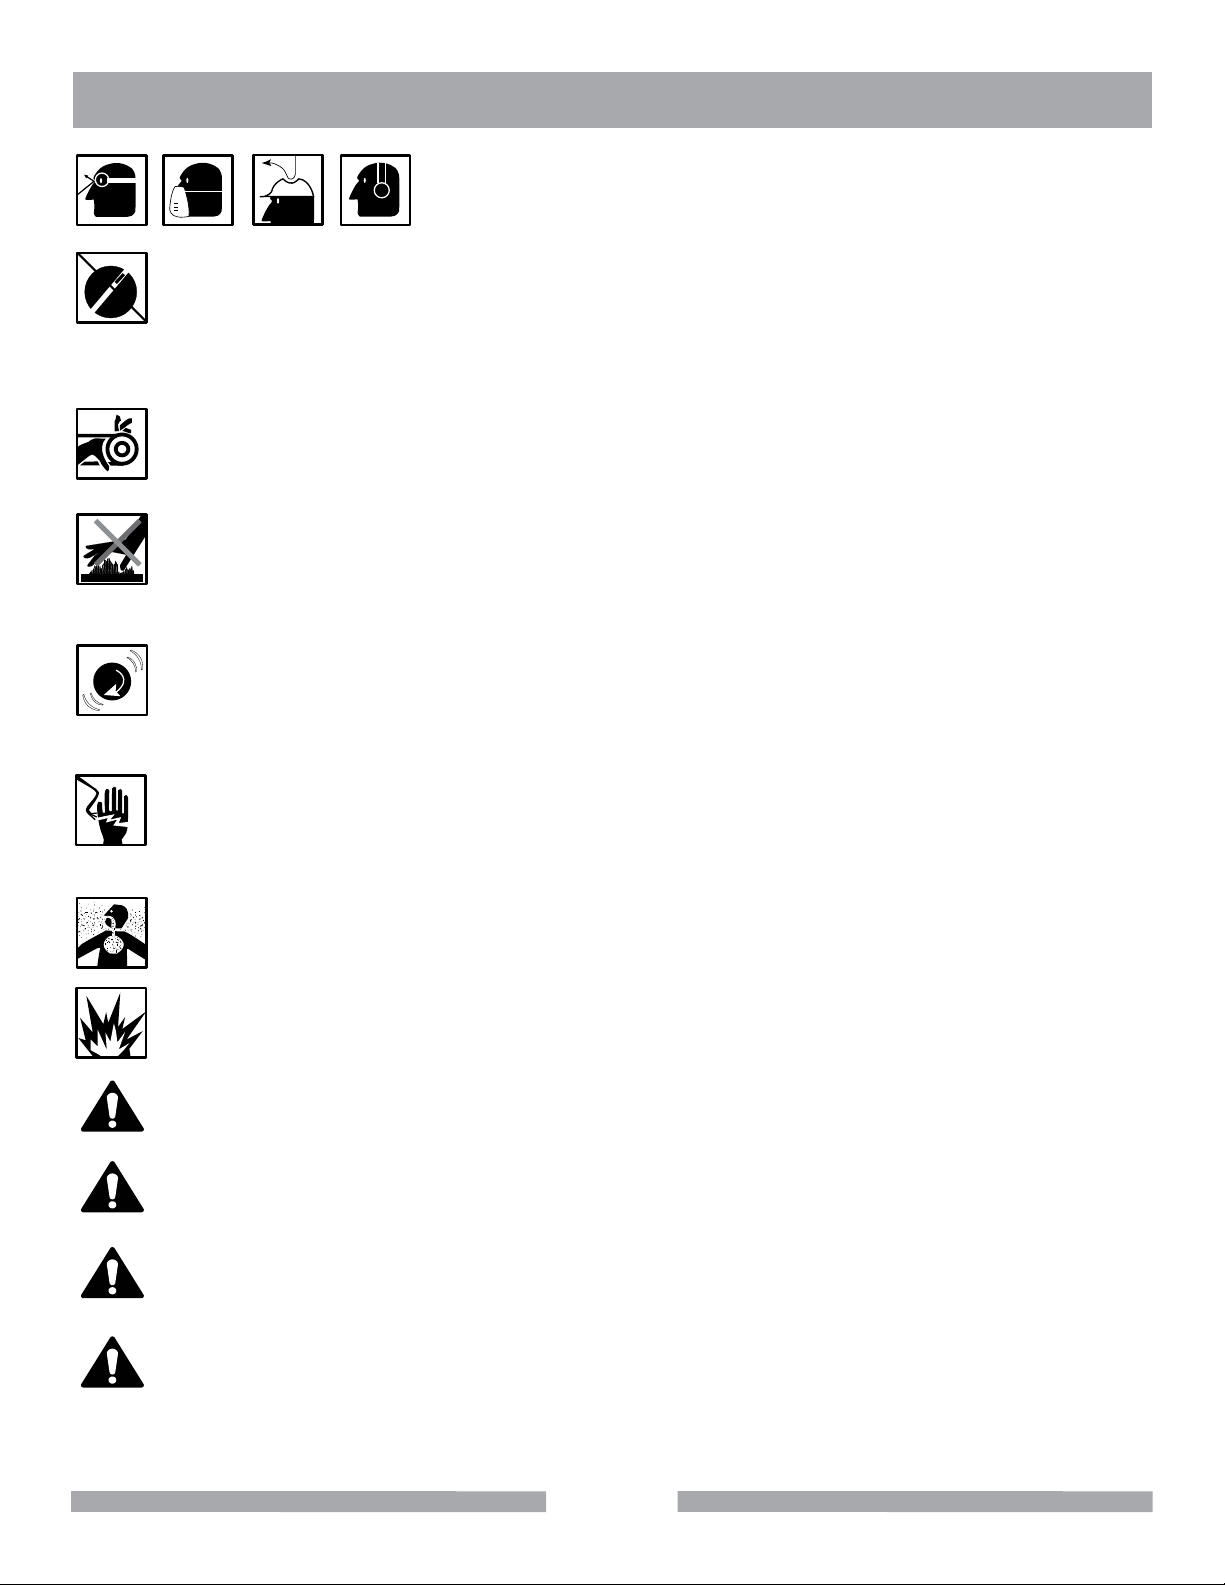
PERSONAL PROTECTIVE EQUIPMENT
ALWAYS wear approved respiratory, head, ear and eye protection
when operating this machine.
ON
ACCIDENTAL STARTS!
Before starting the engine/motor, be sure the ON/OFF switch is in the OFF position to prevent accidental starting. Place the ON/OFF switch in the OFF position before performing any
service operation. ALWAYS place the power ON/OFF switch in the OFF position when the
machine is not in use.
ROTATING PARTS
Keep hands, feet, hair, and clothing away from all moving parts to prevent injury. Never oper-
ate the motor with covers, shrouds, or guards, removed.
HOT PARTS!
Engine components can become extremely hot from operation. To prevent severe burns,
do not touch these areas while the engine is running, or immediately after it is turned off.
Never operate the engine with heat shields removed.
OVER SPEED
)
)
(
(
NEVER tamper with the governor components or settings to increase the maximum speed.
Severe personal injury and damage to the engine or equipment can result if operated at
speeds above maximum.
ELECTRICAL SHOCK
NEVER touch electrical wires or components while the engine is running. Exposed, frayed or
worn electrical wiring and plugs can be sources of electrical shock which could cause severe
injury or burns. Do not touch the plug with wet hands.
ALWAYS avoid inhalation of and skin contact with silica dust and/or mist. Provide proper
dust removal. Use dust-collection system when applicable.
NEVER operate the machine in an explosive atmosphere or near combustible materials.
Sparks from the cutting-action of this machine can ignite flammable materials, liquids, gases
or dust.
This equipment should not be operated by persons under 18 years of age.
KEEP CHILDREN AWAY
All visitors and children should be kept a safe distance from work area. Maintain a safe
operating distance to other personnel.
MAKE THE WORKSHOP KID PROOF
Make the workshops kid proof by using padlocks, master switches or by removing starter keys.
DO NOT FORCE THE TOOL
A power tool will do a job better and safer operating at the rate for which it was designed.
DO NOT force a tool or an attachment to do a job that it was not designed to do.
5
Page 6
MK-3000 SERIES SAFETY
ON
(
(
)
)
ON
(
(
)
)
ON
(
(
)
)
ON
(
(
)
)
ON
(
(
)
)
ON
(
(
)
)
ON
(
(
)
)
ON
(
(
)
)
ON
(
(
)
)
ON
(
(
)
)
ON
(
(
)
)
ON
(
(
)
)
USE PROPER APPAREL
DO NOT wear loose clothing, gloves, neckties, rings, bracelets, or other jewelry that may
be caught in moving parts. Non-slip footwear is recommended. Wear protective hair cover-
ing to contain long hair.
SECURE WORK
Clamps or a vise should be used to hold work whenever practical. Keeping your hands free
to operate a power tool is safer.
DO NOT OVERREACH
Keep proper footing and balance at all times by not overreaching.
DISCONNECT TOOLS
Power tools should always be disconnected before servicing, adjusting or when changing
accessories, such as blades, bits, cutters, and the like.
MAINTAIN TOOLS WITH CARE
Keep tools clean and maintained for the best and safest performance. Always follow
maintenance instructions and examine the machine before use. If any abnormal vibrations
or noises occurs, turn off machine immediately and have the problem corrected before
further use.
REMOVE ADJUSTING KEYS AND WRENCHES
Form a habit of checking to see that keys and adjusting wrenches are removed from
the power tool before it is turned on.
KEEP WORK AREA CLEAN
Cluttered work areas and benches invite accidents. Keep area around machine clear of
obstructions which could cause persons to fall.
DO NOT USE IN DANGEROUS PLACES
DO NOT operate equipment in dangerous or hazardous environments. DO NOT use power
tools in damp or wet locations nor expose them to rain. Always keep the work area well
lighted.
USE RECOMMENDED ACCESSORIES
Consult the owner’s manual for recommended accessories. Using improper accessories
may increase the risk of personal or by-stander injury. Unauthorized equipment
modifications will void all warranties. Manufacturer does not assume responsibility for any
accident due to equipment modifications.
ALWAYS ensure that the machine is on level ground before using.
NEVER STAND ON THE TOOL
Serious injury could occur if a power tool is tipped, or if a cutting tool is unintentionally
contacted.
TRANSPORT
When loading or unloading the machine, use caution. Remove the blade prior to hoisting,
loading and transporting the machine.
6
Page 7
MK-3000 SERIES SAFETY
ON
(
(
)
)
ON
(
(
)
)
ON
(
(
)
)
ON
(
(
)
)
ON
(
(
)
)
ON
(
(
)
)
ON
(
(
)
)
ON
(
(
)
)
ON
(
(
)
)
ON
(
(
)
)
ON
(
(
)
)
ON
(
(
)
)
CHECK FOR DAMAGED PARTS
Before using a power tool, check for damaged parts. A guard or any other part that is
damaged should be carefully checked to determine if it would operate properly and
perform its intended function. Always check moving parts for proper alignment or binding.
Check for broken parts and mountings and all other conditions that may affect the
operation of the power tool. A guard, or any damaged part, should be properly repaired or
replaced. Always check the machine for loose bolts before starting.
DIRECTION OF ROTATION
A blade or cutter should always be installed so that rotation is in the direction of the
arrow imprinted on the side of the blade or cutter. It should correspond with the rotational
direction of the motor. Always feed work into a blade against the direction of rotation.
NEVER LEAVE A TOOL UNATTENDED
TURN POWER OFF - Do not leave a tool until it comes to a complete stop. ALWAYS
turn a power tool OFF when leaving the work area, or, when a cut is finished.
NEVER disconnect any "emergency or safety devices". These devices are intended for
operator safety. Disconnection of these devices can cause severe injury, bodily harm, or
even death! Disconnection of any of these devices will void all warranties. Unauthorized
equipment modifications will void all warranties. Manufacturer does not assume
responsibility for any accident due to equipment modifications.
NEVER use this machine with any cutter designed for woodworking.
NEVER operate this equipment when not feeling well due to fatigue, illness or taking medicine.
NEVER operate this equipment under the influence of drugs or alcohol.
On belt driven equipment, overtensioning of belts will result in premature crank and/or bearing
failure.
Whenever necessary, replace nameplate, operation and safety decals when they become
difcult to read.
ALWAYS store equipment properly when it is not being used. Equipment should be stored in
a clean, dry location out of the reach of children
DO NOT lend or rent this equipment without including the Owner's Manual and the Engine/
Motor Manufacturer's Manual.
Check the chemical properties of the material to be cut/grinded and follow all EPA/OSHA
Regulations.
7
Page 8

MK-3000 SERIES SAFETY
ON
(
(
)
)
SILICA DUST WARNING
Grinding/cutting/drilling of masonry, concrete, metal and other materials with silica in their composition
may give off dust or mists containing crystalline silica. Silica is a basic component of sand, quartz,
brick clay, granite and numerous other minerals and rocks. Repeated and/or substantial inhalation of
airborne crystalline silica can cause serious or fatal respiratory diseases, including silicosis. In ad-
dition, California and some other authorities have listed respirable crystalline silica as a substance
known to cause cancer. When cutting such materials, always follow respiratory precautions.
Use appropriate NIOSH-approved respiratory protection where dust hazard may occur. Paper masks
or surgical masks without a NIOSH approval number are not recommended because they do little to
protect the worker. For more information about respirator programs, including what respirators have
received NIOSH approval as safe and effective, please visit the NIOSH website at:
http://www.cdc.gov/niosh/topics/respirators
Observe OSHA regulations for respirator use (29 C.F.R.§1910.134).
Visit http://www.osha.gov for more information.
CALIFORNIA PROPOSITION 65 MESSAGE
Some dust created by power sanding, sawing, grinding, drilling, and other construction activities contain chemicals known (to the State of California) to cause cancer, birth defects or other reproductive
harm. Some examples of these chemicals are:
• Lead, from lead-based paints
• Crystalline silica from bricks, cement and other masonry products
• Arsenic and chromium, from chemically treated lumber
For further information, consult the following sources:
http://www.osha.gov/dsg/topics/silicacrystalline/index.html
http://www.cdc.gov/niosh/docs/96-112/
http://oehha.ca.gov/prop65/law/P65law72003.html
http://www.dir.ca.gov/Title8/sub4.html
Your risk from these exposures varies depending on how often you do this type of work. To reduce
your exposure to these chemicals, work in a well-ventilated area, and work with approved safety
equipment, such as dust masks that are specially designed to lter out microscopic particles. Where
use of a dust extraction device is possible, it should be used. To achieve a high level of dust collection, use an industrial HEPA vacuum cleaner. Observe OSHA 29 CFR part 1926.57 and 1926.103.
WARNING
Sawing, grinding and drilling generate dust. Excessive airborne particles may cause irritation to eyes,
skin and respiratory tract. To avoid breathing impairment, always employ dust controls and protection
suitable to the material being sawed or drilled; See OSHA (29 CFR Part 1910.1200).
8
Page 9
MK-3000 SERIES SAFETY
ON
(
(
)
)
ON
(
(
)
)
ON
(
(
)
)
ON
(
(
)
)
ON
(
(
)
)
ON
(
(
)
)
ON
(
(
)
)
ON
(
(
)
)
ON
(
(
)
)
ON
(
(
)
)
ON
(
(
)
)
SAW BLADE SAFETY
For complete safety information, refer to ANSI Safety Code B7.1 available through the American
National Standards Institute.
WARNING
Diamond Blades improperly used are dangerous. Comply with American National Standards Institute
Safety Code B7.1 and Occupational Safety and Health Act covering Speed, Safety Guards, Flanges,
Mounting Procedures, General Operating Rules, Handling, Storage and General Machine Conditions.
ALWAYS keep area around the machine clear of obstructions and clear the work area of
unnecessary people. Keep all body parts away from the blade and all other moving parts.
Keep hands out of line of saw blade. Never reach around or over saw blade.
Before starting the machine, check that all guards are in position and correctly tted.
NEVER allow blade exposure from the guard to be more than 180 degrees. DO NOT
operate this machine with any guard removed.
Inspect the blade, anges, and shafts for damage before installing the blade. NEVER use
damaged or worn blade anges. Discard cracked, chipped or bent blades. Cracks in the
core, hot spots on the core, warping steel core, missing segments and damaged arbor hole
are all visible indications that the blade is damaged.
The blade shaft anges must be of proper diameter for the size of blade being used.
DO NOT exceed maximum blade speed, as excessive speed could result in blade break-
age. Use ONLY blades marked with a maximum operating speed greater than the blade
shaft speed. Verify speed and saw drive conguration by checking blade shaft RPM, pulley
diameters, and blade ange diameters.
Use the correct blade for the type of work being done. Use only reinforced abrasive blades
or steel center diamond blades. DO NOT use carbide-tipped blades. Check with the blade
manufacturer if you do not know if blade is correct.
Make sure the blade and anges are clean and free of dirt and debris before mounting the
blade on the saw. Verify the blade arbor hole matches the machine spindle before mounting
the blade. ALWAYS mount the blade solidly and rmly. Wrench tighten the arbor nut.
CAUTION
Make sure that the arrow on the blade points in the same direction as the arrow marked on
the blade guard. Before turning the switch "ON", make sure that the blade is correctly in-
stalled and operating properly.
In the event of blade failure, replace blade guard immediately.
Do not touch a dry cutting blade immediately after use. These blades require several minutes to cool after each cut. Do not use a blade that has been overheated (core has bluish
color).
9
Page 10
ON
(
(
)
)
ON
(
(
)
)
ON
(
(
)
)
ON
(
(
)
)
ON
(
(
)
)
MK-3000 SERIES SAFETY
Never try to stop a moving blade with your hands.
DO NOT cut dry with blades marked "WET".
If the blade makes an unfamiliar noise or vibrate excessively, switch the saw of immediately
and disconnect it from the power source. Investigate the cause and remedy the problem
before restarting the saw.
DO NOT make long continuous cuts with a dry diamond blade. Allow the blade to cool between cuts by freewheeling. Harder materials will cause the blade to heat more quickly.
Let the blade reach full speed before commencing the cut.
10
Page 11

ON
(
(
)
)
ON
(
(
)
)
ON
(
(
)
)
ON
(
(
)
)
ON
(
(
)
)
MK-3000 SERIES SAFETY
GAS ENGINE SAFETY
Gasoline models are shipped from the factory dry, meaning without fuel or oil. Both must be added
before equipment can be used. Check the engine Manufacturer Owner's Manual for instructions on
fueling, break-in, servicing and proper engine care and use.
GAS SAFETY PRECAUTIONS
EXPLOSIVE FUEL!
Gasoline is extremely ammable, its vapors can explode if ignited; store only in approved
containers, in well-ventilated, unoccupied buildings and away from sparks or ames. DO
NOT ll the fuel tank while the engine is running or hot. Spilled fuel could ignite if it con-
tacts hot parts or sparks from ignition. DO NOT overll tank. DO NOT start the engine near
spilled fuel. Never use gasoline as a cleaning agent.
Refer to engine manufacturer manual for specic operating procedures and safety warnings.
ALWAYS check the fuel lines and fuel tanks for leaks and cracks before starting the engine.
DO NOT run the machine if fuel leaks are present or the fuel lines are loose.
Accidental start hazard. Disconnect spark plug prior to servicing.
LETHAL EXHAUST GASES!
Engine exhaust gasses contain poisonous carbon monoxide (an odorless, colorless gas).
Avoid inhaling exhaust fumes Breathing it can cause unconsciousness and even kill you.
Always operate gasoline engine machines in a well-ventilated area. DO NOT operate in areas where exhaust fumes could accumulate without wearing appropriate respiratory protection. Never run the engine in a closed building or conned area.
NOTE: Prior to operation of this machine the operator must determine the existence and
location of any subsurface features that may be hazardous or could damage the
equipment, (i.e. electric cable, natural gas line etc.).
FUELING SAFETY
ALWAYS use caution when handling fuel. Shut off the engine and allow to cool before refueling.
ALWAYS rell fuel tank in a well-ventilated area.
ALWAYS replace the fuel tank cap after refueling.
ALWAYS close fuel value on engines when machine is not being operated.
Move the machine at least 10 feet (3 meters) from the fueling point before starting the engine, and
make sure the gas cap is on the machine and the fuel can is properly tightened.
11
Page 12

MK-3000 SERIES SAFETY
OPERATION & SAFETY DECALS
The MK-3000 is equipped with a number of safety decals (Figure 1) provided for operator safety and
maintenance information. Should any of these decals become unreadable, replacements can be obtained by calling (800) 262-1575.
Keep
hands and
feet clear.
Decal A
Decal D & E
CAUTION
!
!
NOTICE
Overtensioning of belts
will result in premature
crank and/or bearing failure.
Decal B
Decal B
Decal F
Decal C
Decal G
DANGER
Lethal exhaust
gases. Use only
in well ventilated
areas. DO NOT
use indoors.
Decal I
Fig. 1 MK-3000 Safety Decal Sheet, Part No. 166009
12
Decal J
Page 13

MK-3000 SERIES SAFETY DECALS
SAFETY DECAL LOCATIONS
Decal C
Decal J
Decal I
Decal G
Decal H
Decal D
Decal F
Decal B
Decal D
Decal E
Decal
A
B
C
D
E
F
G
H
I
J
Decal A
Fig. 2 MK-3000 Safety Decal Locations
Location Description
Machine Front Caution Keep Hands and Feet Clear
Top of Belt Guard Caution Do Not Overtension Belts
Top of Belt Guard Caution Do Not Touch Hot Surface
Top of Belt Guard Caution Do Not Operate with Guard Removed
Face of Shaft Guard Caution Do Not Operate with Guard Removed
Top of Blade Guard Blade Rotation Direction
Side of Blade Guard Warning Do Not Change to Larger Blade Guard
Top of Blade Guard Caution Do Not Lift Guard When Engine Running
Console Read Owner’s Manual
Console Lethal Gas
13
Page 14

MK-3000 SERIES SAFETY DECALS
CONSOLE DECAL LOCATIONS
Decal A
Decal B
Fig. 3 MK-3000 Console Decal Locations
Decal
A
B
C
Location Description
Console Top Instrument Label
Console Left Console Label Left
Console Right Console Label Right
Decal C
14
Page 15

MK-3000 SERIES SAFETY LABELS
CONSOLE CONTROL DESCRIPTIONS
A
N
L
C
B
E
D
F
O
H
G
M
K
Fig. 4 MK-3000 Console Controls
J
I
Object Name Function
A Fuel Tank Fill Fill the fuel tank at this location.
B Choke Use when cold starting.
C Engine Throttle Controls engine speed.
D Oil Pressure Light Indicates low oil pressure when illuminated.
E Fuel Gauge Shows the level of fuel in the fuel tank.
F Keyed ON-OFF Start Use to start engine.
G T-Handle Knob Use to tighten operator grip handles.
H Depth Indicator Displays cutting depth.
I Engage Handle Engages Transmission.
J FNR Handle Used to Set Direction of Saw (Forward/Neu-
tral/Reverse).
K Water Inlet Hook-up for standard water hose.
L E-Stop Stops down engine in an emergency!
M Water Lever Controls water ow to Blade Guard.
N Engine Tachometer/Hour Meter Shows the engine RPM’s (running) and En-
gine Hours (stopped).
O Blade Raise & Lower Switch Increase & decrease the blade depth
15
Page 16

MK-3000 SERIES SAW FEATURES
SAW FEATURES
The MK-3000 Heavy-Duty Concrete Saw has been engineered for operator convenience, improved accessibility for maintenance and better control during operations. The MK-3000 has been designed for
both front and rear pivoting and has easily removable rear and side panels to provide easy accessibility for maintenance.
•
Ergonomic FNR traverse control
•
Quick release, auto latching bayonet mount blade guard
•
1-7/16 blade shaft with heavy duty pillow block bearings
•
Three position adjustable solid steel handle bars
•
Blade guard has garden hose style connector for quick disconnecting
•
Rigid frame front pointer with high visibility guide wheel for accurate tracking
•
Instrumentation includes engine tach, fuel level and hour meter
•
Indicator lights for oil pressure and charging system
•
Depth of cut indicator
•
Valve control for delivery of water to blade guard
•
Saw designed for left or right side mounting of blade and blade guard
•
Blade guard water distribution system designed for optimal blade cooling
•
Front pivot
•
Removable rear and lower front panel for easy service
•
7 Rib Powerband from engine to center shaft
•
Hand wheel for positive adjustment of cutting depth
•
Wide front wheel base increases stability and allows ramp loading/unloading
•
Eaton model 6 Hydrostatic transmission coupled to an MK trans-axle
•
Transmission can be disengaged from axle to allow saw to be pushed manually
•
Travel speed 0-220 FPM forward, 0-100 FPM reverse
•
Neutral start switch to prevent starting with transmission in gear
•
Made in the U.S.A.
16
Page 17

MK-3000 SERIES PRODUCT SPECIFICATIONS
ENGINE SPECIFICATIONS
Model MK-3020S MK-3020V MK-3020K
Engine Subaru (Gas) Vanguard (Gas) Kohler (Gas)
Power EH99 V-Twin 40 hp V-Twin Big Block OHV 35 hp Command Pro CH980 38 hp
Blade Capacity 20” 20” 20”
Depth of Cut 7-1/2” (190 mm) 7-1/2” (190 mm) 7-1/2” (190 mm)
Weight 650 lbs (295 kg) 650 lbs. (295 kg) 650 lbs. (295 kg)
Part # 170915-20 166447-20 166449-20
Model MK-3026S MK-3026V MK-3026K
Engine Subaru (Gas) Vanguard (Gas) Kohler (Gas)
Power EH99 V-Twin 40 hp V-Twin Big Block OHV 35 hp Command Pro CH980 38 hp
Blade Capacity 26” 26” 26”
Depth of Cut 10-1/2” (267 mm) 10-1/2” (267 mm) 10-1/2” (267 mm)
Weight 650 lbs (295 kg) 650 lbs. (295 kg) 650 lbs. (295 kg)
Part # 170915-26 166447-26 166449-26
Model MK-3030S MK-3030V MK-3030K
Engine Subaru (Gas) Vanguard (Gas) Kohler (Gas)
Power EH99 V-Twin 40 hp V-Twin Big Block OHV 35 hp Command Pro CH980 38 hp
Blade Capacity 30” 30” 30”
Depth of Cut 12-1/2” (190mm) 12-1/2” (318 mm) 12-1/2” (318 mm)
Weight 650 lbs (295 kg) 650 lbs. (295 kg) 650 lbs. (295 kg)
Part # 170915-30 166447-30 166449-30
General Specications
Arbor 1” with 3/8” Drive Pin
Blade RPM 1,900
Fuel Capacity 5 gal
Travel Speed Travel speed 0-220 FPM forward, 0-100 FPM reverse
Starting System Electric
L x W x H 50” x 29” x 42”
L x W x H (mm) 1,270 x 737 x 1,067 mm
Handle Extension 22” (559 mm)
17
Page 18

MK-3000 SERIES PRODUCT SPECIFICATIONS
STANDARD SAW SPECIFICATIONS
BLADE GUARD
CAPACITY 20” 26” 30”
(508 mm) (610 mm) (760 mm)
BLADESHAFT RPM 1,900
MAXIMUM
DEPTH OF CUT
ARBOR SIZE
BLADE SHAFT 1-7/16” (36.5 mm) diameter
BLADE SHAFT
BEARING
BLADE SHAFT
DRIVE
BLADE CONTROL Electric leadscrew for positive adjustment of cutting depth
BLADE COOLANT
AXLES
WHEELS
FRONT
REAR
FRONT
REAR
1” (25.4 mm) with 3/8” drive pin, blade can be mounted on either
side of shaft
Dual Row 1-7/16” Pillow Block Roller Bearings
7 Rib Powerband, optimized for correct blade shaft RPM at peak
engine power
Blade guard uses “ride on the blade” water tubes for superior water
delivery and blade cooling
1” (25.4 mm) diameter
1” (25.4 mm) diameter
Front Wheel 6” x 2-1/2” wide rubber with 1” ball bearings with lubrication ttings.
Rear Wheel 8” x 2-1/2” wide solid rubber
7-1/2” 10-1/2” 12-1/2”
Hydrostatic Transmission with freewheel neutral control. Travel
TRANSMISSION
CHASSIS
CONSOLE
POINTER Adjustable front and rear pointers
HANDLE BARS Three positions
speed 0-220 FPM Forwards, 0-100 FPM Reverse. FNR Handle controls forward/neutral/reverse. Neutral safety start switch.
Heavy-duty rigid box and rib main frame construction.
Removable Service Panels for ease of maintenance.
Console with Tachometer/Hour Meter, Fuel Level Gauge, indicator
for Oil Pressure and Keyed Start Switch
18
Page 19

MK-3000 SERIES PRODUCT SPECIFICATIONS
BLADE SPEED
WARNING
Do not exceed blade shaft speed shown. Excessive blade speed could result in blade failure and serious personal injury.
GUARD SIZE
20”
26”
30”
*Blade Shaft Speed at full throttle engine setting at 3600 rpm.
BLADE SHAFT
SPEED*
1900 RPM
BLADE SPEED (FPM)
Size FPM
16”
18”
20”
18”
20”
24”
26”
28”
30”
8,000
9,000
10,000
9,000
10,000
11,900
13,000
14,000
14,900
NOTICE
As shown on the chart, blade guards accept more than one size blade.
BLADE GUARDS AND BLADE SIZES
BLADE GUARD
20” Uses 16” up to 20”
26” Uses 18” up to 26”
30” Uses 26” up to 30”
BLADE SIZE THAT CAN BE
USED WITH BLADE GUARD
19
Fig. 5 Blade Guards
Page 20

MK-3000 SERIES INSPECTION & START-UP
PRE-OPERATION CHECKLIST
WARNING
Before leaving our factory, every machine is thoroughly tested. Follow instructions strictly and your
machine will give you long service in normal operating conditions.
Before starting up the machine, make sure you read this entire Operation Manual and are
familiar with the operation of the machine.
Machine Cold
1. Check engine oil. See Engine Owner’s Manual for type & quantity.
2. Connect battery cables.
3. Check hydrostatic transmission uid level.
4. Check the engine air cleaner.
SCHEDULE MAINTENANCE QUICK REFERENCE
1-2 Hour Operation Checklist
WARNING
ALWAYS locate machine on a level surface with the engine “OFF” and the ignition switch set in the
“OFF” position before performing any maintenance. Let the machine cool down prior to any service.
Ensure the parking brake is set.
1. Check the engine air cleaner hose clamps. Tighten as required.
2. Tension the blade drive V-belts. DO NOT overtension.
WARNING
Before performing any maintenance, ALWAYS locate machine on a level surface with the engine
“OFF” and the ignition switch set in the “OFF” position.
Service Daily
1. Check engine oil level.
2. Check blade guard for damage.
3. Check hoses and clamps for damage or looseness. Tighten or replace as necessary.
4. Check air cleaner for restriction. Replace at regular intervals air lters.
Other time interval service
See the Maintenance Schedule Table on Page 25.
20
Page 21

MK-3000 SERIES OPERATION
NOTICE
Before mounting the blade, machine should be turned “OFF”. Clean the blade collars and stub shaft.
BLADE MOUNTING INSTRUCTIONS
1. Remove Blade Guard.
A. Unscrew the hose tting to disconnect hose (Figure 6).
B. Hold the Blade Guard by the handle (Figure 7). Release the inner latch.
C. Pull the Blade Guard up and off the Saw.
Fig. 6 Unscrew Hose Fitting
Fig. 7 Hold Blade Guard
2. Remove arbor bolt. If blade is mounted on right side saw, the bolt has left hand threads. To
remove turn clockwise. If the blade is mounted on left side of saw, nut has right hand threads.
To remove, turn counter-clockwise (Figure 8).
3. Remove outer ange (Figure 9).
Fig. 8 Remove Arbor Bolt
Fig. 9 Remove Outer Flange
4. Install new blade (Figure 10).
5. Install the outer ange on to the blade ange (Figure 11).
Fig. 10 Install New Blade
Fig. 11 Slide Outer Flange in place
21
Page 22

MK-3000 SERIES OPERATION
BLADE MOUNTING INSTRUCTIONS CONTINUED
6. Tighten the arbor bolt (Figure 12).
7. Install the blade guard in place. Make sure that the guard locks in place and connect the hose
(Figure 13).
Fig. 12 Tighten Arbor Bolt
Fig. 13 Install Blade Guard
WARNING
Observe the rotation arrow on blade and DO NOT exceed maximum RPM stamped on the blade. To
set proper RPM, consult the Blade Guards and Blade Sizes Table on page 15.
NOTICE
To meet ANSI safety standards, larger diameter blade collars are required for large diameter blades.
Information is available upon request.
NOTICE
We recommend the use of MK Diamond blades with this saw.
22
Page 23

MK-3000 SERIES OPERATION
STARTING ENGINE
NOTICE
Read the engine instructions manual before starting.
WARNING
Be sure blade is unobstructed and not resting on ground.
WARNING
Be sure hands and feet are clear of blade.
1. Check engine oil. Add oil if low.
2. Check fuel level. Add fuel if low.
3. Check cooling air intake areas and external surfaces of engine. Make sure surfaces are clean
and unobstructed.
4. Check that air cleaner components and all shrouds, equipment covers and guards are in place
and securely fastened.
STARTING INSTRUCTIONS
1. Verify that E-Stop is pulled out.
2. Place FNR handle in NEUTRAL. Engine will not
start unless FNR handle is in neutral.
3. Verify the transmission is in NEUTRAL.
Engagement handle in unlocked and fully down position.
4. Pull throttle handle out half-way.
5. Close choke by pulling choke button to full out position.
6. Start engine by rotating starter switch to the right.
FNR
Handle
Engagement
Fig. 14 Pull Engagement Handle
NOTICE
DO NOT crank engine for more than 30 seconds at a time. If engine fails to start, wait about 2 min-
utes between cranking periods to prevent starter from overheating.
7. After engine starts, push choke button in as required for smooth running.
NOTICE
Allow engine to warm up at least 3 minutes before applying load.
Handle
8. When engine is warm, pull throttle out to maximum.
9. To stop engine, push throttle to idle, rotate ignition switch to “OFF” position.
NOTICE
If the engine has been running hard and is hot, do not shut engine off abruptly. Cool engine by re-
moving load and allowing engine to run idle for 3 to 5 minutes.
23
Page 24

MK-3000 SERIES OPERATION
SAW GUIDE ALIGNMENT AND ADJUSTMENT
WARNING
This operation is performed with the engine “OFF”!
The front and rear pointers are set in line at the factory. However, the pointers should be checked
for proper alignment with the blade after every use. The following are the procedures for aligning the
pointers with the blade, with the engine shut off.
1. Using a straight edge, carefully mark a line 12 feet long on a smooth level concrete surface.
2. Place the saw parallel to the line. Lower the blade and center it over the line.
3. FRONT: With the blade centered over the line and the saw frame parallel to the line, lower the
front pointer assembly and position the pointer over the line.
REAR: With the blade centered over the line and the saw frame parallel to the line, loose the pointer
and adjust up or down and ensure that it touches the line.
Finally, roll the saw along the entire length of the line. The saw should lead off no more than 6 inches
to the left in 12 feet of forward travel. Adjust the pointer in or out if the lead-off is outside this param-
eter. Secure hardware.
Fig. 15 Pointer Alignment
24
Page 25

MK-3000 SERIES OPERATION
MANEUVERNG THE SAW
WARNING
The blade is spinning whenever the saw is running. Raise the blade as high as possible when maneuvering so that the blade will not strike the pavement.
DRY CUTTING
Dry cutting blades have been specially designed for use with concrete saws. Ensure that the blade
you are using is clearly marked for dry cutting.
When dry cutting, it is important to keep the air lter clean. Check the condition of the lter at least
every four (4) hours of operation. Clean the pre-lter (wash in soapy water and re-oil) and change the
paper lters as soon as it becomes clogged. Concrete dust is very abrasive and will quickly damage
internal engine parts, causing loss of compression and eventual engine failure.
Saw only as deep as the specications and job conditions require. Remember airow helps to cool
the blade during dry cutting. Cutting too deep with one pass, or exerting excessive forward or side
pressure can be dangerous. Step cut in increments of 1 inch (25 mm) or less, for the best results.
If reinforced abrasive blades are used for cured concrete, it is usually better to saw only 1 inch deep
per pass. If deeper cuts are required, cut in multiple passes.
Thinner Diamond Blades are especially advantageous when cutting dry.
WET CUTTING
The water used on the blade is to provide coolant during cutting and to ush the concrete cutting from
the cut.
ENGAGING THE DRIVE UNIT
This saw is driven by a hydrostatic transmission. To engage the transmission, PULL the Engagement
Handle up and turn to either direction to lock (Figure 14). To disengage the transmission, twist the
Engagement Handle and PUSH down.
NOTICE
DO NOT engage the unit unless directional FNR Handle (Figure 14) is on NEUTRAL.
SPEED CONTROL-LEVER USE AND ADJUSTMENT
Move the saw forward by pushing the lever away from the operator and move the saw in reverse by
pulling the lever toward the operator. The further you push this lever, the faster the saw travels.
25
Page 26

MK-3000 SERIES OPERATION
WATER HOOK UP
Prior to starting the engine, you should hook up the water hose to the Water Inlet (Figure 16) and
visually inspect it to make sure that water is owing to the blade. Hook up the hose to the the unit
and turn on the water source. Open the water valve. Next, lift the front of the blade guard and visually
inspect the make sure water is owing out of each of the tubes. If either of the holes is blocked, ush
impurities from the tube.
NOTICE
Water ow volume can be metered by opening the water valve partially (Figure 17).
Water Inlet
Fig. 16 Inlet attach Hose to Water
Fig. 17 Partially open Water Valve
Water Valve
DEPTH INDICATOR
The saw is equipped with a Depth Indicator. The Depth Indicator (Figure 18) tells you approximately
how deep you are in the cut. To set the indicator, you need to rst lower the blade until it is just touch-
ing the ground and then rotate the knob to 0.
Depth Indicator
Knob
Fig. 18 Depth Indicator Knob
ENGINE
The operation and life of the engine depends on proper maintenance. Do not start engine until engine pre-check is complete. The engine pre-check consists of checking the oil, fuel level, air lter and
greasing the wheel, axle, drive unit and arbor bearings. Basic engine maintenance is shown in Main-
tenance Schedule Table on the next page. For more detailed information, please refer to the Engine
Operator Maintenance Manual and Warranty provided with the saw.
NOTICE
When breaking-in a new saw, we recommend running the engine for one hour with no load prior to
actual use on the job.
26
Page 27

MK-3000 SERIES MAINTENANCE
AIR CLEANER
Due to the dusty conditions created by sawing, it is essential to check the engine air cleaner element
daily. Remove the element and shake out the accumulated dust and dirt. Wipe out dirt from the inside
cover and from the housing. Check the engine manual for washing instructions. Stocking replacement
lters is strongly recommended.
ARBOR, AXLE, DRIVE UNIT AND WHEEL BEARINGS
Bearings should be greased according to the Maintenance Schedule Table on the next page.
WARNING
DO NOT inspect when the engine is running.
Use of high quality detergent oil of API (American Petroleum Institute) service class SF or SG. Select
the viscosity based on the air temperature at the time of operation. For temperatures below 0ºF, 5W20 or 5W-30 oil is recommended. For temperatures above 0º, 10W-30 oe 10W-40 oil is recommend-
ed. Check your engine manual for other recommendations.
HYDROSTATIC DRIVE UNIT & TRANSMISSION GEARBOX
The uid shipped in your hydrostatic transmission is a uid having a viscosity equivalent to SAE
20W20. Mobil uid 300 or any other oil equivalent to SAE 20W20 is preferred by Eaton Transmission. The expansion tank is marked for proper uid level. It should be checked when unit is cold. DO
NOT allow the unit to run low on oil. If the unit is low, you can add oil by removing the cap (Figure 19).
Remove plug (Oil Gearbox Plug) and ll transmission gearbox with 80-90 SAE Gear Oil to lower edge
of ll hole.
Expansion Tank Cap
Oil Gearbox Plug
Fig. 19 Expansion Tank Cap
27
Page 28

MK-3000 SERIES MAINTENANCE
MAINTENANCE SCHEDULE
MAINTENANCE SCHEDULE DAILY 25 HOURS 50 HOURS 250 HOURS
Check Engine Oil Level
Check Air Filter
Check Air Intake, Clean if Necessary
Grease Blade Shaft Bearings
Grease Front Wheel Bearings
Grease Rear Wheel Pillow Blocks
Grease Front Axle Journal Bearings
Check Drive Transmission Oil, Add if Low
Check Bladeshaft Gearbox, Add if Low
Check Power Unit Fluid, Add if Low
Change Engine Oil
•
•
•
•
•
•
•
•
•
•
•
Service Air Cleaner Element
Change Engine Oil Filter
Inspect Fuel Filter, Replace if Dirty
Inspect Spark Plugs and Ignition System
Inspect Cooling System and Clean
Inspect Starting Motor
* See Engine Manual for specic engine maintenance information and schedule.
•
•
•
•
•
•
28
Page 29

MK-3000 SERIES MAINTENANCE
TROUBLESHOOTING
When trouble occurs, be sure to check the simple causes which, at rst, may seem too obvious to be
considered. Refer to the table below for problems and their possible causes.
TRANSMISSION
Problem
Cause
Problem
Transmission
jerky when
starting
Transmission
operates in
one direction
Transmission
operating hot
Oil color is
black
Oil color is
milky
Cause
Loose
Transmission
Linkage
X X X
X
X X X X
No
Fuel
Improper
Fuel
Oil
Level
Dirt in
Fuel
Line
Cooling
Fan
X X
Fuse
Burned
Out
Water in
Oil
Reservoir
X
Incorrect
Oil Level
Dirty
Cooling
Fans
Dirty
Air
Filter
Loose
Drive
Chain
Faulty
Spark
Plugs
ENGINE
OTHER
Will not start X X X X X
Hard starting X X X X X
Stops suddenly X X X X
Lacks power X X X X X
Operates erratically X X X X
Knocks or pings X X
Skips or misres X X X
Back res X X X
Overheats X X X
High Fuel Consumption X X
Cause
Problem
Reduced blade life X X
Excessive belt wear X X
Improper Blade for the
Application
Improper Belt
Tension
Damage Caused by
External Objects
29
Page 30

MK-3000 SERIES ACCESSORIES, ORDERING & RETURN
ORDERING INFORMATION
You may order MK Diamond products through your local MK Diamond distributor or, you may order
direct from MK Diamond.
When ordering direct from MK Diamond, please have the following information ready before calling:
• The Model Number of the saw
• The Serial Number of the saw
• Where the saw was purchased and when
• The Part Number for the part(s) being ordered
• The Part Description for the part(s) being ordered
NOTE: There is a $25.00 minimum order when ordering direct from MK Diamond. A $5.00 charge will
be added to orders having a net billing value under $50.00. All purchases must be made using VISA,
MasterCard or American Express.
All parts may be ordered by calling toll free to – 800 421-5830 or 310 539-5221 and asking for
Customer Service. For technical questions, call – 800 474-5594.
RETURN MATERIALS POLICY
To expedite the service relative to the return of a product purchased through MK Diamond, please
observe the following:
NOTE: When returning all items, they must have been purchased within the previous twelve (12)
months.
• Have the Model Number of the saw
• Have the Serial Number of the saw
• Have the location of where the saw was purchased
• Have the date when the saw was purchased
• Contact Customer Service for approval to return the item(s)
• Obtain a Returned Goods Number (RGA) authorizing the return
• Follow the packaging instructions in the following section
• Ensure your item(s) are prepaid to the destination
For returned items, call toll free to – 800 421-5830 or 310 539-5221 and ask for Customer Service.
For technical questions, call – 800 474-5594 or 310 257-2845.
PACKAGING INSTRUCTIONS
• Remove the Cutting Head and Support Angle Assembly
• Dry the saw before shipping
• When packing, include the following: Saw, Diamond Blade, Blade Guard and Support Angle
Assembly and Adjustable Cutting Guide (Other Accessories are not required)
• Package the unit in its original container or one of comparable size (do not ship the unit partially
exposed)
• Ensure all parts are secured in the packaging to prevent moving
AUTHORIZED SERVICE CENTERS
For quicker repair time, you may contact MK Diamond Customer Service, toll free, at 800 421-5830
or 310 539-5221 for the Authorized Service Center closest too you or visit our web site at
www.mkdiamond.com. For technical questions, call – 800 474-5594.
30
Page 31

MK-3000 SERIES CONTACT & LIMITED WARRANTY
CONTACT:
Please contact MK Diamond Products, Inc. Customer Service Department with any questions you
might have regarding distributors, parts or service.
Telephone: (800) 421-5830
Fax: (310) 539-5158
E-mail: Customer_Service@MKDiamond.com
Customer Service Hours: Monday through Friday, 6AM-4PM PST
MK Diamond Products, Inc.
1315 Storm Parkway
Torrance, CA 90501
MK DIAMOND PRODUCTS, INC. LIMITED WARRANTY
MK DIAMOND PRODUCTS, INC. will guarantee every machine they build, to be free from defects in
material and workmanship for (1) one year from date of purchase. The obligation of MK DIAMOND
PRODUCTS, INC. under this warranty is limited to the repair or replacement of any parts which,
under normal use, prove to be defective in material or workmanship. The parts involved or the unit
in question should be returned to MK DIAMOND PRODUCTS, INC. or to a point designated by us,
transportation prepaid.
This warranty does not obligate us to bear the cost of labor or transportation charges in connection
with replacement or repair of defective parts. Likewise, it shall NOT apply to any unit which has been
subjected to misuse, neglect or accident. This warranty does NOT apply to any machine which has
been repaired or altered outside our factory.
This warranty does NOT obligate MK DIAMOND PRODUCTS, INC., with respect to items not of our
manufacture, such as engines, motors, hydraulics, etc., which are subject to their own guarantees and
warranties.
We shall in no event be liable for consequential damages or contingent liabilities arising out of failure
of any equipment or parts to operate properly.
© COPYRIGHT 2014, MK DIAMOND PRODUCTS, INC. ALL RIGHTS RESERVED.
The MK Diamond logo is a registered trademark of MK Diamond Products, Inc. and may not be used,
reproduced, or altered without written permission. All other trademarks are the property of their respective owners and used with permission.
MK Diamond may have patents, patent applications, trade marks, copyrights of other intellectual
property right covering this product in this document.
This manual MUST accompany the equipment at all times. This manual is considered a permanent
part of the equipment and should remain with the unit if resold.
The information and specications included in this publication were in effect at the time of approval for
printing.
31
Page 32

MK-3000 SERIES
OPERATOR’S MANUAL
MK Diamond Products, Inc.
1315 Storm Parkway
Torrance, CA 90501
Toll-Free: (800) 421-5830
Phone: (310) 539-5221
Fax: (310) 539-5158
www.mkdiamond.com
 Loading...