

Page 1
Page 2

Page 3

Microsoft®, Visual C++® and Windows® are either registered trademarks or trademarks of M icrosoft
Corporation in the United States and/or other countries.
MELDAS is a registered trademark of Mitsubishi Electric Corporation.
Windows, Pentium and other product names and company names are tra demarks or registered trademarks of
their respective companies.
Page 4

Page 5
Introduction
This manual is a guide for users of NC Designer for the Mitsubishi CNC M700V/M70V series.
This manual explains how to operate the NC Designer, so read this thoroughly before using.
Fully understand "Precautions for Safety" on the next page to use the Mitsubishi CNC
M700V/M70V series safely.
Details described in this manual:
CAUTION
For items described as "Restrictions" or "Usable State" in this manual, the instruction
manual issued by the machine tool builder takes precedence over this manual.
Items that are not described in this manual must be interpreted as "not possible".
This manual is written on the assumption that all option functions are added. Confirm the
specifications issued by the machine tool builder before use.
Some screens and functions may differ depending on each NC system (or version), and
some functions may not be possible. Please confirm the specifications before use.
Page 6

Page 7
Precautions for Safety
Always read the specifications issued by the machine tool builder, this manual, related manuals and attached
documents before installation, operation, programming, maintenance or in spection to ensure correct use.
Understand this numerical controller, safety items and cautions before using the unit.
This manual ranks the safety precautions into "DANGER", "WAR NING" and "CAUTION".
DANGER
When the user may be subject to imminent fatalities or major injuries if handling is
mistaken.
WARNING
CAUTION
Note that even items ranked as "
case, important information that must always be observed is described.
Not applicable in this manual.
Not applicable in this manual.
When the user may be subject to fatalities or major injuries if handling is mistaken.
When the user may be subject to injuries or when property damage may occur if
handling is mistaken.
CAUTION", may lead to major results depending on the situation. In any
DANGER
WARNING
1. Items related to product and manual
If the descriptions relating to the "restrictions" and "allowable conditions" conflict between this
manual and the machine tool builder's instruction manual‚ the latter has priority over the former.
The operations to which no reference is made in this manual should be considered impossible.
This manual is compiled on the assumption that your machine is provided with all optional
functions. Confirm the functions available for your machine before proceeding to operation by
referring to the specification issued by the machine tool builder.
In some NC system versions‚ there may be cases that different pictures appear on the screen‚
the machine operates in a different way on some function is not activated.
CAUTION
Page 8

Page 9

Disposal
(Note) This symbol mark is for EU countries only.
This symbol mark is according to the directive 2006/66/EC Article 20 Information for endusers and Annex II.
Your MITSUBISHI ELECTRIC product is designed and manufactured with high quality materials and
components which can be recycled and/or reused.
This symbol means that batteries and accumulators, at their end-of-life, should be disposed of
separately from your household waste.
If a chemical symbol is printed beneath the symbol shown above, this chemical symbol means that the
battery or accumulator contains a heavy metal at a certain concentration. This will be indicated as
follows:
Hg: mercury (0,0005%), Cd: cadmium (0,002%), Pb: lead (0,004%)
In the European Union there are separate collection systems for used batteries and accumulators.
Please, dispose of batteries and accumulators correctly at your local community waste collection/
recycling centre.
Please, help us to conserve the environment we live in!
Page 10

Page 11

CONTENTS
1. Outline.............................................................................................................................................1
1.1 What Is NC Designer?................................................................................................................1
1.1.1 GUI Design Tool ...................................................................................................................2
1.1.2 What Is the GUI Library?...................................................................................................... 2
1.1.3 Interpreter Method and Compilation Method........................................................................ 2
2. Features and Specifications of NC Designer .............................................................................. 3
2.1 Features of NC Designer............................................................................................................3
2.2 Specifications of NC Designer....................................................................................................4
2.2.1 Screen Elements of NC Designer.........................................................................................4
2.2.2 Control..................................................................................................................................5
2.2.3 Configuration of Data File Created With NC Designer.........................................................7
2.2.4 Operating Environment of NC Designer...............................................................................7
2.2.5 Specification List...................................................................................................................8
2.2.6 Function List.........................................................................................................................8
2.3 Menu List....................................................................................................................................9
2.3.1 File........................................................................................................................................9
2.3.2 Editing...................................................................................................................................9
2.3.3 View....................................................................................................................................10
2.3.4 Control................................................................................................................................ 11
2.3.5 Figure .................................................................................................................................12
2.3.6 Setting ................................................................................................................................12
2.3.7 Layout.................................................................................................................................12
2.3.8 Tool.....................................................................................................................................13
2.3.9 Window...............................................................................................................................13
2.3.10 Help..................................................................................................................................13
2.4 Flow of Development Using NC Designer................................................................................14
3. Startup and Termination of NC Designer...................................................................................15
3.1 Starting NC Designer................................................................................................................15
3.2 Exiting From NC Designer........................................................................................................16
3.3 User Interface...........................................................................................................................17
3.3.1 Function of Each Part of Basic Screen............................................................................... 17
3.3.2 Operation Method in Dialog Box and Property Window.....................................................21
4. Creating a Project ........................................................................................................................22
4.1 What Is "Project"?.....................................................................................................................22
4.2 Creating a New Project.............................................................................................................23
4.3 Entering Project Properties.......................................................................................................25
4.4 Changing the Color Setting Method..........................................................................................27
4.5 Saving the Project.....................................................................................................................28
4.6 Saving the Project as ...............................................................................................................28
4.7 Opening a Project..................................................................................................................... 29
4.8 Opening a Recently Used Project.............................................................................................30
5. Creating and Saving the Page ....................................................................................................31
5.1 What Is Page?..........................................................................................................................31
5.2 Creating a New Panel...............................................................................................................31
5.3 Creating a New Window...........................................................................................................32
5.4 Entering Panel Properties.........................................................................................................33
5.5 Entering Window Properties.....................................................................................................34
5.6 Saving the Panel/Window.........................................................................................................36
5.7 Save All.....................................................................................................................................36
5.8 Opening a Panel/Window.........................................................................................................37
Page 12

5.9 Closing the Panel/Window........................................................................................................38
5.10 Switching the Editing Window.................................................................................................39
5.10.1 Previous Screen...............................................................................................................39
5.10.2 Next Screen......................................................................................................................39
5.10.3 Cascade ...........................................................................................................................39
5.10.4 Tile....................................................................................................................................40
5.10.5 Arrange Icons ...................................................................................................................40
5.10.6 Switching Locale...............................................................................................................40
5.10.7 Zoom ................................................................................................................................41
5.10.8 Refresh.............................................................................................................................41
5.11 Creating View Frame..............................................................................................................42
5.11.1 Switching the View Frame................................................................................................44
6. Registering the Resource ...........................................................................................................45
6.1 Resource ..................................................................................................................................45
6.2 Resource View..........................................................................................................................45
6.3 Locale.......................................................................................................................................46
6.3.1 Creating a New Locale.......................................................................................................46
6.3.2 Deleting a Locale................................................................................................................46
6.3.3 Locale Setup.......................................................................................................................47
6.3.4 Switching the Locale...........................................................................................................47
6.4 Character Sequence Resource ................................................................................................48
6.4.1 Creating a New Character String Resource.......................................................................48
6.4.2 Editing or Creating Character String Resource..................................................................49
6.4.3 Replacing the Character String Resource.......................................................................... 50
6.4.4 Deleting Character String Resource...................................................................................50
6.4.5 Importing or Exporting Character String Resource.............................................................51
6.5 Font Resource..........................................................................................................................56
6.5.1 Creating a New Font Resource..........................................................................................56
6.5.2 Deleting Font Resource...................................................................................................... 56
6.5.3 Specifying Font Resource...................................................................................................57
6.6 Image Resource .......................................................................................................................58
6.6.1 Creating a New Image Resource ....................................................................................... 58
6.6.2 Deleting an Image Resource.............................................................................................. 58
6.6.3 Specifying an Image File....................................................................................................59
6.7 Solid Frame Resource..............................................................................................................60
6.7.1 Creating a New Solid Frame Resource.............................................................................. 60
6.7.2 Deleting a Solid Frame Resource.......................................................................................60
6.7.3 Specifying a Solid Frame File.............................................................................................61
6.8 Filling Pattern Resource ...........................................................................................................62
6.8.1 Editing the Filling Pattern....................................................................................................62
6.9 Line Pattern Resource..............................................................................................................63
6.9.1 Editing the Line Pattern......................................................................................................63
6.10 Palette Resource....................................................................................................................64
6.10.1 Creating a New Palette Resource....................................................................................64
6.10.2 Deleting the Palette Resource.......................................................................................... 64
6.10.3 Palette Setting..................................................................................................................64
6.10.4 Editing the Palette ............................................................................................................65
6.10.5 Importing/Exporting Palette Setting.................................................................................. 66
6.11 HTML File Name Resource.....................................................................................................67
6.11.1 Creating a New HTML File Name Resource.....................................................................67
6.11.2 Deleting the HTML File Name Resource..........................................................................67
6.11.3 Specifying the HTML File Name Resource.......................................................................67
7. Creating Controls.........................................................................................................................68
7.1 Common Functions of Controls................................................................................................68
Page 13

7.1.1 Control Name .....................................................................................................................68
7.1.2 Position/Size.......................................................................................................................70
7.1.3 Color/Pattern ......................................................................................................................71
7.1.4 Color Setup.........................................................................................................................72
7.1.5 Image..................................................................................................................................73
7.1.6 Character String .................................................................................................................74
7.1.7 Character Attribute..............................................................................................................75
7.1.8 Scrolling Caption Character String.....................................................................................76
7.1.9 Blink....................................................................................................................................77
7.1.10 Solid Frame......................................................................................................................78
7.1.11 Callback Function.............................................................................................................79
7.1.12 Event List Dialog Box .......................................................................................................80
7.1.13 Switch Screen Dialog Box................................................................................................81
7.1.14 Show/Hide........................................................................................................................81
7.1.15 Input Permission...............................................................................................................81
7.2 Standard Control.......................................................................................................................82
7.2.1 Basic Control Object (GCBasicControl)..............................................................................82
7.2.1.1 Property Settings..........................................................................................................82
7.2.2 Button Object (GCButton)...................................................................................................83
7.2.2.1 Property Settings..........................................................................................................83
7.2.3 Text Box Object (GCTextBox).............................................................................................86
7.2.3.1 Property Settings..........................................................................................................86
7.2.4 Label Object (GCLabel)...................................................................................................... 88
7.2.4.1 Property Settings..........................................................................................................88
7.2.5 List Object (GCList)............................................................................................................89
7.2.5.1 Property Settings..........................................................................................................89
7.2.6 Picture Object (GCPicture).................................................................................................91
7.2.6.1 Property Settings..........................................................................................................91
7.2.7 Check Box Object (GCCheckBox)......................................................................................93
7.2.7.1 Property Settings..........................................................................................................93
7.2.8 Radio Button Object (GCRadioButton)...............................................................................95
7.2.8.1 Property Settings..........................................................................................................95
7.2.9 Progress Bar Object (GCProgressBar) .............................................................................. 97
7.2.9.1 Property Settings..........................................................................................................97
7.2.10 HTML Browser Object (GCHtmlBrowser).........................................................................99
7.2.10.1 Property Settings........................................................................................................99
7.2.11 Scroll Bar Object (GCScrollBarEx).................................................................................102
7.2.11.1 Property Settings......................................................................................................102
7.2.12 Edit Control Object (GCEdit) .......................................................................................... 105
7.2.12.1 Property Settings......................................................................................................105
7.2.13 Table Object (GNCTable)................................................................................................108
7.2.13.1 Property Settings......................................................................................................108
7.2.13.2 Compliments............................................................................................................111
7.3 NC Control Object................................................................................................................... 118
7.3.1 Counter (GNXCounter); Counter Display Part.................................................................. 118
7.3.1.1 Property Settings........................................................................................................118
7.3.1.2 Complements.............................................................................................................120
7.3.2 CycleTime (GNXCycleTime); Cycle Time Display Part ....................................................123
7.3.2.1 Property Settings........................................................................................................123
7.3.2.2 Complements.............................................................................................................124
7.3.3 Feedrate (GNXFeedrate); F Display Part......................................................................... 125
7.3.3.1 Property Settings........................................................................................................125
7.3.3.2 Complements.............................................................................................................126
7.3.4 GModal M (GNXGModal); M System Modal Display Part................................................127
7.3.4.1 Property Settings........................................................................................................127
Page 14

7.3.4.2 Complements.............................................................................................................128
7.3.5 GModal L (GNXGModal_L); L System Modal Display Part ..............................................134
7.3.5.1 Property Settings........................................................................................................134
7.3.5.2 Complements.............................................................................................................135
7.3.6 GModal Simple (GNXGModalSimple); Simple Modal Display Part..................................143
7.3.6.1 Property Settings........................................................................................................143
7.3.6.2 Complements.............................................................................................................144
7.3.7 LoadMeter (GNXLoadMeter); Load Meter Display Part ................................................... 147
7.3.7.1 Property Settings........................................................................................................147
7.3.7.2 Complements.............................................................................................................148
7.3.8 MSTB (GNXMSTB); MSTB display part...........................................................................150
7.3.8.1 Property Settings........................................................................................................150
7.3.8.2 Complements.............................................................................................................152
7.3.9 ONB (GNONB); ONB Display Part...................................................................................156
7.3.9.1 Property Settings........................................................................................................156
7.3.9.2 Complements.............................................................................................................158
7.3.10 ProgramBuffer (GNXPrgBuff); Program Buffer Display Part..........................................159
7.3.10.1 Property Settings......................................................................................................159
7.3.10.2 Complements...........................................................................................................160
7.3.11 SPCommand (GNXSPCommand); S Display Part.........................................................161
7.3.11.1 Property Settings......................................................................................................161
7.3.11.2 Complements...........................................................................................................162
7.3.12 PLC Button Object (GNCPLCButton).............................................................................163
7.3.12.1 Property Settings......................................................................................................163
7.3.12.2 Complements...........................................................................................................167
7.3.13 PLC Text Box Object (GNCPLCTextBox).......................................................................172
7.3.13.1 Property Settings......................................................................................................172
7.3.13.2 Complements...........................................................................................................174
7.3.14 NC Data Textbox (GNCDataTextBox)............................................................................. 179
7.3.14.1 Property Settings......................................................................................................179
7.3.14.2 Complements...........................................................................................................182
7.3.15 PLC extension button (GNCPLCExButton)....................................................................187
7.3.15.1 Property Settings......................................................................................................187
7.3.15.2 Complements...........................................................................................................192
7.3.16 PLC Message (GNCPLCMessage)................................................................................199
7.3.16.1 Property Settings......................................................................................................199
7.3.16.2 Complements...........................................................................................................203
7.3.17 Menu (GNXMenu) ; Menu display part...........................................................................205
7.3.17.1 Property Settings......................................................................................................205
7.3.17.2 Complements...........................................................................................................206
7.3.18 FileInOut (GNXFileTransfer) ; Input/Output Control.......................................................209
7.3.18.1 Property Settings......................................................................................................209
7.3.18.2 Complements...........................................................................................................211
7.3.19 AlarmMessage (GNXAlarmMessage) ; Alarm Display Part............................................214
7.3.19.1 Property Settings......................................................................................................214
7.3.19.2 Complements...........................................................................................................215
7.3.20 MonitorStatus (GNXMonitorStatus) ; Operation Status Display Part..............................217
7.3.20.1 Property Settings......................................................................................................217
7.3.20.2 Complements...........................................................................................................218
7.3.21 Time (GCNXTime) ; Time Display Part........................................................................... 220
7.3.21.1 Property Settings......................................................................................................220
7.3.21.2 Complements...........................................................................................................220
8. Figure..........................................................................................................................................221
8.1 What Is Figure? ......................................................................................................................221
8.2 Figure Creation Method..........................................................................................................222
Page 15

8.2.1 Drawing a New Figure......................................................................................................222
8.3 Common Functions of Figure ................................................................................................. 224
8.3.1 Position/Size.....................................................................................................................224
8.3.2 Perimeter Line..................................................................................................................225
8.3.3 Color/Pattern ....................................................................................................................225
8.4 Figure Settings........................................................................................................................226
8.4.1 Rectangle .........................................................................................................................226
8.4.2 Circle and Oval.................................................................................................................226
8.4.3 Line...................................................................................................................................227
8.4.4 Connected Line ................................................................................................................227
8.4.5 Sector...............................................................................................................................228
8.4.6 Polygon.............................................................................................................................228
8.4.7 Arc ....................................................................................................................................229
9. Screen Editing............................................................................................................................230
9.1 Editing Operation.................................................................................................................... 230
9.1.1 Undo.................................................................................................................................230
9.1.2 Redo.................................................................................................................................230
9.1.3 Cut....................................................................................................................................231
9.1.4 Copy.................................................................................................................................232
9.1.5 Paste ................................................................................................................................233
9.1.6 Delete...............................................................................................................................234
9.1.7 Find...................................................................................................................................235
9.1.8 Select All...........................................................................................................................237
9.1.9 Repeat..............................................................................................................................238
9.2 Layout Function......................................................................................................................239
9.2.1 Size Change.....................................................................................................................239
9.2.2 Move................................................................................................................................. 240
9.2.3 Arrangement and Alignment ............................................................................................. 240
9.2.4 Arrange to Uniform Size...................................................................................................242
9.2.5 Order ................................................................................................................................243
9.2.6 Fine Adjustment................................................................................................................243
9.2.7 Rotation/Flip .....................................................................................................................244
9.2.8 Deformation......................................................................................................................246
9.2.9 Grouping and Ungrouping................................................................................................248
9.3 Control List..............................................................................................................................250
9.4 Focus Setup............................................................................................................................251
9.5 Error Check.............................................................................................................................253
9.5.1 Error Check Item List........................................................................................................ 254
9.5.2 Result of Error Check.......................................................................................................255
9.6 Development by Multiple Users..............................................................................................256
9.6.1 Option Setting...................................................................................................................257
10. Simulation.................................................................................................................................258
10.1 Simulation Function..............................................................................................................258
10.1.1 Starting Simulation..........................................................................................................258
10.1.2 Simulation Screen ..........................................................................................................259
10.1.3 Function List...................................................................................................................260
10.1.4 Quitting Simulation .........................................................................................................260
10.2 Simulation Tools....................................................................................................................261
10.3 Message Window .................................................................................................................262
11. Generating a Document...........................................................................................................263
11.1 Document Generation Function............................................................................................26
1
1.1.1 Generating a Project Information Document
..................................................................264
3
11.1.2 Generating a Screen Information Document..................................................................265
11.1.3 Output Image..................................................................................................................266
Page 16

12. Project Convert ........................................................................................................................268
12.1 Export ...................................................................................................................................268
12.2 File Configuration..................................................................................................................269
13. Source Code Generation.........................................................................................................270
13.1 Generating Screen Data Source Codes...............................................................................270
13.2 Source File Format (C++ language version).........................................................................273
13.2.1 GCXXX.cxx (XXX: project name)................................................................................. 273
13.2.2 GCSampleScreen.cxx....................................................................................................275
13.2.3 GCXXX.cxx (XXX: window/panel name)...................................................................... 277
13.3 User Code Protection ...........................................................................................................280
14. Features and Configuration of GUI Library...........................................................................282
14.1 Features of GUI Library........................................................................................................282
14.2 Configuration of GUI Library.................................................................................................283
14.3 Folder Configuration.............................................................................................................284
14.4 File Configuration..................................................................................................................285
14.4.1 Header File.....................................................................................................................285
14.4.2 Library File......................................................................................................................285
15. Application Execution Method................................................................................................286
15.1 Application Execution Method...............................................................................................286
15.1.1 Outline............................................................................................................................286
15.1.2 Independent/Combinational Execution........................................................................... 288
15.2 Interpreter Method................................................................................................................289
15.2.1 What Is Interpreter Method?........................................................................................... 289
15.2.2 Flow of Operation...........................................................................................................289
15.3 Compilation Method..............................................................................................................292
15.3.1 What Is Compilation Method? ........................................................................................ 292
15.3.2 Flow of Operation...........................................................................................................292
15.3.3 Method of Compilation Environment Establishment in Windows CE .............................297
15.4 Application Window...............................................................................................................301
15.4.1 What Is Application Window?.........................................................................................301
15.4.2 Launching the Application Window................................................................................. 302
15.4.3 Functions of Application Window....................................................................................302
15.4.4 Screen Configuration...................................................................................................... 303
15.4.5 Closing the Application Window.....................................................................................304
15.5 Screen Switching.................................................................................................................. 305
15.5.1 Outline............................................................................................................................305
15.5.2 Screen Switching Method ............................................................................................... 305
15.5.2.1 Changing From the Custom Screen to 700 Series Standard Screen (F0 Release). 307
15.5.2.2 Changing the Menu Name While Displaying Custom Screen (Menu Release) ....... 309
15.5.2.3 Closing the Custom Screen (Menu Release)........................................................... 312
15.5.3 Screen No. Designation Method.....................................................................................313
15.5.4 Panel Switching History.................................................................................................. 315
15.5.5 Displaying Previously Displayed Custom Screen...........................................................316
15.6 Custom Release...................................................................................................................320
15.6.1 Outline............................................................................................................................320
15.6.2 S/W Configuration ..........................................................................................................322
15.6.2.1 Necessary Applications............................................................................................322
15.6.2.2 Necessary Files........................................................................................................323
15.6.3 Development Procedure of Custom Release S/W ......................................................... 325
15.6.4 F0 Release.....................................................................................................................326
15.6.4.1 Interpreter Method....................................................................................................326
15.6.4.1.1 Config.ini............................................................................................................326
15.6.4.1.2 customdef.ini......................................................................................................328
15.6.4.2 Compilation Method.................................................................................................329
Page 17

15.6.4.2.1 Config.ini............................................................................................................329
15.6.4.2.2 customdef.ini......................................................................................................330
15.6.4.3 Switching of "Onboard" and "Execution File by F0 Release" by Bit Selection
Parameter (#6451 bit0)............................................................................................331
15.6.5 Menu Release ................................................................................................................332
15.6.5.1 Interpreter Method....................................................................................................332
15.6.5.1.1 Config.ini............................................................................................................332
15.6.5.1.2 customdef.ini......................................................................................................333
15.6.5.1.3 Icon Image.........................................................................................................338
15.6.5.2 Compilation Method.................................................................................................339
15.6.5.2.1 Config.ini............................................................................................................339
15.6.5.2.2 customdef.ini......................................................................................................339
15.6.5.2.3 Icon Image.........................................................................................................339
15.6.5.3 Changing the Arrangement of the Main Menu .........................................................340
15.6.5.3.1 customdef.ini......................................................................................................340
15.6.6 Limitation of Number of Project Registration.................................................................. 341
15.6.6.1 Register Two or More Windows in One Project .......................................................341
15.6.6.2 Register Two or More Screens in One Project......................................................... 342
15.6.7 About the Switch of Display/Non-display of the Menu by the Parameter.......................343
15.6.8 Parameter.......................................................................................................................344
15.6.9 Limitations ......................................................................................................................345
15.7 M70 S/W Keyboard...............................................................................................................346
15.7.1 Outline............................................................................................................................346
15.7.2 Function Specifications...................................................................................................347
15.7.3 M70 Programming Method............................................................................................. 348
15.7.3.1 Open S/W Keyboard Window ..................................................................................348
15.7.3.2 Close S/W Keyboard Window..................................................................................349
15.7.3.3 Set S/W Keyboard Position......................................................................................350
15.7.3.3.1 Set the initial display position of the S/W keyboard window..............................350
15.7.3.3.2 Change the S/W keyboard window position arbitrarily while the window is
being displayed.................................................................................................351
15.7.3.4 Set the Status of Entry Area of S/W Keyboard Window........................................... 352
15.7.3.4.1 Display the entered characters on the entry area of S/W keyboard window .....353
15.7.3.4.2 Process when the [INPUT] key is pressed.........................................................354
15.7.3.5 Get the Entry Area Status of S/W Keyboard Window ..............................................355
15.7.3.6 Clear S/W Keyboard Entry Area ..............................................................................356
15.7.3.7 Set Character String in S/W Keyboard Entry Area ................................................... 357
15.7.3.8 Get Character String from S/W Keyboard Entry Area.............................................. 358
15.7.3.9 Display S/W Keyboard Window in the Foreground..................................................359
15.7.4 Example..........................................................................................................................360
16. Macro Function ........................................................................................................................364
16.1 What Is the Macro Function?................................................................................................364
16.2 Macro Execution Conditions.................................................................................................364
16.2.1 Project Macro Execution Condition ................................................................................364
16.2.2 Screen Macro Execution Condition................................................................................365
16.2.3 Macro Execution Timing................................................................................................. 366
16.3 Macro Editing........................................................................................................................367
16.3.1 Macro Editing..................................................................................................................367
16.3.2 Macro Editing Dialog Box...............................................................................................368
16.3.3 Event Creation Dialog Box ............................................................................................. 369
16.4 Macro Programming.............................................................................................................370
16.4.1 Macro Editing Area.........................................................................................................370
16.4.2 Program Describing Method...........................................................................................370
16.4.3 Programming Language................................................................................................. 373
16.5 Function Details....................................................................................................................378
Page 18

16.5.1 Normal Command ..........................................................................................................378
16.5.2 Control Common Command...........................................................................................388
16.5.3 Button.............................................................................................................................407
16.5.4 CheckBox.......................................................................................................................424
16.5.5 Edit .................................................................................................................................436
16.5.6 HtmlBrowser...................................................................................................................460
16.5.7 Label...............................................................................................................................467
16.5.8 List..................................................................................................................................471
16.5.9 Picture ............................................................................................................................490
16.5.10 ProgressBar..................................................................................................................497
16.5.11 RadioButton..................................................................................................................504
16.5.12 ScrollBar.......................................................................................................................517
16.5.13 TextBox................................................................................................................ .........530
16.5.14 NCPLCButton...............................................................................................................555
16.5.15 NCPLCTextbox.............................................................................................................585
16.5.16 NCDataTextBox............................................................................................................ 611
16.5.17 Menu.............................................................................................................................640
16.5.18 FileInOut.......................................................................................................................653
16.5.19 AlarmMessage.............................................................................................................. 661
16.5.20 MonitorStatus................................................................................................................662
16.5.21 Counter.........................................................................................................................663
16.5.22 CycleTime.....................................................................................................................665
16.5.23 LoadMeter ....................................................................................................................666
16.5.24 SPCommand................................................................................................................667
16.6 NC Data Access Function.....................................................................................................668
16.7 Error Message List................................................................................................................672
17. GWin (Window Control)........................................................................................................... 673
17.1 Outline ..................................................................................................................................673
17.2 Macro....................................................................................................................................678
17.3 GCBaseWindow (window control)........................................................................................679
17.4 GCPanel (panel)...................................................................................................................681
17.5 GCFrame (frame) .................................................................................................................682
17.6 GCSVFrame (view frame) ....................................................................................................683
17.7 GCScreen (screen)...............................................................................................................684
17.8 GCWindow (window)............................................................................................................686
17.9 GCWDC (drawing attribute control)......................................................................................687
18. GControl (control management)............................................................................................. 688
18.1 GCControl (control management).........................................................................................688
18.2 GCBasicControl (basic control) ............................................................................................ 689
18.3 GCButton (button).................................................................................................................694
18.4 GCPicture (picture)...............................................................................................................699
18.5 GCLabel (label).....................................................................................................................703
18.6 GCTextBox (text box)............................................................................................................707
18.7 GCList (list)........................................................................................................................... 712
18.8 GCCheckBox (checkbox) .....................................................................................................716
18.9 GCRadioButton (radio button)..............................................................................................720
18.10 GCProgressBar (progress bar)...........................................................................................724
18.11 GCHtmlBrowser (HTML browser).......................................................................................727
18.12 GCScrollBarEx (scroll bar)..................................................................................................730
18.13 GCEdit (edit control)...........................................................................................................735
18.14 GCNCControl (NC Control Management) ..........................................................................740
18.14.1 GNCDataTextBox (NC Data Textbox)........................................................................... 741
18.14.2 GCNXMenu (Menu Display)......................................................................................... 747
18.14.3 GNXFileInOut (Input/Output Control) ........................................................................... 752
Page 19

18.14.4 GNXAlarmMessage (Alarm Display)............................................................................756
18.14.5 GNXMonitorStatus (Operation Status Display).............................................................757
18.14.6 GNXTime (Time Display)..............................................................................................758
19. GShape (figure control)...........................................................................................................764
19.1 GCShape (figure control)......................................................................................................764
19.2 GCSRect (rectangle) ............................................................................................................765
19.3 GCSOval (circle & oval)........................................................................................................766
19.4 GCSPoly (polygon)...............................................................................................................767
19.5 GCSPie (sector)....................................................................................................................768
19.6 GCLineShape (line drawing control).....................................................................................769
19.7 GCSLine (line)......................................................................................................................770
19.8 GCSLines (connected lines).................................................................................................771
19.9 GCSArc (arc)........................................................................................................................772
20. GDraw (drawing) ......................................................................................................................773
20.1 Outline ..................................................................................................................................773
20.2 Description of Function......................................................................................................... 782
21. GResource (resource control)................................................................................................789
21.1 Outline ..................................................................................................................................789
21.1.1 Font ................................................................................................................................789
21.1.2 Character String .............................................................................................................789
21.1.3 Palette ............................................................................................................................790
21.1.4 Image..............................................................................................................................790
21.1.5 Solid Frame....................................................................................................................791
21.1.6 HTML File Name ............................................................................................................791
21.1.7 Language Identification Character String ....................................................................... 791
21.2 Description of Function......................................................................................................... 792
21.2.1 Function List...................................................................................................................792
22. GEvent (event control) ............................................................................................................793
22.1 Outline ..................................................................................................................................793
22.2 Flow of Event Processing.....................................................................................................794
22.3 Event Function......................................................................................................................795
22.4 Event Message.....................................................................................................................797
22.5 Event Message Type............................................................................................................798
22.5.1 GM_QUIT.......................................................................................................................798
22.5.2 GM_TIMER.....................................................................................................................798
22.5.3 GM_CHAR......................................................................................................................799
22.5.4 GM_LBUTTONPRESS...................................................................................................799
22.5.5 GM_LBUTTONRELEASE .............................................................................................. 799
22.5.6 GM_RBUTTONPRESS..................................................................................................799
22.5.7 GM_RBUTTONRELEASE..............................................................................................800
22.5.8 GM_MBUTTONPRESS..................................................................................................800
22.5.9 GM_MBUTTONRELEASE ............................................................................................. 800
22.5.10 GM_KEYPRESS .......................................................................................................... 800
22.5.11 GM_KEYRELEASE......................................................................................................801
22.5.12 GM_USER....................................................................................................................801
22.5.13 GM_SHOWPANEL.......................................................................................................801
22.6 Timer Event...........................................................................................................................802
22.7 User Event............................................................................................................................804
22.7.1 GM_USER......................................................................................................................804
Appendix.........................................................................................................................................806
Appendix 1. Error Message List....................................................................................................806
Appendix 2. Shortcut Key List.......................................................................................................809
Page 20

Appendix 3. About NC Designer...................................................................................................810
Appendix 4. Pattern List................................................................................................................ 811
Appendix 4.1 Filling Pattern List................................................................................................ 811
Appendix 4.2 Line Pattern List................................................................................................... 811
Appendix 5. Default Palette Color.................................................................................................812
Appendix 6. Data Type Definitions................................................................................................814
Appendix 7. Addition of Original User Event.................................................................................823
Appendix 8. HTML Tag List...........................................................................................................826
Appendix 9. Executing File Registration Method..........................................................................828
Appendix 9.1 F0 Release..........................................................................................................828
Appendix 9.1.1 melAppCtrl.ini................................................................................................828
Appendix 9.1.2 Details of melAppCtrl.ini................................................................................828
Appendix 9.1.3 Function of Update Cycle Setting.................................................................. 836
Appendix 9.2 Menu Release ..................................................................................................... 837
Appendix 9.2.1 customdef.ini.................................................................................................837
Appendix 9.2.2 Icon Image ....................................................................................................837
Appendix 10. HMI Integrated Installer ..........................................................................................838
Appendix 10.1 Outline...............................................................................................................838
Appendix 10.2 Configuration.....................................................................................................839
Appendix 10.3 Screen Configuration......................................................................................... 840
Appendix 10.4 Operation Methods............................................................................................ 845
Appendix 10.4.1 Installing the Application .............................................................................845
Appendix 10.5 Details for Functions.......................................................................................... 850
Appendix 10.5.1 Installation Method......................................................................................850
Appendix 10.5.2 About the Memory Card for Upgrade..........................................................852
Appendix 10.6 Parameter..........................................................................................................864
Appendix 10.7 Operation/Alarm Messages...............................................................................865
Appendix 11. M70/M700VS SETUP INSTALLER......................................................................... 866
Page 21

1. Outline
s
1. Outline
This section describes an outline of NC Designer.
1.1 What Is NC Designer?
NC Designer provides you with a GUI development environment consisting of a GUI design tool for
generating the source code of host equipment on the drawn GUI screen and a GUI library that
does not depend on specific platforms.
The GUI library is compatible with every environment such as Windows CE.
NC Designer consists of a GUI design tool, which substantially reduces GUI development
work-hours, and a fast and compact graphic library.
PC (Windows environment)
1.1 What Is NC Designer?
GUI design tool
GUI screen development
Simulation of drawing screen
Documentation of settings
GUI library
Window control
Resource control
Event control
Fast drawing logic
Part dependant on platform
The source code is
automatically generated.
The software development kit
(SDK) generates source codes
matching the target board, and
it allows selection of the library.
Link
Source code
(C++)
Compilation
The execution module i
built in the target board.
1
Page 22
1. Outline
1.1.1 GUI Design Tool
With NC Designer, figures and parts having various functions are laid out on the screen during
creation of screen data. Source codes (C++) matching the GUI library are automatically generated
according to the created screen data.
NC Designer has various functions such as the simulation function for the PC, so that the
development process which required many work-hours with conventional development methods
are now automated, and re-working after assembly in the actual machine is minimized.
1.1 What Is NC Designer?
1.1.2 What Is the GUI Library?
The GUI library strongly supports development of the graphic user interface.
The GUI library contains functions for mouse and key events and window system, which are
indispensable for the configuration of the GUI, as well as the drawing function.
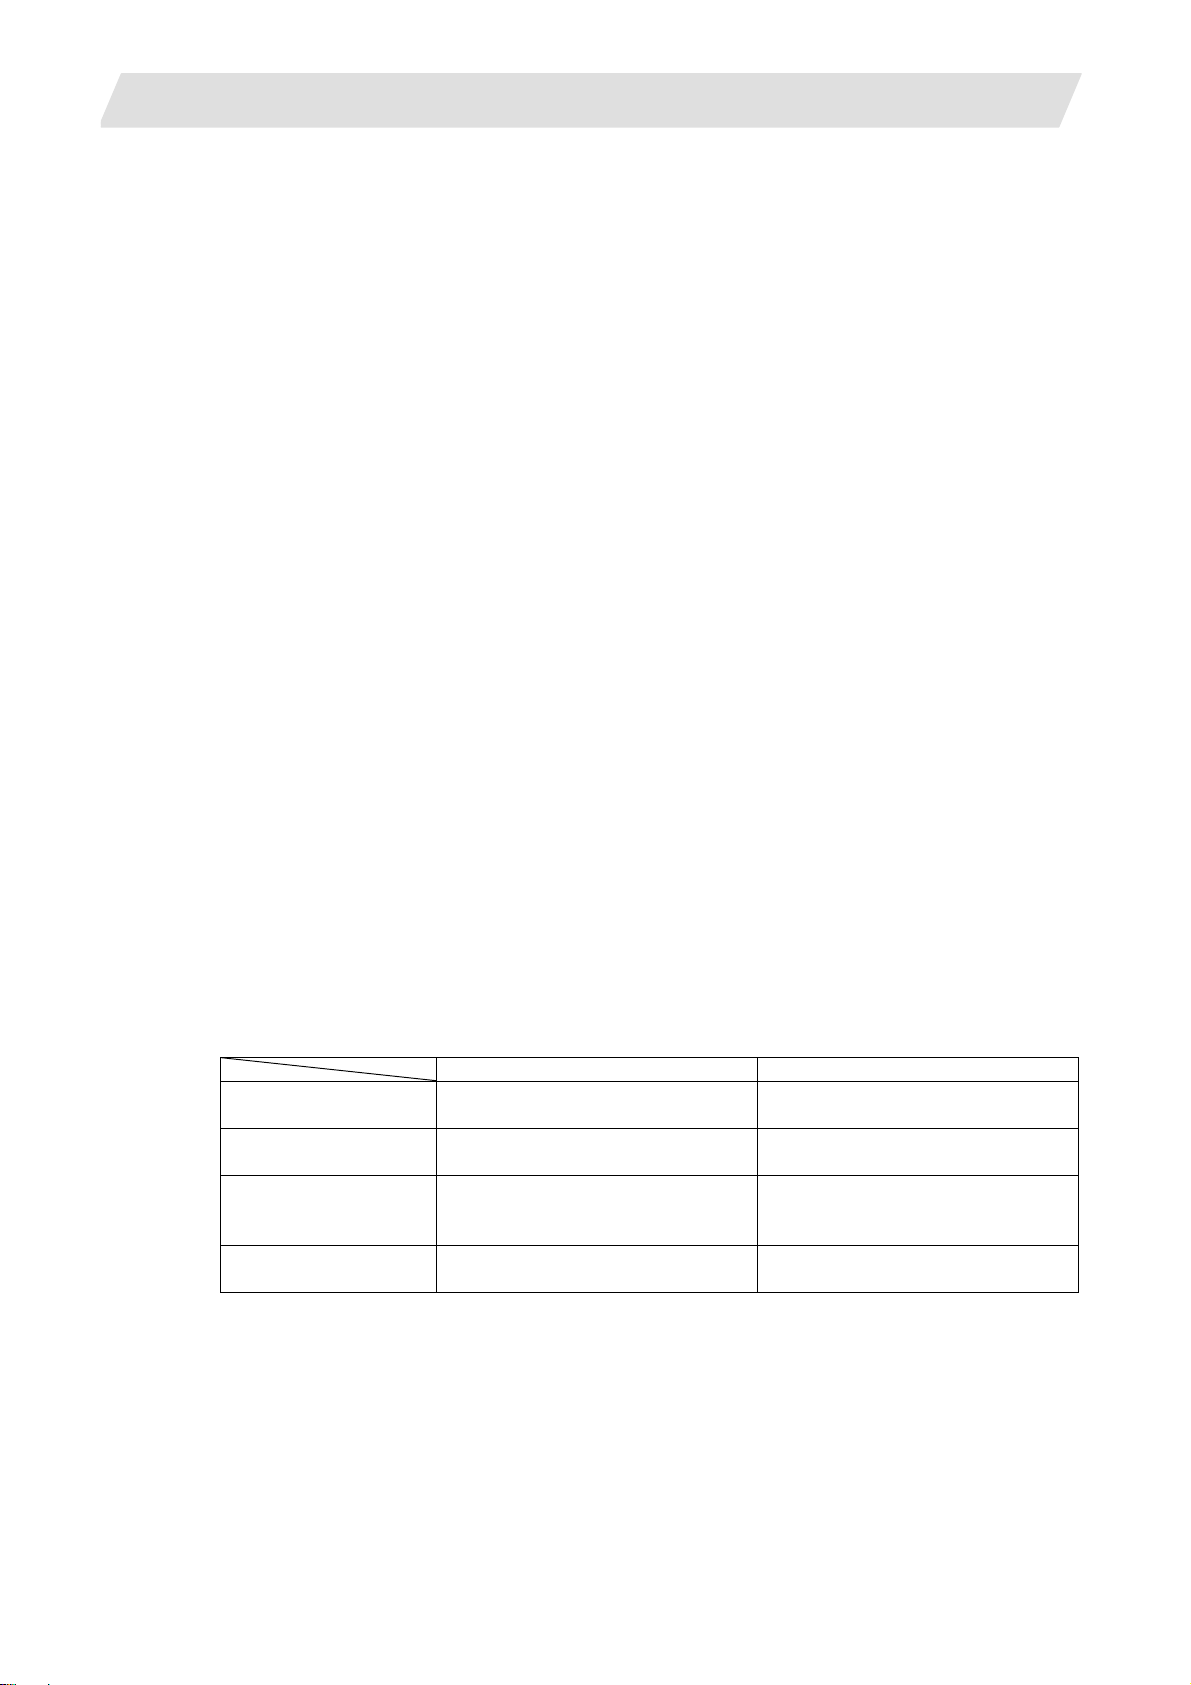
1.1.3 Interpreter Method and Compilation Method
The screen development method includes two types: interpreter method (C++ language is not
needed) and compilation method (C++ language is needed). The intended purposes etc. of these
methods are the table below.
Interpreter method Compilation method
Purpose Development of comparatively
simple screen
Programming Unnecessary (with Macro
function)
Development
(compilation)
environment
Execution speed Slower than the compilation
Unnecessary The compiler is necessary
method
Development of screen with more
complex control operation
C++ language programming
Faster than the interpreter
method
2
Page 23

2. Features and Specifications of NC Designer
2. Features and Specifications of NC Designer
In this section, what can be done with NC designer is described for those who operate NC
Designer for the first time. Specifications and functions are referred to in the description.
2.1 Features of NC Designer
NC Designer has the following features.
Ultimate GUI development framework applicable to various embedded system s (platforms)
Automatic generation of source code
Various source codes are automatically generated from the data created with NC Designer.
Possible to load various fonts
GUI library which does not depend on the platform
The GUI library allows you to match every platform through repetitive generation.
Substantial improvement of GUI development efficiency through embedded system
Powerful editing functions (cut, copy, paste, rotation, alignment, zoom, etc.)
Automatic generation of development document
NC Designer automatically creates documents such as the screen list and property data in a
file (rich text format).
Simulation function for PC
Screens created with NC Designer can be simulated.
Simple GUI simulation such as screen switching is realized.
Using the simulation tool, you can change properties of the GUI part.
(Modification event history is also supported.)
2.1 Features of NC Designer
3
Page 24
2. Features and Specifications of NC Designer
2.2 Specifications of NC Designer
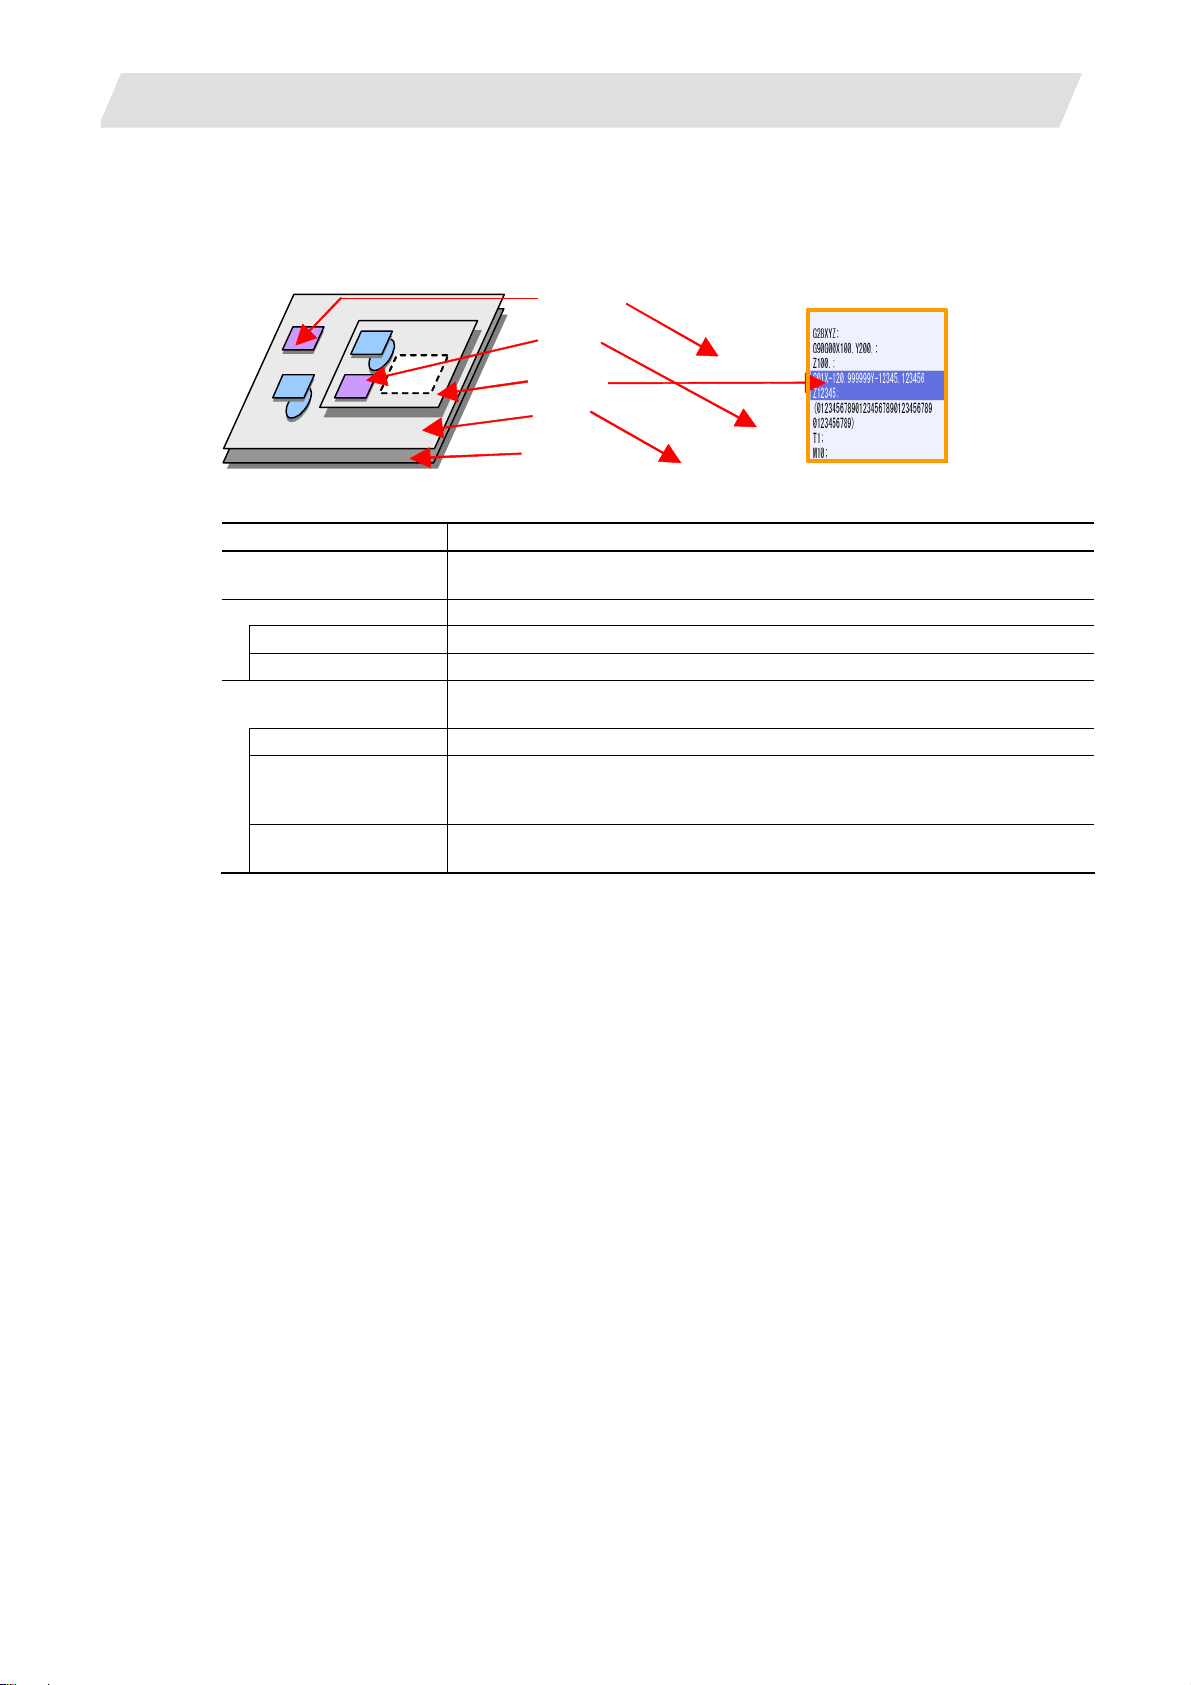
2.2.1 Screen Elements of NC Designer
The screen elements displayed (that is, created) with NC Designer include the followings.
Control
Figure
2.2 Specifications of NC Designer
Window
Panel
Screen
Screen element Description
Screen Physical hardware display area. Available only one screen for each system.
That is, only one screen for each project.
Page Screen. The page includes the panel and the window.
Panel Screen displayed in full size on the screen.
Window Screen displayed in a window state on the screen.
Object The object is a screen element arranged on the page. The object include s the
control, figure and view frame.
Control The control is a group of GUI functions including buttons and pictures.
Figure The figure can be drawn with the basic drawing function of the GUI librar y. The
figure includes rectangles, circles, lines, continuous lines, polygons, sectors and
arcs.
View frame The view frame is a display area in the page having mult iple pages. Controls
and figures can be arranged on each page of the view frame.
4
Page 25
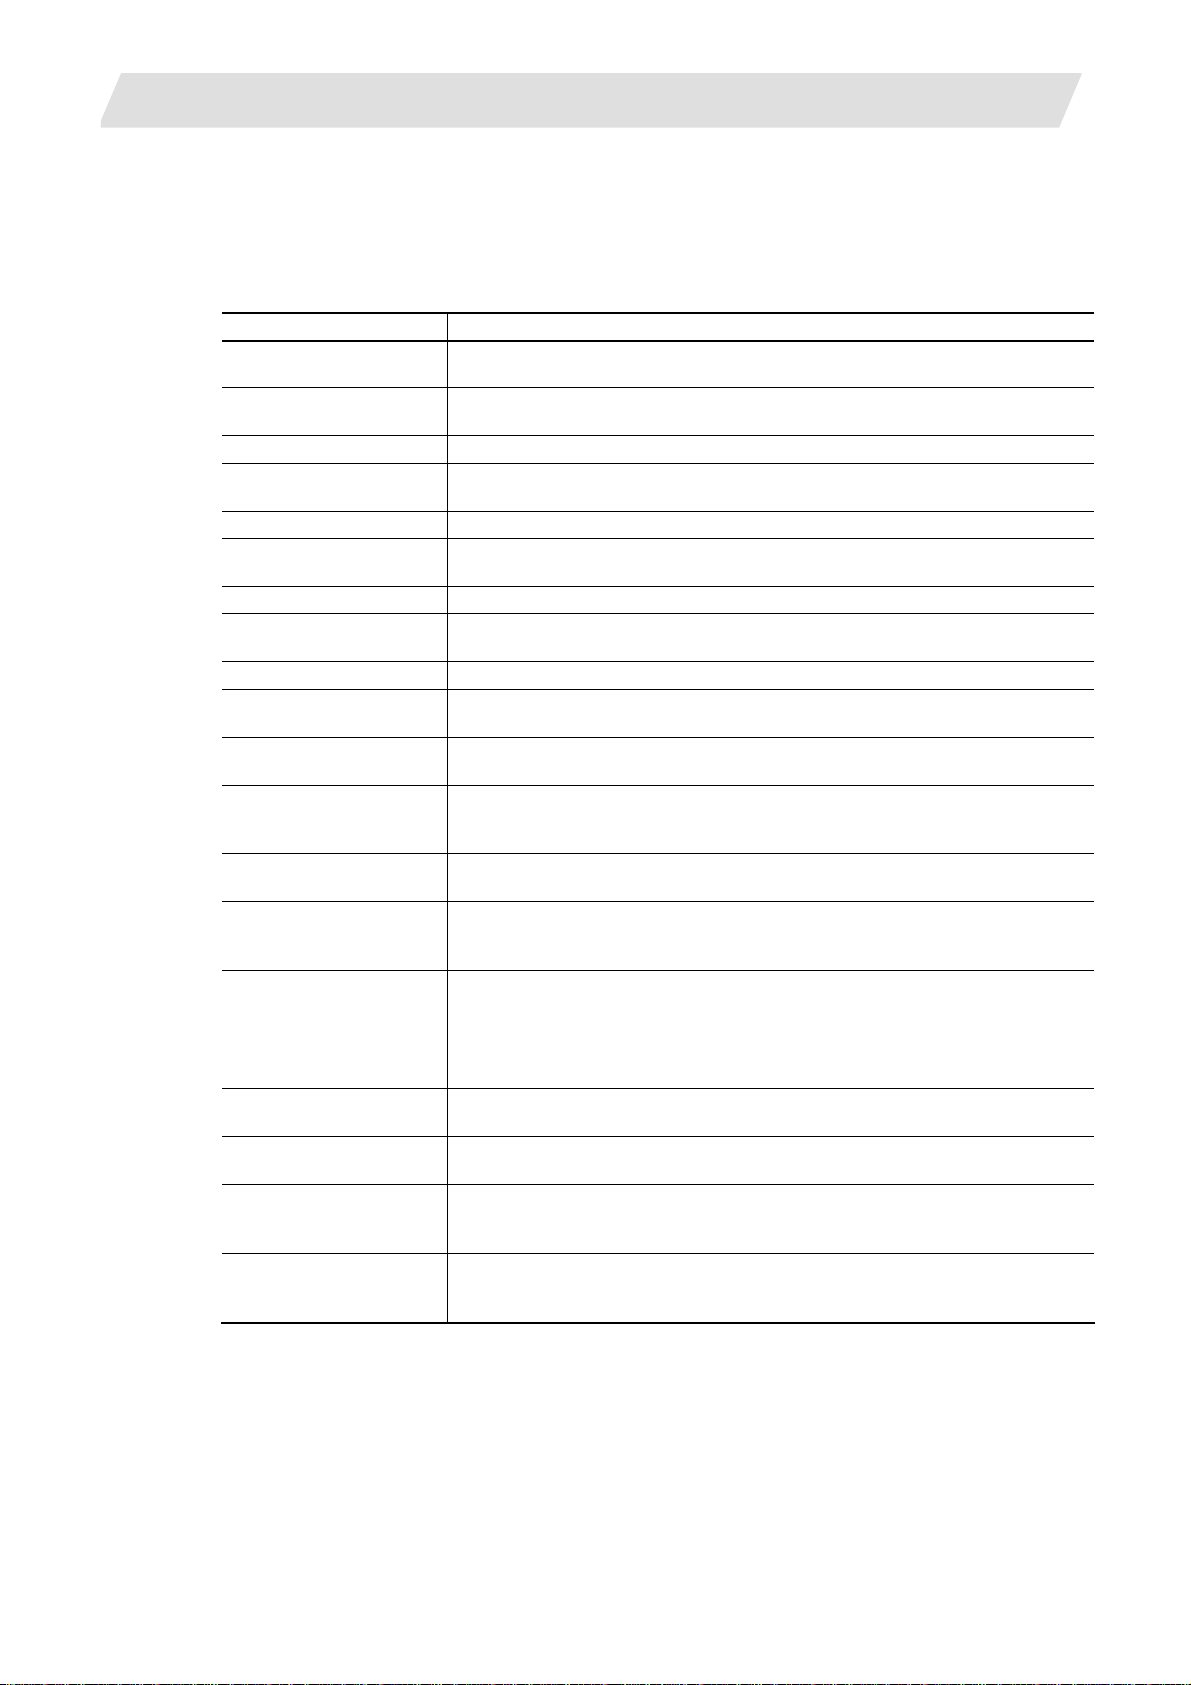
2. Features and Specifications of NC Designer
2.2.2 Control
The control is an object having the following functions.
●
Expression of GUI operation and retention of operation state
● Notification of GUI operation to user program
The control includes the following variations.
Name Outline
Basic control No function is provided for the basic control. The user creates display and event
processes.
Button The button realizes ON/OFF actions (changes in internal status) and switches
the display according to the status.
Check box The check box allows the user to select an item and retain the selected state.
Edit control The edit control displa ys, inserts or overwrites character strings in multiple lines.
Search and replace of a character string are also possible.
HTML browser The HTML browser displays HTML files.
Label The label displays a character string. The character string can be d ynamically
switched.
List In the list, several character strings are displayed for selection by the user.
Picture The picture switches the display according to the status. Simple animati on is
available by switching the design.
Progress bar The progress bar expresses the progress of a process with filling.
Radio button The radio button allows the user to select one of multiple selection items and
retain the selected state.
Text box Character strings and values are displayed and input in the text box. The value
is converted into a character string or binary data.
Scroll bar The scroll bar moves the display area. The scroll bar incl udes two variations:
vertical scroll bar for vertical movement and horizontal scroll bar for horizontal
movement.
NC data text box NC data text box is a control that enables reading and writing from and to the
NC's internal data.
PLC button The PLC button control enables to read and write data from/to the PLC bit
device of NC. It also enables to change the ON/OFF state of the button
according to the state of the bit device.
PLC extension button PLC extension button is a control equivalent to a PLC button control, but is
different from the PLC button in the following points.
・
・
・
PLC text box T he PLC text box control ena bles to read and write data from/to the PLC devic e
of NC.
PLC message PLC message is a control that displays a message according to the status of
PLC device in NC, by obtaining it from the message definition text file.
Table The table control uses cells with the number (n) of rows and columns to control
and display the character string data. Each row and column can have its own
title.
Counter The counter display part can display the current position, workpiece coordinate
position, etc.
"Actuator" has been added to the button types.
"Interlock", "Disable" and "Blink" have been added to PLC devices.
The group designation function has been added.
2.2 Specifications of NC Designer
5
Page 26
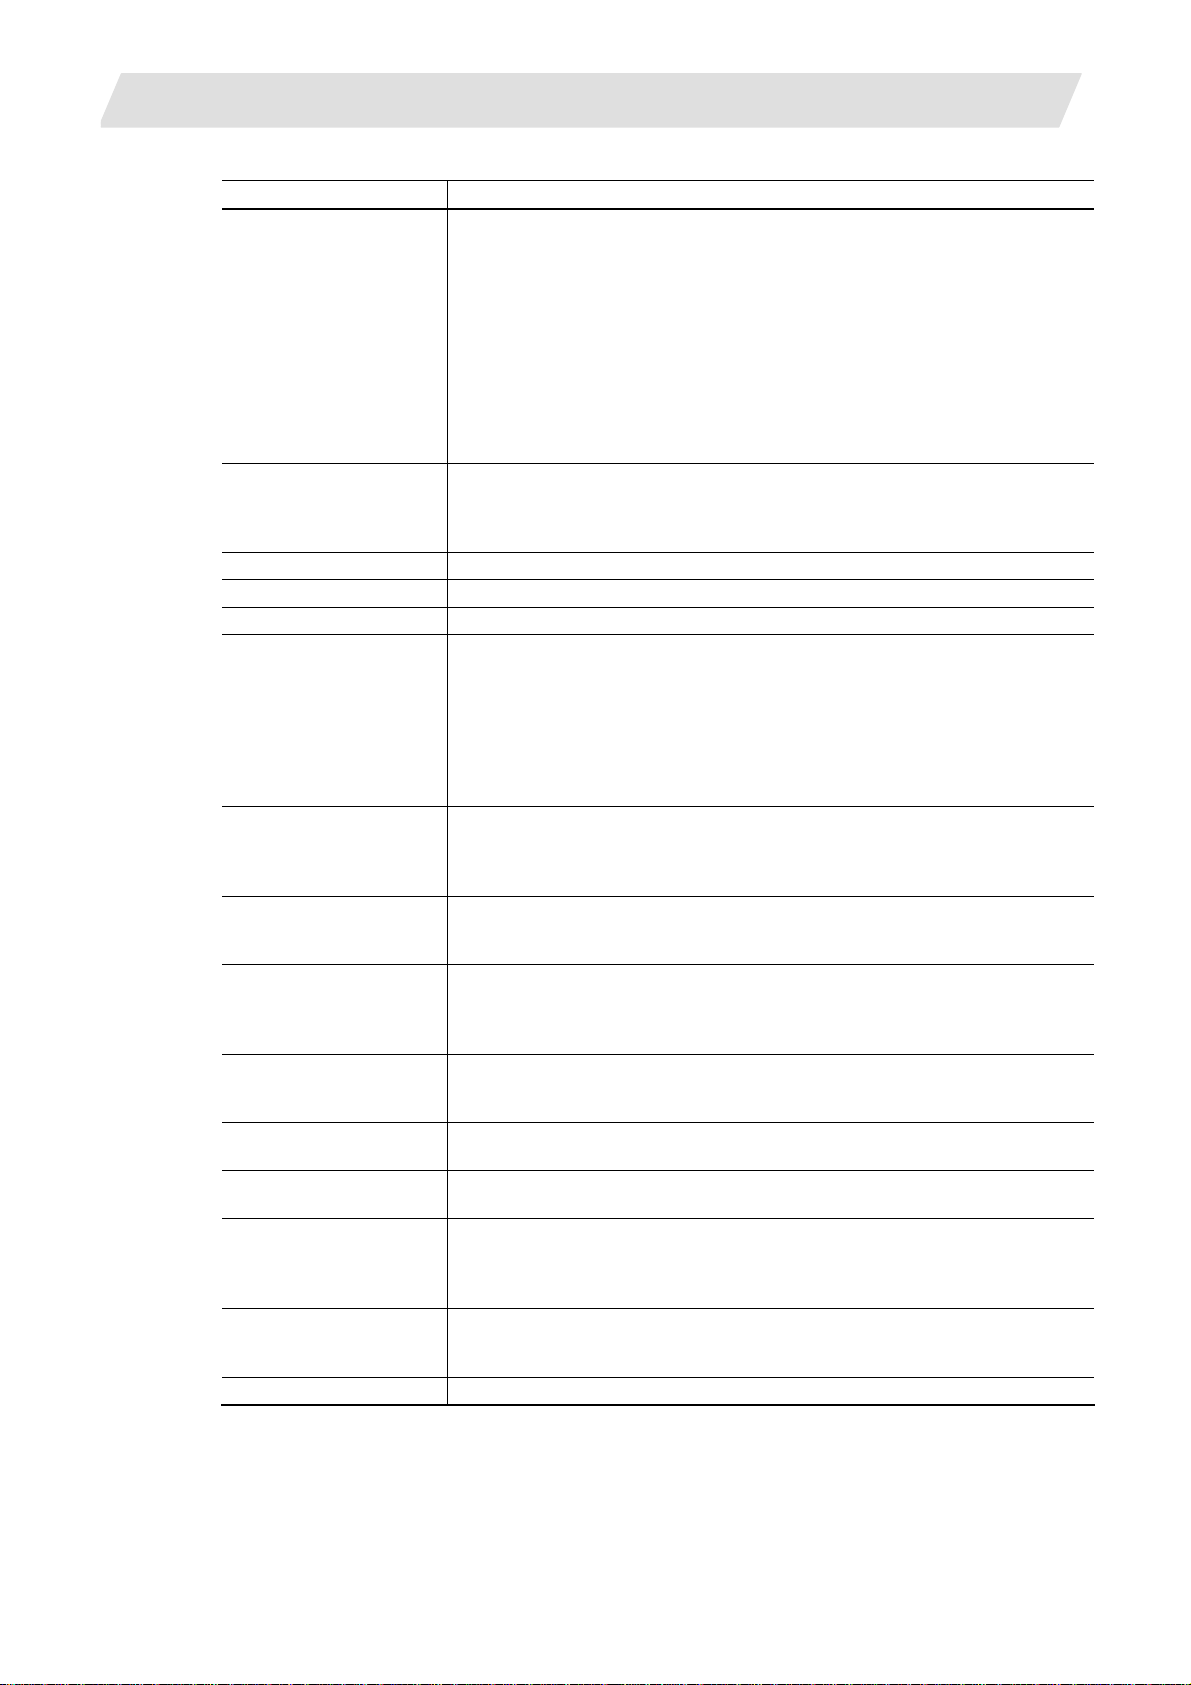
2. Features and Specifications of NC Designer
Name Outline
CycleTime The cycle time display part is used to display the automatic start-up time and
the cycle time.
Automatic start time (STL)... Total accumulated time during the automatic
Cycle time (CYC).. The automatic operation time from when the automatic
Feedrate The F display part shows the vector direction speed currently being moved in
during interporation feed, the speed of the axis with highest speed during each
axis independent feed. This part also shows dwell (code: G04).
Setting the property (speed display type) enables the display of tool tip speed.
GModal M The G modal display part (M system) is used to show each modal state.
GModal L The G modal display part (L system) is used to show each modal state.
GModal Simple The G modal display part (simple) is used to show each modal state.
LoadMater The Load meter display part can display the spindle load and Z axis load in th e
bar graphs by using user PLC.
(When the load meter is not set by user PLC, these are not displayed on th e
screen.)
Two load meters are displayed by using four lines (the area of the spindle
standby and the load meter) when the spindle standby is not displayed.
One load meter is displayed by using two lines (the area of the spindle standby
and the load meter) when the spindle standby is displayed.
Menu The menu display part includes the menu ON , OFF and Disa ble statuses, which
can change the menu selection state.
Two types of settings are available for the menu: one-row menu (icon + menu
name) and two-row menu (two rows of menu name).
MSTB The MSTB display part can display each command of spindle function (S),
miscellaneous function (M), tool function (T) and 2nd miscellaneous function
(B).
ONB The ONB displa y part displays the program No., sequence No. and block No.
currently being executed.
When a subprogram is being executed, the subprogram's program No.,
sequence No. and block No. are displayed.
ProgramBuffer The program buffer display part displays the contents of the machining program
currently being executed.
The block being executed in the program currently is highlighted.
SPCommand This part can display the spindle modal (S) and the value of actual spindle
rotation speed.
FileInOut The input/output control part is used to input and output NC files between the
NC memory and an external device.
AlarmMessage The alarm display part is used to display the alarm No. and alarm message
character string when an alarm occurs.
This part displays NC alarms and PLC alarms, but does not dis play the stop
code.
MonitorStatus The operation status display part is used to display the NC operation status.
If the system controls multiple part systems, this part can display the operation
status of each part system.
Time The time display part is used to display the current time.
2.2 Specifications of NC Designer
operation, from when the automatic start-up
button is pressed in the memory (tape) mode
or MDI to when either of the feed hold stop,
block stop or reset button is pressed.
start-up button is pressed in the memory (tape)
mode or MDI to when either of the feed hold
stop, block stop or reset button is pressed.This
is preset to “0" by turning the power OFF.
6
Page 27
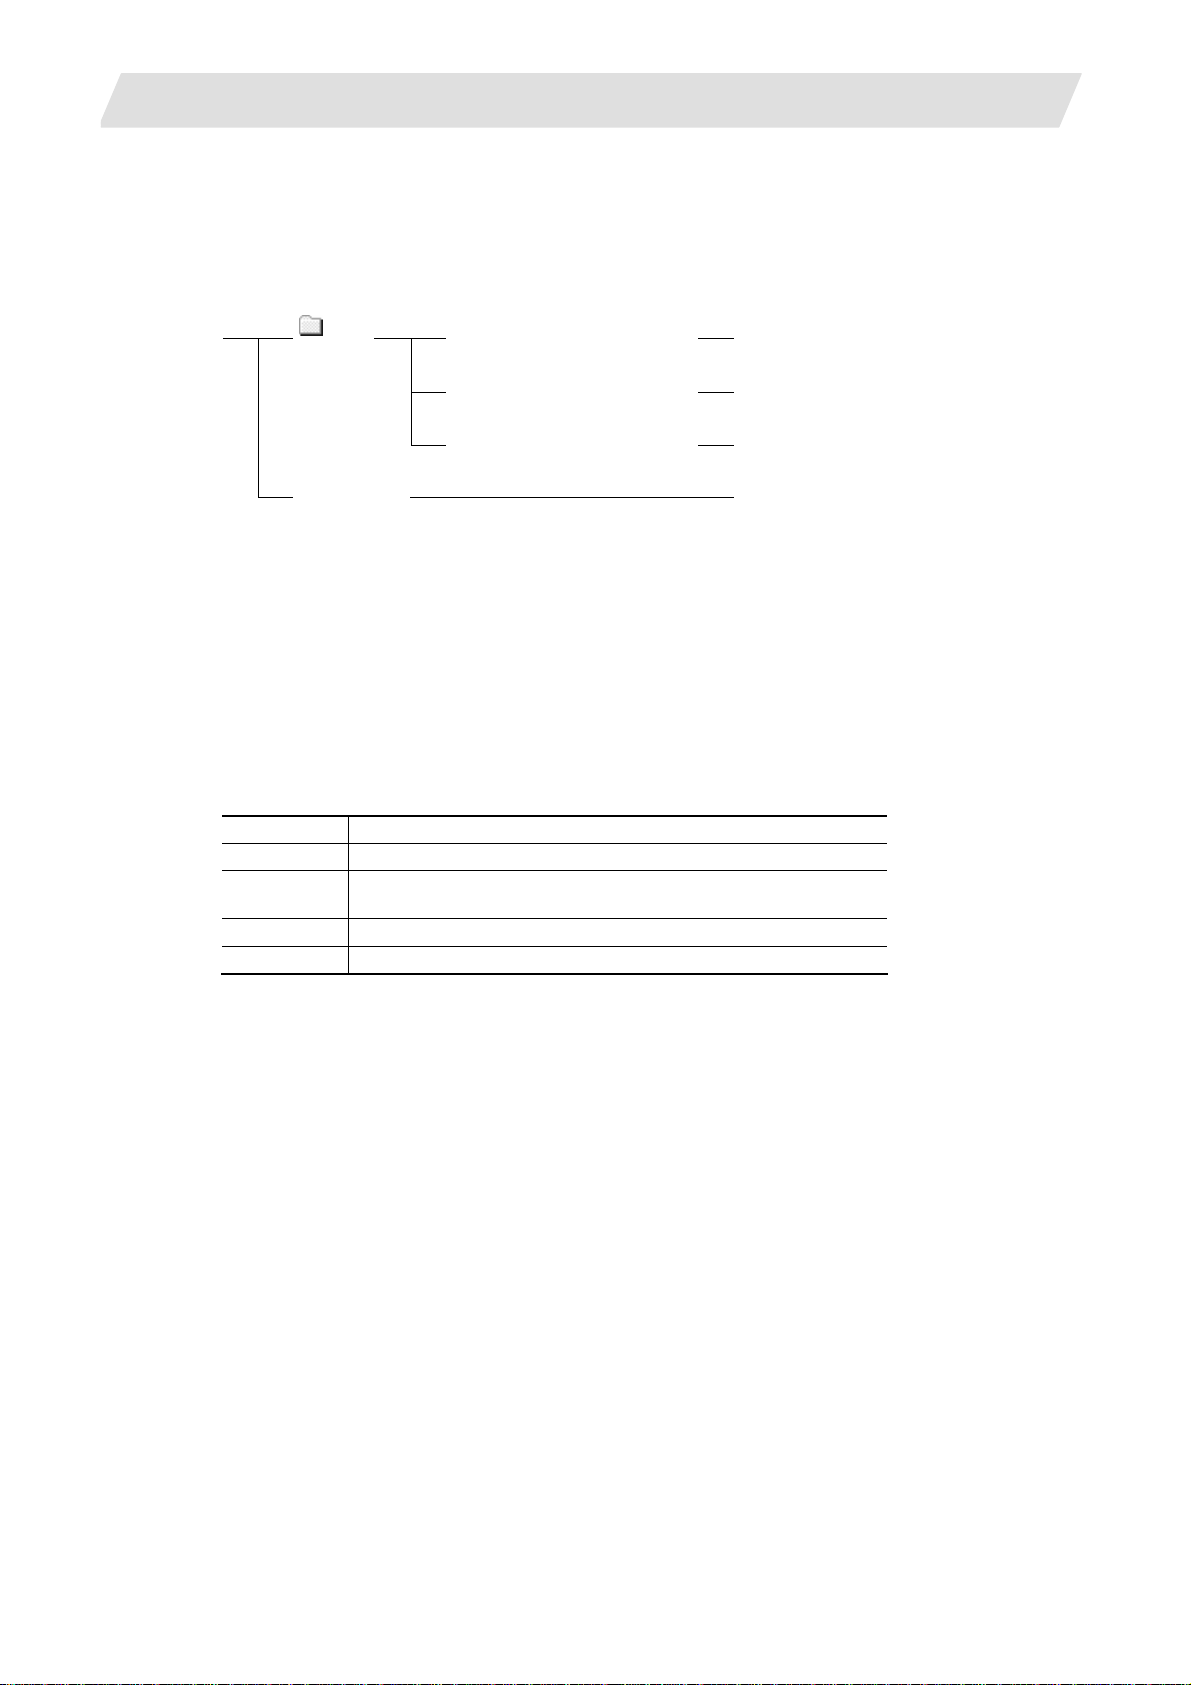
2. Features and Specifications of NC Designer
2.2.3 Configuration of Data File Created With NC Designer
NC Designer handles a group of screen data displayed on the target board, as a project. The
project consists mainly of a folder of which screen files are stored and a project data file.
Suppose you save a project under the name "Sample", a "Sample" folder and a project data file
named "Sample.IPP" are created in the designated folder.
(Note)
Sample
Sample.IPP
: ###: A three-digit hexadecimal value indicating the page number
pnlpg###.ipw(###=000-0FF)
*.bmp,*.jpg
*.res
To open an existing project, select the file having extension IPP.
The screen data file having extension ipw is in the original format of NC Designer. When the user
builds screen data in the application, source codes are generated according to screen data and
they are embedded in the user program.
2.2.4 Operating Environment of NC Designer
The system environment necessary for the operation of NC Designer is shown below.
OS Windows NT/2000/XP
CPU Pentium III 600MHz or better
HD 100MB minimum
Additional disk capacity is necessary for various data files.
Memory 128MB minimum
Screen SVGA or better
2.2 Specifications of NC Designer
Screen data file
Background, or image files set in control
Resource file
Project data file
7
Page 28
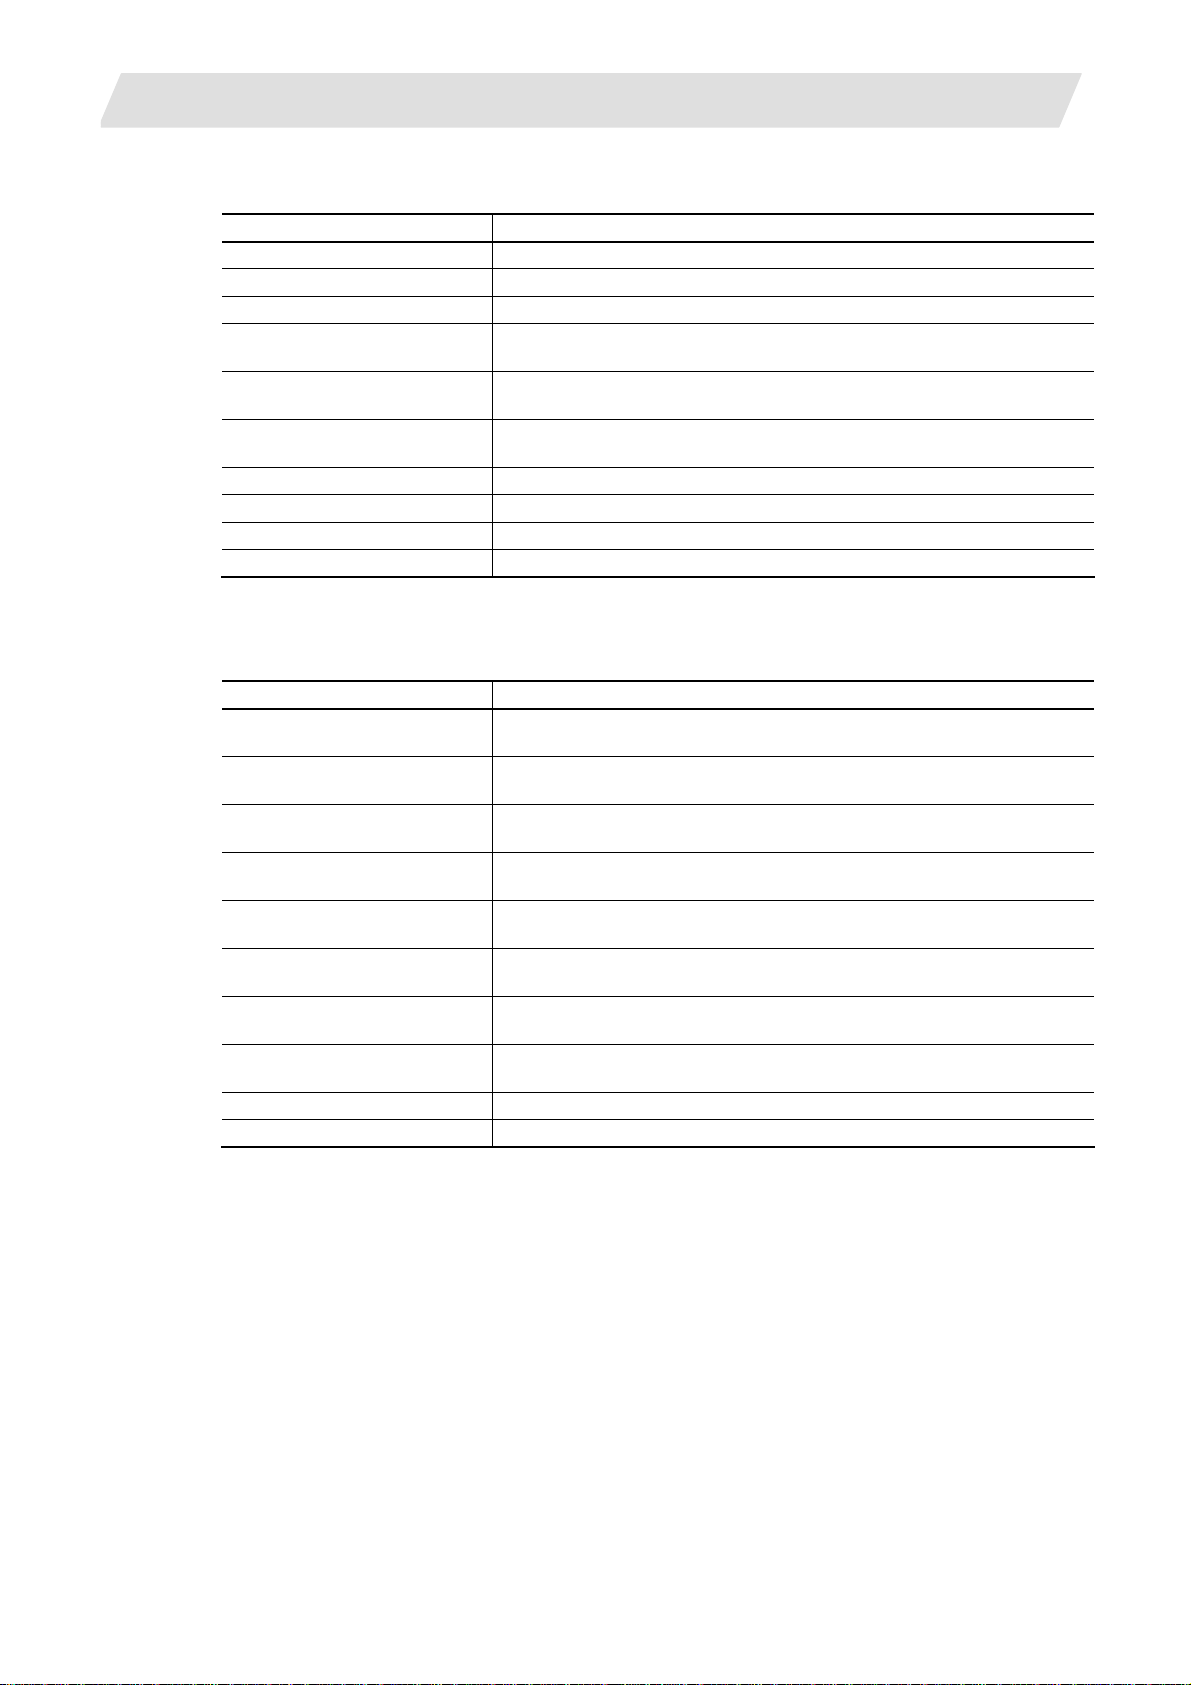
2. Features and Specifications of NC Designer
2.2.5 Specification List
Function Outline
Screen 1 for each project
Panel/window Max. 256 sheets of panels and windows in total for each project
View frame Max. 10 frames for each panel or window
Screen size Horizontal: 1 to 2560 dots
Vertical: 1 to 1920 dots
Number of controls that can be
created on each page
Number of controls that can be
created in each frame
Number of locales Max. 32
Background image file BMP or JPG file
Filling pattern Up to 38 types can be registered.
Line pattern Up to 8 types can be registered.
Max. 512
Max. 512. However, the maximum limit of the page (512) may not be
exceeded inside the page of the frame.
2.2.6 Function List
Function Outline
Property window Specify the properties of the control, figure, project, screen, window and
frame.
Resource view The resource data is displayed in a tree. Registration of the resource is
available.
Source code generation Various source codes are generated according to the created screen
data.
Automatic generation of
development document
Simulation function The appearance and movement of the created screen data is simulated
Editing function Various editing functions such copying, cutting, pasting, search and
Layout function Positioning, resizing, rotation and other layout adjustment functions can
Locale switching Up to 32 locales can be set for each control, and they are switched on NC
Error check Various setting errors are checked.
Control list A list of created controls and property settings are displayed.
Project and window data is output in a file (rich text format).
on the PC.
replacement can be performed.
be performed.
Designer.
2.2 Specifications of NC Designer
8
Page 29
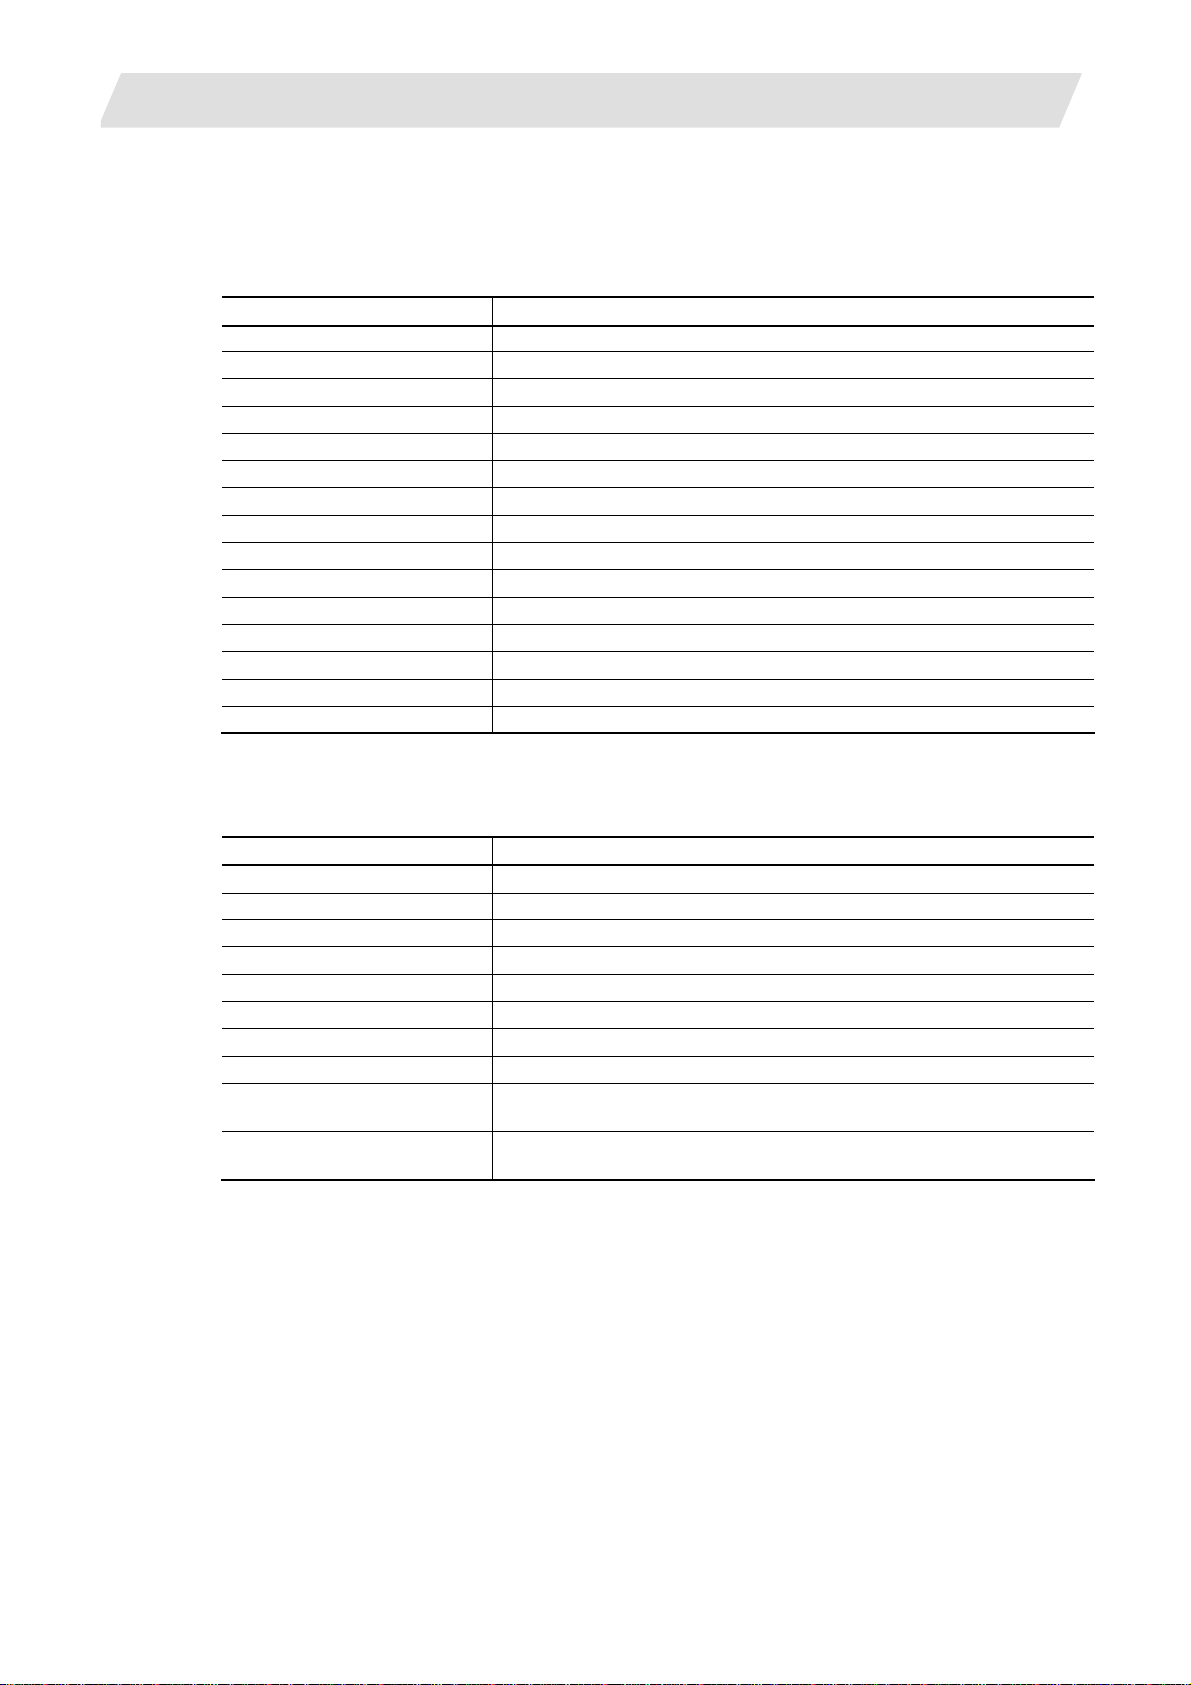
2. Features and Specifications of NC Designer
2.3 Menu List
A list of pull-down menus of NC Designer and the usage of each item are described below.
2.3.1 File
Item Function
New Project Create a new project.
Open Project Open an existing project.
Save Project Overwrite the project being edited.
Save Project As Save the proje c t being edited, under a new name.
New Panel Add a new panel to the project being edited.
New Window Add a new window to the project being edited.
Open Panel/Window Open the pane l/window of the project being edited.
Close Panel/Window Close the panel/window being edited.
Save Panel/Window Save the panel/window being edited.
Save All Overwrite all the project data being edited.
Source code generation Convert the created data into source code of various formats.
Project convert Convert the created data in an interpreter method file.
Document generation Output project and window data into a file (rich text format).
Recent Projects Read and display up to four recently edited projects.
Exit Exit from NC Designer.
2.3.2 Editing
Item Function
Undo Abandon changes and restore the original state.
Redo Execute the operation canceled with "undo."
Cut Delete the selected object and copy it in the clipboard.
Copy Copy the selected obj ect and copy it in the clipboard.
Paste Paste the object from the clipboard.
Delete Delete the selected object (without copying it in the clipboard).
Find Search for a control or caption.
Edit of a caption Edit the caption of each part directly on the editing screen.
Select All Select all objects or all controls or figures of the same type on the editing
page.
Repeat Copy the selected object by the designated number vertically or
horizontally.
2.3 Menu List
9
Page 30
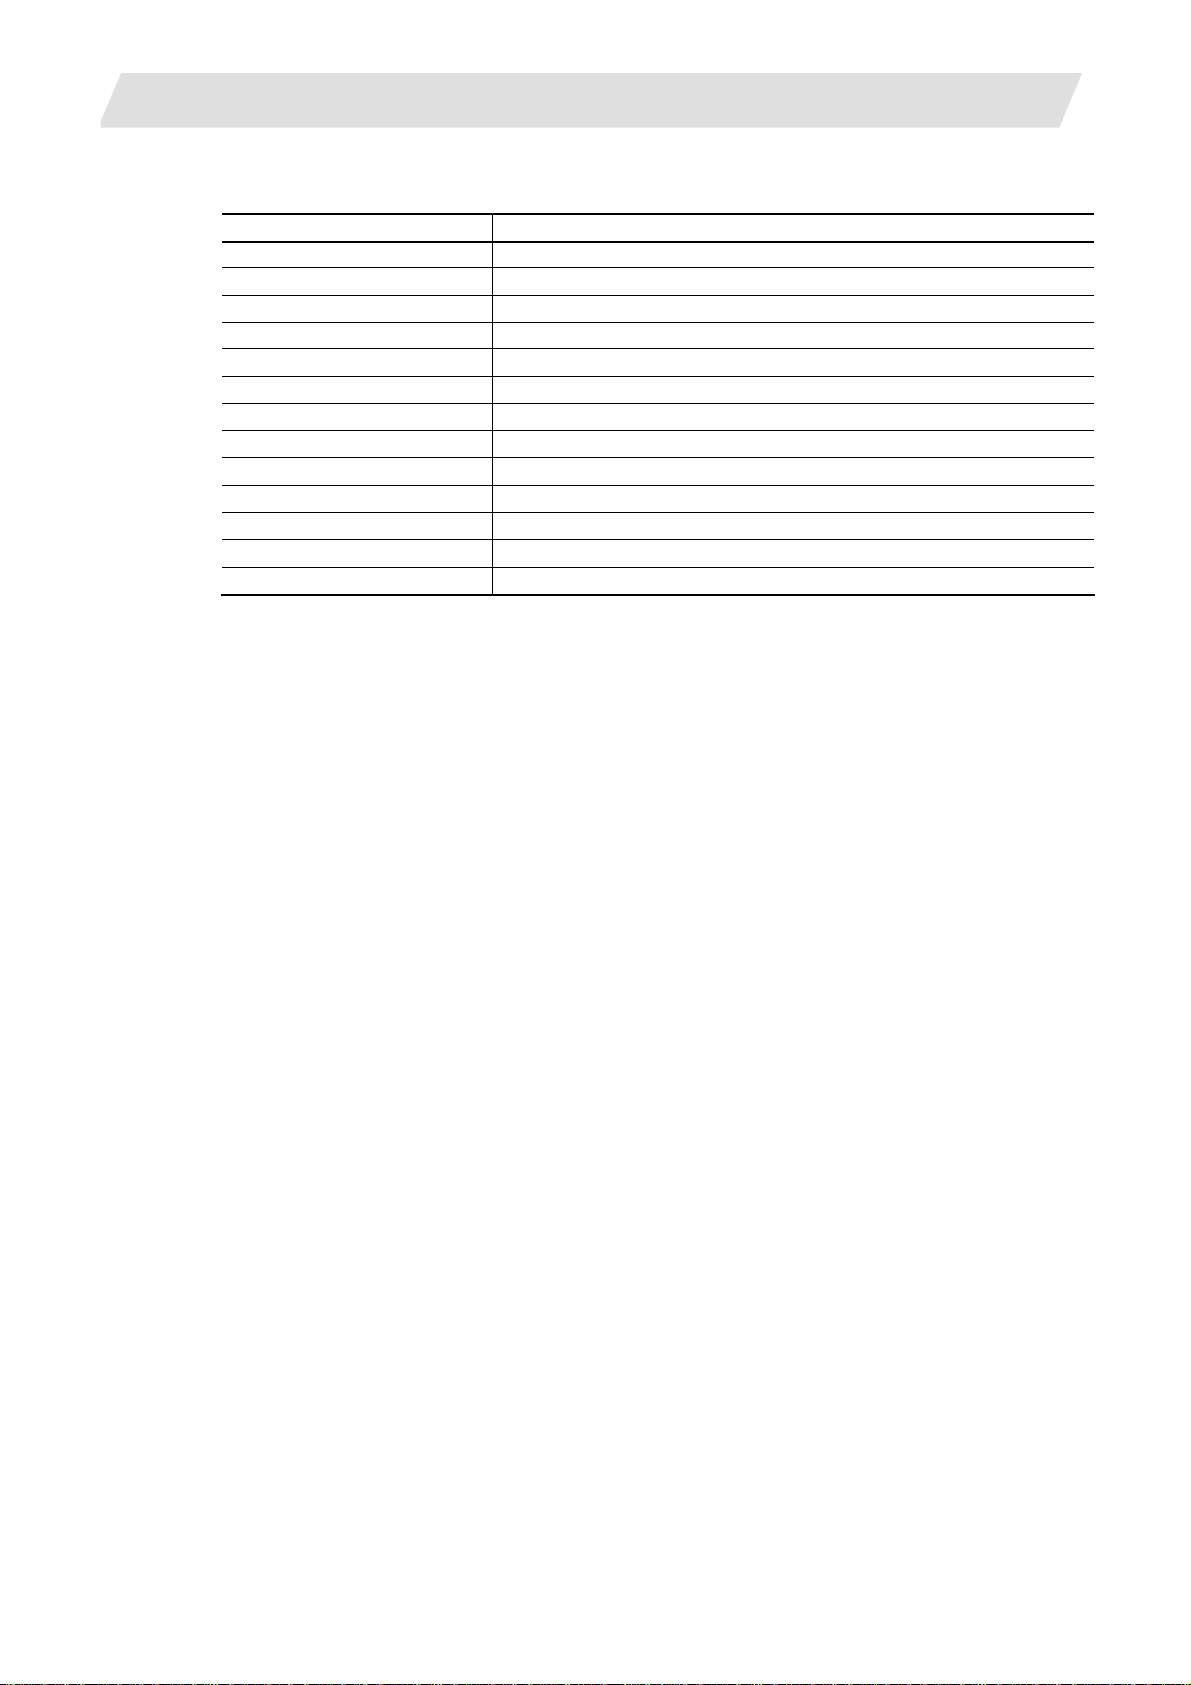
2. Features and Specifications of NC Designer
2.3.3 View
Item Function
Toolbars Select the tool bar displayed with NC Designer.
Resource Display or hide the resource view.
Property Display or hide the properties window.
Message Display or hide the message window.
Image Display or hide the image view.
Statusbar Display or hide the status bar.
Switch Locale Switch the locale being displayed.
Previous Screen Display the previous page.
Next Screen Display the next page.
Previous Frame Page Select the previous view frame.
Next Frame Page Select the next view frame.
Zoom Specify the zoom ratio of the page.
Refresh Redraw the page.
2.3 Menu List
10
Page 31

2. Features and Specifications of NC Designer
2.3.4 Control
Item Function
Basic object Select to draw the basic control.
Button object Select to draw a button.
Checkbox object Select to draw a check box.
Edit control object Select to draw an edit control.
HTML browser object Select to draw an HTML browser.
Label object Select to draw a label.
List object Select to draw a list.
Picture object Select to draw a picture.
Progressbar object Select to draw a progress bar.
Radiobutton object Select to draw a radio button.
Textbox object Select to draw a text box.
Vertical scroll bar object Select to draw a vertical scroll bar.
Horizontal scroll bar object Select to draw a horizontal scroll bar.
NC data text box Select to draw an NC data textbox.
PLC button Select to draw a PLC button.
PLC extension button Select to draw a PLC extension button.
PLC textbox object Select to draw a PLC textbox.
PLC message Select to draw a PLC message.
Table object Select to draw a table.
Counter Select to draw a counter display part.
CycleTime Select to draw a cycle time display part.
Feedrate Select to dra w a feedrate (F) display part.
GModal M Select to draw an M system modal display part.
GModal L Select to draw an L system modal display part.
GModal Simple Select to draw a simple modal display part.
LoadMeter Select to draw a load meter display part.
Menu Select to draw a menu part.
MSTB Select to draw a MSTB part.
ONB Select to draw an ONB display part.
ProgramBuffer Select to draw a program buffer displa y part.
SPCommand Select to draw a spindle (S) displa y part.
FileInOut Select to draw an input/output control part.
AlarmMessage Select to draw an alarm message display part.
Monitor Select to draw an operation status display part.
Time Select to draw a time display part.
Frame Select to draw a view frame.
2.3 Menu List
11
Page 32

2. Features and Specifications of NC Designer
2.3.5 Figure
Item Outline
Rectangle Select to draw a rectangle.
Circle&Oval Select to draw a circle or ellipse.
Straight Line Select to draw a line.
Poryline Select to draw a continuous line.
Polygon Select to draw a polygon.
Sector Select to draw a sector.
Arc Select to draw an arc.
2.3.6 Setting
Item Function
Project Properties Enter the project property settings.
Panel/Window Properties Enter the panel/window property settings.
Focus setup Enter the focus destination setting.
Color setup Enter the settings of the project color setting method.
Panel macro edit Edit the macro used in the screen.
Project macro edit Edit the macro used in the project.
2.3.7 Layout
Item Function
Align/Distribution Change the alignment or arrangement of selected multiple objects.
Make Same Size Resize the horizontal or vertical width of selected multiple objects to the
smallest or largest object size.
Order Display the selected object at the far front or far back position.
Nudge Move the selected object left, right, up or down by a dot or grid.
Rotate/Flip Rotate the object or create a mirror image of it.
Modify Deform the polygon or arc.
Group Group multiple objects. Or cancel a group.
Grid Enter the grid setting.
2.3 Menu List
12
Page 33

2. Features and Specifications of NC Designer
2.3.8 Tool
Item Function
Screen Maintenance Copy or delete the screen.
BSP selection Select the BSP to be used.
Error check Perform an error check of the created data.
Functional Object List Display a list of controls and jump to the selected control.
Export of a character sequence
resource
Import of a character sequence
resource
Test Perform an action test of the screen.
Options Enter reference setting of common project data.
Export the character string resource in a CSV file.
Import the character string in a CSV file into the character string
resource.
2.3.9 Window
Item Function
Cascade Overlap screen editing windows.
Tile Arrange screen editing windows like tiles.
Arrange Icons Arrange minimized window icons.
2.3.10 Help
Item Function
About NC Designer Display the version of the product.
2.3 Menu List
13
Page 34

2. Features and Specifications of NC Designer
)
2.4 Flow of Development Using NC Designer
The flow of GUI development using NC Designer is shown below.
Create a project.
Create resources.
Create panels/windows.
2.4 Flow of Develop men t Usi ng NC Designer
Layout the screen
Simulate on PC
Generate the document (design document
Generate source codes.
Add user programs to source codes.
Creation by multiple users is
allowed.
Resources such as the character strings and image data are controlled by a single user because
they are common project data. Create the character string of each control and the window title
character string in advance as resources. After creating resources, each screen layout can be
arranged by multiple users.
After source codes are generated, add the user-specific program to the source code and perform
application development.
14
Page 35

3. Startup and Termination of NC Designer
3. Startup and Termination of NC Designer
The startup and termination methods of NC Designer are descri bed in this section.
3.1 Starting NC Designer
To launch NC Designer, select the start button of Windows, followed by "Programs,"
"MELSOFT application,"
according to the "program folder" designated during installation.
After NC Designer is launched, the main window shown below is displayed.
"NC Designer" and "NC Designer." (The displayed names may vary
3.1 Starting NC Designer
15
Page 36

3. Startup and Termination of NC Designer
3.2 Exiting From NC Designer
Perform one of the following procedures to exit from NC Designer.
Select [Exit] from the [File] menu.
Click on the button at the upper right of the main window.
Double click on the NC Designer icon at the upper left of the main window.
Click on the NC Designer icon at the upper left of the main window and select [Close] from
the displayed control menu box
While holding down the [Alt] key, press the [F4] key.
If the open project data has not been saved, a confirmation message is displayed.
3.2 Exiting From NC Designer
16
Page 37

3. Startup and Termination of NC Designer
3.3 User Interface
3.3.1 Function of Each Part of Basic Screen
The configuration of the operation screen of NC Designer and the name and function of each part
are described.
3.3 User Interface
Ti tle bar
Menu bar
To ol ba r
Editing screen
Title Bar
Menu Bar
Status bar
The application name, project name, and panel/window name are displayed.
Related functions are grouped.
The menu bar shows a list of group names, and each function in the group is displayed in the
pull-down menu.
17
Page 38

3. Startup and Termination of NC Designer
A
A
Tool Bar
(1) Standard Tool Bar
Frequently used functions are displayed in icons.
Save Panel/Window
3.3 User Interface
New Project New Panel Cut Paste Redo
(2) Control Tool Bar
The drawing function of each control is displayed in an icon. (The image of each control is
displayed in an icon.) Select the icon button corresponding to the desired control to draw the
control.
(3) Figure Tool Bar
The figure drawing function is displayed in icons. Select the icon button corresponding to the
desired figure to draw the figure.
Rectangle Straight Line
Save Project
Open Project
New Window
New Window
Open Panel/Window
Polygon
rc
Copy Undo
Display magnification
bout NC Designer
Circle & Oval Polyline Sector
(4) Control Operation Tool Bar
Functions frequently used during operation of controls are di splayed in icons.
Bring to Far Front Find
Send to Far Back Functional Object List
18
Page 39

3. Startup and Termination of NC Designer
(5) View Tool Bar
Functions frequently used in the [View] menu bar are displayed in icons.
Previous Screen Previous Frame Page
3.3 User Interface
Resource View
Character strings, images and other resources are displayed and entered.
Propery Window
Properties of the project, window, view frame, control, figure and each resource are entered.
Next Screen
Switch Locale
Next Frame Page
Image View
Drawing Screen
A preview of the image data set in the image resource selected in the resource view is displayed.
The screen displayed at the target is created.
19
Page 40

3. Startup and Termination of NC Designer
Status Bar
The position of the cursor and descriptions about the selected function or control are displayed.
3.3 User Interface
The selected menu or description
about the function of the icon in
the tool bar is displayed.
The currently selected
locale name is displayed
The editing right of
the common project
data is displayed.
N
O
T
E
N
N
O
T
E
O
T
E
The tool bar and status bar can be displayed or hidden upon selection.
Tool bar : From the [View] menu, select [Tool Bar] - [Standard]/[Functional Object]/[Fixed
Object]/[Operation]/[Display].
Status bar : Select [Status Bar] from the [View] menu.
The check mark placed before an item indicates that the item is displayed.
The tool bar can be dragged arbitrarily.
The editing right of
the panel/window
data is displayed.
The selected view frame
page number is displayed.
The cursor position is
displayed.
The coordinates
of the upper left
point of the
object are
Place the cursor at a position other
than the button and drag to the desired
position.
The current
displaying
scale is
displayed.
The type of the selected
object is displayed.
20
Page 41

3. Startup and Termination of NC Designer
3.3.2 Operation Method in Dialog Box and Property Window
In the dialog box and property window, detail settings for the execution of each function of NC
Designer can be entered.
Edit Box
Enter a character string. With an edit box provided with spin buttons , click on the up " " or
down "
Radio Button
" button to increase or decrease the value.
3.3 User Interface
Combo Box
Check Box
Selection items with a circle at the left side.
Only one option among several options can be selected. The selected option is indicated with a
dot.
A list of selection items is displayed in a drop-down menu. You can select the desired one.
Selection items with a square at the left side.
Select the validity of the option. The selected option is marked with a check mark
.
21
Page 42

4. Creating a Project
4. Creating a Project
Basic operations about the project where various pieces of created data are stored are described
in this section.
4.1 What Is "Project"?
With NC Designer, a group of GUI screens used for a certain application is called "project."
The project mainly consists of a folder of which screen files are stored and a project data file.
When the project is saved under the name "Sample," for example, a "Sample" folder and a
"Sample.IPP" project data file are created in the folder designated as a destination of saving.
(Note): ###: A three-digit hexadecimal value indicating the page number
To open an existing project, select the file having extension IPP.
Sample
Sample.IPP
pnlpg###.ipw
*.bmp,*.jpg
*.res
4.1 What Is "Project"?
Screen file
Background, or BMP/JPG files
set in control
Resource file
Project data file
I
M
P
O
R
T
A
N
T
I
M
P
O
R
I
M
To move or copy project data on a floppy disk or to another PC, select both the folder and project data file.
Settings related to the screen size and display scale are stored in the CONFIG.INI file. The CONFIG.INI file is
T
P
O
R
Because the project consists of these two pieces of data, the project does not open with only one of them.
created in the folder designated in the [BSP Selection] dialog box.
A
N
T
A
N
T
T
22
Page 43

4. Creating a Project
4.2 Creating a New Project
The procedure from creation of a new project to editing of the screen is described.
1. Select [New Project] from the [File] menu or select the [New Project] button in the tool bar.
2. The New Project wizard is displayed. Follow the instructions in the wizard to enter settings about the
project.
Project setting BSP selection
(1)
4.2 Creating a New Project
(2)
(3)
No. Item Description
(1) Project Enter the project name.
(2) Folder Designate the folder where the project is stored with a full path.
(3) BSP A list of BSP having been installed is displayed. Select the desired BSP.
Source code generation destination designation
(1)
(2)
No. Item Description
(1) Generation Form Select the source code generation form from the list.
(2) Generation Place
Folder
Designate the folder which generates the source file with a full path.
N
O
T
E
N
N
O
T
E
O
T
E
If there is another source file for the other project in the folder designated as a destination folder, the file will be
overwritten during source code generation.
23
Page 44

4. Creating a Project
Screen property setting
No. Item Description
(1) Page size Select the default screen size of the page.
(2) Color Setting
Method
(3) Background Color Designate the default background color of the page. Click on the Select
3. Click on the [Finish] button to create the project.
4.2 Creating a New Project
(1)
(2)
(3)
Select the color setup method of the project, using "Direct Color System".
Click on the Set button to display the [Color] dialog box.
button and select the desired color in the displayed [Color] dialog box.
N
O
T
E
N
N
O
T
E
O
T
E
After a project is created, the panel of page 0 is automatically created.
If a new project is created while another project is being edited, a message urging to save the currentl y edited
project is displayed.
Settings related to the screen size and display scale are stored in the CONFIG.INI file. The CONFIG.INI file is
created in the folder designated in the [BSP selection] dialog box.
24
Page 45

4. Creating a Project
4.3 Entering Project Properties
Enter the properties of the currently edited project.
1. Select [Project Properties] from the [Setting] menu.
2. Project properties are displayed in the property window.
4.3 Entering Project Properties
3. Enter each item.
Enter the following items.
Item Description
Project Title Enter a comment about the project.
System font Select the resource ID of the character font displayed in the title bar of
the window.
Title bar active color Specify the color of the title bar of the active window.
Title bar inactive color Specify the color of the title bar of the inactive window.
System background color Specify the background color of the button displayed in th e title bar of
the window.
System fore ground color Specify the foreground color of the button displayed in the title bar of
the window.
Window frame Select the shape of the window frame from the solid frame resource ID.
Unicode Correspondence Select "Yes" for Unicode character code of each locale.
Exevution start screen No. Specify the page number of the panel displayed first.
System palette Select the palette used in the system, from the registered palette
resource.
Default background color of a
screen
Screen width Designate the screen width in dots (1 to 2560).
Screen height Designate the screen h eig ht in dots (1 to 19 20).
Display magnification Designate the display scale of the application in percent (25 to 800).
Specify the default background color of the panel and window.
The setting is confirmed when it is entered.
25
Page 46

4. Creating a Project
The system font and color settings are reflected as shown below.
4.3 Entering Project Properties
System foreground color
(character color and "x" button color)
System background color
(button color)
Title bar (active/inactive color)
System font
Window frame
(The size is fixed at 1 dot. The selected colors of the solid frame ID
(upper left: coor 1. lower right: color 2) are reflected.)
N
O
T
E
N
N
O
T
E
O
T
E
The user who has opened the project to "Edit" common project data can change the project properties.
If "Yes" is selected for "Unicode Correspondence," the source code of the character string resource is
generated with Unicode during source code generation.
If "No" is selected, source code of the character string resource is generated with the character code specified
for each locale.
26
Page 47

4. Creating a Project
4.4 Changing the Color Setting Method
Change the color setting method to reflect the change on the color setting of the entire project.
1. Select [Color setup] from the [Setting] menu.
A Save File confirmation message is displayed. To change the color setting method, click on the [OK]
button to save the file.
2. A [Color setup] dialog box is displayed.
For the [Color setup] dialog box, refer to Section 4.2 "Creating a New Project."
3. Click on the [OK] button. A confirmation message is displayed. Select the [OK] button to reflect the
changes in all settings related to the color.
N
O
T
E
N
N
O
T
E
O
T
E
The user who has opened the project to "Edit" common project data can change the color setting method.
The user who has opened the project to "Refer to" common project data must close the editing page when the
color designation method is changed.
If the "color setting method" is changed from "Index Color System" to "Direct Color System," the RGB values
of the system palette are reflected on the existing color setting.
If the "color setting method" is changed from the "Direct Color System" to "Index Color System," the colors
with the most resembling RGB values are searched for in the system palette and their index numbers are
specified for the existing color setting.
If the "color setting method" is changed from "Direct Color System" to "Index Color System" to "Direct Color
System," the original colors may not be restored because approximate colors are used during c onversion into
index color.
If "The number of Colors" is changed and the number of colors is reduced when comp ared with that before the
change, approximate colors are searched for from the system palette and their index numbers are assig ned in
color setting.
If the number of colors increases when compared with that before the change, the index number is not
converted.
After the color setting is changed, all editing pages are closed.
4.4 Changing the Color Setting Method
27
Page 48

4. Creating a Project
4.5 Saving the Project
The method for saving the project file is described.
1. Select [Save Project] from the [File] menu or select the [Save Project] button in the tool bar.
N
O
T
E
N
N
O
T
E
O
T
E
If the edited project has not been saved, an overwrite confirmation dialog box is displayed when the project is
closed.
4.6 Saving the Project as ...
Save the currently edited project under another file name or at another location.
1. Select [Save Project as ...] from the [File] menu.
2. The [Save Project as] dialog box is displayed.
Designate the destination directory and file name and click on the [Save] button.
4.5 Saving the Project
N
O
T
E
N
N
O
T
E
O
T
E
If the project is saved under a new name, all the currently opened files are copied to the directory of the new
project.
28
Page 49

4. Creating a Project
4.7 Opening a Project
Open an existing project.
1. Select [Open Project] from the [File] menu or select the [Open Project] button in the tool bar.
2. The Open Project dialog box is displayed.
Select a project file (extension: IPP) and click on the [Open] button.
4.7 Opening a Project
29
Page 50

4. Creating a Project
4.8 Opening a Recently Used Project
Up to four most recent projects can be opened directly.
1. Select [Recent Projects] from the [File] menu.
2. The recently used projects are displayed with directory.
Select the desired project.
4.8 Opening a Recently Used Project
The latest four projects are displayed. (The latest one appears at the top.)
30
Page 51

5. Creating and Saving the Page
5. Creating and Saving the Page
In this section, the page (screen) that can be displayed on the target board and the basic
operations available in each page are described.
5.1 What Is Page?
The "page" indicates a screen displayed with NC Designer.
The page includes the following two types.
Item Description
Panel Screen displayed in full size on the screen.
Window Screen displayed in a window state on the screen.
5.2 Creating a New Panel
Create a new panel in the currently edited project.
1. Select [New Panel] from the [File] menu or press the [New Panel] button in the tool bar.
5.1 What Is Page?
2. A new panel is created.
N
O
T
E
N
N
O
T
E
O
T
E
After a new panel is created, the smallest page number among unused page numbers is automatically
assigned to the new panel.
31
Page 52

5. Creating and Saving the Page
5.3 Creating a New Window
Create a new window in the currently edited project.
1. Select [New Window] from the [File] menu or select the [New Window] button in the tool bar.
5.3 Creating a New Window
2. A new window is created.
N
O
T
E
N
N
O
T
E
O
T
E
After a new window is created, the smallest page number among unused page numbers is automatically
assigned to the new window.
32
Page 53

5. Creating and Saving the Page
5.4 Entering Panel Properties
Enter the properties of the currently edited panel.
1. Select [Panel/Window Properties] from the [Setting] menu or select the [Panel/Window Properties] from the
popup menu displayed upon a click of the right mouse button.
2. Panel properties are displayed in the property window.
3. Enter each item.
The setting items include the followings.
Item Description
Panel Title Enter a one-byte character string to specify the panel title (up to 31
WIDTH Specify the panel width in dots (1 to 2560).
HEIGHT Specify the panel height in dots (1 to 1920).
Background Color Specify the background color.
Background File Select "Yes" to use the background, or select "No" to refrain from using it.
Background Image Select the ID of the image resource used for the background. Use the
Blink off time Enter the OFF interval (regular display) of the control blink in ms (100 to
Blink on time Enter the ON interval of the control blink in ms (100 to 60000).
The setting is confirmed when entry is finished.
5.4 Entering Panel Properties
characters). The first character must be a one-byte letter (A to Z or a to
z).
The second and later characters must be one-byte letters, numbers or
underscores (_).
resource view to register the image resource.
60000).
N
O
T
E
N
N
O
T
E
O
T
E
For the blink, refer to "Blink" in Section 7.1 "Common Control Functions."
33
Page 54

5. Creating and Saving the Page
5.5 Entering Window Properties
Enter the properties of the currently edited window.
1. Select [Panel/Window Properties] from the [Setting] menu or select [Panel/Window Properties] from the
popup menu displayed upon a click of the right mouse button.
2. Window properties are displayed in the property window.
5.5 Entering Window Properties
34
Page 55

5. Creating and Saving the Page
3. Enter each item.
The following items can be entered.
Item Description
Window Name Specify the window name (up to 31 characters).
X Specify the X coordinate of the upper left corner of the window in dots
Y Specify the Y coordinate of the upper left corner of the window in dots
WIDTH Specify the panel width in dots (1 to 2560).
HEIGHT Specify the panel height in dots (1 to 1920).
Background Color Specify the background color.
Background File Select "Yes" to use the background image, or select "None" to retrain
Background Image Select the ID of the image resource used as a background image.
Title Select the character string displayed in the title bar of the window from
Existence of a title bar Select "Yes" to display the window with a title bar, or select "None" to
Existence of a close b utton Select "Yes" to display a close button in the title bar of the window, or
Existence of a window frame Select "Yes" to display the window with the window frame, or select
Blink off time Specify the OFF interval (regular display) of the blink of the control in ms
Blink on time Specify the ON interval of the blink of the control in ms (100 to 60000).
The setting is confirmed when entry is finished.
5.5 Entering Window Properties
The first character must be a one-byte letter (A to Z or a to z).
The second and later characters must be one-byte letters, numbers or
underscores (_).
(0 to 2559).
(0 to 1919).
from using it.
Use the resource view to register the image resource.
the character string resource, or enter a new one.
display it without a title bar.
select "None" to refrain from displaying the close button.
"None" to display the window without the window frame.
(100 to 60000).
N
O
T
E
N
N
O
T
E
O
T
E
For the blink, refer to "Blink" in Section 7.1 "Common Control Functions."
35
Page 56

5. Creating and Saving the Page
5.6 Saving the Panel/Window
The method for saving the currently edited panel/window is described.
1. Select [Save Panel/Window] from the [File] menu or select [Save Panel/Window] button in the tool bar.
Tool bar
N
O
T
E
N
N
O
T
E
O
T
E
The shortcut key for [Save Panel/Window] is [Ctrl] + [S].
If the panel/window being edited has not been saved, a confirmation dialog box is displayed when the
panel/window is closed. To save, click on the [Yes] button.
5.7 Save All
The entire project is saved.
After this procedure, not only the opened page but also the entire project is saved.
1. Select [Save All] from the [File] menu.
2. After the project is saved, a message dialog box is displayed.
Click on the [OK] button.
5.6 Saving the Panel/Window
N
O
T
E
N
N
O
T
E
O
T
E
Saving the entire project causes a change in the common project data. Only the user holding the right of
editing the common project data can execute the function.
36
Page 57

5. Creating and Saving the Page
5.8 Opening a Panel/Window
Open the panel/window of the currently open project.
1. Select [Open Panel/Window] from the [File] menu or select the [Open Panel/Window] button in the tool bar.
Tool bar
2. An "Open Panel/Window] dialog box is displayed.
Select the desired screen and click on the [OK] button.
5.8 Opening a Panel/Window
(1)
(2)
(3)
(4)
No. Item Description
(1) Window The window is marked with an asterisk (*).
(2) Operation state The page being used is marked with an asterisk (*).
(3) Preview A preview of the selected page is displayed.
(4) Jump Designate the page number and click on the [Jump] button to jump to the
designated page.
3. The selected screen is displayed.
N
O
T
E
N
N
O
T
E
O
T
E
The shortcut key for [Open Panel/Window] is [Ctrl] + [0].
If a page with an unused page number is opened, a new panel is created.
The number of pages that can be edited simultaneously is 16.
37
Page 58

5. Creating and Saving the Page
5.9 Closing the Panel/Window
Close the open panel/window without closing the project.
1. Select [Close Panel/Window] from the [File] menu or click on the [x] mark at the upper right of the page
view.
[In case of window] [In case of maximized window]
5.9 Closing the Panel/Window
Click
Click
38
Page 59

5. Creating and Saving the Page
5.10 Switching the Editing Window
The method for switching the editing window is described.
5.10.1 Previous Screen
The editing window of the previous page number is displayed.
1. Select [Previous Screen] from the [View] menu or select the [Previous Screen] button in the tool bar.
Tool bar
N
O
T
E
N
N
O
T
E
O
T
E
The editing window is the screen area created in the editing page (panel or window) units.
If there is no panel or editing windo w one the page earlier than the currently opened panel or window, this
function may not be used.
An error is caused if a new screen is opened beyond the limit in the number of editing pages.
5.10 Switching the Editing Window
5.10.2 Next Screen
The screen of the next screen page number is displayed.
1. Select [Next Screen] in the [View] menu or select [Next Screen] button in the tool bar.
Tool bar
N
O
T
E
N
N
O
T
E
O
T
E
If there is no panel or editing window for the page numbers later than the currently opened panel or window,
this function may not be used.
An error is caused if a new screen is opened beyond the limit in the number of editing pages.
5.10.3 Cascade
The active window is brought to the front.
1. Select [Cascade] from the [Window] menu.
39
Page 60

5. Creating and Saving the Page
5.10.4 Tile
Open page windows are displayed in tiles.
1. Select [Tile] from the [Window] menu.
5.10.5 Arrange Icons
Minimized page windows are arranged neatly.
Minimized page windows are arranged from left to right below the application window.
1. Select [Arrange Icons] from the [Window] menu.
N
O
T
E
N
N
O
T
E
O
T
E
This function may not be used if there is no minimized page window.
5.10.6 Switching Locale
When two or more locales are registered, the locale is switched.
5.10 Switching the Editing Window
1. Select [Switch Locale] from the [View] menu or select the desired locale in the tool bar.
Or, select the desired locale in the source view, and select "Switch" from the popup menu
displayed upon a click of the right mouse button.
N
O
T
E
N
N
O
T
E
O
T
E
The currently displayed locale is marked with a check mark
in the icon.
40
Page 61

5. Creating and Saving the Page
5.10.7 Zoom
The editing window display is enlarged or reduced.
The scale can be selected in the range between 25% and 800%. Or select "fit" to enlarge or
reduce according to the current window size.
1. Select [Zoom] from the [View] menu.
2. The [Zoom] dialog box is displayed.
3. Select the scale and click on the [OK] button.
If [Fit] is selected, the window width fits the width of the editing window.
[100%] [Fit]
5.10 Switching the Editing Window
5.10.8 Refresh
Refresh the screen to erase garbage from the screen or display the current screen again.
1. Select [Refresh] from the [View] menu.
The scale automatically
changes so that the
window is displayed in the
full screen.
41
Page 62

5. Creating and Saving the Page
g
5.11 Creating View Frame
Use the view frame to switch a part of the displayed page.
The view frame consists of multiple view frame pages. Switch each view frame page according to
the variable to switch the displayed image.
The following parts can be arranged in the view frame.
•
Controls
•
Figures
1. Select [Frame] from the [Control] menu or select the [Frame] button in the tool bar.
Tool bar
2. The cursor changes to the following shape.
3. Move the cursor to the starting point of the view frame.
4. Drag the cursor (move the mouse while holding down the left mouse button) to the end point of the display
area of the view frame.
5.11 Creating View Frame
Dra
5. Select the view frame. The view frame properties are displayed.
42
Page 63

5. Creating and Saving the Page
5.11 Creating View Frame
6. Enter each item.
The setting items include the followings.
Item Description
Frame Name Specify the view frame name (up to 31 characters).
The first character must be a one-byte letter (A to Z or a to z).
The second and later characters must be one-byte letters, numbers or
underscores (_).
X 0 to 2559
Y 0 to 1919
WIDTH 8 to 2560
HEIGHT 8 to 1920
The number of the maximum
frames
Edit Frame Designate the frame page No. to be edited.
The setting is confirmed when entry is finished.
N
O
T
E
N
N
O
T
E
O
T
E
The view frame may not be created in another view frame.
The frame of the view frame is highlighted with the reverse color of "Background color" that is specified in
properties of panel or window.
Next, the drawing method of each page of the view frame is described.
1. Double click on the view frame area.
2. The editing mode starts in the view frame.
3. Draw using the operation method similar to that of the regular page.
4. Edit other view frame pages.
5. Click on the area outside the view frame of the drawn page to return to the regular drawing mode.
Specify the maximum number of frames.
43
Page 64

5. Creating and Saving the Page
5.11.1 Switching the View Frame
The method for switching the view frame page is described.
Switching to Previous or Next View Frame Page
Switch to the previous or next view frame page.
1. Select [Previous Frame] or [Next Frame] from the [View] menu or select [Previous Fra me] or [Next Frame]
button in the tool bar.
Tool bar
Switching to an Arbitrary View Frame Page
Display the desired view frame page.
1. Select a view frame and display view frame properties in the property window.
2. Designate the desired view frame page to be edited.
5.11 Creating View Frame
44
Page 65

6. Registering the Resource
6. Registering the Resource
With NC Designer, the settings and data used commonly in the controls are registered in advance
as resources.
In this section, the resource registration method is described.
6.1 Resource
With NC Designer, the settings and data used commonly in the controls can be registered as
resources.
The following data is handled as resources with NC Designer.
Item Description
Locale Character strings used for controls and window title, and font data
Image Figure data (BMP or JPG) used for background image and picture controls
Painting out pattern Filling pattern data used for controls and figures
Line pattern Line pattern data used for figures
Solid frame External frame specified for controls
Palette Palette used for color designation
HTML File name HTML format file data used for HTML browser controls
6.2 Resource View
Resources registered in the currently opened project are displayed. Resources can be added,
deleted or the settings of them can be changed.
6.1 Resource
45
Page 66

6. Registering the Resource
A
6.3 Locale
The set of a character string resource and font resource is called locale.
Up to 32 locales can be registered for each project.
Because two or more locales can be registered for each project, there is no need to divide a
project according to the language, but screen data and settings can be handled as an integral
group.
6.3.1 Creating a New Locale
1. Move the mouse cursor to "Locale" in the resource view and click the right mouse button. Select "New
locale" from the displayed popup menu.
2. A new locale is registered.
6.3 Locale
6.3.2 Deleting a Locale
1. Move the mouse cursor to the desired locale name and select "Delete" from the pop up menu displayed
upon a click of the right mouse button.
locale is added.
46
Page 67

6. Registering the Resource
6.3.3 Locale Setup
1. Double click on the desired locale name or move the mouse cursor to the local name and select
"Properties" from the popup menu displayed upon a click of the right mouse button.
2. Locale setting items are displayed in the property window.
Item Description
Locale name Specify the locale name.
Character code Select the character code of the locale.
Language discerment
character sequence
N
O
T
E
N
N
O
T
E
O
T
E
The character code selected with "Character code" and the language discrimination character string that can
be selected with "Language discerment character string" vary according to BSP being used.
The locale of all languages has already been registered according to the language sp ecification. Thus, do not
change the setting of the locale.
6.3 Locale
The first character of the locale name must be a one-byte letter (A to Z or
a to z).
The second and later characters must be one-byte letters, numbers or
underscores (_).
The locale name must be within 16 characters.
If "Yes" is selected for "Unicode Correspondence" in project properties,
the "character code" is available only in Unicode.
Select the language being used.
6.3.4 Switching the Locale
The displaying locale can be switched on NC Designer.
1. Move the mouse cursor to the desired locale name and select "Switch" from the popup menu displayed
upon a click of the right mouse button.
2. The locale is switched. The currently selected locale is marked with a check mark.
N
O
T
E
N
N
O
T
E
O
T
E
W hen the lang parameter of NC is switched, the language is automatically switched because the interp reter
method and the compilation method (DLL method) synchronize with NC. T he compilation method (execution
file method) should embed the language switch function in the source code.
47
Page 68

6. Registering the Resource
6.4 Character Sequence Resource
Register the character sequence set in the control.
Up to 5000 character sequence resources can be registered in the character string resource.
6.4.1 Creating a New Character String Resource
1. Move the mouse cursor to "Character sequence table" under "Locale" in the reso urce vie w and doubl e click
on it or select "Edit" from the popup menu displayed upon a click of the right mouse button.
2. The [character sequence table] is displayed.
6.4 Character String Resource
3. To register a new character sequence resource, select an arbitrary resource and select [Create] from the
popup menu displayed upon a click of the right mouse button, or double click on the area where no
resource is displayed.
The [character sequence property] dialog box is displayed.
48
Page 69

6. Registering the Resource
4. Enter the "resource data name" and "character sequence" and click on the [OK] button.
N
O
T
E
N
N
O
T
E
O
T
E
The first character of the resource data name of the character string resource must be a one-byte letter (A to Z
or a to z). The second and later characters must be one-byte letters, numbers or underscores (_). The
resource data must be within 32 characters.
Up to 256 one-byte characters (each two-byte character is equivalent to two characters) can be entered as a
character string.
The character string resource is automatically created in the following case.
The character string displayed in the control is entered at control properties setup.
If two or more locales are registered and a character string resource is registered to one of those locales, the
character string resource data name and character strings are reflected on the character string table of the
other locales.
During multi-user development, the character string resource is controlled by a single user because it is
common project data.
6.4.2 Editing or Creating Character String Resource
1. To edit the character string resource, select desired resource data and select [Edit] from the popup menu
displayed upon a click of the right mouse button, or double click on the resource data.
2. The [Character String Properties] dialog box is displayed. Change the setting.
6.4 Character String Resource
49
Page 70

6. Registering the Resource
6.4.3 Replacing the Character String Resource
1. To replace registered character resource data, select the des ired resource data and select [Replace] from
the popup menu displayed upon a click of the right mouse button.
2. The [Replace] dialog box is displayed.
No. Item Description
(a) Find what Designate the character strin g to be repl aced.
Replace With Designate the character string to replace.
(b)
Next Search for the character string designated in "Find what".
(c)
(d) Replace Replace the found character string each time a match is found.
(e) Replace All Replace all the target character string at once.
(a)
(c)
(d)
(e)
(b)
6.4 Character String Resource
N
O
T
E
N
N
O
T
E
O
T
E
The target character string is the one included in the currently edited locale.
6.4.4 Deleting Character String Resource
1. To delete character string resource, select the desired resource data and select [Delete] from the popup
menu displayed upon a click of the right mouse button.
N
O
T
E
N
N
O
T
E
O
T
E
If two or more locales are registered, the character string resource is deleted from the character string table of
the other locales, too.
50
Page 71

6. Registering the Resource
6.4.5 Importing or Exporting Character String Resource
Export the character string resource in a text file and edit it with spreadsheet software or the like,
then import the result to enter the character string resource at a time.
Exporting Character String Resource
Export the character string resource into a text file.
1. Select [Export Character String Resource] from the [Tool] menu. Or move the cursor to "Locale" in the
resource view and select "Export of a character sequence resource" from the popup me nu displa yed upon
a click of the right mouse button.
The [Export of a character sequence resource] dialog box is displayed.
2.
6.4 Character String Resource
(a)
(c)
(b)
(d)
(e)
(f)
(g)
No. Item Description
(a) File name Designate the export file name (default file name: StrTable.txt).The file name is
up to 64 one-byte characters (each two-byte character is equivalent to two
characters).
(b) Folder Designate the destination of the file. (The maximum number of characters of
the folder and file names is 200.)
(c) Open file after
exporting
(d) Delimiter Select either comma or tab as a delimiter used in the export file.
(e) Locale to export Select the export locale among each locale and "all locales."
(f) Character code Select the character code corresponding to the export file. Select among
(g) Only the character
code which BSP
supports
Place a check mark here to launch the application associated with the
extension of the file designated in the "file name" field and open the file.
Unicode, character code supported by BSP, and language identification
character string of Windows.
Place a check mark here to limit the character code selected at "character
code" to only the character code of the language supported by BSP.
3. Click on the "OK" button to start to export.
51
Page 72

6. Registering the Resource
N
O
T
E
N
N
O
T
E
O
T
E
Before exporting the character string resource, save the project ([File] - [Save Project]).
T he language identification character string of Windows that can be selected at "character code" includes the
followings.
Language
identification
character string
chinese Chinese Chinese big5
chinese-simplified Chinese Chinese (simplified) gb2312
chinese-traditional Chinese Chinese (traditional) big5
czech Czech Czech windows-1250
danish Danish Danish windows-1252
dutch Dutch Dutch (default) windows-1252
english English English (default) windows-1252
finnish Finnish Finnish windows-1252
french French French (default) windows-1252
german German German (default) windows-1252
greek Greek Greek windows-1253
hungarian Hungarian Hungarian windows-1250
icelandic Icelandic Icelandic windows-1252
italian Italian Italian (default) windows-1252
japanese Japanese Japanese Shift-JIS
korean Korean Korean ks_c_5601-1987
norwegian Norwegian Norwegian (default) windows-1252
polish Polish Polish windows-1250
portuguese Portuguese Portuguese (default) windows-1252
russian Russian Russian (default) windows-1251
slovak Slovak Slovak windows-1250
spanish Spanish Spanish (default) windows-1252
swedish Swedish Swedish windows-1252
turkish Turkish Turkish windows-1254
6.4 Character String Resource
Main language Auxiliary language Character code
52
Page 73

6. Registering the Resource
Editing Text File
Use spreadsheet software or text editor to edit the exported text file. The character code name,
resource data name of the character string resource, and character string data in the text file can
be edited.
1. Use spreadsheet software or text editor to open the exported text file.
If the "Open file after exporting" checkbox is marked when the file is exported, spreadsheet software or the
like is launched automatically to load the generated text file.
6.4 Character String Resource
Character code key
Data key
Character code
Locale name
Character string data
Resource data name
2. Edit the text file.
N
O
T
E
N
N
O
T
E
O
T
E
Do not delete [CHARSET] and [DATA].
The first character of the locale and resource data names must be a one-byte letter (A to Z or a to z).
The second and later characters must be letters, numbers or underscores (_). The locale name must be within
16 characters.
The character string registered in the character string resource is within 256 one-byte characters (each
two-byte character is equivalent to two characters).
When editing the text file to be imported, enclose each character string including a comma, tab, line feed and
carrier return codes, or double quotation mark in double quotation marks (" "). Specify two repetitive double
quotation marks for each double quotation mark.
Example
To import [AB, CD], enter [AB, CD].
To import [AB" CD], enter [AB"" CD].
53
Page 74

6. Registering the Resource
Importing Character Sequence Resource
Import the edited text file.
An error check is performed when the file is imported.
1. Select [Import of a character sequence resource] from the [Tool] menu. Or move the mouse cursor to
"Locale" in the resource view, and select "Import of a character sequence resource " from the popup menu
displayed upon a click of the right mouse button.
The "Import of a character sequence resource" dialog box is displayed.
2.
(a)
(b)
(c)
6.4 Character String Resource
No. Item Description
(a) Import file Designate the file to be imported. Click on "Load File" and designate the
desired file in the displayed file selector.
Dataform of an
import file
Character code
of an import file
(c) Dilimiter Select the delimiter of the file to be imported.
Designate the data format of the file to be imported. (b)
Select the character code of the file to be imported. Place a check mark at
"Only the character code which BSO supports" to select only the character
codes supported by BSP.
3. Click on the OK button to start to import.
N
O
T
E
N
N
O
T
E
O
T
E
If a duplicate resource data name is found in the importing text file, the duplicate data will overwrite the
original data in the application. Check for duplicate resource data nam e before starting to import.
The character string resource can be imported only if the project is opened with the edit flag.
If importation is interrupted during importation, the character string data having been imported up to the timing
is reflected on the character string resource.
54
Page 75

6. Registering the Resource
Error Check
If an error is detected during importation, the message view displays an error list.
Invalid locale name "XXX" was discovered by the
file under import. The information on this column is
not imported.
The character sequence with a blank locale name
was discovered by the file under import. The
information on this column is not imported.
Invalid resource data name "XXX" was discovered
by the file which is under import. The information on
this line is not imported.
The column with a blank resource data name was
discovered by the file under import. The information
on this line is not imported.
The line to which a locale name overlaps the file
under import was discovered. The information on
this column is not imported.
The character sequence to which length exceeds
256 characters in the file under import was
discovered. It is not imported after 256 characters of
this character sequence.
Since the number of the maximum registration of a
locale name is 32, it is ignored after it.
Since the number of the maximum registration of
the character sequence resource ID is 5000, the
character sequence resource after it is disregarded.
In the file under import, since a data key does not
exist, a file cannot be imported.
6.4 Character String Resource
Message Remedy
Correct the locale name.
Correct the locale name.
Correct the resource data name.
Correct the resource data name.
Enter an unused locale name.
Reset the character string registered in the
character string resource so that it is within 256
one-byte characters (each two-byte character is
equivalent to two characters).
The number of locale names must be within 32.
The maximum number of registered resources must
be within 5000.
Add a data key ([DATA]) in the imported file.
N
O
T
E
N
N
O
T
E
O
T
E
The first character of the locale and resour ce data names must be a one-byte letter (A to Z or a to z). The
second and later characters must be letters, numbers or underscores (_).The locale na me must be within 16
characters.
Show a preview in the [Import Character String] dialo g box to display errors in red. Check for errors before
starting to import.
55
Page 76

6. Registering the Resource
r
r
r
6.5 Font Resource
Register the font, style and other character attributes to be specified for the control.
Up to 5000 font sources can be registered.
6.5.1 Creating a New Font Resource
1. Move the mouse cursor to "Font" in the resource view and select "New font" from the popup menu
displayed upon a click of the right mouse button.
2. The new font resource is registered.
6.5 Font Resource
6.5.2 Deleting Font Resource
1. Move the mouse cursor to the font resource data name to be deleted, and select "Delete" from the popup
menu displayed upon a click of the right mouse button.
The resource is added.
The resource data name is common even fo
different locales. The resource data name is
added to all locates when it is created fo
one of them.
The resource data name is common even fo
different locales. The resource data name is
deleted from all locales when it is deleted from
one of them.
56
Page 77

6. Registering the Resource
6.5.3 Specifying Font Resource
1. Double click on the desired font resource data name or move the mouse cursor to the font resource data
name and select "Property" from the popup menu displayed upon a click of the right mouse button.
2. The font resource setting items are displayed in the property window.
Item Description
Resource data name Specify the resource data name.
Font name Specify the font name.
Font size Specif y the font size. The setting is valid if the selected font is a vector
Zoom horizontal Specify the horizontal zoom of the character size. The setting is valid if
Zoom vertical Specify the vertical zoom of the character size. The setting is valid if the
Thickness Select the character thickness among "THIN," "NORMAL" and "BOLD."
Font style Select the character style among "None" and "Italics."
6.5 Font Resource
The first character of the resource data name must be a one-byte letter
(A to Z or a to z).
The second and later characters must be one-byte letters, numbers or
underscores (_).
The resource data name must be within 32 characters.
font.
the selected font is a raster font.
selected font is a raster font.
N
O
T
E
N
N
O
T
E
O
T
E
The font name that can be selected depends on the BSP that is used.
57
Page 78

6. Registering the Resource
6.6 Image Resource
Register image data used for controls or background images.
The image data that can be registered is either BMP or JPG files.
Up to 5000 image resources can be registered.
6.6.1 Creating a New Image Resource
1. Move the mouse cursor to "Image" in the resource view and select "New image" from the popup menu
displayed upon a click of the right mouse button.
2. The new image resource is registered.
The resource is added.
6.6 Image Resource
6.6.2 Deleting an Image Resource
1. Move the mouse cursor to the desired image resource data name and select "Delete" from the popup menu
displayed upon a click of the right mouse button.
58
Page 79

6. Registering the Resource
6.6.3 Specifying an Image File
1. Double click on the desired image resource data name or move the mouse cursor to the image resource
data name and select "Property" from the popup menu displayed upon a click of the right mouse b utton.
2. The image resource setting items are displayed in the property window.
Item Description
Resource data name Specify the resource data name.
File name Specify an image file.
Palette Specification Select whether or not to designate a palette used for the image resource.
Palette Select the palette used for the image resource from the palette resource.
The number of Colors Select the number of display colors of the image resource among "2
6.6 Image Resource
The first character of the resource data must be a one-byte letter (A to Z
or a to z).
The second and later characters must be one-byte letters, numbers or
underscores (_).
The resource data name must be within 32 characters.
Click on the [...] button to display a file selector. Specify an image file.
The file is either a BMP or JPG file.
To designate the palette, select "Yes." To refrain from designating the
palette, select "None."
The setting is valid only for the "Direct Color System" color setting
method.
The setting is valid only for the "Direct Color System" color setting
method.
Colors", "4 Colors", "16 Colors" and "256 Colors".
N
O
T
E
N
N
O
T
E
O
T
E
Use the palette to reduce the data size (ROM consumption).
If the "inde x color system" is selected as a color setting method, the system palette is applied without using
the designated palette. While the number of colors follows the image resource properties setting, it must be
within the number of system colors specified at [Color Setup] in the [Setting] menu. If the "direct color system"
is selected as a color setting method, property settings (palette designation, palette and number of colors) of
each image resource are followed.
When the palette is used, the number of colors becomes smaller and fine gradation may be disa bled.
Example: Specifying a 256-color palette resource to a 24-bit color image resource
24-bit color 256-color palette
59
Page 80

6. Registering the Resource
6.7 Solid Frame Resource
Register the solid frame used for controls.
6.7.1 Creating a New Solid Frame Resource
1. Move the mouse cursor to "Solid frame" in the resource view and select "New solid frame" from the popup
menu displayed upon a click of the right mouse button.
2. The new solid frame resource is registered.
6.7 Solid Frame Resource
6.7.2 Deleting a Solid Frame Resource
1. Move the mouse cursor to the desired solid frame resource data name and select "Delete" from the popup
menu displayed upon a click of the right mouse button.
The resource is added.
60
Page 81

6. Registering the Resource
)
6.7.3 Specifying a Solid Frame File
1. Double click on the desired solid frame resource data name or move the cursor to the solid frame resource
data name and select "Property" from the popup menu displayed upon a click of the right mouse button.
2. The solid frame resource setting items are displayed in the property windo w.
Item Description
Resource data name Specify a resource data name.
Existence of a solid frame Select the existence of the solid frame between [Yes] and [None].
Color 1 Specify the color of the upper left side of the solid frame.
Color 2 Specify the color of the lower right side of the solid frame.
Line color Specify the color of the frame line.
Frame size Specify the size of the solid frame in d ots (1 to 960).
6.7 Solid Frame Resource
The first character of the resource data name must be a one-byte letter
(A to Z or a to z).
The second and later characters must be one-byte letters, numbers or
underscores (_).
The resource data name must be within 32 characters.
The thickness of the frame line is
fixed at 1 dot.
The thickness of the frame line is
included in the frame size. If the
frame size is set at 1 dot, only the
outer frame line is drawn with 1 dot.
Color 1 (left and top)
Line color
Color 2 (right
and bottom
Frame size
61
Page 82

6. Registering the Resource
6.8 Filling Pattern Resource
Register the filling pattern used for controls and figures.
38 filling patterns are provided in the initial state.
6.8.1 Editing the Filling Pattern
1. Move the mouse cursor to the resource data name of "Painting out pattern" in the resource view and
double click on it or select "Edit" from the popup menu displayed upon a click of the right mouse button.
2. The [Pattern Edit] dialog box is displayed. Edit the pattern.
6.8 Filling Pattern Resource
(a)
(b)
(c)
(d)
(e)
(f)
No. Item Description
(a) Painting out pattern
Select the filling pattern.
list
(b) Browse Copy the currently selected filling pattern to the pattern editing area.
(c) Setting Specify the filling pattern being ed ited in the current pattern edit area to the
selected filling pattern list.
(d) Pattern Edit Edit the filling pattern in dots. Each time the mouse button is clicked, the
foreground and background are switched over.
(e) Display edit pattern Display a sample of the edited filling pattern.
(f) Default Restore the default filling patt ern list.
62
Page 83

6. Registering the Resource
6.9 Line Pattern Resource
Register the line pattern used for figures.
Eight line patterns are provided in the initial state.
6.9.1 Editing the Line Pattern
1. Move the mouse cursor to the resource data name of "line pattern" in the res ource view, and double click
on it, or select "Edit" from the popup menu displayed upon a click on the right mouse button.
2. The [Line pattern edit] dialog box is displayed. Edit the pattern.
6.9 Line Pattern Resource
(a)
(b)
(c)
(d)
(e)
(f)
No. Item Description
(a) Line pattern list Select the line pattern.
(b) Browse Copy the currently selected line pattern to the pattern edit area.
(c) Setting Specify the line pattern edited in the current pattern editing area to the
selected pattern list.
(d) Pattern edit Edit the l ine pattern in dots. Each time the mouse button is clicked, ON and
OFF are switched over.
The left end, center and right end patterns are displayed, starting at the top.
(e) Display edit pattern Display a sample of the line pattern being edited.
(f) Default Restore the default line pattern list.
63
Page 84

6. Registering the Resource
6.10 Palette Resource
Register the palette used for color designation of control and so on.
Up to 5000 palette resources can be registered.
6.10.1 Creating a New Palette Resource
1. Move the mouse cursor to "Palette" in the resource view, and select "New palette" from the popup menu
displayed upon a click of the right mouse button.
2. The new palette resource is registered.
6.10.2 Deleting the Palette Resource
1. Move the mouse cursor to the desired palette resource data name, and select "De lete" from the popup
menu displayed upon a click of the right mouse button.
The resource is added.
6.10 Palette Resource
6.10.3 Palette Setting
1. Double click on the desired palette resource data name, or move the mouse cursor to the desired palette
resource data name, and select "Property" from the popup menu displa yed up on a click of the rig ht mouse
button.
2. The palette resource setting items are displayed in the property window.
Resource data name Specify the resource data name.
Palette Specify the palette.
Item Description
The first character of the resource data name must be a one-byte letter
(A to Z or a to z).
The second and later characters must be one-byte letters, numbers or
underscores (_).
The resource data name must be within 32 characters.
Click on the [...] button to open the [Palette Setting] dialog box.
64
Page 85

6. Registering the Resource
(b)
6.10.4 Editing the Palette
1. Click on the [...] button at [Palette]. The [Palette Setting] dialog box is displayed.
6.10 Palette Resource
(a)
(c)
(d)
No. Item Description
(a) Selecti on Color The index number of the selected color and the RGB values are displayed.
The RGB values are displayed in decimals.
(b) Color Matrix Specify the color corresponding to each index number.
Click on each cell and specify the desired color in the [Color] dialog box.
(c) Import Import color setting from a CSV file.
Specify the source CSV file.
(d) Export Export the current setting to a CSV file.
Specify the destination CSV file.
65
Page 86

6. Registering the Resource
6.10.5 Importing/Exporting Palette Setting
Edit the CSV file created with exported palette setting, using spreadsheet software. Import the
result to change the color at a time.
The CSV file is in the following format.
6.10 Palette Resource
First line: Item name
Second and later lines: Index No. and RGB values
4th column: B value (0 to 255)
3rd column: G value (0 to 255)
2nd column: R value (0 to 255)
1st column: Index No. (0 to 255)
N
O
T
E
N
N
O
T
E
O
T
E
Specify values in decimals.
If an error is caused during importation, importation is interrupted. Check and correct the followings and import
again.
Incorrect index number and/or RGB value (out of permissible range, character string or blank)
Duplicate index number
66
Page 87

6. Registering the Resource
6.11 HTML File Name Resource
Register the HTML file name displayed first when the HTML browser control is operated.
Up to 5000 HTML files can be registered.
6.11.1 Creating a New HTML File Name Resource
1. Move the mouse cursor to "HTML File name" in the resource view, and select "New HTML File" from the
popup menu displayed upon a click of the right mouse button.
2. The new HTML file name resource is registered.
The resource is added.
6.11.2 Deleting the HTML File Name Resource
1. Move the mouse cursor to the desired HTML file name resource data name, and select "Delete" from the
popup menu displayed upon a click of the right mouse button.
6.11 HTML File Name Resource
6.11.3 Specifying the HTML File Name Resource
1. Double click on the desired HTML fine name resource data name, or move the mouse cursor to the HTML
file name resource data name, and select "Property" from the popup menu displayed upon a click of the
right mouse button.
2. The HTML file name resource setting items are displayed in the property window.
Item Description
Resource data name Specify the resource data name.
The first character of the resource data name must be a one-byte letter
(A to Z or a to z).
The second and later characters must be one-byte letters, numbers or
underscores (_).
The resource data name must be within 32 characters.
File name Select the HTML file.
Click on the [...] button to display a file selector. Specify the HTML file
displayed first.
67
Page 88

7. Creating Controls
7. Creating Controls
Each control and property settings are described in this section.
The control is an object having the following functions.
Expression of GUI operation and retention of operation state
Notification of GUI operation to user program
7.1 Common Functions of Controls
7.1.1 Control Name
Specify the name of the control
Item Description
ID Specify the name of the control.
The control name specified here becomes a variable name during source code generation.
7.1 Common Functions of Controls
The first character of the control name must be a letter (A to Z or a to z)
or underscore (_).
The second and later characters must be letters, numbers or underscores
(_).
The control name must be within 31 characters.
.
.
.
GCClassCBMP(GCPage000)
GCEndClassCBMP()
Static const ButtonPropertypbupProperty[1] =
{
{GBUTTON,GCPage000::BUTTON00001, 253 ,
37 , 228 , 155 , GW_STYLE_CAPTION ...
68
Page 89

7. Creating Controls
N
O
T
E
N
N
O
T
E
O
T
E
One of the following control names is automatically given to a new control.
Basic control object : GBasicControlxxxxx
Button object : GButtonxxxxx
Check box object : GCheckBoxxxxxx
Edit control object : Geditxxxxx
HTML browser object : GHtmlBrowserxxxxx
Label object : GLabelxxxxx
List box object : GListxxxxx
Picture object : GPicturexxxxx
Progress bar object : GProgressBarxxxxx
Radio button object : GRadioButtonxxxxx
Text box object : GTextBoxxxxxx
Scroll bar object : GscrollBarExxxxxx
NC data text box: GNCDataTextBoxxxxxx
PLC button : GNCPLCButtonxxxxx
PLC extension button: GNCPLCExButtonxxxxx
PLCtextbox : GNCPLCTextBoxxxxxx
PLC message: GNCPLCMessagexxxxx
Table : GNCTablexxxxx
Counter : GNXCounterxxxxx
CycleTime : GNXCycleTimexxxxx
Feedrate : GNXFeedratexxxxx
GModal M : GNXGModalxxxxx
GModal L : GNXGModal_Lxxxxx
GModal Simple : GNXGModalSimplexxxxx
LoadMeter : GNXLoadMeterxxxxx
MSTB : GNXMSTBxxxxx
ONB : GNXONBxxxxx
ProgramBuffer : GNXPrgBuffxxxxx
SPCommand : GNXSPCommandxxxxx
Menu : GNXMenuxxxxx
FileInOut : GNXFileInOutxxxxx
AlarmMessage : GNXAlarmMessagexxxxx
MonitorStatus : GNXMonitorStatusxxxxx
Time : GNXTimexxxxx
xxxxx: Between 00000 and 99999. Automatically assigned from the smallest number. The automatically given
control name can be changed later.
Specify the control name while avoiding duplication with other controls in the same page.
If there are du plicate control names, source code generation is not in order. Use the error check func tion to
check for duplication.
7.1 Common Functions of Controls
69
Page 90

7. Creating Controls
7.1.2 Position/Size
Specify the displaying position and size of the control
X Specify the horizontal position from the upper left of the page/view frame
Y Specify the vertical position from the upper left of the page/view frameof
WIDTH Specify the width of the control in dots (8 to 2560).
HEIGHT Specify the height of the control in dots (8 to 1920).
Position
7.1 Common Functions of Controls
Item Description
of the control (X coordinate) in dots (0 to 2559).
the control (Y coordinate) in dots (0 to 1919).
Y
Size
X
Control
Page/view frame
WIDTH
The size is changed , serving the upper left
position of the control as the origin.
HEIGHT
Size change
Control
70
Page 91

7. Creating Controls
7.1.3 Color/Pattern
Specify the color/pattern of the control
Background color Specify the background color of the control.
Foreground color Specify the foreground color (pattern color) of the control.
Pattern Select the filling pattern among "background," "foreground," "pattern 0" t o
The relationship among the background color, foreground color and pattern is as shown in the
figure below.
N
O
T
E
N
N
O
T
E
O
T
E
The color or pattern may be specified for each control state for some controls such as the button for which
"foreground color at the time of ON," "background color at the time of OFF" and "pattern at the time of focus"
may be specified.
38 types of patterns are provided for NC Designer in the default state. For the pattern type, refer to Appendix.
7.1 Common Functions of Controls
Item Description
"pattern 37," and "none."
Pattern Foreground color (pattern color)
Background color
71
Page 92

7. Creating Controls
7.1.4 Color Setup
The setting method varies according to the [Color Setup] given in the [Settings] menu.
Direct Color System
1. Click on the setting item related to color in the property window.
2. Click on the [...] button. The [Color] dialog box is displayed.
7.1 Common Functions of Controls
3. Designate the desired color in RGB, and click on the [OK] button.
N
O
T
E
N
O
T
E
N
O
T
E
Colors are red uced to 256 colors on NC Designer. (This is for displaying. The setting (RGB values) does no t
change.)
Index Color System
1. Click on the setting item related to the color in the property window.
72
Page 93

7. Creating Controls
2. Click on the [...] button. The [Color Setting] dialog box is displayed.
3. Select the desired color and click on the [OK] button.
7.1.5 Image
Specify the image displayed on the control.
Design Select the image resource data name to be displayed on the control.
7.1 Common Functions of Controls
Item Description
N
O
T
E
N
N
O
T
E
O
T
E
The image resource may be either a BMP or JPG file. For details, refer to Section 6 "Registration of
Resources."
The image may be specified for each control state for some controls such as the button for which "Design at
the time of ON," "Design at the time of OFF" and "Design at the time of focus" must be specified.
73
Page 94

7. Creating Controls
7.1.6 Character String
Specify the caption character string displayed on the control.
Caption existence Select whether or not the caption is displayed.
Character sequence Specify the character string displayed on the control.
N
O
T
E
N
N
O
T
E
O
T
E
The new character string is registered as a character string resource.
The character string is common data for the project. A single user should enter the new character string.
If [Edit Caption] is selected from the [Edit] menu while a control is selected, you can enter the character string
directly on the control.
7.1 Common Functions of Controls
Item Description
There are the following two methods for the entry of the character string.
Select from registered character string resources.
Click on the
registered character string resources.
Enter a new character string.
Click on the entry area and enter a character string directly.
button at the right of the entry area and select one o f
74
Page 95

7. Creating Controls
7.1.7 Character Attribute
Specify the character attribute of the caption.
Item Description
Character color Specify the character color.
Horizontal position Select the horizontal character position among "Align left," "Center" and
Vertical position Select the vertical character position among "Align top," "Center" and
Font Select the ID of the font resource for displaying the caption.
Margin left Designate the starting pos ition of the caption in dots from the left end of
Margin right Designate the starting position of the caption in dots from the rig ht end of
Margin top Designate the starting position of the caption in dots from the top of the
Margin bottom Designate the starting position of the caption in dots from the bottom of
The relationship between the margin and character string position is as shown below.
"Align right."
"Align bottom."
the control (0 to 2560).
the control (0 to 2560).
control (0 to 1920).
the control (0 to 1920).
Top margin
7.1 Common Functions of Controls
Right margin
Left margin
The solid frame is not included in the margin. The rectangle indicated with dot lines indicates the
area where the character string is displayed.
N
O
T
E
N
N
O
T
E
O
T
E
Avoid reserving too large a margin. Otherwise the character string may not be displayed complet ely.
Bottom margin
Too large a margin causes chipped characters.
75
Page 96

7. Creating Controls
A
A
7.1.8 Scrolling Caption Character String
Scroll the caption character string displayed at the control.
Item Description
Scroll Select the scroll of the caption character string among " Yes," "No" and
"When a string overflows."
The number of times of
scrolling
Start delay (ms) Specify the delay from the start-to-scroll request to the start of scrolling in
Updating i nterval (ms) Specify the scroll refreshment interval in ms (0 to 5000). Specify "0" to
Amount of movements (dot) Specify the amount of movement in scrolling in dots (0 to 100).
Scroll start position Select the starting position between "The present position" and "From a
The relationship between the scroll settings and action is as shown below.
Start-to-scroll
request
fter a delay, the character
string starts to scroll.
Select the scrolling frequency between "Only 1 time" and "Repeat."
ms (0 to 60000).
refrain from scrolling.
right end."
7.1 Common Functions of Controls
fter the character string
disappears completely,
scrolling is finished.
In case of scrolling from right end
If the number of scrolling cycles is "repeat," the
character string repeats scrolling.
N
O
T
E
N
N
O
T
E
O
T
E
The scrolling direction of the caption character string is from right to left (fixed).
If a carriage return is included in the caption character string, the character string scrolls in a single line.
If the number of scrolling
cycles is "only 1 time," the
character string returns to
the original state.
Before scrolling The character string is in a single line while it scrolls.
The caption character string scrolls in the character string display area, allowing for the margins. For the
margin, refer to "Character Attribute."
76
Page 97

7. Creating Controls
r
7.1.9 Blink
Blink the caption character string of the control.
Blink Select whether the character string blinks or not.
The blink method Select the caption character string blinking method among "Switch
The character color/whole
color at the time of blink
If "Switch Show/Hide character" is selected, the caption character string continues to blink.
Blink OFF state
(regular state)
If "A character color is changed" is selected, the character color of the caption character string
repeats to change.
Blink OFF state
If "A whole color is changed" is selected, the button, label, text box and picture objects change the
color of the whole control repeatedly, except for the solid frame. With the check box and radio
button objects, the color of the area where the caption character string is displayed changes.
Blink OFF state Blink ON state
7.1 Common Functions of Controls
Item Description
Show/Hide character," "A character color is changed," and "A whole color
is changed."
Specify the blinking character color. The setting is valid if "A character
color is changed" or "A whole color is changed" is selected for "The blink
method."
Blink ON state
Blink ON state
XOR between regular color and "the characte
color/whole color at the time of blink"
Blink Refreshment Interval
The control for which the blink is specified alternates between the blink OFF and blink ON states.
Specify the intervals of both states at [panel/window properties] in the [Settings] menu. For the
details on the setting method, refer to Section 5.5 "Panel Property Setting" and Section 5.6
"Window Property Setting."
Blink OFF interval
Blink ON interval
77
Page 98

7. Creating Controls
7.1.10 Solid Frame
Specify the solid frame of the control.
Existence of a solid frame Select the presence of the solid frame between "Yes" and "None."
Solid frame Select the resource data name of the solid frame resource.
N
O
T
E
N
N
O
T
E
O
T
E
For the solid frame resource, refer to Section 6 "Registration of Resources."
7.1 Common Functions of Controls
Item Description
78
Page 99

7. Creating Controls
7.1.11 Callback Function
The callback function is an event-driven function for the user to add the original process in the C++
language. The callback function is generated in source codes after it is specified in the property
window of NC Designer.
Item Description
OnKeyPress Select "Yes" to add a process to be executed after the key is pressed.
OnKeyRelease Select "Yes" to add a process to be executed after the key is released.
OnPress Select "Yes" to add a process to be executed after the mouse or another
OnRelease Select "Yes" to add a process to be executed after the mouse or another
OnClick Select "Yes" to add a process to be executed after the mouse or another
OnDraw Select "Yes" to add a process to be executed after the image is drawn.
OnTimer Select "Yes" to add a process to be executed after the timer event is
OnSetFocus Select "Yes" to add a process to be executed after the focus is located.
OnKillFocus Select "Yes" to add a process to be executed after the focus moves apart
OnCreate Select "Yes" to add a process to be executed after the page/control is
OnDelete Select "Yes" to add a process to be executed before the page/control is
OnUser Select "Yes" to add an original process of the user.
OnScroll Select "Yes" to add a process to be executed after the scroll bar is clicked
OnScrollFinish Select "Yes" to add a process to be execute d after the caption character
OnSelectChange Select "Yes" to add a process to be executed when the selection line is
If "yes" is selected at each item, a [...] button is displayed in the setting area.
7.1 Common Functions of Controls
pointing device is pressed.
pointing device is released.
pointing device is clicked. If the pointing device is released on the sam e
control, an event occurs, following OnRelease.
called.
from the control.
generated.
deleted.
on with the mouse or another pointing device.
string has finished scrolling.
changed in the list.
Click on the [...] button to display an [Event list] dialog box where details of the action can be
specified.
N
O
T
E
N
N
O
T
E
O
T
E
If the character string does not overflow though "When a string overflows" is selected as a caption character
string scrolling method, OnScrollFinish is called immediatel y without scrolling after the character string starts
to scroll. For the caption character string scroll, refer to "Caption Character String Scroll."
Whether each callback function can be used or not can be changed for each control by the user. The original
callback function can be added for each control. For details, refer to Appendix 7 "Adding Original Event for
User."
79
Page 100

7. Creating Controls
(b)
(d)
(c)
7.1.12 Event List Dialog Box
7.1 Common Functions of Controls
(a)
(e)
No. Item Description
(a) Event type Select the event to be added. Only "page change" can be specified.
(b) Add Add a selected event.
Click on the "Add" button to display the [switch page] dialog box.
(c) Change Change the setting of an event selected from the registration list.
(d) Delete Delete an event selected from the registration list.
(e) Entry List A list of added events is displa yed.
N
O
T
E
N
N
O
T
E
O
T
E
The page (scr een) that can be switched with "page switching" is panel only. Switching to the window is not
supported.
80
 Loading...