


efrigerator-Freezer
s
R
OPERATING INSTRUCTIONS
DEL: MR-260

2
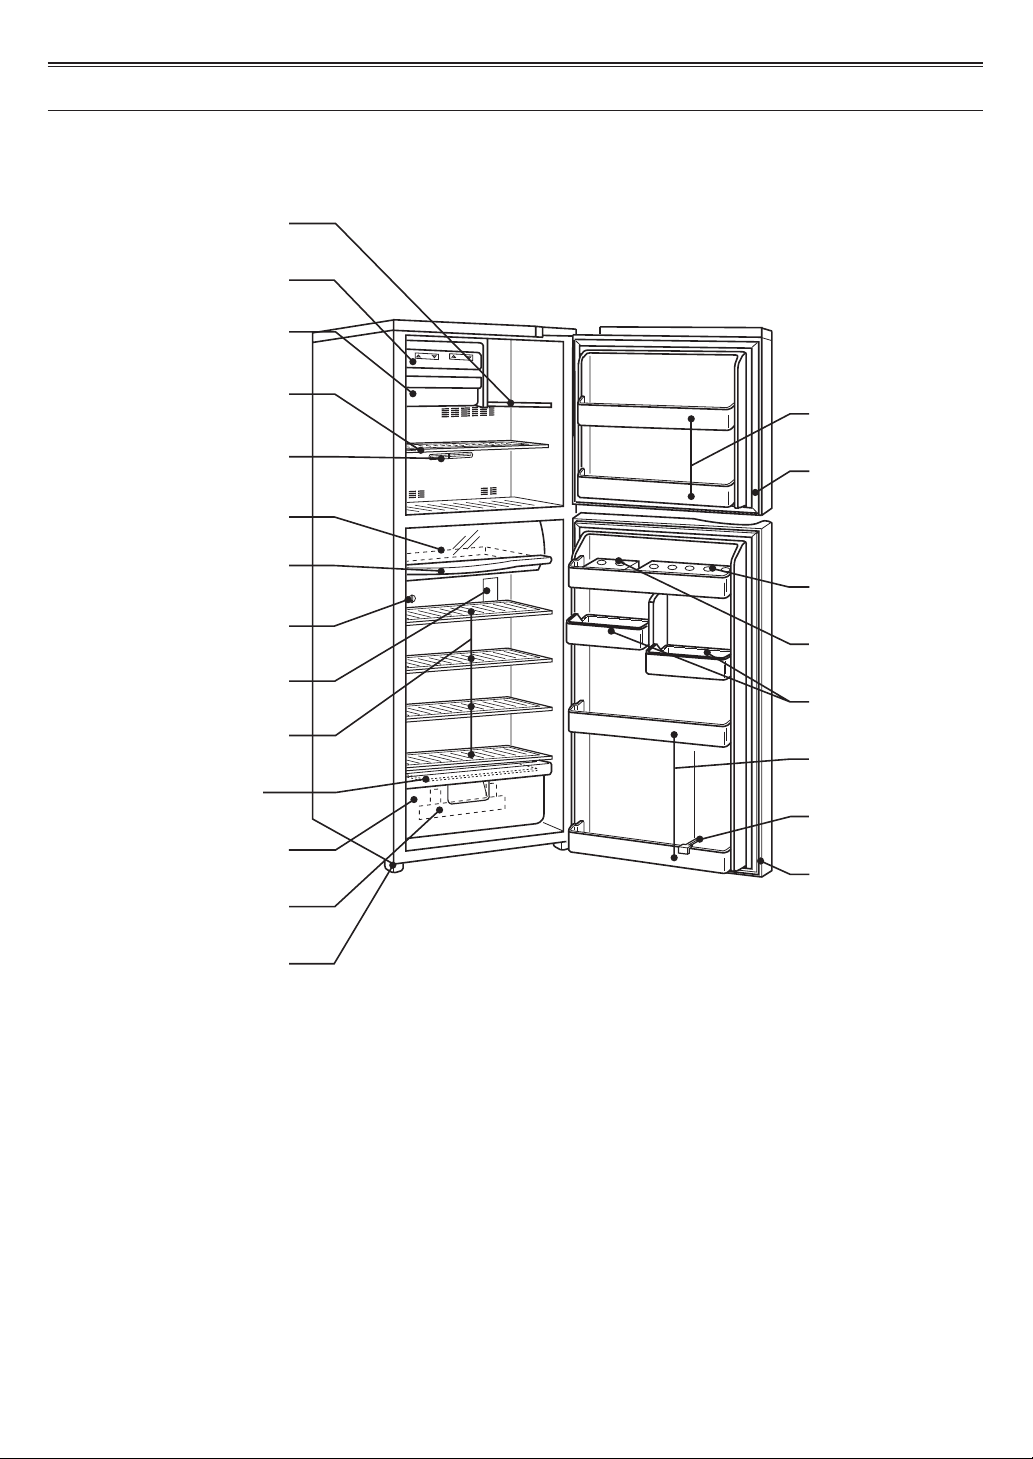
1. Names of the parts
)
)
D
Adj
B
B
D
L
lli
Drain p
V
Veg
f
y
)
l
)
)
)
(
)
p
f
(S
)
Freezer com
Freezer compartment shelf
freezer compartment
refrigerator compartment
Room light (See page 6
efrigerator compartment shel
etable case cover
artment shel
mall
astic ice tra
ce cube storage box
Large
emperature control
lide chilled case
hilled tray
emperature contro
See page 3
egetable case
reezer pocket
oor gaskets
Egg rack (Large
Egg rack (Small
ust pocket
ottle pocket
ottle stopper
oor gaskets
an
eve
ng leg
This picture shows Model MR-260R

2. Installation
Install on a completely flat and rigid surface.
Level the refrigerator by rotating the levelling leg located in the front of the right corner.
The refrigerator is then solidly positioned.
Leave a 2-cm space between the sides of the refrigerator and the walls.
Leave a 10-cm space between the top of the refrigerator and the ceiling.
Choose a location which is not exposed to the sun, which is relatively free from dust, heat and humidity, and which
offers good ventilation. This is to guarantee that the heat radiation will not be impaired.
3. Electrical connection
Important: For personal safety, this appliance must be properly grounded.
The refrigerator should always be plugged into its own individual electrical outlet.
This is recommended for best performance and also to prevent overloading of the house wiring circuits, which may
cause a fire hazard. Extension cords are not recommended.
Be sure that the proper voltage is provided from the outlet.
If your refrigerator has a grounding plug, use it correctly. The 3-point plug must be inserted into a mating 3-point
grounded receptacle. If the installation does not have a proper 3-point grounding wall receptacle, it must be
changed to the proper type. The ground point should never be cut or removed.
If your refrigerator has an ungrounding plug, connect the ground wire to the ground connection screw provided at
the lower, rear side of the refrigerator.
4. Operation
1. Temperature control
H
I
REFRIGERATOR
CONTROL
(A) (B)
The freezer and refrigerator controls are inter-liked. To change the temperature in the freezer for example,
the freezer (A) and refrigerator (B) controls must be adjusted.
For normal coldness in both compartments, set (A) to "MID" and set (B) to "MID".
For maximum coldness in both compartments, (A) remains at "MID" and set (B) to "HI".
For the freezer to be colder than normal, set (A) to "HI" and (B) to "HI".
For the refrigerator to be colder than normal, set (A) to "LOW" and (B) remains at "HI".
2. Automatic defrosting
Thanks to the built-in automatic defrosting timer and the defrosting heater, defrosting is performed automatically in this
refrigerator.
There is, therefore, no need to defrost it. Water produced during defrosting passes through the drainage hose at the rear
and collects in the drain pan at the lower part of the refrigerator’s back.
Then, it automatically evaporates with the heat from the radiator.
LOW
MID
 Loading...