

Page 1
ENGLISH
Rev. 1.1
Page 2

Kiosk version 3.6.3 Operator's manual
Kiosk version 3.6.3
Operator's manual
Page 3

Page 4

Kiosk version 3.6.3 Operator's manual
CONTENTS
1 INTRODUCTION ............................................................................................ 8
1.1 DESCRIPTION .............................................................................................................. 8
1.2 KIOSK MODELS ........................................................................................................... 9
1.3 KIOSK IN “STANDALONE” OR “ORDER TERMINAL” MODE ..................................... 9
1.4 USERS OF THE SYSTEM ............................................................................................ 9
2 SYSTEM FUNCTIONALITY ......................................................................... 11
2.1 INPUT OF IMAGES .................................................................................................... 11
2.2 PHOTOGRAPHY SERVICES ..................................................................................... 15
2.2.1 Instant prints .................................................................................................... 15
2.2.2 Laboratory development (1h/24h) .................................................................... 16
2.2.3 Decoration (Frames and calendars) ................................................................ 16
2.2.4 DVD/CD Burning .............................................................................................. 17
2.2.5 Photo WebAlbum creation on the Internet ....................................................... 17
2.2.6 ID Photo ........................................................................................................... 17
2.2.7 Collage ............................................................................................................. 17
2.2.8 Remote Orders ................................................................................................ 18
2.3 IMAGE EDITING ......................................................................................................... 19
3 PAYMENT METHODS ................................................................................. 20
3.1 COUNTER PAYMENT ................................................................................................ 20
3.2 PREPAYMENT CARD ................................................................................................ 21
3.3 CREDIT / DEBIT CARDS (BANK CARD) ................................................................... 21
3.4 CASH .......................................................................................................................... 22
3.5 FREE MODE ............................................................................................................... 23
4 SCREEN FLOW: USER INTERFACE .......................................................... 23
4.1 CHOOSE LANGUAGE AND SERVICE ...................................................................... 23
4.2 INFORMATION ON SERVICES AND CONDITIONS OF USE .................................. 24
4.3 INPUT OF IMAGES: WHERE DO YOU HAVE YOUR PICTURES? .......................... 25
4.4 FILTERING THE DATA SOURCE .............................................................................. 25
4.5 SERVICES: WHAT DO YOU WANT TO DO WITH YOUR PICTURES? ................... 27
4.6 VIEWER: SELECT PICTURES ................................................................................... 29
4.7 DECORATION: CALENDARS AND FRAMES ........................................................... 33
4.8 DO YOU WANT AN INDEX FROM YOUR PICTURES? ............................................ 34
4
Page 5

Kiosk version 3.6.3 Operator's manual
4.9 ORDER SUMMARY .................................................................................................... 35
4.10 EXTRACT SOURCES ................................................................................................. 36
4.11 METHOD OF PAYMENT SELECTION: HOW WILL YOU PAY? ............................... 37
4.12 CHECKING DEVICES ................................................................................................ 37
4.13 EXECUTION OF SERVICES ...................................................................................... 38
5 SYSTEM CONFIGURATION ........................................................................ 40
5.1 KIOSK OPERATOR .................................................................................................... 41
5.1.1 Operator menu panels ..................................................................................... 42
5.1.2 Customer Cards ............................................................................................... 43
5.1.3 Dispatcher Administrator .................................................................................. 45
5.1.4 Payment registry .............................................................................................. 45
5.1.5 Coin counter ..................................................................................................... 50
5.1.6 DPS Monitor ..................................................................................................... 52
5.1.7 Statistics ........................................................................................................... 52
5.1.8 Shutdown ......................................................................................................... 52
5.2 KIOSK SUPERVISOR ................................................................................................. 53
5.2.1 Settings ............................................................................................................ 54
5.2.2 Operator and Sam card management ............................................................. 67
5.2.3 Logs ................................................................................................................. 69
5.3 PHOTO SUPERVISOR ............................................................................................... 72
5.3.1 Settings ............................................................................................................ 73
5.3.2 Prices ............................................................................................................... 79
5
Page 6

Kiosk version 3.6.3 Operator's manual
APPENDIX DPS Monitor
APPENDIX Activation Wizard
APPENDIX Dispatcher
APPENDIX Statistics
APPENDIX PrintServer
APPENDIX DPSLab
APPENDIX CD Burning
APPENDIX WebAlbum
APPENDIX Customizations
APPENDIX Connection between DPS Systems
APPENDIX SWGifts
6
Page 7

Page 8

Kiosk version 3.6.3 Operator's manual
1 Introduction
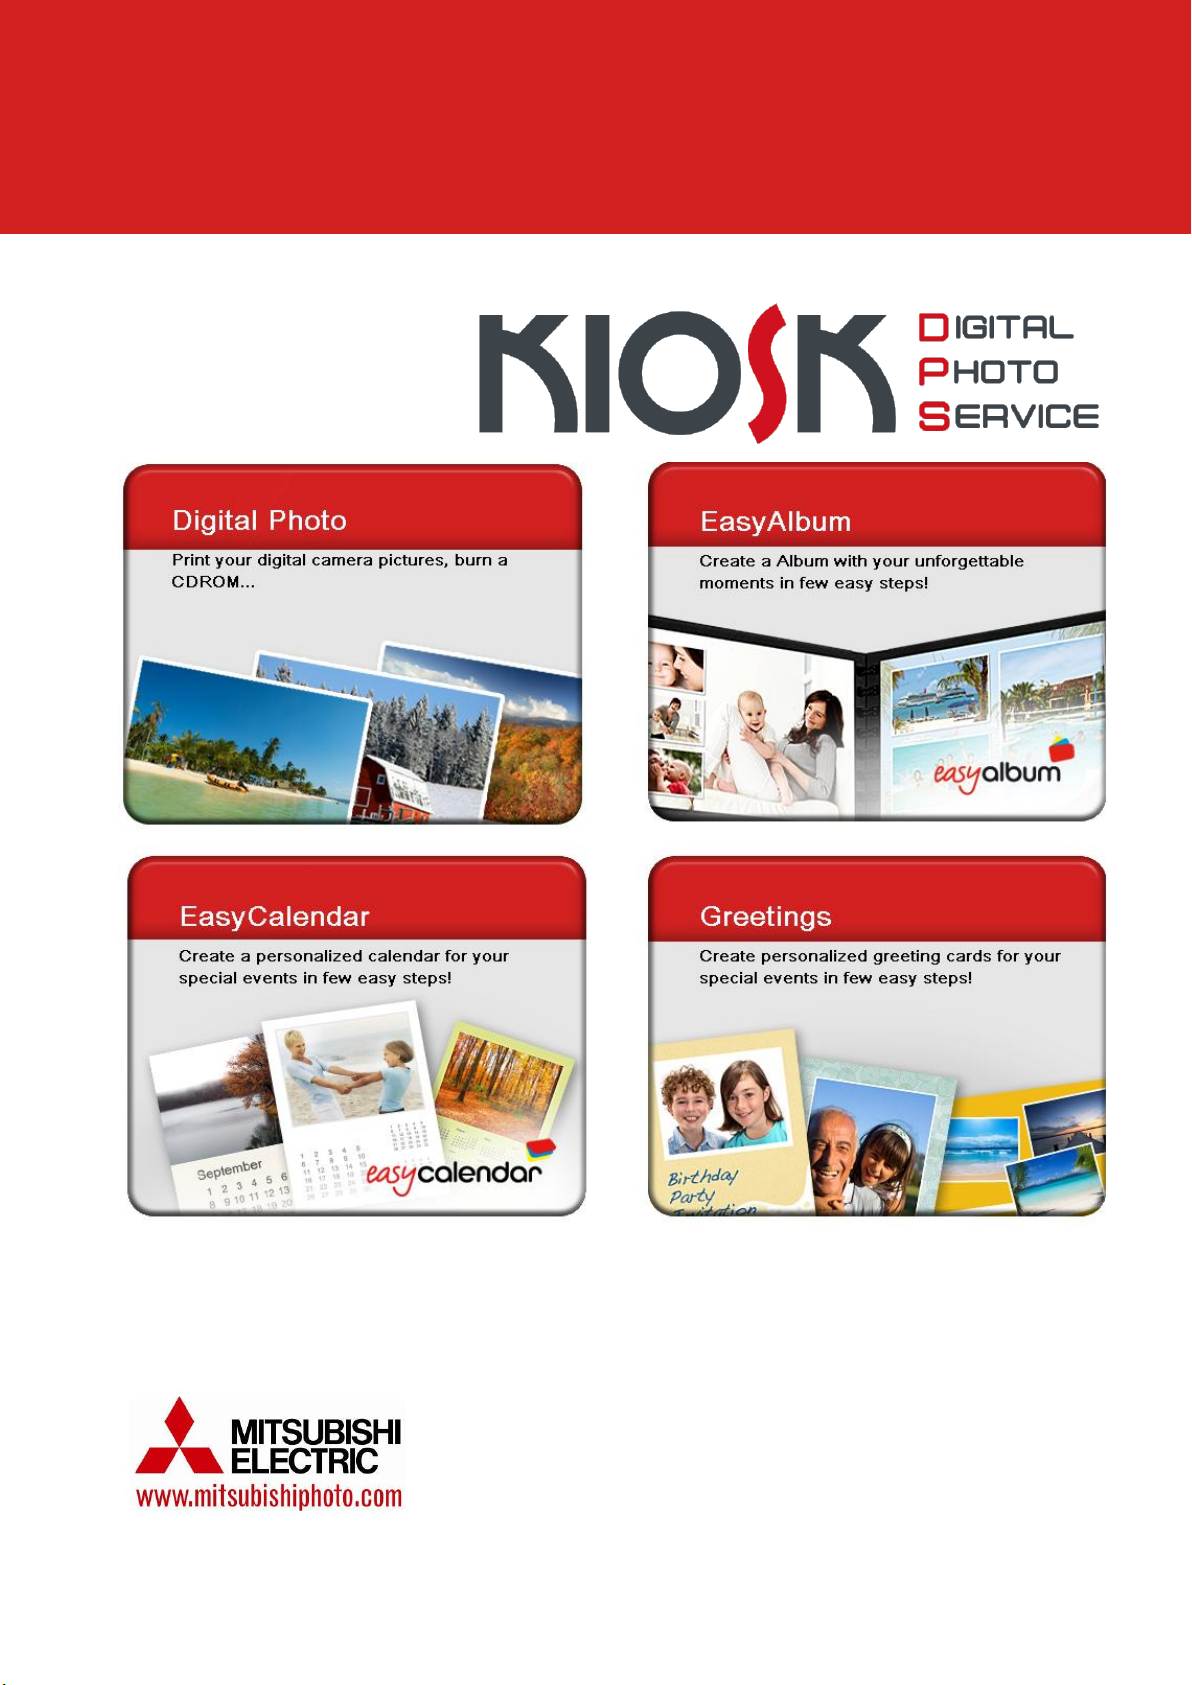
1.1 Description
Kiosk is an easy to use system, providing instant digital prints and other services. It is used
directly by the client user, who can input, manage photographs and pay for every service
requested.
The Kiosk system enables client users to insert their digital media card in the device, see its
contents, select the desired pictures and print them. It is therefore a confidential and simple
self-service system, which the user can use for ordering printings, pay for them and obtain
them immediately.
The main advantage of this system is the possibility of seeing all the pictures and only printing
those desired.
Kiosk does not only enable digital photographs to be printed, but also provides a range of
services and functions, related to the world of digital photography, which are described below:
SERVICES
Immediate digital printing: instant print on paper of the pictures brought by the client to the
shop in digital format.
Laboratory printing: Development of the client's digital photographs in the laboratory
within 1 to 24 hours (1 hour / 24 hours)
Frames and calendars: Adds a decorative frame or creates a calendar using a client's
image.
DVD/CD Burning: Storage of the client's photographs on a CD-ROM or DVD-ROM.
Index print: Provides the client with future copies thanks to an index print with all the
photographs in miniature.
PhotoWebAlbum: Creation of a private album on the Mitsubishi web portal so that clients
can share their photographs. Provides the opportunity to order copies online from
anywhere.
FUNCTIONS
Cropping: Enables photograph to be cropped in order to remove unwanted parts.
Framing: Enables selection of the area of the image desired for printing.
Zoom: When used with trimming or framing, allows a specific part of the photograph to be
enlarged.
Rotation: Allows the photograph to be rotated by preset degrees to improve viewing on
the screen.
Red eyes effect: Enables the red eyes effect in affected photographs to be removed.
Colour adjustments: Allows photographs to be transferred to black and white, sepia or an
increase or decrease in colour components.
Black and white and sepia effects.
8
Page 9
Kiosk version 3.6.3 Operator's manual
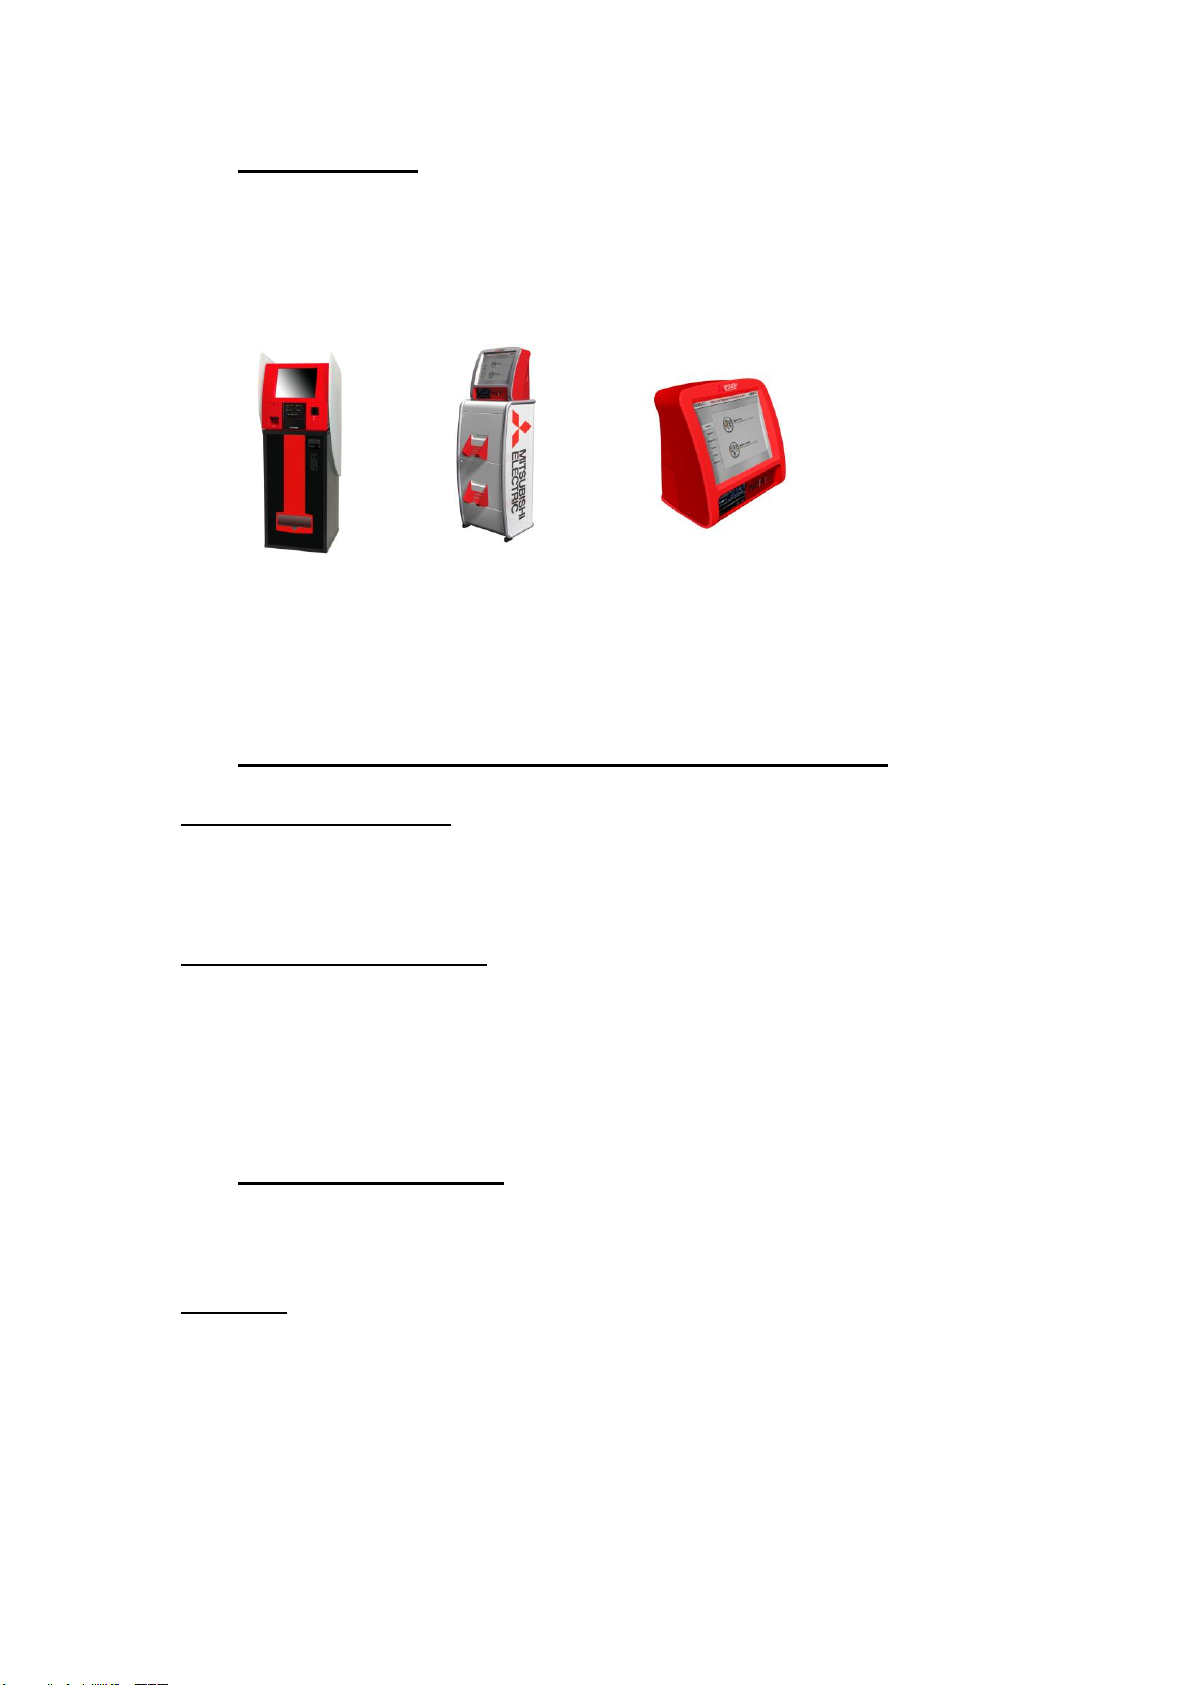
PT7000
PT9000
PT6000
1.2 Kiosk Models
This software version can be used with various hardware models with different features. The
differences among all of them can be read in each product brochure. The specifications may
also vary without notification of the manufacturer.
1.3 Kiosk in “Standalone” or “Order Terminal” mode
Kiosk in “Standalone” mode
A Kiosk in “Standalone” mode works as an autonomous machine that can produce prints and
other services by itself. The end customer can order and get services with the minimum shop
staff assistance
Kiosk in “Order Terminal” mode
A Kiosk in “Order Terminal” mode cannot produce services by himself. It‟s not attached to any
photo printer, per instance. An “Order Terminal” machine is used by the end customer during
less time, because many times consuming operations like printing, burning DVDs or paying
are transferred to a Dispatcher machine. These operations take place at the counter, leaving
the Kiosk immediately free to provide service to another customer.
1.4 Users of the system
The various users of Kiosk are distinguished by the type of operations they carry out on the
machine. There are 3 types of users, which are listed below:
Client User
This is the end user, who uses the Kiosk self-service system for purchasing its services.
The client user can be identified by the system (providing that he/she uses a prepayment
card) or interact with it anonymously (by payment with a credit card, in cash or at the till).
9
Page 10

Kiosk version 3.6.3 Operator's manual
Operator User
The operator user is responsible for the maintenance and correct operation of the machine.
He/she can also validate orders when required.
5 operator users (OP1, OP2, etc.) are generated in the Kiosk registration process. Each one
has access to the system with a personalised card. This card can also be assigned a
password, enabling the user to be validated as an operator with no need for the card.
Supervisor User
One of the five operator users is the supervisor user. This is an advanced operator, able to
change configurations like services activation, prices, passwords, etc.
10
Page 11
Kiosk version 3.6.3 Operator's manual
2 System functionality
2.1 Input of images
It is necessary to input images in the Kiosk to perform any service. To do so, there are many
options enabling the client to transfer his/her images easily, on whatever medium they are
stored.
The various ways of transferring images to the Kiosk are listed below.
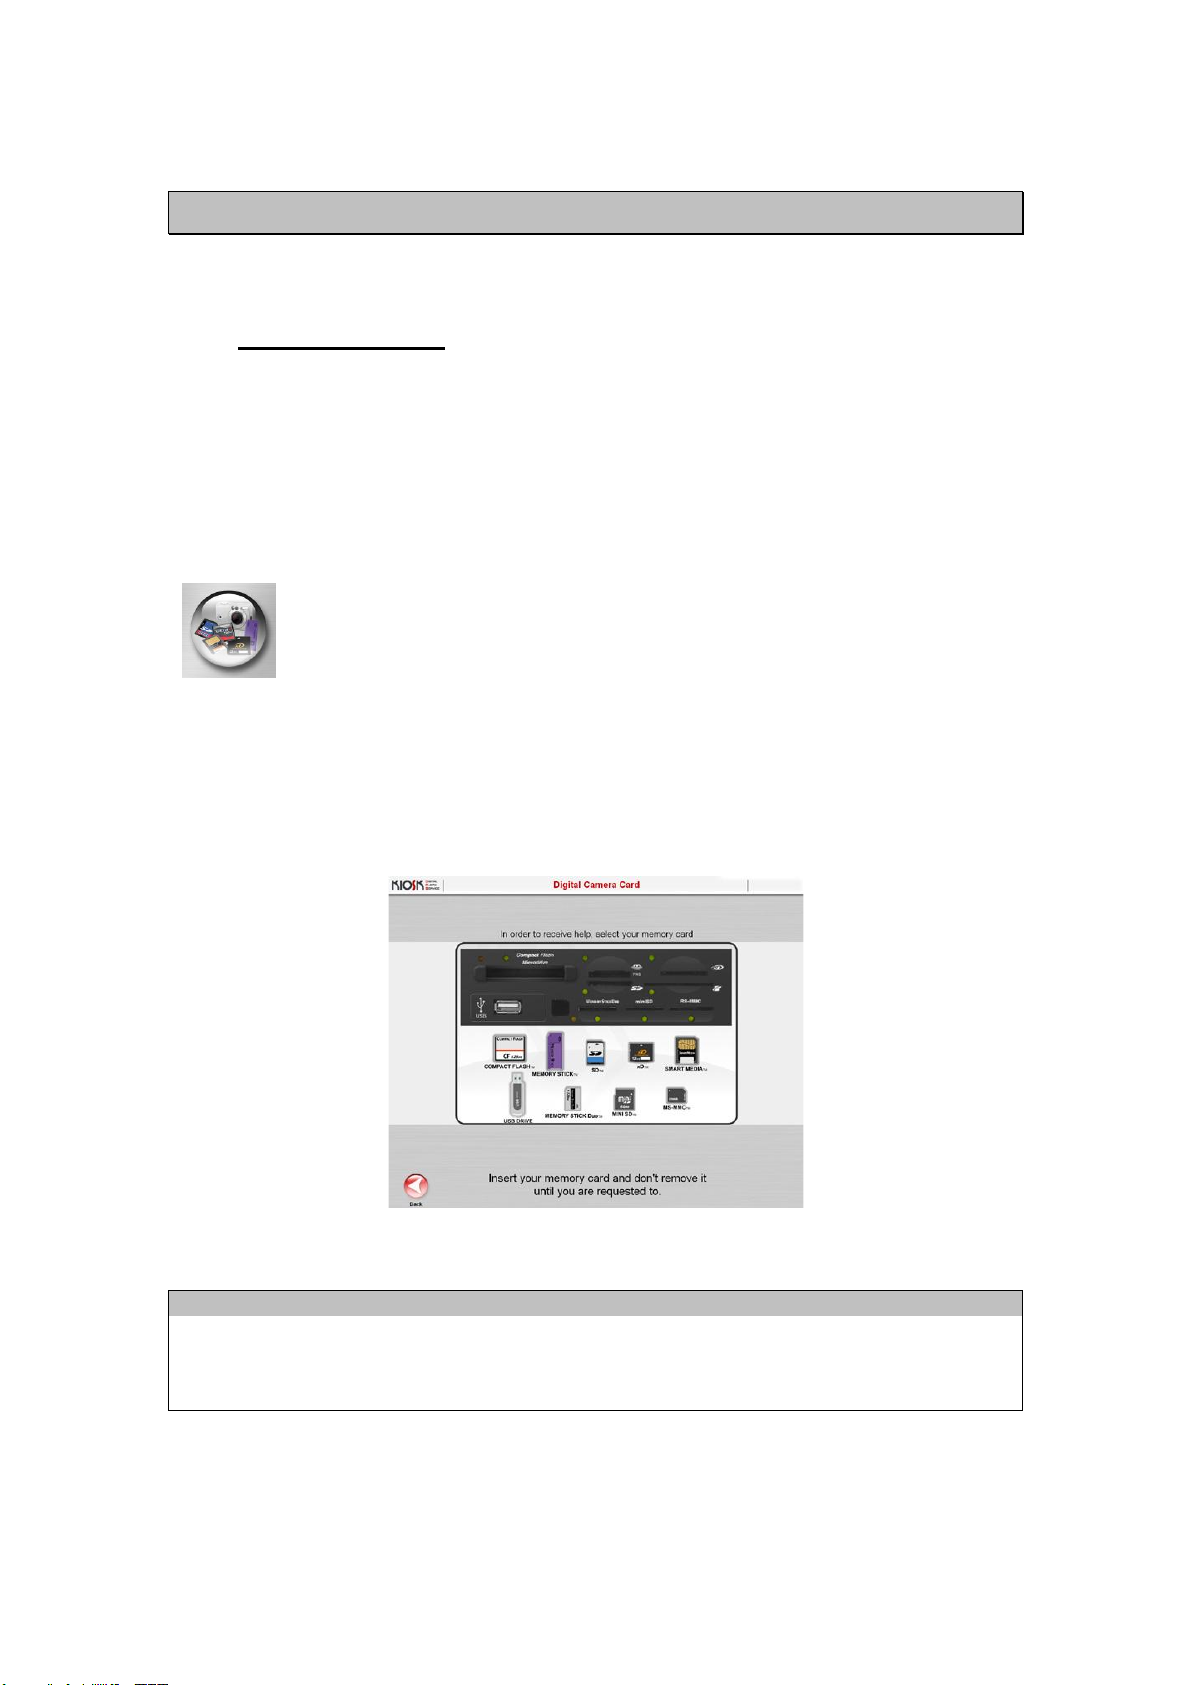
From a DIGITAL CAMERA or USB Device
For photos on flash cards or USB storage devices. When the card or USB
device is inserted, the system detects it automatically. The USB devices
detected by the system are those known as “Removable storage devices”, it
does not detect hard drives.
Kiosk accepts all normal memory cards (Smart Media, Compact Flash, SD, Memory Stick,
Multimedia Card, XD, Mini SD, etc.)
Initially, an animation appears on the screen helping the client to use the card reader. When
the user does not know where to insert the card, he/she is informed that by selecting the type
of card from among those shown on the screen, he/she will be shown where to insert it.
NOTE
The digital media card reader hardware protects the cards against any writing of data,
including USB devices. This helps to protect end customer data stored in their device. Only
USB devices connected to the reader allow writing operations for servicing purposes. Please
check the Monitor Manager appendix for enabling/disabling this feature.
11
Page 12

Kiosk version 3.6.3 Operator's manual
CD / DVD
For images stored in a CD / DVD. The reader tray opens automatically.
To ensure that the CD/DVD is inserted correctly, the user is shown the following
animation.
BLUETOOTH
When the photographs are saved on devices with Bluetooth transfer capacity,
this option allows clients to use the many services offered by the Kiosk when the
images are on a mobile telephone or PDA.
The image(s) saved on the Bluetooth device must be selected and sent to the
Kiosk identified as “DPSxxxxx” on the list of Bluetooth devices detected, which are shown on
the client's mobile telephone or PDA.
Kiosk informs the client of the total number of images received and previews the last image
received.
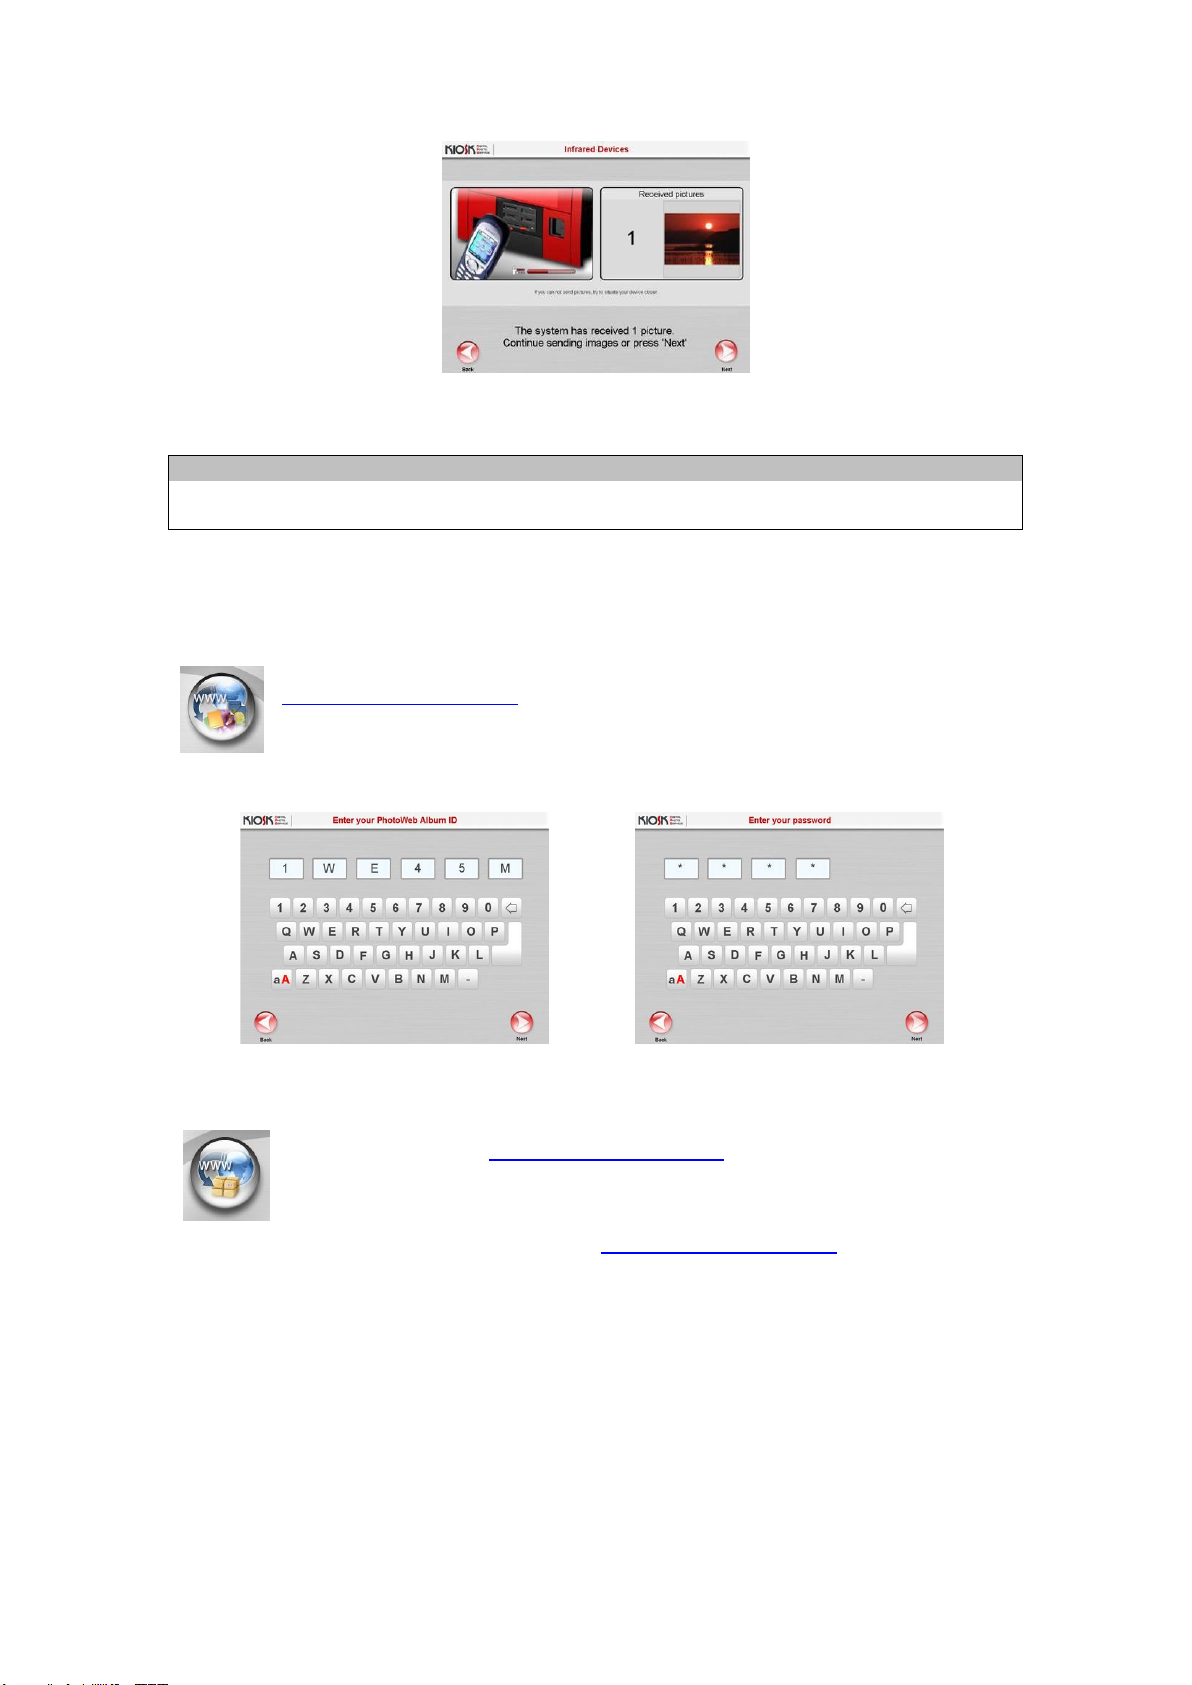
INFRA-RED
For photographs saved on devices able to transfer data using Infra-red. This
option allows clients to use the many services offered by the Kiosk when the
images are in a mobile or PDA.
The image(s) saved on the device must be selected and sent to the Kiosk by
aligning the infra-red ports.
12
Page 13
Kiosk version 3.6.3 Operator's manual
Kiosk shows the total number of images received and previews the last image received.
NOTE
The infra-red source is not available in every hardware model. Please check system model
specifications or brochure for its availability.
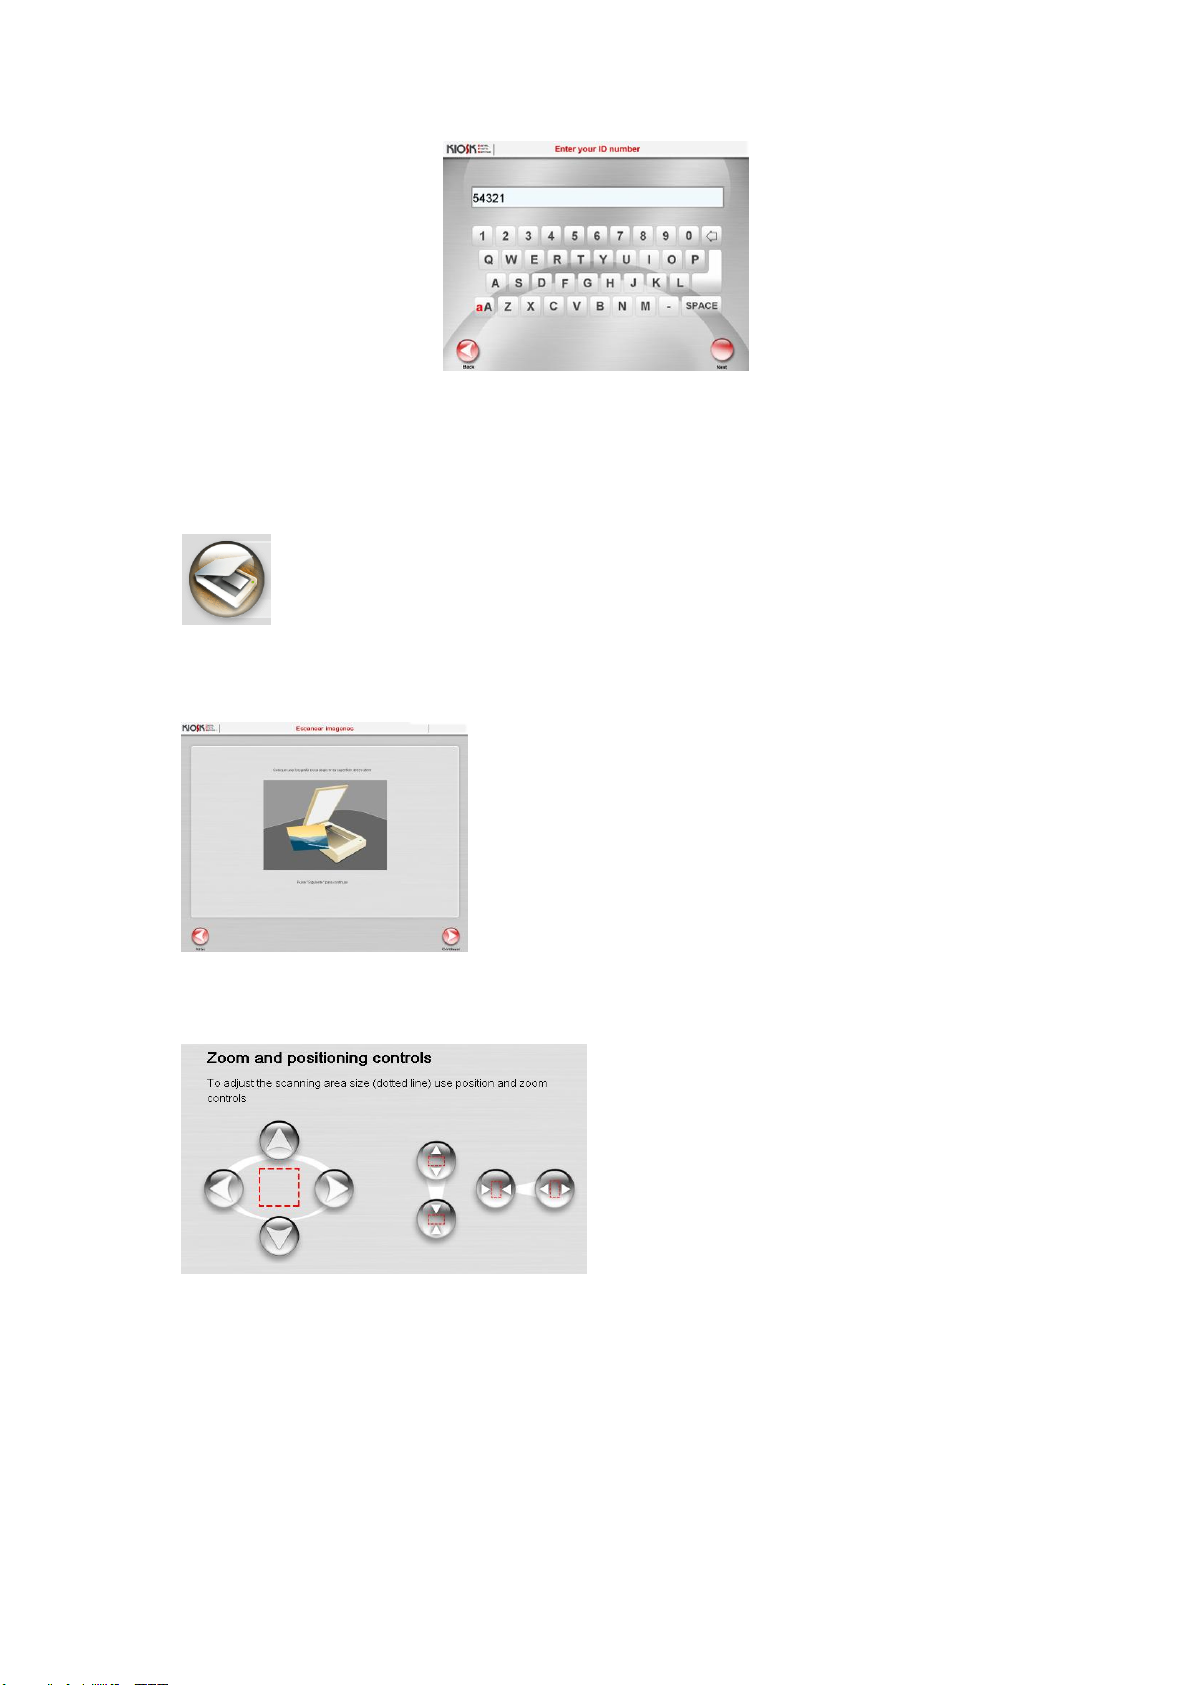
PHOTOWEBALBUM
This option gives access from any Kiosk to the images in private albums on
www.mitsubishialbum.com.
When this option is selected, the identification of the album and its password is
required, using a touch-sensitive keyboard shown on the screen.
REMOTE ORDERS
The main purpose of www.mitsubishialbum.com is not only to be able to share
photographs, but also to order copies from any standard PC with internet
connection and go to the nearest establishment to collect them.
When a client requests a job from www.mitsubishialbum.com he/she is assigned
an order identification code for this job.
Afterwards, when the client comes to the establishment where the order has been sent to
collect it, he/she must enter the order identification code using a touch-sensitive keyboard
shown on the screen.
13
Page 14
Kiosk version 3.6.3 Operator's manual
After the order identification code has been entered, a summary appears on the screen,
showing the price for verification, and the service is performed after payment.
FLATBED SCANNER
With the scanner option you can work on previously printed images. Guided
screens show the customer how to introduce the pictures in the system for
subsequent processing.
First he/ she is told how to place the picture into the scanner for processing.
Once the preview of the image appears the customer can adjust the scanning area by means
of the position and zoom controls.
When the previewed image is optimal it can be saved and the customer can go on working.
14
Page 15

Kiosk version 3.6.3 Operator's manual
2.2 Photography Services
2.2.1 Instant prints
This service enables the client to print on paper the photos he/she wishes from
any digital media. The images can be printed in one of the available formats
according to the client's choice.
The possible paper formats offered by Kiosk are as follows:
10 x 15 cm (4” x 6”). The most frequently used format for standard prints.
7.5 x 10 cm (3” x 4”). The recommended size for low resolution photographs.
9 x 12 cm (3.5” x 4.7”). An alternative size for low resolution photographs.
13 x 18 cm (5” x 7”). This is used in some countries as a standard print size or for
enlargements.
15 x 20 cm (6” x 8”). Used for enlargements.
15 x 21 cm (6” x 8.5”). Used for enlargements.
15 x 23 cm (6” x 9”). Used for enlargements.
11.5 x 15 cm (4.5” x 6”). The recommended format for digital cameras. This maintains the
4:3 image format of the digital camera screen.
After the photographs and the output format have been selected, an index print of the images
entered can be printed too.
Several options are offered:
Of all pictures
With this option, the client will have an index print of all the images from the current
source. One or several sheets will be used to print them, depending on the number of
images per sheet configured in the machine.
Of selected pictures
With this option, the client will have an index print with the images he/she has chosen
beforehand for printing. One or several sheets will be used to print them, depending on
the number of images per sheet configured in the machine.
Summary index print
With this option, the client will have an index print with a series of randomly selected
images as a sample printed on a single sheet.
15
Page 16
Kiosk version 3.6.3 Operator's manual
2.2.2 Laboratory development (1h/24h)
This option is used for printing images at other high production machines
connected to the Kiosk, whatever they are local minilabs connected to a LAN or
even remote photographic laboratories that can be accessed through an internet
connection. To send orders to these external systems, the MITSUBISHI Kiosk
provides a powerful communication protocol that every laboratory can easily integrate.
The various printing formats depend on the high production development equipment or
laboratories in each case.
There are several options for connecting a high production machine to the Kiosk:
FTP (File Transfer Protocol): The data are sent to the laboratory over the Internet.
LAN (Local Area Network): The data are sent to the laboratory using the company's
internal network.
By burning a CD: The data are transported to the laboratory on a CD.
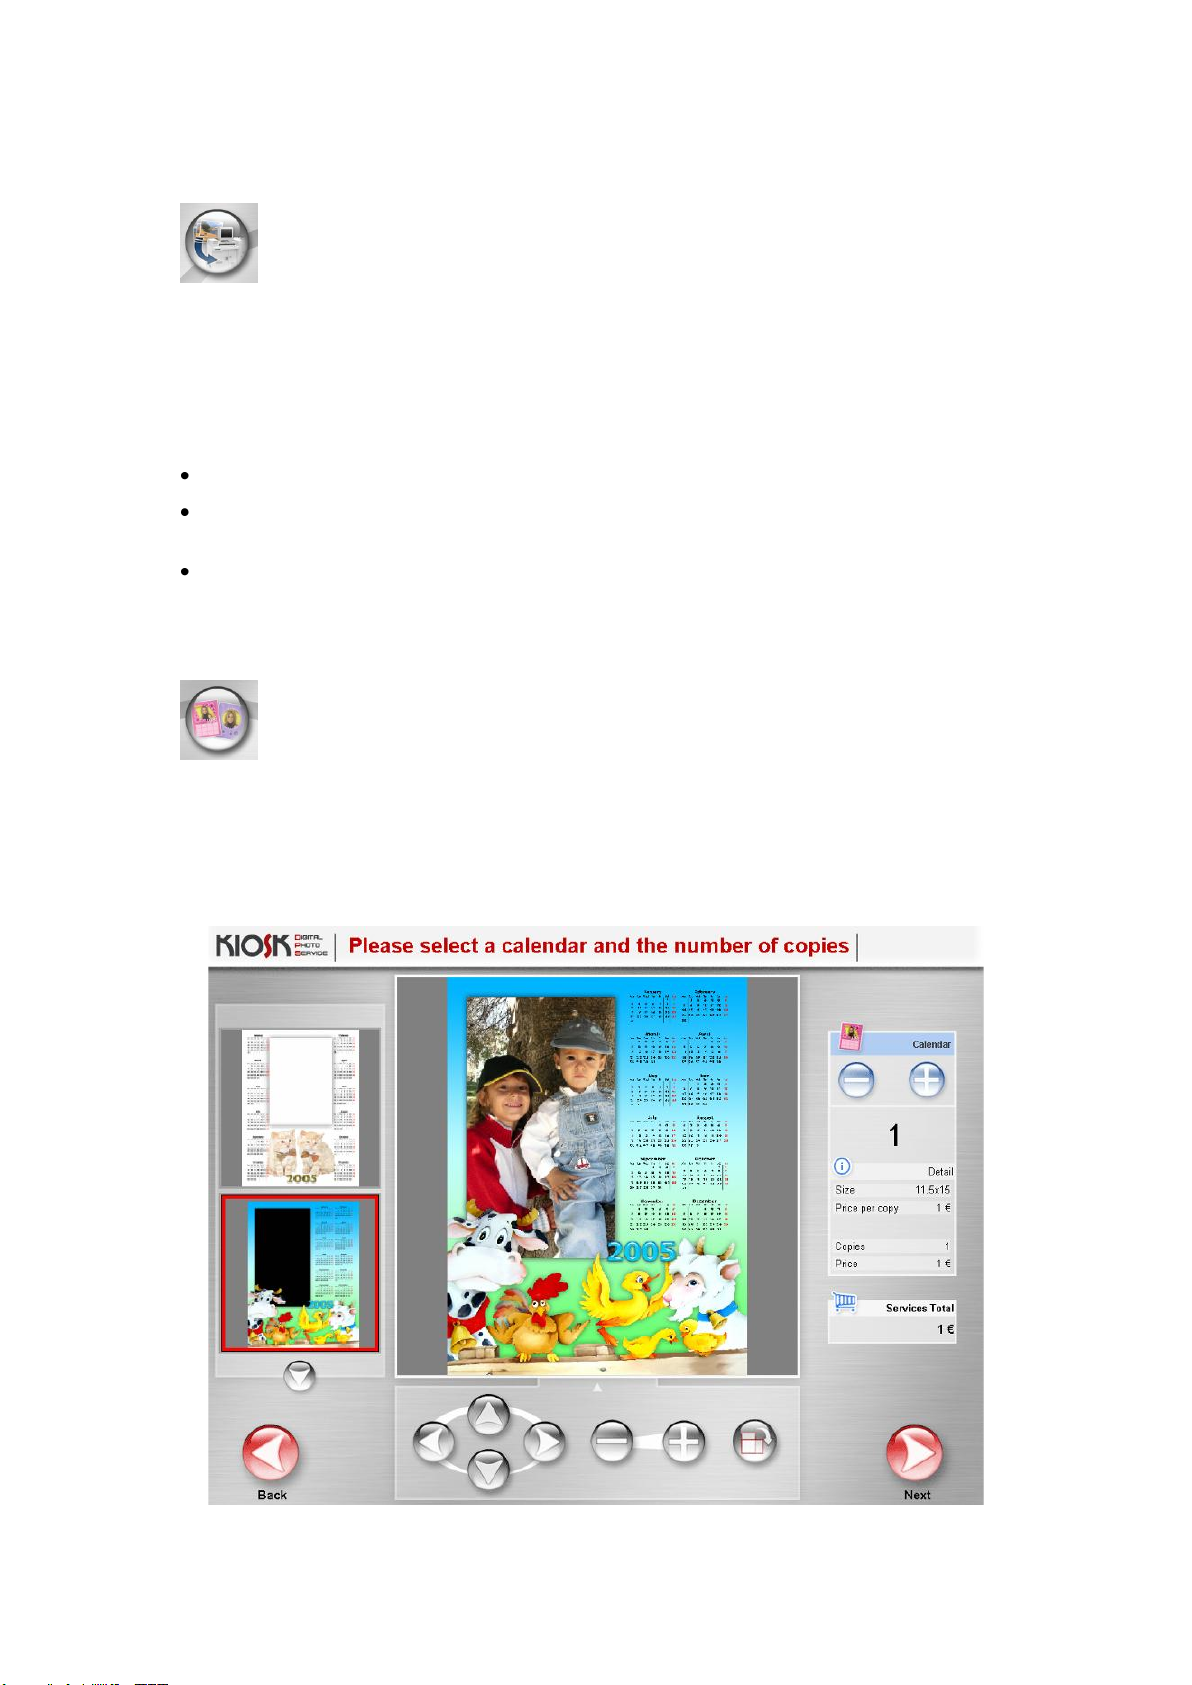
2.2.3 Decoration (Frames and calendars)
This service allows a decorative frame to be added to a photograph or a calendar
to be made using a client's image.
Kiosk has a series of frame templates which the client can choose from.
The desired language and year can also be chosen for calendars.
The next screen shown is the one presented to the client for fitting the image to the template
and selecting the number of copies required.
16
Page 17
Kiosk version 3.6.3 Operator's manual
2.2.4 DVD/CD Burning
This enables the client's images to be burned onto a CD-ROM or DVD-ROM. The
images are always copied in their original format so that their resolution is not
changed.
When a DVD/CD is burned, it includes an easy to use software application for viewing the
pictures, which enables the client to view the photographs on his/her personal computer.
2.2.5 Photo WebAlbum creation on the Internet
The user can temporarily save and/or share images over the Internet by creating
a private album on the Mitsubishi web album server (www.mitsubishialbum.com).
After the photos have been uploaded, the server generates a code that is sent to
the Kiosk and delivered to the customer. This code is used to regain access to the images
from any Kiosk or other device connected to the Internet.
Each album has a maximum storage size of 50 MB. The images loaded remain in the
Mitsubishi Album for 21 days, unless the user has a private account and imports the album.
If the picture files are larger than 500 KB they are resized in order to optimise their transfer on
the network.
Resizing criteria:
If the size in pixels is more than 1500 x 1200 it is resized to this size (keeping the original
aspect ratio) and saved in JPG format.
If the size in pixels is less than 1500 x 1200 the image is only saved in JPG format.
NOTE
These criteria have been considered for traffic on the network to be optimum and the quality
of the image to be sufficiently high for printing up to a 15 x 20 format.
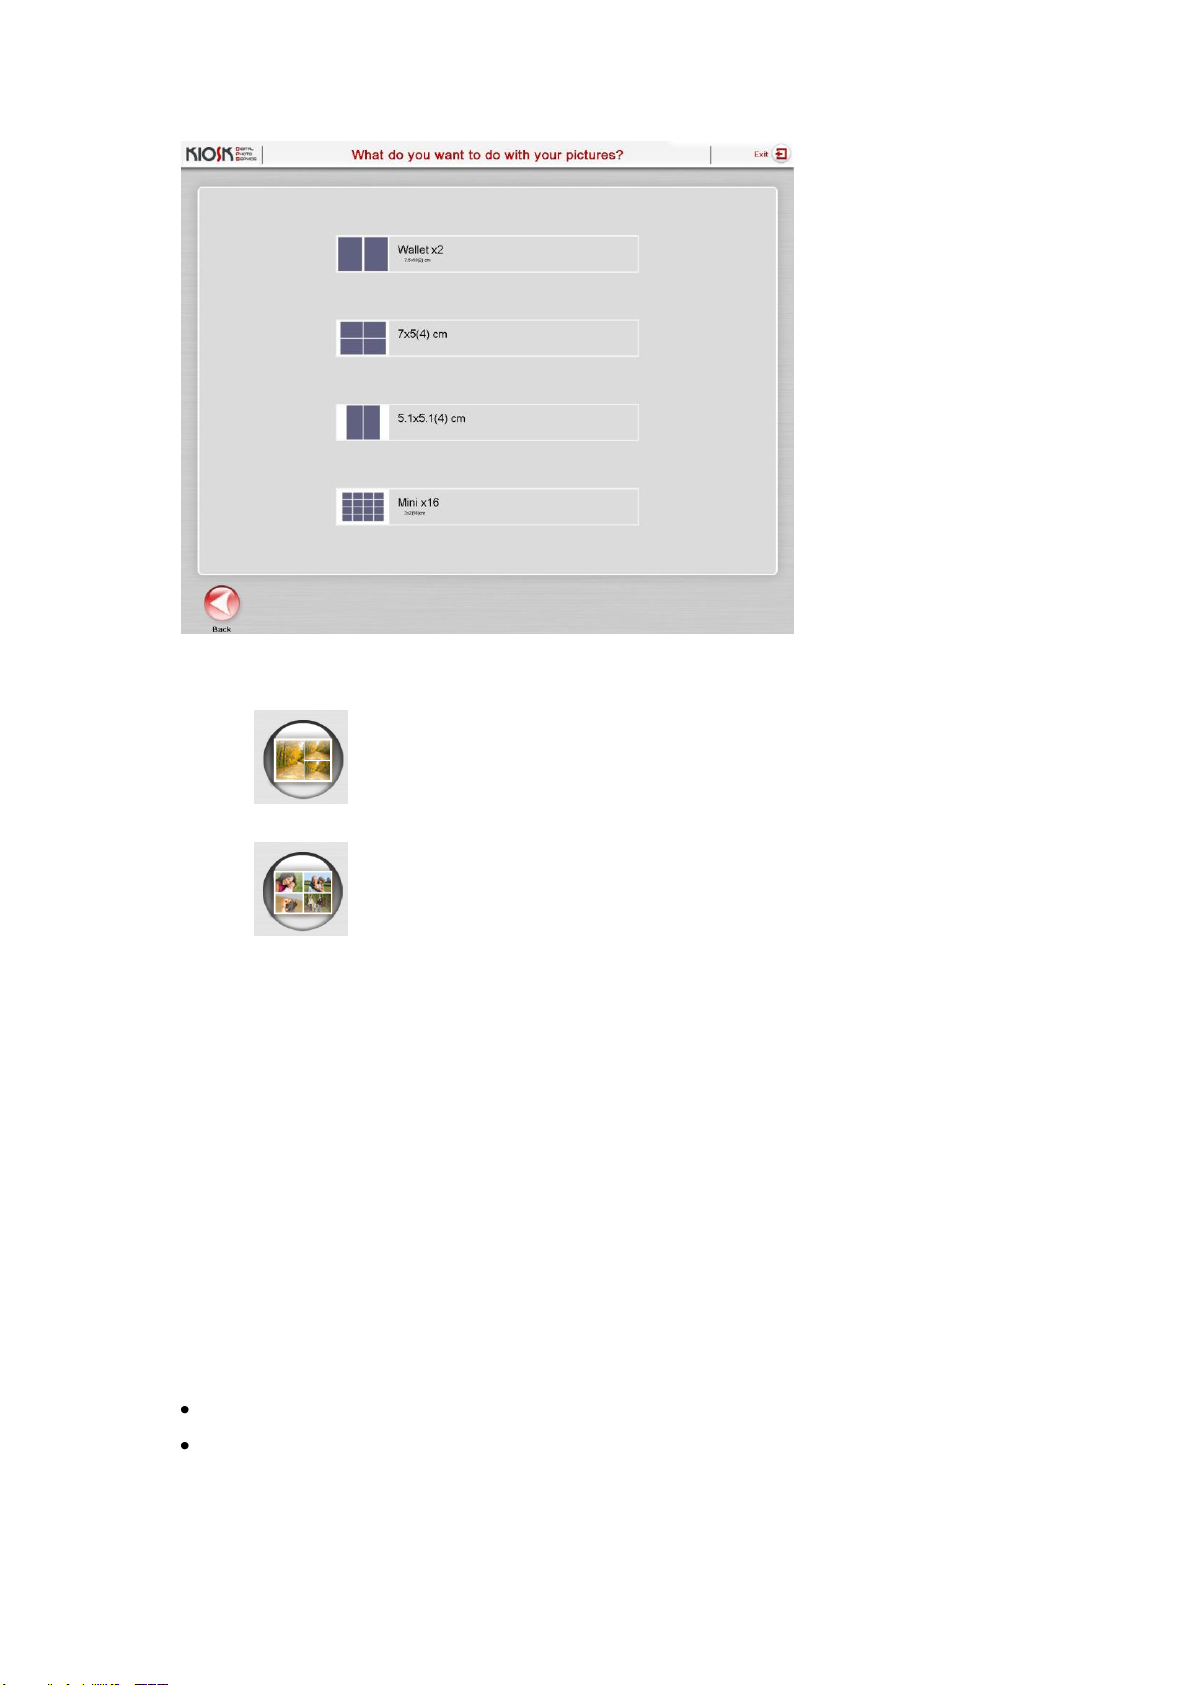
2.2.6 ID Photo
This service enables to print a composition of photos for identity cards, passports
or portraits. The images can be printed in any format accepted for instant digital
print service. For each format Kiosk offers different compositions among witch
the client may choose one. This service can only be used by operator users.
2.2.7 Collage
This service enables to print different compositions according to the user
selected format. The compositions shown can be configured in the settings
configuration.
17
Page 18
Kiosk version 3.6.3 Operator's manual
There are two types of compositions:
With the same image: The compositions is done only with one selected
image (only one image is allowed). The number of copies can be
increased or decreased with the + o - buttons.
With different images: In this case several images can be selected as
images for the composition. No single image can be repeated and the
number of copies cannot be increased or decremented.
2.2.8 Remote Orders
Remote services are for printing or burning CDs which have been ordered beforehand using
the website by a Mitsubishi Web Album user.
Payment for these services takes place when the user comes to the Kiosk to collect them. At
this point, he/she is asked to enter the collection identification code, a check is made as to
whether the job has been downloaded and if so, the order summary is shown.
After the payment for the service has been processed, it is executed immediately.
The configuration of the services provided by any given Kiosk and their prices is currently
carried out by a website administration interface available for each Kiosk on the DPS Website
Server.
It is possible to configure the following services:
Printing : 9 x 13, 10 x 15, 13 x 18, 15 x 20, 15 x 21, 15 x 23, 20 x 25, 20 x 30
CD : with the selected photos
18
Page 19
Kiosk version 3.6.3 Operator's manual
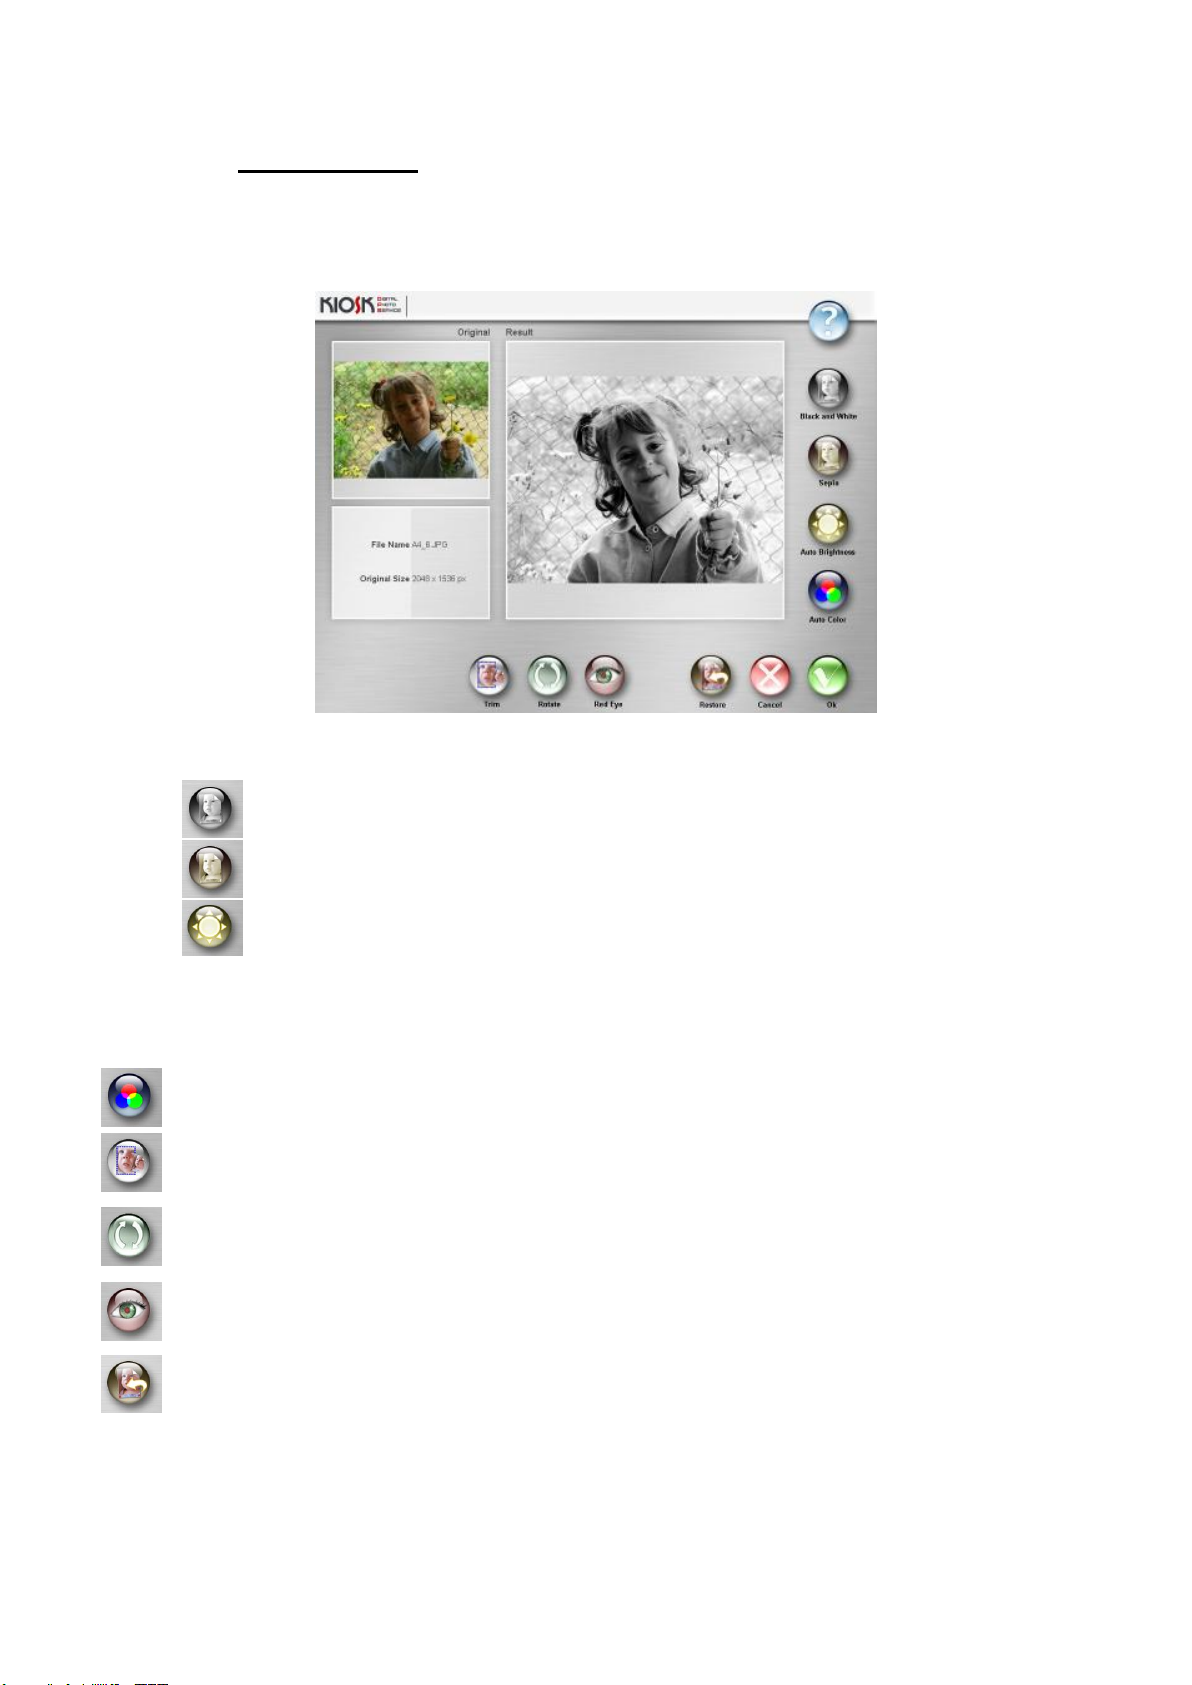
2.3 Image editing
This is a range of tools offered to the client in order to be able to make adjustments to images
in the development services.
The various options are:
Black and white: Transforms colour images to black and white.
Sepia: Transforms colour or black and white images to sepia.
Auto Brightness: Automatic brightness adjustment to improve the quality of the
image (Disabled if the histogram is ON in the configuration).
Auto colour: Automatic colour adjustment to improve the quality of the image (Applies
automatic histogram correction to each colour channel).
Trim: Uses the "+" and "-" icons to trim or increase the image displayed. Use the arrows to
move the image.
Rotate: Allows the image to be rotated in 90 degree angles.
Automatic red eye correction: Can be applied several times, depending on the complexity
of the image.
Restore: Restores the original photograph as it was before the changes.
In case of ID Photo service the „trim‟ option is permanently activated. It is possible to trim,
increase or move the image displayed, while making other image adjustments.
19
Page 20
Kiosk version 3.6.3 Operator's manual
3 Payment methods
There are 5 different ways that the Kiosk services can be paid for. Those desired can be
activated in the configuration menu, depending on the needs of each Kiosk owner.
When paying for services, the client sees a screen displaying all the authorised payment
options in the Kiosk, so that he/she chooses the preferred option.
This screen does not appear in machines in “Order Terminal” mode, as payment and the
collection of services always takes place at the counter.
3.1 Counter payment
Payment for the services is made at the counter of the establishment.
In Kiosks in “Standalone” mode, if the end user wants to pay at the counter, an
operator must validate the operation afterwards in order for the Kiosk to process
the services. This does not happen when the Kiosks are in “Order Terminal” mode, as the
services are not processed in the terminal itself, so they can be validated later in the
Dispatcher machine.
There are two different ways of validation by the operator:
Validation with operator's card
Kiosk prints a ticket with the list of services requested and their prices. Kiosk is
temporarily blocked so that the client can go to the counter and make the payment. Once
the payment has been made, the Kiosk operator inserts his/her operator's card to enable
the client's services to be processed.
This method of payment is designed for establishments in which the Kiosk and the
counter are relatively close to each other.
This method has the advantage of not requiring any additional hardware for processing
the payment, and because payment is made directly in the shop's counter, it is
automatically linked to the shop's accounts.
20
Page 21
Kiosk version 3.6.3 Operator's manual
However, there is the disadvantage that the Kiosk is blocked and cannot be used while
the client is at the counter making the payment.
Validation with an operator's password
This method is identical to the one above, with the sole difference that after the operator
has received payment for the service from the client, he/she authorises the processing of
the services using his/her operator's password.
3.2 Prepayment Card
This method enables users with a prepayment card to pay for any of the services
offered directly in the Kiosk. The establishment sells these cards which are preloaded with the balance at the time of purchase.
The prepayment cards contain a high security chip, with Mitsubishi encryption algorithms that
totally guarantee the protection of the data.
Each card has an associated limit which enables its use to be limited to a specific Kiosk, to all
the Kiosks in a shop or the Kiosks in an entire chain of shops.
The use of prepayment cards enables client loyalty to be maintained thanks to the
personalisation and improvement of the services.
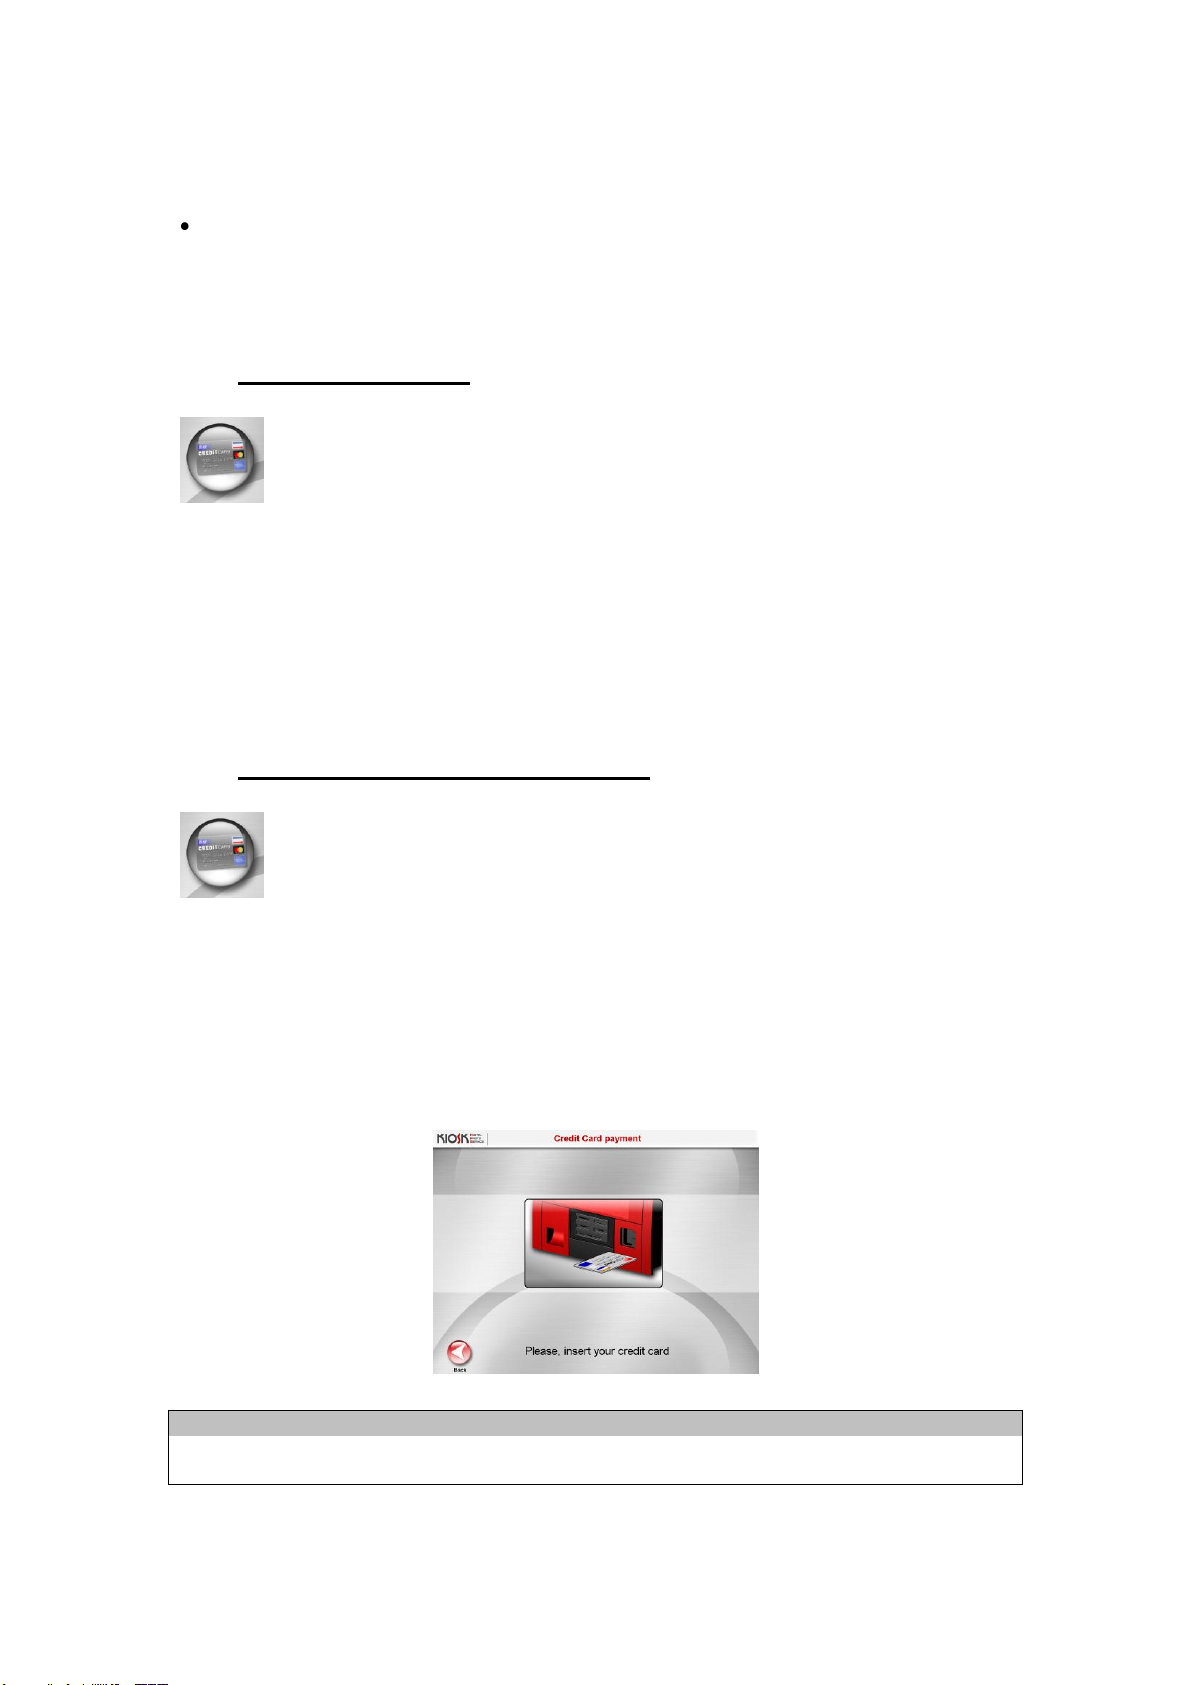
3.3 Credit / debit cards (bank card)
This method enables payment to be made for the Kiosk services using a bank
credit or debit card.
In order to process a payment, the Kiosk reads the information on the card (strip
or chip) including the PIN if necessary. Whether it reads a strip or chip, and if it needs to ask
for the PIN, depends on the platform processing the payment and the regulations in each
country.
Special Kiosk parameters must be configured beforehand for this mode to be active. These
configuration parameters are provided by the same platform which processes payments. The
screen shown to the user for him/her to insert his/her card in the reader when making a
payment is shown below.
NOTE
Please check with your dealer the availability of the Kiosk credit card payment solution in your
country and hardware system.
21
Page 22

Kiosk version 3.6.3 Operator's manual
3.4 Cash
This method enables payment for services to be made in cash, in the currency of
the appropriate country.
To do so, the Kiosk requires these 6 hardware parts:
Coin box
Coin acceptor
Note box
Note acceptor
2 hoppers
The hoppers are devices storing coins for change, and each one can contain only 1 type of
coin. When Kiosk gives change, it always does so with coins from these devices. They are
filled at the side by an operator (see sub-section “Coin counter” in the “Kiosk Operator”
section for more information) and coins of the same value as the contents of the hoppers
inserted in the Kiosk by the end user go directly to these devices.
There are 2 different working methods in the cash payment method – where change is given,
and with no change given. The Kiosk owner is the person who decides which one he/she
wishes to work with.
Some clients prefer to work without change being given, to avoid having to worry about
having change available in the machine.
If the machine is configured to give change, the notes and coins it accepts depends on the
availability of change in the Kiosk. There must be enough to ensure that the money can be
returned if the client cancels the operation. Payment is deemed to have taken place when the
sum inserted equals or exceeds the value of the services. If the value of the services is
exceeded, the appropriate change is given.
If it is configured to not give change, Kiosk accepts notes and coins until the amount for the
services is equalled or exceeded. If the sum inserted exceeds the value of the services, the
difference between the amounts is not returned in this working mode. Two sums appear on
the proof of payment slip.
The machine's hoppers are not used in the "cash payment without change given" mode, as
no amount is returned to the client. If the operation is cancelled during payment, a slip is
printed showing the cancellation of the service and the sum inserted by the client up to that
point.
Using this slip, the owner of the Kiosk can return the sum to the client if he/she considers this
appropriate.
The screen seen by the client when making cash payment is shown below. It shows the
amount for the services, the sum pending payment and the coins and notes accepted by the
Kiosk at any time.
22
Page 23

Kiosk version 3.6.3 Operator's manual
3.5 Free mode
In this mode, Kiosk performs services at no cost to the user. This mode is used basically in
demonstration machines and at trade fairs.
4 Screen flow: User interface
When nobody is using the Kiosk, the screensaver appears on the monitor. When it is
touched, the main screen appears and the client can start using Kiosk.
The client can select the language and service on this screen. The services offered depend
on the applications installed in the Kiosk (Digital Photography Services, EasyAlbum,
EasyCalendar, Greetings, etc.)
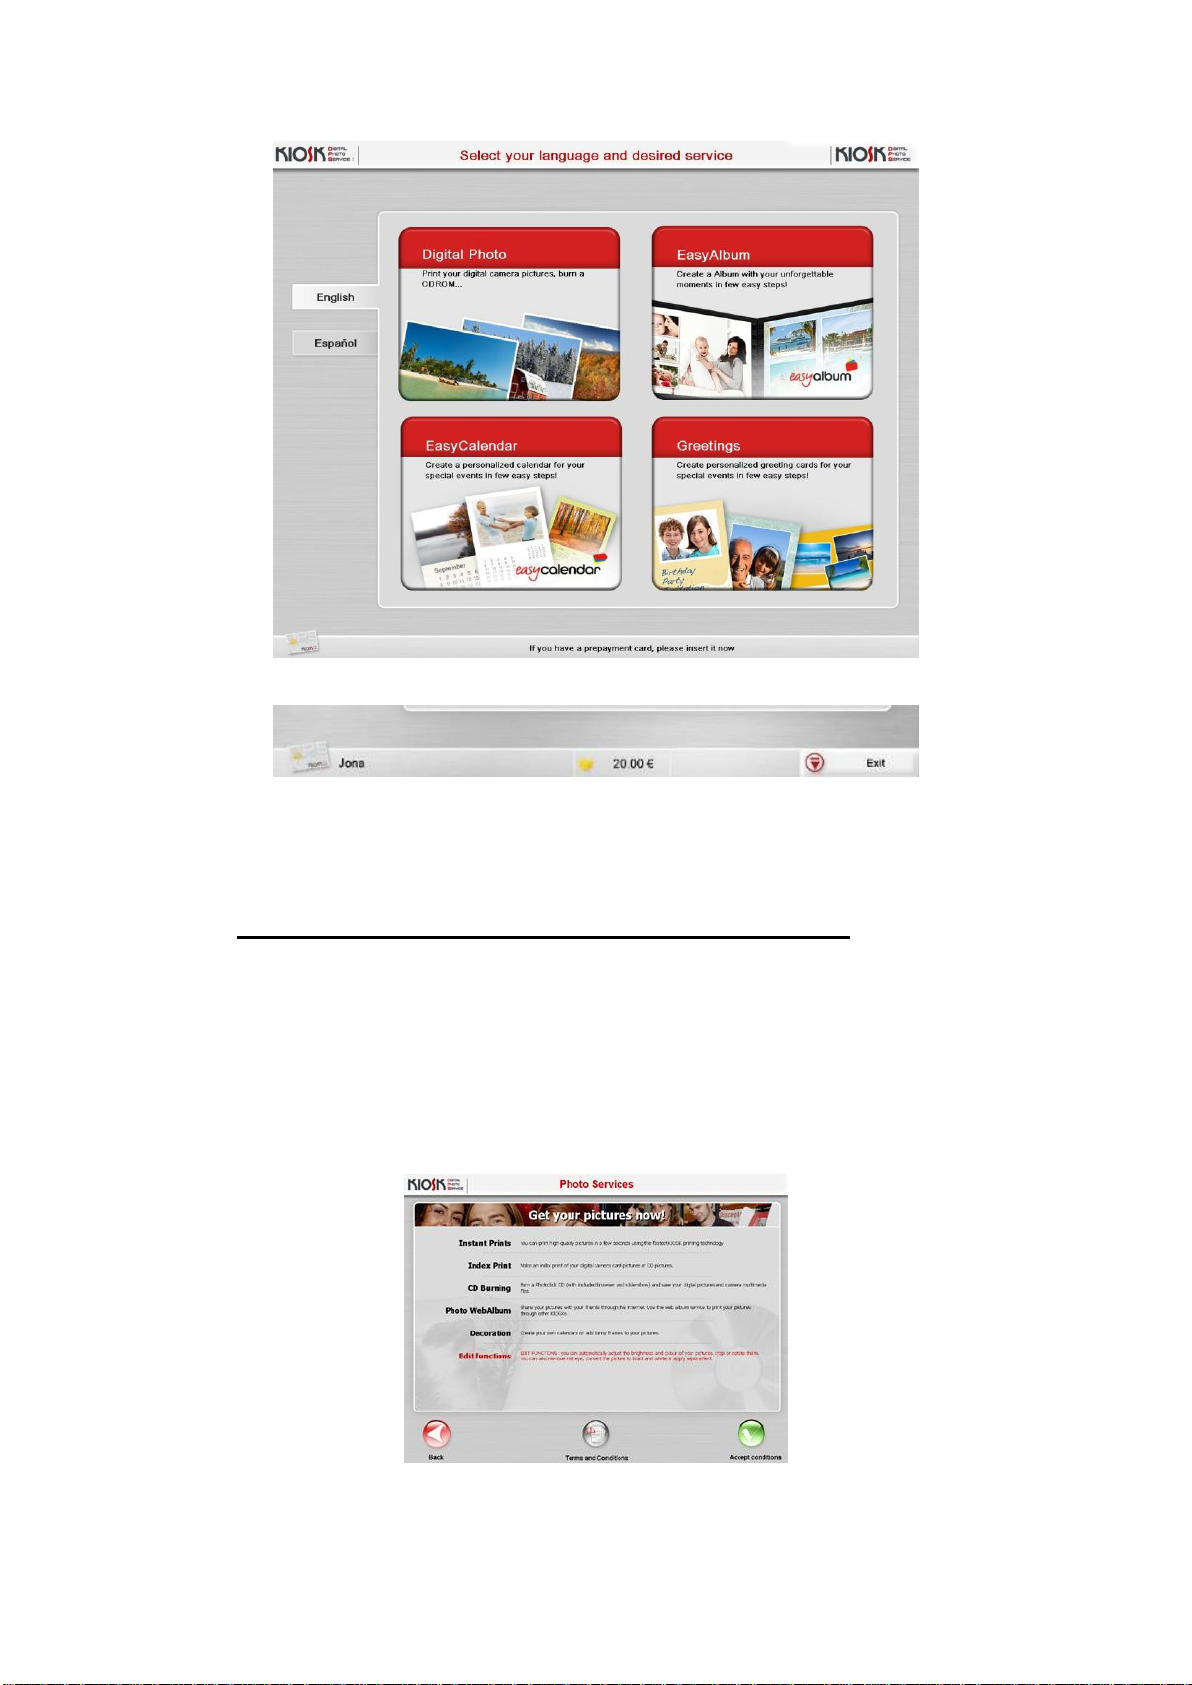
4.1 Choose language and service
The user can choose the language and service desired.
If the client has a prepayment card, it must be inserted now. In this case, the choice of
language takes place automatically as the card is preconfigured with the language the client
has chosen beforehand.
Every time he/she inserts the card, Kiosk welcomes the client and shows the name and
balance available at the bottom of the screen.
23
Page 24
Kiosk version 3.6.3 Operator's manual
When leaving the Kiosk, the "exit" key must be pressed for the prepayment card to be
returned.
4.2 Information on services and conditions of use
This screen welcomes the client and shows the digital photography services provided by the
system.
The client must read and accept the terms and conditions of use in order to continue.
If the client pushes the descriptions of the digital photography services in error, a warning is
given that he/she must read the conditions of use and accept them in order to continue.
24
Page 25

Kiosk version 3.6.3 Operator's manual
4.3 Input of images: Where do you have your pictures?
On this screen, client is asked to show the data source from where the images are to be read.
4.4 Filtering the data source
Data source filtering will save us time in processing and selection when working with a digital
camera cards or DVD/CDs already classified by the customer.
Similarly, it simplifies the development of a whole memory card or a DVD/CD and permits the
direct printing of all the photos without the need to enter the flow of editing screens.
During filtering the source data device will be read, and a summary of the number of folders
and files found will be displayed
NOTE
This filtering screen will appear provided that is has been activated in the Photo configuration
and the file source is a digital camera card or a CD.
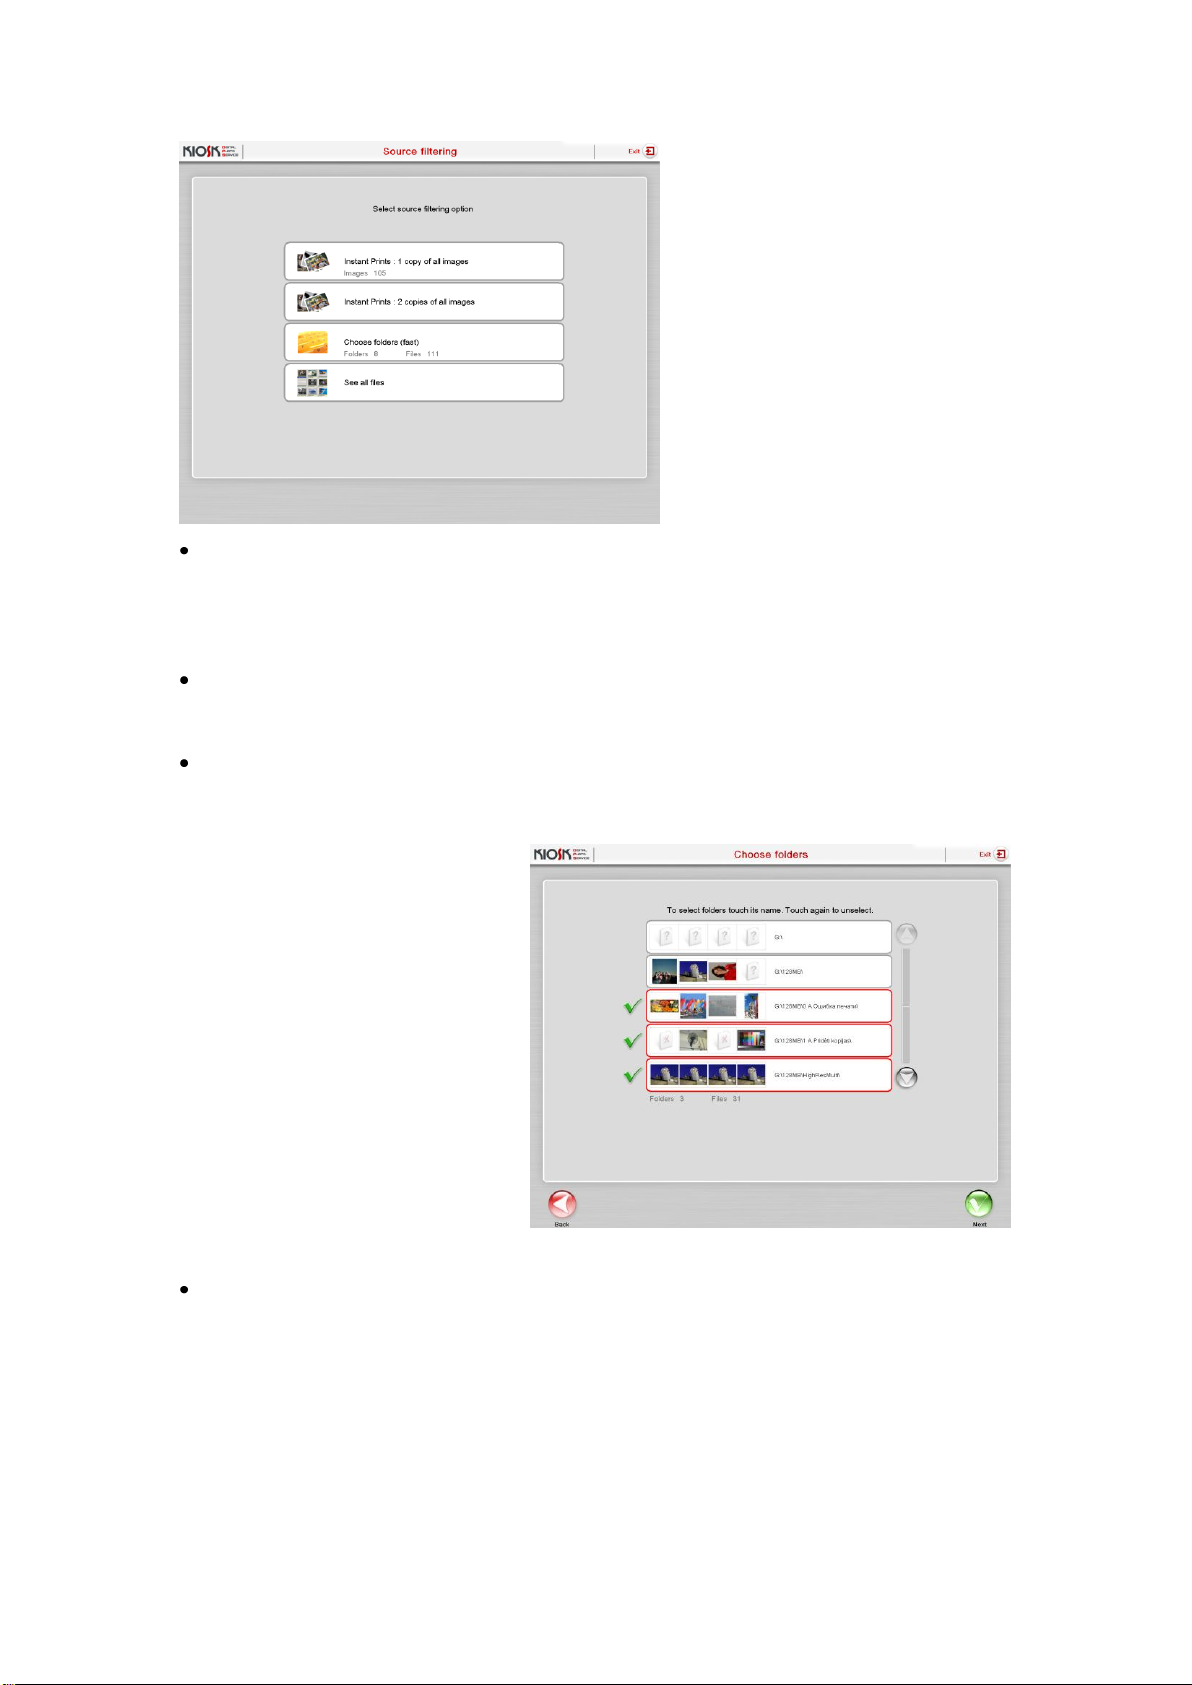
The following figure presents the 4 available options
25
Page 26
Kiosk version 3.6.3 Operator's manual
Print 1 copy of all images
The fastest option. All the selected pictures will be printed without the need to load them. It
will be necessary to select the print format and optionally an index print can be ordered. Once
the order summary has been confirmed the photos will be printed.
Print 2 copies of all images
The same as above but with two copies per photo.
Choose folders
It‟s also a nice option also to save picture loading time. The user can filter by folders that he
or she is really interested in.
If you select this option a screen will
appear showing a list of all the
folders, and a small summary in
miniatures of the picture sin each
folder.
Select the folder by clicking the title
and click again to unselect.
At the bottom there is a summary of
the folders and files selected.
See all files:
No filter is applied and all the files are read to go on to the manual edition screen.
26
Page 27
Kiosk version 3.6.3 Operator's manual
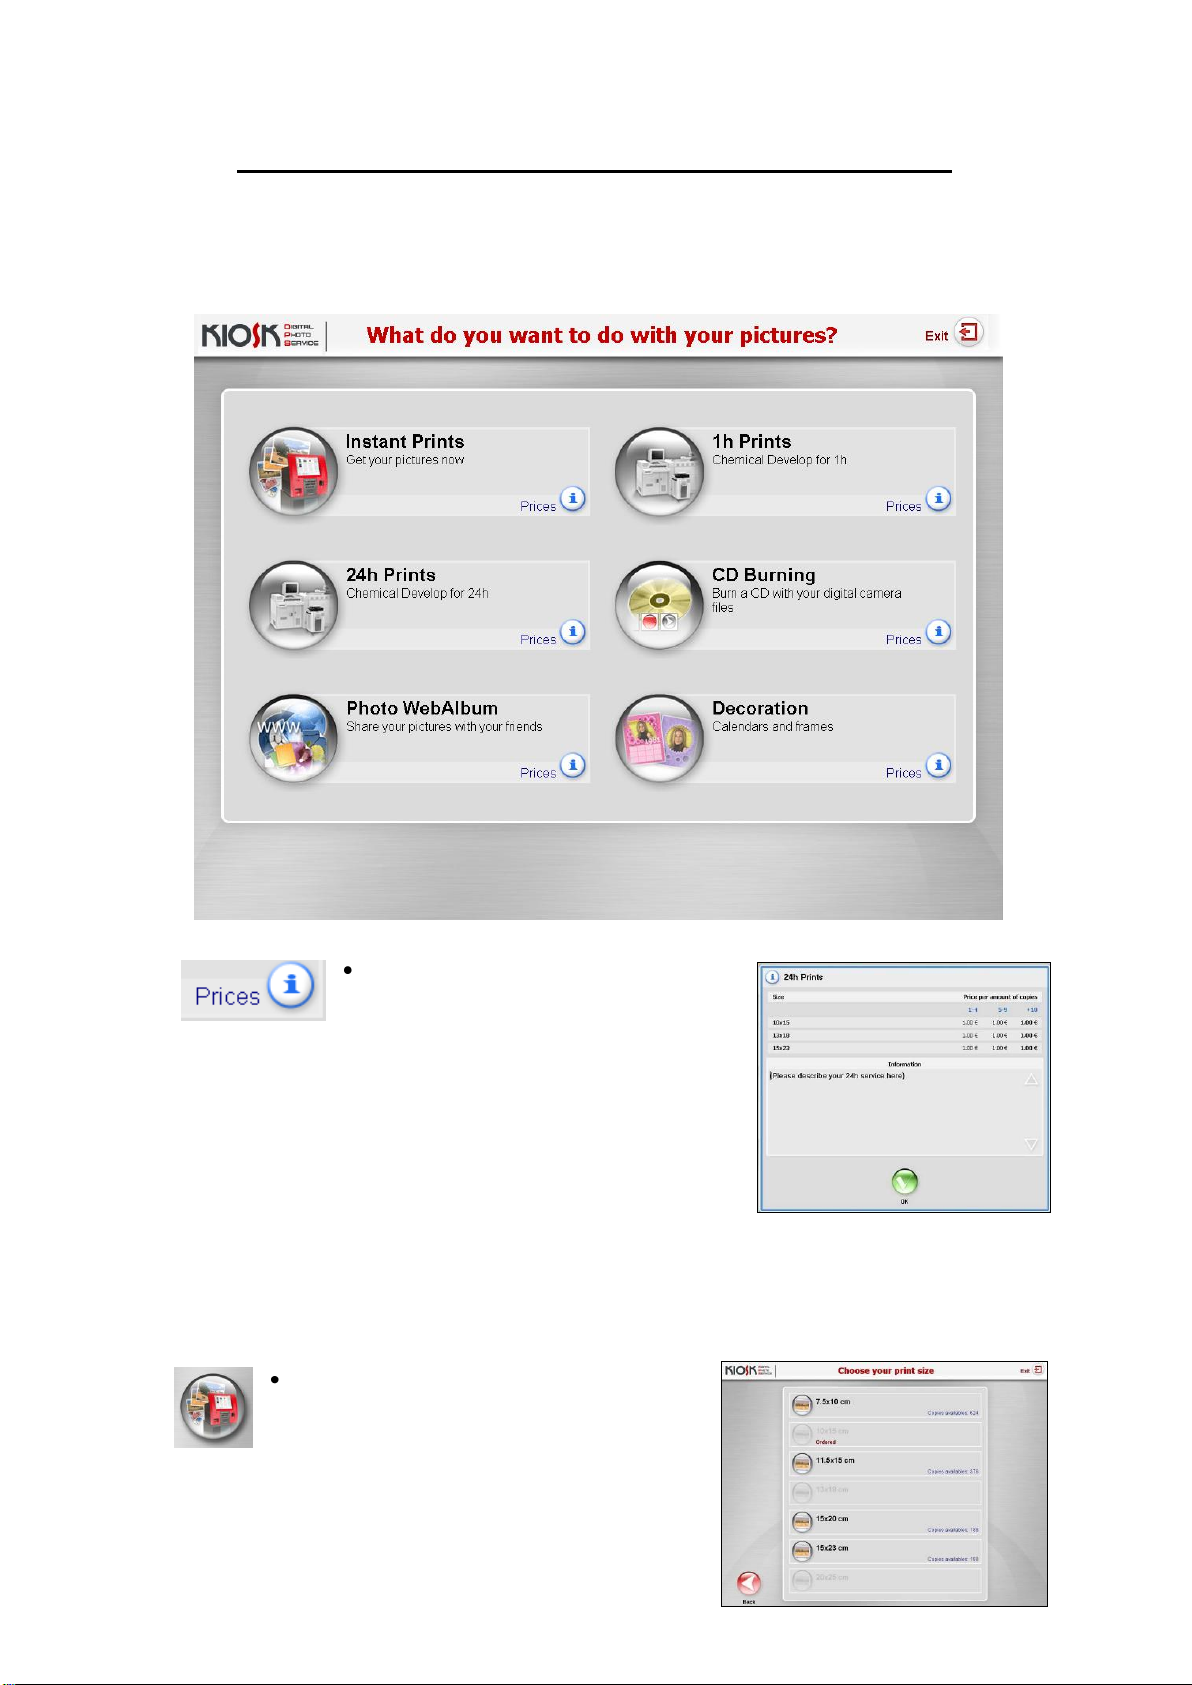
4.5 Services: What do you want to do with your pictures?
After selecting the data source, the next step is to choose the service. When the client's
images are loaded from a CD or PhotoWebAlbum, the CD-ROM burning services or the
creation of a PhotoWebAlbum are disabled, in each case.
Information
There is an information button with a
description of each service, which the client
must push in order to consult prices and obtain more details
about the service.
In the prices section, the prices are shown according to the
format and the number of copies ordered (if the price ranges
are active).
For 1h/24h printing services, the information section can be
personalised.
The description can be modified by editing the text files D:\DPSPhoto\ServicesInstructions.
More information can be found in the “Kiosk Customisation” appendix.
Instant prints
This option enables images to be printed using
the Kiosk printers.
The user must then choose the print size.
27
Page 28
Kiosk version 3.6.3 Operator's manual
The formats available depend on the formats selected in the general configuration of
DPSPhoto and the printers connected.
The number of copies pending also appears next to each size.
The print size appears in grey if the format is temporarily unavailable (for example, due to a
lack of paper, a problem in the printer, etc.)
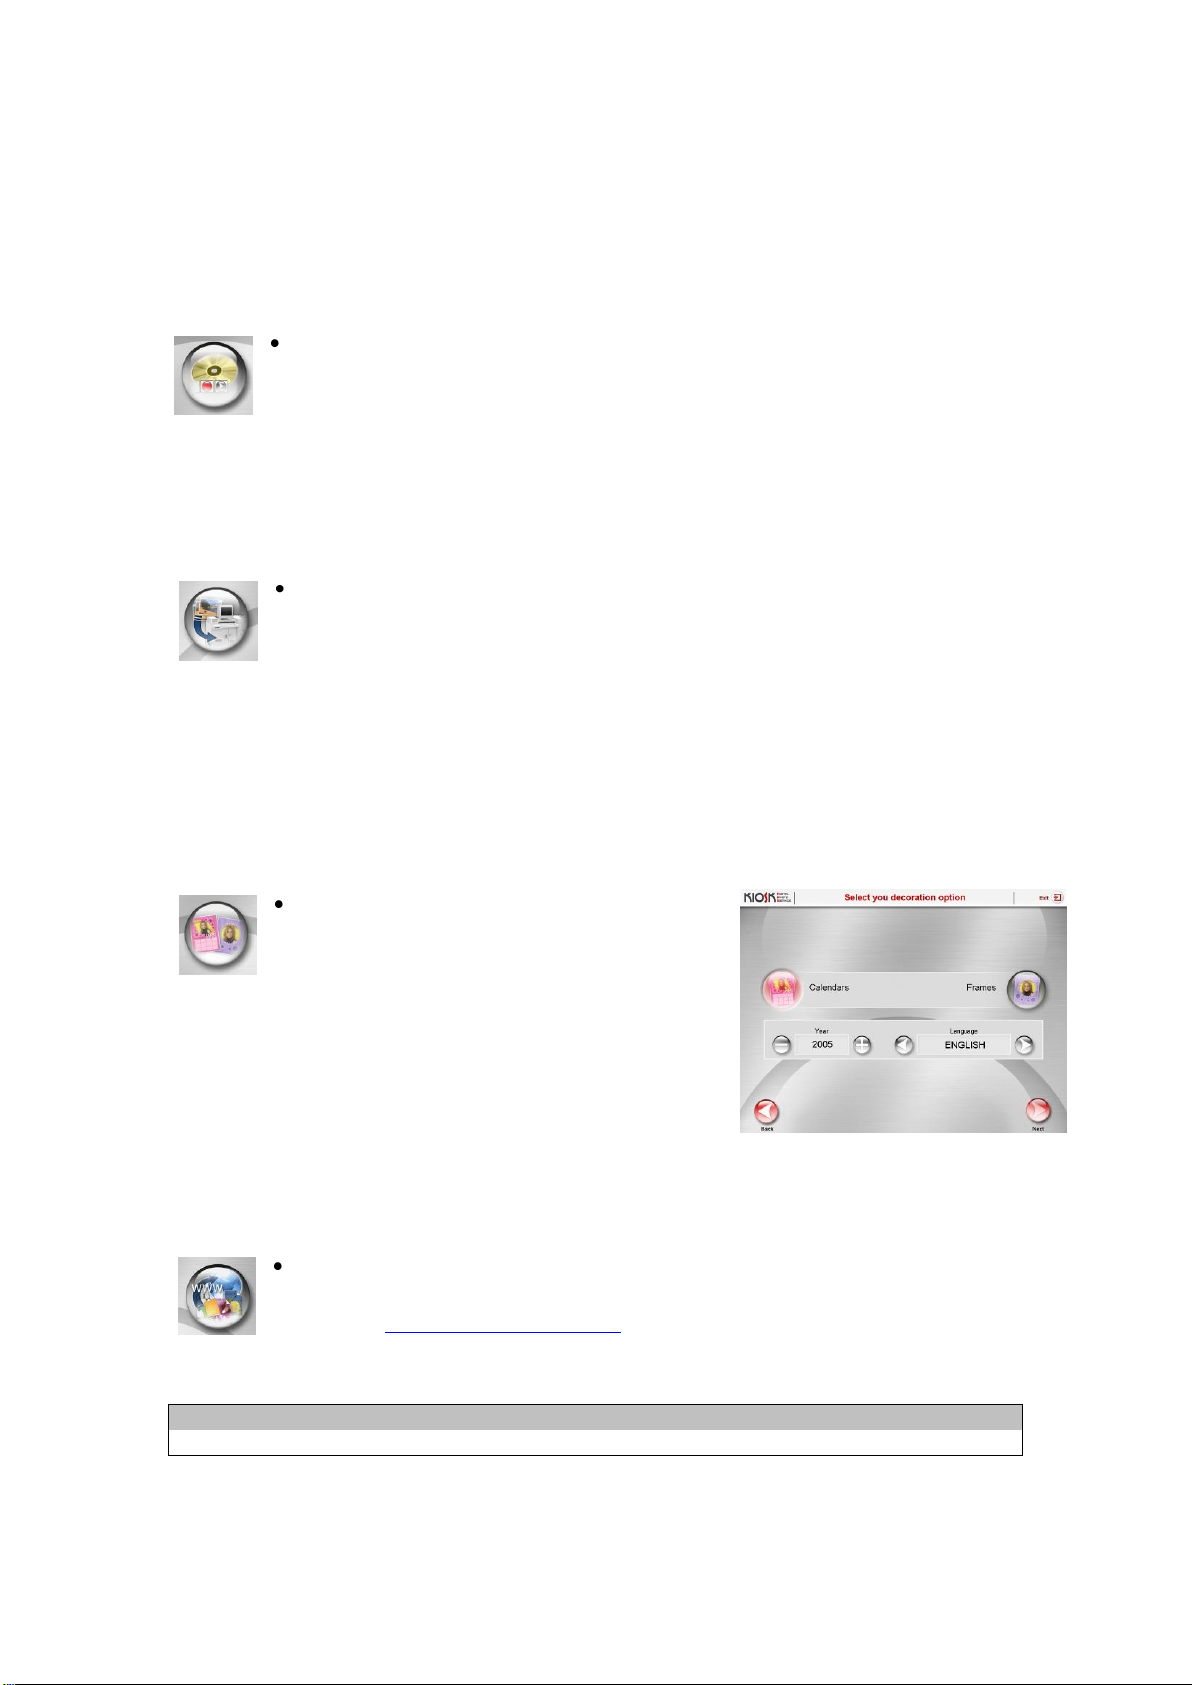
DVD/CD Burning
This option enables a CD or DVD to be burned using the files or images selected.
When this service is chosen, the client is asked to insert an empty disk before
continuing. The maximum capacity of the disk is calculated after it has been inserted. The real
available space will be less than that on the disk as the picture browsing & viewer application
and the thumbnails of the selected images are included on the CD (approximately 175 MB on
a complete CD). The amount of space used on the disk is shown while the images are being
selected.
1 h / 24h prints
This option enables photographs to be sent to an alternative digital photograph
processor. The images are sent to any higher production machine in DPSLab
format.
The option of development in one hour is possible when the establishment has a high
production machine. If not, the development will take longer (up to 24 hours). The order can
be collected at the counter at the time stated by the establishment or sent to the client's
home.
The options available depend on the configuration of the DPSLab module (see DPSLab
Appendix).
Decoration
This option allows calendars to be created with
photographs or decorative frames to be added.
The print size must be chosen, as when producing instant
prints.
The client can also choose between various frames and
calendars designs. For the latter, the year and language
must be chosen.
The formats available depend on the formats selected in the general configuration of
DPSPhoto and the printers connected. The years and languages that can be chosen depend
on the calendars package installed.
Create a Photo WebAlbum
This option allows images be loaded onto a Photo WebAlbum which is created on
the website www.mitsubishialbum.com. After having paid for the service, and if it
has been possible to send the images, the user receives an information ticket with
the user name and password of his/her new Photo Website Album.
NOTE
This service is only available in ONLINE Kiosks
28
Page 29

Kiosk version 3.6.3 Operator's manual
ID Photo
This option allows creating compositions with identity card, passport or portrait
photos and printing them on paper. End customer can not choose this service from
the list of available services, because is not shown in the services screen. The assistance of
the shop staff is needed when this service is required by the end customer.
Available formats depend on the formats chosen in DPSPhoto general settings and on the
connected printers.
Depending on the selected format, different compositions may be possible.
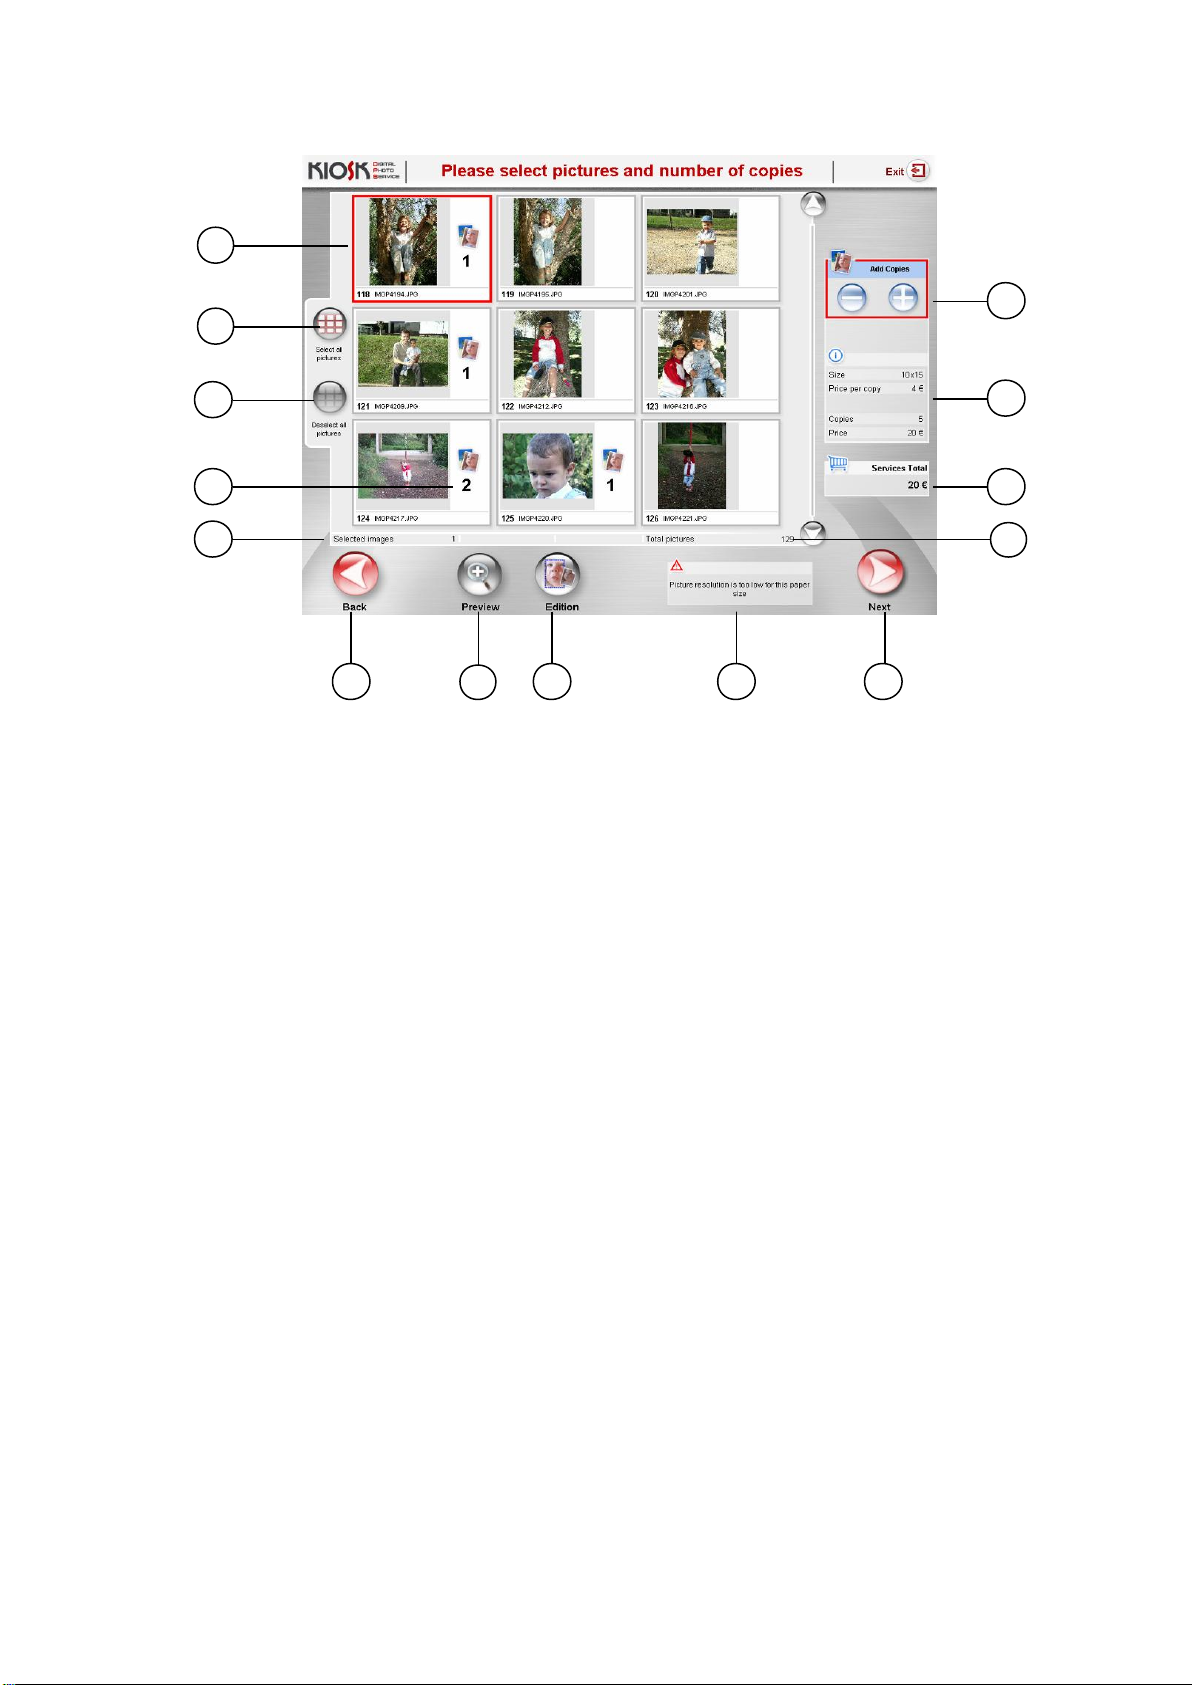
4.6 Viewer: Select pictures
The “viewer” screen shows the files that have been read from any of the available digital
media.
The files that are not images (marked on this screen as Multimedia files) can only be read if
the CD burning service has been selected. This service enables the user to record a CD with
all the films and sounds that his/her digital camera can create on the medium.
There are two working modes that can be configured using the DPSPhoto configuration.
These modes only affect instant prints, 1h/24h prints and decoration.
Mode 1 Automatic copy: Default configuration. When an image is selected, a copy of it
is automatically added to the order.
Multi-selection mode: When an image is selected, the number of copies requested does
not change automatically. To do this, button 6 must be pressed (see below). This mode
enables several images to be selected at the same time and the number of copies of
all of them to be increased or reduced at the same time (using button 6; see below).
29
Page 30
Kiosk version 3.6.3 Operator's manual
1
11
10 9 13 2 12
3
8
14
5
4 7 6
1. Image selected
When an image is chosen, it is highlighted with a red edge. Depending on the working
mode, more than one image or only one can be selected.
2. Select all pictures / One copy of each
Wait until all the photographs have loaded before pushing this button. Check the total
number of photographs (9). (This option is only activated if all the files have been loaded.)
Depending on the working mode, only one copy of each will be selected, or one copy of
each will be selected and a copy ordered.
3. Deselect all pictures / Zero copies each
Depending on the working mode, they are simply deselected, or the number of copies
becomes zero.
4. Copies
This panel shows the number of copies that are to be printed.
The icon changes depending on the service requested (Printing, CD or PhotoWebAlbum).
5. Selected images
Number of images selected.
If the PhotoWebAlbum service is chosen, the megabytes they occupy also appear (Max:
50MB).
6. Add copies (only instant prints, 1h/24h prints and decoration)
This increases/decreases the number of copies of the image(s) selected.
At least one copy must be requested to continue onto the next screen.
7. Information panel
This shows information on the price per copy, the size and number of copies selected.
30
Page 31

Kiosk version 3.6.3 Operator's manual
8. Services total
This shows the total price of this service plus that of other previously requested services,
if any.
The total sum appears in red when the balance of a prepayment card is exceeded.
9. Total pictures
This shows the total number of loaded images and files in the inserted medium. Check
that all the files are loaded before pushing the “select all photos” button.
10. Back
Ask the client whether he/she wants to cancel the current
service and not to add it to the list of projects ordered. If
accepted, the service selection screen reappears.
11. Previewing
Enables the selected image to be previewed. Depending
on the print size, a dotted line appears where the image
will be cut.
This screen also has buttons which allow the image to be
rotated or returned to its original resolution.
12. Edit
Enables the client to modify his/her images. The various options are listed in the “Editing
of images” section.
31
Page 32

Kiosk version 3.6.3 Operator's manual
13. Low resolution signal
This icon appears next to images with a lower resolution than the one recommended for
the selected print size.
14. Next Button
This appears when at least one copy has been ordered. It leads to the next screen.
NOTA
The photo viewer is limited to 2500 files to guarantee good system performance and to make
it easier for the client to select pictures. If there are more files on the same device, the
contents should be structured in folders to simplify usability and selection.
32
Page 33

Kiosk version 3.6.3 Operator's manual
1
2
3
4
6 5 7
4.7 Decoration: Calendars and frames
If the calendars and frames service has been selected by marking the desired photograph on
the “viewer” screen, the composition screen appears.
1. Selection panel
This allows a choice between the calendar and frame screens. It adapts automatically to
the photograph.
2. Template view
This enables the various templates to be viewed.
3. Back Button
This enables the user to return to the viewer and to choose another image.
4. Add copies
This enables the number of copies of the selected composition to be increased or
decreased.
5. Arrow buttons
This is used to centre the photograph in the frame or calendar.
6. Zoom buttons
This enables the size of the photograph to be increased or reduced.
7. Turn button
This enables the photograph to be rotated by 90 degrees every time it is pressed.
33
Page 34

Kiosk version 3.6.3 Operator's manual
4.8 Do you want an index from your pictures?
This option only appears when instant copies or CD burning is selected in the first service
requested by the client. If the client answers yes, a menu showing the various types of index
print appears.
Of all pictures
Printing of an index print of all the images from the current source. "Copies" shows the
number of pages necessary for printing them.
This option may appear in grey if not all the images on the medium have been completely
loaded. In this case, the “Back” button must be pressed and all the images must be
completely loaded.
Of selected pictures
Printing of an index print of the selected images.
"Copies" shows the number of pages necessary for printing them.
Summary index print
Printing of an index print with a series of images selected at random from the source.
Only one page is printed in this option.
34
Page 35

Kiosk version 3.6.3 Operator's manual
4.9 Order summary
This screen lists all the services requested up to this point and their cost.
Back
Go back to the "Search" screen.
Confirm service
By pushing this button, the client confirms the services requested, which are shown on
the summary, and this leads to the next screen.
From here, more operations can be added, the summary
consulted or the services accepted.
NOTE
This is the last screen to appear before payment is made and the services are completed
35
Page 36

Kiosk version 3.6.3 Operator's manual
4.10 Extract sources
If a digital camera card or a CD has been inserted, Kiosk will ask the client to remove it now.
The client must extract the source medium and push the "Next "button".
NOTE
The Kiosk software assumes that the client has removed the data medium before pushing the
"Next" button.
Mitsubishi Electric cannot be held responsible for any medium that is left in the machine.
36
Page 37

Kiosk version 3.6.3 Operator's manual
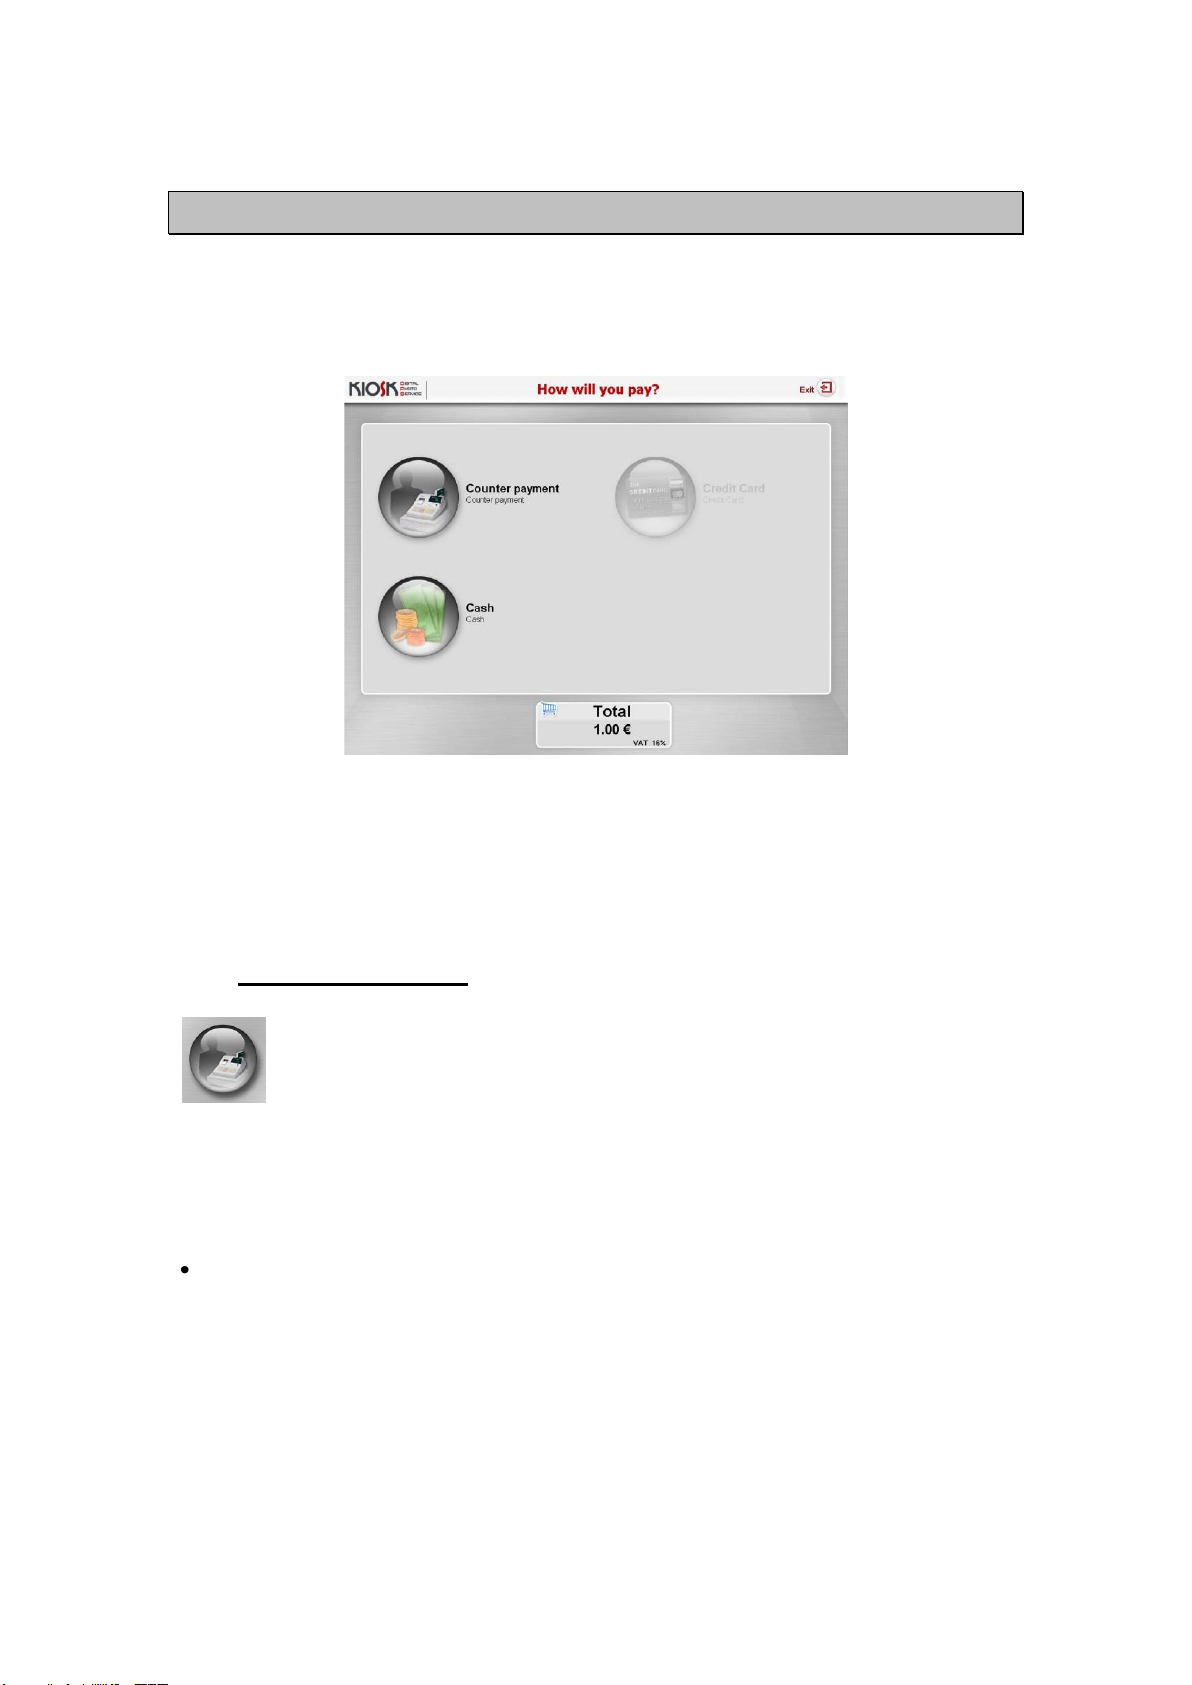
4.11 Method of payment selection: How will you pay?
This screen appears in “Standalone” mode, providing that a prepayment card has not been
inserted at the beginning of the transaction.
Counter payment
Cash
Credit card
This screen does not appear in machines in “Order Terminal” mode, as payment for the
services is always made at the counter.
4.12 Checking devices
At this point, Kiosk checks whether the correct media have been loaded in the printers and/or
whether a blank and valid CD has been inserted in the CD recorder (with a capacity for the
size of the selected files).Depending on the number of images or services selected, this
process may take a few minutes.
This screen does not appear in machines in “Order Terminal” mode, as the services are
processed using another machine.
37
Page 38

Kiosk version 3.6.3 Operator's manual
4.13 Execution of services
This screen shows the progress of the services requested by the client by means of a main
progress bar, and the progress of each service separately, below the appropriate icon.
38
Page 39

Kiosk version 3.6.3 Operator's manual
Services banner
The area located below the main progress bar can be
customised.
It works as an image carousel. More instructions on
adding your own images are in the “Kiosk
Personalisation” appendix.
Alternatively a flash file can be used, for example to
make surveys.
After the services requested have been completed, a slip with the list of operations carried out
will be printed.
If the transaction has been paid for with a prepayment card,
Kiosk asks the client to remove the card now.
In any of the devices breaks down and cannot finish the service, an error slip is printed which
the client can use to make the appropriate claim.
This screen does not appear in machines in “Order Terminal” mode, as the processing and
collection of services always takes place at the counter.
39
Page 40

Kiosk version 3.6.3 Operator's manual
NOTE
The first time using the machine it‟s necessary to use the Activation Wizard (see Activation
Wizard annex) in order to configure some Kiosk settings, such as the name, the IP address,
etc.
Some of the chapters may be only applied depending on the hardware.
1
2
5 System configuration
Kiosk Kernel manages the core components of the system and their interaction with other
applications (DPSPhoto, additional services, etc.)
The system's core components are the hardware devices, methods of payment, operators,
screensaver, main screen, statistics and other general options such as languages,
information on the establishment, etc.
In order to configure and manage the Kiosk's behaviour, the operator must first access the
global configuration screen. This can be done in two ways:
Automatically, by inserting the operator's card from the main screen
Manually, pressing the logo appearing in the top corners of the main screen and then
keying the operator's password in sequence.
Then type the Operator's password
The global settings menu appears after the operator's password or card has been accepted.
All operators, including the supervisor, can access the various configurations of the
applications from this screen.
40
Page 41

Kiosk version 3.6.3 Operator's manual
5.1 Kiosk Operator
Access to the operator interface is limited to users defined as operators, who need to access
the Kiosk system in order to carry out maintenance work.
On this interface, the operator can create client cards, restart failed requests, check payment
records, print a duplicate slip, view the state of the hardware, turn off the system, etc.
The operator can access the following menu by
pressing the “operator” key of the desired
application.
NOTE
This menu should be used whenever a problem arises and the information necessary to find
its cause collected
41
Page 42

Kiosk version 3.6.3 Operator's manual
5.1.1 Operator menu panels
The general state of the system is at the bottom of the operator's menu.
Kiosk Information
o Current user: Shows the number of the operator who is accessing this menu.
o Version: Shows the actual Kiosk Kernel version.
o KioskID: Shows the identification for the machine. Its function is to identify the
machine as unique.
Status
Shows the general state of the machines. The operator can manually update the
information on the state of the hardware by pushing the update devices button.
Update button: Checks the current state of all the devices.
If there is any problem, consult the information listed on faulty operation of the
device in the "Device manager" panel. The three states are:
o OK. The system is working correctly.
o Warning. There is an error but the system can provide other services.
o Critical error. The system cannot operate.
If Kiosk shows a state of warning or critical error in any device, this icon also
appears on the machine's main screen.
Kiosk out of order
If the Kiosk is out of order, the reason is shown on this panel.
The main reasons for this happening may be:
o No application is activated: Restart the applications from the DPS Monitor or
restart the system.
o No payment modes available: Check that all the payment devices (till, credit
card reader) work and are configured correctly
o Ticket printer out of order: Check whether the ticket printer is out of paper or if
there is any problem with the device manager.
Failed Orders
If there is an error (e.g. uncompleted printing), this panel shows the number of jobs
pending or blocked. If this is not zero, push the "orders pending" button to obtain more
information.
42
Page 43

Kiosk version 3.6.3 Operator's manual
Pending Task
o Remote updates: Shows the number of software updates that Kiosk has
downloaded from the DPS Server and which are pending execution. If this is
not zero, push the "DPS Monitors" button to obtain more information.
If the remote updating is ready for execution, this icon also appears on the
machine's main screen.
o WebAlbum downloaded orders: Shows the number of remote orders that Kiosk
has downloaded from the DPS Server and which are pending execution. If this
is not zero, push the "orders pending" button to obtain more information.
o Pending orders: Shows how many orders are pending to be executed. In the
case of an Order Terminal it shows the pending orders on the remote machine.
In case of a Standalone Kiosk it shows pending orders on the machine itself.
Device Manager
The operator can find out the cause of the problem using this panel.
The device manager tree is divided into applications.
Each application offers information that is updated periodically on its software or
hardware modules:
o Kiosk Kernel
Displays the state of the Kiosk hardware
o DPSPhoto
Shows the state of the digital photography services:
Applications: DPSPhoto, DPSPrintServer, DPS Lab
Printers
The four states of the hardware or software components are:
o Ready. The application or device is operating correctly.
o Warning. The system is ready but a problem is anticipated (e.g. the paper is
going to run out).
o Error. The application or device does not work due to an error.
o Start-up. The application or device is still not ready, due to start-up tasks
being carried out.
5.1.2 Customer Cards
Client cards can be created, client details changed or the balance available on
a prepayment card changed on this menu.
Registrations
New client cards can be created here.
43
Page 44

Kiosk version 3.6.3 Operator's manual
o Title, name, gender, job, language, etc.
Enter the client's personal details. These are optional fields. The language specified in
year will be the default language that Kiosk will use when the client inserts his/her card in
the machine.
o Balance
Enter the new client's initial balance.
o Photo WebAlbum information
If the client has an account at www.mitsubishialbum.com, the user name and password
can be included in these fields. This enables the albums generated from the machine to
be automatically saved in the user's private account.
If the prepayment card is not compatible with the kiosk, a of dialogue box informing the
operator of this and he/she can decide whether he/she wants it to be compatible.
All data stored on the card may be used by this DPSKiosk (including money).
The system considers cards created in a DPSKiosk belonging to another business
incompatible (establishment or chain of establishments).
NOTE
The importing of the client's data from an incompatible card is for specific purposes.
The manufacturer cannot be held responsible for inappropriate use of this feature.
Modify
Enables the client's personal details stored on a prepayment card to be modified. At the
end, it is necessary to push the “Modify” button.
Reload
Enables the client's balance to be increased. The amount selected is added to the
balance available on the client's card at that time.
NOTE
The client's data are only read or recorded on the card. They are not saved on the hard disk.
44
Page 45

Kiosk version 3.6.3 Operator's manual
5.1.3 Dispatcher Administrator
The operator can only use this screen when the machine is configured
in Standalone mode. This screen gives access to Dispatcher admin.
(See appendix Dispatcher Admin.), and from there orders pending
because of any error are accessible.
5.1.4 Payment registry
The operator can use this screen to find out the total amount of
transactions carried out in the Kiosk per day, week, month and year.
He/she can also print copies of the receipt for any order carried out in the
Kiosk. The duplicate is useful for tallying the till accounts when the client
pays directly in the kiosk, when the ticket printer is not working, or to
close the balance sheet for the current period and check the statistics
summary.
5.1.4.1 Payment Order tab
This screen shows all the details of the transactions carried out in the Kiosk.
45
Page 46

Kiosk version 3.6.3 Operator's manual
Description of the columns:
Order
Order identification number. An Order is a series of services that kiosk offers the user and
which are paid for in a single transaction. (Prints of photographs, calendars, Photo Web
Album, CD recording, etc.)
Date / Time
Date and time when the request was made.
User Type
Client (USER”) or operator (“OPERATOR”).
User Identifier
Name of client if a prepayment card is used
“END USER” if another payment modes is used.
Operator number (“OPERADOR1” to “OPERADOR5”) if validating an operator.
Payment mode: Payment mode used by the client or operator for the service.
o Operator validation (operator's password or card)
o Operator Free (orders started by an operator)
o Counter
o Free
o Cash
o Credit card
o Prepayment
o Recharge prepayment (recharge prepayment cards)
Total Amount
Money paid by the client. This is the real amount that the Kiosk has collected.
Payment status: The payment status of a request
o Done: request carried out satisfactorily.
o Cancelled: request cancelled by the client.
o Reimburse: The client has paid the total amount but Kiosk has returned the
money because it was unable to perform the service. (This status is only used
for some special applications, such as topping up cell phones, and not for
photographic development)
o Power failure: if there is a cut in the electricity supply, the Kiosk switches off
automatically and the outstanding transactions are marked with "cut in
electricity supply"
o Counter: In a Kiosk in Order Terminal mode, all transactions have to be paid for
at the counter.
The table at the bottom of the “payment request” tab enables quick viewing of the details of
each payment movement.
Description of the columns:
Line: Line number of each row of details of an order
Date / Time: Date and time of each of the actions related to the order carried out by the
client.
46
Page 47

Kiosk version 3.6.3 Operator's manual
Concept: Shows the action performed by the client or Kiosk:
o “Entry”: The user has inserted money into the Kiosk.
o Entry counter: If one of the configured modes of payment is COUNTER, and it
has been used to validate the work in an Order Terminal configuration.
o “Return”: Kiosk has returned money to the client due to a cancellation,
because of the Back button being pushed, etc.
o “Recharge prepayment": The client has charged money to his/her prepayment
card.
o “Return error ticket”: If there has been a cut in the electricity supply or the
"reimbursement" situation arises (see above).
o “Cash income”: An operator has filled the hoppers with cash.
o “Coin value change”: The coin value configured for the hoppers has been
changed.
Debit: The amount of money returned to the client. This may be the total amount entered,
for cancellations, or a change in the transaction. If the Kiosk's “no change” mode is
activated (see configuration), no amount will be returned (the “debit” column always
shows 0).
Credit: The amount of money the client has entered to pay for the service.
(e.g.: in this case, the client entered 1.5 €, and immediately cancelled the service (see
lines 1 and 2). Afterwards, the client entered 6.5€ and 1.5 € was returned as change for
payment of the real price of 5€)
Payment mode: See definitions in the table above.
As a summary, the following equation could be applied to all orders: (except for “without
change” mode)
Total amount = credit - debit
Select and push this button to print a copy of an order identification slip.
NOTE
Records of the transaction are kept until the supervisor decides to delete them.
This action is taken from the Kiosk Kernel supervisor's interface
5.1.4.2 Current balance
This tab shows a summary of all the transactions recorded during a given period of time. It is
possible to print the information with the ticket printer (as in the previous tab).
47
Page 48

Kiosk version 3.6.3 Operator's manual
Sections:
Current period: Shows the period of time included in the “current balance” tab. To start a
new period, push the “close balance” button).
Payments summary: List of payments grouped according to payment modes. This does
not include payments made with a prepayment card or cash refill, for the following
reasons:
o Prepayment mode: The client makes the payment when recharging the
prepayment card.
o Cash refill: The money inserted manually in the hoppers by the operator is not
accounted for as profit.
Cash summary: This is divided into 3 sections: Statements for the hopper levels, the list
of income in cash and the summary of the total in cash.
o Hoppers level: Amount of money currently in the hoppers and which can be
used for giving change to clients. (More information in the Coin counter
section)
o Change income list: List of the record of changes in the hopper: money
inserted (+) and money collected ( - ). This is updated when the operator
pushes the counter button (See the Coin counter section).
o Summary: 2 different ways of calculating the total amount collected during this
period can be seen here (2 columns; the left column shows the statement of
income)
48
Page 49

Kiosk version 3.6.3 Operator's manual
Initial Balance + change income + collected cash = Hoppers + Cash.
Column 1: Statement of cash takings
Initial Balance: The initial value of the hoppers when the balance sheet period begins.
Money carried over from the end of the previous period.
Change income: Total amount of money loaded in the hoppers by an operator. (See
“Cash summary” “List of Income in Cash”)
Cash collected: The cash collected during the entire period for payment of services by the
client.
Column 2: Total in cash to be collected.
Hoppers: Total amount in the Hoppers.
Cash: (Cash to be collected) Amount of money in the "Collection box" to be collected by
the operator.
NOTES:
(1) “Change income” + “initial balance” does not have to be the same as the amount in
the hoppers, as all the client's transactions can change the end result of the hoppers,
increasing or decreasing their value in each cash transaction.
(2) “Cash collected” does not have to be the same as "collection box" as in "Cash
collected," all the money from services (Collection box + coins which will go to the hoppers) is
collected and in "collection box", only the money which has gone to the "Collection box" is
counted.
(3) When closing a balance it is not necessary to count the contents of the hoppers again
or to fill them. Any operation performed with the hoppers after closing a balance will be
recorded in the next period. The initial balance of the new period is the amount of the
previous balance left in the hoppers.
To empty the “collection box,” the operator must push the “close balance" button. All
the values return to zero in order to be able to start a new period. When a balance is
closed, all the information not related to the hoppers in the “current balance” section
is deleted.
When this operation takes place, Kiosk assumes the following:
1. The collection box is empty for the next period.
2. The hoppers remain as they were. The amount in the hoppers is transferred to the next
period as the “initial balance”.
The various actions carried out automatically are:
The summary of payments table is restarted.
The summary of total payments is restarted.
49
Page 50

Kiosk version 3.6.3 Operator's manual
The list of income in cash is restarted.
Initial Balance = Hoppers.
The hopper values are unchanged.
Change income is restarted
Cash collected is restarted.
After pushing the “close balance” icon, the “balance list” tab is updated with all the balance
values (date end, balance end, money entrance (income), collected amount, and finalized =
true).
The current balance is represented with Completed = False on the new line that appears.
5.1.4.3 Balance list
This is where the record of all the previous collection is stored when the “close balance”
button is pushed.
Collected Id: Unique identification number for the registry.
Initial date: Start date of the balance sheet. The same as the final date of the previous
period.
Date end: Date when the balance sheet was closed.
Initial balance: Amount of money in the hoppers at the start of the balance. This comes
from the amount from the hoppers in the previous balance.
Balance end: Calculated when the “close balance” button is pushed.
Money entrance: Total amount loaded in the hoppers by an operator.
Collected amount: Total amount in the hoppers when the “close balance” button is
pushed.
Finalized: “True" when the balance period is closed, and “false”, when the balance period
is the one in progress.
The section at the bottom of the tab shows detailed information on the total amount collected
by each payment method in the selected balance period.
5.1.5 Coin counter
50
Page 51

Kiosk version 3.6.3 Operator's manual
The changes taking place in the hoppers of coins are checked in this
section.
This button only appears if the optional coin machine is connected to the
system and the optional hardware panel is checked.
If you have a coin mechanism and this symbol does not appear, make
sure that the counter is connected properly and receives enough
electricity; and then restart the programme.
Procedure for counting hopper contents:
1. Insert the coins in the hoppers.
2. Close the machine door.
3. Push the “count” button in the appropriate hopper (Hopper 1: upper button; Hopper 2:
lower button) NOTE: As it counts them, the machine will eject the coins.
4. Reinsert the coins in the hoppers.
NOTE
The final result of the count is equivalent to the real contents of the hoppers. (Regardless of
the amount they contained before being filled by the operator)
Coin value
This figure shows the value of the coins that the hopper contains (in the example, 0.10 €
in hopper 1 and 0.50 € in hopper 2). This must be configured by the supervisor and it is
important that it is the same as the value of the coins inserted. The value of the coins
must be configured before counting.
Coin level
This figure shows the number of coins in each hopper after pushing the "count" button.
Every time the system gives change or a client inserts a coin of this value (the coins
inserted directly by the client which have the same value as the value configured for the
hopper go directly to it), the coin level is automatically updated.
Hopper amount
This figure shows the total amount of money in each hopper after pushing the "count"
button. Every time the system gives change or a client inserts a coin of this value (the
coins inserted directly by the client which have the same value as the value configured for
the hopper go directly to it), the coin level is automatically updated.
Total hoppers
51
Page 52

Kiosk version 3.6.3 Operator's manual
This figure shows the total amount of money in both hoppers after pushing the "count"
button. Every time the system gives change or a client inserts a coin of this value (the
coins inserted directly by the client which have the same value as the value configured for
the hopper go directly to it), the coin level is automatically updated.
“Release Critical Stop” button
This button allows the coin counter to be unblocked if it has been blocked for security
reasons, due to attempts at theft or fraud in the insertion of notes.
5.1.6 DPS Monitor
This button is used to access the DPS Monitor module.
More information can be found in the DPS Monitor section of this
manual.
5.1.7 Statistics
5.1.8 Shutdown
This button provides access to the statistics screen. See APPENDIX
STATISTICS.
The system must be shut down in an organised manner to avoid
damage to the operating system and the databases. After pushing the
“Shutdown” button, a confirmation screen appears. Push YES to shut
down the Kiosk correctly.
52
Page 53

Kiosk version 3.6.3 Operator's manual
CASE 1
CASE 2
CASE 3
CASE 4
TURN OFF FROM THE
OPERATOR'S MENU
TURN OFFFROM THE
OPERATING SYSTEM
DISCONNECTION
FROM MAIN ELECTRICITY
SUPPLY
DISCONNECTION
FROM THE MAIN UPS/KIOSK
SWITCH
PROCEDURE 1
PROCEDURE 2
PROCEDURE 3
PROCEDURE 4
System (automatically)
1.- Closes the applications
2.- Saves the databases
3.- Closes the windows
4. - The UPS waits for the
configured period of time.
Operator (manually)
1. - Disconnects the
electricity supply before the
configured time has passed.
System (automatically)
1.- Damages the
applications
2.- Does not save the
databases
3.- Closes the windows
Operator (manually)
1.- Disconnects the
electricity supply
2.- The UPS beeps
3.- The UPS turns off
System (automatically)
1.- Wait 2 minutes
2.- Close the applications
3.- Saves the databases
4.- Close the windows
5. - The UPS waits for the
configured period of time.
6.- The UPS turns off
System (automatically)
1.- Turns off
This procedure may cause a fault
in the system!
Recommended
Not recommended
Recommended
Not recommended
Most systems include an UPS (Uninterruptible Power Supply). In this case, the table below
shows 4 different ways to turn off the system and the procedure followed by the system in
each case is listed.
Case 3: this situation is equivalent to a cut in the electricity supply.
The system carries out all the steps automatically.
The incident is notified to the incident database and the Kiosk owner is also notified by e-
mail (for ONLINE kiosks).
If an order is being executed (e.g. printing) an error it is printed and the remaining copies
are saved in system as pending jobs.
5.2 Kiosk supervisor
Access to the supervisor's interface is restricted to the supervisor of the establishment, and it
allows the Kiosk system to be configured and its advanced functionality to be checked.
With this interface, the supervisor can set up the general configuration of the Kiosk, review
the statistics and manage the operators' cards.
53
Page 54

Kiosk version 3.6.3 Operator's manual
The supervisor can access the next menu by
pushing the “supervisor” key of the desired
application.
He/she must then enter the Supervisor's password
NOTE
The default password is "1 2 3""
For security reasons, it is advisable to change this password when the system is installed.
Information on the password change procedure is in the “Management of operators and SAM
cards” section. Only the supervisor should know the password.
5.2.1 Settings
In this section, the general parameters of the Kiosk can be configured.
54
Page 55

Kiosk version 3.6.3 Operator's manual
5.2.1.1 General
Regional Configuration
o Language
The default language used for the operator and user interface, the screensaver, the
main screen, etc.
o Measure
The metric unit used to show dimensions on any screen: centimetres or inches.
o Currency
Allows the country's currency to be selected. This coin currency applied to both
payments in cash and those with credit cards.
o Coin position
This allows a choice of where the symbol of the currency will appear (before or after
the numbers).
Date format
For selecting the format of the date printed on receipts and the index copy
Online Options (Kiosk ONLINE control panel )
This option will only be enabled if the Kiosk has been registered beforehand. You should
check this panel if the Kiosk is connected to the internet and provides online services.
If it is not checked, the Kiosk will be unable to request jobs or remote updates from the
web server and the web services will be disabled.
55
Page 56

Kiosk version 3.6.3 Operator's manual
Taxes and discounts
If you wish, you can check the taxes panel so
that the value and description of the tax appears
on the receipt.
Add its name and percentage.
By checking the “prepayment discount” you can
offer special prices to clients using the
prepayment card.
NOTE
Taxes are not shown in the final price. The price given to the client must include taxes.
Screensaver
o Inactivity notification time.
After the time selected has passed, a
waiting time screen appears. If no
button is pressed, the screensaver is
activated after this period.
o Inactivity message duration.
If the user is using a service, a message informing him/her of the inactivity appears
on the screen. This message is displayed for this period and the screensaver appears
afterwards.
o Customised screensaver pictures interval.
The screensaver which is used while the service is being performed can be
personalised using a carousel of several images.
The time interval between each change of image can be set here.
(See “Kiosk Customisation” appendix).
Kiosk out of order
On this tab you can determine what will put the
Kiosk in the out of order mode.
o Application Status
Indicates that if no application is working
correctly, this will cause out of order (For
example DPSPhoto). This option cannot be
changed.
o Ticket Printer not available
If a ticket printer is out of paper or has stopped working the Kiosk will get out of.
o Any payment method available
If no payment mode is working correctly (as established in settings) Kiosk will be out
of order.
56
Page 57

Kiosk version 3.6.3 Operator's manual
5.2.1.2 Kiosk Information
Owner Info
o Shop name, address, telephone number
Information on the establishment where the Kiosk is installed. This information
appears at the top of the slip that the client receives.
o Website
URL address which appears on the printed slip and on the screen of the Kiosk when
a Photo Web Album service is requested.
o Fiscal identification
Fiscal identification number of the establishment. In some countries, this number
must be included on the client's slip by law.
o The shop's logo
Logo which appears on the SublimeCD, on the index print and in top left corner of the
screens. More information in the “Kiosk Customisation” appendix.
Order Numbering Options
o Next Order Id
Every order is associated to a unique identification number. It would be possible to
change the value of the following orders. Only use this option following advice of the
technical support.
Terminal Type
o Machine Alias
Name to be shown on the slip. This name is free and can be modified to easy identify
the machine (for example "Kiosk on the corridor”).
o Work Mode
This option makes it possible to configure the Kiosk as an Order Terminal or
Standalone. In case of setting as Order Terminal it is necessary to insert the IP
address of the Flexilab system.
57
Page 58

Kiosk version 3.6.3 Operator's manual
5.2.1.3 Kiosk Applications
All the applications installed in the Kiosk appear on this screen. Those that are marked are
available to clients.
Do not mark the options if you do not want the applications to activate the next time you turn
on system.
In the „Reference‟ section a code to be used when configuring the barcode can be introduced
(see ticket tab on this section).
5.2.1.4 Languages
This section allows you to choose the languages available on the main screen. The first
language configured on the list is the default language used.
58
Page 59

Kiosk version 3.6.3 Operator's manual
5.2.1.5 Payment mode
Payment mode
The payment modes available in the Kiosk and offered in the various DPS applications
are defined in this section.
59
Page 60

Kiosk version 3.6.3 Operator's manual
If there‟s more than one payment method activated, the customer can choose between
them in the payment screen. In case of having a prepayment card, it must be inserted in
the main screen before starting any service. In that case, the payment screen won‟t
appear at the end and the price will be charged from the prepayment card. Otherwise, the
customer will have to choose another way of paying (between the activated ones).
The "print ticket" panel shows that a ticket is printed for each operation performed by the
user as a receipt. If this panel is not marked, the system will not print any tickets and no
receipt will be given to the client.
o Free
The client interacts anonymously with the system and the service is provided free of
charge.
o Counter payment
The client interacts anonymously with the system and at the end of the service; the
operator's presence is required to validate the jobs.
When the client indicates the services used, the system prints a ticket showing the
price of the transaction and asks the client to pay this amount at the counter.
Operator card
The system remains blocked until the operator authorises the service by
inserting an operator's card (Not available in KioskLite).
Operator password
The system remains blocked until the operator authorises the service by
keying an operator's password.
NOTE
Activating this mode is recommended.
These payment modes are a good option when other payment modes are not available.
o Credit card
By activating this mode, clients can pay with a credit card. This option is only
available if the credit card security software has previously been installed. Ask your
local supplier for more information.
Credit card settings
This section is only activated if
the credit card security software
has been installed and the credit
card mode of payment is
chosen.
Use this section to configure the
credit card information
necessary for making payment
in this mode. The payment
platform supplier provides the
necessary details for operating
with the card.
There is also the option of defining a minimum and maximum amount for credit card
payments. This can be used depending on the agreement signed with your bank.
60
Page 61

Kiosk version 3.6.3 Operator's manual
o Prepayment
This mode should be selected if clients use prepayment cards. These cards enable
the client to pay for services beforehand, maintaining the balance on the card. The
system greets the client personally.
This type of card is personal and may be used in a specific Kiosk or in a group of
Kiosks in the same domain. These domains are defined on the administration website
server's interface.
The client must insert the card at the beginning of the transaction, on the main
screen. It will not be possible to use the prepayment card afterwards.
o Cash
This option enables clients to pay for Kiosk services in cash.
The notes or coins accepted can be configured, as well as some parameters related
with to the machine.
This option is enabled by selecting the "optional hardware" box, in the "general" tab. If
the Kiosk does not detect the hardware when the programme starts, it will be unable
to detect it later and the option will remain disabled until the application is restarted.
Cash parameters:
- Coin
If the payment in cash mode is
chosen, the currency in the
"general" tab is automatically
disabled. As a result, the Kiosk
currency is the one configured in the
coins and notes acceptors.
- Supported notes/coins
This enables the coins and notes that Kiosk accepts for cash payments
to be configured.
- Reset Button
Always push this when contradictory information appears in the
compatible coins /notes panel.
- Cash modes
´No change´ mode
Does not give the change to the user, even when he/she wants to cancel
payment. With this option, hoppers are not used, so it is not necessary to
have them connected. All compatible coins and notes that have been
configured are accepted.
Change mode
If working with this mode, the cash payment system can:
Return all the money that the client has inserted if payment is cancelled at any time
during the payment process.
Return change for the coins and notes accepted.
61
Page 62

Kiosk version 3.6.3 Operator's manual
NOTE
In change mode, it is very important to check that the value of the coin set for each hopper is
the same as the coins it really contains. If not, the Kiosk could return an incorrect amount of
change to the client.
When the coins to be contained in the hopper are changed, it is important that the value of
the coin set for each hopper is the same as the coins it really contains, as Kiosk records this
difference as a payment record later in the balance sheet.
The coins and notes accepted during the payment process may vary depending on the
amount of coins contained in the Hoppers and how the “Maximum change allowed”
setting is configured.
NOTE
Combining this mode of payment with counter payment is recommended.
5.2.1.6 Ticket tab
In this section, the information on the ticket can be personalised.
Ticket Header
In this section, the ticket heading can be personalised.
If this option is checked, the text can be edited in the next panel.
62
Page 63

Kiosk version 3.6.3 Operator's manual
Push the "update" button to obtain a preview and the “print” button” to print a sample
ticket.
Ticket Settings
In this section everything related to barcode and tickets is configured.
o Print Ticket
If selected a ticket will be printed for each done order. If not no ticket will be printed
(not recommended).
o Additional Copies
Allows to print as much copies of each printed ticket as the shown value indicates.
o Barcode Type
The standard configuration of barcode allows to chose between different types of
coding:
- No Barcode: no barcode shown on the ticket.
- Order Barcode: one single barcode with information about the total amount of the
order will be printed.
- Product Barcode: one barcode for each product with its price will be printed (see
reference tab on DPSPhoto settings). Order Barcode is also printed at the bottom.
- Product Reference: a number code (no barcode is shown) will be printed for each
product with its price (see reference tab on DPSPhoto settings). Order Barcode is
also printed at the bottom.
o Barcode Format
You can chose among different types of barcodes. A click on this button provides
access to the following settings screen.
63
Page 64

Kiosk version 3.6.3 Operator's manual
Code
The type of barcode can be configured. You can choose among CODE-128, EAN-13,
UPC-A. Each type is related to a maximum number of digits, shown under Code Max
Digits.
On the two following screens codification of the barcodes digits following its meaning will
be configured.
Order Barcode
Barcode when Ticket Type is configured as Order Barcode. Following parameters may be
configured.
o Application Reference
If selected the barcode associated to the application will be printed. (See Kiosk
Applications in this section). The number of digits indicates how many digits will be
used.
o Amount
If selected the value of the order will be printed in the barcode. The number of digits
indicates how many digits will be used.
o Custom Digits
If selected the number indicated at Custom Digits will be printed. The number of digits
indicates how many digits will be used.
Product Barcode
Barcode when Ticket Type is configured as Product Barcode. Following parameters may
be configured.
o Application Reference
If selected the barcode associated to the application will be printed. (See Kiosk
Applications in this section). The number of digits indicates how many digits will be
used.
o Amount
If selected the value of the order will be printed in the barcode. The number of digits
indicates how many digits will be used.
o Custom Digits
If selected the number indicated at Custom Digits will be printed. The number of digits
indicates how many digits will be used.
o Product Reference
If selected the barcode associated to the product and its price will be printed. (See
Reference in the price section of DPSPhoto).
With the arrows you can change position inside the barcode.
By selecting „Validate‟ you will find out if the configuration fits to the selected codification
(CODE-128, EAN-13, UPC-A). In case the configuration may not be validated it must be
made sure that the maximum number of digits corresponds to the sum of the digits
configured.
64
Page 65

Kiosk version 3.6.3 Operator's manual
5.2.1.7 Devices
Optional Hardware
o UPS
If UPS is available this option must be checked. This will allow the system to control
its state and errors in the energy supply.
o Cash Machine
If a cash machine is available this option must be checked. This will allow the system
to control its state and to configure it on the PAYMENT MODE tab.
o Chip Card Reader
If prepayment card is available this option must be checked. This will allow the
system to control its state and to configure discounts on the PAYMENT MODE tab.
o Ticket Printer
If ticket printer is available this option must be checked. This will allow the system to
control its state and to configure its options on the PAYMENT MODE tab.
UPS Configuration
o Warning Time
Time (in minutes) during which the UPS remains on after the electricity supply has
been cut off.
Ticket Printer Configuration
o Ticket Printer
Allows selecting the ticket printer model.
65
Page 66

Kiosk version 3.6.3 Operator's manual
5.2.1.8 Incidences tab
Incidences in the system can be notified to pre-defined groups by e-mail. Use this section to
select whether they should be notified and which groups should be notified.
Error group
Each error by an application or device is classified in a group which enables decisions to
be taken on who to notify of the incidence by e-mail.
E-mail
Mark this option for incidences to be notified by e-mail.
E-mail group
If you mark the e-mail option, you must indicate which group of e-mails is used to receive
notification of the incidence.
There are four notification groups:
5. Service
6. Maintenance
7. Administration
8. All
The e-mail addresses of each group are configured on the administration site of the DPS
Server.
All the notifications are regularly passed on to the DPS server if the Kiosk is ONLINE.
66
Page 67

Kiosk version 3.6.3 Operator's manual
5.2.1.9 Sources tab
This table shows the various media and devices used as inputs for images. In the source and
route columns, the unit and route of the system are shown, respectively.
The sources are predefined by default for the Kiosk system units and must not be changed.
5.2.2 Operator and Sam card management
This menu enables operator cards to be managed and Sam cards to
be created.
The operator's name can also be configured on this menu, and a
password assigned to each card.
It is also possible to create or delete operator's cards, up to a maximum
of 5 operators.
67
Page 68

Kiosk version 3.6.3 Operator's manual
Press Ctrl+Shift+S
and the new Sam
Sam cards are used to activate an optional and independent hardware, for the creation and
recharging of prepayment cards. They will be valid for the Kiosk where the Sam card was
created.
To activate or create the Sam cards function, push “Ctrl+Shift+S” and the “new Sam card”
button will appear in the window
Operator 1…5
Select the card you want to create or modify.
Operator Name
Enter the operator's name and push the green
button. This name is used to identify the
operator.
68
Page 69

Kiosk version 3.6.3 Operator's manual
Password
Enter the password of the selected operator. This will be
necessary later, when the validation of the operator's
password is selected as a payment mode and to enable
access to the operator's menu.
A key will appear next to the operator's card icon to show that
this operator has been assigned a password.
NOTE
Assignment of at least one password to one operator's card is recommended.
It can be used as an alternative for access to the General Settings Menu if the card is lost
Create card
Push this button to create an operator's card and insert an operator's card to continue.
NOTE
With this operation, any data stored on the card will be overwritten.
Delete operator
Push this button to delete the information about this operator.
It is not necessary to insert any card.
After this operation, the operator's card and its password will be disabled.
Supervisor password
This option enables the supervisor's password to be changed.
NOTE
Carrying out this process the first time the supervisor accesses this menu after installation of
the Kiosk is recommended.
5.2.3 Logs
In this section, the supervisor can check on the statistics of the
Incidences and the system, requesting information from local
databases.
All the records are sent to the DPS server and may be distance
consulted by the DPS server administrator if the Kiosk is ONLINE.
5.2.3.1 Log options
The two statistics tables share these buttons, which are used to configure the mode in which
the data panel shows the records.
The supervisor can define the data filtering criteria by clicking on the Filter button.
Date
69
Page 70

Kiosk version 3.6.3 Operator's manual
Operator (only user)
Every time a new filter is applied it is to the original table of statistics (complete).
The “Reset filter” button removes the selected filter. All the information is then
shown.
This button deletes data. A dialogue window appears,
in which the date and time must be entered, in order
to delete "transactions data older than ..." that date.
This button allows all the data in a text file to be exported. This file can
subsequently be imported to any database system and can be opened using a
simple text editor or Microsoft Excel
TM,
The format of these files is CSV (fields separated with a comma and recorded separately with
the Return key)
5.2.3.2 Incidences record tab
This table shows all the Incidences in the Kiosk related to hardware.
The DPS server is regularly notified of the Incidences.
The Incidences are ordered by date and time or using a defined field in the filter configuration
panel. The fields are:
Date / time
Device: Identifies the device
Error code: Identifies the type of incident.
Error message: Description of the problem
70
Page 71

Kiosk version 3.6.3 Operator's manual
Reported: This column shows whether the DPS server has been notified of the incident.
The various values are:
o Reported. The data have been sent.
o Pending. The service has been completed but the data is yet to be sent.
o n/c. The order has not been sent. (for kiosks that are not online)
5.2.3.3 Users tab
This table records some actions carried out by the operators or supervisor in the system
(Turn off, Operators' tasks, create prepayment cards, etc.).
The system records are regularly sent to the DPS server.
This panel shows the actions separately, classified by the field defined in the filter
configuration panel. The fields are:
Date and time
User type
User identifier: Number of the operator performing the action.
Action: Description of the action
Additional information: Additional information which may be relevant.
71
Page 72

Kiosk version 3.6.3 Operator's manual
The DPSPhoto application provides the client with photographic services and a means to
manage the way they are offered. The operator and supervisor interfaces can be entered
from the global configuration screen.
Choose the “New task" option to carry out any transaction the way the
client does, but omitting payment. This operation is carried out at no
charge and is recorded as an operator's transaction.
5.3 Photo supervisor
Access to the supervisor's interface is restricted to the supervisor of the shop, and enables
advanced configuration tasks to be carried out on the kiosk application in order to personalise
photographic services.
With this interface, the supervisor can administer the general configuration of DPS PHOTO
(formats, index print, decoration, etc.) and the prices of these services.
The supervisor can access the next menu
by pushing the “supervisor” key of the
DPSPhoto application
Enter supervisor's password
NOTE
The default password is "1 2 3""
For security reasons, we recommend changing this password when the system is installed.
See the “Management of operators and Sam cards” section on how to change the password.
Only the supervisor should know the password.
72
Page 73

Kiosk version 3.6.3 Operator's manual
5.3.1 Settings
In this section, the supervisor can configure the general parameters of
the DPSPhoto application.
5.3.1.1 "General” tab
Formats
73
Page 74

Kiosk version 3.6.3 Operator's manual
Media
format
(cm)
Media
format
(inches)
Base size
available
(cm)
Base size
available
(inches)
Low resolution
compositions
(cm)
Low resolution
compositions
(inch)
9 x 13
3.5 x 5
9 x 13
3.5 x 5
No
No
10 x 15
4 x 6
10 x 15
4 x 6
7.5 x 10 (2)
9 x 12 (1)
7.5 x 10 (1)
3 x 4 (2)
3.5 x 4.7 (1)
3 x 4 (1)
13 x 18
5 x 7
13 x 18
5 x 7
10 x 15, 7.5 x
10(2)
4 x 6, 3 x 4 (2)
15 x 23
6 x 9
15 x 23
15 x 21
15 x 20
13 x 18W
10 x 15 (2)
11.5x 15 (2)
6 x 9
6 x 8.5
6 x 8
5 x 7W
4 x 6 (2)
4.5 x 6 (2)
If 10 x 15 is
chosen (2); 7.5 x
10 (2); 9 x 12 (1);
7.5 x 10 (1)
If 4 x 6 is chosen
(2); 3 x 4 (2); 3.5 x
4.7 (1); 3 x 4 (1)
o Composition
If this option is checked, the client's low resolution
images can be printed with the paper size selected
in the “paper size” section.
The image is printed in the size established in the
"layout" section. Depending on the size of paper
selected, the image on the paper is located
according to the parameters set for “compositions”.
Not all paper sizes allow low resolution formats.
Base size
This is the first option offered to the client on the
list of available print sizes and is also used by
default as the paper size for the index print.
Additional sizes
Six additional formats are also possible for the
client to choose different enlargements or
alternative formats.
The following table shows the sizes allowed depending
on the media (paper) loaded in the printer.
74
Page 75

Kiosk version 3.6.3 Operator's manual
The number appearing in brackets, (1) or (2) shows the amount of images printed. For
example, 10 x 15 (2) means that two 10 x 15 cm photographs are printed on a 15 x 23 cm
sheet of paper.
If the medium loaded in the printer does not allow some formats to be printed, these formats
will appear in grey (disabled) in the client's interface.
NOTE
The same print size cannot be chosen for two printing formats (e.g. 10 x 15 and 10 x 15 (2)).
The 10 x 15 W format is only related to the Mitsubishi CP8000DW printer and should not be
chosen.
Banner time interval while jobs are being carried out
The number which appears in this text panel shows the time (in seconds) passing
between each customisable dynamic banner which appears while the DPSPhoto services
are being carried out. See the “Kiosk Customisation” appendix for more information.
Collage formats. Define the formats for made the compositions. This format is available or
disable in the service screen according if the format exist or not..
5.3.1.2 Customisation Tab
This section is used to customize the range of photographic services.
Services
The following services can be enabled or disabled:
o CD/DVD burning Enables the CD/ DVD recording service
o Photo WebAlbum Enables the Photo Web Album service. This
option is only available if the Kiosk is ONLINE.
75
Page 76

Kiosk version 3.6.3 Operator's manual
NEW
o 1H Prints Enables the 1H printing service
o 24H Prints Enables the 24H printing service
o Decoration Enables the decoration service with calendars and frames.
NOTE
The 1H and 24H services are disabled if the DPS Lab application has not been configured.
o Browser tab
This enables configuration of the parameters for the image viewer.
Selection mode
This enables the selection mode for the image viewer to be established.
(Information on the modes available in the “Viewer” section)
Edition
This enables or disables the image editing service and the
various options in this section.
Image enhancement
Enabling the “Auto Adjustment” option the Print Server is
instructed to realize a general image adjustment on all
printings. If this option is disabled no corrections will be made.
Sepia
Configures the ink levels for sepia edition.
NOTE
The modifications are only applied to printed images and do not affect the original
photographs saved on the client's medium.
Filtering the source device
We can enable or disable the source device filtering
option to improve file loading (It is selected by
default, and this is the recommended option)
We can print 1 copy of all the source images without
even viewing them, and even filter by folders, thus
gaining in speed and performance.
Copies control. We can control available copies when we select the images in the Browser
screen. For this, we use the following configuration:
1.- Check after finish selection. This specification is used when the next button is
selected. Appears a message if haven‟t available copies in the printer for finish the order. This
is the default option.
76
Page 77

Kiosk version 3.6.3 Operator's manual
2.- Check after selecting images. This check is realized every time that the user select
one image in the browser screen. Appears error message if no exist available copies in the
printer.
3.- Disable available copies control. This option disable el copies control in the
browser screen, this means that the user can print more copies that the available in the
printer. When this occurs, the system will print ticket error with the number of remaining
copies. The operator will have that replace paper & sheet ink the printer and validate the
order in DispatcherAdmin.
.
5.3.1.3 “Index Print” tab
This menu enables the print mode of the index prints to be configured.
o Enable Index Print
If this option is activated, the system asks the client to print the index print before the
service (prints, CD burning) is completed.
o Pictures per sheet
Input the number of photographs for printing on each sheet. The DPSPhoto software
automatically changes the presentation according to the number of images set.
The paper size of the index copy is the size configured as “base size” on the
“general” tab.
o Logo
Establishes the position of the establishment's customised logo which has been
selected in the “Kiosk Information” tab in the Kiosk Kernel configuration window.
Right: Shows the number of pixels on the right edge of the page.
Top: Shows the number of pixels on the upper edge of the page.
77
Page 78

Kiosk version 3.6.3 Operator's manual
o DPSKiosk Logo
Sets the position of the DPSKiosk logo.
Left: Shows the number of pixels on the left edge of the page.
Top: Shows the number of pixels on the upper edge of the page.
"Refresh" button
Allows the presentation of the index print to be previewed.
“Print” button
Allows a sample of the index copy to be printed.
5.3.1.4 Decoration tab
The calendar and frame templates are installed in the system beforehand.
From this section, the calendar and frame templates used in the “decoration” service can be
deleted and previewed. Push the “-“ button to delete a frame or calendar and the "uninstall
year” button to delete all calendars for the selected year.
78
Page 79

Kiosk version 3.6.3 Operator's manual
Price of the
order
Coin Hopper 1
Coin Hopper 2
Money inserted
Return
Real price
(paid by the
client)
2.58€
0.10€
0.50€
3.00€
0.40€
(in 4 coins of 0.10
€, from the
hopper1)
2.60€
5.3.2 Prices
From this section, the supervisor can set the prices for each
photographic service offered.
NOTE
It sets the prices taking into account that the system does not return coins of a lower value
than those contained in the hoppers to the client.
Example:
5.3.2.1 General tab
The supervisor can establish different prices for a group of copies, according to the number of
prints requested by the client. This group of copies in a given price range is called a "range”.
In this section, the number of price ranges and the amount of images for it to cover can be
defined.
The ranges established are applied automatically to the other tabs related to setting prices.
5.3.2.2 Copies tab
This tab allows the prices for each paper size to be set in the “general” tab of the
“configuration” window of DPSPhoto. (See section 5.4.1.1. of the manual)
79
Page 80

Kiosk version 3.6.3 Operator's manual
NOTE
The system will not admit orders for amounts above 999,999,999, and amounts will be
rounded off to 3 decimal points if necessary.
5.3.2.3 Decoration tab
This tab allows the prices for each size of calendar and frame to be set.
80
Page 81

Kiosk version 3.6.3 Operator's manual
5.3.2.4 References Tab
This tab allows the introduction of codes to be used for barcode printing. Each barcode will be
related to the product and its associated value. See „ticket‟ on the DPSKiosk settings section..
5.3.2.5 Other services tab
This tab allows prices to be set for services to which no price ranges are applied.
81
Page 82

Kiosk version 3.6.3 Operator's manual
5.3.2.6 1 h and 24 h prints
This tab allows prices to be set for jobs sent to 1-hour and 24-hour printing services.
Surcharge
If a surcharge is to be applied to the service, such as postage costs, the description and
the sum added to the final price can be entered. It is advisable to include a warning of this
surcharge for the client (see the 1H or 24H print services instructions section) (More
information in the “Kiosk Customisation” appendix). This surcharge is included directly in
the total price of the order.
82
Page 83

APPENDIX
DPS Monitor
Page 84

Page 85

APPENDIX DPS Monitor
CONTENTS
1
2
3
4
GENERAL INFORMATION.......................................................................... 4
UPDATING SOFTWARE ............................................................................. 7
BACK-UP AND RECOVERY ....................................................................... 9
EXPORT/ IMPORT OF PRICES................................................................. 10
APPENDIX DPS Monitor 3
Page 86

APPENDIX DPS Monitor
1 General information
This module controls and manages the activation process, checks the general status of the
other programs and manages communications with the DPS server if the software is ONLINE.
Its specific functions are:
• Management of the system activation.
• Loading all the DPS applications in the correct order when the system is turned on
• Checking on the general state of DPS applications
• Opening and closing all the DPS applications
• Management of communications with the DPS server. This includes:
o Notification of incidences related to hardware malfunctioning
o Notification of the activities of all completed operations
o Notification of the state of devices and DPS applications
o Receiving software updates
o Receiving remote jobs for the DPSPhoto application
• Update policy management
• Backup copies and recovery management
• Restarting of the machine at a specific time.
APPENDIX DPS Monitor 4
Page 87

APPENDIX DPS Monitor
The operator can access the DPS Monitor from the Kiosk Kernel operator's
menu
The main DPS Monitor window is shown below.
• Display the global software version installed in this machine.
• Show the machine System ID. The SystemID is used for the registration and activation of
applications in DPS Systems. The SystemID is unique for each machine.
• The applications installed and their current version are identified in the application and
version columns.
• The running column shows if the application is running.
• The status and error code columns show the status of the devices (which may be ready,
warning, critical warning, error, initializing) and a code which identifies the type of error in
the device and what is necessary for the technical service to be able to solve the problem.
• Error Msg provides a brief explanation of the type of error.
APPENDIX DPS Monitor 5
Page 88

APPENDIX DPS Monitor
From the main menu, it is possible to:
o Run or close the applications manually.
o Restart or shutdown the system.
o Registration and activation the software. For more information, see Appendix
DPSActivation Wizard.
o Selection application to execute in the system.
o Enable/Disable the hardware detection to be connected the machine.
o Enable/Disable the USB device writing protection.
This option allow the writing to the internal or external USB device.
For enable this option must be select the Menu Configuration, USB Protection
section and select Enable.
For disable this option must be select the Menu Configuration, USB Protection
section and select Disable.
The option by default is Enable, this means that always the power on the machine the
USB write protection will be enabled.
IMPORTANT
When a USB is inserted in the machine, the parameter of the USB protection assigned for
this device will be selected in that configured in the DPSMonitor en in the insertion moment.
If the USB protection parameter is changed, must will be extract and insert again the device
for apply the new parameter.
Reference:
Mitsubishi Electric DPS Software is based in technology Copyright © 1995-2006, Oracle. (All
rights reserved) for the internal management information.
APPENDIX DPS Monitor 6
Page 89

APPENDIX DPS Monitor
2 Updating software
Push the UPDATES button on the actions panel on the DPS Monitor main screen to access
the Updates List
The DPS Monitor allows CD or remote updates to be executed. Before installing the update,
the DPS Monitor closes all the applications. After installing the update, the DPS Monitor
allows the system to be restarted or all the applications to be reactivated (without restarting
the machine).
APPENDIX DPS Monitor 7
Page 90

APPENDIX DPS Monitor
NOTE
Restarting the system is recommended after installing an update.
• Updates from a CD
This is used to install frames, calendars, software updates, etc. from a CD.
To carry out an update from a CD, the operator/ supervisor must:
1. Insert the update CD.
2. Close all the applications from the main menu of the DPS Monitor (optional)
3. Push the “Updates” button in the main Monitor window.
4. Push the Run update button.
• Remote updates
These are for remote downloading, installing or deleting of updates.
Downloading: There is a store for publishing and storage of software updates on the
DPS server. There are three types:
o Version
This is a new version of software for a DPS application, which has new specifications
and functions. Published by Mitsubishi Electric.
o Patch
This is a modification to the current version allowing improvements to be applied or
problems to be solved. Published by Mitsubishi Electric.
o Pack
This is an optional update that is not related to any DPS Application, which adds
functions to the system. For example: Calendars, frames, screensaver, firebreak
configuration, etc. Published by Mitsubishi Electric or the Installer or the chain
administrator
When a software update is published and sent to a Kiosk, the DPS Monitor starts to
download the data automatically. The information related to the update is shown in the list
of updates:
o ID: Internal identifier.
o Type: Version / Patch / Package
o Application: The DPS application which will be modified.
o Description: Information on the software update.
o Status: This may be notified / downloading / downloaded
o Run update: A panel for selecting the update executing it by pushing the Execute
update button
Install: when “downloaded” appears in the status column, the updating is ready to be
installed. The operator/supervisor is informed by an icon which appears on the main
screen of the client's interface and on the Kiosk Kernel operator's menu.
To execute a remote update, the operator/ supervisor must:
5. Close all the applications from the main menu of the DPS Monitor (optional).
6. Push the “Updates” button.
7. Choose the update to be installed.
8. Push the Run update button.
If the “update patch automatically” box is checked and the type of update downloaded is
“patch”, it will be executed automatically the next time the Kiosk is turned on.
Delete: This enables an update to be deleted. If the update is "notified" or is being
"downloaded” and the “remove update” button is pressed, the server resends the update
automatically. If the update is downloaded or installed, and the “remove update” button is
pressed, the updates file R:\Updates\id is deleted
APPENDIX DPS Monitor 8
Page 91

APPENDIX DPS Monitor
3 Back-up and recovery
DPS monitor automatically creates backup copies of critical files of all DPS applications.
These are saved in the folder R:\Backups. These files are the databases related to the
system configuration (Prices, general configuration, etc.) There are two types of backup
copies:
• Partial back-up
All the information on databases and images in remote requests are saved providing that
the system is shut down (see section ‘Shut down’).
A maximum of 10 partial backup copies are made at the same time. The previous copies
are deleted from the system and only the last back-up copy is saved if two copies are
executed on the same day.
• Total back-up
All the information on the database and all the DPS Application files (except for the
Calendars and Frames) are saved whenever a remote update is executed. A maximum of
3 total backup copies can be executed at the same time and only the last back-up copy is
saved if two copies are executed on the same day.
The operator/ supervisor can execute a back-up copy manually from the main screen of the
DPS Monitor:
9. Push the “Manual backups" button
10. Select the DPS application for which you want to make a back-up copy
11. Choose the type of back-up copy
The operator can restore the information saved manually from the DPS Monitor main screen:
12. Push the “Restores” button
13. Choose the DPS Application to be recovered
14. Choose the back-up copy for which you wish to recover data
APPENDIX DPS Monitor 9
Page 92

APPENDIX DPS Monitor
4 Export/ Import of prices
This tool enables the prices configured in a Kiosk to be exported and passed on to other
Kiosks.
The prices for Kiosk are configured from the prices screen on the DPSPhoto supervisor
menu.
APPENDIX DPS Monitor 10
Page 93

APPENDIX DPS Monitor
DPS Monitor shows a new button called Export/Import which can be used to export the prices
configured in the Kiosk which is being worked with or to manually import prices from another
Kiosk.
The exportation of prices and price ranges takes place by generating two files:
1. An executable file with the extension .bat
2. A compressed file with the extension .tgz, which contains information on prices. In
this one, the information is encrypted so that the prices cannot be changed by third
parties.
Passing on prices over the Internet
It is possible to pass on prices over the Internet, as if it was a remote package.
The two files created by the exportation must be uploaded to the website, and assigned to the
Kiosks where the prices are to be imported.
The prices are updated automatically, meaning that no actions other than assigning the
package to the right Kiosk is necessary.
APPENDIX DPS Monitor 11
Page 94

APPENDIX DPS Monitor
5 Selecting applications to be run
NOTE
Only personnel authorised by the manufacturer can make changes on this screen
It is possible to select the applications that will be run when the machine boots up. System
performance will increase proportionally to the number of applications disabled. Each
application is associated with a series of services and therefore disabling a given service will
stop these services from running. The following table shows the relationship between
applications and services:
Option in Click and
Kiosk
Activate Monitor
Manager
DVD / CD Burning DPSBurn Burning DVD / CD
Labs Laboratory
DPS Listener DPSLab_Listener
External orders (web) DPSConnection
WebAlbum WebAlbum Webalbum upload
Option on Monitor
(interna name)
Monitor_Alive
DPSLab Laboratory Services
Services affected if disabled
Remote updates, web statistics and
device warnings, VPN initialisation,
Backups, remote printing
Incoming orders from a standalone
machine(Labs)
Remote updates, web statistics and
device warnings, Webalbum
download , Registrer Kiosk on the
web, remote printing
To access this screen, click the option Running applications in the Configuration menu.
APPENDIX DPS Monitor 12
Page 95

APPENDIX DPS Monitor
Regardless of what is selected on this screen, the system has a series of restrictions that will
modify this selection subsequently. These restrictions depend on the product and whether it is
Online or Offline, as the following table shows:
Product Offline Online
Kiosk Standalone
Kiosk OT
Kiosk Lite
Click
WebAlbum or
DPSConnection are not
run
WebAlbum or
DPSConnection are not
run
WebAlbum or
DPSConnection are not
run
WebAlbum,
DPSConnection or
Monitor are not run
WebAlbum,
DPSConnection and
Monitor are run
WebAlbum,
DPSConnection and
Monitor are run
A Kiosk Lite will not be
Online
DPSConnection and
Monitor are run
Click Lite
WebAlbum,
DPSConnection or
Monitor are not run
A Click Lite will not be
Online
APPENDIX DPS Monitor 13
Page 96

APPENDIX
Activation Wizard
Page 97

Page 98

APPENDIX Activation Wizard
CONTENTS
1 WELCOME SCREEN.................................................................................................. 4
2 SHOP INFORMATION / CLICK INFORMATION ........................................................ 6
3 SYSTEM INFORMATION ........................................................................................... 9
4 REGISTRATION ....................................................................................................... 14
5 CREATION OF OPERATORS .................................................................................. 17
6 ACTIVATION FINISHED........................................................................................... 19
7 EXECUTION OF THE WIZARD WITHOUT THE NETWORK CABLE
CONNECTED TO THE KIOSK/CLICK. ........................................................................... 20
APPENDIX Activation Wizard 3
Page 99

APPENDIX Activation Wizard
Aim
The following tool enables the basic settings of a Kiosk or Click to be configured quickly in order
to be able to start work.
The various screens which appear in a Kiosk or Click are then described, which may be
different depending on the type of machine.
1 Welcome screen
This is the welcome screen, which shows the type of machine (Kiosk or Click) and allows the
wizard language to be changed.
The part on the left is the same on all the screens, and shows which step the user has reached
at any time.
If the Kiosk or Click is not activated, the exit button does not appear on this first screen, as the
machine cannot be used until it has been activated correctly. To do this, registration and
operator creation options appear.
APPENDIX Activation Wizard 4
Page 100

APPENDIX Activation Wizard
When the Kiosk or Click is activated, the exit button appears and the record and operator
creation steps are disabled.
APPENDIX Activation Wizard 5
 Loading...