


1
Note: This document is for reference only. For detailed settings and safety information refer to the respective product manual.
GT1020/GT1030 to FX Connection
START
STARTSTART
START
----
UP GUIDE
UP GUIDEUP GUIDE
UP GUIDE
2
Note: This document is for reference only. For detailed settings and safety information refer to the respective product manual.
GOT1000 Startup Guide
Ver. A
GT1020/GT1030-to-FX Connection
Overview:
This document provides a simple guide and reference for setting up the
GT1020 or GT1030 Graphic Operation Terminal (GOT) hardware and
firmware for use with an FX Series PLC.
Hardware Introduction:
The GT1020 and GT1030 are monochrome, 3-color backlight, two
communication channel GOT1000 Series touch panel interfaces, and consist
of the following models:
Model Size Extension Backlight Colors Comm. IF Power
LBD RS-422
LBD2
Green/Orange/Red
RS-232C
LBDW RS-422
LBDW2
White/Pink/Red
RS-232C
24V DC
LBL Green/Orange/Red
GT1020
3.7”
160 x
64 dot
LBLW White/Pink/Red
RS-422 5V DC
LBD RS-422
LBD2
Green/Orange/Red
RS-232C
LBDW RS-422
GT1030
4.5”
288 x
96 dot
LBDW2
White/Pink/Red
RS-232C
24V DC
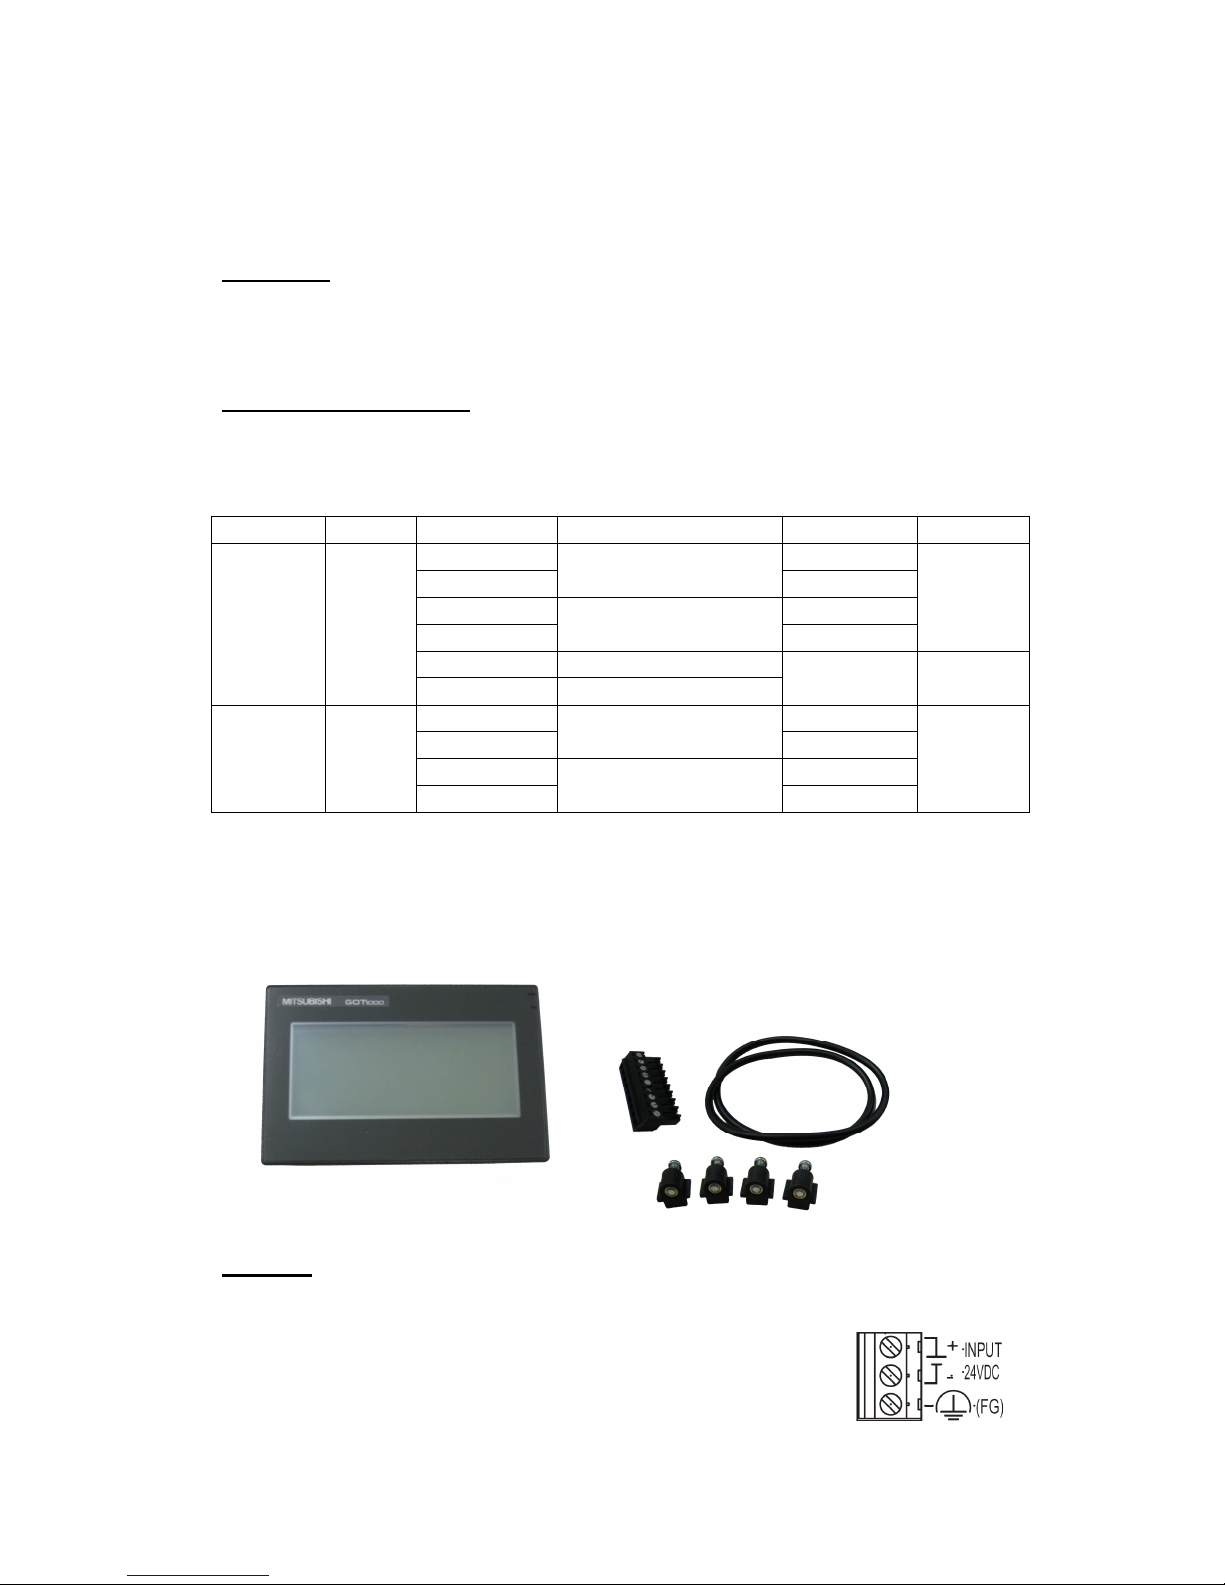
For new GT1020 and GT1030 units, included in the box should be the
GT1020/GT1030 (A), 1 PLC Communication Connector (B), 1 rubber Panel
Mounting Packing (C), and 4 Panel Mounting Brackets (D).
Cabling:
Power
All GT1020/GT1030 GOTs except for the GT1020-LBL
and GT1020-LBLW (5V DC versions) require an external 24V
DC power supply to be connected to the Power Terminal on
the back of the GOT. The 5V DC versions are powered
A
B
C
D

3
Note: This document is for reference only. For detailed settings and safety information refer to the respective product manual.
through the communication cables, described below.
5V DC version GT1020 GOTs
The GT1020-LBL and GT1020-LBLW are the only two 5V DC GOTs in
the GOT1000 lineup. They are powered directly from the communication
cable, and can only be connected with an FX Series PLC. Other PLCs and
connectable products will not provide the necessary 5V DC power. The
power terminals have been removed from the 5V DC versions.
Communication
For the GT1020/GT1030 to communicate with an FX Series PLC, a
dedicated communication cable is required to connect the provided PLC
Communication Connector with the Programming Port (RS-422 8-pin MiniDIN) or other communication channel of the FX (RS-422 8-pin Mini-DIN or
RS-232C 9-pin D-sub). The cable names and length and specific wiring for
each case are illustrated below:
Connection to an RS-422 FX communication channel
Cable Name Length Applicable GOTs FX Comm. Equipment
GT10-C10R4-8P* 1m
GT10-C30R4-8P* 3m
GT10-C100R4-8P 10m
GT10-C200R4-8P 20m
GT10-C300R4-8P 30m
GT1020-LBD
GT1020-LBDW
GT1030-LBD
GT1030-LBDW
Programming Port
FX3U-422-BD
FX2N-422-BD
FX1N-422-BD
* - Only the GT10-C10R4-8P and GT10-C30R4-8P apply to the GT1020-LBL and GT1020LBLW GOTs (5V DC versions).
Connection to an RS-232C FX communication channel
Cables Applicable GOTs FX Comm. Equipment
All RS-232C
GT1020/GT1030-to-FX
connection cables must be
made by the user as
described below.
GT1020-LBD2
GT1020-LBDW2
GT1030-LBD2
GT1030-LBDW2
FX3U-232-BD
FX3U-232ADP(-MB)*
FX2N-232-BD
FX2NC-232ADP*
FX1N-422-BD

4
Note: This document is for reference only. For detailed settings and safety information refer to the respective product manual.
* - Special Adapters require an additional FX**-CNV-BD or, for the FX3U only, a
Communication Expansion Board.
For all screw terminals on the GT1020/GT1030,
use a small flathead screwdriver to secure the wires
within the PLC Communication Connector
(recommended blade size and tightening torque:
0.4 x 2.5 mm and 0.22 to 0.25 N•m).
Programming Cables:
The GT1020 and GT1030 come pre-installed with an
OS and FX communication driver, but without any project
data. To download a project from a PC running GT Designer2
to the GOT, a programming cable is required that connects to
the RS-232C 6-pin Mini-DIN port on the back of the GOT. It
is recommended to use a shielded USB A-type to Mini-B type
cable with a ferrite core paired with the GT10-RS2TUSB-5S,
but any RS-232C programming cable for the Q-Series will
also work fine. A diagram of both is shown below.
QC30R2 (RS-232C)
OR
USB + GT10-RS2TUSB-5S
PC
GOT

5
Note: This document is for reference only. For detailed settings and safety information refer to the respective product manual.
Note that using the GT10-RS2TUSB-5S will require a virtual USB COM port
driver to be installed on the PC. The COM port number can be automatically
or manually assigned so that it does not overlap with the existing COM port
numbers assigned on that PC. When using a Q-Series programming cable,
the COM port number already assigned to the RS-232C interface of the PC
will have to be checked.
Example Connection Diagram:
The following is an example of an FX-to-GOT-to-PC connection, where
the blue lines indicate data communication and the red line indicates power
from the FX3U 24V DC service power supply.
Firmware Updates:
To make sure the GT1020/GT1030
GOT is able to use the latest functions and
features, it is the responsibility of the user to
check and update the firmware (Standard
monitor OS) of the GOT.
Launch the latest copy of GT Designer2 and
start a new project for the corresponding GOT model (GT1020 or GT1030)
with the “MELSEC-FX” Controller Type. Select “Yes” to set the
Communication Setting and make sure the Standard I/F-1 CH No. is set to 1
before selecting “OK”. The “Screen Property” window that pops up for making
a new screen can be either canceled or
accepted for the following steps.
Go to the “Communication” menu and
select “To/From GOT” to bring up the
“Communicate with GOT” window. Go to
the “Communication configuration” tab
and select “RS232” and the corresponding
“Port No.” that connects the PC to the
GOT. With the GOT power ON, use the
“Test” button to verify that the PC and
GOT can communicate properly then turn
the GOT power OFF.
GT10-RS2TUSB-5S + USB
FX3U-16MR-ES/UL
FX3U
-
422-BD
GT1020
-
LBD
(Back)
PC
GT10-C100R4-8P

6
Note: This document is for reference only. For detailed settings and safety information refer to the respective product manual.
To access the OS installation mode of the GT1020/GT1030,
switch the GOT power from OFF to ON, while holding the
bottom right corner of the touch screen (in Horizontal
layout), illustrated to the right.
While the “Please install
the OS” screen is displayed, go to the “OS
Install -> GOT” tab in the “Communicate
with GOT” window of GT Designer2 and
select “Standard monitor OS” from the
data selection tree. Use the “Install”
button to initiate the data transfer and
update the firmware. Once the firmware
update has been completed the GOT will
automatically reboot and all features will
be up to date. Note that new project data
will need to be downloaded to the GOT.
Confirm Communication
Before downloading project data to the GOT, the Comm. Monitor
function can be used to verify that the GOT is communicating properly with
the PLC. If no error is shown, communication has been set up correctly.
Manual References:
Refer to the following manuals for more detailed explanations. For any
further questions, please contact your local Mitsubishi Product Provider.
GT10 User’s Manual (JY997D24701)
GT10 General Description (JY997D22901)
RS-232 / USB Conversion Adapter User’s Manual (JY997D23401)
GOT1000 Series Connection Manual 1/3 (SH(NA)-080532ENG)
- Sections 3.1.5, 3.1.6, 3.1.7, 3.2.1, 3.2.2
Power ON
 Loading...