

Page 1

_= MITSUBISHI
Television
Owner' S
M_i
®
oo .]
Page 2

CAUTION
CAUTION: TO REDUCE THE RISK OF ELECTRIC SHOCK,
DO NOT REMOVE COVER (OR BACK).
NO USER-SERVICEABLE PARTS INSIDE.
REFER SERVICING TO QUALIFIED SERVICE PERSONNEL.
The lightning flash with arrowhead symbol, within
an equilateral triangle, is intended to alert the user
to the presence of uninsulated "dangerous voltage"
within the product's enclosure that may be of
/
sufficient magnitude to constitute a risk of electric
shock.
The exclamation point within an equilateral tri-
angle is intended to alert the user to the presence of
important operating and maintenance (semdcing)
instructions in the literature accompanying: the
/
appliance.
WARNING:
T0 REDUCE THE RISK OF FIRE OR ELECTRIC SHOCK, D0 NOT EXPOSE THIS
APPLIANCE TO WET LOCATIONS.
CAUTION:
TO PREVENT ELECTRIC SHOCK HAZARD, DO NOT USE THIS UNIT'S (POLARIZED) PLUG
WITH AN EXTENSION CORD, RECEPTACLE OR OTHER OUTLET UNLESS THE BLADES
CAN BE FULLY INSERTED TO PREVENT BLADE EXPOSURE.
NOTE TO CATV SYSTEM INSTALLER:
THIS REMINDER IS PROVIDED TO CALL THE CATV SYSTEM INSTALLER'S ATTENTION
TO ARTICLE 820°40 OF THE NEC THAT PROVIDES GUIDELINES FOR PROPER GROUND-
ING AND, IN PARTICULAR, SPECIFIES THAT THE CABLE GROUND SI-]ALL BE CON-
NECTED TO THE GROUNDING SYSTEM OF THE BUILDING, AS CLOSK TO THE POINT OF
CABLE ENTRY AS PRACTICAL.
Page 3
IMPORTANT SAFEGUARDS
PLEASE READ ALL THESE INSTRUCTIONS REGARDING YOUR TV RECErVER AND RETAIN
FOR FUTURE REFERENCE. FOLLOW ALL WARNINGS AND INSTRUCTIONS MARKED ON
THE TV RECEIVER.
o
Read Instructions
All the safety and operating instructions should
be read before the appliance is operated.
.
Retain Instructions
The safety and operating instructions should be
retained for future reference.
.
Heed Warnings
All warnings on the appliance and in the
operating instructions should be adhered to.
.
Follow instructions
All operating and use instructions should be
followed.
.
Cleaning
Unplug this TV receiver from the wall outlet
before cleaning. Use a damp cloth for cleaning.
.
Attachments
Do not use attachments not recommended by
the TV receiver manufacturer as they may
cause hazards.
°
Water and Moisture
Do not use this TV receiver near water -- for
example, near a bath tub, wash bowl, kitchen
sink, or laundry tub, in a wet basement, or near
a swimming pool, and the like.
.
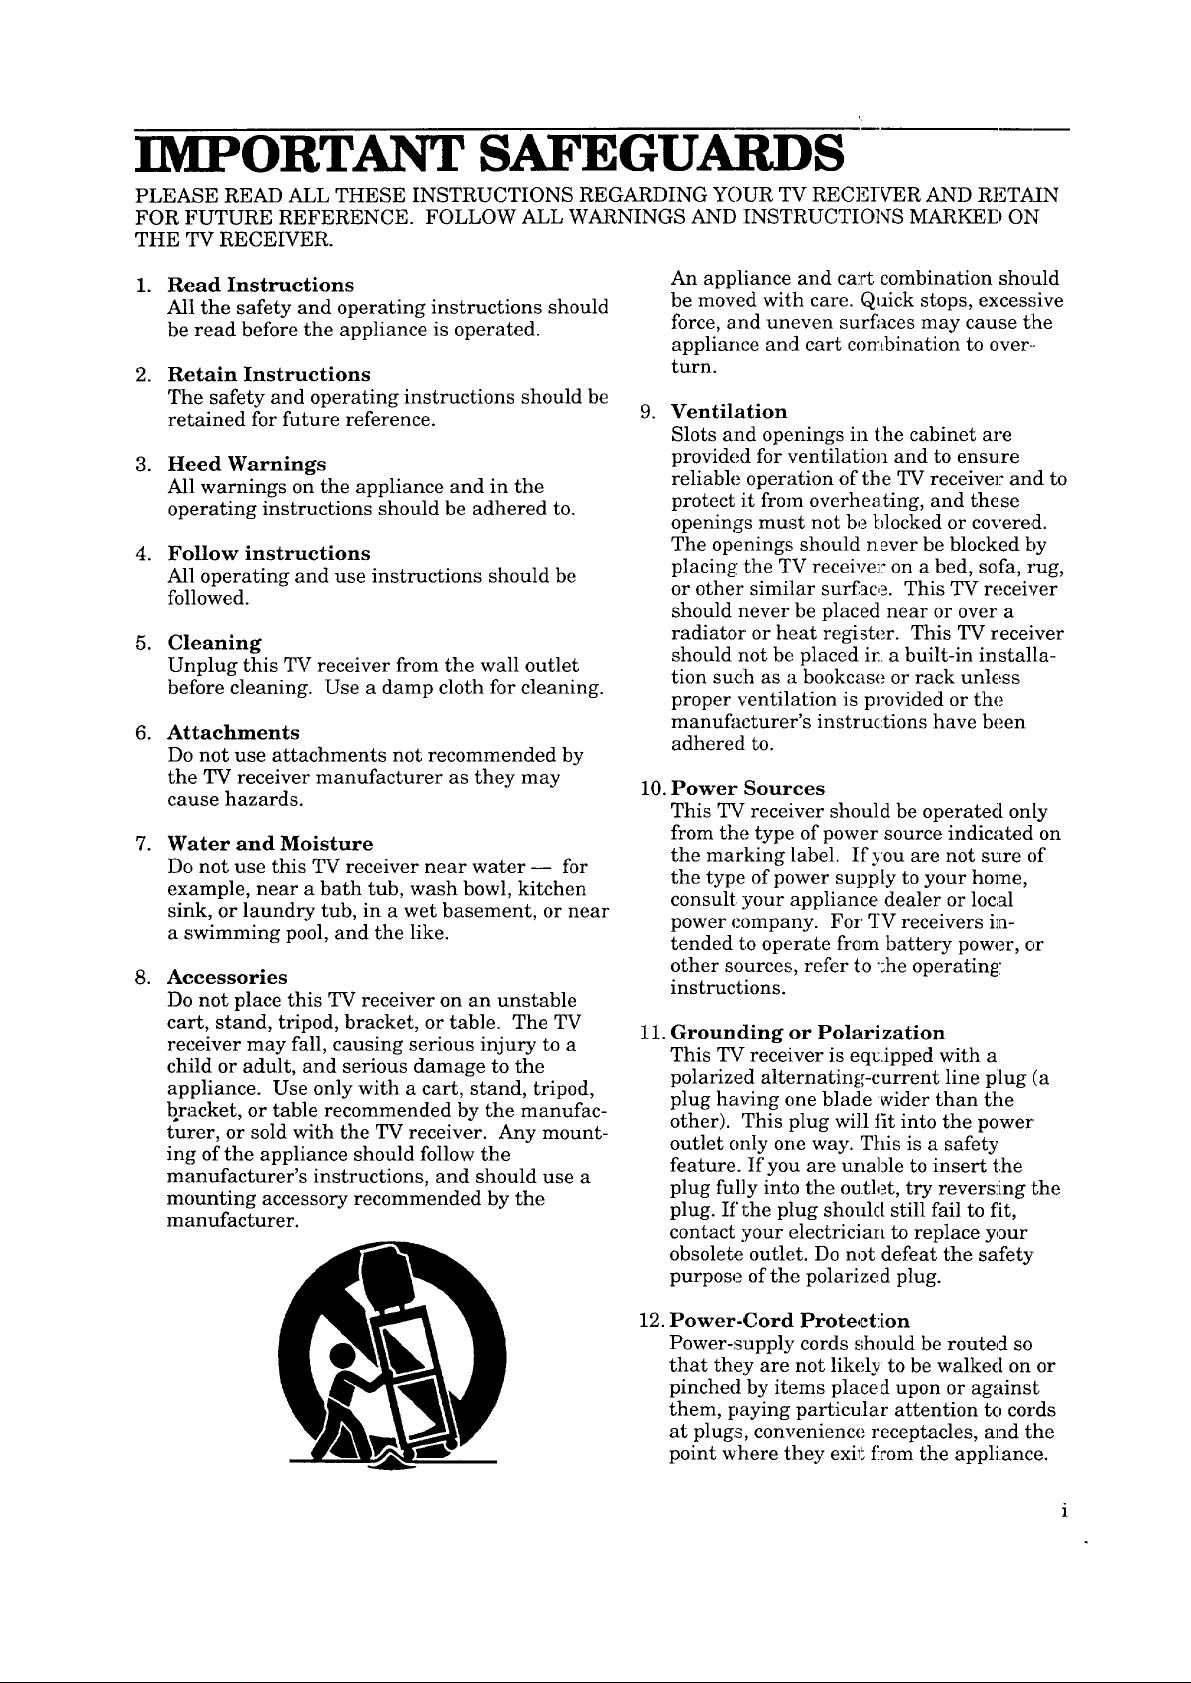
Accessories
Do not place this TV receiver on an unstable
cart, stand, tripod, bracket, or table. The TV
receiver may fall, causing serious injury to a
child or adult, and serious damage to the
appliance. Use only with a cart, stand, tripod,
bracket, or table recommended by the manufac-
turer, or sold with the TV receiver. Any mount-
ing of the appliance should follow the
manufacturer's instructions, and should use a
mounting accessory recommended by the
manufacturer.
An appliance and cart combination should
be moved with care. Quick stops, excessive
force, and uneven surfaces may cause tlhe
appliance and cart combination to over--
turn.
. Ventilation
Slots and openings in the cabinet are
provided for ventilation and to ensure
reliable operation of the TV receiver and to
protect it from overheating, and these
openings must not be blocked or covered.
The openings should never be blocked by
placing the TV receive_: on a bed, sofa, rug,
or other similar sur£ace. This TV receiver
should never be placed near or over a
radiator or heat register. This TV receiver
should not be placed ir a built-in installa-
tion suc:h as a bookcase or rack unless
proper ventilation is provided or the
manufacturer's instructions have been
adhered to.
10. Power Sources
This TV receiver should be operated only
from the type of power source indicated on
the marking label. If you are not sure of
the type of power supply to your home,
consult your appliance dealer or local
power company. For _I;Vreceivers in-
tended to operate from battery power, or
other sources, refer to ';he operating
instructions.
11.
Grounding or Polarization
This TV receiver is eq_:ipped with a
polarized alternating-current line plug (a
plug having one blade voider than the
other). ']?his plug will fit into the power'
outlet only one way. This is a safety
feature. If you are unable to insert the
plug fully into the ou.tlet, try reversing the
plug. If the plug should still fail to fit,
contact your electrician to replace your
obsolete outlet. Do not defeat the safety
purpose of the polarized plug.
12.
Power-Cord Protect:ion
Power-supply cords should be routed so
that they are not likely to be walked on or
pinched by items placed upon or against
them, paying particular attention to cords
at plugs, convenience receptacles, and the
point where they exit from the appliance.
Page 4

13.Lightning
For added protection for this TV receiver
during a lightning storm, or when it is left
unattended and unused for long periods of
time, unplug it from the wall outlet and
disconnect the antenna or cable system.
This will prevent damage to the TV receiver
due to lightning and power-line surges.
14. Power Lines
An outside antenna system should not be
located in the vicinity of overhead power
lines or other electric light or power circuits,
or where it can fall into such power lines or
circuits. When installing an outside antenna
system, extreme care should be taken to
keep from touching such power lines or
circuits as contact with them might be fatal.
15. Overloading
Do not overload wall outlets and extension
cords as this can result in a risk of fire or
electric shock.
16. Object and Liquid Entry
Never push objects of any kind into this TV
receiver through openings as they may touch
dangerous voltage points or short-out parts
that could result in a fire or electric shock.
Never spill liquid of any kind on the TV
receiver.
17. Outdoor Antenna Grounding
If an outside antenna or cable system is
connected to the TV receiver, be sure the
antenna or cable system is grounded so as to
provide some protection against voltage
surges and built-up static charges.
EXAMPLE OF ANTENNA GROUNDING
ENNA
LEAD IN WIRE
NNA
DISCHARGE UNIT
(NEC SECTION 810-20)
GROUNDING
CONDUCTORS
~(NEC SECTION 810.21)
GROUND CLAMPS
POWER SERVICE GROUNDING
NEC -- NATIONAL ELECTRICAL CODE
ii
ELECTRODE SYSTEM
(NEC ART 250, PART H)
Section 810 of the National Electrical
Code, ANSUNFPA No.70, provides infor-
mation with regard to proper grounding of
the mast and supporting structure,
groundling of the lead-in wire to an an-
tenna discharge unit, size of grounding
conductors, location of antenna discharge
unit, connection to grounding electrodes,
and requirements for the grounding
electrode.
18.
Servicing
Do not attempt to service this TV :receiver
yourself as opening o:r removing covers
may expose you to dangerous voltage or
other hazards. Refer all servicing to
qualified service personnel.
19.
Damage Requiring Service
Unplug this TV receiver from the wall
outlet and refer se_icing to qualified
service personnel under the following
conditions:
(a) When the power-s_pply cord or plug is
damaged.
(b) If liquid has been spilled, or objects
have fallen into the TV receiver.
(c) If the TV receiw_r has been exposed to
rain or water.
(d) If the TV receiver does not operate
normally by following the operating
instructions.
Adjust only those ,controls that are
covered by the operating instructions as
an improper adjustment of other con-
trols may result in damage and will
often require exLe_]sive work by a
qualified technician to restore the 'IW
receiver to its notarial operation.
(e) If the TV receiw_r has been dropped or
the cabinet has been damaged.
(f) When the TV receiver exhibits a distinct
change in perfo_zn ance- this indicates
a need for service.
20. Replacement Parts
When replacement parts are required, be
sure the service technician has used
replacement parts specified by the manu-
facturer or have the same characteristics
as the original part. Unauthorized substi-
tutions may result in fire, electric: shock or
other hazards.
21.
Safety Check
Upon completion c,f any service or repairs
to this TV receiver, ask the service techni-
cian to perform safety checks to determine
that the TV receiver is in safe operating
conditions.
Page 5
_ TABLE OF CONTENTS
Table of Contents
Important Safeguards ............................................................... iL
Preface: Welcome to Mitsubishi ............................................... 1
Chapter One: Getting to Know Your TV ................................ 3
Chapter Two: Connecting Your TV ......................................... 5
Chapter Three: Operating Your TV ...................................... 9
Special features ................................................................... 1
Unpacking your TV ............................................................. 2
Overview of the remote control ........................................... 3
Overview of the control panel ............................................. 4
Locating the terminal and inputs ...................................... 5
Connecting the indoor antenna ......................................... 5
Connecting a VHF/UHF combined antenna ..................... 6
Connecting separate VHFflJHF antennas ........................ 6
Connecting cable without a cable box ............................... 7
Connecting cable with a cable box ..................................... 7
Connecting a VCR ................................................................. 8
Using the remote .................................................................. 9
Using the menus .................................................................. 9
Selecting the on-screen language .................................... 10
Memorizing channels ........................................................ 10
Adding and deleting channels .......................................... 11
Adjusting the video settings .............................................. 12
Adjusting the audio settings (CS-20203/cs-20203c only) ........ 1'_)
Using closed captions ......................................................... 13
Setting the sleep timer ....................................................... 14
Selecting your favorite color setting ................................. 14
Using headphones .............................................................. 14
Chapter Four: Troubleshooting ............................................ 15
PREFACE
Welcome to Mitsubishi
Thank you for selecting our product, and welcome to Mitsubishi!
Your new television is designed ibr excellent picture quality, and
this owner's guide is written with easy-to-follow directions. We
hope you enjoy your new Mitsubishi television.
Special features
Your TV comes with many special features, inc:[uding:
• Trilingual menus --- You can choose to display your TV's on-
screen menus in English, Spanish, or French.
• Closed Caption Decoder --- You can view conversations,
narration, and other soundtrack information as captions on
your TV screen.
• Sleep timer --- You can set your TV to tur_ off after 30, 60, 90,
or 120 minutes.
• Preview --- You can quickly scan all of your TV's availahle
channels at the touch of one button.
Page 6
• QuickView ---YoucanquicklyswitchbetweentwocThannels
atthetouchofabutton.
• 181-ChannelCapacity---YourTVcan_;uneupto181
channels,ensuringthatyourTVwill stillbeup-to-dateascable
systemsexpand.
• Multichannel TV Sound (MTS) --- Your TV can receive and
play stereo or bilingual signals (CS-202;03 and CS-20203C only).
Unpacking your TV
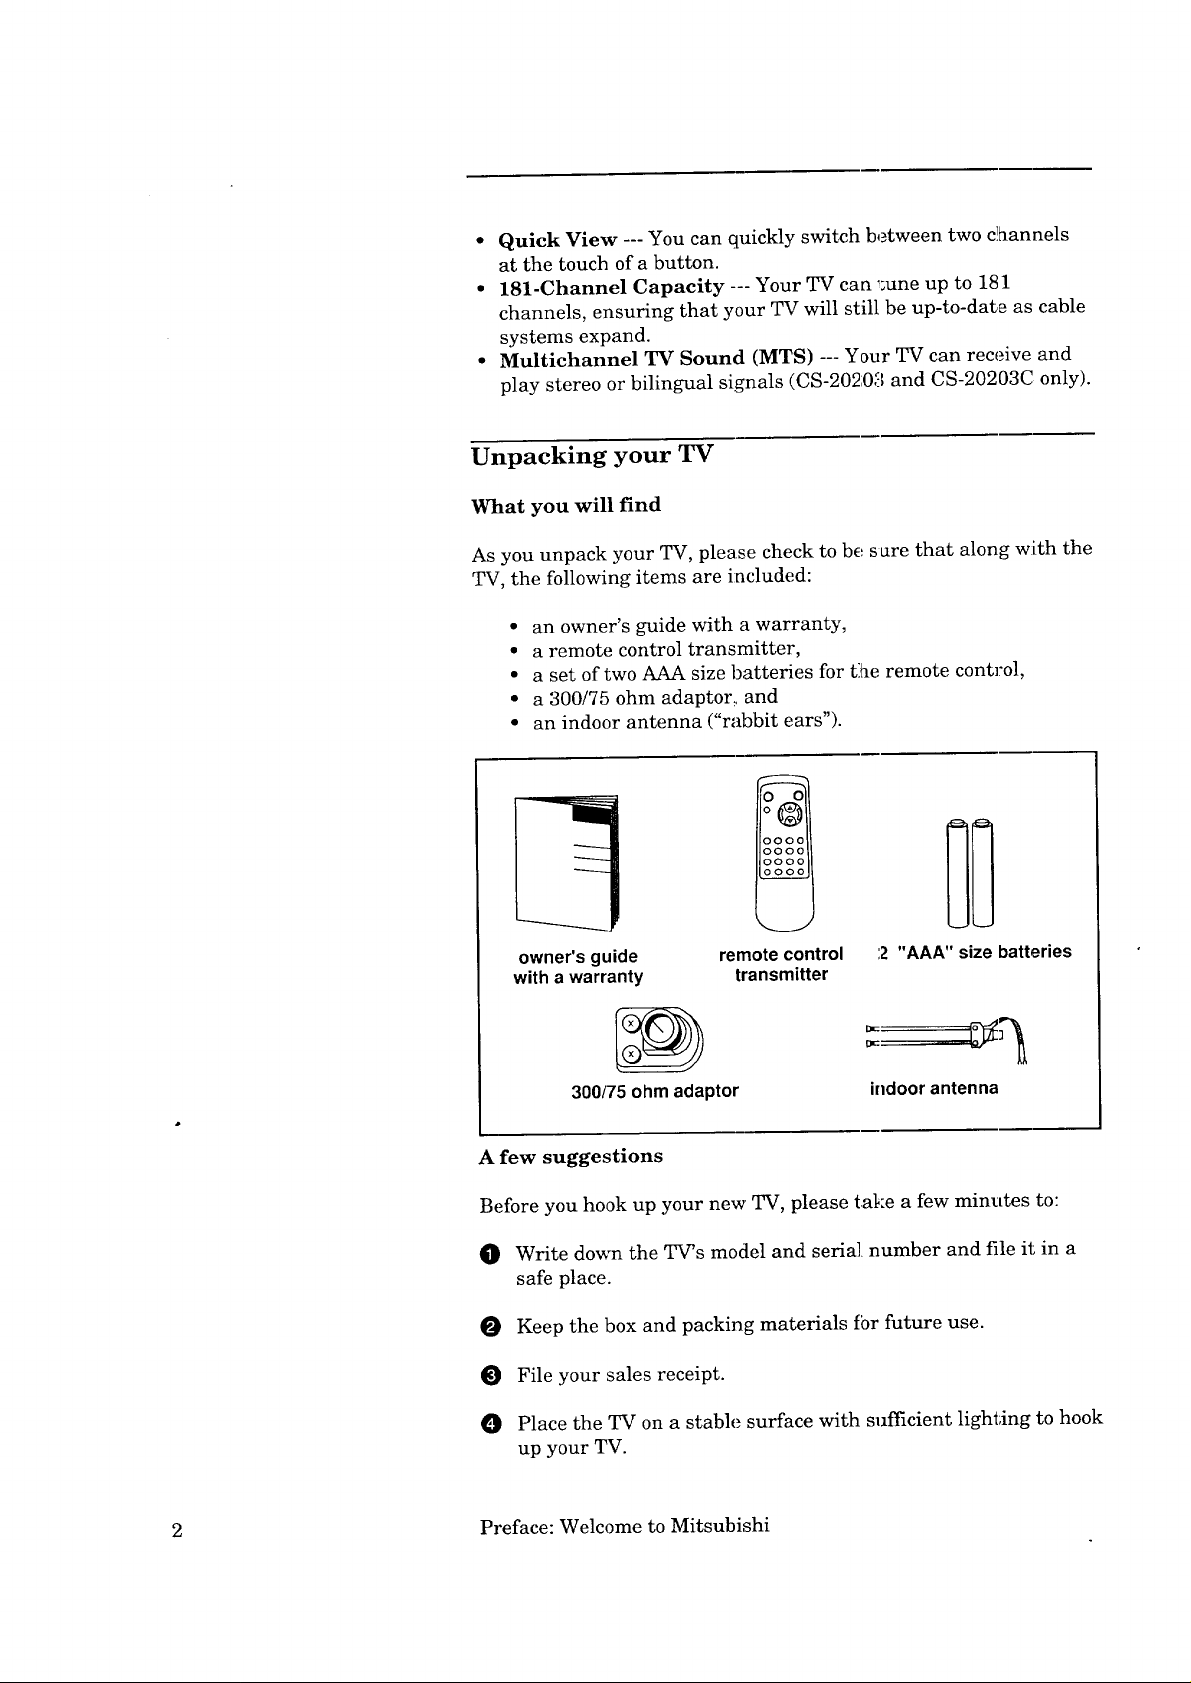
What you will find
As you unpack your TV, please check to be s are that along with the
TV, the following items are included:
• an owner's guide with a warranty,
• a remote control transmitter,
• a set of two AAA size batteries for the remote control,
• a 300/75 ohm adaptor, and
• an indoor antenna ("rabbit ears").
owner's guide
with a warranty
300/75 ohm adaptor
A few suggestions
Before you hook up your new TV, please take a few minutes to:
O Write down the TV's model and serial number and file it in a
safe place.
Keep the box and packing materials fbr future use.
File your sales receipt.
0 Place the TV on a stable surface with sufficient lighting to hook
up your TV.
2 Preface: Welcome to Mitsubishi
remotecontrol 2 "AAA" size batteries
transmitter
indoor antenna
Page 7

_ CHAPTER ONE
Getting to Know Your TV
This chapter will introduce the buttons that yo:a will use to control
your TV. These buttons are located in two places: on the remote
control, and on the TV's front panel.
Overview of the remote control
@
®
®
-© ® ® 0-'
F
@
@
@ power button (POWER)
Press this button to turn the TV on or off
®
display button (DISPLAY)
Use this button to display the current chan:ael.
®
volume buttons ( VOL -, VOL +)
Press the "+" button to turn up the volume ;and the "-" to turn
down the volume. Also use these buttons to adjust settings
when using the menus.
®
number buttons (0 - 9, 100)
Use these buttons to tune directly to a particular channel.
@
input button (INPUT)
Use this button to switch between viewing the TV and viewing
the signal from any components that may be attached (such as
a VCR).
=®® ® 0-"
L
-Q ® ® 0-.,
:0 ® ® 0-,,
MUTE
®
@
@
@
(_) menu button (MENU)
Press this button to enter or exit the menus.
®
channel buttons ( • CHANNEL • )
Press the • button to switch to a higher nu:mber channel and
the • button to switch to a ]ower number channel.
3
Page 8

Overview of the Remote Control (cont.)
®
quick view button (QV)
Use this button to return to the previously viewed channel.
®
preview button (PREVIEW)
Use this button to scan through the T_'s channels.
®
audio adjustment button (MTS) (CS-_0203, CS-20203C only)
Use this button to change the TV's audio setting.
_) mute button
Use this button to turn of["the sound a:nd display the captions.
Overview of the control panel
The front panel of your TV may not match tile illustration exactly.
(_) power button (POWER)
Press this button to turn the TV on or off.
(_) volume buttons ( - VOL +)
Press the %" button to turn up the volume and the "-" button
to turn down the volume.
® remote sensor area
This area receives the signal from the remote control Aim the
remote control here.
® channel buttons ( • CH • )
Press the • button to switch to a channel with a higher num-
ber and the • button to switch to a channel with a lower
number.
® headphone jack
Plug headphones in here.
4 Chapter One: Getting to Know Your TV
Page 9

_ CHAPTER TWO
Connecting Your TV
This chapter describes the equipment and procedures needed for
basic hook-ups. For more complex hook-ups, contact your dealer or
local cable company.
Locating the terminal and inputs
When connecting antennas, cables, or A/V products to your TV, you
will connect them to either the COAXIAL CABLE CONNECTOR or
to the AUDIO IN and VIDEO IN terminals. These are locate(] on
the rear of your TV, on the lower left.
Co_
LXialCable Connector
Television Rear Panel
AUOIO VIDEO
©©
li IN
ANI/CABkE
75Q
Connecting the indoor antenna
0 Plug the indoor antenna
(included) into the TV as shown
in the illustration. Push the
antenna in until it snaps into
place.
Place the leads from the antenna
0
under the screws on the adaptor.
Tighten the screws with a
screwdriver.
O Press the adaptor onto the
COAXIAL CABLE CONNECTOR
on the back of the TV.
Coaxial Cable Connector
Page 10

Connecting a VHF/UHF combined antenna
O If the antenna uses a 75-ohm coaxial lead, press the lead
directly onto the COAXIAL CABLE CO:NNECTOR on the TV.
O If the antenna uses twin leads, place the leads under the
screws on the adaptor. Tighten the screws with a screwdriver.
O Press the adaptor onto the COAXIAL C_BLE CONNECTOR on
the back of the TV.
O
75 ohm coaxial lead
ANT/CABLI
0
twin leads
O
Coaxial Cable Connector
Connecting separate VHF/UHF antennas
O Connect the leads from each antenna onto a combiner. (You can
purchase a combiner from your dealer or an electronics store.)
Press the combiner onto the COAXIAL CABLE CONNECTOR
on the back of the TV.
VHF Antenna UHF Antenna
ANT/(_kBLE
75 g
Combiner
The combiner you need may be different from the one shown in the
illustration, especially if your VHF antenna has a 75 ohm coaxial
lead.
6 Chapter Two: Connecting Your TV
Coaxial Cable Connector
Page 11

Connecting cable without a cable box
O Connect the incoming coaxial cable onto the COAXIAL CABLE
CONNECTOR on the back of the TV.
O
Incoming cable
Coaxial Cable Connector
Connecting cable with a cable box
Use this connection if you only need to use the cable box to
descramble some channels. If your cable box is needed to
descramble ALL channels, use the method de,;cribed in
"Connecting cable without a cable box."
O Connect the incoming cable to a signal splitter (not included).
O Connect a coaxial cable (not included) to one: output on the
splitter. Connect the other end of this cable Lo the "A IN"
terminal on an RF switch (not included).
Connect another coaxial cable to the other' o a_put of the
splitter. Connect the other end of this cable Lo the INPUT
terminal on the cable box.
Connect a third cable to the OUTPUT termiaal on the cable
box. Connect the other end of this cable to tile "B IN" terminal
on the RF switch.
Connect a fourth cable to the OUTPUT terminal on the RF
switch. Connect the other end of this cable to the COAXL_L
CABLE CONNECTOR on the back of the TV.
O ANT/CABLE
75 g
cable box
C,oaxial Cable Connector
Page 12

Connecting a VCR
These instructions show how to connect a VCR to allow you to view
a VCR tape on your TV. These instructions may not be appropriate
if you want to use your VCR to record. Please refer to your VCR's
operating guide for more information.
"x Audio/Vid:o IrLputs
0 0 0
O Connect a video cable to the VIDEO OUT terminal on the VCR.
Connect the other end of this cable to the VIDEO IN terminal
on the rear of the TV.
O (For models CS-13103, CS-13104, CS-13]03C, CS-20103, and
CS-20103M.) Connect an audio cable to the AUDIO OUT ter-
minal on the VCR. If you have a stereo ¥'CR, connect the
cable to the LEFT terminal. Connect the other end of thi,_
cable to the AUDIO IN terminal on the rear of the TV.
O (For models CS-20203, CS-20203C.) Connect an audio cable to
the AUDIO OUT L terminal on your VCR; connect the other
end of this cable to the AUDIO IN L o_. the rear of the TV.
Connect a second audio cable to the AUlDIO OUT R terminal on
the VCR; connect the other end of the cahle to the AUDIO IN R
terminal on the rear of the TV.
Watching the VCR on your TV
In order to watch the VCR on your TV, yo_Lneed to tune your TV to
the VIDEO mode. You can do this in one ot'two ways:
O Press the INPUT button on the remote control. You will switch
from the TV mode to the VIDEO mode.
You can also switch to the VIDEO mode with the channel
O
buttons. Tune your TV to the highest-numbered station your
TV has memorized, then press the CI4_qEL • button. Or,
tune your TV to the lowest-numbered station your TV has
memorized, then press the CHANNEL _' button.
To return to normal TV _4ewing, press the INPUT button on
the remote control.
8 Chapter Two: Connecting Your TV
Page 13

_ CHAPTER HREE
Operatmg rour TV
Using the remote
O Remove the back cover of the remote controL as shown.
• T
Battery cover
O Take the two batteries from the packing bag and load them into
the remote control, making snre that they match the polarities
(+ and -) as indicated on the remote control.
Replace the back cover of the remote contro 1.
O Point the top of the remote control towards the TV and press
the appropriate button.
Notes about using the remote control
• Don't press two or more buttons at, the same time.
° Don't allow the remote control to get wet or become heated.
• Avoid dropping the remote control.
• Don't use harsh chemicals to clean the remote. Use only a soft,
slightly moistened cloth.
• Don't use an old battery with a new one.
• Don't heat, take apart, or throw batteries into a fire.
Using the menus
To use the menus:
TIMER SET
VIDEO ADJUST
CLOSED CAPTION
FAVORITE COLOR
LANGUAGE
CH SETTING
"Main Menu"
O Press the MENU button on the remote control. You will see the
"Main Menu," shown to the left.
O Press the CHANNEL buttons to move the "_" mark next to the
feature you wish to use or change. Press the CHANNEL, •
button to move the "€" mark up; press tile CHANNEL 'V
button to move the "€" mark down.
Press the VOL + button to use or change t_.at feature.
O When you are finished using the menus, press the MENU
button on the remote control to return to normal TV viewing.
Page 14

LANGUAGE
Selecting the on-screen language
To
select the on-screen menu language:
Press the MENU button on the remote control. You will see the
0
"Main Menu."
Use the CHANNEL button:_ to move the "€" mark next to
0
"Language."
ENGLISH
ESPA_IOL
FRANOAIS
"Language Menu"
CH SETTING
AIR/CABLE
CH SEARCH
CHMEMORY
"Channel Setting
Menu"
Press the VOL + button.
0
0
Press the CHANNEL buttons to select the language you want
to use.
0
When you are finished, press the MENU button on the remote
control to return to normal TV viewing.
Memorizing channels
Whenever you first install your TV, ),our TV needs to memorize, all
of the channels it can receive. This memorization has two parts:
choosing an antenna setting and searching f_r available channels.
Choosing an antenna setting
O Press the MENU button on the remote control. You will see the
"Main Menu."
Use the CHANNEL buttons to move the ":_" mark next; to
"CH SETTING."
Press the VOL + button. You will see the "Channel Setting
Menu."
Use the CHANNEL buttons to move the, ":_" mark next to
"AIPJCABLE."
Press the VOL + button. You will see the °Air/Cable Menu"
AIR / CABLE
AIR
CABLE
STD HRC IRC:- +
"Air/Cable Menu"
• If you have connected an off-air anltenna, use the
CHANNEL buttons to move the "_" mark next to ".4.JR."
If you have connected a cable antenna, use the
CHANNEL buttons to move the "€" mark next to "(',ABLE."
Use the VOLUME buttons to select STD, HRC, or IRC,
depending on what type of cable system you have. (Contact
your cable company if you do not know what type of cable
system you have.)
Press the MENU button to exit.
O
10 Chapter Three: Operating Your TV
Page 15

CH SETTING
Searching for available channels
0 Press the MENU button on the remote control. You will see the
"Main Menu."
AIR / CABLE
CH SEARCH
CH MEMORY
"Channel Setting
Menu"
CHSEARCH
AIR 12
START :+
STOP :-
"Channel Search
Menu"
O Use the CHANNEL buttons to move the "_" mark next to
"CH SETTING."
O Press the VOL + button. You will see the "Channel Setting
Menu."
O Use the CHANNEL buttons to move the "$" mark next to
"CH SEARCH." Press the VOL + button. ___ouwill see the
"Channel Search Menu."
Press the VOL + button to begin searching for available chan-
nels. Available channels will be displayed on the TV as they are
tbund.
If you wish to stop channel search, press the VOL - button.
When finished, press the MENU button tc, exit.
Adding and deleting channels
There may be times when you want to add cr delete channels fi_om
your TV's memory. To do this:
CH MEMORY
AIR 12
TOADD :+
"Channel Memory
Menu"
O Press the MENU button on the remote COrLlrol.You will see the
"Main Menu."
Use the CHANNEL button,,; to move the ":_" mark next to
"CH SETTING."
Press the VOL + button. You will see thc_•"Channel Setting
Menu."
O
Use the CHANNEL buttons, to move the "¢" mark next to
"CH MEMORY." Press the VOL + button. You will see the
"Channel Memory Menu."
Use the CHANNEL buttons to select a clhannel that you want
to add or delete.
O
If the channel is in the TV's memory, press the VOL - button to
delete it. If the channel is not in the TV's memory, press the
VOL + button to add it.
When finished, press the MENU button to exit.
11
Page 16

PICTURE
TINT
COLOR
BRIGHT
SHARP
RESET
'_ideo Adjustment
Menu"
Adjusting the video settings
To adjust the video settings:
O Press the MENU button on the remote control. You will see the
"Main Menu."
O Use the CHANNEL buttons to move the "€" mark next to
"VIDEO ADJUST." Press the VOL + button. You will see the
'_Video Adjustment Menu."
Use the CHANNEL buttons to move the. T mark next to
setting you want to adjust.
0 Press and hold the VOL + or VOL - buttoa to adjust that
setting. The descriptions of each type of setting are shown
below.
When finished, press the MENU button to exit.
Descriptions of video settings
• Picture --- Press VOL - to decrease contrast; press VOL + to
increase contrast.
• Tint --- Press VOL - to add purple to skin tones; press VOL + to
add green to skin tones.
• Color --- Press VOL - to decrease color intensity; press VOL +
to increase color intensity.
• Bright --- Press VOL - to decrease brightness; press VOL + to
increase brightness.
• Sharp --- Press VOL - to decrease sharpness; press VOL + to
increase sharpness.
• Reset --- Press VOL - or VOL + to return all settings to their
original factory levels.
Adjusting the audio settings (cs-2c,203, CS-20203C only)
Your TV can receive and play three types cf audio signals::
stereo, S.A.P., and mono.
• You should set your TV to stereo for normal TV viewing. "Your
TV will play stereo when the program you are watching is being
broadcast in stereo. Otherwise, your TV will play in mono.
• Some broadcasters will broadcast an S.A.P., or Separate Audio
Program. An S.A.P. is an alternative soundtrack. It is often
another language, but it can also be unrelated information, such
as news or weather. Choose S.A.P. when you want listen to this
soundtrack. (S.A.P. is a mono signal.)
• Choose mono when you are having difficulty receiving an audio
signal on a particular station. This may help make the sound
clearer.
12 Chapter Three: Operating Your TV
Page 17

_STEREO e ON AIR
SAP _ ON AIR
MONO
"Audio Adjustment
Menu"
To choose an audio setting:
0 Press the MTS button on the remote control. You will cycle
through the audio settings: "stereo," "SAF," and "mono." Press
the MTS button until you have selected the setting you want.
Using closed captions
Your TV is equipped with an internal closed caption decoder.
"Closed Captioning" is a system that allows you to view
conversations, narration, and sound effects a,; captions on your [[W
screen. Captions usually appear at the bottom of your screerL and
do not block your view of the program.
Closed captioning also gives you access to "text" services, which
provide news, weather, and other information. Text services
sometimes take up your entire TV screen and. c_n block your view
of the program.
Additionally, each television channel can have more than one
version of captions, or more than one version of text. These versions
are called "channels." To use the closed caption system:
CLOSED CAPTION
MODE : CAPTION
DATA :CH1
"Closed Caption
Menu"
O Press the MENU button on the remote control. You will see the
"Main Menu."
O Use the CHANNEL buttons to move the '_'€:" mark next to
"CLOSED CAPTION." Press the VOL + bul;ton. You will see
the "Closed Caption Menu."
Use the CHANNEL buttons to move the "€:" mark next to
O
either "mode" or "data." "Mode" allows you to choose between
captions, text, or off. "Data" allows you to Choose between
channels 1 and 2 for captions and text.
O Use the volume buttons to change the "Mode" and "Data"
settings.
When finished, press the MENU button 1;oexit.
• If you are watching a program that has captions and you
press the MUTE button, captions will au.tomatically appear.
They will disappear when you press the MUTE button again.
• Closed captioning can malfunction (showing white blocks or
strange characters instead of letters) when there are prob-
lems with the TV signal. This is not a m_lfunction of the TV.
• Captions do not appear when you tu_: oa a display or menu.
• If you have "Text" mode selected, and you are watching a
program without text service, your screen may be blocked by
a large black rectangle. [['urn tlhe "Text" mode off.
13
Page 18

SLEEP TIMER
"Sleep Timer
Menu"
REMAIN
Setting the sleep timer
You can set your television to turn off after 30, 60, 90, or ] 20
minutes. To do this:
O Press the MENU button on the remote control. You will see the
"Main Menu."
O Use the CHANNEL buttons to move the ':€" mark next to
"TIMER SET." Press the VOL + button. You will see the
"Sleep Timer Menu."
O Use the volume buttons to set the sleep time to 30, 60, 90, or
120 minutes. (To cancel the sleep timer, press the volume
buttons until "---" appears.)
O When finished, press the MENU button t_ exit. The TV will
turn off after the set number of minutes have elapsed.
Selecting your favorite color setting
You can set your television's color tone to a s_:tting that you like
best. To do this:
FAVORITE COLOR
"Favorite Color
Menu"
STD
O Press the MENU button on the remote co ntrol. You will see the
"Main Menu."
O Use the CHANNEL buttons to move the "€" mark next to
"FAVORITE COLOR." Press the VOL + button. You will see
the "Favorite Color Menu."
O Use the volume buttons to set your favorite color to RF, D
TONE, BLUE TONE, or STANDARD (,_TD).
O When finished, press the MENU button to exit.
Using headphones
When using headphones, follow the instrucl_ions below.
0 Turn the volume of the TV all the way clown.
O Plug the headphones into tlhe headphone jack on the TV.
O Adjust the volume to a comfortable level.
When headphones are plugged in, the TV's external speakers are
turned off.
14 Chapter Three: Operating Your TV
Page 19

_ CHAPTER FOUR
Troubleshooting
Problems
If you are having a problem with your TV, plea,_e try one or :more of
the solutions below before contacting your dealer or service ,_hop.
You may be able to correct the problem yoursel:_.
If you can't see the signal from your VCR or disc
player, try solution @.
If there is no picture or sound coming from your
TV, try solutions @, @, @, @, and @.
If the remote control does not work, try solutions
@, @, and @.
If there are bars on the screen, try solution @.
If the picture is distorted, try solutions @ and
®.
If the picture rolls vertically, try solutions @,
®, @, and ®.
If there is no color, try solutions (J), @, ®, @,
®.
Is there is poor reception on some channels, try
solutions @, @, ®, and ®.
If there is a weak picture, try solutions @, @,
and ®.
If there are lines or streaks in the picture, try
solutions @, @, and @.
If there are ghosts in the picture, try solutions
@, @, @, and (_).
If the picture is blurry, try solutions (_) and _i).
If the sound is good but the picture is poor, try
solutions @, (4_, ®, @, @, @), and @.
If the picture is good but the sound is poor, try
solutions @, (6_, _, and _).
If there is no picture or sound, try solutions @,
@, @, @, @, (_), (8_, and (_.
If your screen is covered by a dark, black
rectangle, try solutions @ and @.
Possible solutions
@ Try changing channels to see if it may be a
problem with that broadcast station.
@ Make sure the TV is plugged into a working
outlet.
Make sure the TV is turned on.
®
Make sure the antenna is connected to the
®
back of the TV.
®
Check for a broken wire in your antenna.
®
Check to see if there are any magnetic or
electric products that may be interfering
with the TV reception.
@ Try turning the TV off for about one nfinute,
then turning it back orL.
(_) Try leaving the TV unplugged for about one
minute, then plugging it back in.
® Adjust the, COLOR video setting.
@ Adjust the PICTURE (contrast) setting.
@ Check the connections to your TV.
(_) Check the batteries in the remote control
@ Set the closed caption setting to "OFF."
15
Page 20

Page 21

MITSUBISHI COLOR TELEVISION OR COl_OR MONITOR
20" OR SMALLER
LIMITED WARRANTY
MITSUBISHI ELECTRONICS AMERICA, INC. ("MELA") warrants to the original purchaser of this television
or monitor if purchased from an authorized MITSUBISHI Audio/Video Dealer that, should it prow., defective by reason
of improper workmanship and/or material:
a. Picture Tube. For two years from the date of purchase at retail we will repair or replace, at our option,
any defective picture tube without charge for the tube.
b. Other Parts. For one year from the date of original purchase at retail, we will repair or replace, at our
option, any defective part without charge for the part.
c. All parts used for replacement are warranted for the remainder of the original warranty period.
d. Labor. For one year from the date of original purchase at retail, we will provide the labor for a warranty
repair without charge at an authorized MITSUBISHI service center.
e. Notice. To obtain warranty service, you must notify an authori;,_ed MITSUBISHI service center of any
defect within the applicable warranty time period.
1. TO OBTAIN WARRANTY SERVICE, deliver your television or monitor Io the nearest autho "ized MITSUBISHI
service center. Shipping expenses are your responsibility. The name and address of the nearest service center can be
obtained from your MITSUBISHI Dealer, or by writing or calling MELA at the address and telephone number provided
below. Proof of purchase date from an authorized MITSUBISHI Dealer is requ red when requestinc warranty service.
Present your sales receipt or other document which establishes proof and date of purchase. THE RETURN OF THE
OWNER REGISTRATION CARD IS NOT A CONDITION OF WARRANTY COVIERAGE. Howew;r, please detach and
return the Owner Registration Card so that we can contact you should a question of safety arise which could affect you.
2. THIS WARRANTY DOES NOT COVER damage caused by: modification, alteration, repair or service of this
product by anyone other than an authorized MITSUBISHI service center; physical abuse to, or misuse of, the product;
operation in a manner contrary to the instructions which accompany the product; freight damage; or any damage caused
by acts of God such as lightning or fluctuation in electrical power. This warranty also excludes all costs arising frorn
installation, adjustment of user controls, external antenna systems, service of products purchased c,r serviced outside
the U.S.A., initial technical adjustments (set-up) and user-required maintenanc;e. Consult the eperating instructions
furnished with the product for information regarding user controls.
3. ANY EXPRESS WARRANTY NOT PROVIDED HEREIN, AND ANY REMEDY WHIC,H, BUT FOR THIS
PROVISION, MIGHTARISE BY IMPLICATION OR OPERATION OF LAW, ISHEREBY EXCLUDE[) AND DISCLAIMED.
THE IMPLIED WARRANTIES OF MERCHANTABILITY AND OF FITNESS FOR ANY PARTICUI_AR PURPOSE ARE
EXPRESSLY LIMITED TO A TERM OF ONE YEAR.
4. UNDER NO CIRCUMSTANCES SHALL MELA BE LIABLE TO PURCHASER OR AklY OTHER PERSON
FOR ANY INCIDENTAL, SPECIAL OR CONSEQUENTIAL DAMAGES, WHE-_HER ARISING OUT OF BREACH OI--"
WARRANTY, BREACH OF CONTRACT, OR OTHERWISE.
5. Some states do not allow limitations on how long an implied warranty lasts, or the exclusion or limitation of
incidental, special, or consequential damages, so the above limitations or exclusions may not apply to you.
6. This warranty gives you specific legal rights and you may also have other rights which vary from state to state.
7. BEFORE REQUESTING SERVICE, please review the instruction booklet to insure proper installation and
correct customer control adjustment. If the problem persists, contact your nearest MITSUBISHI Dealer for name(s) of
authorized MITSUBISHI Service Center(s). If you are unable to obtain this information, please cal 1-800-332-2119, or
write us at the address below.
MITSUBISHI ELECTRONICS AMERICA, INC.
P.O. Box 5025
Norcross, GA 30091-5025
MITSUBISHI
Page 22

Page 23

RETAIN THIS PORTION FOR YOUR RECORDS
CUSTOMER NAME
STREET ADDRESS
SERIAL NO.
CITY
PHONE ( )
PLACE OF PURCHASE
STATE ZIP
PURCHASE DATE! / /
MO DAY YR
Page 24

_,_ MITSUBISHI
MITSUBISHI ELECTRONICS AMERICA, INC.
6100 Atlantic Boulevard
Norcross, GA 30071-1305
© 1995 Mitsubishi Electronics America, Inc.
PRINT'FD IN U.S.A.
TINS- 5579MEZZ
 Loading...