

Page 1
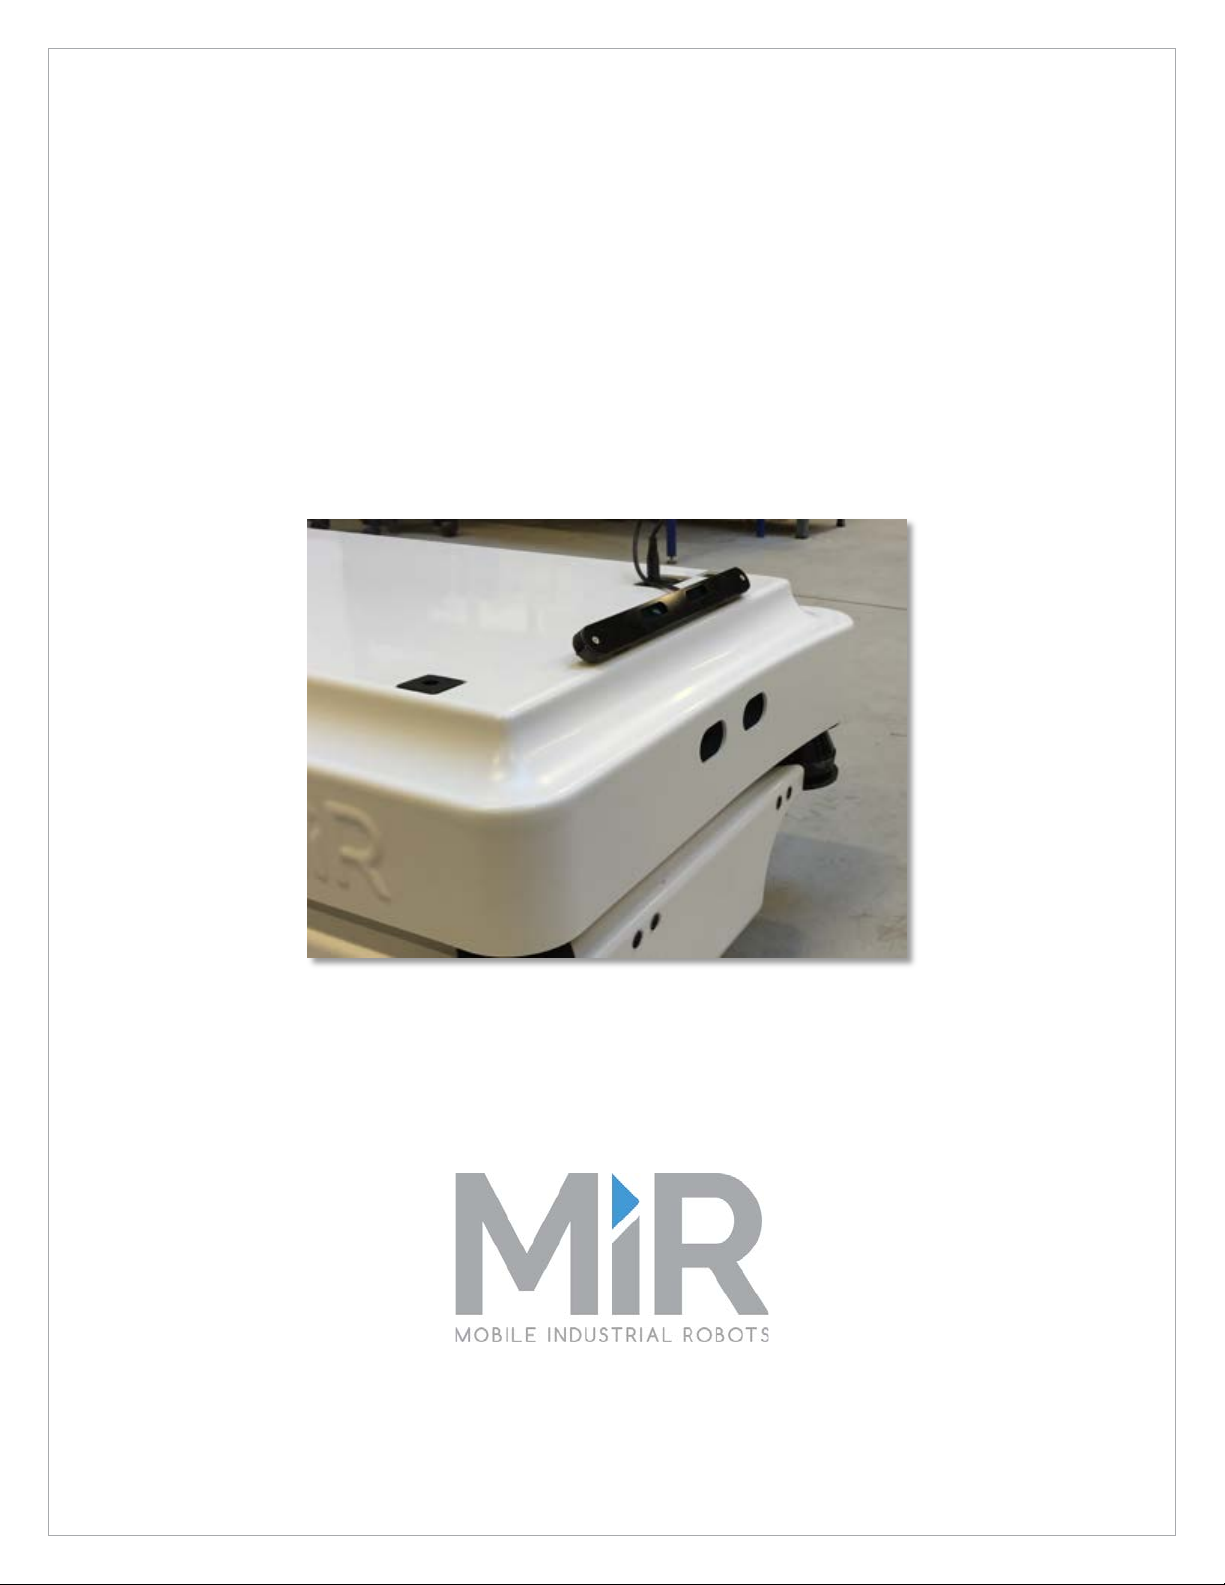
MiR Top camera
Intel® RealSenseTM Camera (R200)
Technical Documentation
Version 1.1
Release date: 21.12.2016
Page 2

MiR Intel Top camera –Technical documentation
Table of contents
1 Introduction ......................................................................................................................................................3
2 What’s included in the box? .............................................................................................................................3
3 Mounting the top camera ................................................................................................................................4
3.1 Preparation of MiR100 for retrofitted camera .........................................................................................4
3.2 Mounting the top camera ........................................................................................................................5
3.3 Connecting the top camera ......................................................................................................................6
3.4 Setting up top camera in ROS parameters ...............................................................................................7
4 Frequently Asked Questions .............................................................................................................................8
5 Changelog .........................................................................................................................................................9
Copyright Mobile Industrial Robots 2016 Page 2 of 9
Page 3
MiR Intel Top camera –Technical documentation
1
213
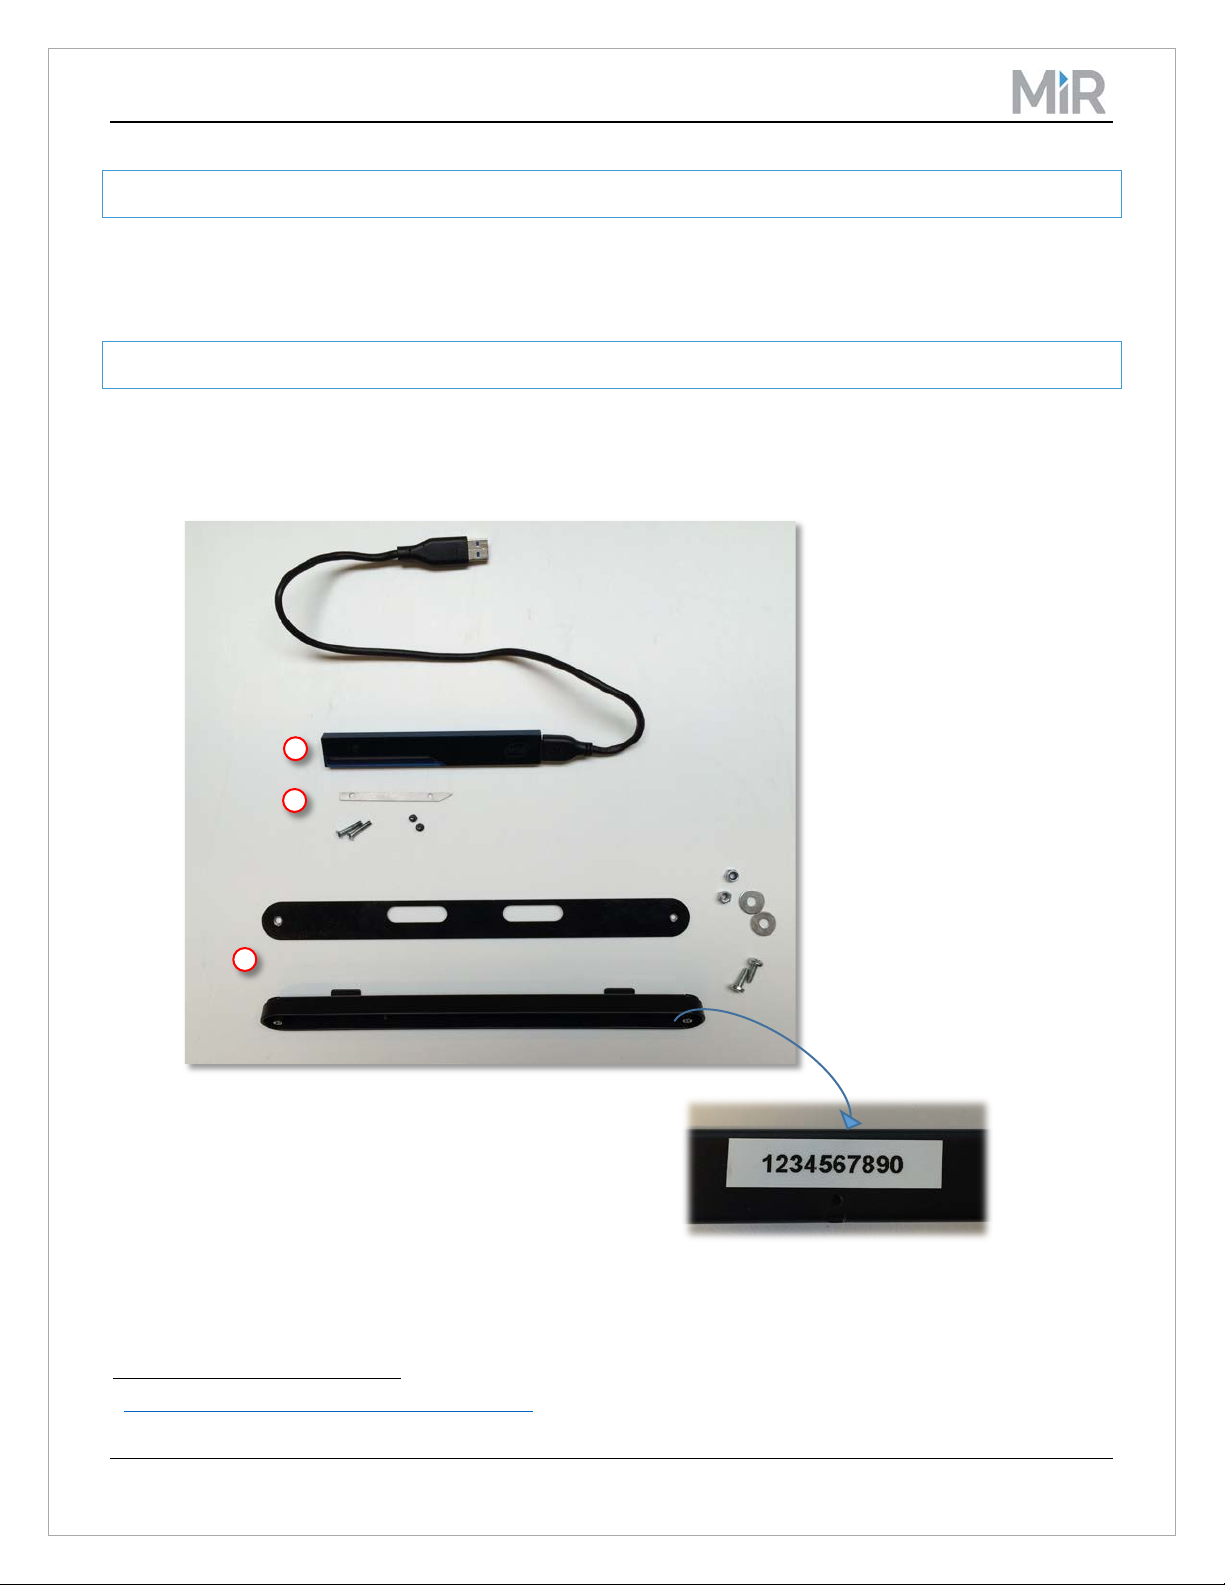
Note! The camera serial number is found at the
up the camera in the software.
1 Introduction
The floor camera detects objects in a height of 50 cm (19.7”) measured from the ground and up. The height of
the MiR100 is 35 cm (13.8”). If more than 15 cm (6”) are added on top of the MiR100, a top camera is needed.
The top camera is similar to the floor camera, which is an Intel® RealSense
TM
3D camera.
2 What’s included in the box?
• (1) Intel® RealSense
TM
Camera (R200)1, w USB cable.
• (2) Metal sheet to fix camera in bracket.
• (3) Top camera bracket, bottom and top parts (screws, nuts and washers not included)
back of the bracket’s bottom part.
Write down the number before you start
the mounting as you’ll need it later to set
1
https://software.intel.com/en-us/realsense/home
Copyright Mobile Industrial Robots 2016 Page 3 of 9
Page 4
MiR Intel Top camera –Technical documentation
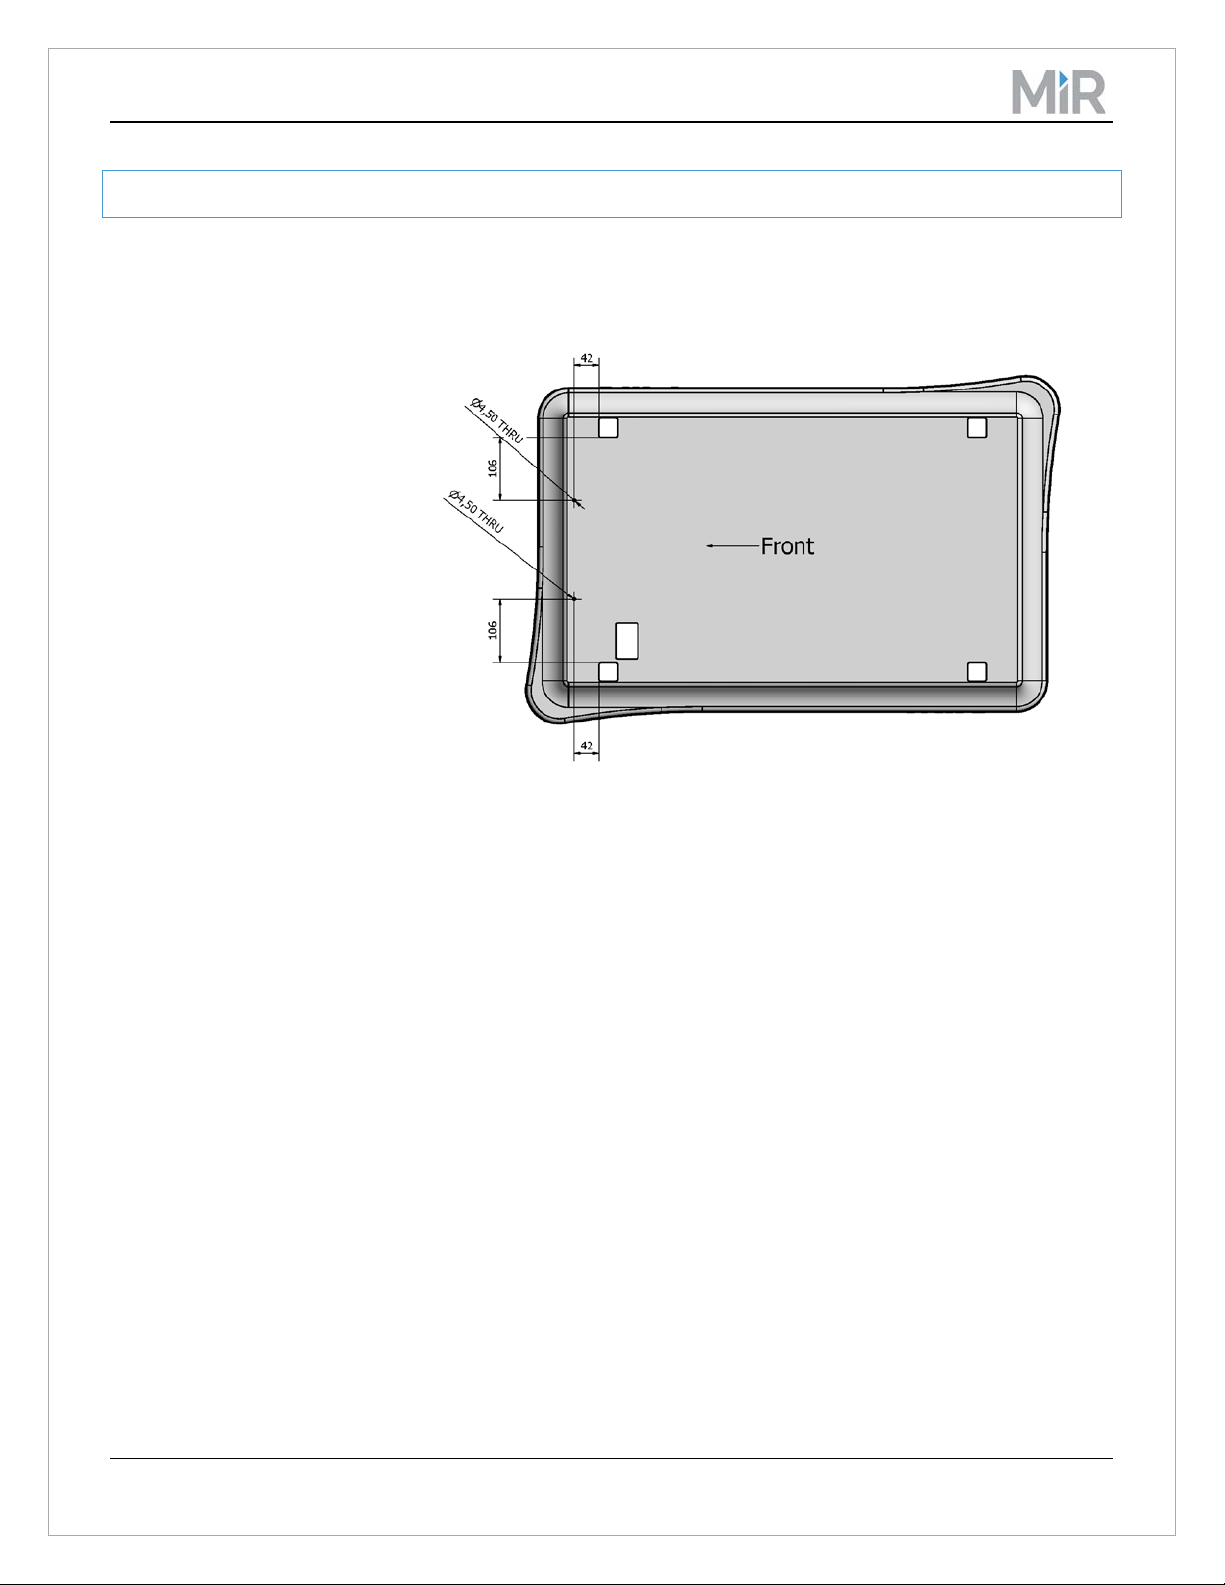
Drill two holes Ø4.50 in shown positions.
3 Mounting the top camera
3.1 Preparation of MiR100 for retrofitted camera
If the top camera is going to be retrofitted on the MiR, the top panel must be prepared as shown in this
illustration.
Dimensions shown in mm.
-106 mm (4.17”)
-42 mm (1.65”)
Copyright Mobile Industrial Robots 2016 Page 4 of 9
Page 5
MiR Intel Top camera –Technical documentation
3.2 Mounting the top camera
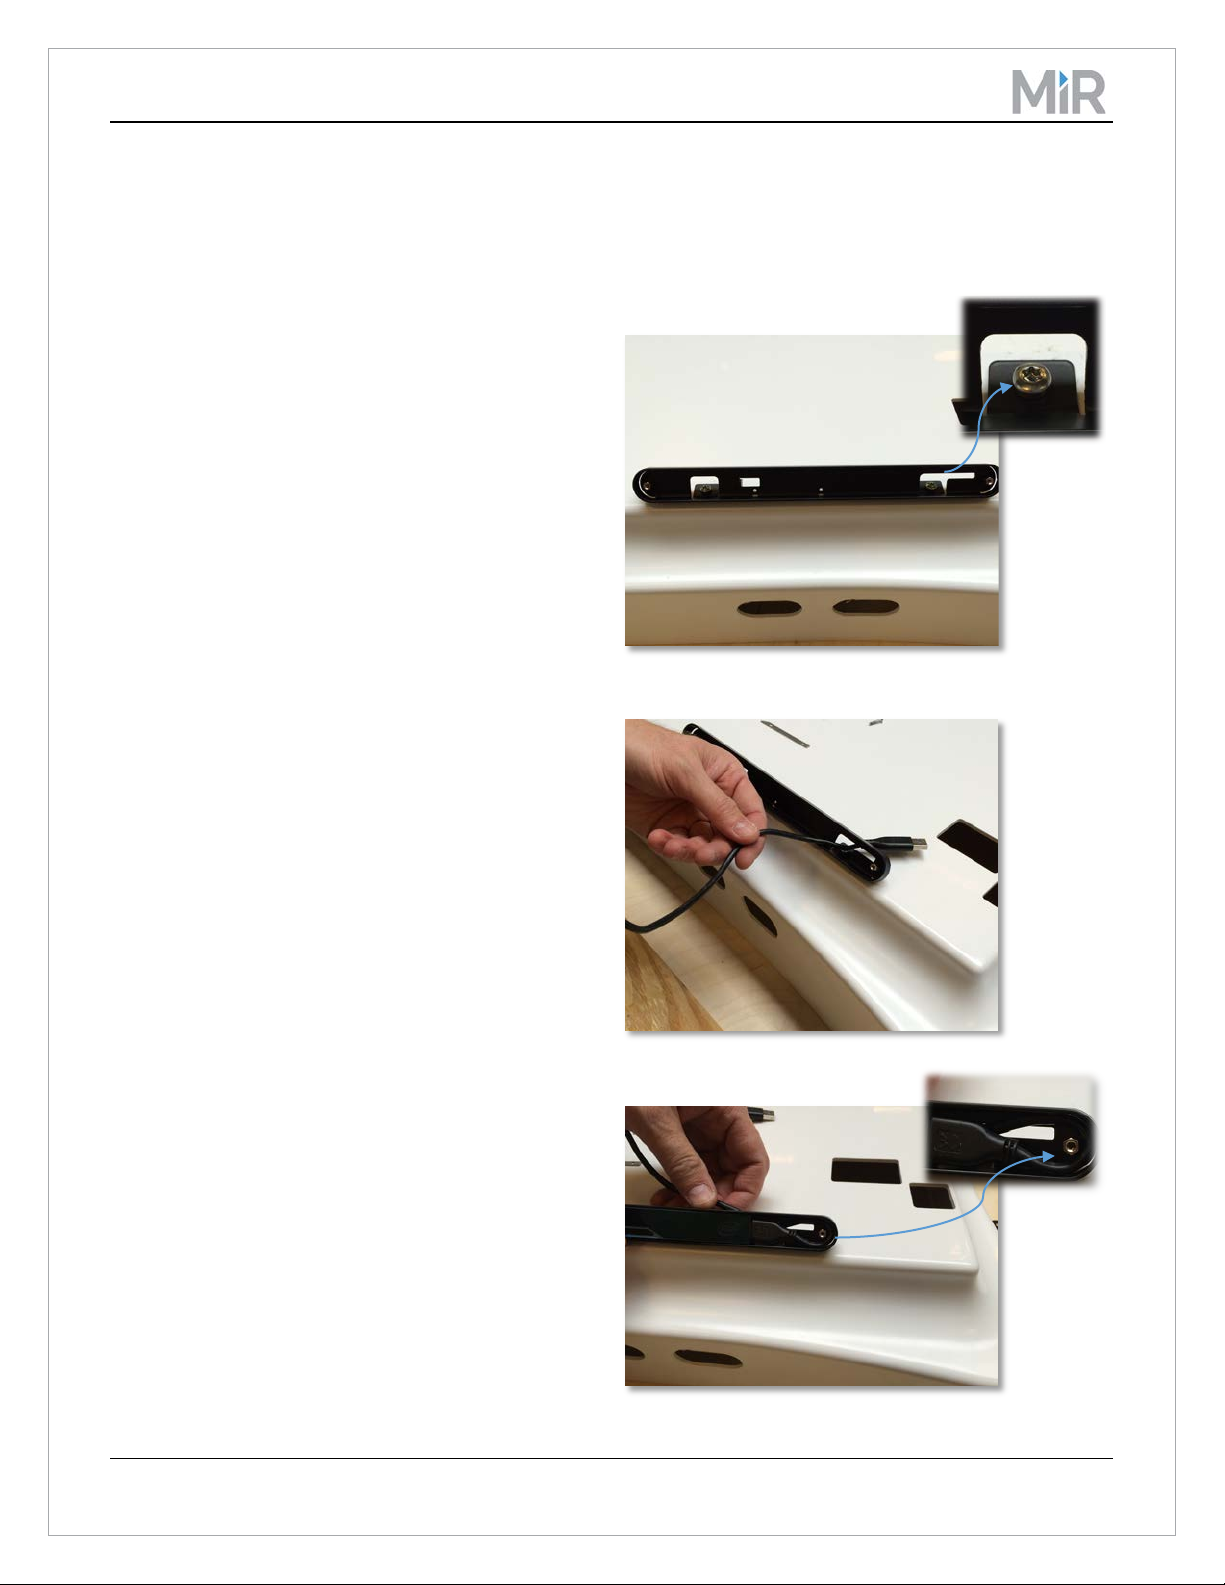
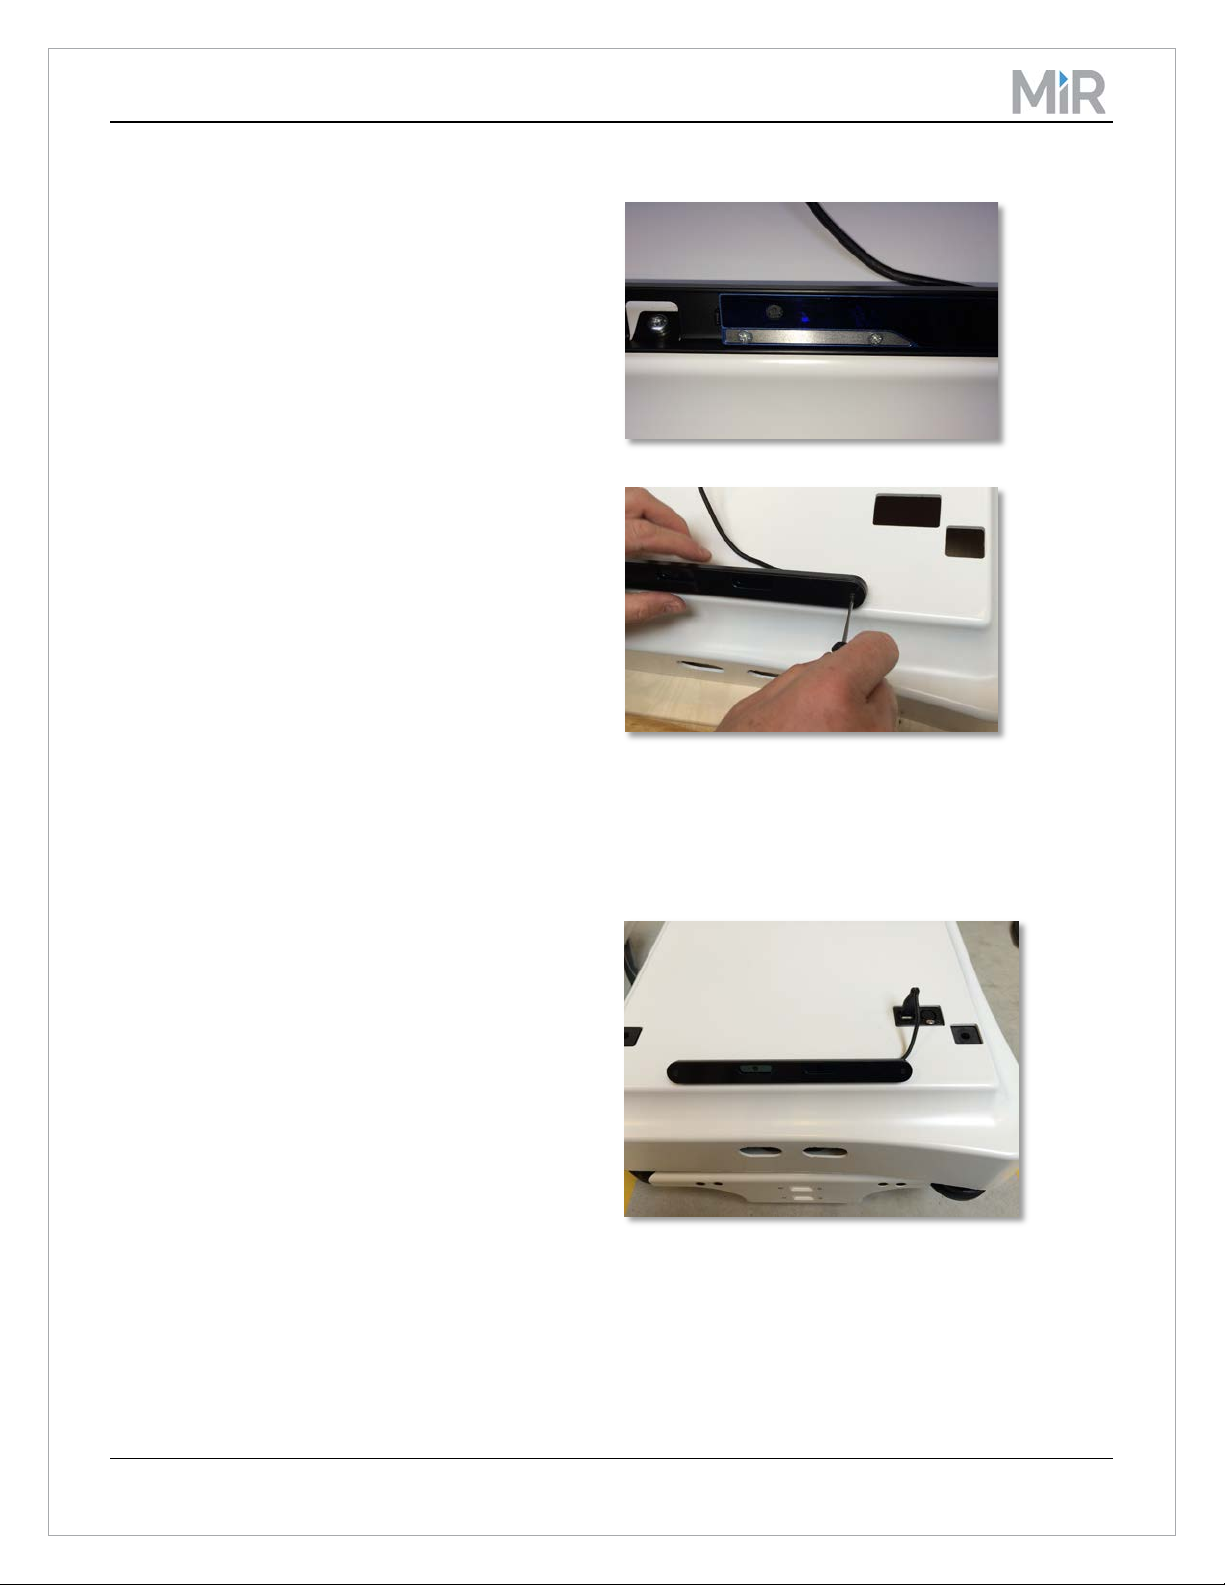
Mount the top camera as described here:
1. Fasten the bottom part of the bracket in the
two pre-drilled holes.
Fasten screws at the back of the cover with
nuts and washers.
2. Thread the USB cable through the bracket as
shown.
3. Fit the camera in the bracket.
Copyright Mobile Industrial Robots 2016 Page 5 of 9
Lead the cable around the screw to and pull it
carefully from the back to hold it in place.
Page 6
MiR Intel Top camera –Technical documentation
Place the robot’s top panel with camera on
4. Affix the metal sheet to the camera with the
two small black screws.
5. Place the top part of the bracket as shown
and fasten with two screws.
3.3 Connecting the top camera
the robot. Connect the camera to the USB
socket as shown.
Copyright Mobile Industrial Robots 2016 Page 6 of 9
Page 7
MiR Intel Top camera –Technical documentation
Ste
p
Instruction
Illustration
1
Log in as
2
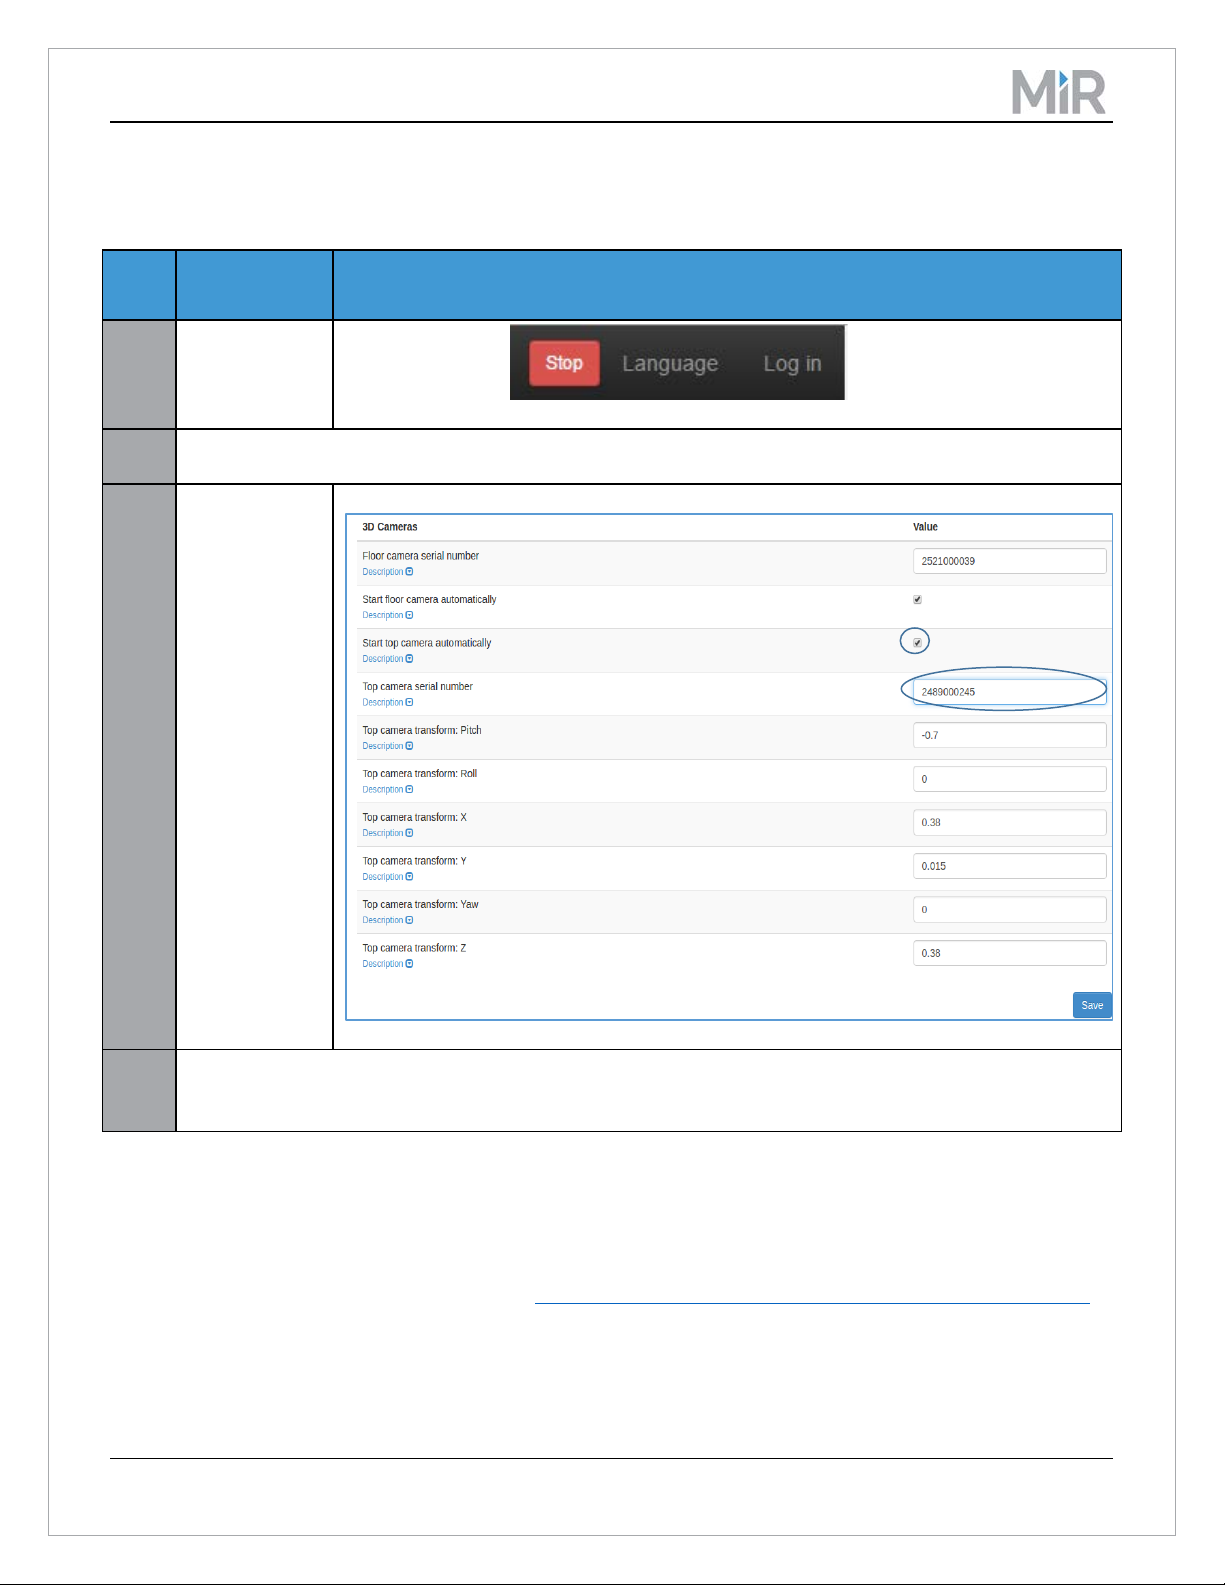
Go to Service Configuration System settings ROS parameters
3
Find 3D
4
Restart the MiR100 by turning the power switch to OFF. Wait until the light of the MiR100 is off. Turn
The MiR100 is now ready to operate with the top camera.
3.4 Setting up top camera in ROS parameters
Follow these steps to set up the top camera software.
administrative
user.
Cameras
under the ROS
parameters.
• Tick off
Start top
camera
automatical
ly
• Enter the
serial no. as
written on
the camera
bracket.
• Click Save.
the power switch ON.
Note! The preset top camera parameters are valid when the camera is positioned directly on the top panel of
the MiR100 as shown in this document. If the camera is mounted in a different position or on an external top
module, the parameters must be adjusted accordingly.
For assistance, contact MiR Customer support, https://mirrobot.atlassian.net/servicedesk/customer/portal/1
Copyright Mobile Industrial Robots 2016 Page 7 of 9
.
Page 8
MiR Intel Top camera –Technical documentation
4 Frequently Asked Questions
Question: The 3D cameras are not active.
Answer: The 3D cameras are active only when the MiR100 is driving in automatic mode. Set the MiR100 to
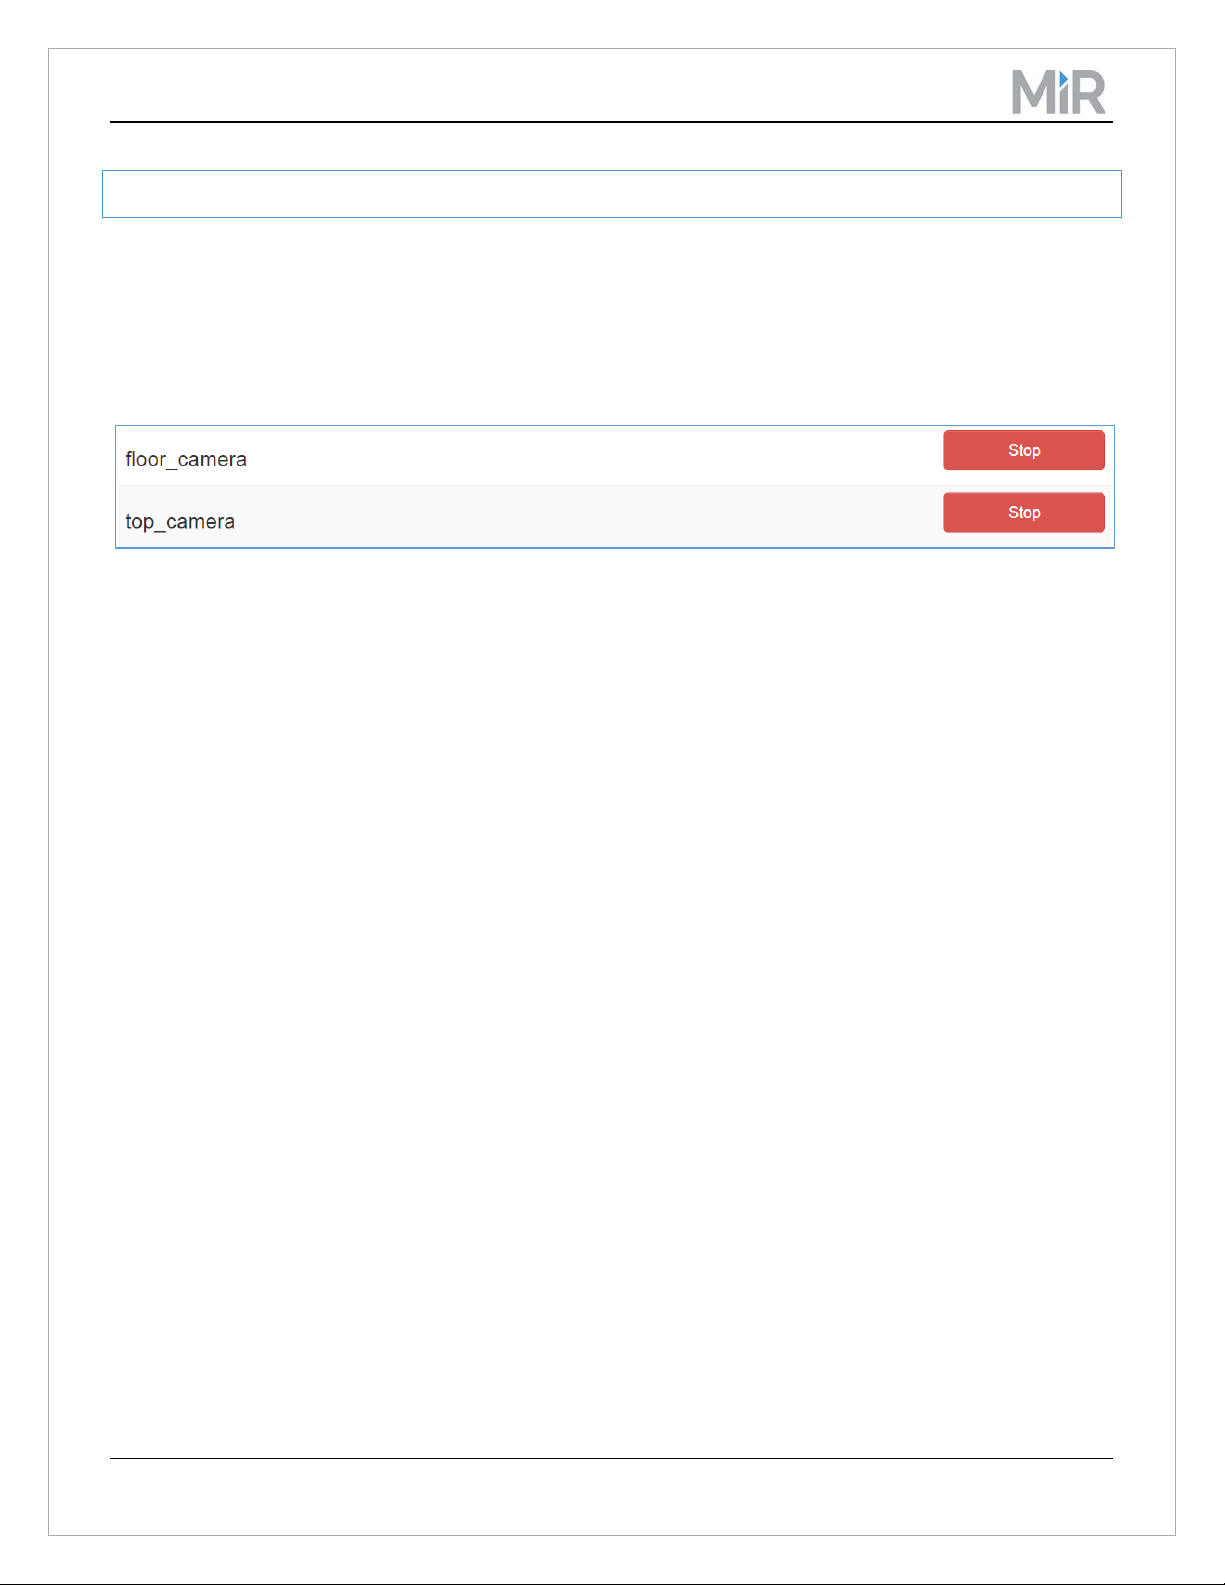
drive in for example a ROUTE or TAXI. Check the launch menu under “Service” --> “Configuration”
--> “Launch Menu” to see if the cameras are active.
This example shows that both cameras are running and active:
Copyright Mobile Industrial Robots 2016 Page 8 of 9
Page 9

MiR Intel Top camera –Technical documentation
Version
Date
Changes
1.0
03.05.2016
Document created
1.0
21.12.2016
ROS parameter screenshot in
section 3.4 updated
5 Changelog
Copyright Mobile Industrial Robots 2016 Page 9 of 9
 Loading...