

Page 1
Activity Monitor with 7-Day Memory and Social Connectivity
User’s guide and how-to videos available at
www.mioglobal.com
Page 2

English 1English 1
CONTENTS
PACER PC +
ACTIVATING YOU PEDOMETER
MODES OF OPERATION
SETTING THE TIME
SETTING THE ALARM
USER SETTINGS
SETTING DAILY OR WEEKLY TARGET
TIMER
BUTTON LOCK
MEMORY
PC UPLOAD
CHANGING THE BATTERIES
SPECIFICATIONS
LIMITED ONE YEAR WARRANTY
DISCLAIMER
2
4
5
7
8
8
10
11
11
12
12
13
13
14
15
Page 3

English 2
A. PACER PC +
LIGHT/CLEAR button
resets values,
turns light on
START/STOP button
starts or stops timer,
shortcut to timer
mode
MEMORY/+ button
switches to memory
mode/increases
values (press and
hold to fast forward
value selection)
SUBMENU/– button
decreases values (press and
hold to fast reverse value
selection)
MODE/SET button
switches modes
Button lock
locks and unlocks buttons
USB port for
uploading
data to PC
Page 4

English 3
Alarm on
Autoscroll
automatically
switches between
screens
Keylock on
indicates buttons
are locked to
prevent accidental
changes
Memory Mode
Timer Mode
Day of the week
Page 5

English 4
ACTIVATING YOUR PEDOMETER
If the screen is blank remove the insulation tape
to activate the set-up mode (time, date and user
settings).
To ensure accuracy Pacer PC + will wait for five to ten consecutive steps. Once the steps have been detected the
Pacer PC + will start to count your steps. Your Pacer PC +
uses Advanced Acceloremeter Technology (AAT) motion
sensor and, unlike conventional pedometers which must
be worn vertically, can be carried in a variety of places and
positions. Tuck your Pacer PC + into your pocket or carry it
in your purse.
The Pacer PC + also comes with a carrying sleeve, belt clip
and USB Cable.
Page 6
English 5
B. MODES OF OPERATION
Press MODE to move to the next mode. Press START/STOP button in any
mode to go directly to Timer.
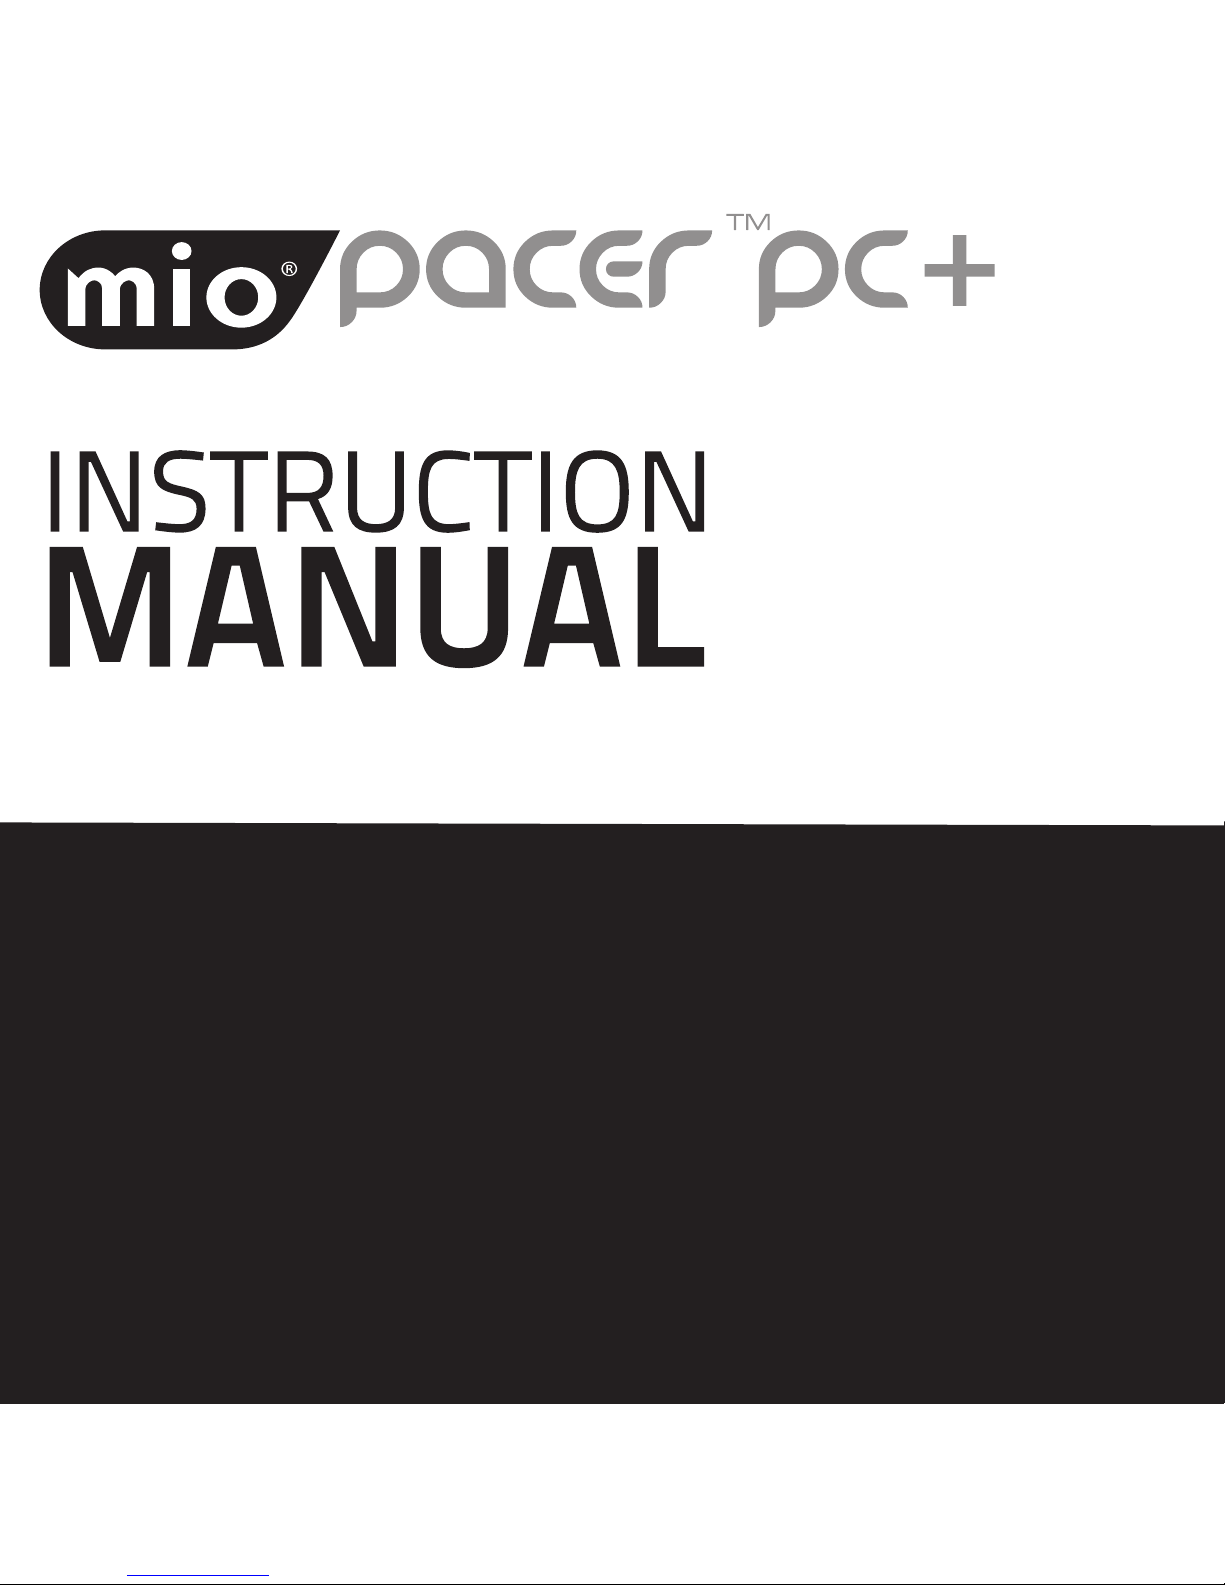
STEP
Top line displays number of steps taken.
Second line scrolls between calories
burned, distance, active time (walk+run)
and speed
TIME
Top line displays number of steps taken.
Second line scrolls between calories
burned, distance, active time (walk+run)
and speed
ALARM
Set daily alarm
Page 7
English 6
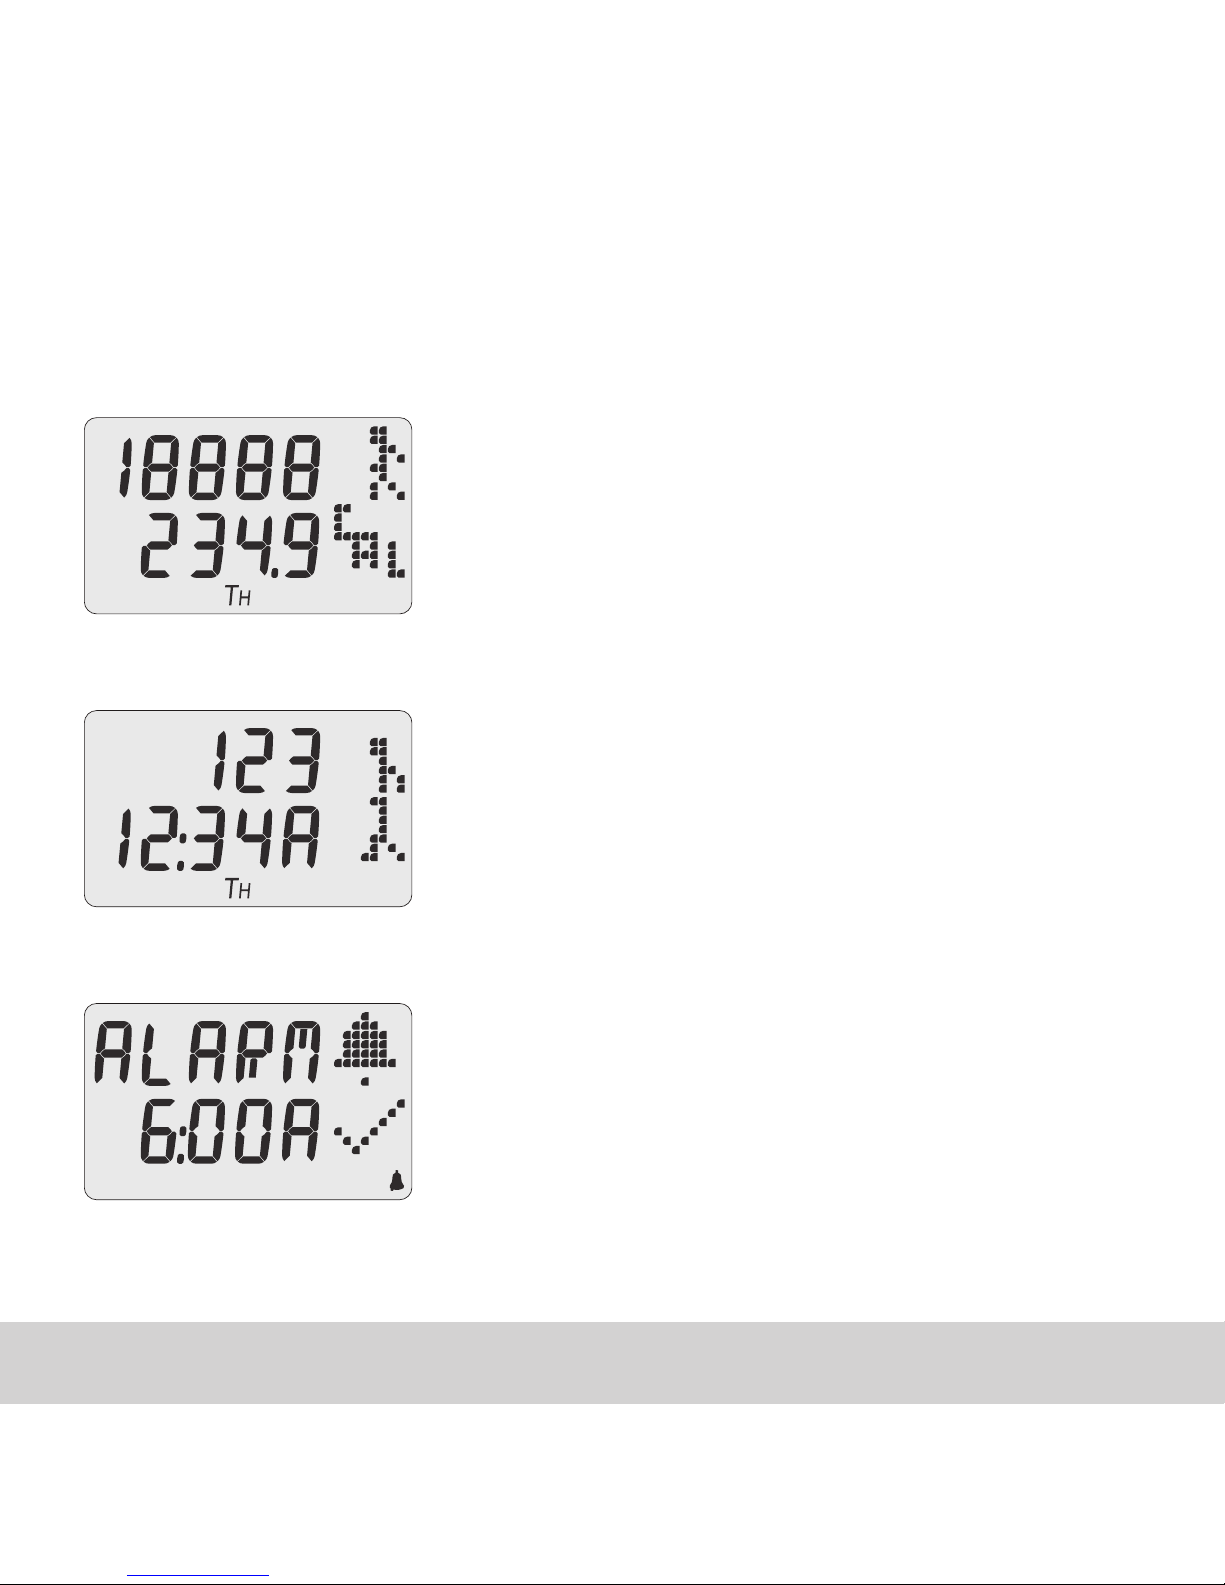
TIMER
Top line displays number of steps taken.
Second line scrolls between calories burned,
distance, active time (walk+run) and speed
TARGET
Displays remaining daily or weekly target
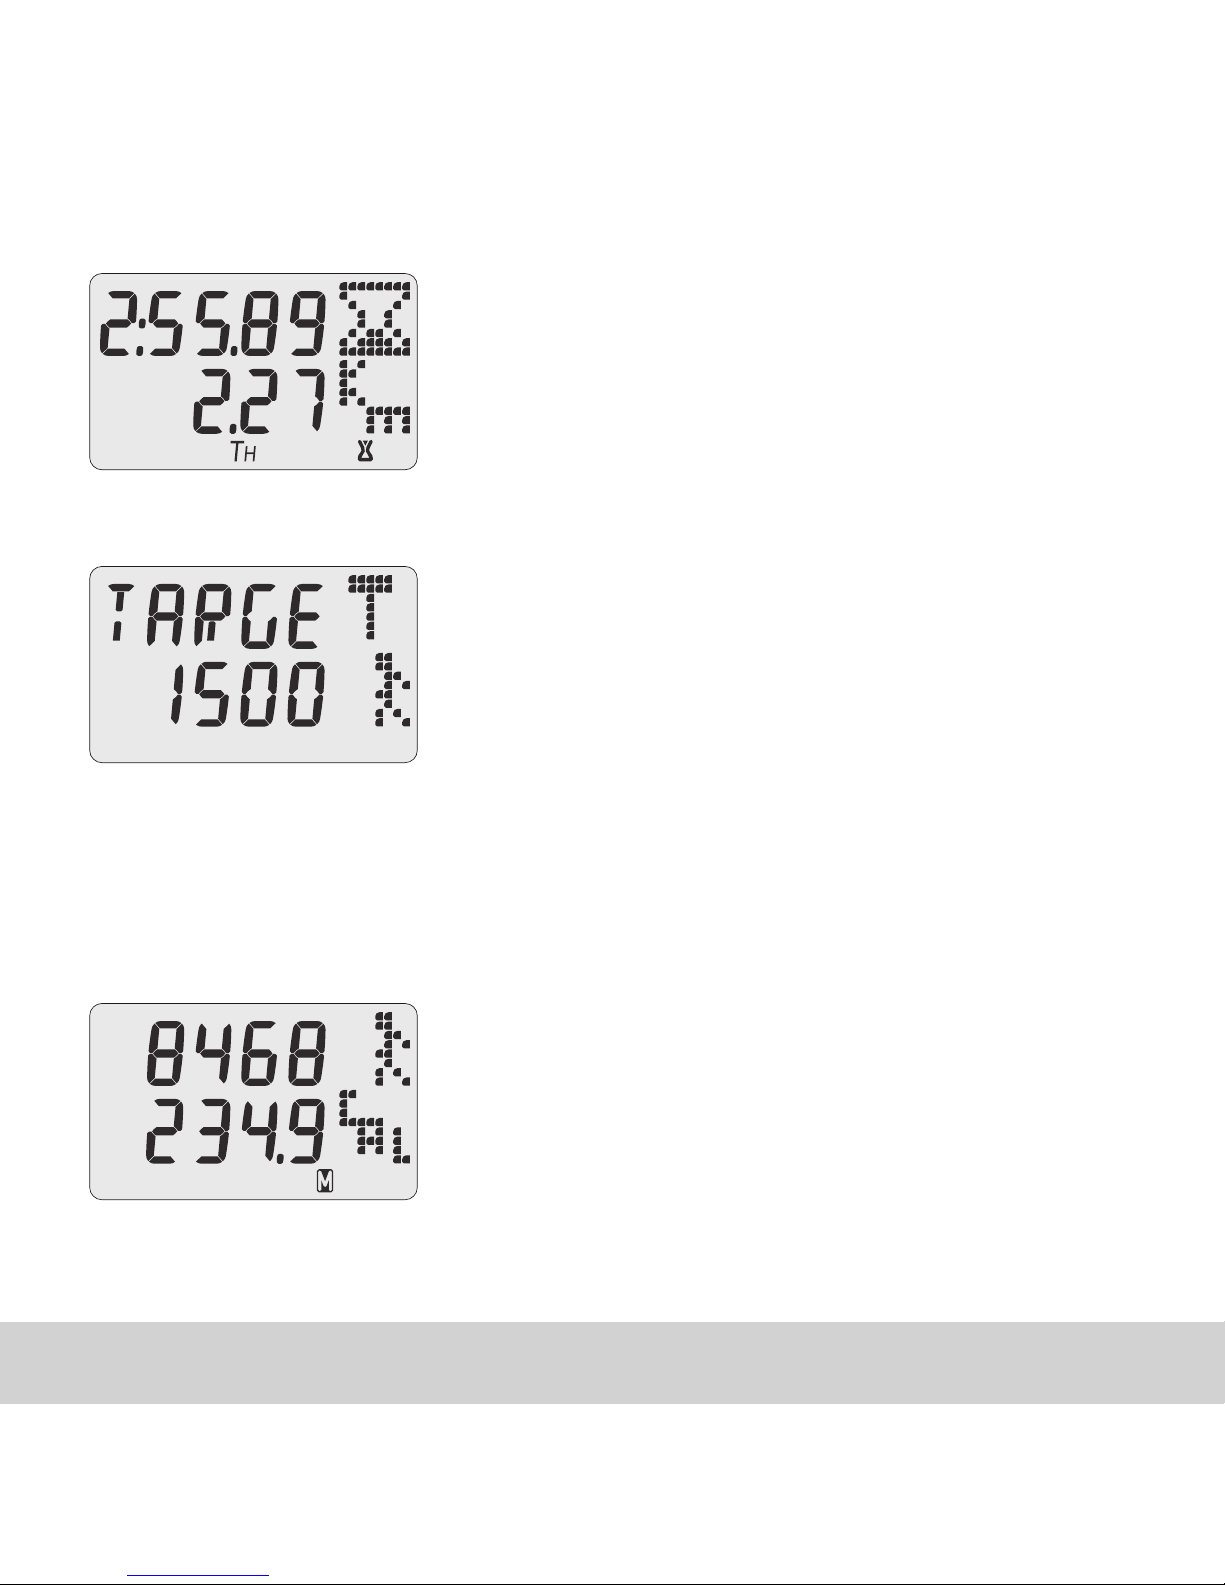
Pressing MEMORY in any mode will bring up the Memory mode (except
when inputting user data).
MEMORY
Displays data stored in memory
Page 8

English 7
C. SETTING THE TIME
1. Press the MODE button until you reach the time screen.
Press and hold SET until the screen begins to flash.
2. Use the + or – to select 12 or 24 hr clock. Press SET to select.
3. Next, use the + and – buttons to increase/decrease the hour. Press SET to select.
Repeat for minutes.
4. Next, use the + and – buttons to increase/decrease the year. Press SET to select.
5. Next, use the + and – buttons to toggle between the date settings. M.D indicates the
date will be displayed as month first, then day (Ex. 02.30), D.M indicates the day will
be displayed first, (Ex. 30.02). Press SET to select.
6. Next, use the + and – buttons to increase/decrease the month. Press SET to select.
Repeat for day.
7. Next, the screen will ready, “Key Tone”. Use the + and – buttons to toggle between
setting the sound for the buttons on or off, indicated by a “√” for on or an “X” for off.
8. Next the screen will read “Auto Scroll”. Use the + and – buttons to toggle between
setting the scroll function on or off (√=on, X=off). Press SET to confirm. On the time
screen, choosing on will scroll between the date and the number of steps walked.
Choosing off will leave the date on the screen, and you can use the SUBMENU but
-
ton to see the number of steps walked.
Note: You can press and hold the + or – button to quickly advance through the
numbers when changing the settings.
Page 9

English 8
D. SETTING THE ALARM
1. Press the MODE button until you reach the alarm screen.
2. Press and hold the Set button until the hour begins to flash. Use the + or – to
increase or decrease the hour. Press SET to confirm and repeat for minutes.
3. To activate the alarm press the – sub menu button, you will see a “√” or an “X”
indicating the alarm is on or off.
4. When the alarm is sounding, press any button to turn off. The alarm will
automatically turn off after 30 seconds.
5. The alarm will sound at the same time everyday at this time unless reset by user.
E. USER SETTINGS
1. Press the mode button until you reach the Step Screen. Press and hold
down the Set button until the screen displays “Weight Unit”.
2. Use the + and – buttons to toggle between KG and LB. Press SET to select.
3. Use the + and – buttons to increase/decrease the weight as necessary.
Press SET to select.
4. Next, use the + and –buttons to toggle between cm and inches for your
height. Press SET to select.
Page 10

English 9
5. Use the + and – buttons to increase/decrease height as necessary.
Press SET to select.
6. Next, use the + and – buttons to toggle between Male and Female for Gender.
Press SET to select.
7. Next, use the + and – buttons to toggle between choosing Power Save ON
(indicated with √ or off, indicated with an X). Press SET to select. Power save
will turn off the 3D sensing of the pedometer when not in use to save battery.
8. If you choose √ for Power save, you will be prompted to enter a “Sleep” and
“Awake” time for the pedometer. This will automatically turn the pedometer off at
the time set and then turn it back on for the time indicated.
9. In the Sleep screen, use the + and – buttons to increase/ decrease the time as
necessary. Please note, only the hour can be set. Press SET to select.
Page 11

English 10
F. SETTING DAILY OR WEEKLY TARGET
1. Press the MODE button until you reach the target screen. Press and hold
SET until the screen begins to flash.
2. Use the + and – buttons to toggle between the different goals you can
choose as your target. Press SET to select your desired target:
MIO’s recommended goal of burning 3500 calories/week
Will set 3500 as your weekly calorie goal. Based on the fact that losing one
pound a week requires burning an extra 500 calories per day, 3500 calories
over the whole week.
Kcal set a daily/weekly goal for the number of calories burned
Use the + and – buttons to toggle between daily or weekly. Press SET to
select. Use the + and – buttons to increase/decrease the goal as necessary.
Step set a daily/weekly goal for the number of steps walked
Use the + and – buttons to toggle between daily or weekly. Press SET to
select. Use the + and – buttons to increase/decrease the goal as necessary.
Dist set a daily/weekly goal for the distance walked
Use the + and – buttons to toggle between daily or weekly. Press SET to
select. Use the + and – buttons to increase/decrease the goal as necessary.
None no target selected
Note: You are only able to use one target function at one time. When the Target is
achieved the display will read “GOAL” and beeps will sound for few seconds.
Page 12

English 11
G. TIMER
1. Press the MODE button until you reach the timer screen. An hourglass icon
will be displayed in lower right corner.
2. Press the SET button until the screen begins to flash.
3. Use the + and – buttons to toggle between count up and
count down timers. Press SET to select.
4. For the countdown timer the hours will begin to flash.
Use the + and – buttons to increase or decrease the time.
Press SET to select. Repeat for minutes and seconds.
5. Press the START/STOP button to start and stop the timer.
6. Press and hold the CLEAR button for 2 sec to reset timer.
Note: Pressing the START/STOP button in any mode works as
a shortcut to the Timer screen.
H.BUTTON LOCK ( )
To lock the buttons so they are not accidently pressed while in use push the
switch on the top of the pedometer to the left. When locked an icon of a lock
will appear on the screen in the bottom left. To unlock, switch the button back
to the right.
Page 13

English 12
I. MEMORY
1. Use the MEMORY button to enter the memory mode.
2. Pressing the MEMORY button will scroll between Today, This Week, Last
Week, and then the last 7 days. After each screen, it will display the number
of steps walked, calories burned, distance and active time (walk+run time).
3. To clear any of the time periods, press and hold the CLEAR button to reset.
4. Your “Today Totals” (steps, distance, calories and speed) will automatically be
saved in the weekly memory at midnight each night.
J. PC UPLOAD
1. Connect Pacer PC + to your PC via USB cable.
2. Launch a web browser and go to mioglobal.com; create a free user account in MyMIO.
3 .Once MyMIO account is created login to MyMIO, select the Pacer PC + tab and
follow the instructions to upload your data.
4. Set up your Tweets and launch the Facebook App in MyMIO.
PHYSI-CAL ENTERPRISES INC., 7501 N HARKER DRIVE, PEORIA, IL 61615
TOLL-FREE: 1-877-770-1116
WWW.MIOGLOBAL.COM
Page 14

English 13
K. CHANGING THE BATTERIES
PACER uses a CR2025 battery.
1. Locate battery tray on the right side of the back .
2. Slide the tray out, replace the battery. Make sure that the polarity is lined up correctly.
3. Slide the battery tray back.
Note: After changing the battery you will need to re-enter your personal
information and set the time and date.
PACER PC + SPECIFICATIONS
12/24 hour clock + daily alarm
Maximum Steps: 99,999
Maximum Distance: 999.99 kilometers or miles
Maximum Calories: 99,999
Maximum Timer: 9:59’59” (9 hours 59 minutes and 59 seconds)
Material: plastic
Operating Temperature: 0°C to 45°C
Battery: CR2025
SPECIFICATIONS SUBJECT TO CHANGE WITHOUT NOTICE
Made in China
Page 15

English 14
LIMITED ONE YEAR WARRANTY
THE MIO LIFESTYLE WATCH, EXCEPT THE BATTERY, IS WARRANTED TO THE ORIGINAL PURCHASER TO BE FREE FROM DEFECTS IN
MATERIAL & WORKMANSHIP UNDER NORMAL USE FOR A PERIOD OF ONE (1) YEAR FROM THE DATE OF PURCHASE. DURING THE
WARRANTY PERIOD, & UPON PROOF OF PURCHASE, THE MIO FITNESS WATCH WILL BE REPAIRED OR REPLACED (WITH THE SAME
OR SIMILAR MODEL) AT THE OPTION OF THE MANUFACTURER, WITHOUT CHARGE FOR EITHER PARTS OR LABOR. THE WARRANTY
DOES NOT APPLY TO DAMAGE RESULTING FROM ABUSE, MISUSE OR ALTERATION OF THE MIO WATCH. THIS INCLUDES ANY DAMAGE TO THE MIO THAT APPEARS TO BE CAUSED BY THE USE OF TOOLS. WITHOUT LIMITING THE FOREGOING, DAMAGE RESULTING
FROM BENDING OR DROPPING THE MIO WATCH WILL BE DEEMED TO RESULT FROM ABUSE OR MISUSE. THIS WARRANTY IS VOID IF
THE WATCH CASE OF THE MIO WATCH HAS BEEN OPENED OR OTHERWISE TAMPERED WITH. THERE IS A U.S. $12.00 CHARGE FOR
HANDLING, POSTAGE & INSURANCE ON WARRANTY REPAIRS. CONTACT PHYSI-CAL CUSTOMER SERVICE TO ARRANGE FOR WARRANTY REPAIR OR REPLACEMENT BY PHONING 1-877-770-1116. IT CAN TAKE UP TO SIX WEEKS TO RECEIVE YOUR REPLACEMENT/
REPAIRED WATCH AFTER YOUR DEFECTIVE WATCH HAS BEEN RECEIVED AT OUR WAREHOUSE. PLEASE NOTE THAT ONLY YOUR
ORIGINAL RETAILER CAN OFFER REFUND ACCORDING TO THEIR OWN TERMS & CONDITIONS.
YOU CAN ALSO CONTACT US BY MAIL TO ARRANGE TO RECEIVE RETURN/REPLACEMENT SHIPPING AUTHORIZATION: MIO WATCH
SERVICE CENTER, 7501 N. HARKER DRIVE, PEORIA, IL 61615, TOLL FREE 1-877-770-1116 FAX 1-309-689-6543
NEITHER THE WARRANTY NOR ANY OTHER WARRANTY, EXPRESS OR IMPLIED, INCLUDING IMPLIED WARRANTIES OF MERCHANTABILITY, SHALL EXTEND BEYOND THE WARRANTY PERIOD (ONE YEAR FROM DATE OF ORIGINAL PURCHASE). NO RESPONSIBILITY
IS ASSUMED FOR ANY INCIDENTAL OR CONSEQUENTIAL DAMAGE, INCLUDING BUT NOT LIMITED TO DAMAGE RESULTING FROM
INACCURACY OF THE PRODUCT OR ANY OF ITS FUNCTIONS. THE LAWS OF SOME JURISDICTIONS DO NOT ALLOW THE EXCLUSION OR
LIMITATION OF INCIDENTAL OR CONSEQUENTIAL DAMAGES SO THAT THE ABOVE LIMITATIONS OR EXCLUSIONS MAY NOT APPLY TO
YOU. THE WARRANTY GIVES YOU SPECIFIC LEGAL RIGHTS & YOU MAY HAVE OTHER RIGHTS THAT VARY FROM STATE TO STATE. THIS
WARRANTY IS VOID UNLESS THE MIO WATCH IS PURCHASED FROM AN AUTHORIZED MIO RESELLER.
Page 16

English 15
DISCLAIMER
THE MATERIAL IN THE INSTRUCTION GUIDE & MIOSENSE BOOKLET & WEBSITE IS FOR INFORMATION PURPOSES ONLY. THE
MIO WATCH DESCRIBED IS SUBJECT TO CHANGE WITHOUT PRIOR NOTICE, DUE TO THE MANUFACTURER’S CONTINUOUS DEVELOPMENT PROGRAM. THE MIO WATCH, INSTRUCTION GUIDE & MIOSENSE BOOKLET ARE INTENDED TO SUPPORT A SENSIBLE
APPROACH TO HEALTH & FITNESS. THEY ARE NOT INTENDED TO REPLACE PROFESSIONAL MEDICAL ADVICE RELATED TO DIET,
EXERCISE OR WEIGHT LOSS. PHYSI-CAL ENTERPRISES SHALL NOT BE LIABLE FOR ANY DAMAGES, DIRECT OR INCIDENTAL,
CONSEQUENTIAL OR SPECIAL, ARISING OUT OF, OR RELATED TO, THE USE OF MIO & ACCOMPANYING DOCUMENTS. IF YOU
EXPERIENCE SEVERE OR PROLONGED DISCOMFORT OR PAIN AT ANY TIME, SEE YOUR DOCTOR IMMEDIATELY. THE INFORMATION IN THE INSTRUCTION GUIDE & MIOSENSE BOOKLET IS INTENDED TO BE USED AS A GENERAL GUIDE ONLY & MAY NOT BE
APPROPRIATE TO SPECIFIC USERS. IN PARTICULAR: MAXIMUM HEART RATE. CONSULT A DOCTOR TO DETERMINE YOUR PERSONAL MAXIMUM HEART RATE. MIO USES COMPLEX FORMULAE THAT GENERALLY PREDICT THE HR BASED UPON STUDIES
OF SUBJECTS WITH HEALTHY HEARTS. THE PERCENTAGE OF MAXIMUM CALCULATIONS ARE NOT TO BE RELIED UPON ESPECIALLY IF YOU HAVE A HISTORY OF HEART DISEASE, STROKE, HIGH OR LOW BLOOD PRESSURE, DIABETES, ASTHMA OR OTHER
CIRCULATORY OR RESPIRATORY CONDITIONS. CALORIE TARGET & EXPENDITURE: RELIANCE ON INAPPROPRIATE INTAKE &
EXPENDITURE TAR GETS MAY RESULT IN EXCESSIVE WEIGHT GAIN OR LOSS, FAINTING, DIETARY DEFICIENCIES OR OTHER
ADVERSE MEDICAL CONSEQUENCES. CONSULT A DOCTOR TO DETERMINE WHAT CALORIC INTAKE & EXPENDITURE TARGETS
ARE APPROPRIATE FOR YOU. MIO, WHILE DESIGNED TO PROVIDE AN ECG-ACCURATE HEART RATE, IS NEITHER DESIGNED NOR
WARRANTED FOR MEDICAL USE & SHOULD NOT BE RELIED UPON FOR MEDICAL PURPOSES. ALWAYS CONSULT A DOCTOR
BEFORE BEGINNING A NEW EXERCISE REGIME OR DIET PROGRAM OF ANY KIND.
EU RESIDENTS: Do not dispose of this product as unsorted municipal waste. It is your responsibility to return
this product to local recycling service. EU-DECLARATION
OF CONFORMITY Physi-Cal Enterprises Inc. declares this
Finger Sense Heart Rate Watch (PACER PC + ) in compliance with EMC directive 2004/108/EC. A copy of the
Declaration of Conformity is available on request from
our Customer Service.
Made in China
PWC130-03003(MIO)
Page 17

Page 18

Page 19

www.mioglobal.com
Page 20

Française 1Française 1
TABLE DES MATIÈRES
PACER PC + EN UN COUP D’OEIL
ACTIVATION DE VOTRE PODOMÈTRE
MODES D’OPÉRATION
RÉGLAGE DE L’HEURE
RÉGLAGE DE L’ALARME
CONFIGURATIONS DE L’UTILISATEUR
RÉGLAGE DES OBJECTIFS QUOTIDIENS OU HEBDOMADAIRES
MINUTEUR
BOUTON DE VERROUILLAGE
MÉMOIRE
TÉLÉCHARGEMENT PC Pacer PC + SEULEMENT
CHANGEMENT DES PILES
SPÉCIFICATIONS DU PACER PC +
GARANtIE LIMItÉE (D’UN AN)
DÉNÉGATION DE RESPONSABILITÉ
2
4
5
7
8
9
10
11
12
12
13
13
14
15
16
Page 21

Française 2
A. PACER PC + EN UN COUP D’OEIL
Bouton LUMIÉRE/«CLEAR»
Réinitialisa les valeurs,
Allume la lumiére
Le PACER et le Pacer PC + sont
identiques avec une
seule exception: Pacer PC + vous
perment de télécharger vos données vers un PC par un port USB
Bouton MARCHE/ARRÊ
Démarre ou arrête le
minuteur, raccourci au
mode minuteur
Bouton MÉMOIRE/+
Passe au mode mémoire
Augmente les valeurs
(Appuyez et maintenez
le bouton pour avancer
rapidement la sélection
de valeur)
Bouton SOUS-MENU/-
Diminue les valeurs (Appuyez et
maintenez le bouton pour reculer
rapidement la séction de valeur)
Bouton MODE/«SET»
Change de mode
Bouton verrouillage
Verrouille et déverrouille
les boutons
Page 22

Française 3
Alarme en marche
Délement automatique
Changement automatique
entre les écrans
Verrouillage de clés en marche
Indique que les boutons sont
verrouillés pour prévenir des
changements accidentels
Mode mémoire
Modeminuteur
Jour de la semaine
Page 23

Française 4
ACTIVATION DE VOTRE PODOMÈTRE
Si l’écran est vide, enlevez le ruban isolant pour
activer le mode de configuration (heure, date et
configurations de l’utilisateur).
Pour s’assurer de la précision, le Pacer PC + attendra
de cinq à dix pas consécutifs. Dès que les pas ont
été détectés, le Pacer va commencer à compter vos
pas. Votre Pacer PC + utilise un senseur de mouvement avec une technologie accéléromètre avancée
et contrairement à des podomètres conventionnels
qui doivent être porté verticalement, le Pacer PC +
peut être porté en une variété de positions. Serrez
votre Pacer PC + dans votre poche ou mettez-le
dans votre sac à main.
Page 24

Française 5
B. MODES D’OPÉRATION
Appuyez sur le bouton MODE pour accéder au prochain mode. Appuyez sur le bouton MARCHE/ARRÊT dans n’importe quel mode pour aller directement au minuteur.
PAS
Affiche le nombre de pas pris
et les calories (montrées ici),
la distance, le temps actif
(marche + course) et la vitesse
HEURE
Affiche le nombre de pas pris
ainsi que l’heure et le jour de
la semaine.
ALARME
Réglez l’alarme quotidienne
Page 25

Française 6
MINUTEUR
Affiche le minuteur ainsi que la
distance parcourue (montrée
ici), la vitesse moyenne, les pas
pris et les calories brûlées
OBJECTIF
Affiche l’objectif quotidien
hebdomadaire qui reste à atteindre
Si vous appuyez sur le bouton MÉMOIRE dans n’importe quel mode,
le mode mémoire apparaîtra (sauf si vous êtes en train d’inscrire
vos données personnelles).
MÉMOIRE
Affiche les données
sauvegardées dans la mémoire
Page 26

Française 7
C. RÉGLAGE DE L’HEURE
1. Appuyez sur le bouton MODE jusqu’à ce que vous ayez accédé à l’écran d’heure. A
puyez et maintenez le bouton « SET » jusqu’à ce que l’écran commence à clignoter.
2. Utilisez le bouton + ou – pour sélectionner l’horloge 12h ou 24h. Appuyez sur le
bouton « SET » pour sélectionner.
3. Ensuite, utilisez les boutons + et – pour augmenter/diminuer l’heure. Appuyez sur le
bouton « SET » pour sélectionner. Répétez ces étapes pour les minutes.
4. Ensuite, utilisez les boutons + et – pour augmenter/diminuer l’année. Appuyez le
bouton « SET » pour sélectionner.
5. Ensuite, utilisez les boutons + et – pour basculer entre les configurations de la date. «
M.D. » indique que la date sera affichée avec le mois en premier et le jour après (par
exemple: 02.30), « D.M. » indique que le jour sera affiché avant (par exemple: 30.02).
Appuyez sur le bouton « SET » pour sélectionner.
6. Ensuite, utilisez les boutons + et – pour augmenter/diminuer le mois. Appuyez sur le
bouton « SET » pour sélectionner. Répétez pour le jour.
7. Ensuite, l’écran affichera les mots « Key Tone». Utilisez les boutons + et – pour ba
culer entre la configuration du son pour les boutons en marche ou en arrêt, indiqué par le
symbole « √
» pour le bouton en marche ou le symbole « X » pour le bouton en arrêt.
8. Ensuite, l’écran affichera les mots « Auto Scroll ». Utilisez les boutons + et – pour
basculer entre le réglage de la fonction de défilement en marche ou en arrêt (√ = en
marche, X = en arrêt). Appuyez sur le bouton « SET » pour confirmer votre sélection. À
l’écran de l’heure, si vous choisissez « en marche », il y aura un défilement entre la date
et le nombre de pas marchés. Si vous choisissez « en arrêt », la date restera sur l’écran
et vous pouvez utiliser le bouton SOUS-MENU pour voir le nombre de pas marchés.
Page 27

Française 8
Notez bien : vous pouvez appuyer et maintenir le bouton + ou – pour avancer rap
-
idement à travers les numéros lorsque vous changez les configurations.
D. RÉGLAGE DE L’ALARME
1. Appuyez sur le bouton MODE jusqu’à ce que vous accéder l’écran de l’alarme.
2. Appuyez et maintenez le bouton « SET » jusqu’à ce que l’heure commence
à clignoter. Utilisez les boutons + ou – pour augmenter ou diminuer l’heure.
Appuyez sur le bouton «SET » pour confirmer et répéter ces étapes pour
régler les minutes.
3. Pour activer l’alarme, appuyez sur le bouton –. Vous allez voir le symbole « √
» ou le = symbole « X » qui indiqueront si l’alarme est en marche ou en arrêt.
4. Lorsque l’alarme sonne, appuyez sur n’importe quel bouton pour l’éteindre.
L’alarme s’éteindra automatiquement après 30 secondes.
5. L’alarme sonnera en même temps chaque jour à cette heurelà à moins que
l’utilisateur la réinitialise.
Page 28

Française 9
E. CONFIGURATIONS DE L’UTILISATEUR
1. Appuyez sur le bouton mode jusqu’à ce que vous accéderiez l’écran pas. Appuyez et
maintenez le bouton « SET » jusqu’à ce que l’écran affiche « Weight Unit ».
2. Utilisez les boutons + et – pour basculer entre KG et LBS. Appuyez sur le bouton «
SET » pour sélectionner.
3. Utilisez les boutons + et – pour augmenter/diminuer le poids si nécessaire. Appuyez
sur le bouton « SET » pour sélectionner.
4. Ensuite, appuyez sur les boutons + et – pour basculer entre cm et pouces pour votre
hauteur. Appuyez sur le bouton « SET » pour sélectionner.
5. Utilisez les boutons + et – pour augmenter/diminuer votre hauteur si nécessaire.
Appuyez sur le bouton « SET » pour sélectionner.
6. Ensuite, utilisez les boutons + et – pour basculer entre homme et femme pour le
sexe. Appuyez sur le bouton « SET » pour sélectionner.
7. Ensuite, utilisez les boutons + et – pour basculer entre « Power Save ON » (indiqué
par le symbole « √ » ou en arrêt, indiqué par le symbole « X »). Appuyez sur le bou-
ton « SET » pour sélectionner. L’économiseur d’énergie éteindra le détecteur 3D du
podomètre lorsqu’il n’est pas en usage pour économiser l’énergie de la pile.
8. Si vous choisissez le symbole « √
» pour l’économiseur d’énergie, vous serrez invité à
entrer une heure « sommeil » et une heure « réveil » pour le podomètre. Ceci va
automatiquement éteindre le podomètre à l’heure désignée et le mettra ensuite en
marche selon l’heure désignée.
9. Lorsque vous êtes en écran sommeil, utilisez les boutons + et – pour augmenter
diminuer l’heure si nécessaire. Veuillez prendre note que seulement l’heure peut être
réglée. Appuyez sur le bouton « SET » pour sélectionner.
Page 29

Française 10
F. RÉGLAGE DES OBJECTIFS QUOTIDIENS
OU HEBDOMADAIRES
1. Appuyez sur le bouton MODE jusqu’à ce que vous accédiez l’écran objectif. Ap-
puyez et maintenez le bouton « SET » jusqu’à ce que l’écran commence à clignoter.
2. Utilisez les boutons + et – pour basculer entre les différents buts que vous
pouvez choisir comme votre objectif. Appuyez sur le bouton « SET » pour
sélectionner votre objectif désiré :
MIO Le but recommandé de MIO de brûler 3 500 calories/semaine
Réglera 3 500 comme votre but de calories hebdomadaires. Fondé sur le fait
que perdre une livre par semaine nécessite la brûlure de 500 calories en une
journée et de 3 500 calories pendant toute la semaine.
Kcal réglez un but quotidien/hebdomadaire pour le nombre de calories brûlées
Utilisez les boutons + et – pour basculer entre le quotidien et
l’hebdomadaire. Appuyez sur le bouton « SET » pour sélectionner. Utilisez
les boutons + et – pour augmenter/ diminuer le but si nécessaire.
Pas réglez un but quotidien/hebdomadaire pour le nombre de pas marchés
Utilisez les boutons + et – pour basculer entre le quotidien ou l’hebdomadaire.
Appuyez sur le bouton « SET » pour sélectionner. Utilisez les boutons + et –
pour augmenter/ diminuer le but si nécessaire. Dist réglez un but quotidien/
hebdomadaire pour votre distance parcourue.
Utilisez les boutons + et – pour basculer entre quotidien ou hebdomadaire.
Appuyez sur le bouton « SET » pour sélectionner. Utilisez les boutons + et –
pour augmenter/ diminuer le but si nécessaire.
Aucun aucun objectif sélectionné
Page 30

Française 11
Notez bien : Vous êtes seulement capable d’utiliser une fonction d’objectif
à la fois. Lorsque l’objectif est atteint, l’écran affichera le mot « GOAL » et
votre podomètre va biper pour quelques secondes.
G. MINUTEUR
1. Appuyez sur le bouton MODE jusqu’à ce que vous accédiez à l’écran min
teur. L’icône d’un sablier apparaîtra au coin inférieur droit de l’écran.
2. Appuyez sur le bouton « SET » jusqu’à ce que l’écran commence à clignoter.
3. Utilisez les boutons + et – pour basculer entre les minuteurs de compte et les
minuteurs de compte à rebours. Appuyez sur le bouton « SET » pour sélectionner.
4. Pour le minuteur de compte à rebours, les heures vont commencer à clignoter.
Utiliser les boutons + et – pour augmenter ou diminuer l’heure. A puyez sur le bou
-
ton « SET » pour sélectionner. Répétez ces étapes pour les minutes et les secondes.
5. Appuyez sur le bouton MARCHE/ARRÊT pour démarrer et arrêter le minuteur.
6. Appuyez et maintenez le bouton « CLEAR » pendant 2 COMPtE À REBOURs
DE 3 500 CALORIEs Votre Pacer MIO peut vous aider à accomplir le compte à
rebours MIO de 3 500 calories et à perdre 1 livre par semaine. Vous avez simplement à suivre vos calories brûlées tout au long de la journée alors que vous
marchez avec un but de 500 calories brûlées par jour pour un total de 3 500 par
semaine. Utilisez le journal Montre MIO en ligne pour vous aider à suivre vos
calories brûlées au quotidien au www.miowatch.com. secondes pour réinitialiser
le minuteur.
Notez bien : Si vous appuyez sur le bouton MARCHE/ARRÊT dans n’importe quel
mode, ce bouton fonctionne comme un raccourci pour accéder à l’écran minuteur.
Page 31

Française 12
H. BOUTON DE VERROUILLAGE
Pour verrouiller les boutons pour qu’ils ne puissent être appuyés par accident
lorsqu’ils sont en marche, glissez le bouton situé au-dessus du podomètre vers
la gauche. Lorsque le podomètre est verrouillé, l’icône d’une serrure apparaîtra
sur l’écran au coin inférieur gauche. Pour déverrouiller le podomètre, glissez le
bouton situé au-dessus du podomètre vers la droite.
I. MÉMOIRE
1. Appuyez le bouton de MÉMOIRE pour entrer dans le mode de mémoire.
2. Si vous appuyez sur le bouton de MÉMOIRE, vous défilerez entre aujourd’hui,
cette semaine, la semaine passée, et ensuite les 7 derniers jours. Après
chaque écran, les nombres de pas marchés, les calories brûlées, la distance
et le temps actif (temps de marche + course) seront affichés.
3. Pour effacer n’importe lesquelles des périodes de temps, appuyez et mai
tenez le bouton « CLEAR » pour réinitialiser.
4. Tes « Today Totals » (pas, distance, calories, et vitesse) vont automatiqu
ment être sauvegardés dans la mémoire hebdomadaire à minuit chaque nuit.
Page 32

Française 13
J. TÉLÉCHARGEMENT PC Pacer PC + SEULEMENT
1. Connectez votre Pacer PC + à votre PC par un câble USB.
2. Ouvrez une fenêtre de fureteur Web et allez au miowatch.com; créez un
compte d’utilisateur pour le club calories 3 500.
3. Connectez-vous au miowatch.com et allez à la section « Pacer PC + ».
4. Le logiciel « Pacer PC + » sera téléchargé à votre PC et sera lancé automatiquement.
5. Suivez les instructions sur miowatch.com pour installer le logiciel requis.
K. CHANGEMENT DES PILES
Le Pacer exige une pile CR 2025 (disponible dans la plupart des pharmacies).
1. Localisez le compartiment de pile sur le côté droit au dos du podomètre.
2. Glissez le compartiment de pile vers l’extérieur et remplacez la pile. Assurez
vous que la polarité positive et la polarité négative soient alignées proprement.
3. Glissez en place le compartiment de pile.
Notez bien: après avoir changé la pile, vous devriez réinscrire vos
données personnelles ainsi que régler l’heure et la date.
PHYSI-CAL ENTERPRISES INC., 7501 N HARKER DRIVE, PEORIA, IL 61615
sANs-FRAIs: 1-877-770-1116
WWW.MIOWATCH.COM
Page 33

Française 14
SPÉCIFICATIONS DU PACER PC +
Horloge 12/24 heures + Alarme quotidienne
Nombre de pas maximum: 99 999
Distance maximum: 999.99 kilomètres ou milles
Maximum de calories: 99 999
Minuterie maximum: 9:59’59” (9 heures 59 minutes et 59 secondes)
Matériel: plastique
Température d’opération: 0°C à 45 °C
Pile: CR2025
MODIFICATIONS TECHNIQUES RÉSERVÉES SANS PRÉAVIS
Fabriqué en Chine
Page 34

Française 15
GARANTIE LIMITÉE (D’UN AN)
LE PODOMÈTRE STYLE DE VIE MIO, SAUF LA PILE, EST GARANTI À L’ACHETEUR ORIGINAL CONTRE TOUT DÉFAUT DE PIÈCES ET DE MAIN
D’OEUVRE DANS DES CONDITIONS NORMALES D’UTILISATION PENDANT UNE PÉRIODE D’UN (1) AN QUI SUIT LA DATE D’ACHAT. PENDANT LA
PÉRIODE DE GARANTIE, & AVEC UNE PRÉSENTATION DE PREUVE D’ACHAT, LE PODOMÈTRE DE CONDITIONNEMENT PHYSIQUE MIO SERA
RÉPARÉ OU REMPLACÉ (PAR UN MODÈLE IDENTIQUE OU SIMILAIRE) À LA DISCRÉTION DU FABRICANT, SANS FRAIS POUR LES PIÈCES NI
POUR LA MAIN D’OEUVRE. LA GARANTIE NE COUVRE PAS LES DOMMAGES RÉSULTANT DE L’UTILISATION ABUSIVE, DU MAUVAIS USAGE,
OU DE LA TRANSFORMATION DU PODOMÈTRE STYLE DE VIE MIO. CECI COMPREND N’IMPORTE QUEL DOMMAGE QUI PARAIT AVOIR ÊTRE
FAIT AU MIO PAR L’UTILISATION D’OUTILS. SANS LIMITANT LES FAITS PRÉCITÉS, LE DOMMAGE RÉSULTANT DU PLIAGE OU D’UNE CHUTTE
D’UN PODOMÈTRE STYLE DE VIE MIO SERA CONSIDÉRÉ COMME UNE UTILISATION ABUSIVE OU DE MAUVAIS USAGES. CETTE GARANTIE
EST NULLE SI LE BOÎTIER DU PODOMÈTRE DU PODOMÈTRE DE CONDITIONNEMENT PHYSIQUE MIO A ÉTÉ OUVERT OU SINON ALTÉRÉ. IL Y
A DES FRAIS DE 12.00 $ USD POUR LES FRAIS D’EMBALLAGE, D’ENVOI & D’ASSURANCE SUR LA GARANTIE DE RÉPARATIONS. CONTACTEZ
LE SERVICE À LA CLIENTÈLE DE PHYSI-CAL POUR PRENDRE LES ARRANGEMENTS NÉCESSAIRES POUR LA GARANTIE DE RÉPARATIONS
OU POUR LE REMPLACEMENT EN APPELANT LE 1.877.770.1116. VEUILLEZ COMPTER AU MOINS SIX SEMAINES AVANT DE RECEVOIR
VOTRE PODOMÈTRE RÉPARÉ/REMPLACÉ APRÈS QUE VOTRE PODOMÈTRE DÉFECTUEUX AIT ÉTÉ REÇU À NOTRE ENTREPÔT. VEUILLEZ
NOTER QUE SEULEMENT VOTRE DÉTAILLANT ORIGINAL PEUT VOUS OFFRIR UN REMBOURSEMENT SELON LEURS PROPRES TERMES
& CONDITIONS. VOUS POUVEZ AUSSI NOUS CONTACTER PAR LA POSTE POUR PRENDRE LES ARRANGEMENTS NÉCESSAIRES POUR
RECEVOIR L’AUTORISATION POUR UN ENVOI DE RETOUR/ REMPLACEMENT : CENTRE DE SERVICE PODOMÈTRE MIO, 7501 N. HARKER
DR., PEORIA IL 61615, SANSFRAIS 1.877.770.1116 FAX 1.309.689.6543. NI CETTE GARANTIE, NI AUCUNE AUTRE GARANTIE, EXPRESSE
OU IMPLICITE, INCLUANT LES GARANTIES IMPLICITES DE VALEUR COMMERCIALE, VA ÊTRE PROLONGÉE AU-DELÀ DE LA PÉRIODE DE
LA GARANTIE (UN AN À PARTIR DE LA DATE ORIGINALE D’ACHAT). AUCUNE RESPONSABILITÉ N’EST ASSUMÉE POUR N’IMPORTE QUEL
DOMMAGE CONSÉCUTIF OU INDIRECT, Y COMPRIS, MAIS NON LIMITÉ, AU DOMMAGE RÉSULTANT DE L’INEXACTITUDE DU PRODUIT OU DE
N’IMPORTES QUELLES DE SES FONCTIONS. LES LOIS DE CERTAINES JURIDICTIONS NE PERMETTENT PAS L’EXCLUSION OU LA LIMITATION
DE DOMMAGES CONSÉCUTIFS OU INDIRECTS POUR QUE LES LIMITATIONS OU LES EXCLUSIONS CI-DESSUS NE PUISSENT S’APPLIQUER À
VOUS. LA GARANTIE VOUS DONNE DES DROITS LÉGAUX SPÉCIFIQUES & VOUS POUVEZ AUSSI AVOIR D’AUTRES DROITS QUI VARIENT D’UN
ÉTAT À L’AUTRE. CETTE GARANTIE EST NULLE À MOINS QUE LE PODOMÈTRE MIO AIT ÉTÉ ACHETÉ D’UN REVENDEUR MIO AUTORISÉ.
Page 35

Française 16 16 Française
DÉNÉGATION DE RESPONSABILITÉ
LE MATÉRIEL DANS LE GUIDE D’INSTRUCTION & DANS LE LIVRET MIOSENSE A POUR BUT D’INFORMER SEULEMENT. LE PODOMÈTRE MIO
DÉCRIT EST SUSCEPTIBLE D’ÊTRE MODIFIÉ SANS PRÉAVIS, À CAUSE DU PROGRAMME DE DÉVELOPPEMENT CONTINU DU FABRICANT.
LE PODOMÈTRE MIO, LE GUIDE D’INSTRUCTION & LE LIVRET MIOSENSE ONT L’INTENTION D’APPUYER UN APPROCHE RAISONNABLE FACE
À LA SANTÉ ET AU CONDITIONNEMENT PHYSIQUE. ILS N’ONT PAS L’INTENTION DE REMPLACER LES CONSEILS D’UN MÉDECIN RELIÉS AU
RÉGIME, À L’EXERCICE OU À L’AMAIGRISSEMENT. LES ENTREPRISES PHYSI-CAL NE SE TIENNENT RESPONSABLES EN AUCUN DOMMAGE,
DIRECT OU INDIRECT, CONSÉQUENTS OU SPÉ- CIAUX, PROVENANT DE, OU RELIÉS À, L’UTILISATION DE MIO & LES DOCUMENTS
ACCOMPAGNANT. SI VOUS AVEZ DES MAUX GRAVES OU PROLONGÉS, OU DE LA DOULEUR À N’IMPORTE QUEL MOMENT, CONSULTEZ VOTRE
MÉDECIN IMMÉDIATEMENT. L’INFORMATION DANS LE GUIDE D’INSTRUCTION & DANS LE LIVRET MIOSENSE A POUR BUT D’ÊTRE UTILISÉE
EN TANT QUE GUIDE GÉNÉRAL SEULEMENT & PEUT ÊTRE INAPPROPRIÉE POUR DES UTILISATEURS SPÉCIFIQUES. EN PARTICULIER :
LA FRÉQUENCE CARDIAQUE MAXIMALE. CONSULTEZ UN MÉDECIN POUR DÉTERMINER VOTRE FRÉQUENCE CARDIAQUE MAXIMALE
PERSONNELLE. MIO UTILISE DES FORMULES COMPLEXES QUI PRÉVOIENT GÉNÉRALEMENT LA FC FONDÉE SUR DES ÉTUDES AVEC DES
SUJETS AUX COEURS SAINS. VOUS NE POUVEZ PAS COMPTER SUR LE POURCENTAGE DES CALCULS MAXIMUMS SPÉCIALEMENT SI VOUS
AVEZ DES ANTÉCÉDENTS DE MALADIES CARDIAQUES, D’ATTAQUES D’APOPLEXIE, DE TENSIONS ARTÉRIELLES HAUTES OU BASSES, SI
VOUS AVEZ LE DIABÈTE, DE L’ASTHME OU D’AUTRES MALADIES CIRCULATOIRES, OU RESPIRATOIRES. LES OBJECTIFS CALORIQUES
& LES DÉPENSES. LA DÉPENDANCE VIS-À-VIS DE LA CONSOMMATION & D’OBJECTIFS DE DÉPENSES INAPPROPRIÉES PEUT MENER À
L’AMAIGRISSEMENT EXCESSIF OU À UNE PRISE DE POIDS EXCESSIVE, L’ÉVANOUISSEMENT, DES CARENCES DIÉTÉTIQUES, OU D’AUTRES
CONSÉQUENCES MÉDICALES NUISIBLES. CONSULTEZ UN MÉDECIN POUR DÉTERMINER LES CONSOMMATIONS ET LES DÉPENSES
CALORIQUES APPROPRIÉES POUR VOUS. BIEN QUE MIO EST CONÇU POUR FOURNIR UNE ECG PRÉCISE DU RYTHME CARDIAQUE, IL N’EST NI
CONÇU, NI GARANTI POUR L’USAGE MÉDICAL & VOUS NE DEVRIEZ PAS VOUS FIER À MIO POUR DES BUTS MÉDICAUX. PRIÈRE DE TOUJOURS
CONSULTER UN MÉDECIN AVANT DE COMMENCER N’IMPORTE QUEL GENRE DE NOUVEAU PROGRAMME D’EXERCICE OU DE RÉGIME.
AUX RÉSIDENTS DE L’UNION EUROPÉENNE Prière de ne pas jeter
ce produit parmi les déchets municipaux non sujets au tri sélectif.
C’est votre responsabilité de renvoyer ce produit à un service de
recyclage local. U.E.- DÉCLARATION DE CONFORMITÉ Physi-Cal
Entreprises Inc. déclarent que ce podomètre (PACER PC + ) est en
conformité avec la directive EMC 2004/108/EC. Une copie de la
Déclaration de conformité est disponible sur demande de notre
service à la clientèle.
Made in China
PWC130-03003(MIO)
Page 36

See Pacer PC + Instructional Video here.
Instructional Videos
Visit www.mioglobal.com to watch easy to follow instructional videos on the Pacer PC+. If you have a smartphone then scan these QR
codes to watch the videos
Set up
Video
Software
Demo Video
 Loading...