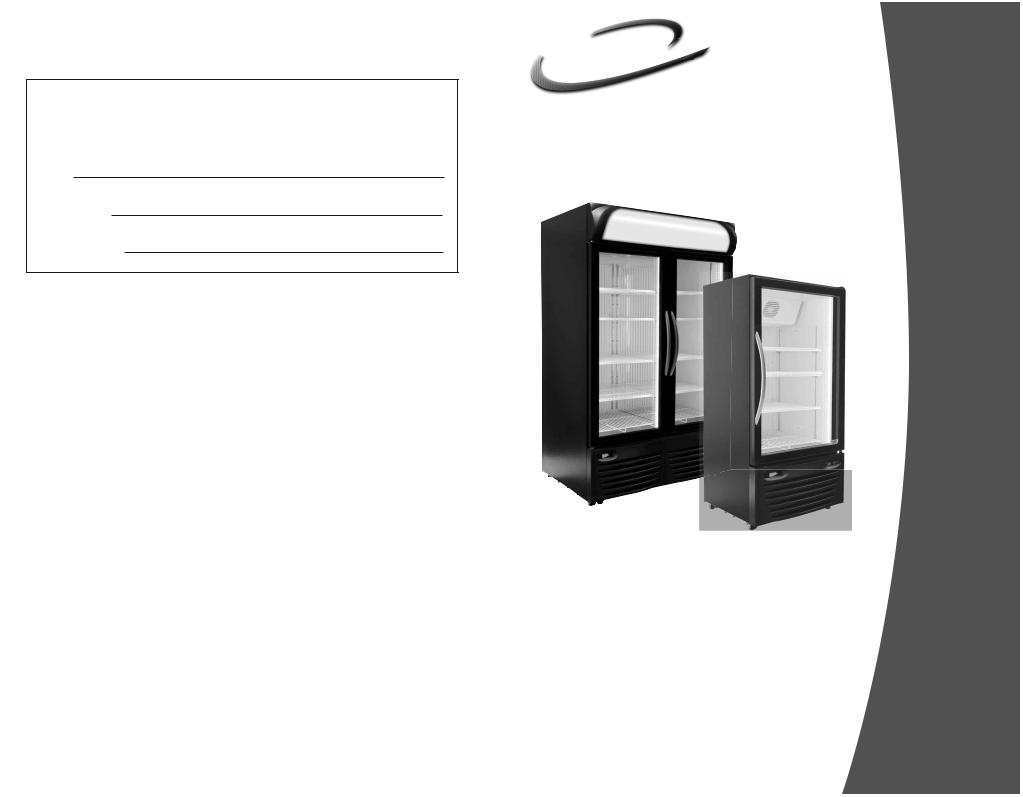
Minus Forty 15-UDGR Installation Manual

To better help you obtain assistance or service should you ever need it, write down the following information about the product. This information is on the identification label located on the left hand inside wall of the cabinet. We advise you to keep this Owners Manual and sales slip in your possession.
Model:
Serial Number:
Date of Purchase:
Owners Manual
|
|
|
|
Glass Door |
Models |
|
|
|
|
10-USGR-X1 |
|
|
|
|
|
|
09-USGR-X1 |
|
|
|
|
Refrigerators |
09M-USGR-X1 |
30 Armstrong Avenue |
|
15-UDGR-X1 |
|||
|
|
|
|
|
13-USGR-X1 |
|
|
|
|
|
15-UDGR |
Georgetown, Ontario |
|
|
|||
Canada L7G 4R9 |
|
|
19-USGR-X1 |
||
|
|
|
|
|
|
Tel: 800.800.5706 or 905.702.1441 |
|
|
22-USGR-X1 |
||
Fax: 905.702.1442 |
|
|
43-UDGR-X1 |
||
Email: info@minusforty.com |
|
|
|||
|
3 0 A R M S T R O N G AV E . G E O R G E T O W N , O N TA R I O C A N A D A L 7 G 4 R 9 |
44-UDGR-X1 |
|||
Web: www.minusforty.com |
|
||||
|
TEL 800.800.5706 • 905.702.1441 • FAX 905.702.1442 • WWW.MINUSFORTY.COM |
||||
|
|
|
MNL_US-UDGR-X1_EN150101 |
|
|
|
|
|
|
|
|
|
|
|
|
|
|

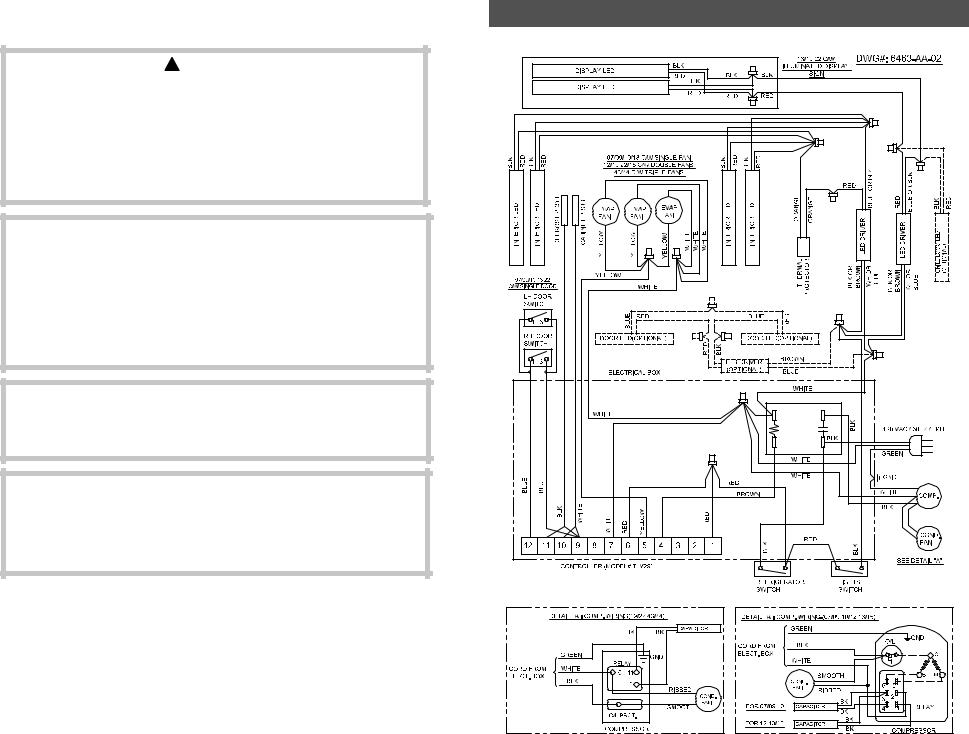
WIRING DIAGRAM
 WARNING
MAKE SURE THE REFRIGERATOR IS DISCONNECTED FROM THE
POWER SUPPLY BEFORE ANY SERVICE. PRESS THE REFRIGERATOR
SWITCH TO THE “OFF” POSITION THEN UNPLUG THE POWER CORD
FROM THE ELECTRICAL RECEPTACLE.
ALL SERVICE WORK MUST BE PERFORMED BY A CERTIFIED
TECHNICIAN ONLY.
NOTICE
MODELS 13-USGR-X1, 19-USGR-X1 and 22-USGR-X1 ARE
CERTIFIED FOR USE WITH BOTH POTENTIALLY HAZARDOUS AND
NON-POTENTIALLY HAZARDOUS PACKAGED FOODS.
ALL OTHER MODELS ARE CERTIFIED FOR USE WITH
NON-POTENTIALLY HAZARDOUS PACKAGED FOODS.
IMPORTANT
READ ALL INSTRUCTIONS
SAVE THESE INSTRUCTIONS FOR FUTURE REFERENCE
NOTICE
OPERATING THE REFRIGERATOR FOR 24 HOURS PRIOR TO
LOADING PRODUCT IS RECOMMENDED
MONITOR REFRIGERATOR TEMPERATURE REGULARLY
12

TROUBLESHOOTING GUIDE CONT...
for online reference go to www.minusforty.com
 WARNING
Make sure the refrigerator is disconnected from the power supply before any service. Press the refrigerator switch to the “Off” position then unplug the power cord from electrical receptacle. All service work must be conducted by a certified technician only.
Problem |
Possible Cause |
Action |
Condensation on glass door. |
• Door not closing properly. |
• Check the spring tension or any |
|
|
obstruction |
|
• Room humidity too high. |
• To prevent condensation, room |
|
|
humidity should be below 55%. |
|
|
|
LED strips are not working. |
• Light switch is off. |
• Check if the light switch is on. |
|
• Burned out strip. |
• Replace the LED strip. (See page 9) |
|
|
|
Cabinet is noisy. |
• Part(s) loose |
• Locate and tighten loose part(s). |
|
• Tubing vibrating |
• Ensure tubing is not in contact with |
|
|
other tubing or components. |
|
|
|
Door does not close tight. |
• Refrigerator is not leveled. |
• Level the unit (See page 2). |
|
• Hinges are loose / not adjusted. |
• Adjust / tighten the hinge screws. |
|
• Gasket is out of the groove. |
• Check gasket condition. Adjust position |
|
|
or replace gasket. |
|
|
|
Electronic control blank, |
• Wires disconnected at back of |
• See actions described on the |
flashing, or displaying incorrect |
electronic control. |
• controller section. (page 4) |
characters. |
|
|
|
|
|
Evaporator fan does not run. |
• Fan wire disconnected. |
• Check wiring. |
|
• Door switch not working. |
• Check door switch. |
|
|
|
CONTENTS
Warranty |
1 |
Installation Instructions |
2 |
Shelf and Basket, Placement and Adjustment |
2 |
Operating Instructions |
3 |
Product Loading |
3 |
Temperature Adjustment and Switch Functions |
4 |
Controller Alarms and Signals |
4 - 5 |
Controller Symbols and Functions |
5 |
How to Remove the Front Bottom Grill |
6 |
Condenser Cleaning |
6 |
Cleaning |
7 |
ISD Trans-Light LED Strip Replacement |
8 |
Interior LED Strip Replacement |
9 |
Troubleshooting Guide |
10 - 11 |
Wiring Diagram |
12 |
11
 Loading...