

Page 1
ENGLISH
Bedienungsanleitung
MANUAL
Page 2

MindPrint T-Comp
Dear Recording Specialist,
We are pleased that you selected the MindPrint®T-COMP as your tool of choice
in your quest for high-quality sound.
The T-COMP is a high-quality compressor featuring stereo and dual mono modes.Among the
hallmarks of this device are certainly its ease of use and excellent tone.With the benefit of
authentic tube circuitry,it will make your tracks come with a lavish helping of analog
warmth.And with the optional digital interface,it merges seamlessly into your digital
studio environment.
The engineers of the MindPrint development team are all specialists in their chosen fields,
highly experienced hands at designing tube,audio,mixer and digital technology.These
sound "gurus" invested all of their talents and skills to do justice to the wishes of
numerous recording enthusiasts all over the world.
Modern recording equipment has achieved a very high standard over the last couple of
years and prices have dropped to fairly affordable levels.Unfortunately,many studio
recordings nonetheless fall short of what most consider desirable in audio sound.
Generally,the problem is an absence of analog audio phenomena such as tape saturation
and tube warmth.
The T-COMP puts precisely these missing qualities at your fingertips—all you have to do
is exploit them to make the most of your talents and recording equipment.A classic case of
technology driving inspiration,you will be amazed at the difference.Get ready for a more
intense,vivid and musical sonic experience.
St.Wendel,October 1999
Page 3
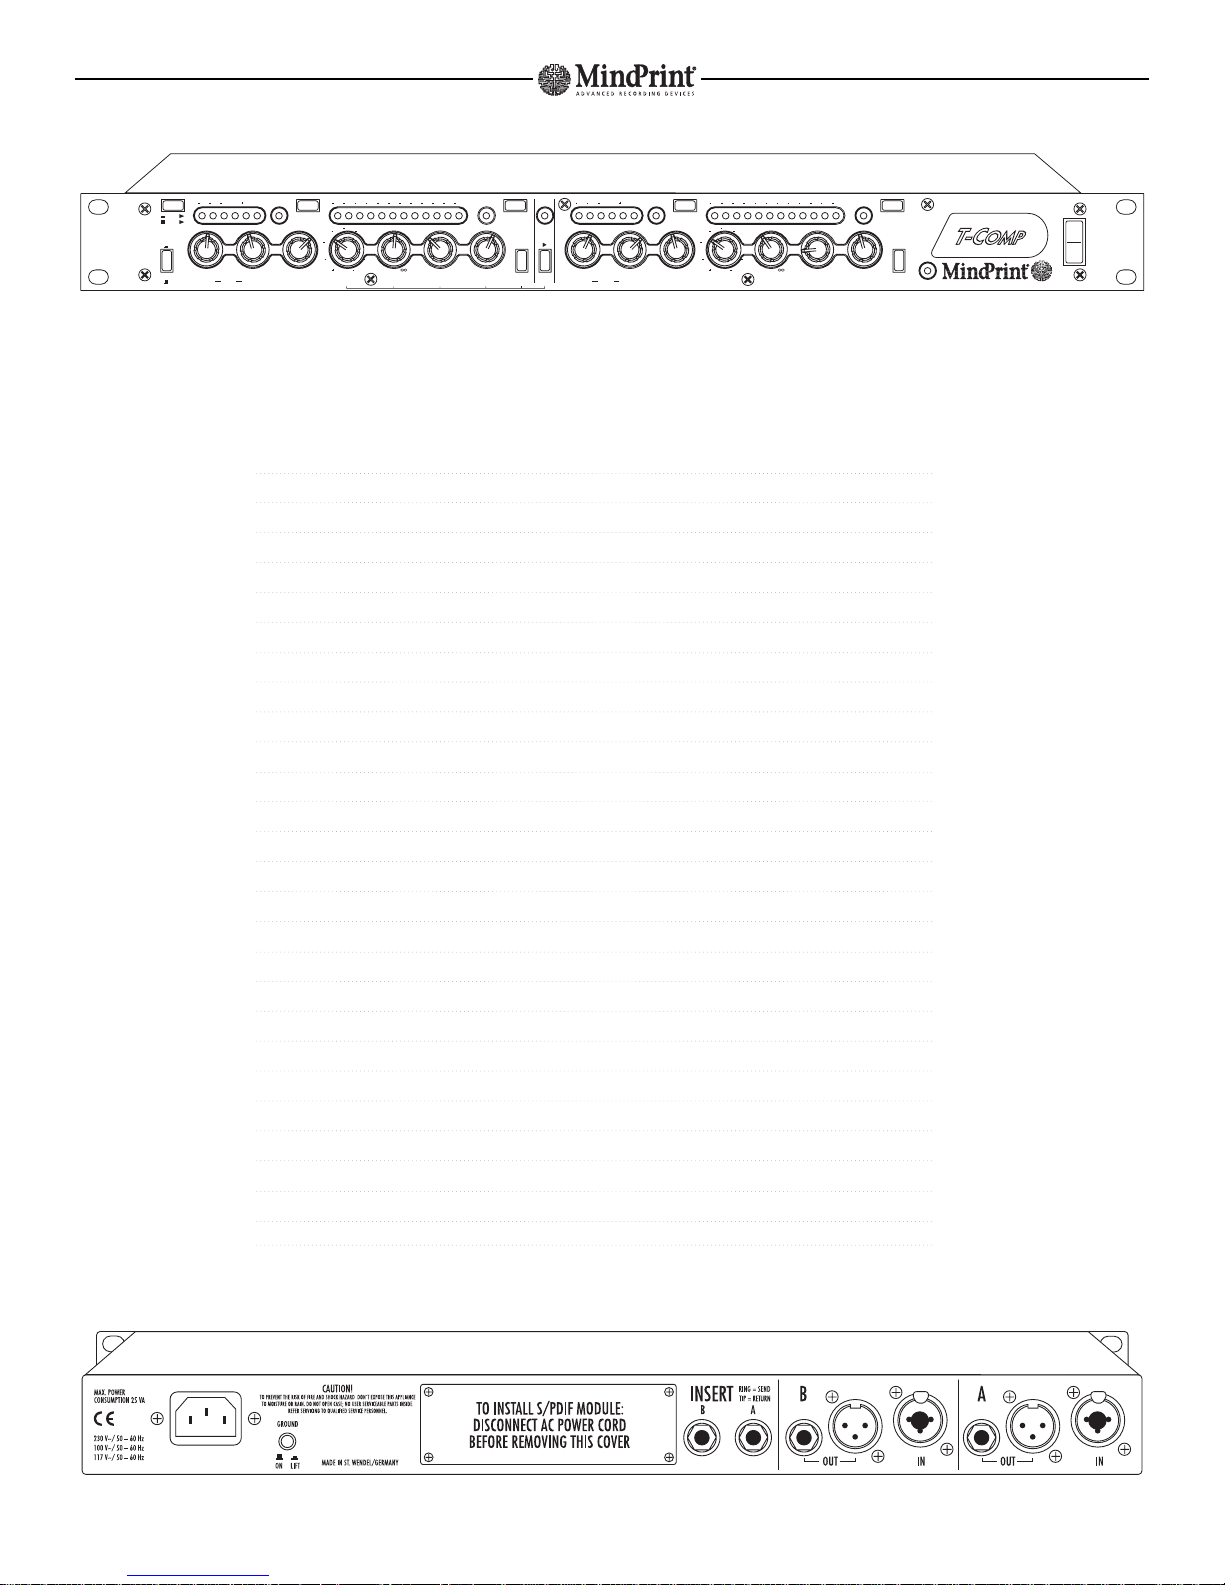
Table of contents
1 Layout of the T-COMP 7
1.1 Input and Output Section 7
1.2 Compression 7
1.3 Attack and Release Times 7
1.4 Filter 8
1.5 Tubes 8
2 Control Features 8
2.1 Input and Output Sections 8
2.2 Compressor Section 9
2.3 Tube and Mains Switch 9
3 Connections 9
3.1 Inputs 9
3.2 Outputs 9
3.3 Inserts 9
3.4 Digital Interface 10
3.5 AC Power 10
4 Applications 10
4.1 The Purpose of the T-COMP 10
4.2 The T-COMP in a Channel Insert 10
4.3 The T-COMP in a Subgroup 10
4.4 The T-COMP in a Stereo Master 11
4.5 The T-COMP in a Digital Environment 11
4.6 The T-COMP in Insert Mode 11
4.7 The T-COMP in Live Applications 11
5 Tips and Tricks 11
6 Block Diagram 29
7 Technical Specifications 12
MindPrint T-Comp
22 16 12 10 8 7 6 5 4 3 2 1 dB
5
0
3
2
4
1
7
8
6
5
0
3
2
4
1
7
8
6
5
0
3
2
4
1
7
8
6
INPUT OUTPUT TUBE SAT ATTACK ms ADAPTIVE
SAT ON
FILTER
THRESHOLD
dB
12
2
28
8
25
16
1
:1
:1.2
:2.5
:3.5
:5
:25
:8
RELEASE ms
500
1000
1500
100
200
RATIO
:1.7
15
50
0.2
5
4
LEVEL
14 830 3 OVER
10 30 300 800
0.1 150
100
2000
5
DIGITAL IN
ANALOG IN
OUTPUT
INPUT
LINK
A
B
22 16 12 10 8 7 6 5 4 3 2 1 dB
5
0
3
2
4
1
7
8
6
5
0
3
2
4
1
7
8
6
5
0
3
2
4
1
7
8
6
INPUT OUTPUT TUBE SAT ATTACK ms ADAPTIVE
SAT ON
FILTER
THRESHOLD
dB
12
2
28
8
25
16
1
:1
:1.2
:2.5
:3.5
:5
:25
:8
RELEASE ms
500
100
200
RATIO
:1.7
15
50
0.2
5
4
LEVEL
14 830 3 OVER
COMP A ON
COMP
B ON
10 30 300 800
0.1 150
100
5
1000
1500
2000
Page 4

MindPrint T-Comp
1 Layout of the T-COMP
1.1 Input and Output Section
Featuring both 1/4" jacks and XLR connectors, the T-COMP is equipped with balanced line
inputs and outputs designed to accept standard studio levels.You can also add a digital
input to the unit by installing the DI-MOD expansion module.Inserts let you patch analog
devices into the T-COMP when you are using it in a digital environment, which means you
don't have to invest in external converters.Sporting a dual-channel design,each channel
is equipped with separate dedicated controls so that you can use the T-COMP to process a
stereo signal or two separate mono signals.
Use the Input Gain knob to adjust the input level.The level meter,which can be switched
to display either the input or the output,provides a good visual reference you can use to
dial in suitable settings.On the one hand,you want the input signal to be as high as
possible,on the other,it should not exceed + 6 dB.Please make sure that the red LED
(Over) does not illuminate even at signal peaks.
The Out Level knob controls the overall volume of the processed signal.Since a
compressor reduces signal levels, you may find that whenever you are compressing the
signal fairly drastically, you will need to compensate for that reduction by bringing the
output signal back up.To dial in the most desirable level, switch the level meter so that it
indicates the output level and set the Out Level knob so that peak levels in the signal
reach,but do not exceed,the + 6 dB mark.Be sure that the red LED (Over) does not flash.
Press the Comp On button to activate the compression circuitry; the status LED On will
light to confirm that the effect is working.Whenever the effect is switched off, the input
signal is routed directly to the device's output.Since the Out Level knob influences the
wet or processed signal exclusively—it has no influence on the dry or unprocessed
signal—you can,by keeping an eye on the level meter,set both signals to the same
value.The best possible way to judge how the compressor is affecting the signal is simply
by switching the effects off and on and comparing the dry and wet signals.
1.2 Compression
You'll find that the compression which this unit delivers is impressive in its effectiveness,
yet it is smooth and unobtrusive.Powered by a high-quality THAT-VCA (Voltage Controlled
Amplifier) which has been fine-tuned to interact with the tube,it generates uncolored
compression as well as the typical overtone structure that you would expect of a premium
tube device.
The compressor kicks in whenever the signal exceeds the setting determined by the
position of the Threshold knob. Adjust the compression ratio via the Ratio knob.Every
signal that exceeds the threshold value is attenuated by a certain degree,namely by the
ratio that you have set.This type of damping is also called gain reduction;the amount of
reduction is displayed in a 12-segment LED meter located above the compressor controls.
Compr
essor Curve:A typical compressor curve
When you use the compressor to shape signals,louder signals become quieter,while
softer signals remain unprocessed. After you have compressed a signal, you can tweak the
level so that the louder parts of the signal,which the effect has cut,are boosted back up
to their original level.The volume of the softer parts is then also amplified,which means
that the entire track will seem louder. Furthermore,since the signal's dynamics are
"squeezed" so that the difference in levels between loud and soft passages is not nearly
as drastic,you end up with a more balanced,smoother soundscape.Many signals such as
vocals and acoustic instruments are inherently extremely dynamic, so you'll find that
these won't blend nicely into the mix until you have compressed them.
To achieve compression that is as inconspicuous as possible, the T-COMP uses something
called soft-knee compression.What happens here is this:as a signal's level approaches
the threshold point,the compression rate is increased continuously.When the signal level
finally exceeds the threshold value,it is compressed at the ratio that you have dialed in.
What this means is that even when you choose to compress signals heavily,these are not
"crushed" into submission,but gently "squeezed" when the signal exceeds the threshold.
Soft-Knee Cur
ve:The curve of the T-COMP's soft-knee compression is smoother and
soundsmore musical.
1.3 Attack and Release Time
Attenuating the level of a signal when it crosses a given threshold is an operation that
controls the level of a signal,which is why in the past compressors were called leveling
or gain control amplifiers. Here a detector monitors the audio signal at all times and
controls the amplification level of the VCA accordingly.
Any type of control operation requires some amount of time to be carried out.To avoid
overshooting,the time it takes for the compression to kick in should be as short as
possible.On the other hand,if the compressor responds too quickly,the effect will
generate distortion.The amount of time it takes for the compressor to respond to changes
in level is called attack time.For many creative applications,you'll find that a long attack
was selected to generate a special kind of effect,for instance to shape an envelope.In
any case,selecting the right type of attack time will always entail some type of
compromise,one you'll have to define anew for each different application and musical
material.Much the same holds true for the release time,i.e.the amount of time it takes
for the compressor to return to an amplification ratio of 1:1 after the signal level has
dropped below the defined threshold.If you select too short a release time,the signal will
chatter, too long a release time often produces an ugly pumping sound.
Attac
k and release times:Selecting the right attack and release times is crucial so that
compression remain inaudible.
Output
Input
1:1
∞
Threshold
Compression
Output
Input
normal
Soft Knee Characteristic
Envelope
Threshold
Distortion
Attack Release
Page 5

Use the Attack and Release knobs to dial in the desired times. This is the biggest problem
users of conventional compressors are confronted with.To remedy it,the T-COMP works
with a type of program-dependent control for the attack and release times, a feature that
you can activate by pressing the Adaptive button. The attack and release times that our
engineers chose are fast enough to handle percussive material. If certain parts of a signal
fade in and out slowly—in other words,if it has certain passages with lengthy attack
and release times—the T-COMP will adapt its attack and release times accordingly to
ensure the best possible processing results.
Whereas the Adaptive circuit may at first glance resemble the automated mode of some of
the more popular automatic compressors, in terms of functionality,it actually out-performs
these by a considerable margin. When you're dealing with an automatic compressor,the
controls governing attack and release times are disabled. With the T-COMP on the other
hand,these are always enabled and at your disposal.This means that you can set the
attack and release times manually so that the device will deliver exactly the kind of
compression you have in mind.In addition,T-COMP automatically fine-tunes your settings
to match the given musical material. The compressor gives you the best of both worlds:
You have the creative leeway to define the compression as you see fit, while at the same
time,the automated functionality frees you of tedious technical considerations.
You can focus on the music that you're working with and the creative process of shaping
itvia theT-COMP.
1.4 Filter
The Filter button activates a certain compression mode in which the amount of
compression generated by the device depends on the frequency content of the signal.
A filter is inserted into the control circuit,usually called a sidechain,rather than the
signal chain.It compels the compressor to respond differently to different frequencies.
The filter is not in the signal path itself,and so it has absolutely no influence on the
frequency response or timbre of the signal;instead it just governs how the compressor
responds! While we were in the process of designing this filter,we listened carefully to
the input of professional sound engineers. They made the point that in the real world,
bass-heavy signals tend to evoke excessive compression.For this reason,we tuned the
filter so that the compressor responds less aggressively to lower frequencies, thereby
delivering results that are much closer to the way the human hear naturally
"compresses"signals.
When the filter is activated,you will note that the compression seems more balanced,with
silky,shimmering highs and improved top end response. The filter was optimized for vocal
signals,but if you experiment with acoustic instruments, you can also come up with great
results.It also works wonders for complex master mixes.
1.5 Tubes
The two onboard tubes definitely make up what could be called the "soul" of the
compressor;they have a considerable influence on its sound.Use the Tube Sat knob to dial
in variable saturation levels. This knob gives you precision control over the amount of
overtones that the tubes generate.In the lower end of the control range,few overtones
are generated. As you turn the knob clockwise,the overtone content increases slightly,
which allows you to make extremely subtle adjustments.Once you turn the knob beyond
the twelve o'clock position,the tubes really start to go to work.When you turn it wide
open,you'll definitely hear some distortion in the signal.Normally,if you compress a
signal heavily,its level is decreased.Lower levels don't drive the tube as hard,leaving it
without the material it needs to work its magic. We compensated for this phenomenon by
installing a circuit where the compressed signal,depending on the Threshold setting that
you dial in,is automatically boosted back up to a suitable level.
When you dial in higher levels of saturation,keep this in mind:although the Tube Sat knob
setting and threshold play a major role in determining the amount of harmonics that are
generated,signal level plays a key role as well.In order to achieve a consistent overtone
structure when the signal is on the verge of clipping,you should experiment with higher
compression ratios in order to "prep" the signal optimally for the tube. When you dial in
the appropriate settings, compression and tube saturation mesh to a homogeneous whole,
which will give your tracks just the right sheen.
The light-emitting diode located below the tube window gives you a good visual reference
for the effect.When the tube enters the saturation zone,the colour of the LED will change
from green to yellow. When you start pushing the tube harder,the LED will turn red.If at
this point you drive the tube even harder, it will generate audible distortion.
If the Ratio knob is set to the far left position,the dynamics of the signal are not
processed at all because the compression ratio remains at 1:1. In order to deactivate the
compressor fully,you must also turn the Threshold knob to the far left position.Although
at a ratio of 1:1,the compressor indeed has no effect on the characteristics of the signal,
the circuit mentioned earlier— the one that boosts the signal before it is routed to the
tube—remains active.
Obviously,the more convenient option for deactivating the compressor is to simply switch
the Comp On button off.This is a good habit to get into:When you leave the settings as
they are,you can switch the circuitry off and on and get a good A/B comparison between
the compressed and uncompressed signals.
2 Control Features
With the exception of the input selector and the level meter buttons,each of the T-COMP's
channels is equipped with a set of dedicated controls.
2.1 Input and Output Sections
Digi In:This button activates the digital input.
If the optional DI-MOD digital interface hasn't been
installed,the digital input is of course unavailable.
Input Gain:Adjust the input level of the T-COMP here.This knob's setting affects all inputs.
LED Ladder:This LED meter indicates the level of the input or output signal,depending on
the status of the Output to Disp.button.The yellow LEDs indicate the headroom of the
T-COMP,the red LEDs the amount of distortion.
Output to Disp.:This button switches the level meter so that it displays either the input or
output signal.
Comp On:Turns the T-COMP’s compression effect on.When you switch the effect off,the
input signal is routed directly to the device's output.
Output Level:Controls the output level of the processed signal.When the effect is
switched off,this knob has no influence on the signal.Since the knob Output Level
influences the wet or processed signal exclusively,you can use it to set the processed
signal to the same level as the unprocessed signal.The best possible way to judge how
the compressor is affecting the signal is simply by switching the effects off and on and
comparing the dry and wet signals.
Tube Sat:Controls tube saturation within the compressor for all signals which exceed the
threshold value.The higher this knob is turned up,the more harmonic overtones are
generated.
Sat LED:This tricolor LED indicates the tube saturation status. In normal operation,it will
light up green.As soon as the tube is driven hard enough so that it is slightly saturated,
the LED changes its color to yellow.When driven too hard, the tube produces audible
distortion and the LED turns red.
MindPrint T-Comp
5
0
3
2
4
1
7
8
6
5
0
3
2
4
1
7
8
6
5
0
3
2
4
1
7
8
6
INPUT OUTPUT TUBE SAT
SAT
T
1
4
LEVEL
14 830 3 OVER
DIGITAL IN
ANALOG IN
OUTPUT
INPUT
COMP A ON
Page 6

MindPrint T-Comp
Tube:Not only does the warm red glow of the tube add a certain visual value to the
T-COMP,it is also the "secret ingredient" of its great sound. Depending on how hard you
drive it,the tube (type 12AX7A) can add anything from a touch of silky analog warmth to
unmistakable tube saturation to your tracks.
Mains Switch:In addition to switching the AC power supply on and off,the mains switch
also activates the hard-wired bypass of the T-COMP.When the device is switched off,the
Line In and Line Out circuits are linked directly;the signal bypasses the device
completely. The hard-wired bypass is also activated automatically in case of power failure
or a power supply defect.This feature definitely enhances the safety of the device,
particularly in broadcasting and live applications where you can't afford to have a circuit
drop out even for a moment.In the studio,the T-COMP can be removed completely from the
signal path by simply switching the unit off.
On LED:Illuminates to indicate the T-COMP is switched on.
3 Connections
All connectors are located on the processor’s rear panel.
3.1 Inputs
The inputs feature a dual connector design to accept both balanced XLR connectors and
balanced 6.3 mm (1/4“) plugs.You can also connect unbalanced cables to both input jacks.
The pin assignments of the XLR connector comply with the international norm IEC 268-12.
In accordance with this norm,pin 1 is connected to the ground,pin 2 carries the positive
signal and pin 3 the negative.If you are using an unbalanced circuit,be sure to bridge pin
1 and pin 3.
In the stereo (tip-ring-sleeve) 1/4“ jack,the positive signal is routed via the tip,the
negative signal via the ring,and the ground via the sleeve.When you insert an unbalanced
mono plug,the input automatically switches to unbalanced operating mode.
3.2 Outputs
For the line outputs,you also have separate balanced XLR connectors and 1/4“ jacks at
your disposal.When you insert an unbalanced mono plug,the input automatically switches
to unbalanced operating mode.
You can access both jacks simultaneously, in which case the output of the T-COMP acts as
a distributor or splitter. If you want to use both outputs, you must use balanced cables.
Simultaneous use of the outputs in unbalanced operating mode is not permissible.
3.3 Inserts
The Insert jacks allow you to insert external devices into the signal
path for additional processing.The unbalanced 6.3 mm (1/4") TRS
jacks accept standard insert cables,the usual type of patch cord used
for mixing console inserts.
2.2 Compressor Section
The tube compressor gives you the best of both worlds—the precision of a high-quality
semiconductor circuit with the silky sound that only vacuum tubes can deliver.Its
circuitry, an entirely unique and innovative design, lets you control compression and tube
saturation separately.
Threshold: This knob adjusts the threshold of the compressor within a range of +2 dB to 28 dB.Signals which exceed the threshold value are processed by the compressor.
Depending on the threshold value that you have dialed in,the signal is also boosted
before it is routed to the tube.Rotate the knob hard left to its far left position or switch
the Comp On button off to deactivate the compressor.
Ratio:This control determines the relationship between, or ”ratio”of,the input and output
levels of all signals which exceed the threshold value.A setting of 2:1 means that when
the level of an input signal increases by 2 dB,the output signal level increases by just 1
dB. The control range starts at a ratio of 1:1 (no compression) and can be increased
infinitely. The latter is basically a limiter setting—no further increase of the output level
is possible.To deactivate the compressor,rotate the knob to the far left-hand position or
switch the Comp On button off.
LED Ladder:Indicates the amount of attenuation,or gain reduction,that the signal is being
subjected to.
On LED:Illuminates to indicate that the device's processing circuitry is enabled. The Comp
On button located in the input/output section activates the circuitry.
Attack:Determines the amount of time it takes for the compressor to fully attenuate the
signal level once the level exceeds the defined threshold.
Release:Determines the amount of time that it takes for the amplification ratio to return
to 1:1 once the signal level has fallen below the threshold.
Filter:This button switches the sidechain filter of the compressor on. When the filter is
activated,frequencies lower than 300 Hz have less influence on compression,which gives
you a more balanced sound in the mid and high frequency ranges.
Adaptive:Switches the automated,signal-dependent attack and release time control
feature on.The Attack and Release controls remain active and are used to shape how the
automated adaptive circuit responds.
Link:This button switches the control circuit of the two channels to stereo mode. If you
want to process stereo signals, be sure to activate this button. If you're working with
mono signals,it must be deactivated.
Link On LED:Illuminates when the Link function is active.
2.3 Tube and Mains Switch
At the heart of the T-COMP are two high-quality tubes; these are responsible for the unique
sound of the compressor.
22 16 12 10 8 7 6 5 4 3 2 1 dB
ATTACK ms ADAPTIVE
ON
FILTER
THRESHOLD
dB
12
2
28
8
25
16
1
:1
:1.2
:2.5
:3.5
:5
:25
:8
RELEASE ms
500
1000
1500
100
200
RATIO
:1.7
15
50
0.2
5
4
10 30 300 800
0.1 150
100
2000
5
LINK
A
B
Page 7

The internal signal path is interrupted when you introduce a plug into the Insert jack.
Instead of continuing on through the internal busses,the signal is patched out via the tip
of TRS plug (T = Tip).It is then routed through the external device that is connected to the
other end of the insert patch cord. The signal is returned to the T-COMP via the ring (R) of
the plug.The sleeve (S) of the plug is connected to ground.
The insert is located post-input level knob and pre-compressor. If you have installed the
optional digital interface,then you can connect these inserts to additional analog devices
in a digital signal chain without the need for additional digital interfaces or external
converters for those devices.
3.4 Digital Interface
If you choose to work with digital mixers or hard disk recording systems,you have the
option of retrofitting a digital interface to the expansion slot located on the rear panel of
the T-COMP.
When you equip the T-COMP with the DI-Mod module,
this upgrade gives you a digital input/output in stateof-the-art 24-bit format;it is also compatible with all
16,18 and 20-bit devices.The sampling frequency can
be switched between 44.1 and 48 kHz.When you
synchronize devices via the input,the DI-Mod even works with every frequency between
32 and 48 kHz.
3.5 AC Power
The T-COMP connects to a wall outlet or mains supply via a standard power cable attached
to the T-COMP’s AC power socket.
Should you encounter a ground loop,the ground lift
switch severs the signal ground from the device's
chassis ground. A ground loop is pretty easy to
identify—the device emits annoying hum.If this is
the case,set this switch to the position where the
noise is canceled out.
4 Applications
4.1 The Purpose of the T-COMP
The dynamics of instruments and the human voice can be too much of a good thing,often
exceeding what you want and need for purposes of recording.If during mixdown you focus
on loud passages,the softer parts would be submerged in the mix.If on the other hand,
you dial in a level that allows the softer passages to be heard clearly,the louder parts
would drown everything else out. The T-COMP remedies this problem by smoothing out the
difference between loud and soft passages,giving you more manageable dynamics. This in
turn makes it so much easier to integrate the processed track into the mix, with much
better overall results.
A compressed recording also sounds louder than an uncompressed track. Even though the
actual level remains the same,increasing loudness creates the kind of compact sound,
presence and punch which makes many professional recordings sound so good.The
"secret" ingredient that enables recordists to come up with this kind of up-front, punchy
sound is,in the vast majority of cases,a compressor.Not only do the pros process
individual tracks with compression,they also give the stereo master signal the same
treatment. The T-COMP can do both—it is designed to deal with the kind of individual
mono signals that you would find in the separate channels of a mixer,as well as with the
stereo signals of a master insert in stereo link mode.Not only does it process the
dynamics of signals,but thanks to its tube circuitry it also adds extremely musical analog
warmth to the signal.
The T-COMP also takes on a key role in digital environments.Prices have collapsed in
recent years, making digital mixers and multitrack recording systems affordable for the
amateur recordist. The majority of functions featured in pro devices,astronomically
expensive just ten years ago,are part and parcel of every contemporary hard disk
recording program. Fortunately,more and more processing operations can be performed
completely in the digital domain,which certainly enhances the quality of productions.
Nonetheless,many musicians perceive a digital chill,a cold,sterile sound that is the
product of analytical,high-precision systems. This is where the T-COMP comes into play.
Powered by tube engineering,it delivers creamy analog tone and,with the help of the
digital DI-Mod option,transports it directly to the hard disk system.In the final analysis,
you can have your cake and eat it too:T-COMP delivers great analog sound and digital
engineering prevents undesirable signal degradation when you post-process tracks.
4.2 The T-COMP in a Channel Insert
If you want to process an individual instrument,simply insert the T-COMP into the
appropriate mixer channel. With its two channels,the T-COMP can work with two mixing
console channels and process different mono signals simultaneously. In addition to
compressing the dynamics of a signal,you can also use it to come up with an interesting
overtone structure and the typically warm tone with enhanced presence that only a tube
device can deliver.
Connect the input and output of the T-COMP to a mixing console channel via insert patch
cables.If your mixer is not equipped with insert jacks,you can patch in the T-COMP
between the line output of a recorder, sampler or synthesizer and the mixer's input.
Experiment with the diverse control features to get a feel for how the T-COMP operates
and responds. You'll find that it is not always desirable to dial in the shortest attack times
and a high ratio to compress a signal as drastically as possible.For instance,if you're
processing a rhythm guitar track,you'll often come up with better results if you choose a
longer attack time to allow the instrument's natural attack to remain intact. You can
attenuate the rest of the signal—the actual "body" of the sound consisting of the decay
and sustain phases of the signal—via the compressor.In the mix,you'll end up hearing
just the pick or fingers hitting the strings, which is a great option for making it sound less
cluttered and more transparent.
4.3 The T-COMP in a Subgroup
You can also use the T-COMP in a mixing console's subgroup inserts.For example,if you're
using subgroups to create a stereo mix for all drums, this option will let you compress the
signals of the entire drum kit.
Subgroups can also be used to patch a signal to a multitrack recorder.For this application,
you can use the T-COMP to compress signals while you're recording.If your mixer is not
equipped with subgroup inserts,you can patch the T-COMP in directly between the mixer
and recorder.
If you choose to use this option,you should only compress the signal slightly to give you
some leeway when you're shaping the signal during post-processing. You’ll find that the
T-COMP will again come in handy when you're ready to mix a recording down!
MindPrint T-Comp
T -COMP
IN
2x INSERT
OUT
IN
OUT
Page 8

MindPrint T-Comp
4.4 The T-COMP in a Stereo Master
Once you have compressed individual tracks, you can compress the stereo master signal
for an even tighter mix.Generally,a compression rate of 2:1 and gain reduction of some
6 dB delivers great results.To use the T-COMP on the final mix,insert the T-COMP between
the mixing console's output and the master recorder's input.If your master machine is a
DAT recorder and you have installed the DI-Mod option, you can also work in the digital
realm via S/P-DIF.
Incidentally,if you want to achieve the best possible results using this type of
configuration,you shouldn't execute fades at the end of a song manually by pulling down
the mixer's master fader. The reason for this is that the threshold you have dialed in via
the Threshold knob will shift in response to the change in levels. Instead, create the fadeout via the master recorder's level control,or better yet,during digital post-processing.
If you nonetheless prefer to use the master fader,patch the T-COMP into the mixer's
master insert.Unfortunately,you won't often find this feature on most
lower-priced mixers.
4.5 The T-COMP in a Digital Environment
If you plan to work with a digital mixer or hard disk recording system, you can also
integrate the T-COMP via the S/P-DIF interface, provided of course you have installed the
DI-Mod option.
Simply route the signal that you want to process via a digital interface from the digital
mixer or hard disk system to the T-COMP.The processed signal will be sent back to the
mixer or hard disk system in digital form via the output of the T-COMP and, once it arrives
there,can be processed or recorded to another track.At the same time, the analog output
is available for monitoring purposes.
When you're inserting signals via the digital interface,the T-COMP (like every other digital
device) generates a slight latency—in other words,it causes a minimal delay. The delay
is no more than 1.5 ms,so normally this is not a problem. However,if you are using the
dry and wet versions of a given signal simultaneously or several channels for the same
signal,you may encounter undesirable phasing effects generated by this delay.Should you
encounter this problem,compensate for the delay produced by the T-COMP using the track
delay of your hard disk system or the channel delay of your digital mixer.
4.6 The T-COMP in Insert Mode
By inserting external devices via the insert jacks,you can actually create a serial signal
chain consisting of analog devices within a digital studio environment.You would patch
these additional devices into the analog signal bus of the T-COMP,so you don't need any
additional digital interfaces or external converters.
A favorite trick of experienced audio engineers is to employ an equalizer before the signal
is piped through a compressor.The MindPrint PARA-Q is the ideal tool for this task—it
was designed specifically to work together with the T-COMP.A truly high-quality device,it
delivers remarkably musical results.
Another interesting option is to insert an analog exciter—many recordists don’t like the
sound of digital exciter algorithms.
4.7 The T-COMP in Live Applications
Although the T-COMP was primarily developed for recording purposes,it actually wears
many hats—you'll find that it is an excellent tool for live applications.If you are the
proud owner of a guitar rack system,you can patch it in post-preamp and pre-power amp
to compress your instrument's signal.For processing vocals, you can patch the T-COMP
into a mixer insert just as you would an effects device,so that the amplified sound of your
voice enjoys the benefits of those desirable tube characteristics. Feel free to experiment
with other instruments such as electric bass guitars.
5 Tips and Tricks
5.1 Switching noise
The T-COMP's On button is a real hardware switch.This means that,rather than just being
deactivated,the processing stages are actually removed from the signal path. While
removing unused electronics from the signal path enhances audio quality, these switches
sometimes cause undesirable popping noises,which are produced by sudden surges in
amplitude.Your best bet is to forget about switching the effect on and off while you're in
the middle of recording or processing signals with the T-COMP.
5.2 Over-the-top distortion
The tube compressor processes all signals that lie above the threshold value.Moreover,
the level of tube saturation of course depends on the signal level.The compressor is used
to keep the signal level as steady as possible.If you dial in a low threshold value and a
high saturation level,the tube will be driven hard enough to produce fairly heavy
distortion at signal peaks.In this case,you should increase the compression ratio to limit
these signal peaks.If you don't want this type of signal processing,you'll have to dial in
lower threshold and saturation values.
5.2 Monitoring the mix
Make a habit of monitoring the results in the context of the entire mix.Even when you're
compressing the signal of a single channel,don't just judge by what you hear when you
activate the Solo button on your mixer.Get adventurous and give heavier distortion a
go—it might be just the thing to spice up a take.Often,a track might sound almost
pathetic heard in isolation,but in the context of the mix,absolutely brilliant.For instance,
a touch of tube saturation can work really well to "fatten up" harmony vocals in the
chorus of a song.
6 Block Diagram
T-COMP
DAT RECORDER
OUT
IN
OUT
IN
S/PDIF
optional
DIGITAL
OUT
DIGITAL
IN
INSERT
T-COMP
IN
OUT
EQUALIZER
Page 9

12
7 Technical Specifications
LINE IN
Connections: Combined XLR (pin 1 = ground;pin 2 = +;pin 3 = - ) and
1/4“ phone jack (tip = +;ring = -;sleeve = ground)
Input type: electronically balanced and floating
Input impedance: 22 kOhm
Sensitivity: 0 dB
Maximum input level: +20 dB
DIGITAL IN only with optional DI-Mod (see Option below)
LINE OUT A/B
Connections: Combined XLR (pin 1 = ground;pin 2 = +;pin 3 = -) and
1/4“ phone jack (tip = +;ring = -;sleeve = ground)
Output type: electronically balanced & floating
Output impedance: 220 Ohm
Maximum output level: +20 dB
DIGITAL OUT only with optional DI-Mod (see Option below)
INSERTS
INSERT A/B
Connection: 1/4“ phone jack (tip = Return;ring = Send;sleeve =
ground)
Input type: unbalanced (Return)
Input impedance: 4.7 kOhms with Gain control at 0
47 kOhms with Gain control at 10
Sensitivity: 0 dB
Maximum input level: +20 dB
Output type: unbalanced (Send)
Output impedance: 220 Ohm
Maximum output level: +20 dB
EFFECT SECTION
Switchable on or off
TUBE SECTION
TUBE SAT
Distortion: adjustable between 0.1% and 10%
Treble boost: from 0 dB to 2 dB between 4 kHz and 22kHz (Tube Sat control)
COMPRESSOR SECTION
THRESHOLD: adjustable from +2dB to -28 dB
RATIO: adjustable from 1:1 to 1:infinity
Attack: adjustable from 0.1 ms to 150 ms
Release: adjustable from 5 ms to 2000 ms
Adaptive: automatically sets the attack and release times,based on
settings
FILTER: Switchable on or off
Frequency: 300 Hz
(Compression circuitry only affects material above 300 Hz.)
DISTORTION
Effect Section off: 0.0008%,LINE IN,10 Hz - 22 kHz @ 0 dB input / 0dB output
0.0007%,INSERT IN,10 Hz - 22 kHz @ -10 dB input / 0dB output
Effect Section on: 0.06%,LINE IN,10 Hz - 22 kHz @ 0 dB input / 0dB output
0.05%,INSERT IN,10 Hz - 22 kHz @ -10 dB input / 0dB output
with TUBE SAT = 0
FREQUENCY RANGE
Effect Section off: 10 Hz - 22 kHz,±0.2 dB
Effect Section on: 10 Hz - 22 kHz,±1 dB
DYNAMIC RANGE
Effect Section off: 106 dB,LINE IN,10 Hz- 22 kHz @ 0 dB input / 0dB output
108 dB,INSERT IN, 10 Hz - 22 kHz @ -10 dB input / 0dB output
Effect Section on: 92 dB,LINE IN, 10 Hz - 22 kHz @ 0 dB input / 0dB output
92 dB,INSERT IN, 10 Hz - 22 kHz @ -10 dB input / 0dB output
All values A-weighted
BYPASS
When power is removed from the unit,LINE IN is hardwired to LINE OUT.
GENERAL SPECIFICATIONS
Versions 230-volt,117-volt,and 100-volt, Protection Class 1
Power supply fuse,internal:
230 volts/160 mA slo-blo
117 volts/315 mA slo-blo
100 volts/315 mA slo-blo
max.current draw: 113 mA (133 mA with DI- MOD)
max.power consumption: 31 VA
Dimensions: 19”wide (482 mm) by 1.75”high (44 mm) by
9.4”deep (238 mm)
Rack dimensions: 19 ",1 U
Depth in rack: 8.75" (222 mm)
Protrusion of controls: 5/8" (16 mm)
Weight: 7.6 lbs (3.44 kg);with DI-Mod installed 7.8 lbs.(3.55 kg)
Option DI- MOD:S/P-DIF I/O card,stereo
MindPrint T-Comp
 Loading...