


Mammylock ML-303
mammylock
MANUAL
for
Model
ML-303
From the library of: Superior Sewing Machine & Supply LLC
MANUAL
FOR
MAMMYOCK
ML-303
INTRODUCTION
We
thank
you
very
much
for
your
buying
our
MAMMY-
LOCK
ML-303
machine.
This
booklet
contains
some
notes
on
the
operations
and
maintenance
of
the
MAMMYLOCK ML-303 machines,
which
should
be useful
to
you
and
should
help
you
to
become
familiar
with
the
machine
and
to
derive
the
best
use
from
it.
This
machine
is
designed
for
sewing
on
various
kind
of
materials
such
as
light
to
heavy
weight
or
woven
and
knit
fabrics
beautifully
and
firmly.
All
machines
are
shipped
from
our
factory
after
inspect
ing
carefully
one
by
one,
so we
hope
you
will use a
MAMMYLOCK
machine
regularly
and
forever.
From the library of: Superior Sewing Machine & Supply LLC
CONTENTS
1.
Name
of parts 1
2. How to run a machine 2
3.
Oiling
^
4. Threading 5
5. Test
sewing
8
6. Howto regulatethe thread tensions 9
7. Howtooperate 19
8. How
to
regulate
the
stitch
length
and the pressure of presser
foot
11
9. How to replace the needle 12
10. How to change the upper and lower knives 13
11. How to replacethe carbon brush for the drive motor 15
12. How
to
adjust
for
incorrect
sewing
16
13.
The
relation
chart
of
materials
and
threads
17
14. Specifications 17
15.
The
contents
of packing 18
16.
Standard
accessories
18
From the library of: Superior Sewing Machine & Supply LLC
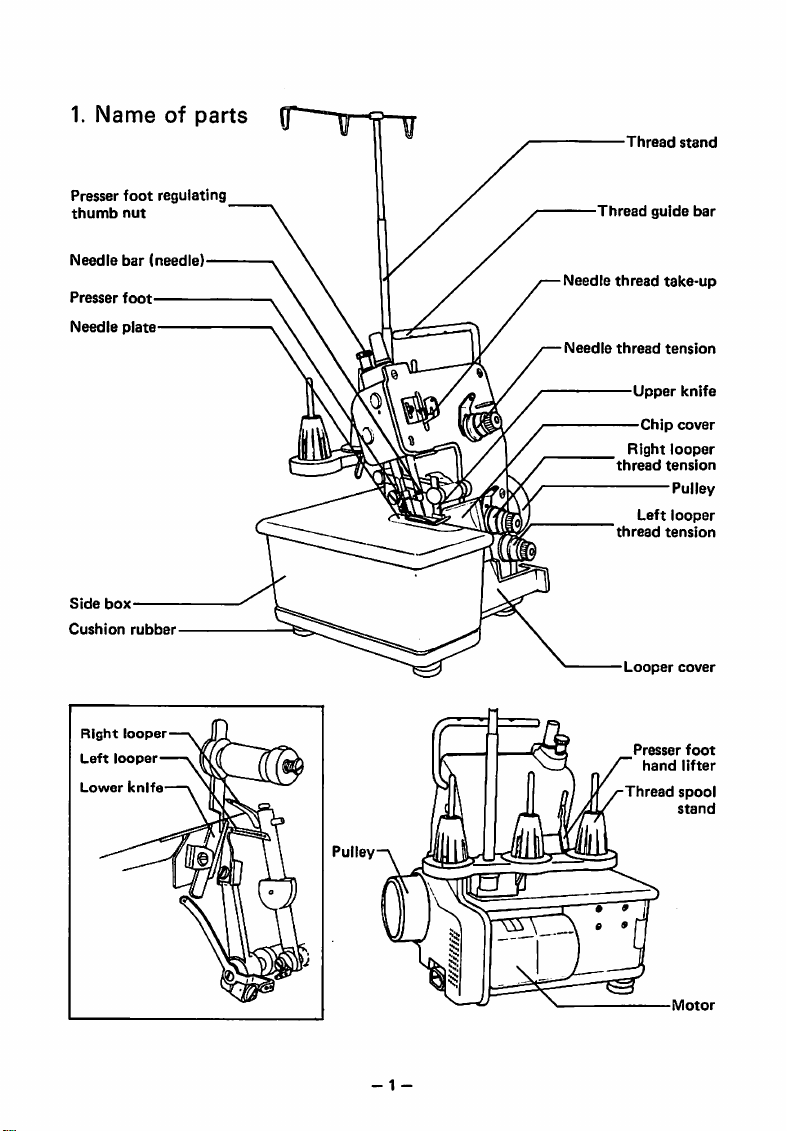
1.
Name
of
parts
Presser
foot
regulating
thumb
nut
Needle
bar
(needle)
Presser
foot
Needle
plate
Side
box
Cushion
rubber
Right
looper—V
Left
looper—V
Lower
knife—\
ML
Pulley
- 1 -
Thread
stand
Thread
guide
bar
Needle
thread
take-up
Needle
thread
tension
Upper
knife
Chip
cover
Rightlooper
thread
tension
Pulley
Left
looper
thread
tension
Looper
cover
Presser
foot
hand
lifter
Thread
spool
stand
Motor
From the library of: Superior Sewing Machine & Supply LLC
2.
How
to
run
a
machine
(1)
Prepartion
You
must
lay a
machine
flat
on
a
desk
or
a
machine
table
to
use
it.
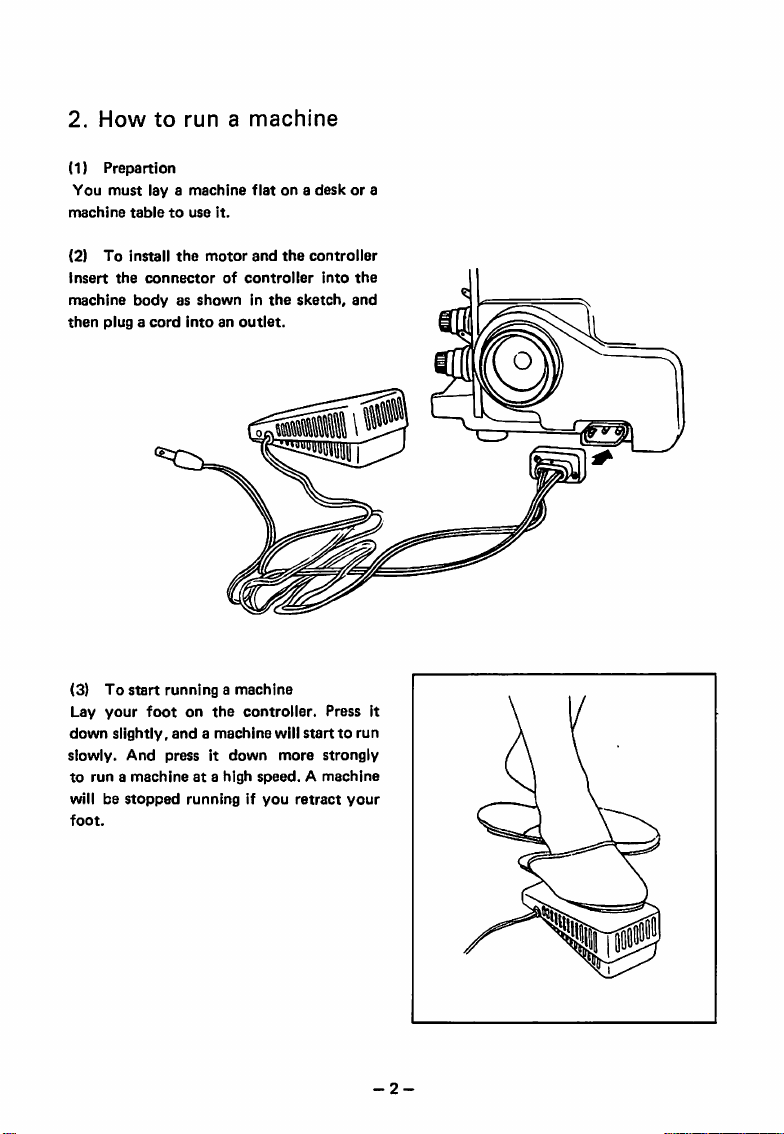
(2)
To
install
the
motor
and
the
controller
insert
the
connector
of
controller
into
the
machine
body
as
shown
In
the
sketch,
and
then
plug
a
cord
into
an
outlet.
5*1]
(3)
To
start
running
a
machine
Lay
your
foot
on
the
controller.
Press It
down
slightly,
and
a
machine
will
start
to
run
slowly.
And
press
it
down
more
strongly
to
run
a
machine
at
a high
speed.
A
machine
will be
stopped
running
if
you
retract
your
foot.
-2-
From the library of: Superior Sewing Machine & Supply LLC
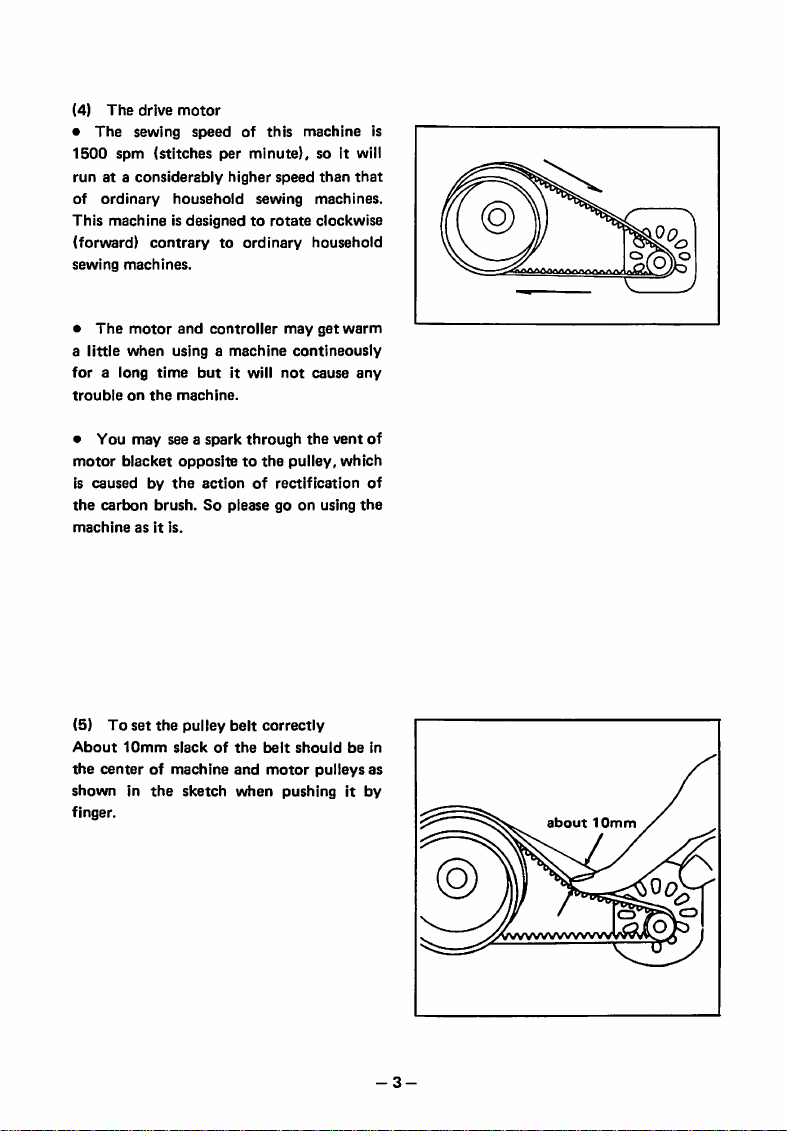
(4)
The
drive
motor
•
The
sewing
speed
of
this
machine
is
1500
spm
(stitches
per
minute),
so it will
run
at
a
considerably
higher
speed
than
that
of
ordinary
household
sewing
machines.
This
machine
is
designed
to
rotate
clockwise
(forward)
contrary
to
ordinary
household
sewing
machines.
•
The
motor
and
controller
may
get
warm
a
little
when
using a
machine
contineously
for
a
long
time
but
it
will
not
cause
any
trouble
on
the
machine.
• You may see a
spark
through
the
vent
of
motor
blacket
opposite
to
the
pulley,
which
is
caused
by
the
action
of
rectification
of
the
carbon
brush.
So
please
go
on
using
the
machine
as
it
is.
(5)
To
set
the
pulley
belt
correctly
About
10mm
slack
of
the
belt
should
be
in
the
center
of
machine
and
motor
pulleys
as
shown
in
the
sketch
when
pushing
it
by
finger.
-3-
about
10mm
From the library of: Superior Sewing Machine & Supply LLC
3.
Oiling
(1) Oiling is
quite
important in using a
machine
forever.
Be
sure
to
oil
the
machine
at
specified
oil holes
everytime
before
using
it.
Such
important
moving parts as bush
ing are made of special alloy and oiled
sufficiently in
our
factory
before
ship
ping, so
pour
the
oil
supplied
with
machine
only
once
or
twice
monthly.
One
or
two
drop
of oil may be
enough
at
a
time.
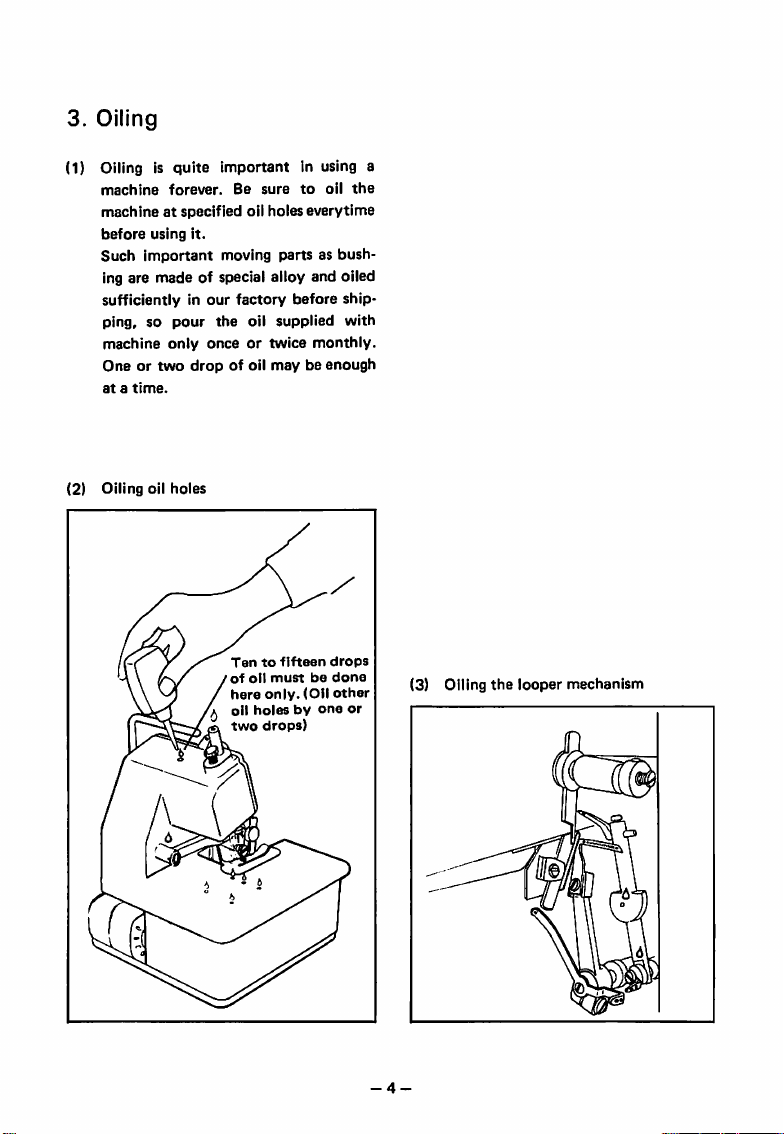
(2)
Oiling
oil
holes
Ten
to
fifteen
drops
of
oil
must
be
done
here
only.
(Oil
other
oil
holes
by
one
or
drops)
(3) Oiling
the
looper
mechanism
-4-
From the library of: Superior Sewing Machine & Supply LLC
 Loading...