

Millipore Pellicon 2, Pellicon 2 mini User Manual

Pellicon® 2 and 3 Mini Holder
User Guide

Notice
The information in this document is subject to change without notice and should not be
construed as a commitment by Millipore Corporation. Millipore Corporation assumes no
responsibility for any errors that may appear in this document. This manual is believed
to be complete and accurate at the time of publication. In no event shall Millipore
Corporation be liable for incidental or consequential damages in connection with or
arising from the use of this manual.

Pellicon-2 and 3 Mini Holder User Guide 3
Contents
Unpacking ...............................................................................................5
Plumbing and Instrumentation ..............................................................6
Assembling the Pellicon 2 and 3 Mini Holder ......................................7
Feed and Retentate Fitting Connections ................................ 7
Permeate Fitting Connections ................................................7
Connecting Pressure Gauge Adapter Fittings
to FEED and RETENTATE Fittings .........................................8
Connecting the Pressure Gauge ............................................9
Connect the Permeate Fittings ............................................. 10
Inserting the Pellicon Cassettes ...........................................10
Attaching the End Plate ........................................................ 11
Setup for Autoclaving ..........................................................................13
Ordering Information ............................................................................14
Spare Parts and Accessories ...............................................14
General Limited Warranty .................................................................... 15
T echnical Assistance ...........................................................................16

4 www.millipore.com
Pellicon-2 and 3 Mini Holder User Guide 5
Unpacking
The Pellicon 2 and 3 Mini Holder comes packed in a box and includes the following items:
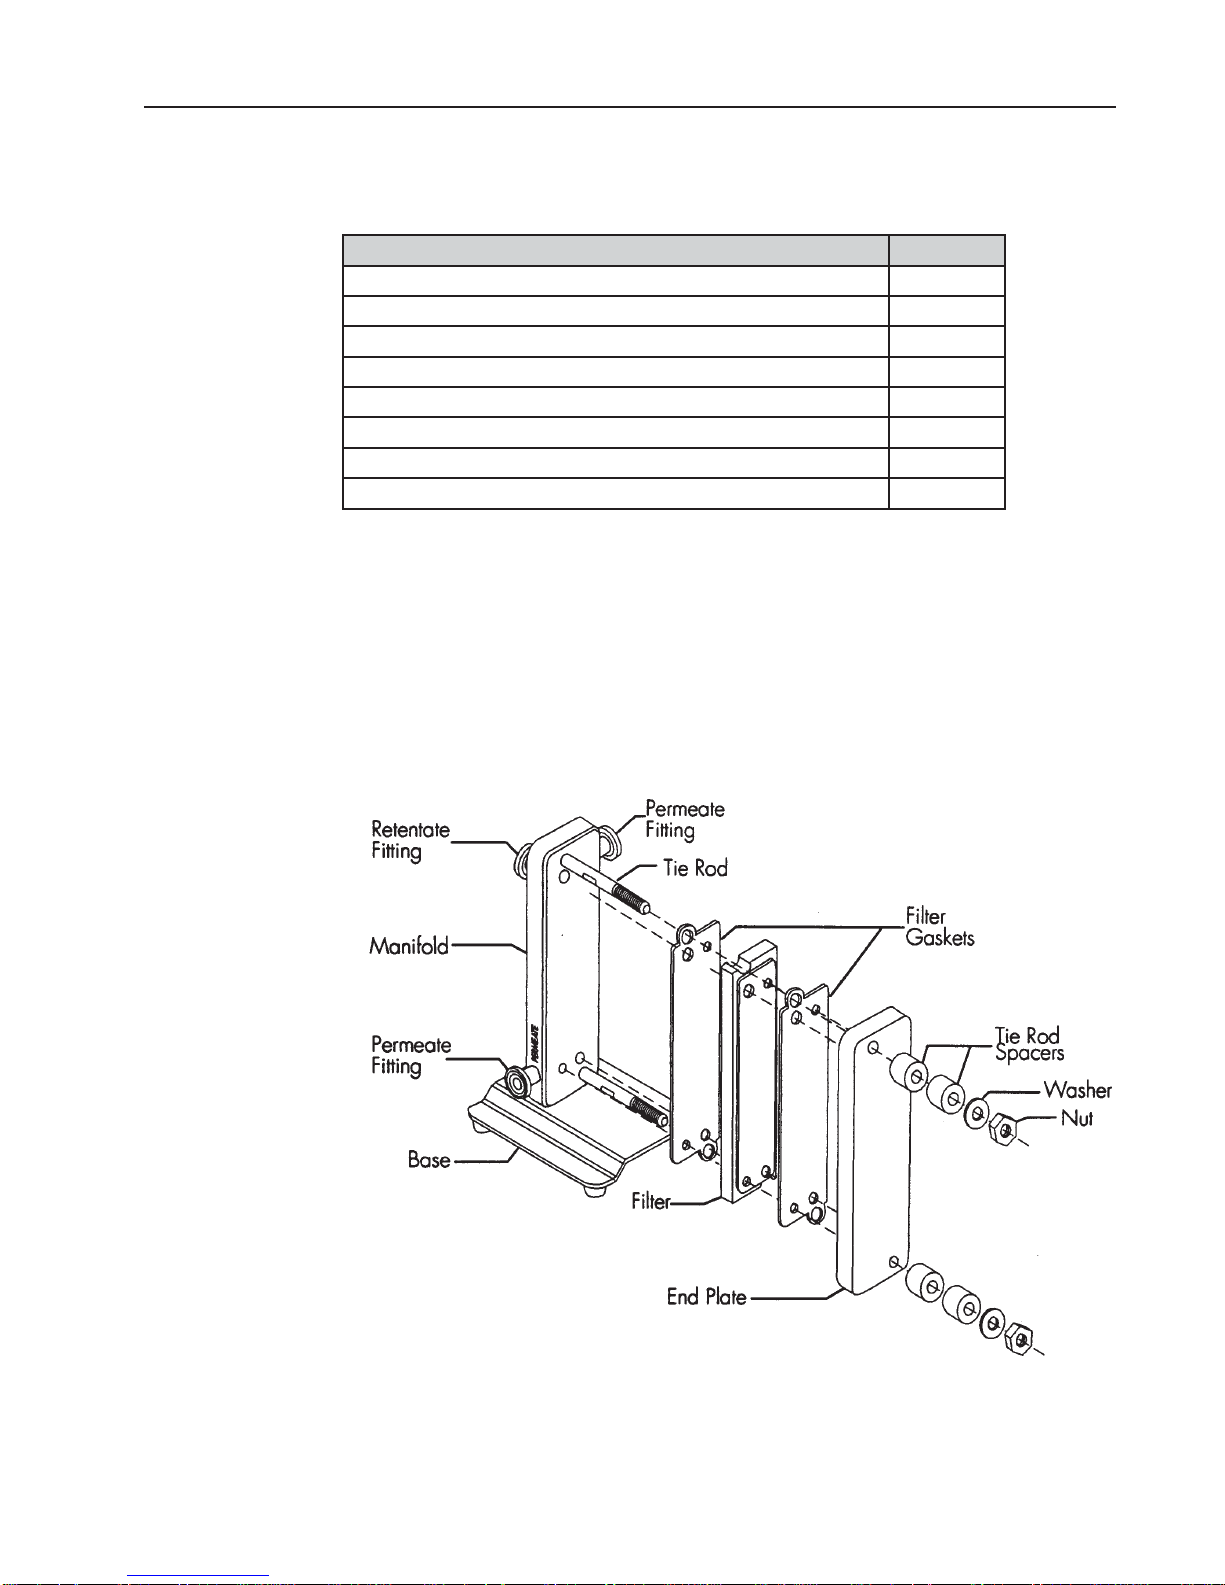
Description Quantity
Manifold with two tie rods, attached to a base 1
End plate 1
Tie rod spacer 4
3/8 inch Flat washer 2
3/8-16 UNC Hex nut, silicon bronze 2
½-inch Sanitary gasket 4
Fractional sanitary clamp 4
9/16 inch Deep socket 1
Unpack the holder and deep socket. 1.
Remove the FEED and RETENTATE fittings from the holder.2.
Loosen and remove the two nuts on the tie rods. 3.
Remove the washers, spacers, and end plate from the holder. Remove the shipping 4.
insert located between the holder manifold and end plate.
Place the holder base on a level surface.5.
Exploded view of Pellicon 2 and 3 Mini HolderFigure 1:
 Loading...