

Millipore milli-q, milli-q a10 User Manual
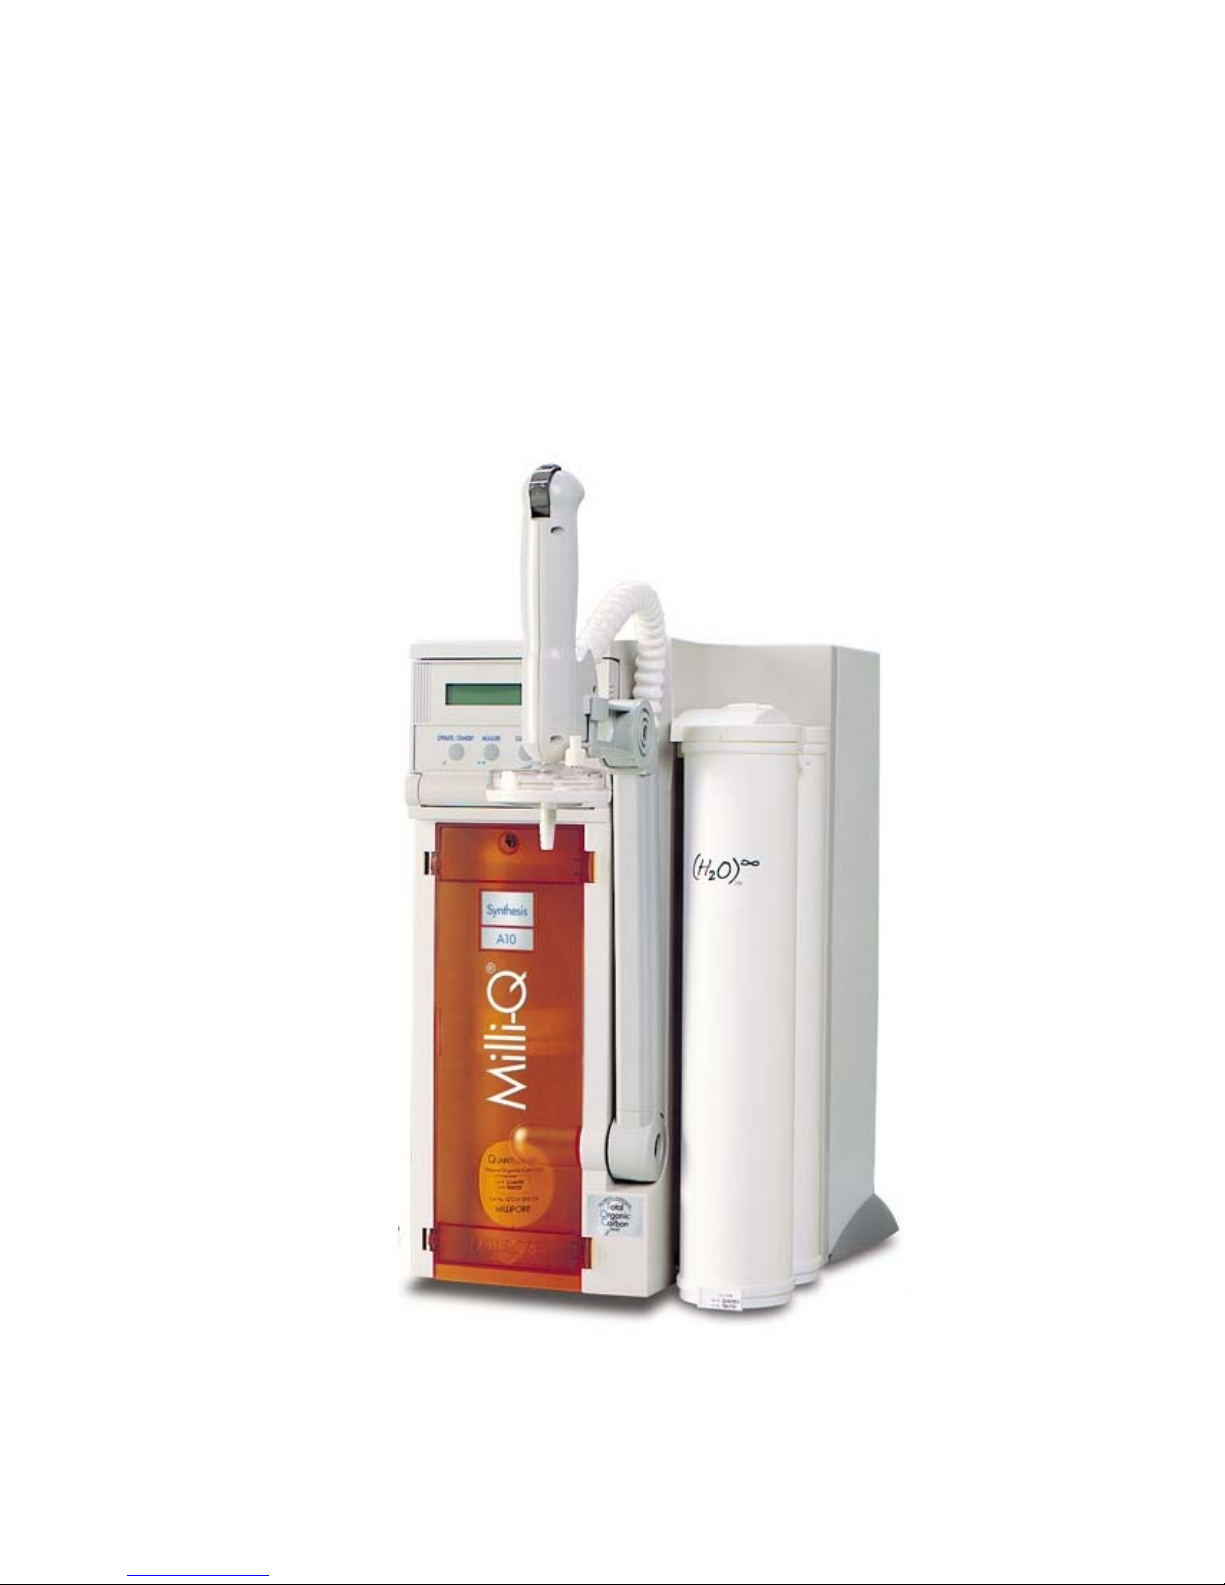
Milli-Q Synthesis and Milli-Q Synthesis A10
User Manual

Milli-Q Synthesis/Milli-Q Synthesis A10
Notice
The information in this document is subject to change without notice and should not be construed as a commitment
by Millipore Corporation. Millipore Corporation assumes no responsibility for any errors that might appear in this
document. This manual is believed to be complete and accurate at the time of publication. In no event shall
Millipore Corporation be liable for incidental or consequential damages in connection with or arising from the use of
this manual.
We manufacture and sell water purification systems designed to produce pure or ultrapure water with specific
characteristics (S/cm, T, TOC, CFU/ml, Eu/ml) when it leaves the water purification system provided that the Elix
Systems are fed with water quality within specifications, and properly maintained as required by the supplier.
We do not warrant these systems for any specific applications. It is up to the end user to determine if the quality of
the water produced by our systems matches his expectations, fits with norms/legal requirements and to bear
responsibility resulting from the usage of the water.
Millipore’s Standard Warranty
Millipore Corporation (“Millipore”) warrants its products will meet their applicable published specifications when
used in accordance with their applicable instructions for a period of one year from shipment of the products.
MILLIPORE MAKES NO OTHER WARRANTY, EXPRESSED OR IMPLIED. THERE IS NO WARRANTY OF
MERCHANTABILITY OR FITNESS FOR A PARTICULAR PURPOSE. The warranty provided herein and the
data, specifications and descriptions of Millipore products appearing in Millipore’s published catalogues and
product literature may not be altered except by express written agreement signed by an officer of Millipore.
Representations, oral or written, which are inconsistent with this warranty or such publications are not authorised and
if given, should not be relied upon.
In the event of a breach of the foregoing warranty, Millipore’s sole obligation shall be to repair or replace, at its
option, the applicable product or part thereof, provided the customer notifies Millipore promptly of any such breach.
If after exercising reasonable efforts, Millipore is unable to repair or replace the product or part, then Millipore shall
refund to the customer all monies paid for such applicable product or part. MILLIPORE SHALL NOT BE LIABLE
FOR CONSEQUENTIAL, INCIDENTAL, SPECIAL OR ANY OTHER INDIRECT DAMAGES RESULTING
FROM ECONOMIC LOSS OR PROPERTY DAMAGE SUSTAINED BY ANY CUSTOMER FROM THE USE
OF ITS PRODUCTS.
Copyright
2003 MILLIPORE CORPORATION. PRINTED IN FRANCE. ALL RIGHTS RESERVED.
THIS BOOK OR PARTS THEREOF MAY NOT BE REPRODUCED IN ANY FORM WITHOUT THE WRITTEN
PERMISSION OF THE PUBLISHERS.
Rev. 3 - 03/06
Trademarks
Millipore is a registered trademark of Millipore Corporation.
Elix, Q-Gard, Millipak and Milli-Q are registered trademarks of Millipore Corporation.
Quantum and RiOs are trademarks of Millipore Corporation.
A10 is a registered trademark of Millipore Corporation.
Teflon is a registered trademark of E.I. du Pont de Nemours & Co.
Tygon is a registered trademark of the Norton Company.
ASTM is a registered trademark of the American Society for Testing and Materials.
Allen is a registered trademark of the Holo-Krome Technology Corporation.
Windows and EXCEL are registered trademarks of Microsoft Corporation.
All other trademarks are trademarks of their respective manufacturers.
Milli-Q Synthesis/Milli-Q Synthesis A10
Milli-Q Synthesis and Milli-Q Synthesis A10
DECLARATION OF CONFORMITY
EUROPEAN UNION EC DIRECTIVES
Directive 89/336/CEE
Directive 73/23/CEE
The system mentioned above is manufactured in Millipore SAS - 67120 Molsheim - FRANCE - facilities whose
quality management system is approved by an accredited registering body to the ISO9001 Quality System
Standards.
We certify that these Lab Water Systems are designed and manufactured in application of the following
European Council directives :
- 89/336/CEE relating to Electromagnetic compatibility.
- 73/23/CEE relating to electrical equipment designed for use within certain voltage limits.
Standards to which conformity is declared as applicable are the following :
- EN 55022 Classe B: 1998: Limits and method of radio-disturbance characteristics of
information technology equipment.
- EN 50082-1: 1997: Electromagnetic compatibility: generic immunity standard.
- EN 61000-3-2: 1995 / A1 and A2: 1998 / A14: 2000: Electromagnetic compatibility
(EMC) Part 3-2: limits : Limits for harmonic current emissions (equipment input current up to and
including 16A per phase )
- EN 61000-3-3: 1995: Electromagnetic compatibility (EMC) Part 3: limits. Section 3:
limitation of voltage fluctuation and flicker in low voltage supply systems for equipment with
rated current inferior or equal 6A.
- EN 61010-1: 1993 /A2: 1995: Safety requirements for electrical equipment for
measurement, control, and laboratory use.
Guy REYMANN
Quality Assurance Manager
Millipore S.A.S.

Milli-Q Synthesis/Milli-Q Synthesis A10
Directive 2002/96 EC: For European users only
The symbol “crossed bin” on a product or its packaging indicates that the product
should not be treated like household waste when discarded. Instead the product should
be disposed of at a location that handles discarded electric or electronic equipment.
Proper disposal of equipment containing electric or electronic components will help to
reduce pollution effects to the environment or to human health. Proper recycling of these
products helps in environmental preservation and helps to protect natural resources. For
more information about recycling of products containing electric or electronic
components, please contact your local recycling representative or organisation.

TABLE OF CONTENTS
Milli-Q Synthesis/Synthesis A10 i
CHAPTER 1 INTRODUCTION .............................................................................1
1-1 USING THIS MANUAL..................................................................................................................1
Matching this manual with your Milli-Q®............................................................................................1
How to use the keypad and the LCD.................................................................................................1
Commonly used abbreviations in this manual......................................................................................2
1-2 SAFETY INFORMATION ................................................................................................................3
1-3 CONTACTING MILLIPORE .............................................................................................................4
Internet and Email..........................................................................................................................4
Manufacturing Site.........................................................................................................................4
CHAPTER 2 PRODUCT INFORMATION .................................................................5
2-1 MILLI-Q PRODUCT WATER SPECIFICATIONS .......................................................................................5
Water produced by the Milli-Q Synthesis or Synthesis A10 ...................................................................5
Flowrate......................................................................................................................................................5
Resistivity.....................................................................................................................................................5
Particles ......................................................................................................................................................5
Pyrogens.....................................................................................................................................................5
TOC ..........................................................................................................................................................5
Micro-Organisms .........................................................................................................................................5
Comparison of Milli-Q Water and ASTM Standard Specifications ..........................................................5
2-2 SCHEMATIC OF MAIN COMPONENTS ..............................................................................................6
2-3 DESCRIPTION OF MAIN COMPONENTS .............................................................................................7
Inlet Solenoid Valve .......................................................................................................................7
Pressure Relief Valve.......................................................................................................................7
Pump ..........................................................................................................................................7
Q-Gard ......................................................................................................................................7
What are the different types of Q-Gards? .........................................................................................................7
When do I change the Q-Gard Purification Pack?..............................................................................................8
UV Lamp......................................................................................................................................8
When do I change the UV Lamp? ...................................................................................................................8
Quantum .....................................................................................................................................8
What are the different types of Quantum Cartridges?..........................................................................................8
When do I change the Quantum Ultrapure Cartridge? ........................................................................................8
Pyrogard 5000 UF Cartridge ..........................................................................................................9
Resistivity Sensor............................................................................................................................9
Resistivity and temperature measurements ..........................................................................................................9
Temperature Compensation/Conductivity Measurements .....................................................................................9
Point Of Use Valve ........................................................................................................................9

TABLE OF CONTENTS
Milli-Q Synthesis/Synthesis A10
ii
Millipak.................................................................................................................................... 10
What types of Millipak Filters are there? ........................................................................................................ 10
When do I change the Millipak? .................................................................................................................. 10
A10 TOC Monitor...................................................................................................................... 12
What does the A10 do?............................................................................................................................. 12
What maintenance is involved with the A10? ................................................................................................. 12
2-4 TECHNICAL SPECIFICATIONS ...................................................................................................... 13
Dimensions (System and Clearance)...............................................................................................13
Weight .................................................................................................................................... 13
Electrical................................................................................................................................... 13
Measurement Ranges for TOC, Resistivity, Conductivity and Temperature............................................... 13
Materials of Construction ............................................................................................................. 14
Noise Level ............................................................................................................................... 14
CHAPTER 3 PRE INSTALLATION .......................................................................15
3-1 PRE INSTALLATION CHECKLIST ..................................................................................................... 15
3-2 PRE INSTALLATION CHECKLIST – “ARMLESS” MILLI-Q .......................................................................... 16
3-3 OPTIONAL EQUIPMENT YOU MAY NEED ......................................................................................... 17
Wall Mounting Bracket................................................................................................................ 17
Pressure Regulator....................................................................................................................... 17
Ball Valve for shutting off the feedwater supply ................................................................................. 17
Remote Point Of Use Dispenser ..................................................................................................... 17
Remote Point Of Use Dispenser used on a “Production” type Milli-Q..................................................... 18
Footswitch................................................................................................................................. 18
Printer or Computer Cable............................................................................................................ 18
Remote Display with Keypad ........................................................................................................ 18
3-4 INSTALLATION REQUIREMENTS..................................................................................................... 20
Consumables needed for installation .............................................................................................. 20
Space and Weight Requirements...................................................................................................20
Electrical Requirements................................................................................................................. 20
Feedwater Requirements .............................................................................................................. 21
Environmental Requirements .......................................................................................................... 21
Other Requirements..................................................................................................................... 21
3-5 UNPACKING THE MILLI-Q BOX – WHAT’S INSIDE?............................................................................ 22
CHAPTER 4 INSTALLATION .............................................................................24
4-1 CONNECTING TO A SUPPLY OF FEEDWATER .................................................................................... 24
Feedwater is from a reservoir ........................................................................................................ 24
Feedwater is from a pressurised source such as a pipe (a loop) ........................................................... 24

TABLE OF CONTENTS
Milli-Q Synthesis/Synthesis A10
iii
4-2
CONNECTION OF TUBING AND THE POWERCORD .............................................................................26
Feedwater Tubing........................................................................................................................26
Feedwater Pressure Relief Tubing ....................................................................................................26
UF Reject tubing..........................................................................................................................26
Connecting the Powercord ............................................................................................................27
4-3 INSTALLATION OF THE Q-GARD....................................................................................................27
4-4 TURNING ON THE SYSTEM POWER ...............................................................................................30
4-5 INSTALLATION OF THE QUANTUM CARTRIDGE ...................................................................................30
4-6 INSTALLATION OF THE TYGON TUBING ...........................................................................................30
4-7 PURGING THE AIR FROM THE SYSTEM..............................................................................................32
4-8 HYDRATING THE SYSTEM ............................................................................................................33
4-9 INSTALLATION AND RINSING OF THE MILLIPAK ...................................................................................35
4-10 HOW TO CALIBRATE THE FLOWRATE FROM THE MILLI-Q....................................................................35
4-11 HOW TO CHANGE THE DISPLAYED LANGUAGE...............................................................................38
4-12 HOW TO SHOW EITHER M.CM OR μS/CM (RESISTIVITY OR CONDUCTIVITY UNITS) ..................................39
4-13 HOW TO SHOW NON TEMPERATURE COMPENSATED RESISTIVITY OR CONDUCTIVITY VALUES ..........................41
What is temperature compensation? ..............................................................................................................41
4-14 HOW TO SET THE DATE AND THE TIME OF DAY...............................................................................44
CHAPTER 5 USING THE MILLI-Q .....................................................................46
5-1 HOW TO GET WATER FROM THE MILLI-Q ........................................................................................46
5-2 STANDBY, PRE OPERATE AND PRODUCT MODE .........................................................................48
What is STANDBY Mode?...........................................................................................................................48
What is PRE OPERATE Mode? ......................................................................................................................48
What is PRODUCT Mode? ..........................................................................................................................48
5-3 HOW TO VIEW THE RESISTIVITY, TEMPERATURE AND TOC.....................................................................49
Viewing Resistivity........................................................................................................................49
Viewing Temperature ...................................................................................................................49
Viewing TOC .............................................................................................................................49
5-4 HOW TO USE THE FOOTSWITCH (OPTIONAL ACCESSORY).....................................................................50
5-5 HOW TO DISPENSE AN EXACT AMOUNT OF PRODUCT WATER ...............................................................50
5-6 HOW TO VIEW THE AGE OF THE CONSUMABLES ...............................................................................52
5-7 HOW TO UNDERSTAND MILLI-Q MESSAGES.....................................................................................54
CHAPTER 6 MAINTENANCE ............................................................................57
6-1 MAINTENANCE SCHEDULE .........................................................................................................57
6-2 HOW TO REPLACE THE Q-GARD ..................................................................................................58
6-3 HOW TO REPLACE THE QUANTUM CARTRIDGE ..................................................................................60
6-4 HOW TO REPLACE THE MILLIPAK ...................................................................................................65

TABLE OF CONTENTS
Milli-Q Synthesis/Synthesis A10
iv
6-5
HOW TO SANITISE AND CLEAN THE UF CARTRIDGE ........................................................................... 66
How often would I normally Sanitise and Clean the UF Cartridge?....................................................... 66
Things to know BEFORE you sanitise the UF Cartridge........................................................................ 66
Sanitising and Cleaning the UF Cartridge........................................................................................66
6-6 HOW TO CLEAN THE SCREEN FILTER ............................................................................................. 70
6-7 HOW TO TIGHTEN THE POU DISPENSER ARM ................................................................................. 72
6-8 HOW TO REPLACE THE A10 UV LAMP .......................................................................................... 72
6-9 HOW TO CLEAN THE A10 TOC MONITORING DEVICE..................................................................... 72
How long does the A10 Cleaning take ?....................................................................................................... 72
Why would I need to do an A10 Cleaning ? ................................................................................................. 72
Would an A10 Cleaning ever happen automatically ?..................................................................................... 72
How do I do an A10 Cleaning? .................................................................................................................. 73
How do I cancel the A10 CLEANING once it is started?.................................................................................. 74
6-10 HOW TO PERFORM AN AIR PURGE ............................................................................................ 75
6-11 HOW TO REPLACE THE UV LAMP .............................................................................................. 76
CHAPTER 7 TROUBLESHOOTING......................................................................77
The problem is Low or No Flowrate from the POU Dispenser............................................................... 77
The problem is Low Resistivity of the Product Water ........................................................................... 78
The problem is there is no power to the Milli-Q system....................................................................... 79
The problem is there is an “ERROR Number” Alarm displayed ............................................................. 79
Continuation of “ERROR Number” Alarm displayed ........................................................................... 80
The problem is a message is displayed with a Flashing Service or Alarm LED ......................................... 81
Other Troubleshooting items.......................................................................................................... 82
CHAPTER 8 ORDERING INFORMATION .............................................................83
8-1 CATALOGUE NUMBERS FOR CONSUMABLES ................................................................................... 83
8-2 CATALOGUE NUMBERS FOR ACCESSORIES...................................................................................... 84
8-3 CATALOGUE NUMBERS FOR ALL MILLI-QS ....................................................................................... 84
C
HAPTER 9 APPENDIXES................................................................................85
APPENDIX 1 HOW TO REPLACE THE MAIN POWER FUSE ............................................................................ 85
APPENDIX 2 HOW TO TRANSFER INFORMATION TO A PRINTER .................................................................... 87
APPENDIX 3 HOW TO TRANSFER INFORMATION TO A COMPUTER ................................................................ 89
APPENDIX 4 HOW TO USE A REMOTE DISPLAY ....................................................................................... 92
APPENDIX 5 HOW TO USE A REMOTE POU DISPENSER ............................................................................ 92
APPENDIX 6 COMP MODE 1 AND COMP MODE 2.......................................................................... 93
INTRODUCTION
Milli-Q Synthesis/Synthesis A10 1
Chapter 1 INTRODUCTION
1-1 USING THIS MANUAL
MATCHING THIS MANUAL WITH YOUR MILLI-Q
This manual is intended for use with a Millipore Milli-Q Synthesis or Milli-Q Synthesis A10 Water
Purification System.
This User Manual is a guide for use during the installation, normal operation and maintenance of a Milli-Q Synthesis
or Milli-Q Synthesis A10 Water Purification System. It is highly recommended to completely read this manual and
to fully comprehend its contents before attempting installation, normal operation or maintenance of the Water
Purification System.
You can easily identify your type of Water Purification System if you do not see the Catalogue Number. The Milli-Q
Synthesis and Synthesis A10 Water Purification Systems have an Orange Door on the front cabinet.
If this manual is not the correct one for your Water Purification System, then please contact Millipore.
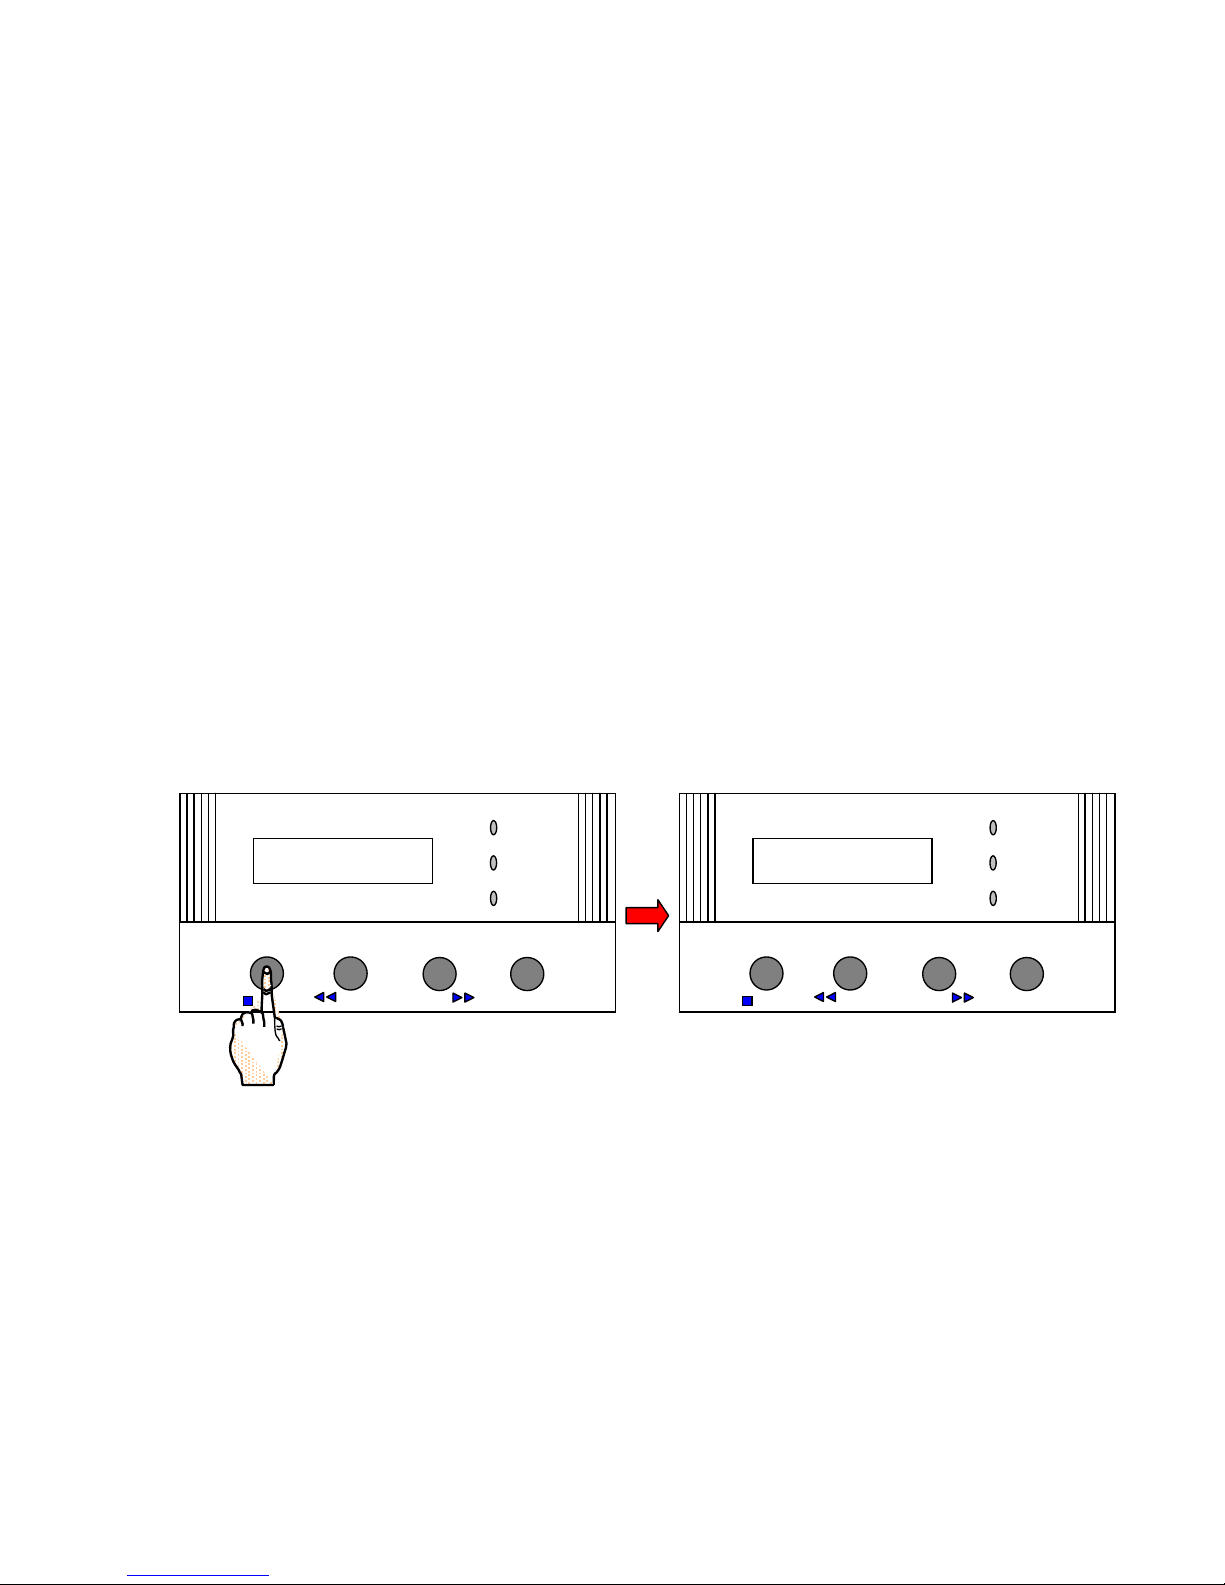
HOW TO USE THE KEYPAD AND THE LCD
The Keypad and LCD (liquid crystal display) are located on the front of the Water System Cabinet.
The Keypad buttons sometimes have a slight delay when pressed. As an example, suppose you want to change the
Milli-Q from STANDBY Mode to PRE OPERATE Mode. This is done by pressing the OPERATE/STANDBY Keypad
button for about two seconds.
There are four Keypad buttons. These are labelled as OPERATE/STANDBY, MEASURE, CLEANING and MENU.
See the drawing above for their placement.
The LCD is a backlit, dual line 16-character display.
The LEDs are located to the right of the LCD (see above). The POWER LED is green. This is lit when the Water
System microprocessor has electrical power. The SERVICE LED is yellow. This will flash when a service type of LCD
message is displayed (i.e. EXCH. CARTRIDGES. is shown, meaning to change the cartridges in the system). The
ALARM LED is red. This will flash when an alarm condition is indicated on the LCD (i.e. PAK NOT IN PLACE,
meaning a purification pack is not fully in place or is absent).
POWER
SERVICE
A
LARM
PRE OPERA T E
POWER
SERVICE
A
LARM
S T A ND B Y

INTRODUCTION
Milli-Q Synthesis/Synthesis A10 2
COMMONLY USED ABBREVIATIONS IN THIS MANUAL
This manual will use abbreviations for text that is commonly repeated (i.e. Liquid Crystal Display is abbreviated as
LCD).
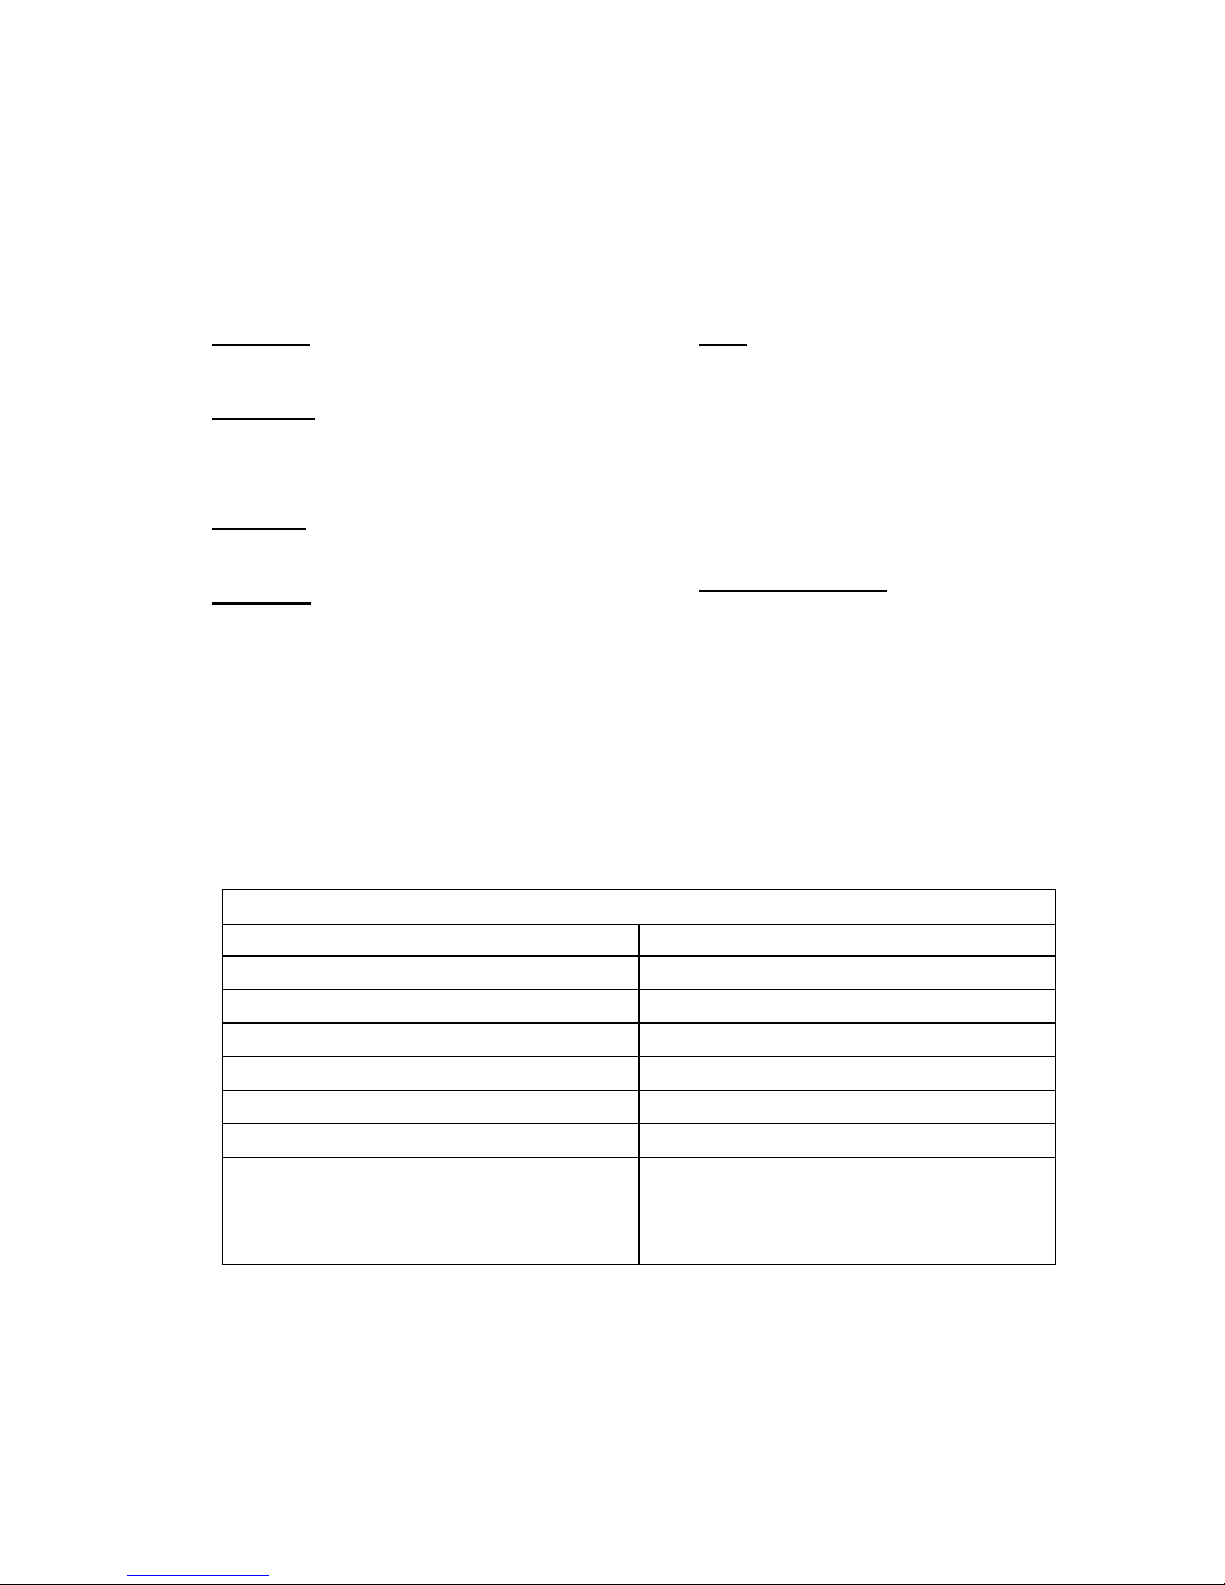
The table below shows a list of the abbreviations used in this manual.
A
BBREVIATION FULL TEXT
m micron (unit of length)
S/cm microSiemens per centimeter (a measurement unit
describing the electrical conductivity of water)
A10 a Millipore device which measures TOC in
Ultrapure Water
ASTM American Society for Testing and Materials
CFU/ml Colony Forming Units per milliLitre
EDI Electrical Deionisation (referred to as Elix also)
Eu/ml Endotoxin Units per milliLitre
LCD Liquid Crystal Display
LED Light Emitting Diode
lpm Litre Per Minute
M.cm Megohm.centimeter
M.cm @ 25C Megohm.centimeter when measured at 25C
mm millimeter
NPT National Pipe Thread (the type of thread used on
a fitting)
NPTF National Pipe Thread Female
NPTM National Pipe Thread Male
OD Outer Diameter
ppb part per billion; a microgram per Litre (g/L)
RO Reverse Osmosis
SANIT. Sanitisation
TOC Total Organic Carbon
UF Ultrafilter Cartridge
UV Ultraviolet
INTRODUCTION
Milli-Q Synthesis/Synthesis A10 3
1-2 SAFETY INFORMATION
Your Milli-Q Water Purification System should be operated according to the instructions in this manual. In particular,
the hydraulic and electrical specifications should be followed and met. It is important to use this equipment as
specified in this manual; using this equipment in a different manner may impair the safety precautions of the Water
System.
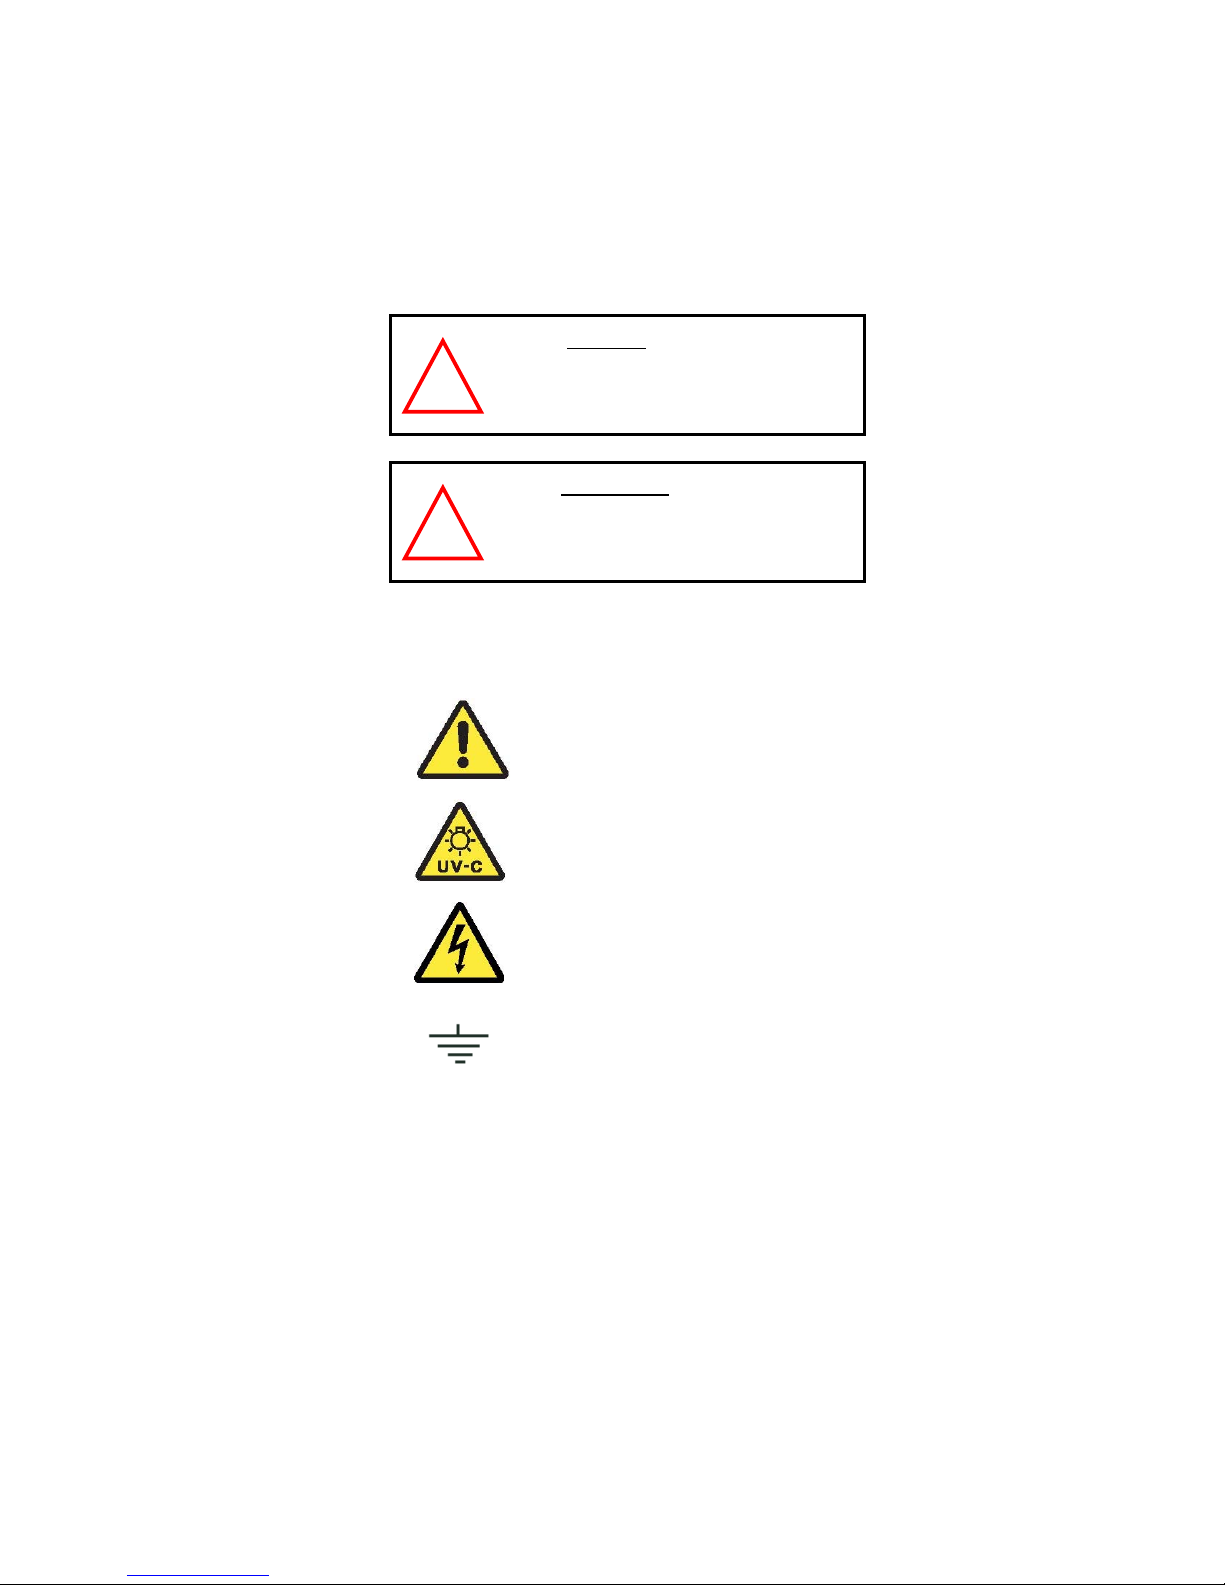
Other safety symbols
Danger
Danger: UV radiation
Electrical Danger
Ground Connection
!
THIS HAZARD symbol is used t
o
refer to instructions in this manual
that need to be done safely and
carefull
y
THIS ATTENTION symbol is used t
o
refer to instructions in this manual
that need to be done carefully

INTRODUCTION
Milli-Q Synthesis/Synthesis A10 4
1-3 CONTACTING MILLIPORE
INTERNET AND EMAIL
The Millipore Internet Site can be used to find addresses, telephone/fax numbers, and other information.
Internet Site Address: www.millipore.com
www.millipore.com/techservice
MANUFACTURING SITE
Millipore SAS
67120 Molsheim
FRANCE
PRODUCT INFORMATION
Milli-Q Synthesis/Synthesis A10 5
Chapter 2 PRODUCT INFORMATION
2-1 MILLI-Q PRODUCT WATER SPECIFICATIONS
WATER PRODUCED BY THE MILLI-Q SYNTHESIS OR SYNTHESIS A10
FLOWRATE
0.8 - 1.2 LPM with Millipak Express 20
RESISTIVITY
Minimum 18.0 M.cm @ 25C
Typically 18.2 M.cm @ 25C
PARTICLES
1/ml (particle size > 0.22 m)
PYROGENS
< 0.001 Eu/ml
TOC
Maximum 5 ppb (this specification came from test
conditions where a Milli-Q Synthesis was fitted with a
Q-Gard
1 Purification Pack and a Quantum EX
Ultrapure Cartridge and the feedwater came from a
Millipore RiOs Water System. The feedwater TOC
value was < 50 ppb). The TOC of the Milli-Q
Product Water can vary as a function of the
feedwater TOC.
MICRO-ORGANISMS
1 CFU/ml
COMPARISON OF MILLI-Q WATER AND ASTM STANDARD SPECIFICATIONS
Milli-Q Product Water Quality will meet or exceed ASTM Type I Standard Specifications for Reagent Grade Water.
The specifications for ASTM Type I Reagent Grade Water are shown below. Note that the Water Quality
Specifications for a Milli-Q Synthesis (or Milli-Q Synthesis A10) are listed in the section just above.
(From “Standard Specification for Reagent Water” Designation: D 1193 – 99; American Society For Testing And
Materials)
ASTM Type I Standard Specifications for Reagent Grade Water
Parameter Value
Conductivity @ 25C (S/cm) 0.056
Resistivity @ 25C (M.cm) 18
Total Silica max. value (g/L) 3
Total Organic Carbon max. value (g/L) 100
Chlorides max. value (g/L) 1
Sodium max. value (g/L) 1
pH not specified (The measurement of pH has been
eliminated for this standard because this grade of
water does not contain constituents in sufficient
quantity to alter pH)
PRODUCT INFORMATION
Milli-Q Synthesis/Synthesis A10 6
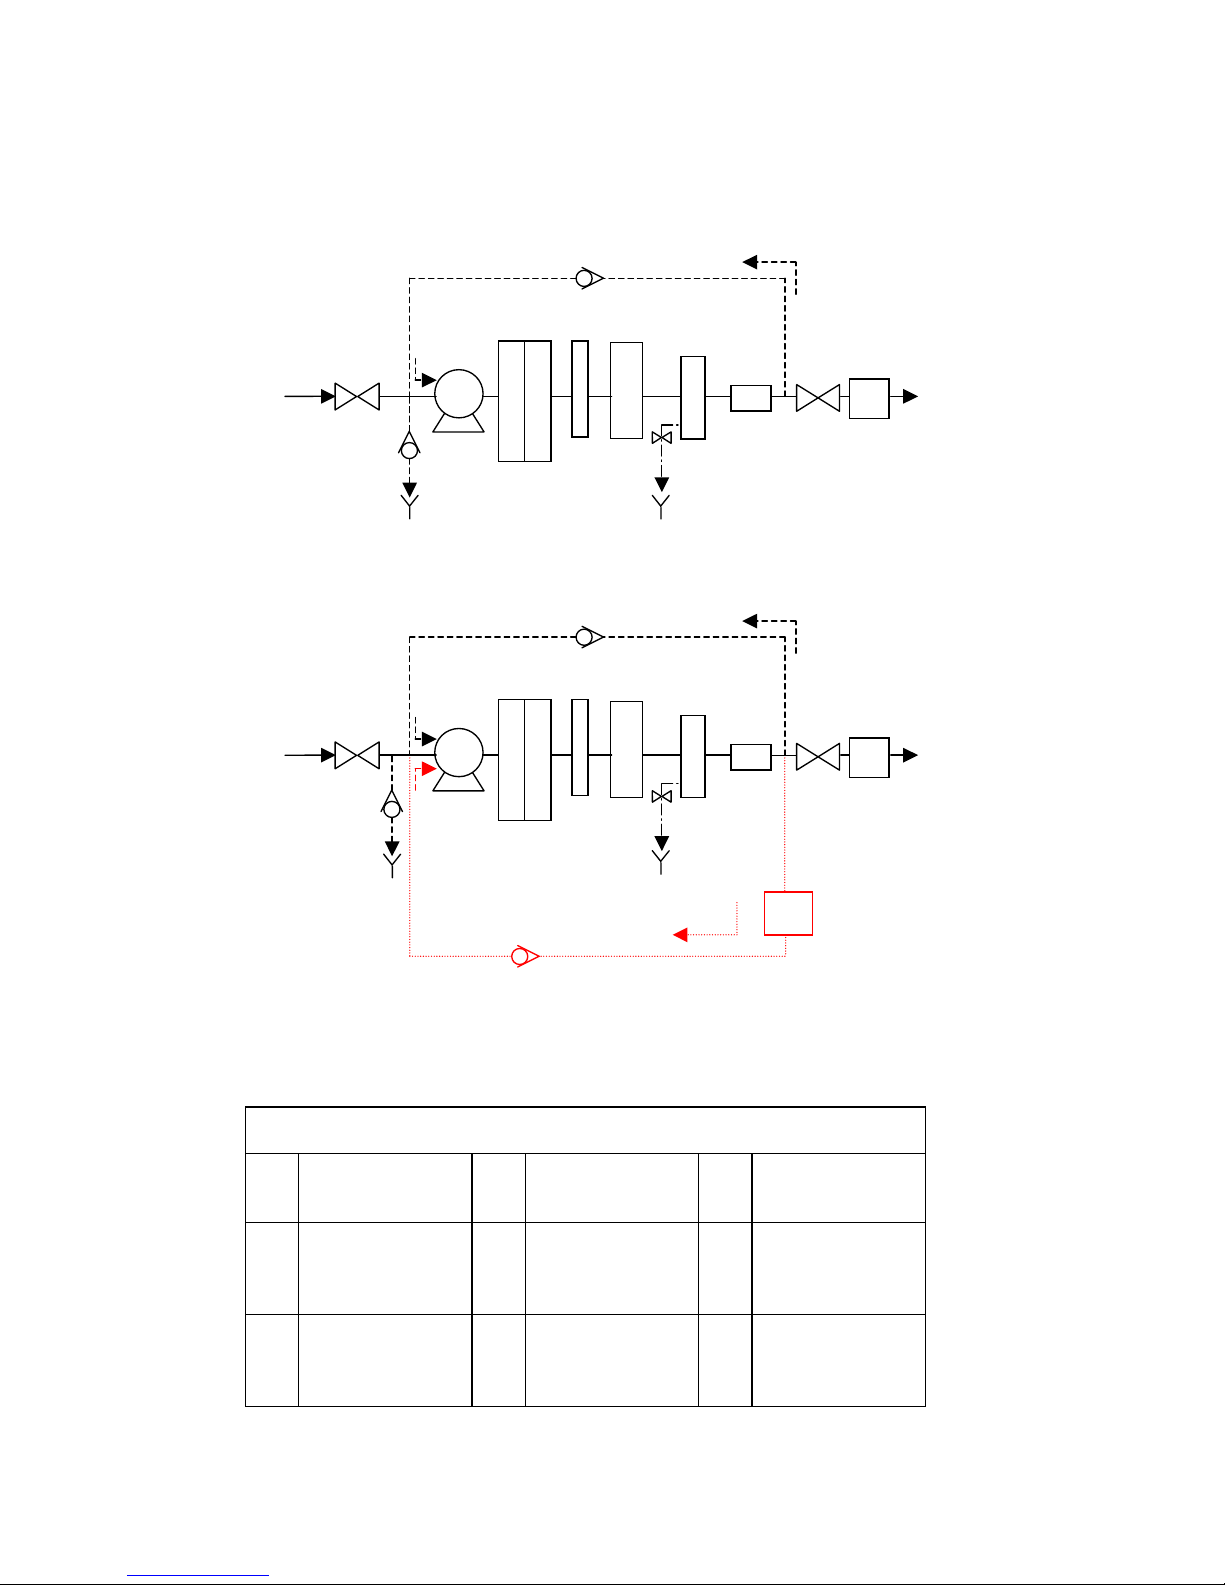
2-2 SCHEMATIC OF MAIN COMPONENTS
The water flow through a Milli-Q Synthesis Water Purification System is shown here in a flow diagram. A
description of each item is in the next section below.
The water flow through a Milli-Q Synthesis A10 is shown here in a flow diagram.
Identification of lettered items in the flow schematic above
A Inlet Solenoid
Valve
D UV Lamp and
Housing
G Resistivity
Sensor
B Pump E Quantum
Ultrapure
Cartridge
H Electric 2-way
Valve
C Q-Gard
Purification
Pack
F
Pyrogard
5000 UF
Cartridge
I Millipak
Membrane
Filter
FEEDWATER
A
B
C
D
E
MILLI-Q
PRODUCT
F
G
H
RECIRCULATED
WATER PATH
I
UF DRAINPRESSURE RELIEF
PRESSURE
RELIEF
A-10 REJECT
WATER PATH
A-10 TOC MONITOR
FEEDWATER
A
B
C
D
E
MILLI-Q
PRODUCT
F
G
H
RECIRCULATED
WATER PATH
I
UF DRAIN

PRODUCT INFORMATION
Milli-Q Synthesis/Synthesis A10 7
2-3 DESCRIPTION OF MAIN COMPONENTS
INLET SOLENOID VALVE
The Inlet Solenoid Valve is used to control the flow of feedwater into the Milli-Q system. The Inlet Solenoid Valve is
open when the system is delivering water from the Point Of Use Dispenser and during RECIRCULATION Mode.
PRESSURE RELIEF VALVE
The Milli-Q system has a Feedwater Pressure Relief Valve inside. The purpose of this is to vent out any Feedwater
that has a pressure higher than 0.75 bar (11 psi). This would prevent any excessive Feedwater pressure that could
build up in the Milli-Q system during RECIRCULATION Mode.
A piece of tubing is included in the Accessories Bag. This tubing is attached to the Milli-Q system and then placed
in a drain or sink. When the incoming Feedwater has a pressure greater than 0.75 bar, the Pressure Relief Valve
will open up and Feedwater will be vented to drain via the attached tubing. The water will stop flowing to drain
when the Feedwater Pressure drops to less than 0.75 bar. If a Pressure Regulator is installed on the Feedwater
Tubing (between the Milli-Q and a Loop), then it is unlikely that the Feedwater Pressure will get this high.
The installation of this tubing is described in more detail in Chapter 4 (Installation).
A Milli-Q fed from a Reservoir will not need the Pressure Relief Valve tubing. A Milli-Q fed from a Pressurised Pipe
(a Loop) should have the Pressure Relief Valve tubing installed during installation. Please note that the Pressure Relief
Valve is factory installed inside all Milli-Q systems and only the tubing needs to be attached during installation.
PUMP
The Pump is used to bring water into the Milli-Q and then to send it through the various components such as the QGard Purification Pack and the Quantum Ultrapure Cartridge.
Q-GARD
The Q-Gard Purification Pack is used to remove ions and organic molecules from the feedwater. The Q-Gard is a
consumable device. A consumable device is something that is periodically changed out for a new one during the
maintenance of the Water System.
WHAT ARE THE DIFFERENT TYPES OF Q-GARDS?
The Q-Gard 1 is used when the feedwater comes from RO, distillation or Electrodeionisation (EDI). An example of
RO or EDI feedwater is the water coming from either a Millipore RiOs or Elix Water Purification System. This type of
feedwater typically has some ions but contains little organic, particulate and colloidal contamination.
The Millipore Catalogue Number for a Q-Gard 1 is QGARD00R1. See Section 8-1 for more information.
The Q-Gard 2 is used whenever the feedwater comes from a source other than those mentioned above. An
example of feedwater requiring a Q-Gard 2 would be Service Deionised Water (this is the process of deionising
water by connecting bottles of ion exchange directly to tap water and deionising the tap water). Deionised Water
produced by multiple regeneration ion exchange resins may have a high level of organic, particulate and colloidal
contamination.
The Millipore Catalogue Number for a Q-Gard 2 is QGARD00D2. See Section 8-1 for more information.

PRODUCT INFORMATION
Milli-Q Synthesis/Synthesis A10 8
WHEN DO I CHANGE THE Q-GARD PURIFICATION PACK?
The decision to change a Q-Gard Pack is based upon time (calendar days) with a Milli-Q Synthesis system.
The Milli-Q Synthesis will indicate a message “EXCH. CARTRIDGES” after 180 Calendar Days.
The Milli-Q Synthesis A10 will never display a message “EXCH. CARTRIDGES”. It is up to the user to change the
Q-Gard, Quantum and Millipak based upon resistivity (and TOC) values.
UV LAMP
The dual wavelength UV Lamp emits light at 185 nm (for TOC reduction) and 254 nm (Germicidal action). The UV
Lamp is used to kill bacteria and to reduce the levels of organic molecules in the water stream between the Q-Gard
Pack and the Quantum Cartridge. The UV Lamp has a Millipore Catalogue Number of ZMQUVLP01.
WHEN DO I CHANGE THE UV LAMP?
It is recommended to change the UV Lamp every 365 Days (once per year). The Milli-Q LCD will show a message
“EXCHANGE UV” after 365 Calendar Days indicating it is time to replace the UV Lamp.
QUANTUM
The Quantum Ultrapure Cartridge is used to remove trace levels of ions and organic molecules.
WHAT ARE THE DIFFERENT TYPES OF QUANTUM CARTRIDGES?
The Quantum IX contains only Mixed Bed Ion Exchange resin. This type of Quantum Cartridge is used when
maintaining absolutely trace levels of ions is critical.
The Millipore Catalogue Number for a Quantum IX is QTUM000IX. See Section 8-1 for more
information.
The Quantum EX contains ion exchange resin and synthetic carbon. These purification media are used when the
Milli-Q Product Water needs to have both trace levels of ions and trace levels of organic species.
The Millipore Catalogue Number for a Quantum EX is QTUM000EX. See Section 8-1 for more
information.
The Quantum VX contains media that removes Volatile Organic Carbon species and maintains trace levels of
ions.
The Millipore Catalogue Number for a Quantum VX is QTUM000VX. See Section 8-1 for more
information.
WHEN DO I CHANGE THE QUANTUM ULTRAPURE CARTRIDGE?
It is recommended to change the Quantum Ultrapure Cartridge when the Q-Gard Purification Pack
is changed. See “When do I change the Q-Gard Purification Pack” (see the section above) for more
information.

PRODUCT INFORMATION
Milli-Q Synthesis/Synthesis A10 9
PYROGARD 5000 UF CARTRIDGE
The Pyrogard 5000 UF Cartridge (called UF Cartridge in the remainder of this manual) is used to remove any
Pyrogens or Endotoxins in the Milli-Q Product Water. The UF Cartridge will also remove bacteria from the water
passing through it.
The maintenance of the UF Cartridge involves sanitising and cleaning it every 4 weeks with Sodium Hydroxide. The
Sanitisation of the UF Cartridge is described in the Maintenance Chapter of this manual.
The UF Cartridge has a Reject Water Stream which is plumbed via a piece of 8 mm OD tubing from the back of the
Milli-Q to a sink or a drain. This stream is used to transport the bacteria, pyrogens, particles, ... that are rejected by
the UF Cartridge. The flow through this piece of tubing is controlled by a solenoid valve. This valve is only open for
30 seconds every 3 hours of PRE OPERATE Mode or when the AIR PURGE Mode is active. This valve will also
open for portions of the Sanitisation Mode.
RESISTIVITY SENSOR
RESISTIVITY AND TEMPERATURE MEASUREMENTS
The resistivity sensor is used to measure the electrical resistivity of the Milli-Q Product Water. Additionally, a
thermistor (temperature sensor) is located in the resistivity sensor. The temperature displayed on the Milli-Q LCD
during PRODUCT Mode is measured by this thermistor.
TEMPERATURE COMPENSATION/CONDUCTIVITY MEASUREMENTS
The resistivity and temperature are measured while water is flowing through the sensor. The Milli-Q microprocessor
will then temperature compensate the resistivity to a 25 C value. It is possible to use the Milli-Q software to display
non-temperature compensated resistivity. It is also possible to display conductivity (S/cm) (temp. compensated or
non-temp. compensated) on the LCD by using the Milli-Q software. The software can be changed by using the
Keypad.
POINT OF USE VALVE
The Point Of Use (POU) Dispenser has a 2-way electric valve inside.
This valve is closed when the POU Dispenser Trigger is in the upright position. This also places the Milli-Q into PRE
OPERATE Mode after 90 seconds if you were using the Milli-Q in PRODUCT Mode.
When the POU Dispenser Trigger is pushed down, the electric valve is powered. This allows water to be dispensed
out of the Milli-Q System instead of being recirculated back to the pump (see flow diagram).

PRODUCT INFORMATION
Milli-Q Synthesis/Synthesis A10 10
MILLIPAK
The Millipak Final Filter is a membrane based filter that removes all particles and bacteria with a size greater than
0.22 m by a sieving mechanism. All contaminants larger than the filter pore size are retained on its surface. This
essentially will block and retain any bacteria present in the water flowing through it.
WHAT TYPES OF MILLIPAK FILTERS ARE THERE?
There are 2 types of Millipak Filters (sometimes called the Final Filter).
The Sterile Millipak 40
is generally used for some Life Science applications. This has a Millipore
Catalogue Number of MPGL04SK2. See Section 8-1 for more information.
The Non Sterile Millipak Express 20
is generally used for Analytical Science Applications including
applications where trace levels of Volatile Organic Compounds are desired or with Life Science
Applications where Endocrine Disrupter Analysis is being done. The Non Sterile Millipak Express 20
has a Millipore Catalogue Number of MPGP02001. See Section 8-1 for more information.
WHEN DO I CHANGE THE MILLIPAK?
The Millipak is changed when the Q-Gard Purification Pack and the Quantum Ultrapure Cartridge are changed.
However, it may be necessary to change the Millipak if it becomes clogged with particles or bacteria and reduces
the flowrate of Milli-Q Product Water.
PRODUCT INFORMATION
Milli-Q Synthesis/Synthesis A10 11
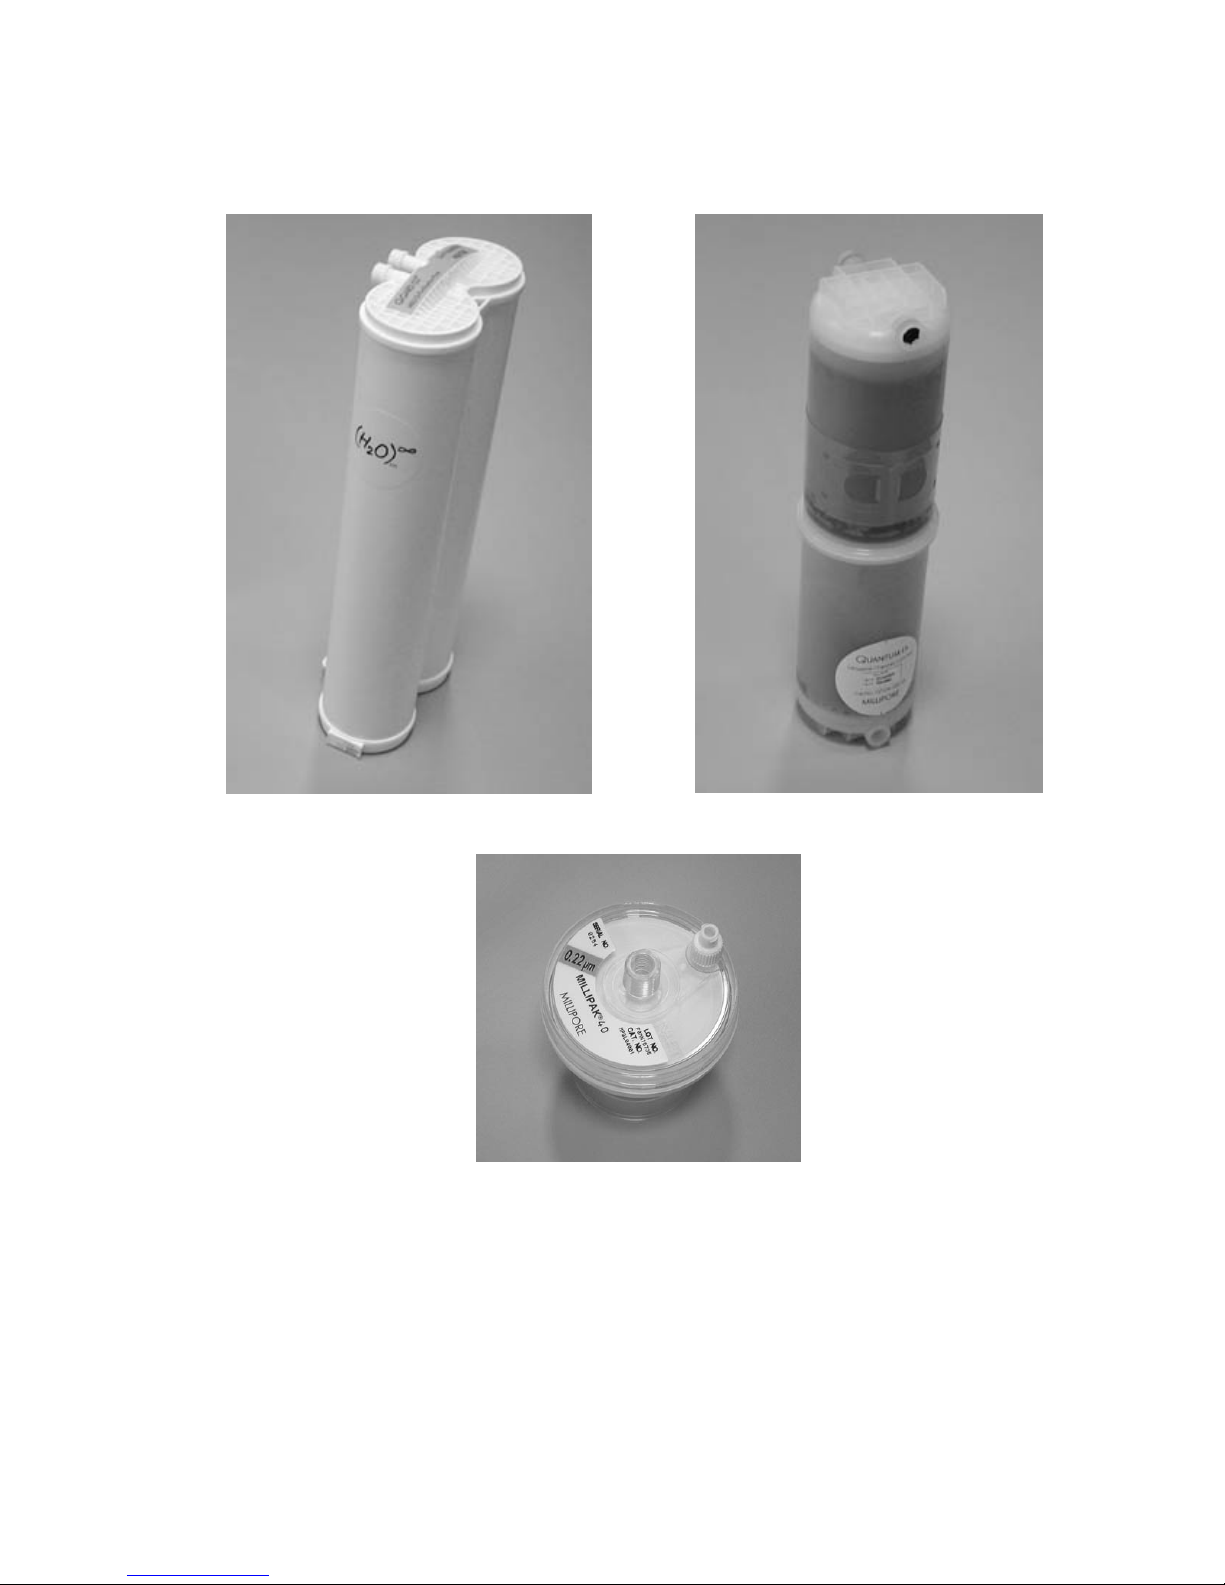
Q-GARD
QUANTUM
MILLIPAK

PRODUCT INFORMATION
Milli-Q Synthesis/Synthesis A10 12
A10 TOC MONITOR
WHAT DOES THE A10 DO?
The A10 TOC Monitor (called A10 in this manual) is used to measure the TOC of the Milli-Q Product Water. The
A10 is located inside the Milli-Q System Cabinet. Any Milli-Q system with an A10 inside will have ‘A10’
on the end of the name of the Milli-Q (i.e. Milli-Q Synthesis A10 vs. Milli-Q Synthesis).
An A10 TOC measurement is initiated every time the Milli-Q is brought from PRE OPERATE to PRODUCT Mode
(when the POU Dispenser Trigger is brought forward). A single TOC Measurement will take approximately
5 minutes. It is possible to have a TOC analysis time of either 9 or 12 minutes when the TOC levels are high. The
A10 will continuously perform TOC measurements while the Milli-Q is in PRODUCT Mode. The A10 will perform a
TOC measurement once per hour while the Milli-Q is in PRE OPERATE Mode. The A10 will not perform any TOC
measurements when the Milli-Q is in STANDBY Mode.
WHAT MAINTENANCE IS INVOLVED WITH THE A10?
The A10 uses a small UV light during its TOC Analysis Mode. The A10 UV Lamp needs to be replaced
periodically. The normal useful lifetime of the A10 UV Lamp is 1 year. The Milli-Q system uses a calendar day
timer to record the age of the A10 UV Lamp. A service message is prompted after 365 Days
(“EXCHANGE A10 UV”) to remind you to change the A10 UV Lamp. The Catalogue Number for the A10 UV
Lamp is ZFA10UV01.
There is a Cleaning Mode for the A10. This Cleaning Mode can be initiated with the Milli-Q software. The A10
CLEANING Mode does not use a chemical reagent of any kind. The A10 Cleaning is explained in further detail in
the Maintenance Section of this manual.
PRODUCT INFORMATION
Milli-Q Synthesis/Synthesis A10 13
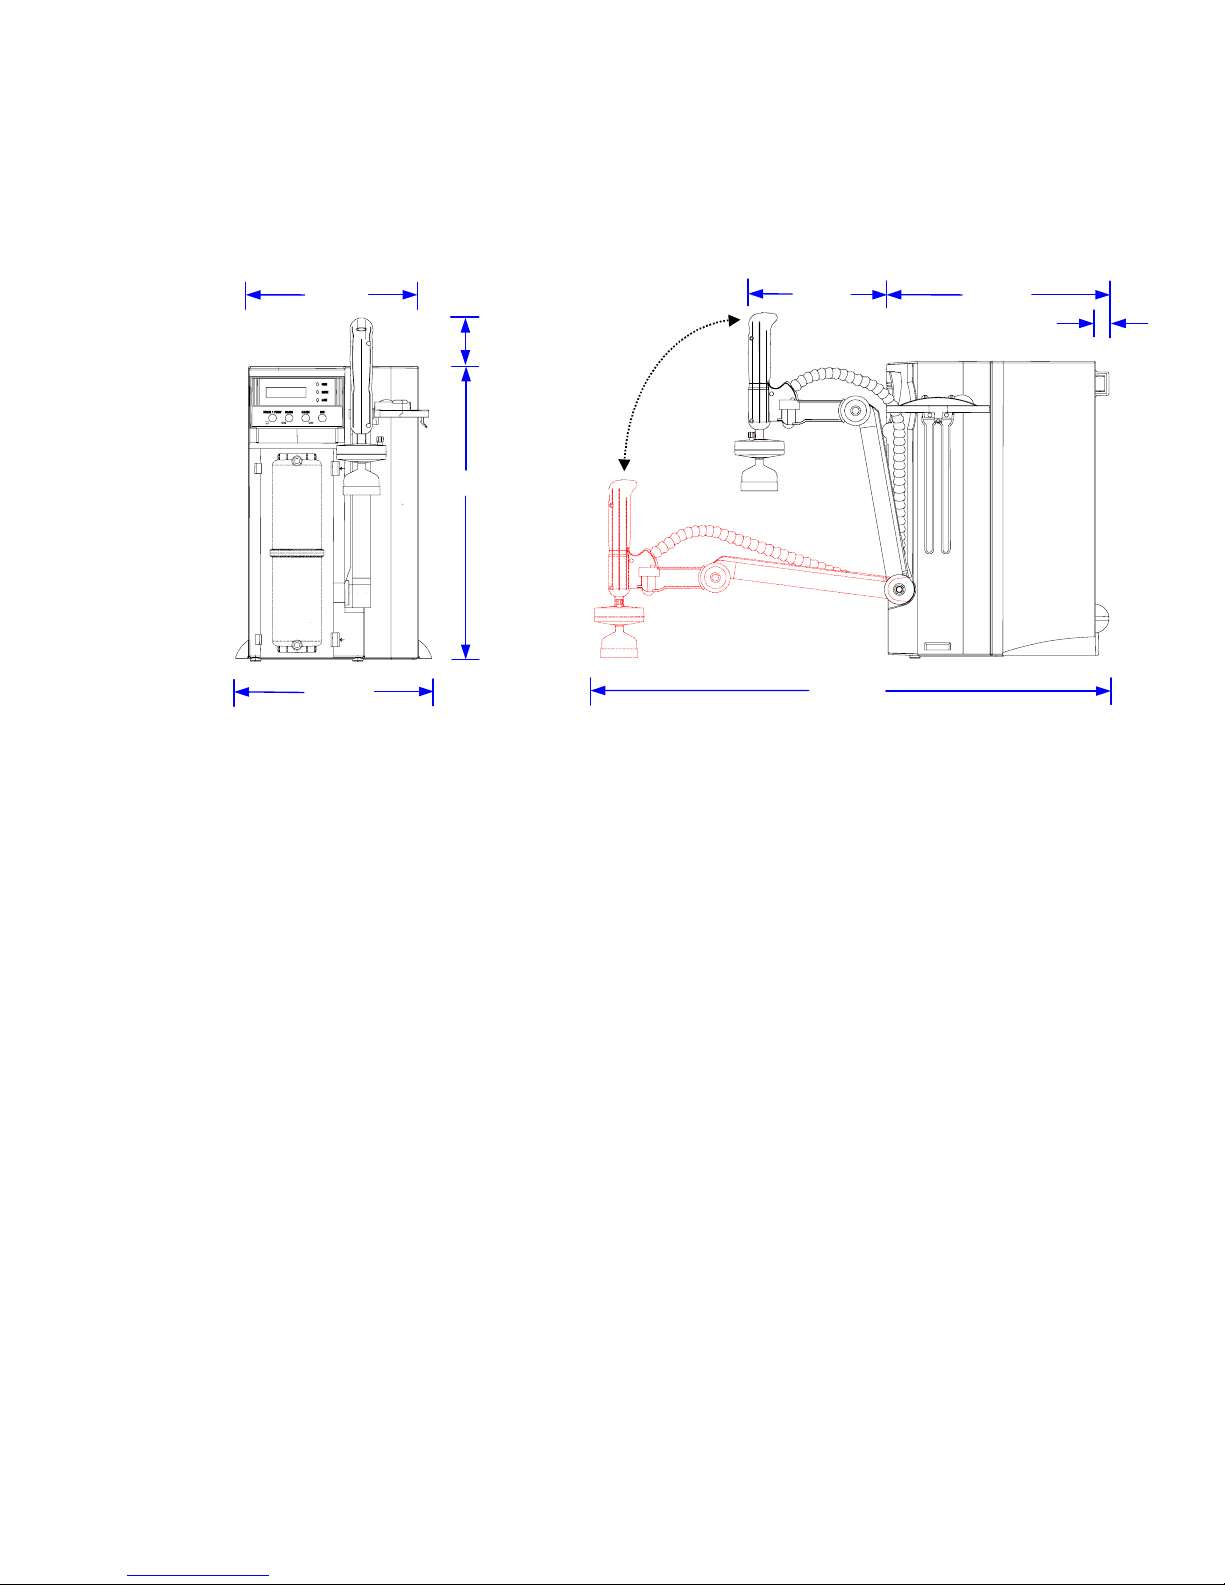
2-4 TECHNICAL SPECIFICATIONS
DIMENSIONS (SYSTEM AND CLEARANCE)
The height, width and depth of a Milli-Q Synthesis (and Synthesis A10) are shown here:
WEIGHT
Milli-Q Synthesis: Operating weight (wetted Q-Gard, Quantum and Millipak): 16 kg.
Milli-Q Synthesis A10: Operating weight: 16.8 kg.
ELECTRICAL
The electrical requirements for a Milli-Q Synthesis (or Milli-Q Synthesis A10) are:
120 VAC 10%, 50/60 Hz, 100 VA, 0.5 amp source, 2 amp Time Lag fuse used (ref. ZMQS6VFT1,
ZMQP6VFT1, ZMQS6VF01, ZMQP6VF01).
230 VAC 10%, 50/60 Hz. 0.26 amp source, 1 amp Time Lag fuse used (ref. ZMQS5VFT1,
ZMQP5VFT1, ZMQS5VF01, ZMQP5VF01).
The source of electrical power should be within 1 meter of the Milli-Q. The source of electrical power must be
earth grounded.
MEASUREMENT RANGES FOR TOC, RESISTIVITY, CONDUCTIVITY AND TEMPERATURE
The Milli-Q can display various Product Water quality parameters. The range of measurement of each parameter is
written below.
Resistivity Measurement Range: 2.4 – 18.2 M.cm (compensated to 25C values)
Conductivity Measurement Range: 0.055 – 0.294 S/cm
Temperature Measurement Range: 0 – 45C (not the system temperature operating range)
TOC Measurement Range: 1 – 999 ppb
256 mm
296 mm
445 mm
74 mm
778 mm
336 mm
20 mm
190 mm

PRODUCT INFORMATION
Milli-Q Synthesis/Synthesis A10 14
MATERIALS OF CONSTRUCTION
Please contact Millipore for a list of the materials of construction for wetted components.
NOISE LEVEL
The Milli-Q has a noise level of 42 dB at a distance of 1 meter away.

PRE INSTALLATION
Milli-Q Synthesis/Synthesis A10 15
Chapter 3 PRE INSTALLATION
3-1 PRE INSTALLATION CHECKLIST
The installation of your Milli-Q will go much easier if certain pre installation requirements are met and followed.
The checklist below can be used to facilitate the pre installation of your Milli-Q system. You can refer back to this
checklist as you read the sections on Optional Equipment, Installation Requirements and Unpacking the Milli-Q Box.
Do you have a Q-Gard Purification Pack?
Do you have a Quantum Ultrapure Cartridge?
Do you have a Millipak?
Do you have a Milli-Q and all items in its Accessories Bag?
Do you have a source of electrical power close enough to the Milli-Q?
Is the electrical source earth grounded?
Are you feeding with a Reservoir? (if feeding from a pressurised pipe, see below)
Is the reservoir full of water?
Is the source of water filling the reservoir fully operational?
Does the reservoir have an 8 mm tubing connection on one of its valves?
Are you feeding the Milli-Q from a pressurised pipe (loop)?
Do you have a pressure regulator ready to connect between the pipe and the Milli-Q?
Is the water system feeding the pipe fully operational?
Does the pipe have a valve ending with a 1/2 inch NPTM connection? If not, do you have a fitting or
connection that will attach to the pipe and will end in a 1/2 inch NPTM connection?
Is there a way to shut off water from the pipe to the Milli-Q? If not, did you order a ball valve from
Millipore to install on the Feedwater Tubing?
Are you mounting the Milli-Q on a wall?
A wall mounting bracket may be needed in specific conditions
Will the wall support the weight of the Milli-Q (plus full reservoir, ...)?
Is the Milli-Q accessible at this height (viewing the LCD, using the keypad)?
Did you include space on the right side of the Milli-Q to remove and replace the Q-Gard?
Did you want a location so as to dispense water over a sink?
Is the Milli-Q located within 2.5 meters of a drain (for the UF Reject tubing)?
Is the Milli-Q located within 2.5 meters of a drain (for the Feedwater Pressure Relief Valve tubing)?
Are the room environmental conditions adequate (humidity, temperature)?
If you are going to connect a printer or computer to the Milli-Q later, did you leave room for this?
If you are using a footswitch accessory to control the Milli-Q, did you leave room for this?

PRE INSTALLATION
Milli-Q Synthesis/Synthesis A10 16
3-2 PRE INSTALLATION CHECKLIST – “ARMLESS” MILLI-Q
Milli-Q Systems can be ordered from Millipore without the Front Arm and without the Front Point Of Use Dispenser.
These are called “Production” or “Armless” Milli-Q Systems. These Milli-Q Systems always begin with ZMQP
instead of ZMQS.
When a “Production” Milli-Q is ordered (you ordered Millipore Catalogue Number ZMQP ... for example), the
Milli-Q arrives in a box without a Front Arm and without a Front Point Of Use Dispenser.
It is necessary to have a Remote Point Of Use Dispenser with these types of Milli-Qs. Section 3-3 of this manual has
more information regarding the Remote Point Of Use Dispenser.
It may be desired to have Remote Display with the “Production” Milli-Q System. An example of when this would be
needed is when the Milli-Q System is being mounted underneath a Lab Bench. In this instance, the Remote Display
(and Remote Point Of Use Dispenser) could be mounted on top of the Lab Bench.
When you have a “Production” type of Milli-Q System, use the same Pre Installation Checklist on the
previous page. Additionally, you should review the items below also.
Do you have a Remote Point Of Use Dispenser (this item is not part of a ZMQP Millipore Catalogue Number)?
Do you have a Remote Display? (This item is not part of a ZMQP Millipore Catalogue Number)?
Will the Milli-Q System Cabinet and the Remote POU Dispenser be located within 2.5 meters of each other?
Will the Milli-Q System Cabinet and the Remote Display be located within 2.4 meters of each other?
PRE INSTALLATION
Milli-Q Synthesis/Synthesis A10 17
3-3 OPTIONAL EQUIPMENT YOU MAY NEED
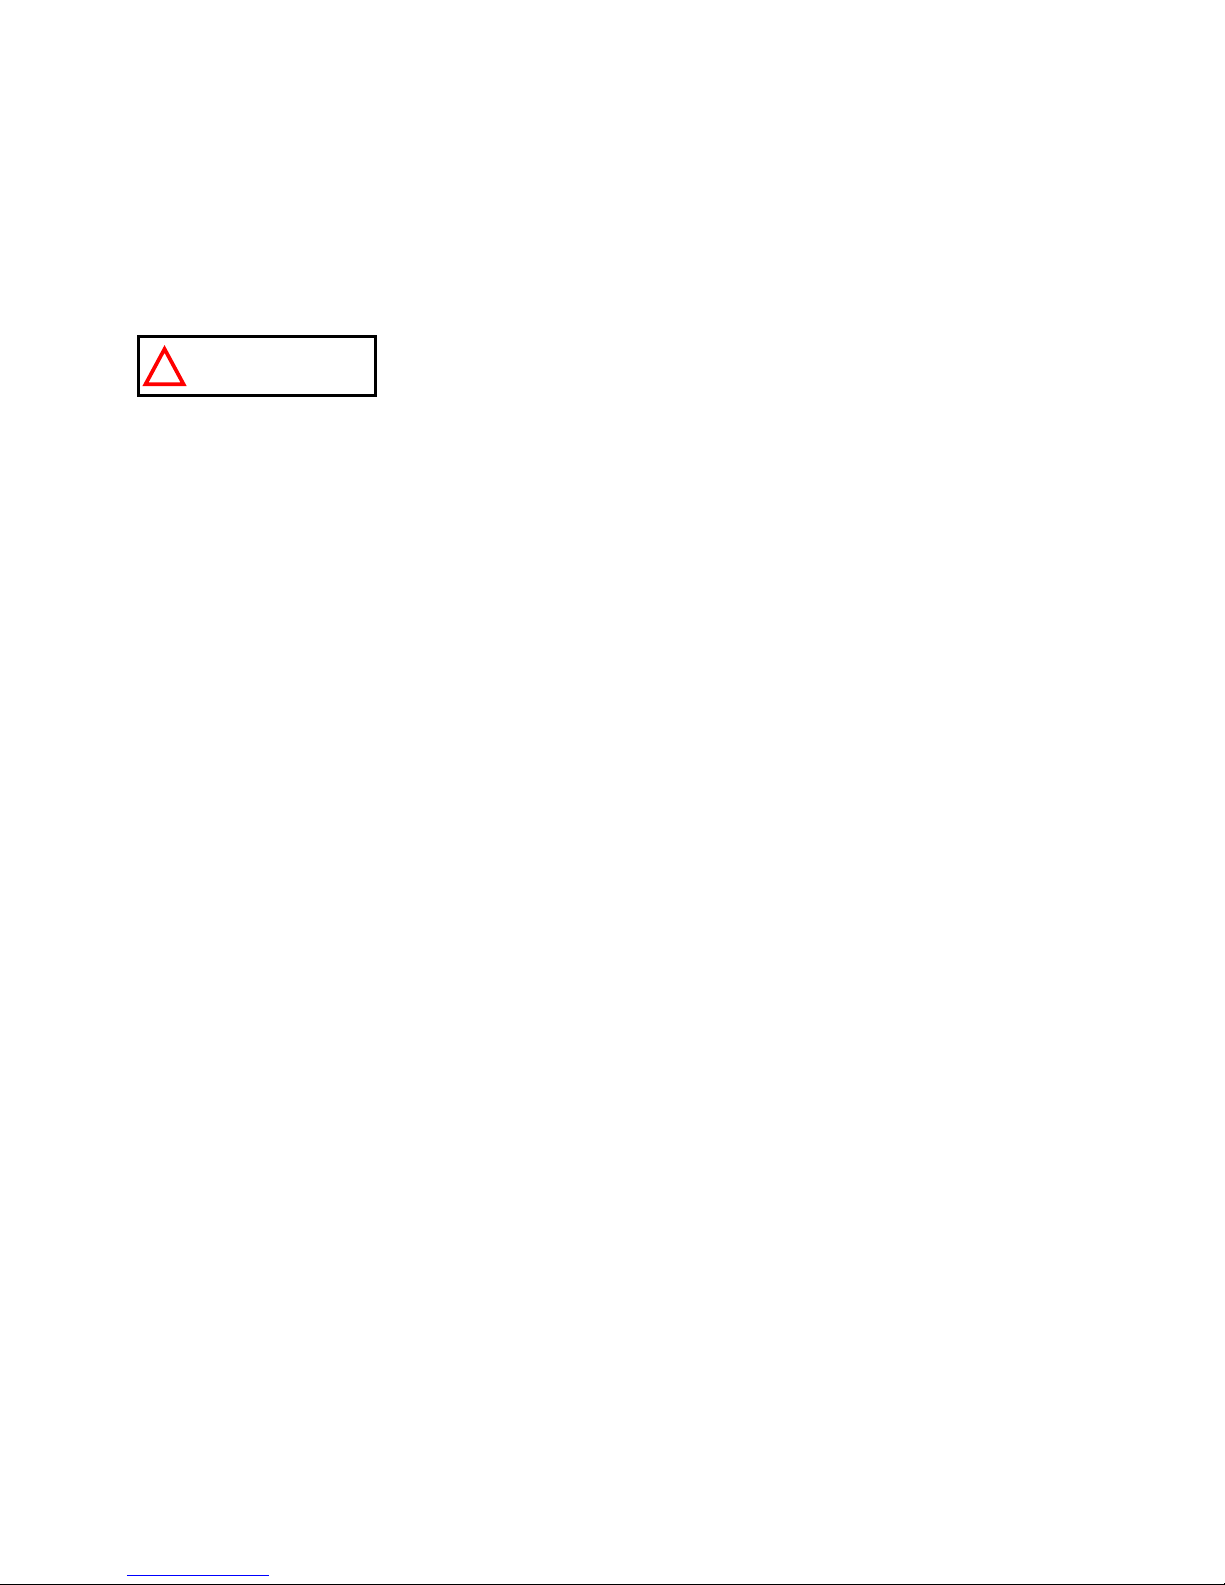
WALL MOUNTING BRACKET
The Millipore Catalogue Number for the Wall Mounting Bracket is SYSTFIX01. The mounting hardware
for attaching the bracket to a wall is not included and must be supplied. The bracket is attached with at least 2
bolts (or screws).
Width of bracket = 23 cm Height of bracket = 5.4 cm
Thickness of bracket = 0.4 cm Diameter of holes in the bracket for bolts or screws = 0.7 cm
Mounting holes on bracket are approximately 5.4 cm from either edge
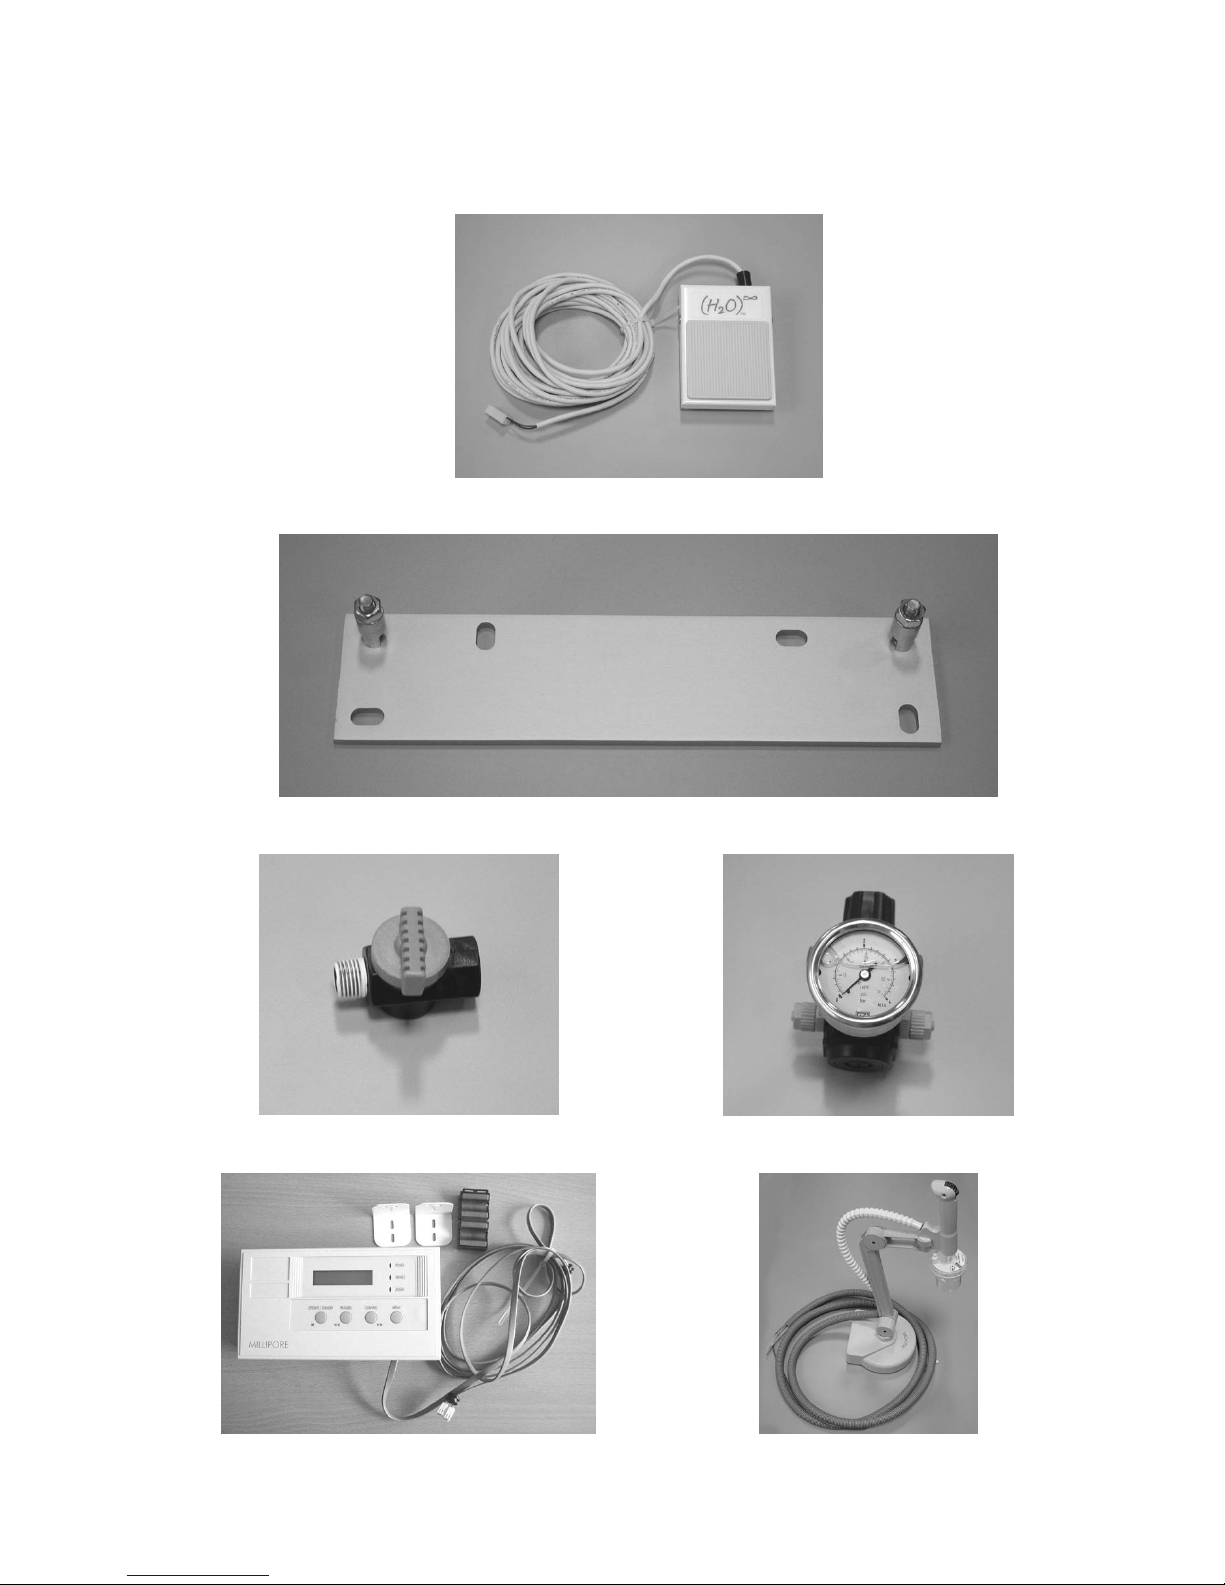
PRESSURE REGULATOR
The Millipore Catalogue Number for a Pressure Regulator (with Pressure Gauge and 8 mm tubing connections) is
ZFMQ000PR.
It is important that the Pressure Regulator is adjusted while water is
flowing through it. A range between 0.1 bar and 0.3 bar (1.5 to
4.5 psi) is the normal setting of the Pressure Regulator while water
is being dispensed from the Milli-Q. The Pressure Regulator is
factory pre-set to 0.3 bar while water at 80 LPH is flowing through
it.
BALL VALVE FOR SHUTTING OFF THE FEEDWATER SUPPLY
It is highly recommended to use a ball valve on the Feedwater Tubing. The ball valve will be used to shut off the
Feedwater Supply if necessary.
Contact Millipore for information regarding the ball valve. It is usually necessary to have fittings installed on both
ends of the ball valve to be able to connect it to the Feedwater Tubing.
REMOTE POINT OF USE DISPENSER
A Remote POU Dispenser can be added to the Milli-Q. This allows you to dispense water a maximum distance of
2.5 meters away from the Milli-Q. The Remote POU Dispenser is rested on a moveable arm that allows 180
rotation.
The Millipore Catalogue Number for a Remote POU Dispenser (plus arm and weighted base) is
ZMQSP0UR1. It is also necessary to order an installation kit with the Remote POU Dispenser. This
Installation Kit has a Millipore Catalogue Number of ZMQSP0U01.
The Remote POU Dispenser can be either wall mounted or set on a benchtop. The Installation Instructions for the
Remote POU Dispenser are included with it.
ATTENTION
PRE INSTALLATION
Milli-Q Synthesis/Synthesis A10 18
REMOTE POINT OF USE DISPENSER USED ON A “PRODUCTION” TYPE MILLI-Q
A “Production” type Milli-Q System needs to have a Remote Point Of Use Dispenser added to it. Without one, you
would not be able to dispense water from the Milli-Q.
All of the information in the above section (“Remote Point Of Use Dispenser”) applies to a “Production” type of
Milli-Q System. You will not need to order the Installation Kit however. The items in the Installation Kit are Factory
installed on “Production” Milli-Q Systems.
Do not order Installation Kit Catalogue Number ZMQSP0U01 when
you have a Milli-Q System beginning with a ZMQP Catalogue
Number.
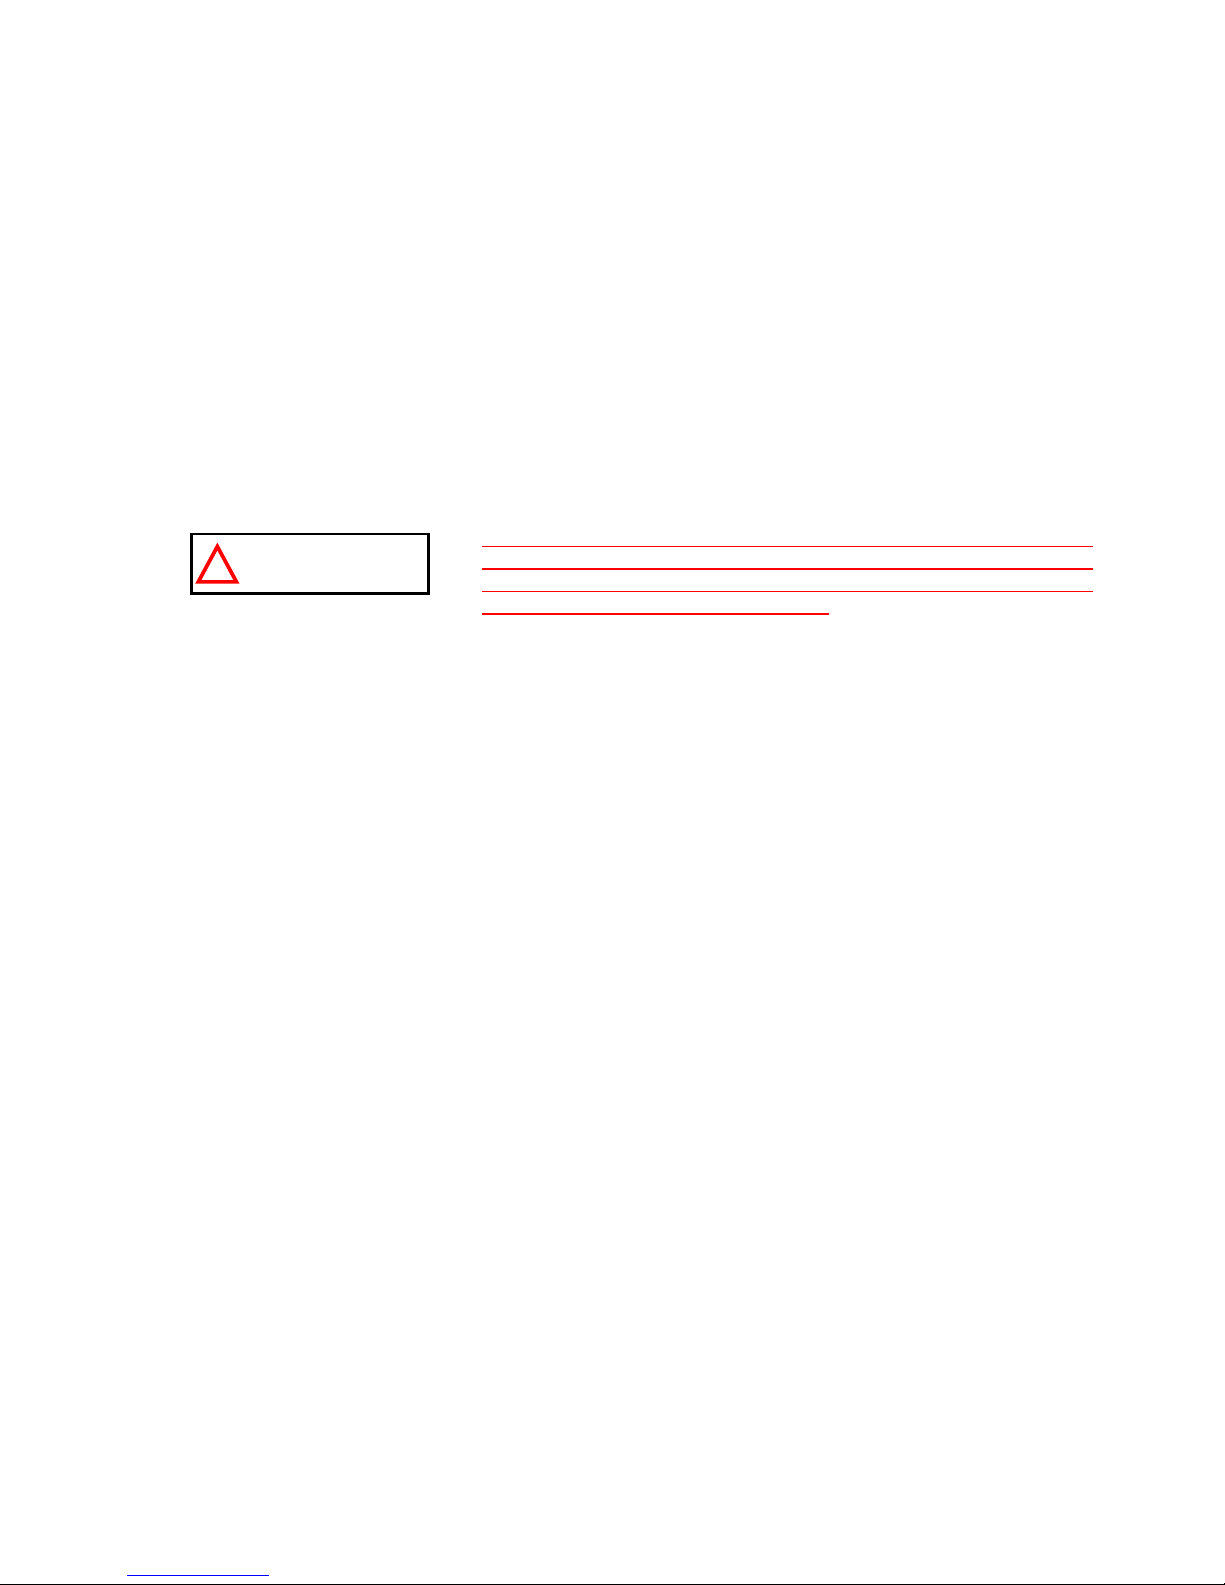
FOOTSWITCH
The Millipore Catalogue Number for the Footswitch (plus cable) is ZMQSFTS01. The Footswitch allows
you a ‘hands free’ operation where you could change the Milli-Q from PRE OPERATE Mode to PRODUCT Mode.
The length of the Footswitch Cable is 5 meters. You will use about 0.3 meters of the Footswitch Cable inside the
Milli-Q.
PRINTER OR COMPUTER CABLE
The Millipore Catalogue Number for the Printer Cable is PRNTCBL01. Its length is 2.79 meters.
The Millipore Catalogue Number for the Computer Cable is C0MPCBL01. Its length is 1.65 meters.
You will use about 0.6 meters of either cable for its connection inside the Milli-Q cabinet.
REMOTE DISPLAY WITH KEYPAD
The Millipore Catalogue Number for a Remote Display is ZMQSRMDS1. The Remote Display allows you
to view the LCD and to use the Keypad Buttons remotely.
The dimensions of the Remote Display are length = 204 mm, height = 112 mm and depth = 48 mm. Its weight is
613 g.
The Remote Display comes with a 3 meter cable that plugs into the Milli-Q System inside. You will use about
0.6 meters of the cable inside the Milli-Q.
The Remote Display can be wall mounted. There are 2 Stainless Steel Brackets that are attached to either side of
the Remote Display. These brackets can be fastened to the wall. The Hardware necessary to attach these brackets
to a wall (i.e. screws, bolts) does not come with the Remote Display.
The instructions for installing the Remote Display are inside its shipping box. The instructions for installing a Remote
Display are not inside this manual. Contact Millipore for these instructions if you would like to see them before
obtaining the Remote Display.
ATTENTION
PRE INSTALLATION
Milli-Q Synthesis/Synthesis A10 19
FOOTSWITCH
WALL MOUNTING BRACKET
BALL VALVE
PRESSURE REGULATOR
REMOTE DISPLAY
REMOTE POU DISPENSER

PRE INSTALLATION
Milli-Q Synthesis/Synthesis A10 20
3-4 INSTALLATION REQUIREMENTS
CONSUMABLES NEEDED FOR INSTALLATION
You will need one Q-Gard Pack, Quantum Cartridge and Millipak for installation. These items do not come with
the Milli-Q system. These items need to be ordered separately. The Catalogue Numbers and options for these
items are written below.
Some of the items below can be ordered as part of a kit. An example might be a kit consisting of a particular type
of Quantum Cartridge plus a Millipak Express 20. See Section 8-1 for the catalogue numbers and descriptions of
various kits.
See Section 2-3 for technical information regarding the Consumables for a Milli-Q system.
Q-Gard Purification Pack
Q-Gard 1 QGARD00R1 1/box (RO, Elix, distilled, Milli-RX, Milli-RO feedwater)
Q-Gard 2 QGARD00D2 1/box (DI, Service DI feedwater)
Quantum Ultrapure Cartridge
Quantum IX QTUM000IX 1/box
(100% Ion Exchange Resin)
Quantum EX QTUM000EX 1/box
(Ion Exchange Resin + media for Organics removal)
Quantum VX QTUM000VX 1/box
(Volatile Organics removal + ion exchange resin)
Quantum Ultrapure Cartridge with 1 non sterile Millipak 20 Express
Quantum IX QTUMMPEIX 1/box
Quantum EX QTUMMPEEX 1/box
Millipak 40 Final Filter
Millipak 40 (sterile) MPGL04SK2 2/box
Millipak Express 20 Final Filter
Millipak Express 20 (non sterile) MPGP02001 1/box
SPACE AND WEIGHT REQUIREMENTS
See Section 2-4 for a drawing showing the dimensions of a Milli-Q.
Total Height needed (includes POU Dispenser being fully upright): 53 cm
Total Width needed (includes room needed to remove Q-Gard): 45 cm
Total Depth needed (includes POU when it is fully upright): 53 cm
Operating weight for a ‘wet’ Milli-Q Synthesis (Synthesis A10): 16 kg (16.8 kg)
ELECTRICAL REQUIREMENTS
The electrical requirements for a Milli-Q Synthesis (or Milli-Q Synthesis A10) are:
120 VAC 10%, 50/60 Hz, 100 VA, 0.5 amp source, 2 amp Time Lag fuse used (ref. ZMQS6VFT1,
ZMQP6VFT1, ZMQS6VF01, ZMQP6VF01).
230 VAC 10%, 50/60 Hz. 0.26 amp source, 1 amp Time Lag fuse used (ref. ZMQS5VFT1,
ZMQP5VFT1, ZMQS5VF01, ZMQP5VF01).
The source of electrical power should be within 1 meter of the Milli-Q. The source of electrical power must be
earth grounded.

PRE INSTALLATION
Milli-Q Synthesis/Synthesis A10 21
FEEDWATER REQUIREMENTS
Feedwater Conductivity: < 100 S/cm @ 25C
Feedwater Flowrate: The source of feedwater should deliver 1.5 lpm
Maximum Feedwater Pressure: 0.3 bar (use a Pressure Regulator if necessary)
Minimum Feedwater Pressure: 0.0 bar (i.e. reservoir same level as the Milli-Q)
Feedwater temperature: Between 5 C and 35 C
Items to note about feedwater:
The ion exchange capacity of the Q-Gard Purification Pack and the Quantum Ultrapure Cartridge are a strong
function of the conductivity and the dissolved CO
2
gas level of the Feedwater Source.
The Fouling Index (Silt Density Index) of the Feedwater, when > 5, can effect the ability of the Ion Exchange
Resin to remove ions.
The TOC level of the Milli-Q Product Water could be affected by the type of feedwater.
Contact Millipore for additional information regarding the 3 items noted just above.
It is highly recommended to use a feedwater source treated by RO or EDI. Millipore RiOs or Elix Water Purification
Systems are examples of RO or EDI feedwater sources respectively.
ENVIRONMENTAL REQUIREMENTS
Indoor use only
Storage and operating temperature: 5C < T < 40C
Humidity: Should not exceed 80% for temperatures below 31 C
Should stay within 50% to 80% between 31C and C.
Altitude: < 2000 Meters
Installation category: II
Pollution degree: 2
OTHER REQUIREMENTS
Reservoir is the feedwater source
If you are using a reservoir as the feedwater source, then you will need a ball valve on the reservoir. This ball valve
is normally supplied on the standard Millipore 30 Litre or 60 Litre or 100 Litre Reservoirs.
The end of the ball valve should terminate with a fitting that accepts 8 mm tubing. This fitting is not supplied on the
standard Millipore 30 Litre or 60 Litre or 100 Litre Reservoirs. You can order a fitting from Millipore with a 1/4
inch NPTM connection on one end and an 8 mm tubing insert on the other.
Contact Millipore if your reservoir has another thread size on the port you want to use for the feedwater connection
to the Milli-Q.

PRE INSTALLATION
Milli-Q Synthesis/Synthesis A10 22
3-5 UNPACKING THE MILLI-Q BOX – WHAT’S INSIDE?
Open the Milli-Q Shipping Box. Use the checklist and illustrations below to make sure all items were shipped and
are accounted for. It is highly suggested to become familiar with the items that are shipped in the Accessories Bag
since these will be used in the Installation Section of this manual.
Check the box if the item is present.
Contact Millipore if an item is missing.
Do you have …?
Milli-Q Water Purification System
Electrical Powercord
Inside the Accessories Bag:
Black Tubing (8 mm OD) about 5 meters in length. An assembly of blue fittings is attached to one end of
this tubing. The assembly of blue fittings has a Screen Filter inside. The term ‘Screen Filter’ will be used for
the remainder of this manual to refer to the assembly of blue fittings.
Fitting (1/4 inch NPTM on one end and a hose barb on the other end)
Clear Tygon Tubing
Roll of Teflon Tape
3 Elbow shaped fittings (black with yellow coloured collar) (one fitting will be smaller than the other two
fittings)
‘Allen’ Wrench (6-sided black wrench)
Removal Tool (used to remove the Sanitisation Port on top of the system cabinet)
Clear tubing (6 mm OD) about 2.5 meters in length
 Loading...