

Miele TWI1 Quick Start Manual
Initial commissioning Operation
Drying Changing the program
Fragrance capsule
M.-Nr. 10 671 390/00
Tip: Using a fragrance capsule will add a
pleasant fragrance to your laundry.
寿Before using a fragrance capsule,
please read "IMPORTANT SAFETY
INSTRUCTIONS – Using a fragrance
capsule (optional accessory)" and
"Fragrance capsule" in the operating
instructions.
Inserting a fragrance capsule
1. 2.
3. 4.
Markers and must line up with
one another.
5. 6.
ĺ Turn the outer ring clockwise a little.
Before drying
ĺ Turn the outer
ring clockwise.
The further you open the capsule, the
more intense the fragrance.
After drying
To avoid the fragrance escaping needlessly:
ĺ Turn the outer
ring counterclockwise until
marker is in
position .
If you want to dry laundry occasionally
without adding fragrance: Remove the
fragrance capsule and store it in its original packaging until you want to use it
again. See the following section.
Before cleaning the lint filters
ĺ Remove the
fragrance
capsule
(reverse points
3 and 4) and
store it in its
original packaging.
寿Never lay the fragrance capsule
down on any surface as the fragrance
will spill out.
TWI 180 WP en - US
1. Notes on correct laundry care
寿Remove foreign objects like detergent dispensing
devices from the laundry.
They can melt and damage the dryer and the laundry.
ĺ Sort the laundry according to the type of fiber and
weave, size, garment care label symbol, and the drying
level required.
ĺ Untangle the laundry.
ĺ Check seams and stitching to ensure that padding and
linings are intact.
ĺ Fasten duvet covers and pillow cases to prevent small
items from being rolled up inside them.
ĺ Fasten hooks and eyes.
ĺ Tie together textile belts and apron ties.
ĺ Sew in or remove underwiring from bras.
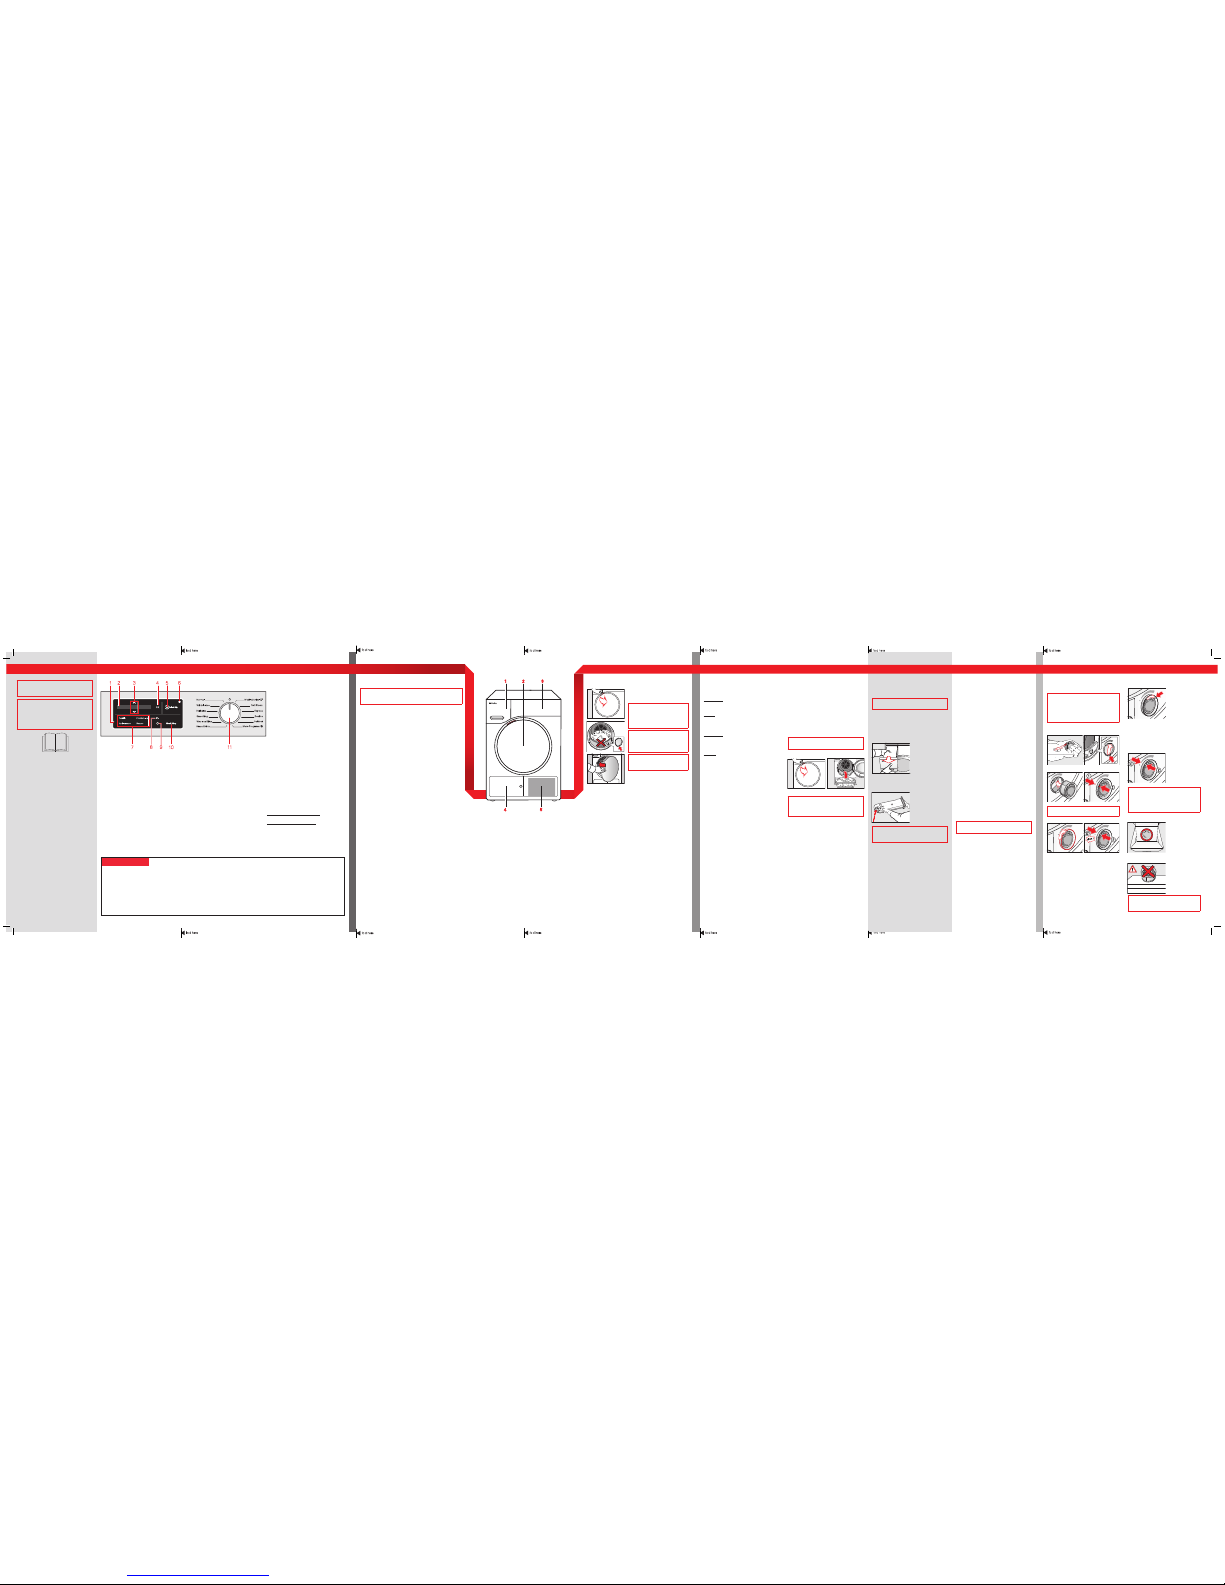
1 Condensed water container
– empty after every drying program
2 Door
3 Control panel
4 Access panel for the heat exchanger and plinth filter
– do not open during drying
5 Cool air intake grille
– do not obstruct with a laundry basket or other objects
OPERATION
DRYING
CHANGING THE PROGRAM SEQUENCE
3. Loading the tumble dryer
ĺ Open the door.
ĺ Unfold the laundry and load
loosely into the drum.
寿Do not overload the drum.
Overloading can cause unnecessary wear and tear to the laundry, give a disappointing drying
result and cause more creasing.
寿If you are not using a fra-
grance capsule: The tab must be
pushed down completely (see
arrow).
寿When closing the door, make
sure that laundry does not get
trapped in the door opening.
ĺ Shut the door with a gentle
swing.
Switching on the tumble dryer
ĺ Turn the program selector to a program.
The welcome tone will sound and the welcome screen will light up. The display will
now guide you through the initial commissioning, which is divided into several steps.
For further information please refer to the
separate operating instructions supplied.
4. Selecting program settings
Programs with drying levels
Normal, Wrinkle-free, Delicates, Smoothing, Dress Shirts,
Express, Denim, Outdoor, Sportswear, Steam Care, Table
Linen/Drapes, Bed linen
The pre-set drying level can be changed if required.
ĺ Touch the or sensor buttons to change the dry-
ing level.
Time-controlled and other programs
Time Dry, Cold Air, Basket
You can change the duration in ten-minute increments.
ĺ Touch the or sensor buttons to change the dura-
tion.
Woollens/Silks, Pillows, Proofing
The drying result is preset by the dryer and cannot be
altered.
Selecting an extra option
ĺ Touch the sensor button for the desired
extra. It then lights up brightly.
Freshen up
For removing or reducing odors in clean
(dry or damp) clothing.
Gentle
Low temperature for delicate fabrics with
the symbol on the care label, e.g. acrylic
garments.
Anti-crease
Helps to prevent creasing if the laundry is
not removed immediately after the end of a
program.
Buzzer
A buzzer sounds to let you know the program has finished.
EcoFeedback
You can use the sensor button to call
up an energy consumption forecast for the
selected drying program.
ĺ Touch the sensor button.
The estimated energy consumption levels
will be displayed as a bar chart.
Delay start/SmartStart
Delay start
With the delay start function, you can delay
the start of the program. The start of the
program can be delayed from 15 minutes
up to a maximum of 24 hours.
SmartStart
With the SmartStart function you can define
a time period during which your dryer will
be started automatically by a signal, for
instance to make use of cheaper electricity rates.
5. Starting a program
ĺ Touch the flashing Start/Stop sensor but-
ton.
The Start/Stop sensor button will light up
and
Drying will appear in the display.
6. Program end – removing the
laundry
The program is finished when End/
Anti-crease or End appears. The Start/Stop
button light goes out.
– To save energy, 10 minutes after the end
of the program the Start/Stop sensor button will begin to flash slowly and the display will go out.
– The tumble dryer switches off automati-
cally.
寿Do not open the door before the end
of the program.
ĺ Open the door.
ĺ Remove the laundry.
寿Check that all items have been
removed from the drum. If items are left
in the dryer, they could be damaged by
overdrying when the dryer is next used.
The inside of the drum lights up so that
you don't forget any items of laundry
when you empty it.
The drum lighting switches off
automatically (energy saving).
ĺ Turn the program selector to .
ĺ Clean the lint filters.
ĺ Close the drum door.
ĺ Empty the condensed water container.
Emptying the condensed water
container
Empty the condensed water container
after every drying program.
Empty container See .
will light up in the display if the maximum
level of the condensed water container is
reached.
To turn the message off: Open and close
the door while the dryer is switched on.
ĺ Remove the
condensed water
container.
ĺ To prevent water running out, keep it in a
horizontal position when carrying it. Hold
it at the front and towards the back.
ĺ Empty the
condensed water
container.
ĺ Replace the con-
densed water
container in the
dryer.
寿Do not drink condensed water. It can
cause health problems in people and animals.
Energy saving tips
To avoid unnecessarily long drying times
and high consumption of energy:
– Make sure your laundry is spun at the
maximum spin speed before drying.
– Load according to the optimum
amount of laundry recommended for
the program being used. This will mean
that the energy consumption for the
amount of laundry is at its most economical.
– Clean the lint filters after every drying
cycle.
– Make sure the room temperature is not
too high.
If there are other heat producing appliances in the room in which the tumble
dryer is located, make sure the room
is well-ventilated and switch the other
appliances off, if possible.
1 Control field
The control field consists of a display and
various sensor buttons.
2 Display
Different values are displayed and/or
selected on the display:
3 Sensor buttons
The values in the display can be changed
with the sensor buttons.
4 OK sensor button
Confirm the selected values with the OK
sensor button.
5 Perfect Dry indicator
With programs with a selectable drying
level, the Perfect Dry system calculates
the residual moisture present in the laundry to ensure a precise drying result.
The display flashes at the beginning of
the program and lights up towards the
end of the program.
6 Optical interface
for service technicians.
7 Sensor buttons for extras
You can supplement the drying program
with extra options.
8 Sensor button
You can use the sensor button to call
up an energy consumption forecast for
the selected drying program.
9 Sensor button
The sensor button starts the delay
start function.
10 Start/Stop sensor button
Touching the Start/Stop sensor button
starts the selected program or cancels a
program that has already been started.
11 Program selector
For selecting programs and for switching off the machine. The tumble dryer is
switched on when you select a program,
and switched off by turning the program
selector to the position.
Operating the sensor buttons
The sensor buttons react to fingertip contact. Selection is possible as long as the
respective sensor button is illuminated.
If a sensor button is brightly lit,
this means: currently selected
If a sensor button is dimly lit,
this means: selection possible
2. Selecting a program
ĺ Turn the program selector to a program.
The interior drum lighting will come on.
Program selection
There are three possible ways to select a program:
1. Selecting the standard programs with the program
selector dial
ĺ Turn the program selector to the required program.
The selected program will be shown in the display. This
will then be replaced by the standard display.
2. Selecting more programs by setting the program
selector to the "More programs/" position and the
display.
ĺ Turn the program selector to the More programs/
position.
The following will appear in the display: Time Dry
ĺ Touch the sensor buttons until the program you
want appears in the display.
ĺ Confirm the program with the OK sensor button.
3. Selecting the programs via the MobileControl
program selector position and the Miele@mobile app
ĺ Turn the program selector to the MobileControl position.
ĺ Follow the instructions in the display.
ĺ Touch the "Start⁄Stop" sensor button.
The dryer can now be operated via a mobile device together
with the Miele@mobile app.
You cannot change to another program
once a program has started (this prevents
unintentional alterations). If you move the
program selector, Cannot be changed will
light up in the display until you move the
program selector back to the original program.
Exception: The dryer is switched off by
turning the program selector to the position.
You will need to cancel the current program
before you can select a new one.
Canceling a program
ĺ Touch the Start/Stop sensor button.
Cancel program will light up in the display.
ĺ Confirm with the OK sensor button.
As soon as Program canceled lights up:
ĺ Turn the program selector to .
The current program can also be
canceled in this way
ĺ Turn the program selector to .
ĺ Select a program.
ĺ Touch the Start/Stop sensor button.
The drying cycle begins.
Adding or removing laundry
寿Bear in mind that hot steam can
escape after the door is opened.
ĺ Pull open the door.
ĺ Add or remove items.
ĺ Close the door.
ĺ Touch the Start/Stop sensor button.
The program starts.
Program duration
Altering the program sequence can cause
the program duration shown in the time display to be adjusted.
寿Before using the tumble dryer for
the first time, ensure that it is correctly
installed and connected.
If the tumble dryer has not been transported as described in "Installation and
connection" then it must be left to stand
for at least 1 hour before it is connected
to the electricity supply. Otherwise the
heat pump can be damaged.
It is essential to read the operating instructions.
en – US M.-Nr. 10 671 390
Quick Start Guide
Heat-pump dryer
These short instructions are not a substitute for the operating instructions supplied with
the appliance! It is essential to familiarize yourself with the dryer before using it for the first
time.
Take note of the operating instructions, as well as the "IMPORTANT SAFETY
INSTRUCTIONS".
Cleaning and care Frequently asked questions
Lint filters
Removing visible lint
Clean both lint filters in the door opening
after every drying cycle.
寿Remove the fragrance capsule (if fit-
ted).
ĺ Pull the upper lint
filter forward to
remove it.
ĺ Use your fin-
gers or a vacuum cleaner to
remove the lint
from the surface
of the filter.
ĺ Push the upper lint filter back into posi-
tion until it clicks.
ĺ Close the door.
Cleaning the lint filters and air flow
openings thoroughly
If the drying duration has become longer
or the surface of the filters is visibly compacted with lint, you should carry out the
following cleaning procedure.
ĺ Pull the upper lint filter forward to remove
it.
ĺ Turn the yellow
dial on the lower
lint filter in the
direction of the
arrow (until you
hear it click).
ĺ Hold the dial and
pull the lint filter
forward to
remove it.
ĺ Use a vacuum
cleaner to
remove any
visible lint from
the upper air flow
openings.
ĺ Flush the lint filters through with warm
running water.
ĺ Shake out the lint filters thoroughly and
then dry them carefully.
寿Ensure the filters are dry before replac-
ing them.
ĺ Refit all of the lint filters and close the
door.
CLEANING AND CARE
FREQUENTLY ASKED QUESTIONS
Program guide
PROGRAM GUIDE
Garment care label symbols
Drying
Normal⁄higher temperatureReduced temperature: Select Gen-
tle (for delicate textiles)Do not tumble dry
Ironing
Very hotHotWarmDo not iron
Tips on drying
– Always observe the maximum recom-
mended load for each program (see Pro-
gram guide).
寿Overloading can cause unnecessary
wear and tear to the laundry, give a dis-
appointing drying result and cause more
creasing.
– Do not load the drum with items that are
still soaking wet. Make sure your laun-
dry is spun at the maximum spin speed
before drying.
– Minimum iron fabric tends to crease
more, the larger the load. This is partic-
ularly the case for garments made from
very fine weave fabric, such as dress
shirts or blouses.
Plinth filter
Only clean the plinth filter when Clean lint
and plinth filter See lights up.
To turn the message off: Switch the dryer off
and then on again. Confirm with OK.
ĺ Press the round,
indented area on
the heat
exchanger access
panel to open it.
The access panel
will spring open.
ĺ Pull the plinth filter
out by the handle.
A guide pin in the dryer will come out which
prevents the access panel from closing without the plinth filter.
ĺ Pull the handle
out of the plinth
filter.
ĺ Clean the filter
thoroughly under
running water.
ĺ Squeeze the water out of the plinth filter
thoroughly.
寿The plinth filter must not be replaced
dripping wet.
ĺ Use a damp cloth
to remove any
lint.
Checking the heat exchanger unit
寿Danger of injury! Do not touch the
cooling fins with your hands. You could cut
yourself.
ĺ Carefully vacuum
up any visible fluff
or dirt.
Refitting the plinth filter
ĺ Fit the filter back
on the handle.
Make sure it is the
correct way
round.
ĺ First insert the
handle with the
plinth filter
attached over the
two guide pins.
The word Miele on the handle must be the
correct way up.
ĺ Close the heat exchanger access panel.
Some of the messages in the display are more than one line long. Touch the or sensor
button to read them in full.
Problem/Fault message Possible cause and solution
000 lights up after
the tumble dryer is
switched on and a
program cannot be
selected
Access via a PIN code has been activated.
You must enter the correct PIN code to use the tumble dryer.
See "Settings menu – PIN Code" in the operating instructions.
The program is canceled and the following
lights up:
Empty container. See
The condensed water container is full or there is a kink in the
drain hose.
ĺ Empty the condensed water container.
ĺ Check the drain hose.
To switch off the message:
ĺ Open and close the door while the dryer is switched on.
Fill condensate container
This is to remind you that water is taken from the condensed
water container when the SoftSteam program is being used.
The condensed water container must be filled with water to
at least the –min– marker.
ĺ Confirm with OK.
Open & close door.
This it to remind you to load the laundry when the SoftSteam
program is selected.
ĺ Load the laundry in the drum.
At the end of a program
the following lights up:
Clean the lint and plinth
filter See
There is a build-up of fluff in the airways. See "Cleaning and
care" in the operating instructions.
ĺ Clean the lint filters.
ĺ Clean the plinth filter.
To switch off the message:
ĺ Confirm with OK.
After a program has
been interrupted, the
following lights up:
Clean the lint and plinth
filter See
There is a build-up of fluff in the airways. See "Cleaning and
care" in the operating instructions.
ĺ Clean the lint filters.
ĺ Clean the plinth filter.
ĺ Cleaning the air flow openings.
ĺ Clean the heat exchanger.
To switch off the message:
ĺ Switch the dryer off and then on again.
End/Cooling down
The program has finished but the laundry has not yet cooled
down.
ĺ Either remove the laundry and spread it out to cool down
or leave it in the tumble dryer to cool down during the
cooling phase.
Problem/Fault message Possible cause and solution
The display is in a different language
A different language has been selected in "Settings, Language ".
ĺ Set the language you want. The flag symbol will guide you.
The display remains
dark, and the Start/Stop
sensor button does not
light up or flash
There is no power to the dryer.
ĺ Check whether the plug is plugged in.
ĺ Check whether the fuse has tripped.
The dryer has switched off automatically to save energy.
ĺ Turn the program selector to switch the dryer on again.
The laundry is not sufficiently dry
The load consisted of different types of fabric.
ĺ Finish drying using the Time dry drying program.
ĺ Select a more suitable program next time.
Tip: You can alter the residual moisture level for some programs. See "Settings menu – Drying levels" in the operating
instructions.
Items made of synthetic
fibers are charged with
static electricity after
drying
Synthetic fibers tend to attract static charge.
Static charge can be reduced by adding a fabric softener to
the final rinse in the washing program.
There is a build-up of
lint
Lint is principally the result of friction when garments
are being worn and to some extent when they are being
washed. Machine drying hardly causes any lint to form.
Lint is collected by the lint and plinth filter and can be
removed easily.
See "Cleaning and care".
You can hear operating
noises (buzzing/humming)
This is not a fault. The compressor (heat pump) is operating
or you have selected the SoftSteam program.
No action required. These noises are quite normal and can
be heard when the compressor or the condensed water
pump is operating.
Program Load
(weight of dry laundry)
Laundry type
Extra dry
Normal+
Normal
Slightly dry
Hand iron
Hand iron
Machine iron
Extra options
Normal Full load (17.6lb) T-Shirts, underwear, baby clothes, workwear,
jackets, covers, aprons, overalls, hand towels,
bath towels, bathrobes, bed linen
For T-shirts, underwear, baby clothes: do not use
Extra dry (laundry can shrink)
X X X X X X X
, , ,
Wrinkle-free Half load (8.8lb) Workwear, overalls, pullovers, dresses, pants,
table linen, leggings
– X X X X X –
, , ,
Delicates Small load (5.7lb) Dress shirts, blouses, lingerie, appliquéd garments – X X X X X –
, ,
Smoothing Very small load (2.2lb) Cotton pants, jackets, shirts – – X X – –
, ,
Woolens/Silks Small load (4.4lb) Pullovers, cardigans, socks, leggings – – – – – – –Dress Shirts Small load (4.4lb) Shirts, blouses – X X X X X –
, , ,
MobileControl
The Miele@mobile app is used to select the programs and operate the appliance.
SoftSteam Very small load (2.2lb) Cotton pants, jackets, shirts – – X – X – –
,
Express Half load (8.8lb) Resilient garments (such as those suitable for the
Normal program)
X X X X X X X
,
Denim Small load (6.6lb) Pants, jackets, skirts, shirts – X X X X X –
, , ,
Outdoor Small load (5.5lb) Outdoor clothing – – X – X – –
, ,
Time dry Full load (17.6lb) Thick jackets, pillows, sleeping bags, blankets – – – – – – –
, ,
Table Linen/
Drapes
Half load (8.8lb) Table linen, drapes, curtains – – X – – – –
,
Cold Air Full load (17.6lb) Everything
– – – – – – –
Proofing Small load (5.5lb) Microfiber fabrics, skiwear, outdoor wear, fine,
close weave cotton garments (poplin), tablecloths
Prohibited: Proofing agent containing paraffin
– – X – – – –
,
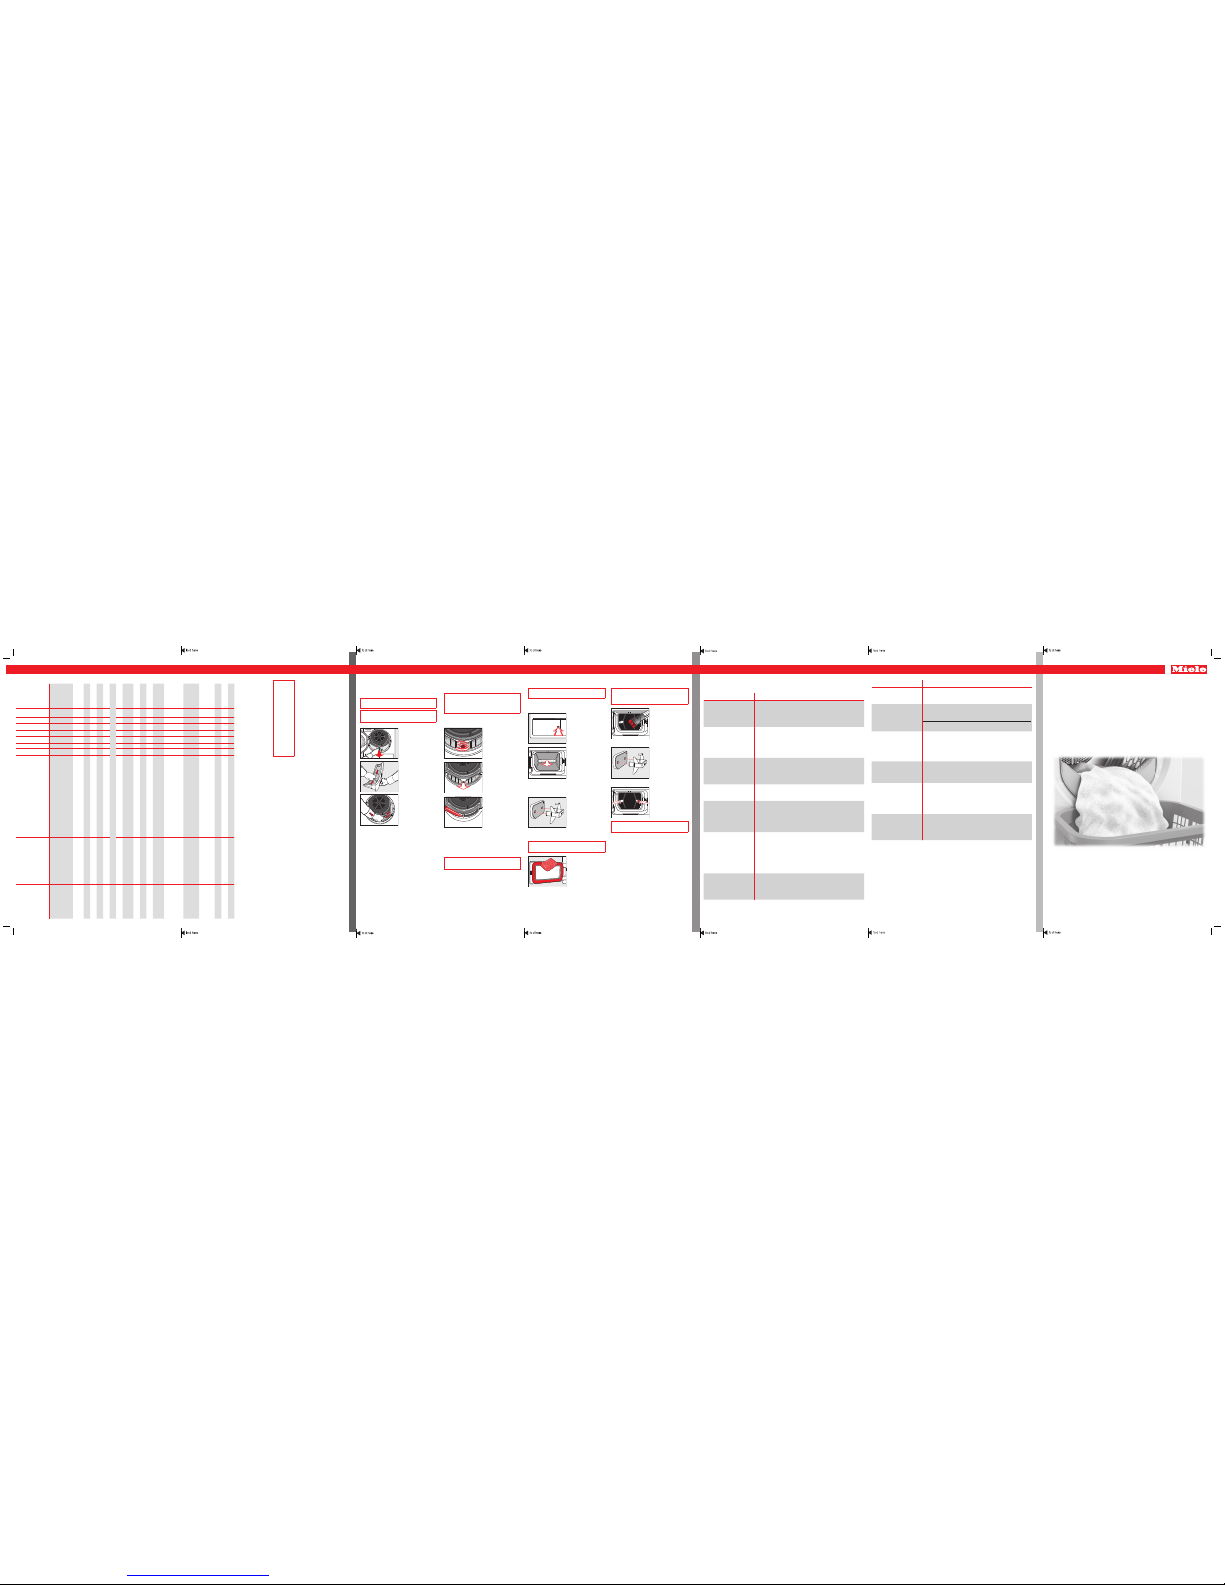
Basket program Maximum weight: 7.7lb Bags, shoes, stuffed animals, hats, scarves,
gloves, sequined tops
Only with dryer basket (optional accessory)
– – – – – – –
Sportswear Small load (6.6lb) Sportswear – X X X X X
, ,
Pillows – Pillows (2 small or 1 large) – – X – – – –
,
Bed linens Half load (8.8lb) Bed linen X X X X X X
, , ,
= Freshen up; = Gentle; = Anti-crease; = Buzzer
X = yes, – = no
 Loading...