

Page 1
Operating instructions
Cooker hood
DA 265
It is essential to read these
operating instructions before
installing or using the machine
to avoid the risk of accident
or damage to the machine. M.-Nr. 05 457 490
@ ] ä
Page 2

Contents
Contents
Caring for the environment. . . . . . . . . . . . . . . . . . . . . . . . . . . . . . . . . . . . . . . . . . 3
Description of the appliance . . . . . . . . . . . . . . . . . . . . . . . . . . . . . . . . . . . . . . . . . 4
Warning and safety instructions. . . . . . . . . . . . . . . . . . . . . . . . . . . . . . . . . . . . . . 6
Operation
Basic information . . . . . . . . . . . . . . . . . . . . . . . . . . . . . . . . . . . . . . . . . . . . . . . . . . . 9
Switching the cooktop illumination on/off. . . . . . . . . . . . . . . . . . . . . . . . . . . . . . . . . 9
Switching the fan on/off . . . . . . . . . . . . . . . . . . . . . . . . . . . . . . . . . . . . . . . . . . . . . . 9
Selecting a power setting. . . . . . . . . . . . . . . . . . . . . . . . . . . . . . . . . . . . . . . . . . . . . 9
Manual selection of power setting . . . . . . . . . . . . . . . . . . . . . . . . . . . . . . . . . . 10
Automatic selection of power setting . . . . . . . . . . . . . . . . . . . . . . . . . . . . . . . . 10
Activating the switch-off delay . . . . . . . . . . . . . . . . . . . . . . . . . . . . . . . . . . . . . . . . 11
Switching off . . . . . . . . . . . . . . . . . . . . . . . . . . . . . . . . . . . . . . . . . . . . . . . . . . . . . 11
Checking the operating hour counter . . . . . . . . . . . . . . . . . . . . . . . . . . . . . . . . . . 12
Programmable functions . . . . . . . . . . . . . . . . . . . . . . . . . . . . . . . . . . . . . . . . . . . . 12
Altering the operating hour counter . . . . . . . . . . . . . . . . . . . . . . . . . . . . . . . . . 12
Mains failure. . . . . . . . . . . . . . . . . . . . . . . . . . . . . . . . . . . . . . . . . . . . . . . . . . . . . . 14
Cleaning and care
Housing . . . . . . . . . . . . . . . . . . . . . . . . . . . . . . . . . . . . . . . . . . . . . . . . . . . . . . . . . 15
Grease filters . . . . . . . . . . . . . . . . . . . . . . . . . . . . . . . . . . . . . . . . . . . . . . . . . . . . . 15
Replacing the fluorescent lamps . . . . . . . . . . . . . . . . . . . . . . . . . . . . . . . . . . . . . . 16
After-sales service . . . . . . . . . . . . . . . . . . . . . . . . . . . . . . . . . . . . . . . . . . . . . . . . 17
Electrical connection and technical data. . . . . . . . . . . . . . . . . . . . . . . . . . . . . . 18
Installation . . . . . . . . . . . . . . . . . . . . . . . . . . . . . . . . . . . . . . . . . . . . . . . . . . . . . . 19
Air extraction . . . . . . . . . . . . . . . . . . . . . . . . . . . . . . . . . . . . . . . . . . . . . . . . . . . . 25
Page 3

Caring for the environment
Disposal of packing material
The transport and protective packing is
manufactured from the following recyclable materials:
– Corrugated paper/cardboard.
– Polystyrene - CFC-free.
– Transparent polyethylene foil.
These materials should be taken to the
local collection point for recyclable materials, rather than just being thrown
away with normal domestic refuse.
Caring for the environment
Disposal of old appliances
Old appliances contain valuable materials. Please enquire about suitable recycling schemes at your local authority
before discarding an old appliance.
Read the appropriate section in
"Warning and safety instructions".
3
Page 4

Description of the appliance
Description of the appliance
4
Page 5

Description of the appliance
This cooker hood is suitable for
– Air extraction:
The air is drawn in and cleaned by the
grease filters
phere.
Vent socket
b
Deflector plate
c
Shelf
d
This can be used for kitchen spices.
Grease filters
e
Cooktop illumination
f
This switch is used to turn the cooktop
illumination on or off, regardless of
whether the cooker hood is in operation
or not.
The deflector plate
out slightly.
The control lamp comes on when the
cooktop illumination is switched on.
and vented to atmos-
e
c must be pulled
– / + switch
g
Four fan throughput settings are available to suit the intensity of the kitchen
vapours.
The control lamps indicate which setting has been selected.
Switch-off delay
h
A 5 or 15-minute switch-off delay can
be selected. The cooker hood is
switched off automatically at the end of
the selected time.
Automatic function
i
Pressing this switch activates the Automatic function. When the Automatic
function is in operation, the power setting is determined by the position of the
deflector plate.
Grease filter switch
j
Press this to indicate the number of
operating hours which have expired on
the grease filter.
When the preset time has expired, the
control lamp comes on.
5
Page 6
Warning and safety instructions
Warning and safety instructions
Before installation and before using
the appliance for the first time, read
the operating instructions carefully.
This way you will avoid the risk of
accidents and damage to the appliance.
Keep these instructions in a safe
place for future reference and pass
them on to the new owner if the machine changes hands.
Specified use of the cooker
hood
This appliance is designed specifi-
cally for domestic use.
The manufacturer cannot be held responsible for damage caused by improper use of the appliance.
Technical safety
Before connecting the cooker
hood to the mains supply, check
that the voltage and frequency correspond to the ratings on the data plate.
This data must correspond in order to
avoid the risk of damage to the appliance. If in doubt, consult a qualified
electrician.
The electrical safety of this ap-
pliance can only be guaranteed
when continuity is complete between
the appliance and an effective grounding system. It is imperative that this
basic safety requirement is tested and
where there is any doubt, the electrical
system should be checked by a qualified electrician. The manufacturer cannot be held responsible for damage
caused by the lack or inadequacy of
an effective grounding system.
Repairs should only be carried out
by suitably qualified and competent service technicians to ensure maximum safety. Repairs by unqualified persons could be dangerous.
To disconnect the appliance from
the mains supply:
– switch off at the main socket and pull
out the plug.
Do not pull on the mains cable when
unplugging the appliance.
– switch off the appropriate circuit at
the fuse-box.
– withdraw the mains fuse.
Do not use an extension cable to
connect the appliance to the
mains supply.
Extension cables do not provide the required degree of safety.
For the user
Do not use an open flame under
the cooker hood; to prevent the
risk of fire avoid flambéeing or grilling
food.
When switched on, the cooker hood
could draw flames into the filter.
Grease and fat particles in the hood
present a fire hazard.
Always switch the cooker hood on
when the cooktop is in use.
Failure to do so could result in condensation forming. This could cause corrosion.
When cooking with oil or fat, do not
leave pans, frying pans and deepfat fryers unattended. If overheated, oil
and fat can ignite and set fire to the
cooker hood.
6
Page 7
Warning and safety instructions
for CDN: Never leave an open grill
unattended when grilling. If overheated, fat can ignite and set fire to the
cooker hood.
Do not use the hood without the
grease filters in place.
Deposits of grease and dirt on the
cooker hood could inhibit its functioning.
Clean the grease filters regularly.
An oversaturated filter is a fire hazard.
Some washing-up liquids or dish-
washer detergents may cause the
metal filter to discolour. This discolouration will in no way affect the function
or fitness for use.
Do not use a steam cleaner.
The steam may penetrate live components of the cooker hood and cause
a short-circuit.
In countries which may be subject
to infestation by cockroaches or
other vermin, pay particular attention to
keeping the appliance and its surroundings in a clean condition at all times.
Any damage which might be caused
by cockroaches or other vermin will not
be covered by the appliance guarantee.
Installation
AUS / NZ:
The distance between the cooktop
and the bottom of the deflector plate
when lowered to the lowest position
should be at least 60 cm.
Safety regulations prohibit installation
above a solid-fuel stove or an open grill.
CDN:
The distance between the cooktop
and the bottom of the deflector plate
when pushed in should be at least
50 cm.
Safety regulations prohibit installation
above a solid-fuel stove. Installation
above gas cooktops or an open Miele
grill is permitted providing that the vertical distance between the cooktop and
the underside of the cabinet holding
the hood is at least 65 cm.
All ducting, pipework and fittings
must be of non-flammable material.
The appliance must not be con-
nected to a chimney or vent flue
which is in use. Neither should it be
connected to ducting which ventilates
rooms with fireplaces.
If exhaust air is to be extracted into
a chimney or ventilation duct no
longer used for other purposes, take
professional advice.
7
Page 8

Warning and safety instructions
When using the cooker hood at the
same time as another heating appliance which depends on the air in the
room (e.g. gas, oil or coal-fired heaters,
through-flow or other water heaters,
gas cooktops and gas ovens), special
care must be taken, as the action of the
cooker hood extracts air from the room
which these types of heaters need for
combustion.
In order to ensure safe operation, and
to prevent combustion from the heating
appliances being drawn back into the
room when the extractor and the heater
are in operation simultaneously, a negative pressure in the room of 0.04 mbar
(4 Pa) is the maximum permissible.
Ventilation can be maintained by permanent air inlets, e.g. in doors, windows and outside wall vents or by
implementing other technical measures
such as ensuring that the extractor can
only be switched on when the heating
appliance is switched off, or vice versa.
Disposal of an old appliance
Before discarding an old appliance, unplug it and render the
plug useless to prevent mis-use.
Particular attention should be paid
to information highlighted in this
way.
Note: The overall ventilation system in
the home must be taken into account. If
in any doubt, seek approval from the
appropriate authorities.
8
Page 9
Operation
Basic information
When the deflector plate is pushed in,
the mains supply is interrupted. The
cooker hood cannot be operated with
the deflector plate in this position.
Switch on the cooker hood by pulling
the deflector plate down slightly.
Operation
Switching the fan on/off
Press the + switch to switch the fan
on.
To switch the fan off
– press the - switch or
– push the deflector plate in.
Select the required function by gently
pressing the appropriate switch.
If the deflector plate is pulled down
slightly, (= light position), the cooktop illumination can be switched on or off.
All other functions can be used by pulling the deflector down further.
When first used the cooker hood is set
at the factory to operate as follows:
– cooktop illumination is switched on
– Power setting 2.
The cooktop illumination is automatically switched on when the deflector
plate is pulled down to the light position. The fan is switched on by pulling
the deflector plate down further.
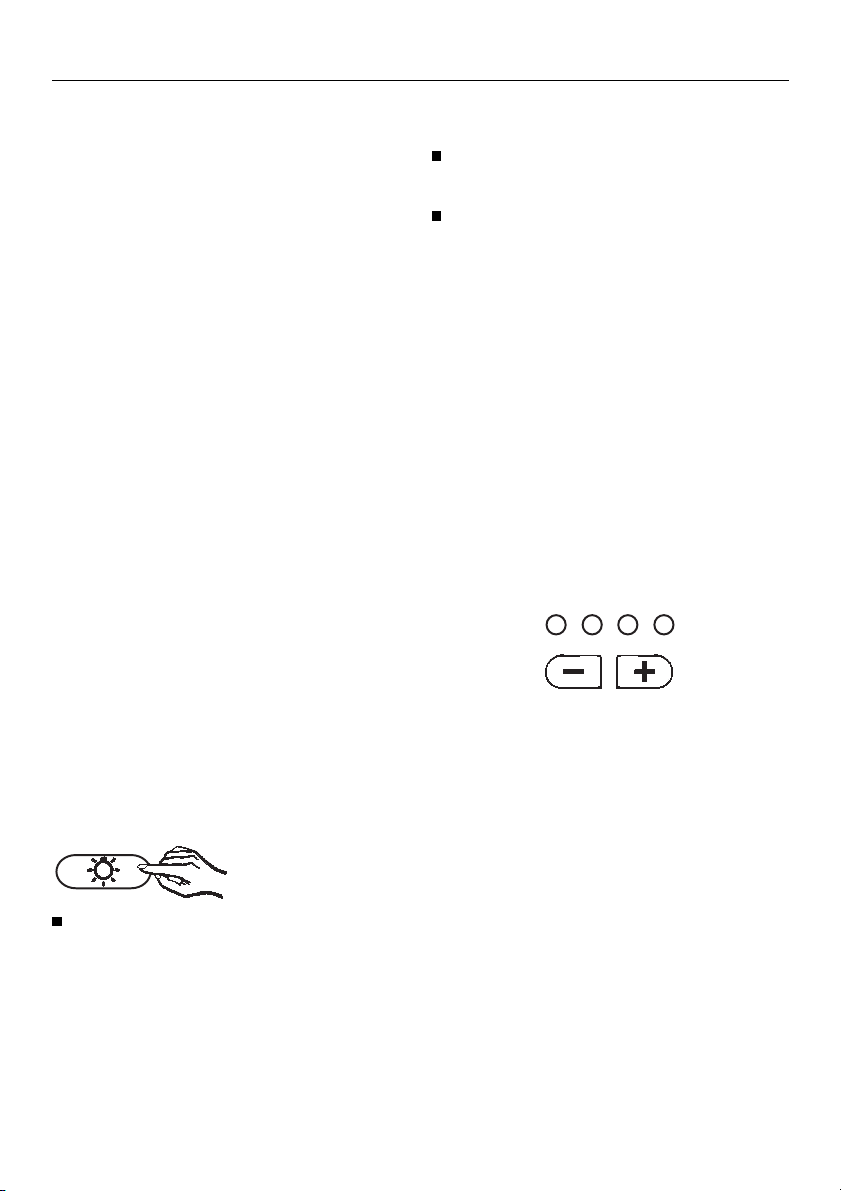
Switching the cooktop illumination on/off
Selecting a power setting
Four fan throughput settings are available to suit the intensity of the kitchen
vapours.
A low or medium power setting is sufficient for normal use. The booster setting is recommended for strong kitchen
odours.
Control lamps above the -/+ switch indicate which setting has been selected:
lowest setting . . . . . . . . booster setting
The power setting can be selected
– manually,
by pressing the -/+ switch.
This operating mode is set at the factory.
Press the cooktop illumination switch.
The control lamp above the switch
comes on when the cooktop illumination is on.
– automatically,
by pulling the deflector plate up or
down.
9
Page 10

Operation
Operation
Manual selection of power setting
Select the required setting by pressing the -/+ switch.
- switch = lower setting
+ switch = higher setting
The - switch can also be used to turn
off the fan. None of the control lamps
above the -/+ switch come on.
Power settings can also be adjusted
manually, regardless of the position
of the deflector plate, even if the
Automatic function has been activated.
For example if the fan throughput must
be increased to remove excessive
cooking vapours.
Press the - or + switch.
Press + to turn the fan on again.
Automatic selection of power setting
Press "Auto".
The control lamp confirms selection of
the Automatic function. The power setting is determined according to the position of the deflector plate:
– deflector plate pulled down = lower
setting
– deflector plate pushed up = higher
setting
- switch = lower setting
+ switch = higher setting
The selected power setting is not, initially, altered if the deflector plate is
pulled up or down.
If, however, the deflector plate is adjusted to a position where the setting
corresponds to that selected manually,
the modified Automatic function reverts
to its original status.
To switch off the Automatic function
press "Auto".
The control lamp goes off.
10
Page 11

Operation
Activating the switch-off delay
If, after cooking, there are still vapours
in the kitchen, the switch-off delay
should be activated. The cooker hood
is then automatically switched off after
5 or 15 minutes.
Press the switch-off delay switch as
follows:
Operation
Switching off
Push deflector plate up until it
reaches stop.
This way cooktop illumination and
fan are switched off automatically.
Automatic safety switch-off
If the switched-on cooker hood has not
been used for 4 hours, the fan switches
off automatically. The cooktop illumination stays on.
Press once = 5 minutes
Press twice = 15 minutes
Press three times = switch off
The respective control lamp comes on
to confirm the selected time.
To switch the fan on again press any
switch.
11
Page 12

Operation
Checking the operating hour
counter
The operating hour counter of the
grease filter is set at the factory at a
certain number of operating hours. This
can be altered as detailed in "Programmable functions".
At the end of the set time the control
lamp above the grease filter switch
comes on. The filters should then be
cleaned.
The set time which has already expired
can be displayed as follows:
Press the grease filter switch.
The number of control lamps flashing
above the -/+ switch indicates the percentage of operating hours for which
the filters have already been used in relation to the number set in the operating hour counter:
1 control lamp = 25 %
2 control lamps = 50 %
3 control lamps = 75 %
4 control lamps = 100 %
Programmable functions
User-programmable functions are available for
– altering the operating hour counter
for the grease filter.
Prior to programming adjust the deflector plate to the "light" position, or
switch the fan off by pressing the switch (not for Automatic function).
Altering the operating hour counter
The maximum number of operating
hours in the operating hour counter can
be altered to suit individual requirements. Select a short time if cooking
consists of a great deal of frying and
deep-fat frying.
– Grease filter
The operating hour counter for the
grease filter is set at the factory at 30
operating hours. This number can be increased or reduced; 20, 30, 40 or 50
operating hours can be selected.
The number of operating hours for
which the filters have already been
used is stored in the event of mains
failure.
12
Press the switch-off delay switch and
the grease filter switch simultaneously.
Page 13

The control lamps above these switches start flashing.
Select the required time by pressing
the -/+ switch.
The control lamps above the -/+ switch
indicate the time selected:
1. control lamp from the left = 20 hours
2. control lamp from the left = 30 hours
3. control lamp from the left = 40 hours
4. control lamp from the left = 50 hours
Confirm by pressing the grease filter
switch.
If confirmation is not given within
4 minutes after programming, the
appliance automatically adopts the
old data.
Operation
13
Page 14

Operation
Mains failure
If mains failure occurs while the deflector plate is pulled out, the Automatic
function is interrupted.
The fault should be rectified as follows:
Push the deflector plate in as far as
possible.
Lower the deflector plate to the appropriate position for the required
power setting.
14
Page 15

Cleaning and care
Before any cleaning or maintenance
work, the cooker hood must be disconnected from the mains supply
by
– switching the appliance off and
– removing the plug from the wall.
Housing
The cooker hood casing may be
cleaned using a soft cotton cloth with
hot water to which a little mild detergent has been added.
Dry with a soft cloth.
Cleaning and care
Press the upper grease filter back by
the handle strip and lower to remove.
Pull the two lower grease filters down
by the handle strips to remove.
Never use a cleaner which scours
or contains grit, soda, acid or
chlorine. This would damage the
surface of the cooker hood.
Grease filters
The re-usable metal grease filters in the
appliance absorb solid particles
(grease, dust, etc.) from the kitchen vapours, thus preventing soiling of the
cooker hood.
At the latest, the grease filters should
be cleaned when the control lamp
above the grease filter switch comes
on.
An oversaturated grease filter is a
fire risk.
Clean the grease filters
– by hand: with a scrubbing brush in
hot water with a mild detergent.
– in a dishwasher: place the grease fil-
ters with the short side upright in the
lower basket.
Depending on the detergent, cleaning the grease filter in a dishwasher
may cause permanent discoloration
of the filter surface. Performance of
the filter will not be affected.
After cleaning, leave the filters to dry
for a while on an absorbent surface.
When removing the filters for cleaning, also clean off any residues of
grease or fat from the filter casing to
prevent the risk of these catching fire.
After inserting the grease filter, set
the operating hour counter to "0" by
pressing the grease filter switch for
approx. 4 secs.
15
Page 16

Cleaning and care
Replacing the fluorescent
lamps
Disconnect the cooker hood from
the mains supply by
– switching the appliance off or
– removing the plug from the wall.
Lower the fluorescent lamp carefully
and pull forward to remove.
Replace the fluorescent lamp and
push back up into position.
Insert the lamp cover and secure.
Unscrew the fixing screw on the
lamp cover.
Remove the lamp cover by lowering
it diagonally.
16
Page 17

After-sales service
In the event of any fault which you cannot correct yourself, please contact
– your Miele specialist dealer
or
– the Miele Service Department (the
address is on the back page).
When contacting the Service Department, please quote the model and serial number of the appliance, both of
which are shown on the data plate
which is on front of the appliance.
After-sales service
17
Page 18

Electrical connection and technical data
Electrical connection and technical data
All electrical work should only be
carried out by a suitably qualified
person in accordance with national
and local safety regulations.
Technical data AUS, NZ
Total rated load
– AUS . . . . . . . . . . . . . . . . . . . . . 232 W
– NZ. . . . . . . . . . . . . . . . . . . . . . . 212 W
Caution:
In order to avoid a hazard this appliance must be installed according
to these instructions for installations.
The voltage, rated load and plug rating
are given on the data plate which is on
the right under the shelf.
Please ensure that voltage and frequency comply with the mains supply.
Electrical connection CDN
The cooker hood is equipped with a
power cord and 3-prong plug for
connection to an AC single phase
120 V ~ 60 Hz supply.
WARNING!
THIS APPLIANCE MUST BE
GROUNDED.
Light . . . . . . . . . . . . . . . . . . . . 2 x 11 W
Voltage
– AUS . . . . . . . . . . . . . . . . . . . . . 240 V
– NZ. . . . . . . . . . . . . . . . . . . . . . . 230 V
Frequency . . . . . . . . . . . . . . . . . 50 Hz
Plug rating . . . . . . . . . . . . . . . . . . . 10 A
Test marks. . . . . . . . . . Electrical safety
. . . . . . . . . . . . . . . . . . . . . C-Tick Mark
Electrically suppressed
according to . . . . . . . . . . AS/NZS 1044
Technical data CDN
Total rated load . . . . . . . . . . . . . . 232 W
Light . . . . . . . . . . . . . . . . . . . . 2 x 11 W
Voltage . . . . . . . . . . . . . . . . . 120 V AC
Frequency . . . . . . . . . . . . . . . . . 60 Hz
Fuse rating . . . . . . . . . . . . . . . . . . 10 A
Connection cable with 3-prong plug
18
Air throughput
– Vented, 125 mm
Setting 1-3 . . . . . . . . . . . . 150-430 m
Booster setting . . . . . . . . . . . . 550 m
Unconnected. . . . . . . . . . . . . . 720 m
3
/h
3
/h
3
/h
Page 19

Installation
The vent connection must be made
by a suitably qualified and competent person.
AUS / NZ:
The distance between the cooktop
and the bottom of the deflector
plate when lowered to the lowest position should be at least 60 cm.
Safety regulations prohibit installation above a solid-fuel stove or an
open grill.
Building-in dimensions
Installation
CDN:
The distance between the cooktop
and the bottom of the deflector
plate when pushed in should be at
least 50 cm.
Safety regulations prohibit installation above a solid-fuel stove. Installation above gas cooktops or an
Miele open grill is permitted providing that the vertical distance between the cooktop and the underside of the cabinet holding the hood
is at least 65 cm.
19
Page 20

Installation
Installation
Building in
Remove the door of the wall unit to
simplify installation.
Do not lift or carry the cooker hood
by the deflector plate but by the
casing.
Secure the support brackets to both
interior walls of the unit using four
3.5 x 16 mm screws for each side,
position as illustrated.
For 16 mm thick side walls only:
Fasten the spacer strips onto the
right and left-hand side of the appliance.
20
Push the cooker hood into the wall
unit from the front and hang it onto
the support bracket.
Turn the Allen screws on both sides
to contact the support brackets.
To align the height, turn the Allen
screws clockwise or anti-clockwise.
Page 21

Installation
Move the cooker hood into its correct position.
Secure the cooker hood on both
sides to the bottom of the cabinet,
using 3.5 x 16 mm screws.
19 mm thick side walls:
16 mm thick side walls:
Secure the cooker hood to the support bracket on both sides using
3.5 x 16 mm screws.
Use a spacer if side walls are only
16 mm thick or if there is a visible
gap.
21
Page 22

Installation
Depth alignment
Units deeper than 285 mm require the
fitting of a spacer strip to prevent vapours collecting between the rear of
the cooker hood and the wall.
Press the fascia strips into the appropriate notch according to the thickness of the side walls. Note the markings on the back of the fascia strips.
To achieve the correct depth shorten
the spacer strip at the pre-determined breaking points.
Attach the spacer strip to the track located at the rear of the cabinet base.
22
Page 23

Installation
Fitting the shelf
Installation
Inserting the grease filter
Slide the shelf between the guide rail
with the perforated edge facing
upwards.
Secure the shelf with two screws.
Insert the two grease filters with the
handle strip facing the back of the
unit.
Refit the door of the wall unit.
23
Page 24

Installation
Air extraction
Fit non-return flat.
Push the ducting onto the cooker
hood vent connection and secure.
When installing a condensate trap,
ensure that it is located vertically
and if possible directly above the
vent connection of the cooker hood.
Note
If the vent ducting is to run through
cool rooms, lofts, etc., where there may
be great variations in temperature between the different areas, condensation
may occur.
The vent ducting must therefore be suitably insulated.
In addition to insulating the vent ducting, installation of a suitable
condensate trap to collect and evaporate any condensate which may occur
is recommended.
24
Page 25

Air extraction
Air extraction
Danger of toxic fumes.
Please heed the "Warning and
safety instructions".
The cooker hood should be installed according to local building
regulations. Seek approval from the
appropriate authorities.
Vent ducting
– All ducting, pipework and fittings
must be of non-flammable material
(AUS/NZ).
– Vent ducting should be as short and
straight as possible.
– To ensure efficient air extraction the
diameter of the vent ducting should
not be less than 125 mm.
The use of flat ducting also reduces
the air extraction efficiency.
– The use of vent ducting with a
diameter less than 125 mm and of
flat ducting increases the noise level
of the cooker hood.
– Only use wide-radius bends. Tight
bends reduce the air throughput of
the cooker hood.
– Only use smooth or flexible pipes
made from non-flammable materials
for the purpose of venting.
– If the exhaust air is to be vented to
the atmosphere, use readily available flexible pipes and wall vent
from a hardware store.
– If the exhaust air is to be ducted into
a vent flue, ducting must be directed
in the direction of flow.
Connection
Only use narrower-diameter pipework
where it is unavoidable, for example
where existing pipework has to be
used.
The narrower the diameter the
lower the performance and
– the noisier the operation.
– Where ducting is horizontal, it must
be laid to slope away at 1 cm per m
to ensure no condensate drains into
the appliance.
25
Page 26

Page 27

Page 28

All rights reserved / 44 / 001 AUS, CDN, NZ - 4600
This paper consists of cellulose which has been bleached without the use of chlorine.
 Loading...