

Midmark SpeedClave M7 Care Manual
R
MA514400
Caring for Your M7 SpeedClave® Sterilizer
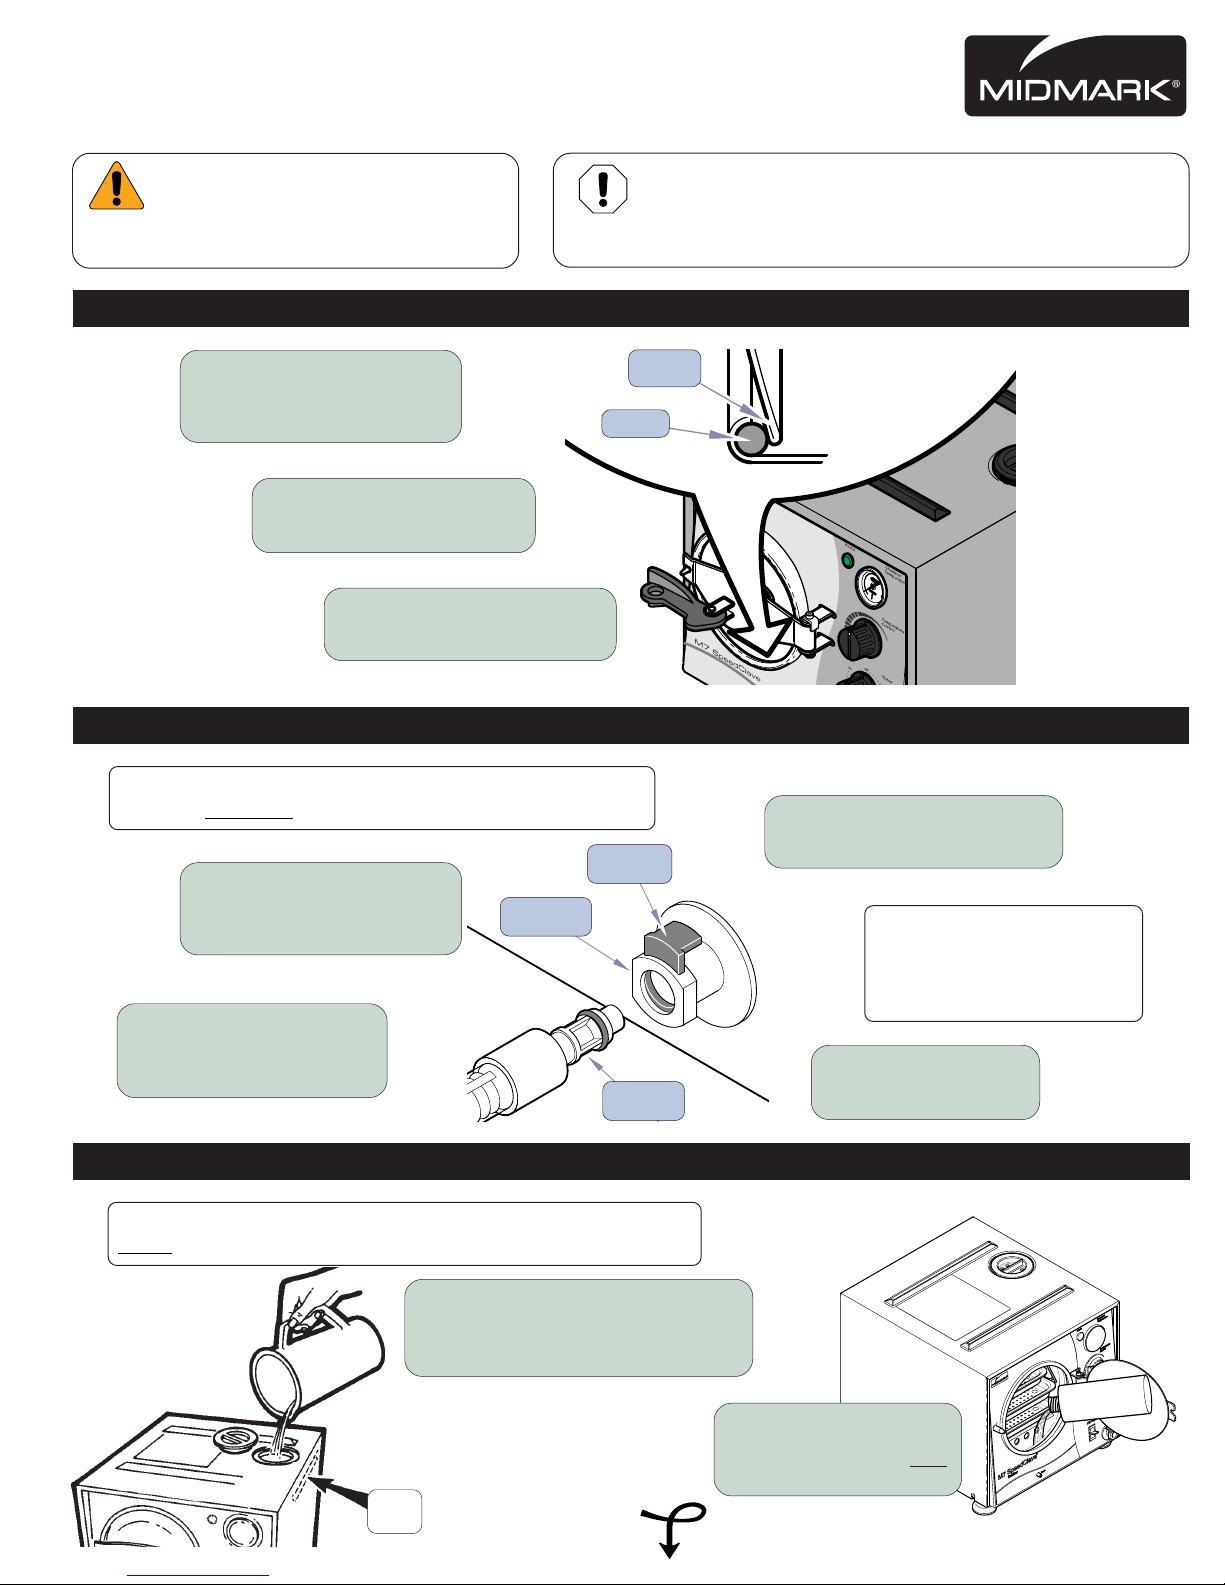
WARNING
Make sure the Sterilizer is cool before
attempting to clean to prevent personal
injury from burns.
1. External Surfaces
Wash with damp cloth and
mild soap solution, then
wipe with soft, dry cloth.
2. Door Gasket & Surface
Wipe door gasket & mating
surface with a damp cloth.
3. Door Gasket
Examine gasket for damage
and replace if necessary.
EQUIPMENT ALERT
Never use abrasive or bleaching agents (steel wool,scouring
powder, bleach, etc. or a wire brush) to clean chamber. Damage
to the chamber or related components could result.
DAILY
Mating
Surface
Gasket
WEEKLY
Note
Refer to “Tray Rack” for Removal & Installation Instructions.
1. Trays & Chamber
Wash with damp cloth and
mild soap solution, then
wipe with soft, dry cloth.
2. Drain Reservoir
Place end of hose in
container and connect
hose adapter to coupling.
Note
Never sterilize instruments while performing cleaning procedures.
1. Drain & Refill Reservoir
Drain reservoir and refill with
clean distilled or demineralized
water. (Refer to Weekly Cleaning)
Full
Mark
Drain
Coupling
Release
Lever
Hose /
Adapter
MONTHLY
OVER
3. Remove Hose
Press down on release lever
and remove hose assembly.
Note
If drain coupling leaks after
insertion or removal reinsert
adapter / hose several times
to clean seals, stopping leak.
4. Fill Reservoir
Use only distilled or
demineralized water.
2. Add Cleaner
Add 1 oz. (29.6 ml) of
Speed-Clean to a cool
chamber.
004-0524-00 Rev. A

MA670700i
3. Fill Chamber
R
Press down and hold
Fill / Vent Lever until
water is within 1/2''
(1.3 cm) of rim.
MONTHLY (
continued
)
8. Clean Chamber, Filter, & Trays
Remove and clean chamber filter, wipe out
chamber and clean trays and tray rack.
4. Run Cycle
Run one 6 Minute cycle
at 270°F (132°C).
1/2''
(1.3 cm)
5. Drain & Refill Reservoir
Drain chamber and reservoir and refill with clean distilled
or demineralized water. (Refer to Weekly Cleaning)
6. Run Cycle
Run one 3 Minute cycle
at 270°F (132°C).
7. Drain & Cool
Drain chamber and reservoir
and allow sterilizer to cool.
Remove trays and tray rack.
(Refer to Tray Rack Removal)
TRAY RACK
WARNING
Make sure unit is cool before attempting to remove or install tray rack and plate. Use care to prevent injury
when handling metal tray rack assembly. Do
1. Removal
Lift up on left edge of tray plate until
it “pops” free of wire rack.
Slide tray out of chamber.
NOT run sterilizer without tray rack assembly in place
Fill / Vent
Filter
9. Refill Reservoir
Refill reservoir with clean distilled
or demineralized water. Install
chamber filter, tray rack and trays.
.
2. Removal
Squeeze bottom of wire rack together
and slide out of chamber.
1. Installation
With the offset ends of the rack on the left,
gently squeeze bottom of rack together
and insert into chamber as far as it will go.
2. Installation
Holding tray plate with right side point down,
insert into chamber positioning right side of
tray plate under bottom rack wire aligning
straight ends of rack with notches on plate.
3. Installation
Holding right side of plate in position, press
down left side of plate until it snaps into
© Midmark Corporation 2006
offsets of wire rack.
Tray
Plate
Left Edge
Right Edge
Wire
Rack
Note
Offset ends of rack must
be on left side of chamber.
Wire
Rack
Offset
Ends
Straight
Ends
Tray
Plate
Midmark Corporation
60 Vista Drive
Versailles, Ohio 45380-0286
P.O. Box 286
1-800-MIDMARK
Fax 937-526-5542
midmark.com
 Loading...