

Page 1
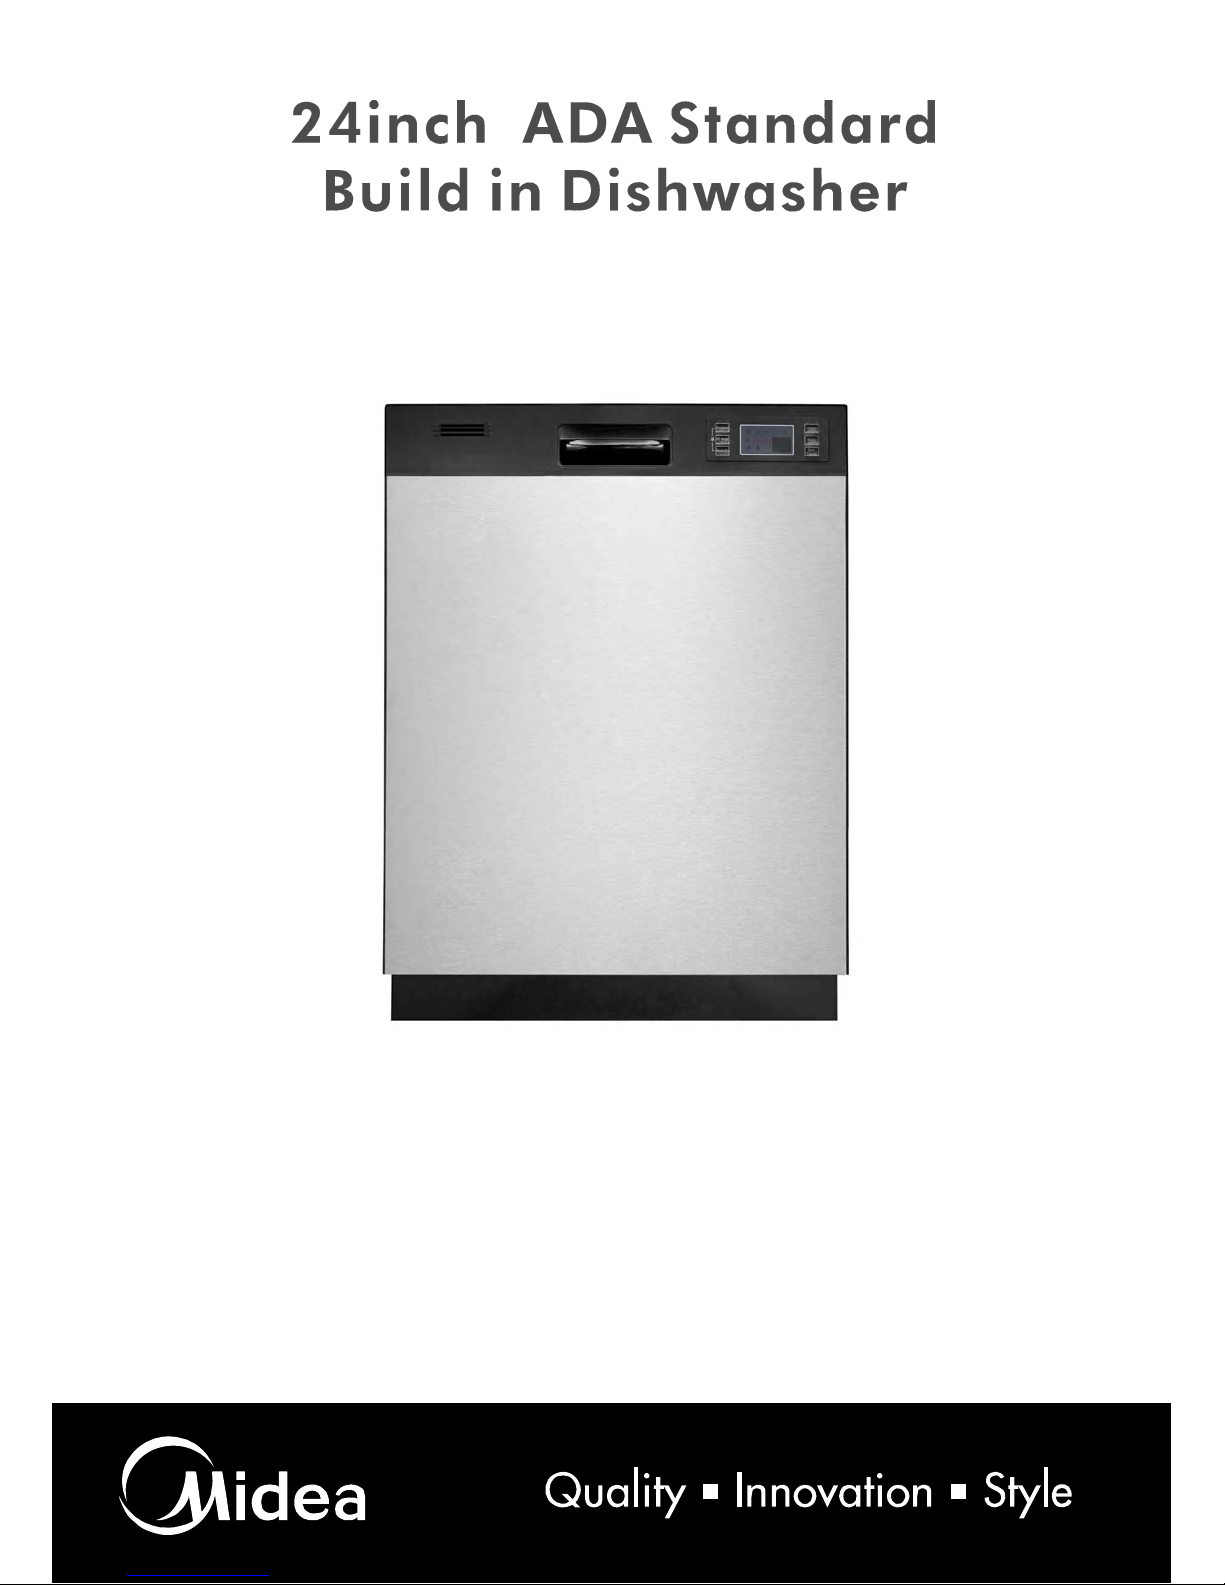
Model: SB 80-9373
USER MANUAL
Dishwasher
Page 2
ControlPanel..........................................................................3
DishwasherFeatures.................. ................................................ 3
WashCycleTable......................................................................4
Detergent............................ ................................................5
RinseAid.................. .......... ................................................5
LoadingtheDishwasherRack .......... .................................6
SilverwareBasket......................................................................7
LoadingtheDishwasherRack........................................... 7
SilverwareBasket......................................................................8
FilteringSystem...................... .... ............................................8
TurningOntheAppliance.............. ..... ........................................... 9
CaringfortheDishwasher........ .. ....... ...........................................9,10
(10 placeset tin gs)
........... ......
...................... 2..................................................
.............. 1....................................................
Beforecallingforservice..........
....... ...........................................11,12
Page 3
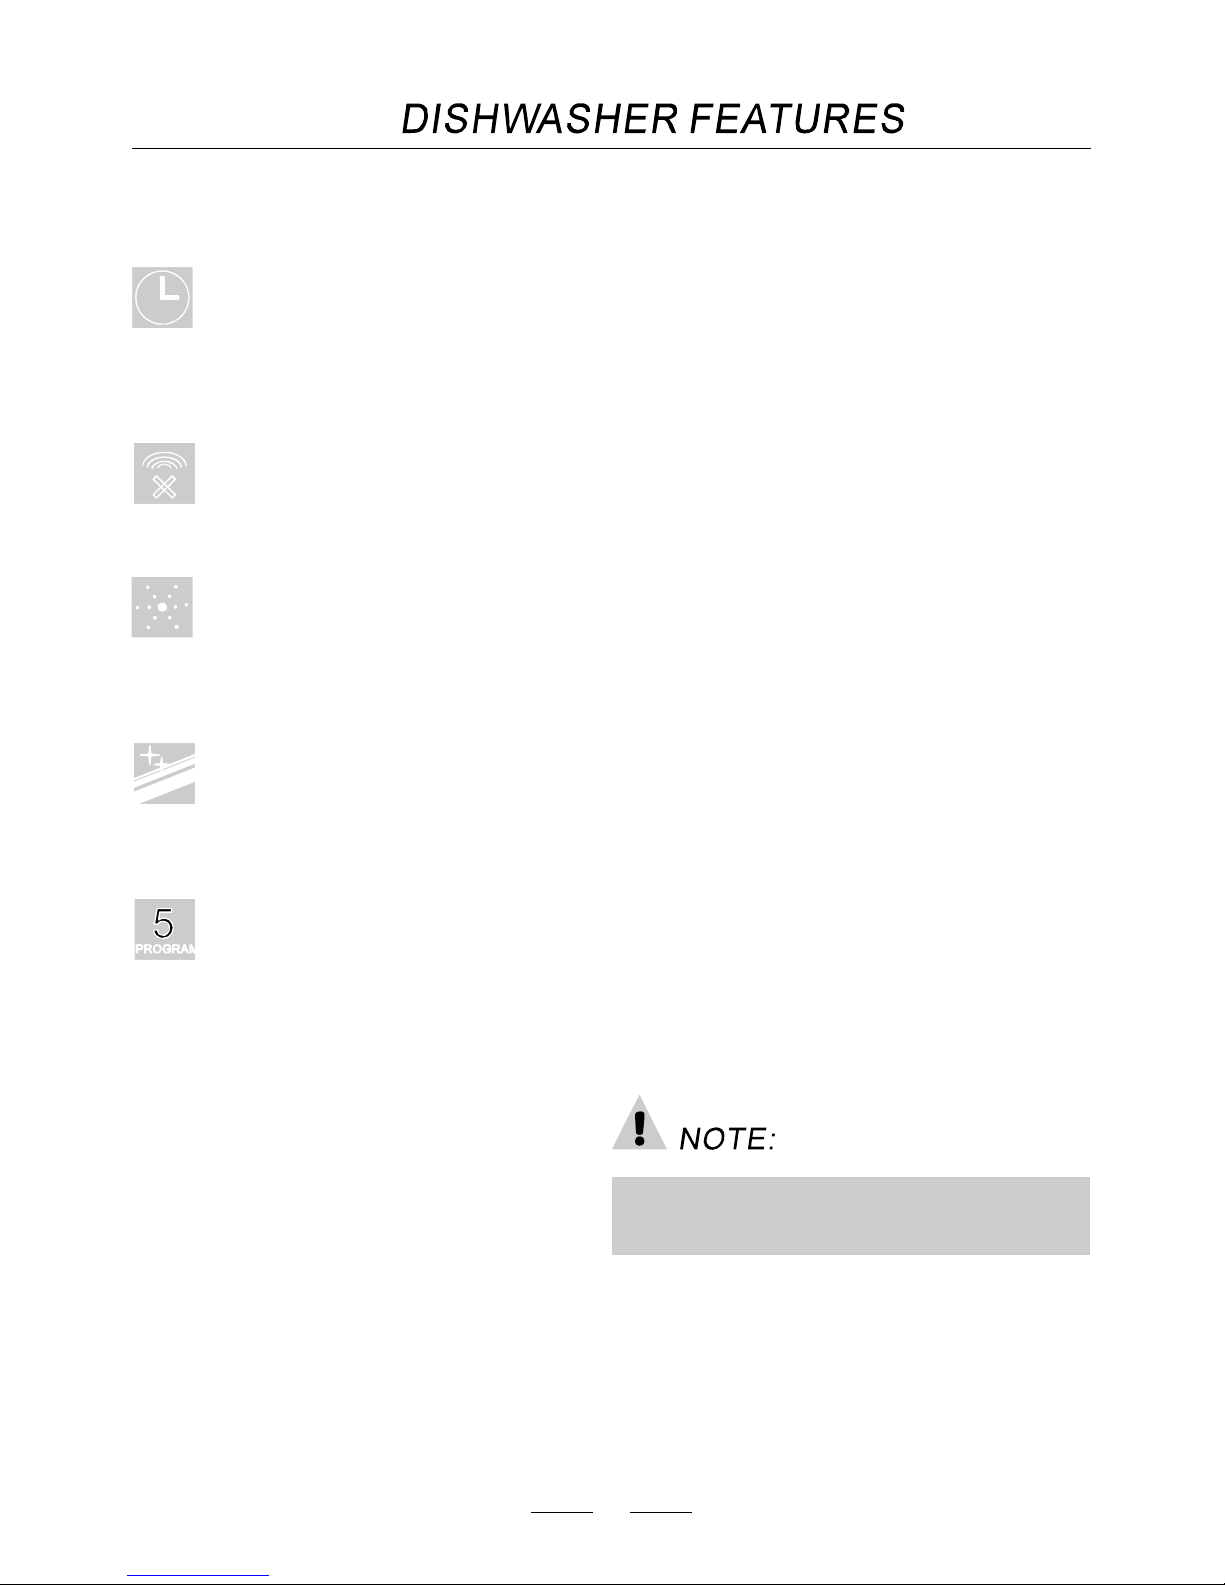
Error alarm
5washprograms
Stainless steeltub
Rinse aid WarningIndicator
Timedelayfeature
1
The manufacturer, following a policy of constant
development and up-dating of the product, may
make modifications without giving prior notice.
This allows thestart of the washc ycle to be delayed
The wash cycle canbedelayedfrom 1 to 24 hours
Totake a dvantag e of lower electricity costs dur ing non
peak hour s o r to have the dishes ready when you need
them
Fault code dis pl ay wo u ld inform the use r of abno r mal
status of t h e mach i n e.
Whentherinseaidreservoirrequiresrefilling,the
control p anel d isplay will indi cate such.
The tub and doo r liner ar e constructed with qualit y
stainless ste el w hat will n ever stai n a nd i mproves
drying p erformance
You can choose adesired program a ccording to the
type of load incl u din g H e avy, Normal, Quick Wash,
ChinaC rystal, RinseOnly.
Thedishw asher model contain all of the
qualitystan dard features plusthe f ollowing specific features:
M24DB9373HSS, M24DB9 373HBB,M24DB9373HW W,
Page 4
This appliance must be grounded. In the event
of a malfunction or breakdown, grounding will
reduce the risk of electric shock by providing a
path of least resistance of electric current. This
appliance is equipped with a cord having an
equipment-grounding conductor and a grounding
plug.The plug must be plugged into an appropriate
outlet that is installed and grounded in accordance
with all local codes and ordinances.
Improper connection of the equipmentgrounding conductor can result in a risk
ofelectric shock. Checkwith a qualified
electrician or service representative if you
arein doubt whether theappliance is
properly grounded. Do not modify the plug
provided with the appliance ;If it is not fit
for the outlet .have a proper outlet installed
by a qualified electrician.
2
Keep child away from detergent and rinse aid, keep
child away from the open door of the dishwasher,
there could still be some detergent left inside.
Do not abuse, sit on, or stand on the door or dish
rack of the dishwasher.
Donot touch the heating elementduring or
immediately after use.
Do not wash plastic items unless they are marked
dishwasher safe or the equivalent. For plastic
items not so marked, check the manufactures
recommendations.
Use onlydetergent andrinseadditivesdesigned
foran au tomatic dishwasher. Nev er u se s oap ,
laundry detergent, o r hand washing detergent
in yourdishwasher. Keep these products out of
childre n.
Duringi nstallation, the power supplymust not
beexce ssively o r d angerous ly bent or fl attened.
The d oor should not be l eft in the o pe n positi on
sincethis couldpresentatripping hazards.
Donot tamperwithcontrols.
Do not operate your dishwasher unless all
enclosure panels are properly inplace. Open the
door very carefully if the dishwasher is operating,
there is a risk of water squirting out.
Do not place any heavy objects of stand on the door
when it is open. The appliance could tip forward.
When loadingitemsto be washed:
1)Locate sharp it ems so that they are not likely to
damage the door seal;
2)Load sharp kni ves with the handles upto re duce
theriskofcut-typeinjuries.
When us ing y our dishwasher, you should p revent
plastic item fr om c ontactin g wit h he ating element.
If th e su pply cord is dam ag e d, it must be rep laced
bythe m anufactureroritsservice agentor a
similarly qualified pe rson inorde r to avoid a
hazard.
Please d ispose of pack ing materials properly.
Use the dishwasher only for its intended function.
Remove the door to the washing compartment when
removing an old dishwasher from service or discarding it.
The appl iance is not intended for use by young
children or infirm persons withou t supervision.
Dishwasher detergents ar e s trongly alkaline,they
can be extremely da ngerous if swallowed .Avoid
contact with skin and eyes an d keep childr en away
from the dishwasherwhen t hedoor isopen.
Young c hildren should be supervised to ensure that
they do not play with the app liance.
Checkthatthedetergent receptableisempty after
completionofthe washcycle.
Page 5
Toget the best performance from your dishwasher,read all operating instructions before using
itf or the first time.
3
1
77
6
4
7
6
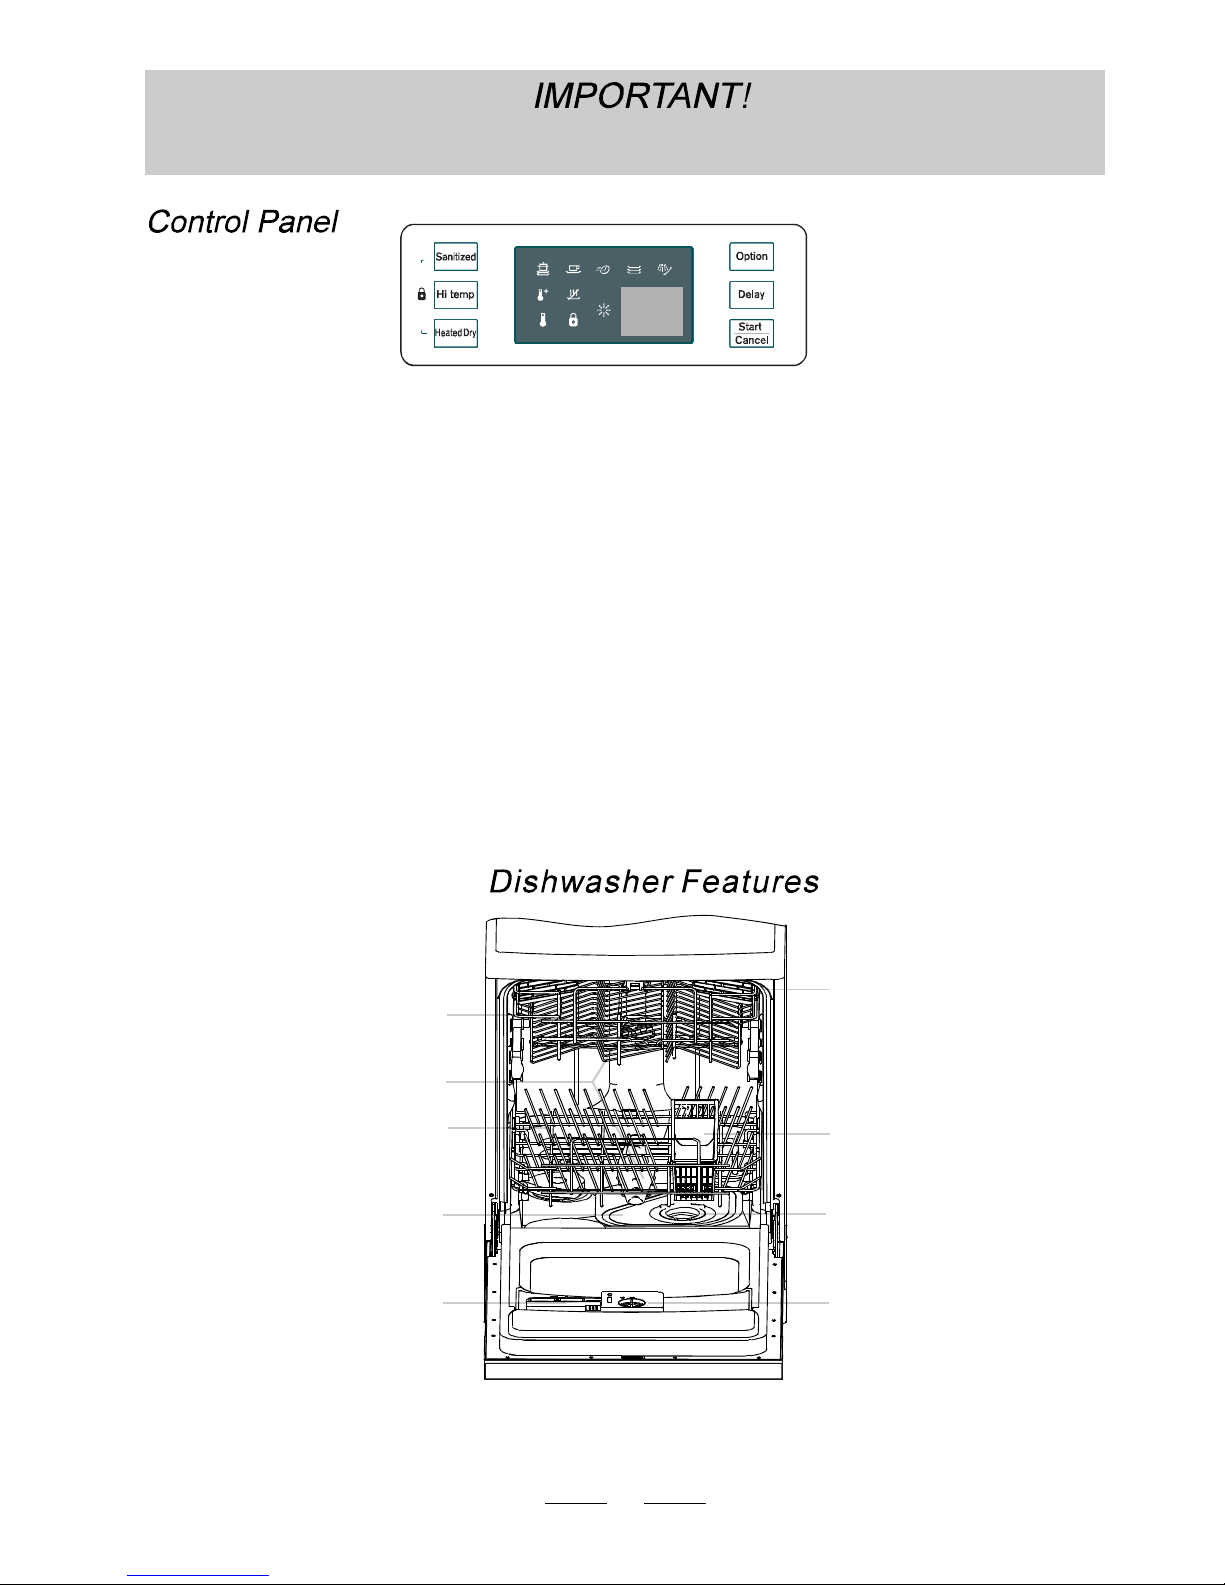
Display: To display delay time orerror c odes.
3
1
Rinse Ai d Warning Light: Toco me on when the
dispenser needs tobe r efilled.
2
Option: Toselectwashingprogram
when pressthe button.
Delayed Start Button: Press this button t o se t the
delayed h ours for w ashing. You can delay t he start
ofwashingupto 24 hours.O nepresson this
button delays th e st art of washin g by one hour.
5
Detergent Dispenser
6
Cup Shelf
7
Silverware Basket
8
Coarse Filter
9
Rinse Aid Dispenser
Lower Basket
3
Spray Arms
2
Upper Basket
1
Main Fi lter
4
1
2
3
4
5
6
7
8
9
on
Off
Front view
Prog.
SANITIZE
HI
TEMP
HE
ATED DRY
Child Lock
1
3
2
4
5
6
7
8
9
5
START/CANCEL : Tostop or reset the wash cycle, press
the START/CANCEL button,the dishwasherwill stop
washing.
When Sanitize isselected,thetemperature
of the water will rea ch 7 0 C (158 F)max .
“”
°°
Note : it is possible that the 70 C (158 F) max may not
bereached if the temperature of the incominghotwater
does not meet thesugge sted t emperatures.
°°
When the Hi Temp isselected, t he temperature
of t he water wi ll re ach 60 C(140 F) max,
“”
°°
When t he Heated Dry op tion is select ed,
theheaterw illwork during the dryprocesses.
“”
Press t he SANITIZE and HEATED DRYbuttons
for 3 seconds the
LOCK li ght w ill display o n the LCD. No butto ns
can be operated
when th e dishw asher controls arelocked .
To cancelthe Child Lock option, pr ess the
SANITI ZE and
HEATEDDRYbuttonsfor3 seconds,the LOCK
lightwillnolonger
beshownon theLCD and the dishwasher
controls wi ll be unlocked.
“”
8
9
Page 6

4
The inlet water temperature is 120 F ,If not ,t he wash p erformance w ill reduce.
Quick
Heavy
Nor mal
For nor m ally so iled loads , s uch as pots, pl ate s,
glasse s and lightly soile d pans . st an da rd daily
cycle.
Forlightlysoiledloads,such as plates,glasses,
bowlsandlightly soiled pans.
For the h ea vies t s oile d l oa ds, such as po ts , p ans,
casseroledishesand dishesthathavebeensitting
with dr ied food on t hem for a whi le.
Rinse O nly
Chi n a
Crystal
(AHAM)
Pre-wash
Pre-wash
Pre-wash
Wash (48.9 )
Rinse
Rinse (52. 1 )
Drying
℃
℃
Pre-wash
Wash (49.6 )
Rinse
Rinse (54. 3 )
Drying
℃
℃
Pre-wash
Pre-wash
Wash (55 )
Rinse
Rinse (57. 4 )
Drying
℃
℃
Pre-wash
Pre-wash
Pre-wash
Wash (63.7 )
Rinse
Rinse
Rinse (61. 2 )
Drying
℃
℃
Longer inlet time.
Faucets are not opened, or water intake is restricted,or water pressure
is too low.
Malfunction of temperature sensor or of heating element.
Longer heating time,
but not reaching required temperature
130/140
80
25
90
24.3
13.8
17.3
13.8
7.3
130
0.884
0.616
0.527
0.578
0.1
This cycle is for lightlysoiled china and crystal.
This cycle is for pre-rinsing dishes or glasses.
This is only a rinse that keeps food fromdrying
on your dishes and reduces odor build upin your
dishwasheruntilyouare ready to wash a fullload.
Donot use detergent.
Page 7

5
Dishwasher detergent is corrosive!
Takecare t o ke ep it out o f rea ch o f ch ildren.
IF THEWATER ISN'T TOO HARD,YOU MAY ALSOPREVENTTHE FORMATION OF DEPOSITSBY ADDING
DETERGENT.
The amo unt of detergent needed can v ary due to d ifferences in water hardne ss. Todetermine the wat er ha rdness in
your area, c ontactyour localwaterutilityorarea watersoftening company. The harderthewater,the moredetergent
you may need. Re member, you should adjust the amount o f detergent you use by small amounts until you find the
correct a mount.
Toremovehard water spots, try the following:
Run d ishes through a normal w ash program.
Removeallmetaldishware, suchascutlery,pans,etc.,
from the di shwashe r.
Donotadddetergent.
Pour twocups of vi negar in to a bowl and set t he bowl fa ce
up onthe l ower r ac k of the dishwasher.
Runthedishes throughanormal w ashprogram.
If this doesn't work, tr y the same process w ith 1 / 4 cup of
citric acid crystals ins tead of vinegar.
Use o nly dete rgen t specifi cally m a defor use in dishwashers.
Keepyourdetergent fresh anddry. Don'tputpowderdetergent
into the dispenseruntil You'reready to wash dishes.
The r inse aidis released du ring the final rinse to prevent
water from forming droplets on your dishes th at c an le ave
spots and streaks. It al so im proves d rying by allowing
water to"sheet"off the dishes.
Your dishwasher is designed t o use liqui d rin se a ids.
The r inse aiddispe nser is locate d ins ide the door next to
thedetergent dispenser. Tofill thed ispenser, open the
capand pourtherinse aidinto the dispenser until the level
in dica tor tu rn s completely black. T he dispen s e r h olds
about 100 ml o f liquid rinse aid.
Be ca reful not t o o verfil l the dispenser, becau se this could
causeoversudsing.Wipeawayanyspillswithadampcloth.
Don ' t forget t o replace t he cap bef o re yo u close th e
dishwasherdoor.
Ifyouhave softwater, youmaynotneed rinse aid for it may
cause a white film to develop on your dishes.
The dis penser m ust be refilled before the sta rt o f eachwash cycle followi ng t he instructions provided i n the" Wash
CycleTable".Your dishwasher u es than conventionaldishwashers. Generally,onlyone
tablespoon of deterge nt is needed for a normal wash load.and, more heav ily s oiled i te ms need more detergent.
Always add the detergent just before starting dishwasher,otherwise it cou ld get damp and will n ot dissolve prop erly.
s less detergent and rinseaid
To ope n the d i spenser, tu r n t h e ca p tothe "ope n" (left)
arr ow and li ft i t ou t.
Pourthe rinse aid into t he d ispenser, be ing ca reful
nottooverfill.
Replacethecapb y insertingit alignedwith "open"
arrowandturningit to theclosed(right) arrow.
A measuredamount of rinseaid isreleasedduringthefinalrinse.As with detergent, the amount
of rinse aid needed for your dishes de pends on the hardness of th e wa ter inyour area. Toomuch
rinseaid can resultin lather of foaming andcause cloudinessor steaks on yourdishes.If the
waterinyourareaisverysoft,youmaynotneedrinseaid.Ifyoudo,youcandilutetherinseaid
with an equal amountof water.
Therinse aid di spenser has fou r settings.A lway s startwith t he dispenser set on " 2 ". If sp ots a nd
poor dryingare problems, increase theamountofrinse aiddispensedby removing the dispenser
lid and rotating the dial to "3 ". If the dishes s till a re not dryi ng properly or are s potted, adjust the
dial to" 4".. We suggest y ou toset on "2" .
Button
Indicator
Dispenser cap
Adjustable setting
Adjustable setting
Page 8

6
If there is n o rinse ai d w arning li gh t in t he co n tr ol pa n el, you c an judg e th e amount of rinse ai d by the fol l owi n g means .
The b lack dot ontherinse aiddispenser indicatestheamountofrinse aidinthe dispenser. Asthe rinse aidd iminishes,
th e si ze of th e bl ack d o t de cre a se s. You shoul d never l et the r inse aid get bel ow 1 / 4 full.
As t he rins e aid dim i nis hes , the size of the black dot on the rin se
aid leve l in dicator c h ang es, as il lustrated be l ow.
Ful l
3/4full
1/2full
1/ 4full-Should refill to eliminate s potting
Empty
Indicator
The u pper rack is designed to hold more d elicate and li ghter dishware s uch asglasses, coffee and te a c up a nd
saucers,as wellas plates,small bowlsand shallow pans(aslong as they arenottoo dirty).
Position the dishe s an d co okware sothat they donot get move d by the spray of water.
The u pper rack can be ad justed for he ight byputting wheels of different height i nto therails.
We recommend that yo u plac e l arge items which are most difficult to clean in to th e lo wer rack: pot s, p ans, lids,
serving dishes and bowls, as show n in the f igure to t he r ight.
It is preferable toplace serving d ishes a nd lids o n the side of theracks i n order to avoid bl ocking the ro tation of the
top spray a r m.
Pots, serving bowls, etc, m ust always be placed t op d own .
Dee p pots s h ould be s lant e d t o al low water to flow out.
The b ottom rack feature fold down tine rows s o that lar ger o r mo re pots and pans c an b e l oaded.
5
1
Cups
2
Fruitbowl
3
4
Bread a nd butterplates
Glasses
1
3
2
5
Saucer
3
9
6
8
Br ead an d bu tter p lates
Silverware basket
4
Dinner plates
Serving plate
6
6
4
4
5
8
7
Serving bowl
5
Saucer
7
5
Page 9

7
12 place settings
8 place settings
SILVERWARE BASKET
Silverware should be placed in the silverware basket with handles at the bottom: If the rack has side baskets,
the spoon should be loaded individually into the appropriate slots, Especially long utensils should be placed
in the horizontal position at the front of the upper rack.
4
3
8
2
6
7
4
4
4
5
4
4
4
4
1
1
1
1
1
1
1
4
4
1
1
1
5
5
5
5
5
5
5
5
5
2
2
2
2
2
2
2
2
2
3
3
3
3
3
3
3
3
3
6
Do not let any item extend
through bottom.
WARNING!
Teaspoons
4
Soup spoons
2
Forks
1
Serving fork
8
Serving spoon
6
Knife
5
3
Dessert spoons
7
Gravy ladle
The upper rack is designed to hold more delicate and lighter dishware such as glasses, coffee and tea cup and
saucers, as well as plates, small bowls and shallow pans(as long as they are not too dirty).
Position the dishes and cookware so that they do not get moved by the spray of water.
The upper rack can be adjusted for height by putting wheels of different height into the rails.
How to use the Upper Rack
How to use the Lower Rack
We recommend that you place large items which are most difficult to clean into the lower rack: pots, pans, lids,
serving dishes and bowls, as shown in the figure to the right.
It is preferable to place serving dishes and lids on the side of the racks in order to avoid blocking the rotation of the
top spray arm.
Pots, serving bowls, etc, must always be placed top down.
Deep pots should be slanted to allow water to flow out.
The bottom rack feature fold down tine rows so that larger or more pots and pans can be loaded.
5
1
Cups
2
Fruit bowl
3
4
Bread and butter plates
Glasses
1
1
4
3
4
2
5
Saucer
3
9
6
8
Bread and butter plates
Silverware basket
4
Dinner plates
Serving plate
6
6
4
4
5
8
99
7
Serving bowl
5
Saucer
7
3
2
1
4
4
5
5
6
6
7
8
99
12 place settings
12 place settings
8 place settings
8 place settings
Page 10

When the washing cycle h as fi nished, the b uzzer of dishwasher will mo oing 8 seconds , th en s top. O
urn o ff the applianceusingtheON/OFFbutton,.Waita fewminutesbeforeunloadingthedishwasher to avoid
handlingthe dishes andutensilsw hile theyarestillhot and moresusceptibletobreakage.They willalso dry better.
pen th e do or,
t
A forgotten dish can be added any time before the detergent cup opens.
Openthedooralittletostopthewashing.
After the spray arms stop working,you can open the door
completely.
Addforgotten dishes.
Close the door, the dishwasher will work after ten second.
3
2
1
1. Makesure thatthe plug0f the appliance is insertedinto thewall socket;
2.Make sur e tha t the water s uppl y is turned on to fu ll pre ssur e;
3.Load the dish (seethe sectionentitled loading the dishwasher ;
4.Pourthe detergent ( see the sectionentitled detergent and Rinse aid ;
5.Pressthe on/offbutton ,the on/off light will turnon;
6.Pre ss t he pr og r am b utt on t o se lec t p ro gr am ;
7.
“”)
“”)
Closethe door,after 10 seconds,the machinewillwork.
Itis dangerousto open the door when w ashing, beca usethehot water may scald you.
the machine will working after 10 seconds.continue
If you open t he door , the machine w ill pause. When you close the door ,dur ing a was h cycle
A cyclethat is underway can onlybemodifiedif it has onlybeen running forashort
time. Otherwise, thedet ergent may ha ve a lready been r eleas ed, a nd thea ppliance m ay
have already drained t he w ash water. If t his is the case, the deter gent dispenser must
be refille d (see the sect ion entitled " Loadi ng theDetergent " ).
Open th e door a l ittle to stop the washing. Press the programme button more tha n 3 secondsto cancel t he r unning
programme.Thenyou can selectother p rogrammes (seethesectionentitled " Starting a wash cycle. . . " ).
1
2
8
Silverware should be placed in the silverware basket with handl es a t thebottom: If the rack h as s ide b askets,
the s poon should be loaded individually into the appropriate slots, Es pecially long ut ensils should be placed
in t he horizontal po sition a t the fr ont of the upper rack.
4
4
3
8
2
6
7
4
4
4
5
4
4
4
4
1
1
1
1
1
1
1
1
1
4
4
4
1
1
1
5
5
5
5
5
5
5
5
5
5
5
2
2
2
2
2
2
2
2
2
2
2
3
3
3
3
3
3
3
3
3
3
3
6
Do not let any item exten d
throughbottom.
Teaspoons
4
Soup spoo ns
2
Fork s
1
Serving for k
8
Serving spo on
6
Knife
5
3
Dessert sp o ons
7
Gravyladle
4
3
8
2
6
7
4
4
5
4
4
4
1
1
1
1
1
1
4
4
1
1
5
5
5
5
5
5
5
2
2
2
2
2
2
2
3
3
3
3
3
3
3
6
12 place setting s
8 place settings
Page 11

9
Coarse filter
Larger items , su ch aspieces of b one orglass, t hat co uld clog th e d rain aretrapped
in th e coar se fil te r. To remo v e an item cau ght in thi s filt er, g en tl y sq ueez e the tabs
ontop of this filter and lift it out .
Fo r yo ur conv enience , we ha ve pl a ced the dr ain pump and f i lte r i ng s yst e m wi thin easy re ach inside t h e t u b.
There are three components of thefiltering system: the main filter, the coarse fi lter, and the fi ne filter.
Finefilter
This filte r holdssoil and f ood residue i n the sump a rea and pr events it from being
redeposited o n t he dishes during a cyc le.
Mainfilter
Food and soil particles t rapped by thi s fil ter a re p ulverized by aspecial jet on
the low er s pray arm and washed d own the dr ain.
If your dishwasher is left in an unheated place during the winter, ask a servicetechnician to:
Cut off electrical power to th e dishwasher. Remove
fuses or trip circuit breaker.
Turn off the water supply and disconnect the water
inlet pipe from the water valve.
Drain water from the inlet and water valve.pipe
(Useapantocatchthewater.)
Reconnectthe water inlet to the
water valve.
pipe
Remove the plastic sump cover in the
tub the bottom and use a sponge to
soak up water in rubber boot.
It is necessary to clea n th e sp ray a rms regularly because ha rd water chemic als w ill clog t he s pray armjets and
bear ings . Wash t he arms in soap y and warm water and us e asoft br us h to clean the jets . R e place the m a f ter rinsi ng
themthoroughly.
Step Turnthe filterin anti-clockwisedirection,
then lift it up.
:
1
Step liftthe Main filterup:
2
Step liftthe Fine filter up:
3
2
1
3
If do it from step1 to step 3, the filtersystem w ill be removed; Reverse operate by placingthe
main filter ,then screw up the fine filter to finish installation
Page 12

10
Never use a spr ay cleaner to clean t he door p anel fo r itcould damage thedoor lock and electrical components.
It is not allowed to use the abrasive agent or some pa per towel bec ause of the risk ofscratching or leavi ng s pots
on the stain le ss st e el surf a c e.
To clean the edge around the door, you should u se o nly a soft warm, dam p rag .
To prevent penetration of w ater into the door lock and electrical components ,
do not use aspray cleaner of any kind.
Also, n ever use abras ive cleaners or scouring pads on the outer s urface s be cause
they will scratch the fini sh. Some pape rs towels can also sc ratch or leav e m arks
onthesurface.
After ev ery wash, leav e th e door slightl y aja r so that
moisture and odors are not trapped inside.
To clean the exteriorand rubberparts of the dishwasher,
do not use solven ts or abr a sive clea ning pr o duc ts .
Rather, use only a cloth a nd warm s oapy water.
To rem ove spotsor stains from the surface of t he
inte ri o r, u se a clo th da mp ened with water an d a l ittle
white vinegar,or a cleaning pr oduct m ade specifically
for dishwashers.
Whenyougoonholiday,it is recommened thatyou
runawashcyclewiththedishwasheremptyandthen
leave the doorof the appliance slightly ajar.
This willhelpthe seals lastlongerandpreventodors
fromforming withintheappliance.
Ifthe appliancemustbe moved, try to keepitinthe
vertica l posit ion. If a bsol utel y necess ary, it can b e
positioned on its back.
Oneof thefactorsthat cause odors to forminthe
dishwashe r i s fo od th at remains trapped in th e seal s.
Period ic clea ning wi th a damp sp ong e wi l l prevent t his
fromoccurring.
This dis hwasher is desi gned for oper ation o n an ade quately wired i ndividual 120VAC,60Hz.Use required fuse
16 amps. Fused electrical supply is required-copper wire only.Time de lay fuse or circuit b reaker recommended
and prov ide sep arate c ircui t serving only this ap pliance. Outlet sh ould be plac ed i n adjacent cabinet .
Ensure that the voltage and the frequency values for the current in the home
correspond to those on the rating plate and that theelectr ical system is sized t or the maximum
voltage on the r ating plate.
Page 13

11
Before you call for service
Problem Possible Causes What To Do
Noise Some of the sounds you’ll Detergent cup opening.
hear are normal
The motor starting during the drying period.
Water draining out of the tub immediately after you
start the dishwasher.
Utensils are not secure in the
Make sure everything is secured in dishwasher.
rack or something small has
dropped into the rack
Motor hums
.
Detergent left in
Dishes block the
Reposition the dishes.
dispenser cups
Detergent cover
Water will not pump
Drain is clogged
out of the tub
Suds in the tub
Rinse agent was spilled Alway s wipe up rinse agent spills immediate ly.
Stained dishwasher parts Detergent with Some deter gents conta in colorant (pigment or dyes) that
Colorant was used will discolor the tub interior with extended use. Check the
detergent cup for signs of any discoloration. If cup is
discolored, change to detergent without any colorant.
Cascade, Cascade Completeand Electrasol Dishwashing
Detergents have been approved for use in our dishwashers.
Some tomato-based
Use of theRINSE ONLY
cycle after adding the dish to the
foods can stain
load can decrease the level of staining.
Dishes and flat w are Low inlet water temperature
Make sure inlet water temperature is correct (see page 4).
not clean
Water pressure is temporarily low
Turn on a faucet.Is wate r coming out more slowly than usual?
If so, wait until pressure is normal before using your dishwasher.
Air gap is clogged
Cleanthe air gap.
Improper rack loading
Make sure large dishware does not block the deterg ent
dispenserorthewasharms.
Trouble s hooti ng T ips
Save time and money! Review the charts on the following pages.
You may not need to call for service.
Correct detergent was not used
Dishwasher has not beenusedon a regularbasis.
Ifyou do not useyourdishwasherfor longtime,
pleases electandrun the shortestwashprogram
onceeveryweek.This will helpkeep the seal
moist to avoid Motor hums.
Check ifyourkitchensink isdrainingwell.If not,
pleasea skplumberto deal with.
.
Use only thespecial dishwasher detergent to avoid
suds. If this occurs, open the dishwasher and let suds
evaporate.Add 1 gall onof cold water to the tub. Close
and latch the dishwasher, then Start the wash
cycle to drain out the water . Repeat if necessary.
Check coarse the filter
(see section titled )" Cleaning The Filter "
Check drain hose.
Page 14

12
Problem Possible Causes What To Do
Spots and filming
UseJet-Dry
rinse agent to remove spots and prevent new film buildup.
on glasses and
To remov e stubborn spots and pre-existing film from glassware:
flatware
1 Remove all metal utensilsfrom the dishwasher.
2 Do not add detergent.
3 Star tthe dishwasher and allow to run for 30 minutes. Dishwas her
will now be in the main wash.
4 Open the door and pour 2 cups (500 ml) of white vinegar into the
bottom of the dishwasher.
5 Close the door and allow to complete the cycle. If vinegar rinse does not
work: Repeat as above, Except use 1/4 cup (60 ml) of
citric acid crystals
instead of vinegar.
Cloudiness on
Combination of soft water and
This is called Etching and is permanent. To prevent this from happening,
glassware
too much detergent
Use less detergent if you have soft water. Wash glassware in the shortest
cycle that willget them clean.
Water temperature entering
Lower the water heater temperature.
the dishwasher exceeds 150°F
Black or gray
Aluminum utensils have
Remove marks with a mild, abrasive cleaner.
marks on dishes
rubbed again st dishes
Yellow or brown film
Tea or coffee stains
Remove the stain by hand, using a solution of 1/2 cup bleach and
on inside surfaces
3cupswarmwater.
CAUTION
Before cleaning interior wait at least 20 minutes after a cycle for the
temperature to cool down. Failure to do can result in scalding.
An overall yellow or brown film can
A special filter in the water supply line is the only way to correct
be caused by iron deposits in water
this problem. Contact a water softener company .
White fil m on inside Hard water minerals
To clean the interior, apply dishwasher detergent to a damp sponge.
surfaces
W ear rubber gloves.
Do not
use any type of cleanser other than
dishwasher detergent because it may cause foaming or sudsing. Cascade
Cascade CompleteAnd Electrasol Automatic Dishwashing Detergents
have been approved foruse in your dishwasher.
Dishes don t dry
'
Low inlet water temperature
Make sure inlet water temperature is correct (see pa ge4 ).
Rinse agent dispenser is empt y
Check the rinse agent dispenser.
Dishwasher won t
'
Fuse is blown, or the
Replace fuse or reset circuit breaker. Remove any other appliances
circuit breaker tripped
from thecircuit.
Steam Thisisnormal
Steam comes through the vent during washing, drying and when
water is being pumped out.
Extremely hard water
Low inlet water temperature
Overloading the dishwasher
Improper loading
Old or dam ppowder detergent
Rinse agent dispenser empty
Too little detergent
Before you call for service
run
Page 15

The installation of the pipes
and electrical equi pments
should be doneby professionals.
Electrical ShockHazard
Disconnect electricalpower
before
installingdishwasher.
Failureto do so can resultin
deathor electrical shock.
The i nstallati on positi on o f d ishwashe r sho uld benear the existi ng i nlet and drai n ho ses and
power cord.
One side of th e ca binet sink sh ould be chosen tofacilita te t he c onnectio n of drain ho ses of
the dishwasher.
Installationpreparation
Note: pl ease check the accompanying installation a ccessorie s(hook for aes thetic panel,screw)
●
Minimumspace when
the door is opened
【】Figure2
Cabinetdimensions
【】Figure1
Cabinet
Dishwasher
Doorof
dishwasher
Minimum space of 50mm
Lessthan5mm
betweenthe top
ofdishwasher and
cabinetand the
outerdoor aligned
tocabinet.
90 °
90 °
600mm
825-860mm
100
580mm
80
Space between cabinet
bottom and floor
Electrical, drain and
water supply line
entrances
13
 Loading...