

Page 1
Microtek LightLid
Series Products
Installation and Scanning Guide
Copyright © 2000 Microtek International Inc. I49-02802A, January 2000
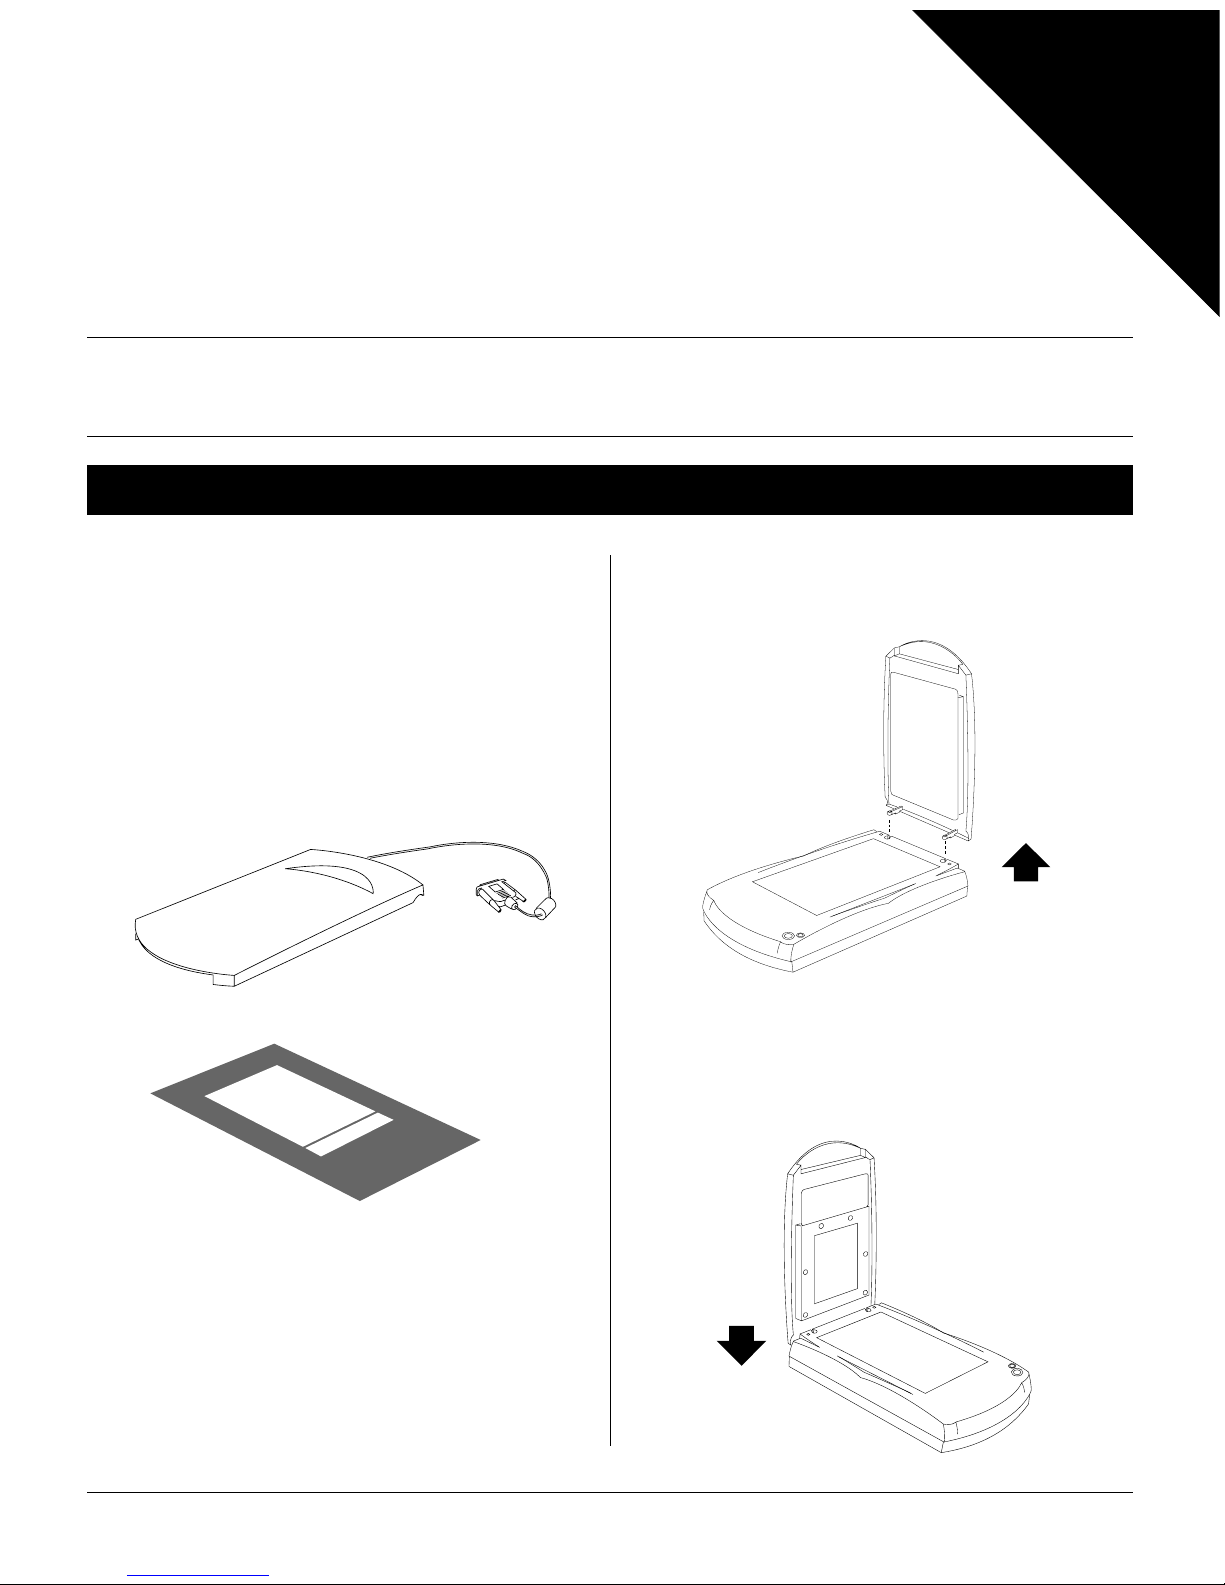
1.Unpack LightLid
The LightLid is a scanner accessory that is used to
scan transparent materials with your flatbed
scanner. Before proceeding any further, check to see
that all items are in the package. If any item is
missing, contact Microtek Customer Service.
3.Remove the scanner
lid
This document provides information on how to connect the LightLid to your scanner and how to scan transparent
materials with it.
Installation
For
Windows
& Macintosh
NOTE: Before installing the LightLid, your scanner
should be installed and ready to scan.
2.
T urn off your scanner ,
then computer
4.Install LightLid
Insert the two LightLid guide pins into your scanner.
Template
LightLid
Page 2
2
English
Deutsch
Français
Italiano
Nederlands
Español
Accessory Port
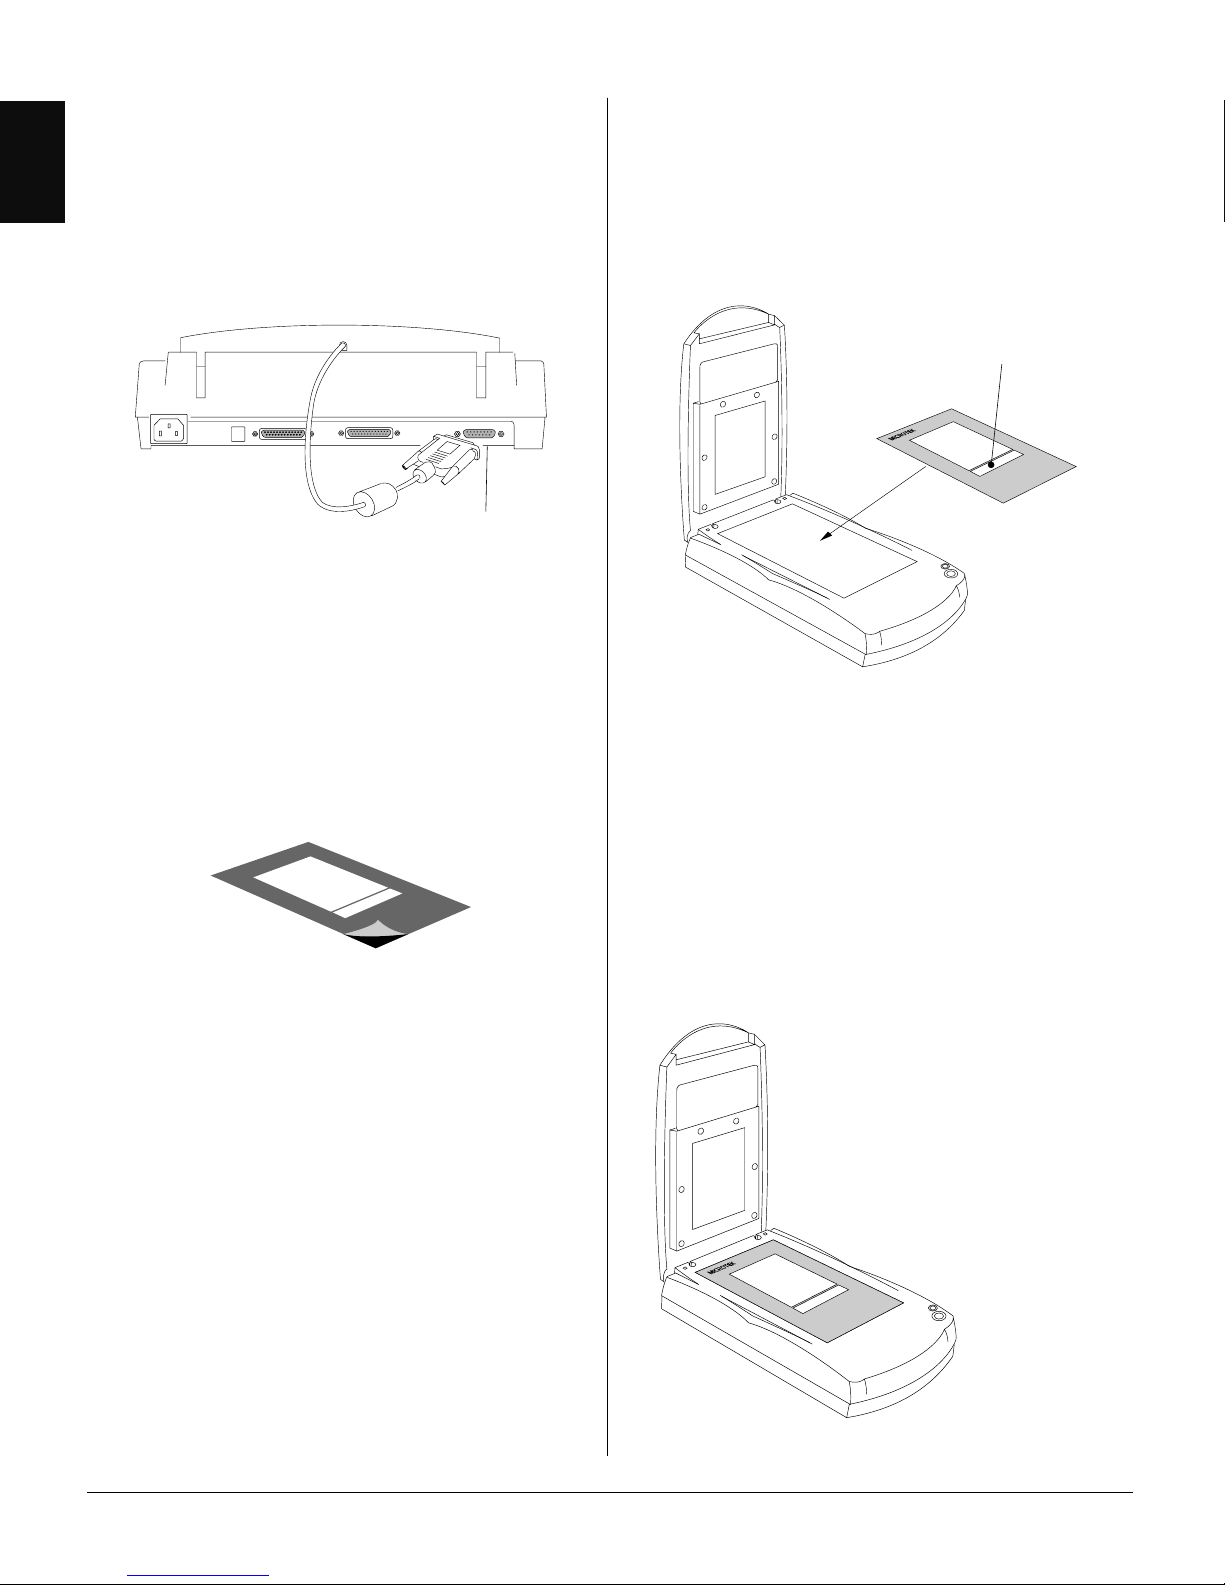
5.Connect LightLid to
your scanner
Plug the LightLid connector into the 15-pin
Accessory port on the back of your scanner.
6.
Peel off the protective
vinyl film
Peel off the protective vinyl film from the back of
the template.
The protective vinyl film covers the template during
shipping and prevents it from being scratched.
When peeling the vinyl film from the template, be
careful not to tear off or bend the template.
Template should fit snugly
within the scanner glass
surface and not overlap on
the vertical/horizontal rulers.
8.Press the template
against the glass
surface
Press the template all the way around against the
scanner glass bed. This ensures that the template
adheres securely to the glass.
7.
Position the template
Place the template on the scanner glass surface. The
clear opening strip should point toward the front of
the scanner.
Clear opening strip
Page 3

3
English
DeutschFrançais
Italiano
Nederlands
Español
Warning: To scan transparent or negative film, the
template should always stay on the scanning bed. If
the template is removed or incorrectly placed, the
scanner will not work properly. The clear opening
strip of the template is the color calibration area,
and this area must be kept clear from any
obstructing or overlapping material, such a the film
being scanned. Covering this calibration area may
adversely affect the quality of your scanned images
and also cause the scanner to malfunction.
R
R
9.Position the material
to be scanned
Place the transparent material to be scanned, face
down on the scanner glass surface, inside the
template.
Make sure the film being
scanned does not in any way
block, obstruct, or overlap the
clear opening strip of the
template.
Close-up view
Page 4

4
English
Deutsch
Français
Italiano
Nederlands
Español
10. Scan an Image
1. Power up your scanner and then the computer .
2. Press the scanner’s “Go” button, or double-click
the ScanWizard 5 icon on the desktop to
launch ScanWizard 5.
3. When ScanWizard 5 launches, it automatically
performs a fast preview of the material on your
scan bed and displays it in the preview area.
4. In the preview window, you can resize the
floating dotted line around the image by
dragging on the edge or corner of the scan
frame to determine the final size of the actual
scan.
5. To make adjustments to the image, use the tool
buttons. To scan the image, click the Scan to
button. The image is then scanned and saved to
a file. Aside from saving, you may also deliver
the saved image to an image-editing software, an
e-mail editor , or a web browser.
To switch to the Advanced Control
Panel window
To save the scanned image
to a file, or deliver it to an
image-editing program,
an e-mail editor, or a web
browser.
To specify image settings
To exit ScanWizard 5
After launching ScanWizard 5, you may want to
change the scan material. To do this, click the
Original button, select Film, then Positive
Film or Negative Film.
If you are running ScanWizard 5 in Advanced
Control Panel mode, click on the Scan Material
icon, then select Positive Film or Negative Film.
 Loading...