

Page 1
Copyright©2004 Microtek International, Inc. http://www.microtek.com
I49-003702 A, March 2004
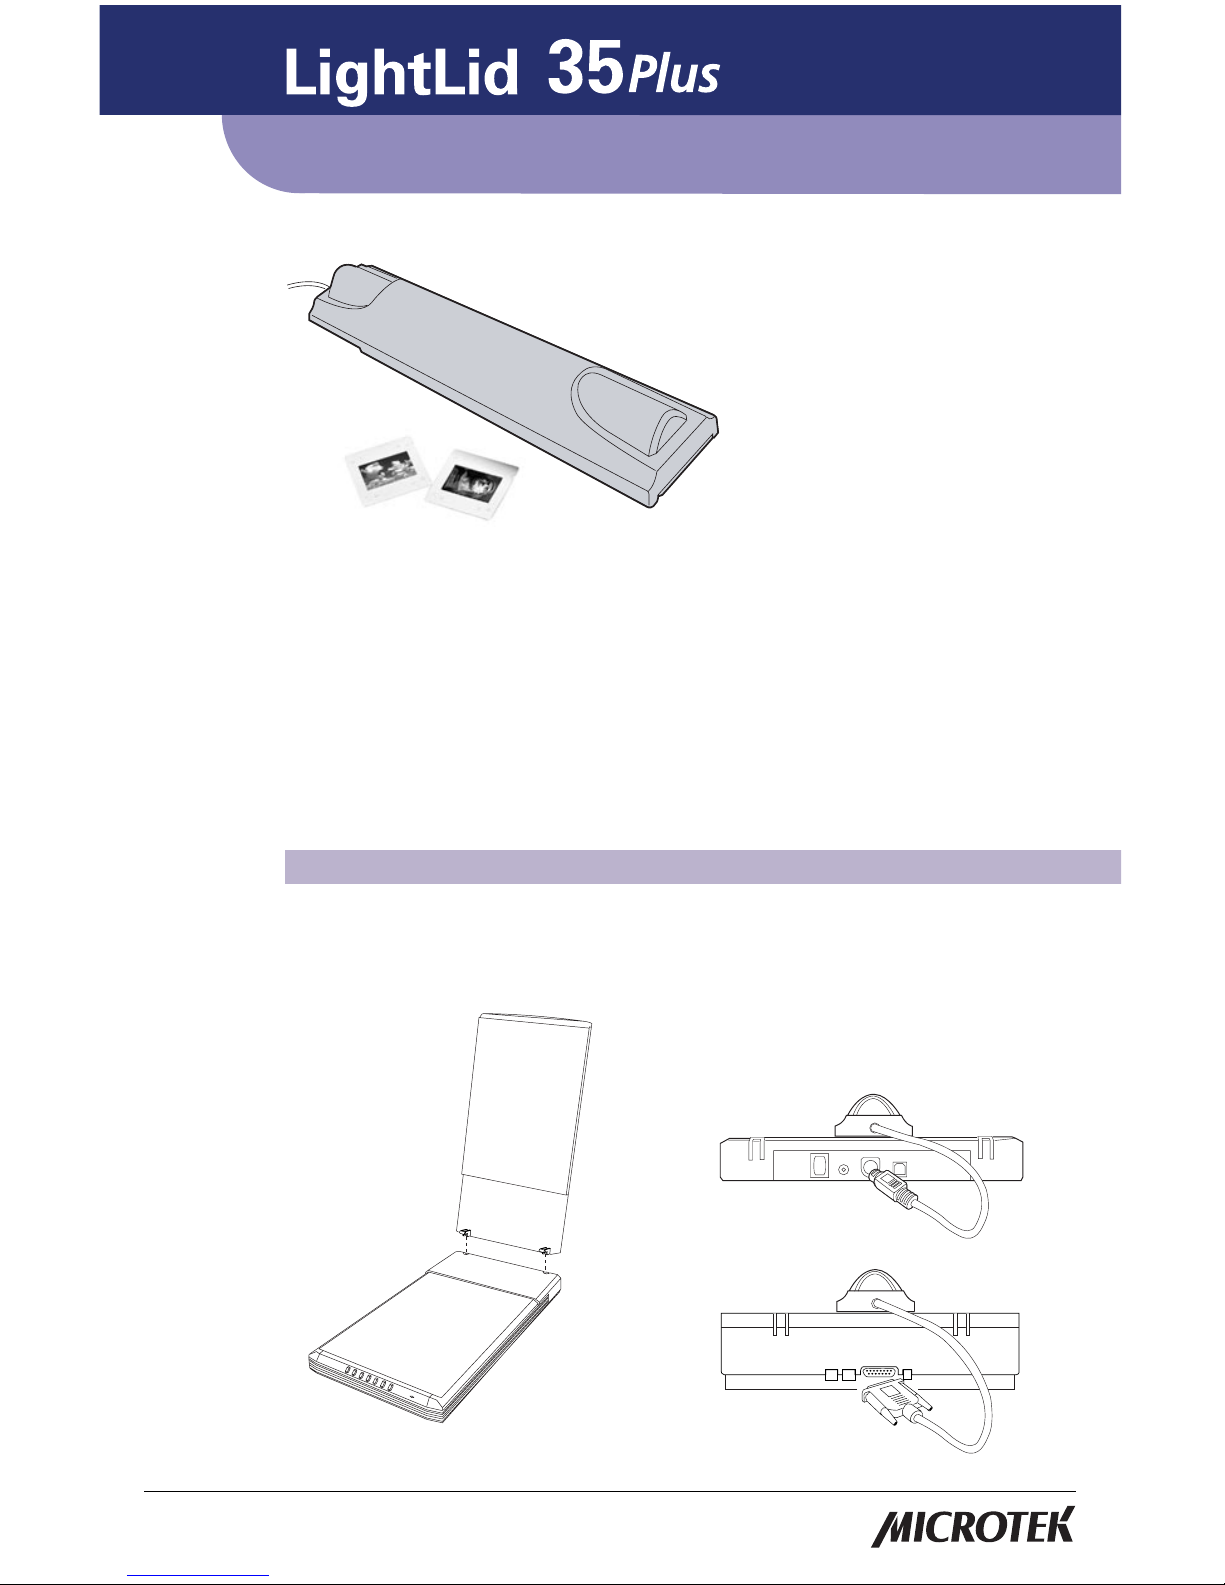
The LightLid 35 Plus is a bonus accessory included with your Microtek scanner,
providing you with the versatility to scan 35mm slides and filmstrips on your flatbed
scanner.
Microtek recommends the use of this accessory to scan slides for on-screen display
purposes or where high resolution is not critical. For high-quality print reproduction, we
recommend purchasing a dedicated slide scanner or a Microtek scanner with built-in
film-scanning features.
Please note: Scanning of color transparencies may vary, depending on the quality of
your film original.
A. Installing the LightLid 35 Plus
1. Unpack the LightLid 35 Plus.
2. Remove the scanner lid.
3. Plug the connector (9-pin or 15-pin) of
the LightLid 35 Plus into the accessory
port at the back panel of your scanner.
Note: Make sure the scanner is powered
off before making the LightLid 35 Plus
connection.
9-pin connector
15-pin connector
Installing and Getting Started
Page 2
2 LightLid 35 Plus Installing and Getting Started
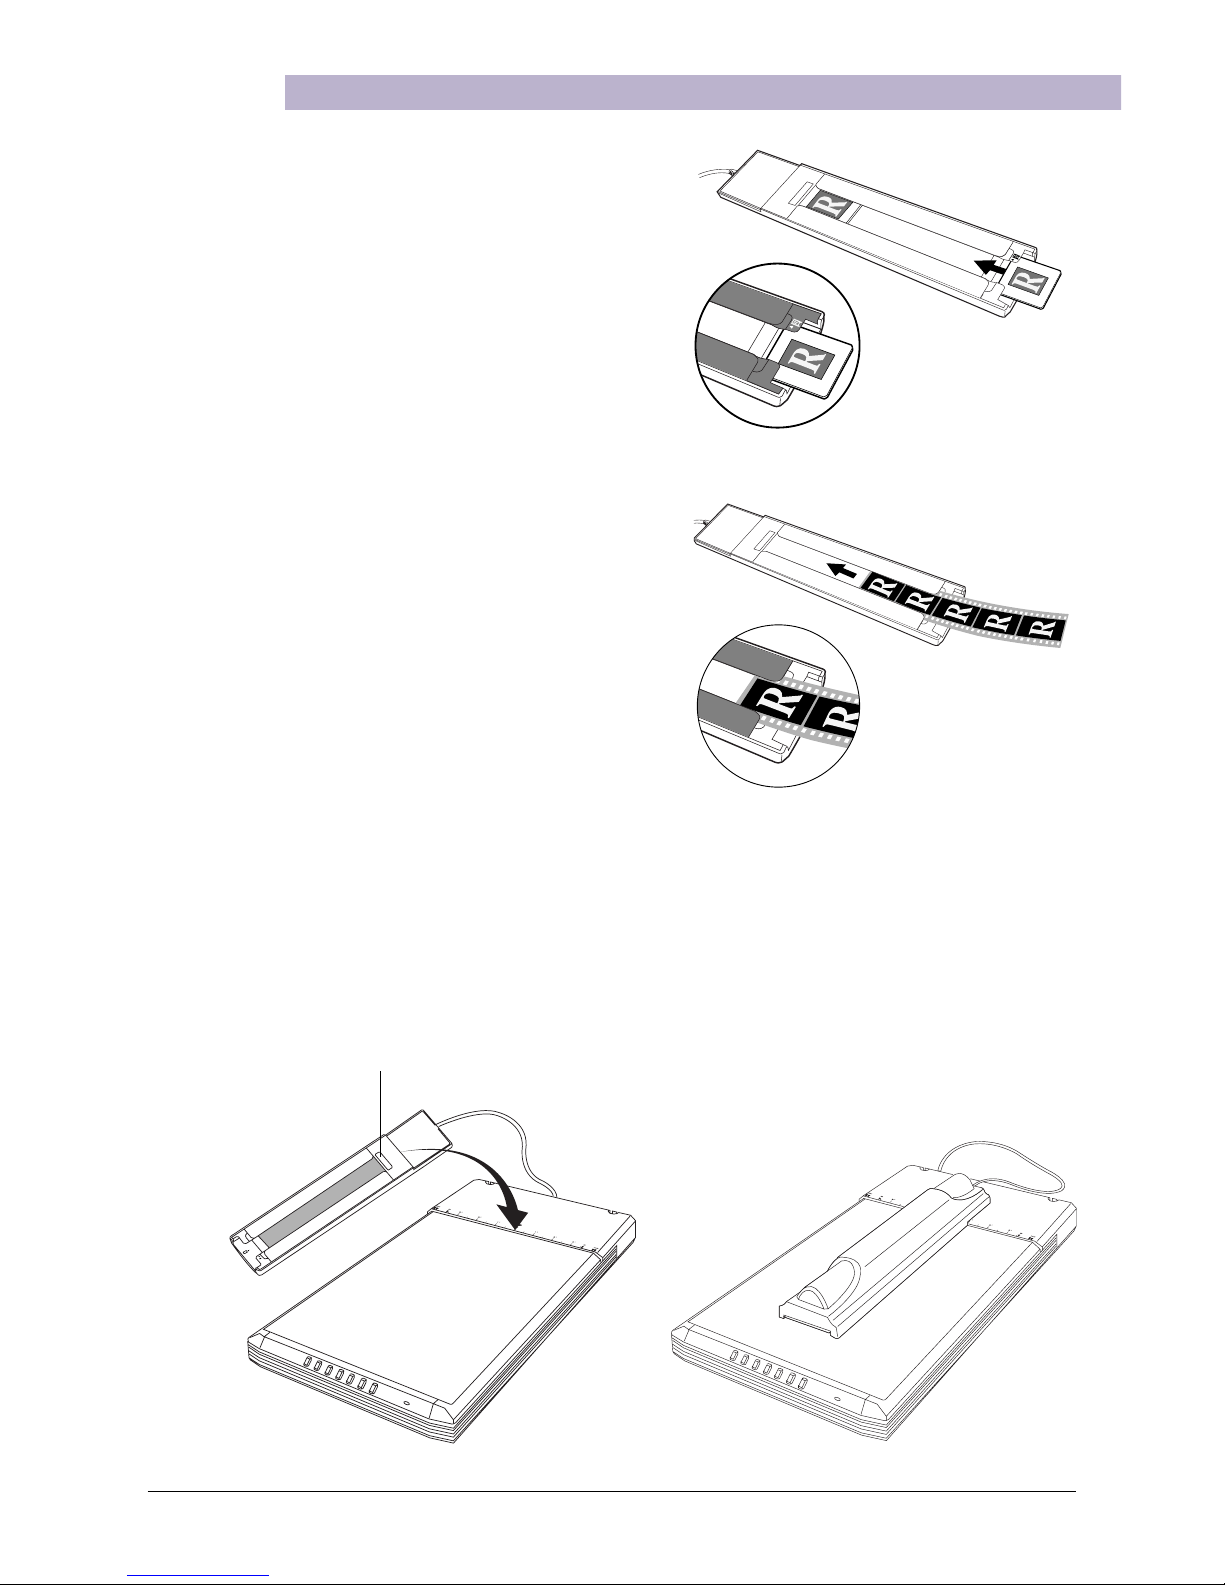
B. Positioning the LightLid 35 Plus
The lower slots are for
loading 35mm slides
The upper slots are for
loading 35mm filmstrips
1. Load the transparent film.
A. Loading 35mm slides:
Turn the LightLid 35 Plus over. Load
the 35mm slide face up along the slots
of the LightLid.
The slides should be inserted inside the
slots specifically allotted for slides, as
shown in the illustration.
A maximum of four slides can be
loaded at a time into the LightLid 35
Plus.
B. Loading 35mm filmstrips:
Turn the LightLid 35 Plus over. Load
the 35mm filmstrip face up inside the
slots of the LightLid.
The filmstrip should be inserted inside
the slots specifically allotted for film,
as shown in the illustration.
A maximum of five frames in a
filmstrip can be scanned at a time.
2 . Place the LightLid 35 Plus vertically on the glass surface of the scanner, and center
it along the top ruler of the scanner.
Important: Place lengthwise on
center of scan bed and align notch
flush with the top edge of the glass.
Ensure that the calibration window
is kept clear and free from any
obstruction for successful calibration
and best image results.
Page 3

C. Scanning your transparent film
Launch the ScanWizard 5 scanning software in stand-alone mode or from your imageediting software, then select your scan material and start scanning. ScanWizard 5 has
two modes — Standard and Advanced — and each mode has its own way of selecting
the scan material and scanning. Each mode of operation is shown below.
A. Standard Control Panel:
1 . Double-click the ScanWizard 5 icon ( ) on your desktop to launch the ScanWizard
5 Standard Control Panel.
When ScanWizard 5 launches, it automatically performs a fast preview of the
material on your scanner glass surface and displays it in the preview area.
2 . Click the Original button, and choose Positive Film or Negative Film, depending on
the film you wish to scan.
When selected, the light source of the LightLid 35 Plus lights up.
3. Click the Preview button to perform a preliminary view of the entire image.
4 . In the preview window, you can resize the scan frame (floating dotted lines) around
the image by dragging on the edge or corner of the scan frame to determine the
final size of the actual scan.
5 . Click the Scan to button to scan the image.
After the scan, the scanned and processed image can be saved as a file, opened in an
image-editing program, sent to a printer, attached in an e-mail, or uploaded to a
website.
LightLid 35 Plus Installing and Getting Started 3
To obtain best
results when
scanning with the
LightLid 35 Plus,
set the scan
Resolution to a
minimum 600 dpi
and the Scaling to
100%.
Page 4

B. Advanced Control Panel:
1 . Launch the ScanWizard 5 scanning software, then click the Switch icon ( ) on the
right corner of the Standard Control Panel to switch to Advanced Control Panel.
2 . Click the Scan Material button, and choose Positive Film or Negative Film,
depending on the material you wish to scan. Note: For Mac OS X, select Positive or
Negative from the Scan Material pull-down menu.
When selected, the light source of the LightLid 35 Plus lights up.
3. Click the Overview button to perform a preliminary view of the entire image.
4 . In the preview window, you can resize the scan frame (floating dotted lines) around
the image by dragging on the edge or corner of the scan frame to determine the
final size of the actual scan.
5 . Click the Scan to button to scan the image.
After the scan, the scanned and processed image can be saved as a file, opened in an
image-editing program, sent to a printer, attached in an e-mail, or uploaded to a
website.
4 LightLid 35 Plus Installing and Getting Started
To obtain best results when
scanning with the LightLid
35 Plus, set the scan
Resolution to a minimum
600 dpi and the Scaling to
100%.
 Loading...