

Page 1
Page 2
21
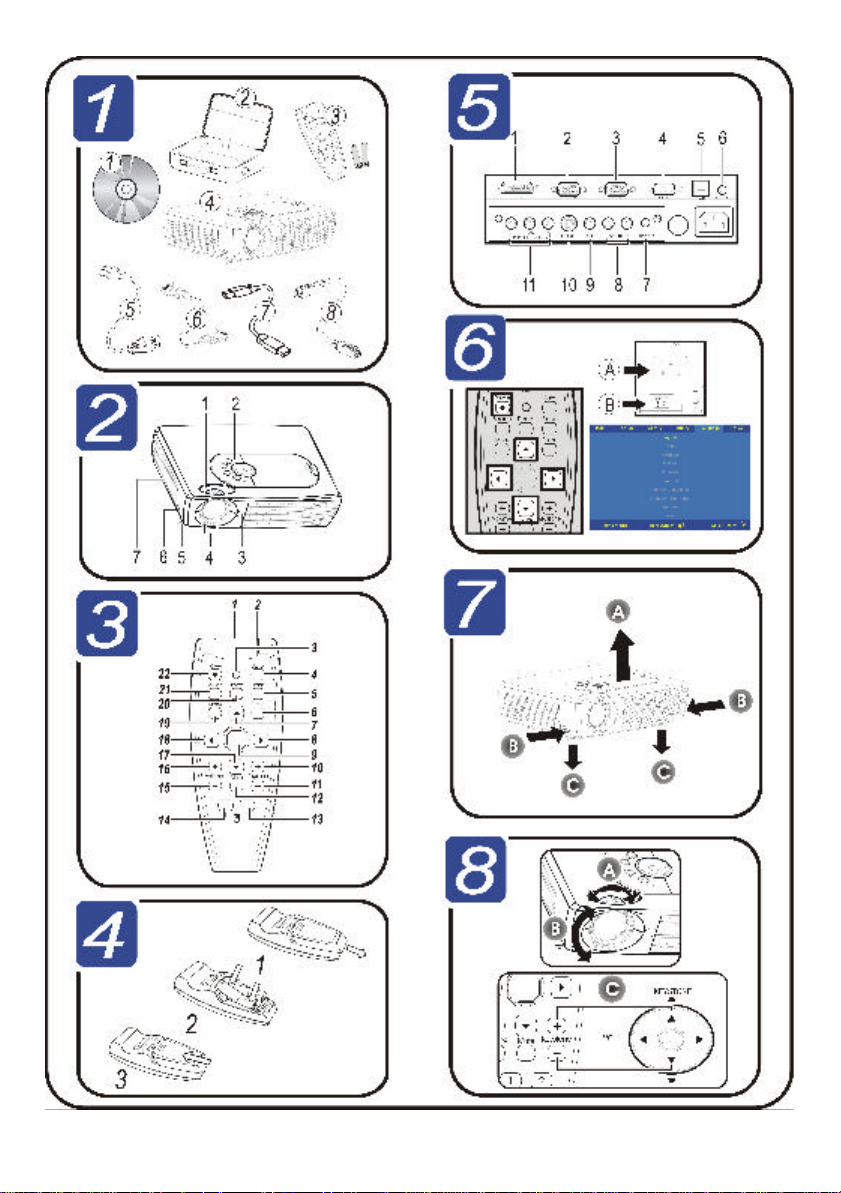
CHECK PARTS LIST
ojector.
Parts List
1.
CD-ROM (User ma nual)
2. Carrying case
3. Remote control with batteries
4. Projector
5. Power cord
6. Computer cable (DVI-DB15)
7. USB cable
8. S-video cable
2
I DENTIFY PROJECTOR PARTS
Projector Parts Description
1. Turn to adjust zoom
2. Projector controls
3. IR receiver
4. Turn ring to focus
5. Side foot—adjusts level of projector
6. Height adjuster button—push to ad-
just height
7. Speaker
23
I DENTIFY REMOTE PARTS
Remote Buttons Description
1. Use as on-screen pointer. DO NOT
POINT IN EYES.
2. Transmits signals to projector
3. Lights when the remote is used
Optimizes image size, position, and
4.
resolution
5. Makes the screen blank
6. Changes settings in the OSD
7.
Navigates and changes settings in
the OSD
8.
Moves the on-screen cursor when
9.
connected to a PC
10.
Corrects keystone (wider top/bottom)
effect
11
12 Mutes the built -in speaker
13
Function as mouse buttons when
connected to a PC
14
15
Adjusts volume
16
17
Navigates and changes settings in
the OSD
18
19 Opens the On-Screen Display (OSD)
20 Freeze/unfreezes the on-screen pic-
ture
21 Detects the input device
22 Turns the projector on or off
4
INSERT REMOTE CONTROL BATTERY
Remove the battery
1.
compartment cover by sliding
the cover in the direction of the
arrow.
Insert the supplied batteries
2.
taking note of the polarity (+/-).
Replace the cover.
3.
—— QQuuiicckk SSttaarrtt GGuuiiddee ——
Page 3
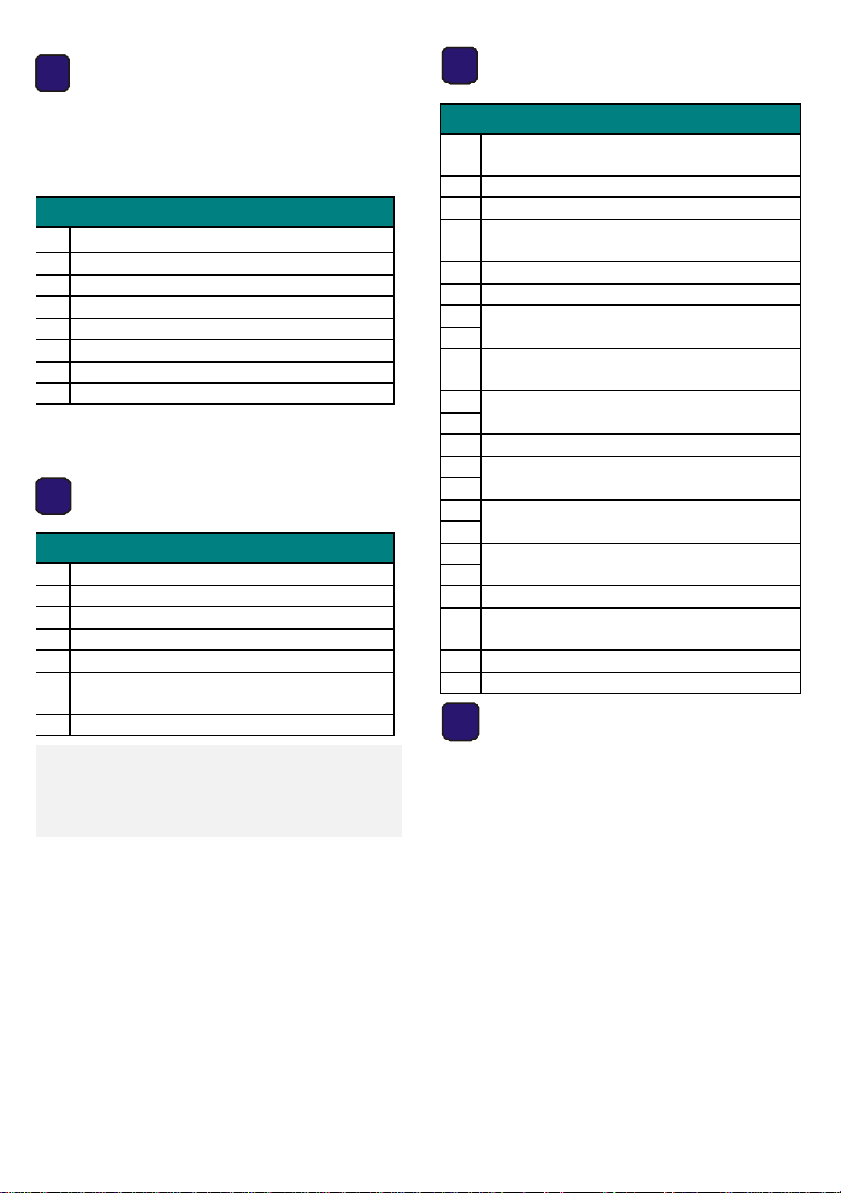
25
MAKE CONNECTIONS
Label Description
1.
2.
3.
4.
5.
6.
7.
8.
9.
10.
11.
DVI-I in
RGB in
RGB
out
RS-232
USB
Audio-
in
Audioout
LAudioR
Video
in
S-video
Comp onent
Video in
Connect the supplied DVI
cable from a co mputer.
Connect an RGB cable
from a computer (not supplied).
Connect an RGB cable (not
supplied) to an external
monitor.
Reserved service port for
firmware upgrades.
Connect the supplied USB
cable from a co mputer.
Connect an audio cable
(not supplied) from the
computer’s audio-out connector.
Connect an audio cable
(not supplied) to audio-in
port of a amplifier device
Connect an audio cable
(not supplied) from a video
device.
Connect a composite video
cable (not supplied) from a
video device.
Connect the supplied Svideo cable from a video
device.
Connect a component video
cable (not supplied) from a
video device.
ecting
nnections.
6
POWER ON/ OFF AND SET LANGUAGE
Connect the power cord to the
1.
projector (A). Connect the other
end to a wall outlet.
Turn the main power switch on
(B).
The Power LED and Lamp -ready
LED turn on.
Turn on the connected devices.
2.
Ensure the Lamp-ready LED is
3.
orange (not flashing) and then
press the Power button to turn
on the projector (B).
The projector splash screen
displays and connected devices
are detected.
Press the Menu button and then
4.
press the cursor button until
Language is highlighted (C).
Press the cursor button until
5.
the language you want is
highlighted (D).
Press the cursor ENTER button
6.
to confirm the language.
Press the Menu button twice to
7.
close the OSD.
To turn off the projector, press
8.
the power button once and then
again after the prompt. Then,
turn off the main power switch.
—— QQuuiicckk SSttaarrtt GGuuiiddee ——
Page 4

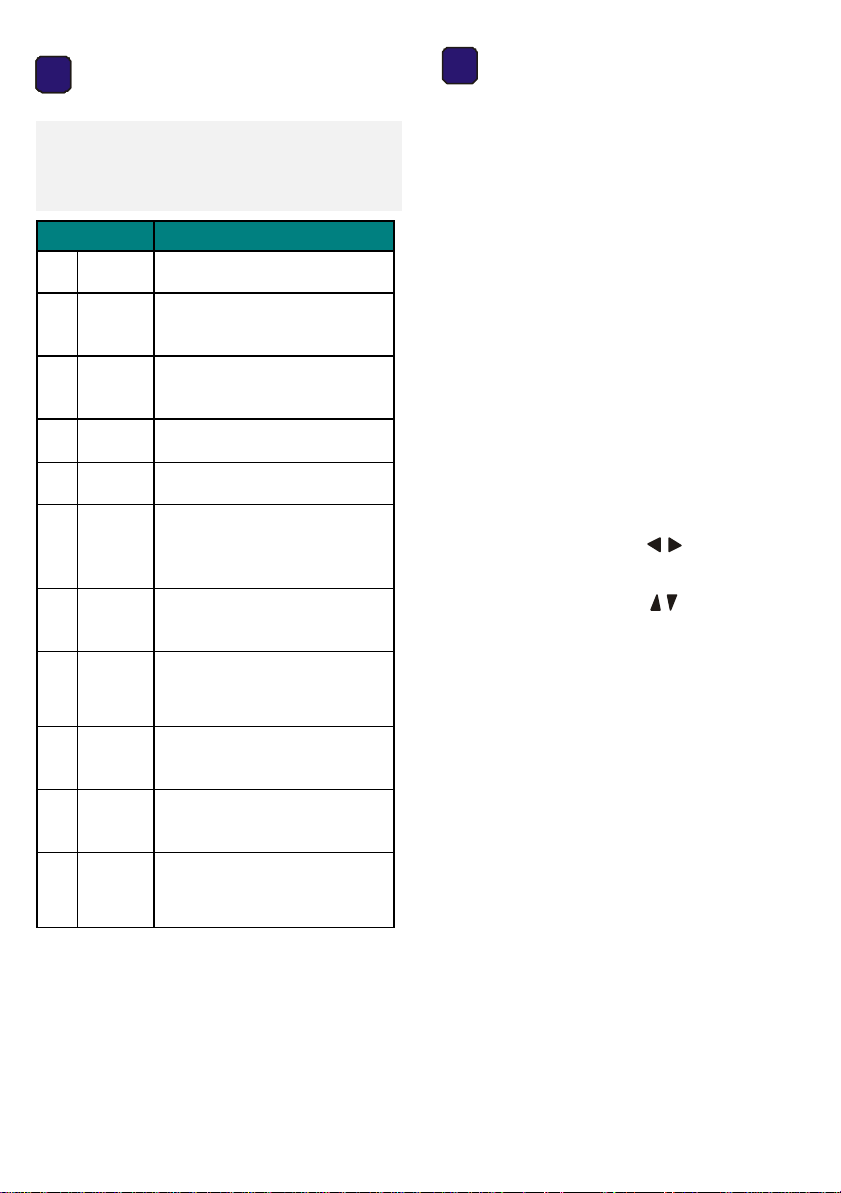
7
tions.
ADJUST PROJECTOR LEVEL
NEED MORE I NFORMATION?
To raise the level of the
1.
projector, lift the projector (A)
and press the height adjuster
buttons (B).
The height adjusters drops down
(C).
To lower the level of the
2.
projector, press the height
adjuster buttons [B] and push
down [A] on the top of the
projector.
28
ADJUST I MAGE AND VOLUME
Use the Image-zoom control (on
1.
the projector only) to resize the
projected image and screen size
(A).
Use the Image-focus control (on
2.
the projector only) to sharpen
the projected image (B).
Use the Keystone buttons (on
3.
the remote control or projector)
to correct keystone (wider top or
bottom) effect (C).
The CD-ROM that shipped with your projector features a detailed user manual in
a printer-friendly format. The user ma nual includes detailed hardware,
operation, and maintenance descrip
You will also find troubleshooting proc edures and instructions on securing the
projector by means of a security lock.
The projector has an On-Screen Display
(OSD) that lets you make image adjus tments and change various settings. To
open the OSD, press the Menu button
on the remote control. Use the remote
Cursor buttons to navi gate and make
changes to the projector settings.
Refer to the “On-Screen Display Settings” section of the CD-ROM user
manual for more information.
Warning message:
Before unplug power cord, pls ensure
the Lamp-ready LED is orange (not
flashing).
Use the Volume buttons (on the
4.
remote control or projector) to
adjust the volume.
—— QQuuiicckk SSttaarrtt GGuuiiddee ——
 Loading...