

Page 1
Page 2

Copyright © 2005 Microtek International,Inc.
Microtek® is a registered trademark of Microtek International, Inc. All
other trademarks or registered trademarks are the property of their
respective holders. Specifications, software and hardware bundles
are subject to change without notice. Delivery of technical support
services subject to change without notice. Not responsible for
typographical errors.
219-20-990418 A
2
Page 3

Contents
Caution .............................................................................. 4
The Microtek MF-202 Audio Player ........................................ 5
SD/MMC Memory Card Support ............................................. 7
Package Components ........................................................... 8
The LCD Screen .................................................................. 9
Turning On the Player ......................................................... 10
Turning Off the Player ........................................................ 10
Playing Music .................................................................... 11
Selecting the Menu Functions .............................................. 12
Setting Your Recording ....................................................... 14
How to Record .................................................................. 16
Playing Back Your Recording ............................................... 18
Listening to FM Radio ......................................................... 19
Recording from FM Radio .................................................... 21
Deleting Files .................................................................... 22
Setting the Equalizer ........................................................... 23
Setting the Repeat Mode .................................................... 24
Setting the Auto OFF Time .................................................. 26
Loop Repeat ..................................................................... 28
Viewing Information / Memory Usage .................................... 29
Choosing Your Language ..................................................... 30
Returning to Music Playback Mode ....................................... 31
Connecting to a Computer ................................................... 32
System Requirements ......................................................... 33
Troubleshooting ................................................................. 34
Specifications ................................................................... 37
3
Page 4

Caution
1. Do not expose the device to extreme temperatures (range from
41O to 95OF).
2. Do not expose to moisture.
3. Do not apply excessive pressure to the device.
4. Do not place heavy objects on top of the device.
5. Do not expose the device to chemicals such as benzene or
thinners.
6. Do not expose the device to direct sunlight or heat sources.
7. Do not store in dusty areas.
8. Do not try to disassemble and repair the device yourself.
9. Do not drop the device. This may cause internal damage or
scratches to the surface.
10.Do not turn up the volume too high.
11.Stop using the device or turn the volume down if you experience
ringing in your ears.
12.Do not use wet or rough cleaning cloths. This may scratch or
even damage the device.
13.Some earphone plugs may not fit the remote properly. Use the
included earphone extension if your headphones will not plug in.
4
Page 5
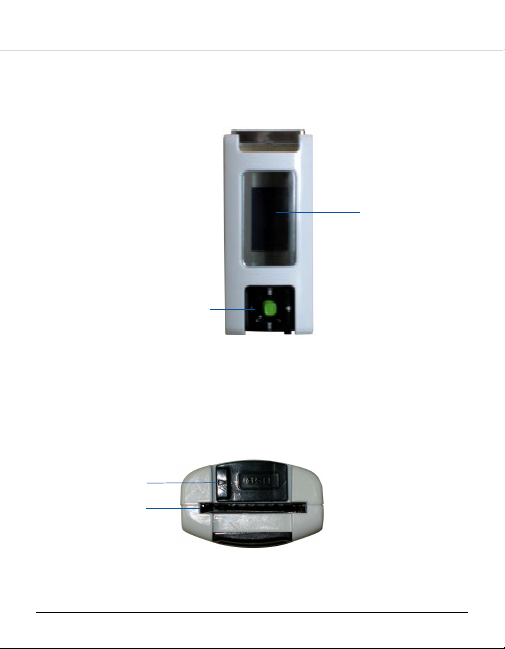
The Microtek MF-202 Audio Player
5-way button
• MENU (Center of button)
• Volume up (Up arrow)
• Volume down (Down arrow)
• Rewind (Left arrow)
• Fast Forward (Right arrow)
USB port
MMC/SD
memory
card slot
LCD screen
5
Page 6
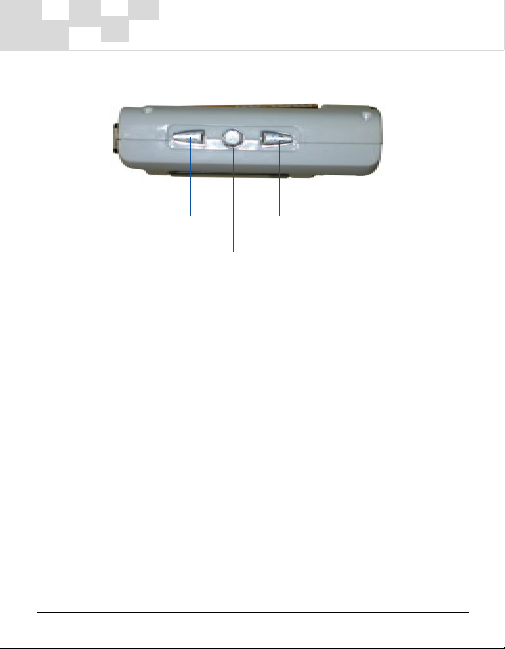
A-B button (Record or loop)EQ (Equalizer)
Play/Pause/Power button
6
Page 7
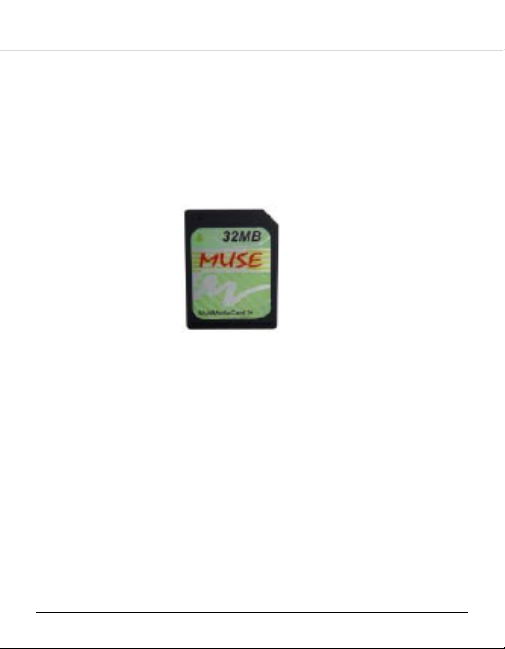
SD/MMC Memory Card Support
The MF-202 Audio Player supports SD and MMC memory cards.
If using an SD or MMC memory card, make sure the card is inserted
correctly into the SD card compartment of the player, located next to
the USB port.
MMC
7
Page 8
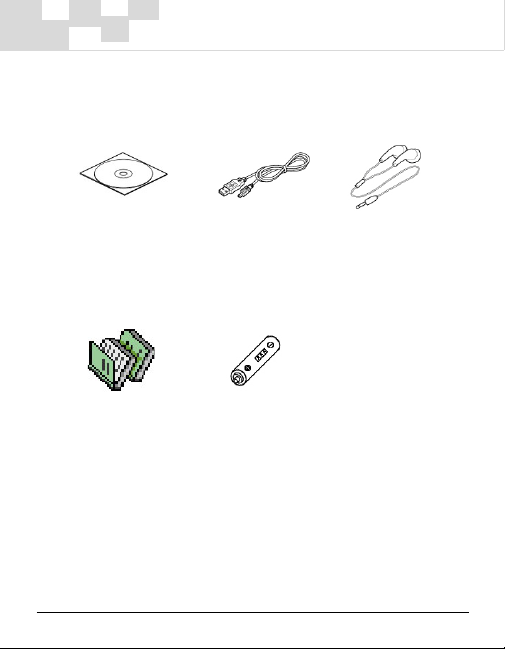
Package Components
Included with the MF-202 Audio Player are the following
components.
Installation CD USB cable Earphone
User Guide AAA battery (1)
8
Page 9
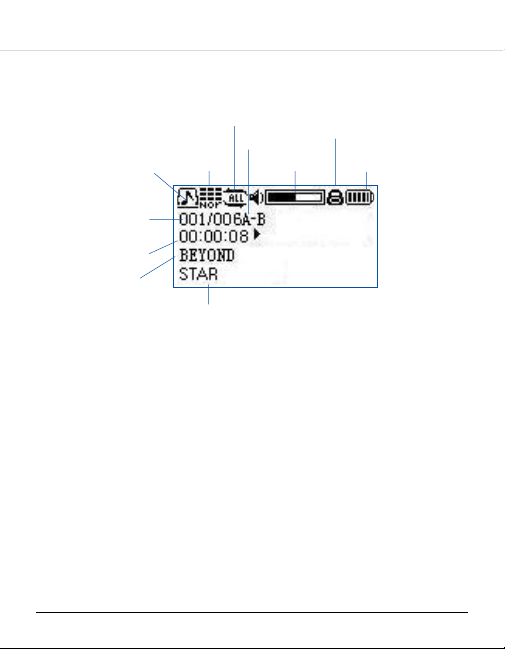
The LCD Screen
Playing mode
Current track/
Total number
of available
tracks
Playing time
Artist
Loop mode
Equalizer
mode
Track name/ title
Loop Repeat
Lock status
Volume Battery Life Indicator
The loop mode includes Repeat Track, Repeat All, Shuffle, Shuffle
Repeat, and Normal mode.
9
Page 10
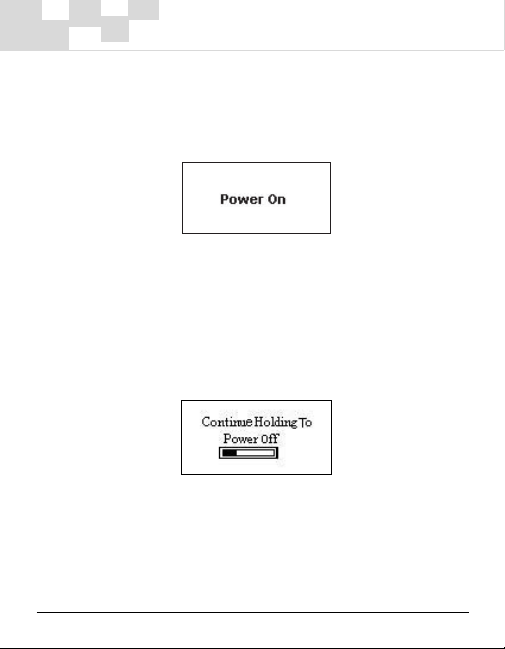
Turning On the Player
Press the Play/Pause button. After about 2 seconds, the LCD screen
displays the message “Power On”.
Turning Off the Player
Press the Play/Pause button. The LCD screen displays the message
“Continue holding to Power off,” after which the player turns off.
10
Page 11
Playing Music
When the player is turned on, it goes immediately into music
playback mode, automatically playing the first track on your playlist.
1. To pause music playback, press the Play/Pause button.
2. Press the Play/Pause button to resume music playback mode.
3. To select the previous track, press the MENU button towards the
LEFT arrow button and release, holding down the button will
rewind segments or passages of the same track.
4. To select the next track, press the MENU button towards the
RIGHT arrow button and release, holding down the button will
forward segments or passages of the same track.
5. To adjust volume, press the MENU button towards the UP or
DOWN arrow button and release. Volume range can be adjusted
to up to 32 levels.
6. To turn off the player, press the Play/Pause button for about 3
seconds or until the player turns off.
11
Page 12
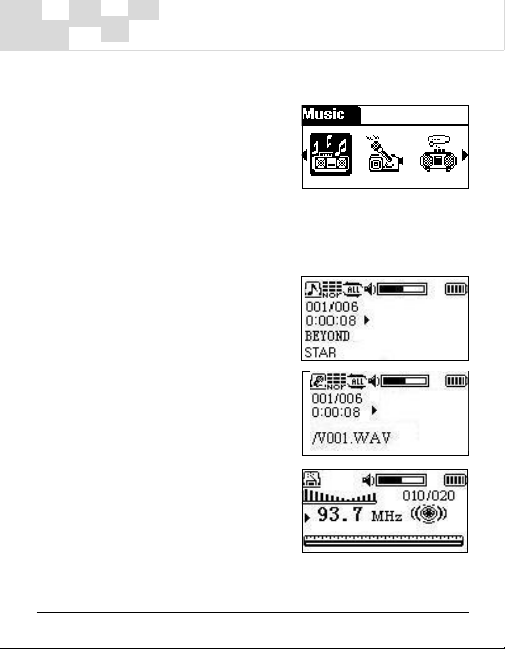
Selecting the Menu Functions
1. Press the Play/Pause button to turn on the player.
2. Press and hold down the MENU button.
3. Press the MENU button towards the
LEFT or RIGHT arrow button to
cycle through the menu functions.
4. To select a menu function, press the MENU button again. Once
inside a menu function, press the MENU button at any time to go
back and see the menu selections.
The menu functions include the following:
• Music: This function lets you enter
music playback mode. See the
section “Playing Music” for more
information.
• Voice: This function lets you play
back your recordings in either MP3
or WAV formats. See the section
“Playing Your Recording” for more
details.
• FM Tuner: This function lets you
listen to FM radio, as well as record
music from FM stations. See the
section “Listening to FM Radio” for
more details.
12
Page 13

• Setting: This function lets you
determine the parameters for a
variety of settings, including
Repeat, Equalizer, Auto Off,
Record, and Return. These settings
are discussed in various sections
throughout the manual.
• Delete File: This function lets you
delete a music or voice file. See the
section “Deleting Files” for more
details.
• Information: This function shows
you the version number of the
firmware for the MF-202 player, as
well as information relating to the
player’s use of internal and external
memory. See the section “Viewing
Information” for more details.
• Record: This function lets you make
recordings. Recording sources can
include a microphone, the built-in
FM tuner, or an external audio
source. See the section “How to
Record” for more details.
• Language Setting: This function lets
you select the language in which
information is to be displayed in the
player. See the section “Choosing
Your Language” more for details.
• Return: This function returns you to the music playback screen. See
the section “Returning to Music Playback Mode” for more details.
13
Page 14

Setting Your Recording
The MF-202 allows you to record using three different input sources:
through a microphone, through the built-in FM tuner, or through an
external audio source and line feed (line-in).
1. Press the Play/Pause button to turn on the player.
2. Press the MENU button.
3. Press the LEFT or RIGHT arrow button to cycle through the menu
until you see the “Setting” function. The screen below displays:
4. To cycle through the Setting menu, press the LEFT or RIGHT
arrow button again. Release the arrow button when you see “Rec
Setting”.
5. The Record Setting menu now displays, showing the various
recording parameters. Press the LEFT or RIGHT arrow button to
move between parameters (from Source to Encoder to Quality to
Exit, and back).
The default Record Setting values are Microphone (for Source),
MP3 (for Encoder), and Low (for Quality).
14
Page 15

• Source: This parameter determines the source of your recording.
Choose from Microphone, FM, or Line-in (audio feed from an
external source). To toggle between options, press the MENU
button.
• Encoder: This parameter determines the recording format. Choose
between MP3 (compressed audio format, occupies less memory)
or WAV (uncompressed audio format, occupies more memory).
To toggle between options, press the MENU button.
To play back an MP3 file, use the “Music” function in the main
menu. To play back a WAV file, choose the “Voice” function in
the menu (see the section “Playing Your Recording” for more
details).
• Quality: This parameter determines the quality of your recording.
Choose from Low, Medium, or High, with the “High” option
occupying the most memory. To toggle between options, press
the MENU button.
• Exit: This parameter lets you exit the Record Setting feature and
returns you to the Setting function.
15
Page 16

How to Record
The MF-202 lets you record in two ways: through the A-B button, or
through the “Record” function in the menu.
Note: When you use the recording function, the player will make its
recordings based on the default settings of the player or the settings
that were last specified in the “Record Setting” feature (discussed in
the previous section).
A. Recording through the A-B button
1. Press the Play/Pause button to turn on the player.
2. Press and hold down the A-B
button. The player starts recording,
based on the parameters specified
in the “Record Setting” feature (of
the “Settings” function).
3. To stop recording, press the Play/Pause button. The player returns
automatically to music playback mode.
16
Page 17

B. Recording through the “Record” function
1. Press the Play/Pause button to turn on the player.
2. Press the MENU button.
3. Press the LEFT or RIGHT arrow
button to cycle through the menu
until you see the “Record” function,
then press the MENU button again.
The player starts recording, based
on the values specified in the
“Record Setting” feature (of the
“Settings” function).
4. To stop recording, press the Play/Pause button. The player returns
automatically to music playback mode.
17
Page 18

Playing Your Recording
Recordings that are made using the WAV file format can be played
back with the “Voice” function.
1. Press the Play/Pause button to turn on the player.
2. Press the MENU button.
3. Press the LEFT or RIGHT arrow button to cycle through the menu
until you see the “Voice” function, then press the MENU button
again. The player automatically plays the first recorded and stored
WAV file, with the screen below displaying:
4. The following operations can be performed while in the Voice
function:
• To pause playback of the WAV recording, press the Play/Pause
button.
• To move through the track listing, press the LEFT or RIGHT arrow
button and release.
• To move through segments of a track number, press the LEFT or
RIGHT arrow button without releasing.
• To stop playback and return to the menu, press the MENU button.
18
Page 19

Listening to FM Radio
The FM radio function lets you listen to preset or manually selected
radio stations through your player. It also lets you record music from
any FM station of your choice.
1. Press the Play/Pause button to turn on the player.
2. Press the MENU button.
3. Press the LEFT or RIGHT arrow button to cycle through the menu
until you see the “FM” function, then press the MENU button
again.
4. Upon activating the FM function, you are automatically channeled
to the preset mode.
The preset mode has 20 fixed channels, and the player automatically
seeks out the strongest channels in the area or the channels you
have chosen through the manual selection mode to include in your
presets.
19
Page 20

5. To switch to manual selection mode, press the MENU button. The
upper left corner of the screen changes to show manual mode.
Once in manual mode, press the LEFT or RIGHT arrow button to
move up and down the radio frequency in the built-in tuner (in
increments of 100 kHz).
To save a manually selected frequency, press the A-B button
located on the upper panel of the player for a few seconds. The
selected frequency is now stored as a new preset FM channel in
your player.
20
Page 21

Recording from FM Radio
1. Make sure the FM function is selected
from the menu, and go to the radio
station of your choice.
2. To start recording from FM radio, press the A-B button located on
the upper panel of the player.
3. To pause recording and/or to resume recording, press the MENU
button.
4. To stop recording, press the Play/Pause button. This also returns
you to the FM radio mode.
5. To listen to the radio track you recorded, select the Music
function in the menu to go to music playback mode.
21
Page 22

Deleting Files
The Delete File function lets you delete music and voice files from the
player.
1. Press the Play/Pause button to turn on the player.
2. Press the MENU button.
3. Press the LEFT or RIGHT arrow
button to cycle through the menu
until you see the “Delete File”
function, then press the MENU button
again. The screen below displays:
4. The Delete File menu lets you delete a music file, delete a voice
file, or exit the delete file function. To move from one delete
function to another, use the LEFT or RIGHT arrow buttons.
5. To delete a music or voice file, choose “Music” or “Voice” in the
Delete File menu. Use the LEFT or RIGHT arrow buttons to
choose “Yes” or “No”.
After deleting a file, the player returns to the delete mode
automatically to let you continue deleting files. To stop, press the
MENU button to return to the menu.
22
Page 23

Setting the Equalizer
The Equalizer function in the player includes preset values that
provide optimal sound levels geared towards specific genres of music.
For the MF-202 player, choose equalizer modes for Normal, Rock,
Jazz, Classical, or Pop.
1. Press the Play/Pause button to turn on the player. The LCD shows
the music playback screen (shown on page 9), with the Equalizer
mode shown on the top left corner.
2. To change the Equalizer mode, press the EQ button located at the top
panel of the player. Pressing the EQ button cycles through the different
Equalizer modes for Normal, Rock, Jazz, Classical, and Pop.
3. You can also access the Equalizer and cycle through the various
Equalizer modes in the “Setting” function of the menu.
23
Page 24

Setting the Repeat Mode
The MF-202 allows various repeat modes to suit your listening
preferences. Repeat modes include Normal, Repeat Track, Repeat
All, Shuffle, and Shuffle Repeat.
1. Press the Play/Pause button to turn on the player.
2. Press the MENU button.
3. Press the LEFT or RIGHT arrow button to cycle through the menu
until you see the “Setting” function, then press the MENU button
again. The screen below displays:
4. To cycle through the Setting menu, press the LEFT or RIGHT
arrow button again. Release the arrow button when you see the
“Repeat” setting.
5. The Repeat menu now displays, showing the various repeat
modes. Use the LEFT or RIGHT arrow button to make your
selection.
24
Page 25

The repeat modes are as follows:
• Normal: Plays tracks in order.
• Repeat Track: Repeats the current track.
• Repeat All: Repeats all tracks.
• Shuffle: Shuffles tracks at random.
• Shuffle Repeat: Shuffles tracks at random, then repeats the entire
track listing (also at random).
• Exit: Exits the Repeat setting and returns you to the Setting menu.
25
Page 26

Setting the Auto OFF Time
This function lets you set the Auto OFF feature for turning off the
player automatically at a preset time if it is inactive. Choices include
Disable, 1 min (minute), 2 mins, 5 mins, and 10 mins.
1. Press the Play/Pause button to turn on the player.
2. Press the MENU button.
3. Press the LEFT or RIGHT arrow button to cycle through the menu
until you see the “Setting” function, then press the MENU button
again. The screen below displays:
4. To cycle through the Setting menu, press the LEFT or RIGHT
arrow button again. Release the arrow button when you see the
“Auto OFF” setting.
5. The “Auto OFF” menu now displays, showing the various closing
times for the player. Use the LEFT or RIGHT arrow button to
make your selection.
26
Page 27

• If you choose “Disable” as your Auto OFF setting, the player will
not turn off automatically unless you press the Play/Pause button
to shut it down.
• If you choose any of the time settings from 1 minute to 10
minutes, the player turns off automatically after the selected
number of minutes when the player is in Stop or Pause mode for
that amount of time.
• Choose “Exit” from the Auto OFF menu to exit and return to the
Settings menu.
27
Page 28

Loop Repeat
The loop repeat function makes it easy to repeat a particular section
of a music track.
1. Go to the segment of the track where you wish the loop to begin,
then press the A-B button located on the upper panel of the
player.
2. Go to the segment of the track where you wish the loop to end,
and press the A-B button once again. The desired loop will now
play repeatedly.
3. To cancel the loop, press the A-B button again.
28
Page 29

Viewing Information / Memory Usage
The Information function lets you view information relating to the
player and the way memory is being used.
1. Press the Play/Pause button to turn on the player.
2. Press the MENU button.
3. Press the LEFT or RIGHT arrow button to cycle through the menu
until you see the “Information” function, then press the MENU
button again. The screen below displays:
• The first line on the screen shows the firmware version number of
the player.
• The second line on the screen indicates the internal memory
used, relative to the total internal memory available.
• The third line on the screen indicates the external memory used,
relative to the total external memory available. External memory
is obtained with the use of a memory device, such as an MMC or
SD card.
29
Page 30

Choosing Your Language
This function lets you choose the language in which the player
displays information, including track title and artist/performer.
1. Press the Play/Pause button to turn on the player.
2. Press the MENU button.
3. Press the LEFT or RIGHT arrow button to cycle through the menu
until you see the “Language Setting” function, then press the
MENU button again. The screen below displays:
4. The Language Setting menu now displays, showing “English” and
“Chinese” as your choices. Use the LEFT or RIGHT arrow button
to make your selection.
5. To exit the function and return to the main menu selections,
choose “Exit”.
30
Page 31

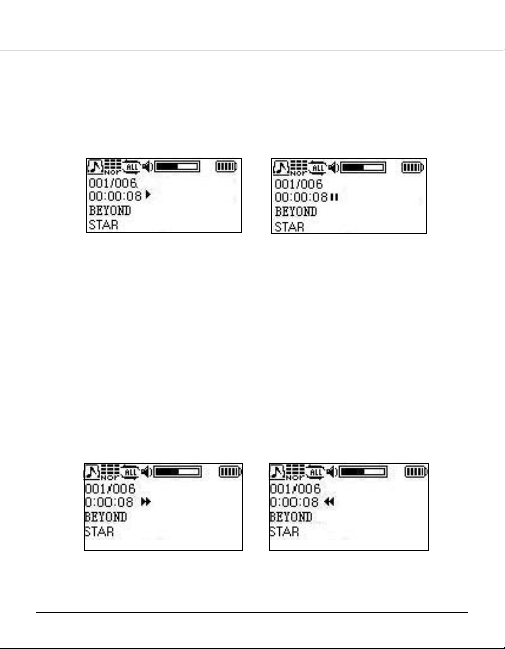
Returning to Music Playback Mode
This function returns you from any of the menu functions or items
back to the music playback screen.
1. Press the Play/Pause button to turn on the player.
2. Press the MENU button.
3. Press the LEFT or RIGHT arrow button to cycle through the menu
until you see the “Return” function, then press the MENU button
again.
You are returned to the music playback screen in “stop” mode.
Music playback screen
in “stop” mode
To resume music playback, press the Play/Pause button once
more.
Music resumes
playing
31
Page 32

Connecting to a Computer
Before connecting the player to a PC, check to make sure that the
PC has an available USB port for connection.
In addition, make sure that the software for the player (included in
your installation CD) has been installed in your PC.
1. Turn on the player and the PC.
2. Connect one end of the USB cable to the player’s USB port.
3. Connect the other end of the USB cable to an open USB port on
the computer.
4. The player switches automatically to
USB mode.
5. The player is recognized as removable storage and is assigned a
drive letter. You can view, add, and delete files by navigating to
the player via My Computer.
32
Page 33

System Requirements
• IBM or compatible computer
• Pentium 166 MHz or higher processor, or equivalent
• Windows 98SE/ 2000/XP
• USB port
• 32MB memory (64MB preferred)
• 20MB hard disk space
• CD-ROM drive (4x or greater)
• Internet access (recommended)
33
Page 34

Troubleshooting
Note: The USB 2.0 connection is a plug-and-play interface. Plug and
play is supported only on Window 2000, ME, and XP. When using
Windows 98, it is strongly suggested that users first install the driver
and then connect the player. This way, the player will be recognized.
The management software includes the driver, and if the management
software is installed, there is no need to install the driver.
File transfer speeds differ depending on the operating system in use.
A transfer is complete when the file transfer animation ends.
1. Problem: The player does not power on.
Reason: There is no battery loaded.
Solution: Check to see if there is an AAA alkaline battery loaded.
If so, remove the battery, wait 5 seconds, and replace correctly.
Power on the player. If this does not work, replace the battery.
2. Problem: After powering on the player, music cannot be played.
Reason: The hold switch is engaged.
Solution: The hold switch is located on the bottom of the player.
Slide the hold switch toward the direction opposite the arrow
indicator.
3. Problem: After connecting the player to a PC, the storage device
icon is not available.
Reason: The player management software may not be installed,
or the application has been corrupted. Or, the PC does not
recognize the USB port.
Solution: Reinstall the application. If this does not resolve the
issue, check the status of the USB port.
34
Page 35

4. Problem: What happens if the USB cable is unplugged while the
player is transferring files to and from the PC?
Solution: Do not unplug the USB cable while a transfer is in
progress. Files on the computer and the player may become
corrupted.
5. Problem: The player does not play the music files correctly.
Reason: The audio format or the bit rate of the file may not be
supported by the player.
Audio formats supported: MPEG1 Layer 3, MPEG1 Layer 2,
MPEG1 Layer 1, MPEG2 Layer 3, WMA.
Bit rate supported for MP3: 32 - 256 Kbps
Bit rate supported for WMA: 64 - 192 Kbps
If the file in question is not within these parameters, the file may
not play correctly.
Solution: Delete the file or compress the audio file within the
parameters listed above and transfer to the player again.
6. Problem: Problem: Elapsed time display is illegible when certain
music files are played.
Reason: The file type is a VBR-format MP3 file which has a
variable bit-rate. The change in bit-rate causes the discrepancy in
the time displayed.
Solution: Compress the file in the fixed rate format.
35
Page 36

7. Problem: The available internal memory shown differs from the
actual memory capacity.
Reason: The player utilizes a small portion of the internal memory
capacity to store the application as well as the Chinese-character
library for bilingual support. This portion of the memory cannot be
used to store audio files.
8. Problem: Settings are lost.
Reason: Settings are saved as data files, and if these files are
deleted or if the memory is formatted, the preferences will be
lost. In this case, the settings will need to be redefined.
36
Page 37

Specifications
Internal Memory 128/256/512/1024 MB
Battery AAA Alkaline battery (1)
LCD 128×64 OLED
Signal/Noise Ratio >80 dB
Earphone Output Power 5 MW + 5 MW
Music File Format MP3, WMA, WAV
Recording Format MP3, WAV
Language Library ISO8859
*Specifications, bundles, and accessories are subject to change without
notice.
*Capacity depends on the version of the
player purchased.
37
Page 38

FCC Compliance Statement
This equipment has been tested and found to comply with the limits for a Class B
digital device, pursuant to Part 15 of the FCC rules. These limits are designed to provide
reasonable protection against harmful interference in a residential installation. This
equipment generates, uses and can radiate radio frequency energy and, if not installed
and used in accordance with the instructions, may cause harmful interference to radio
communications. However, there is no guarantee that interference will not occur in a
particular installation. If this equipment does cause harmful interference to radio or
television reception, which can be determined by turning the equipment off and on, the
user is encouraged to try to correct the interference by one or more of the following
measures:
• Reorient or relocate the receiving antenna.
• Increase the separation between the equipment and receiver.
• Connect the equipment into an outlet on a circuit different from that to which the
receiver is connected.
• Consult the dealer or an experienced radio/TV technician for help.
Caution: Changes or modifications not expressly approved by the manufacturer
responsible for compliance could void the user's authority to operate the equipment.
This device complies with Part 15 of the FCC Rules. Operation is subject to the
following two conditions: (1) This device may not cause harmful interference, and (2)
this device must accept any interference received, including interference that may
cause undesired operation.
Responsible Party: Loi Han
38
Microtek Lab, Inc.
16941 Keegan Avenue
Carson, CA 90746
USA
Phone: 310-687-5800
Fax: 310-687-5950
 Loading...