

Page 1

Nokia Lumia 520
Welcome to the
Nokia Lumia 520
9260456 Issue 14 EN
Page 2
Psst...
This guide isn't all there is...
There's a user guide in your phone – it's always with you,
available when needed. On the start screen, swipe left, and
Nokia Care.
tap
For the online user guide, even more info, and
troubleshooting help, go to www.nokia.com/support. You
can also scan the code to go to the website. Press
. Point the camera at the code, and tap the result.
tap
Check out the videos at www.youtube.com/
NokiaSupportVideos.
For info on Nokia Service terms and Privacy policy, go to
www.nokia.com/privacy.
First start-up
Your new phone comes with great features that are
installed when you start your phone for the first time.
Allow some minutes while your phone sets up.
, and
2
Page 3
Quick Guide
Nokia Lumia 520
Contents
Safety 4
Keys and parts 6
Get started 9
Get the basics 12
Take your friends with you 14
Add a personal touch 15
Take photos and share 16
Product and safety information 21
3
Page 4
Safety
We invite you to read the instructions on this guide before
using the device.
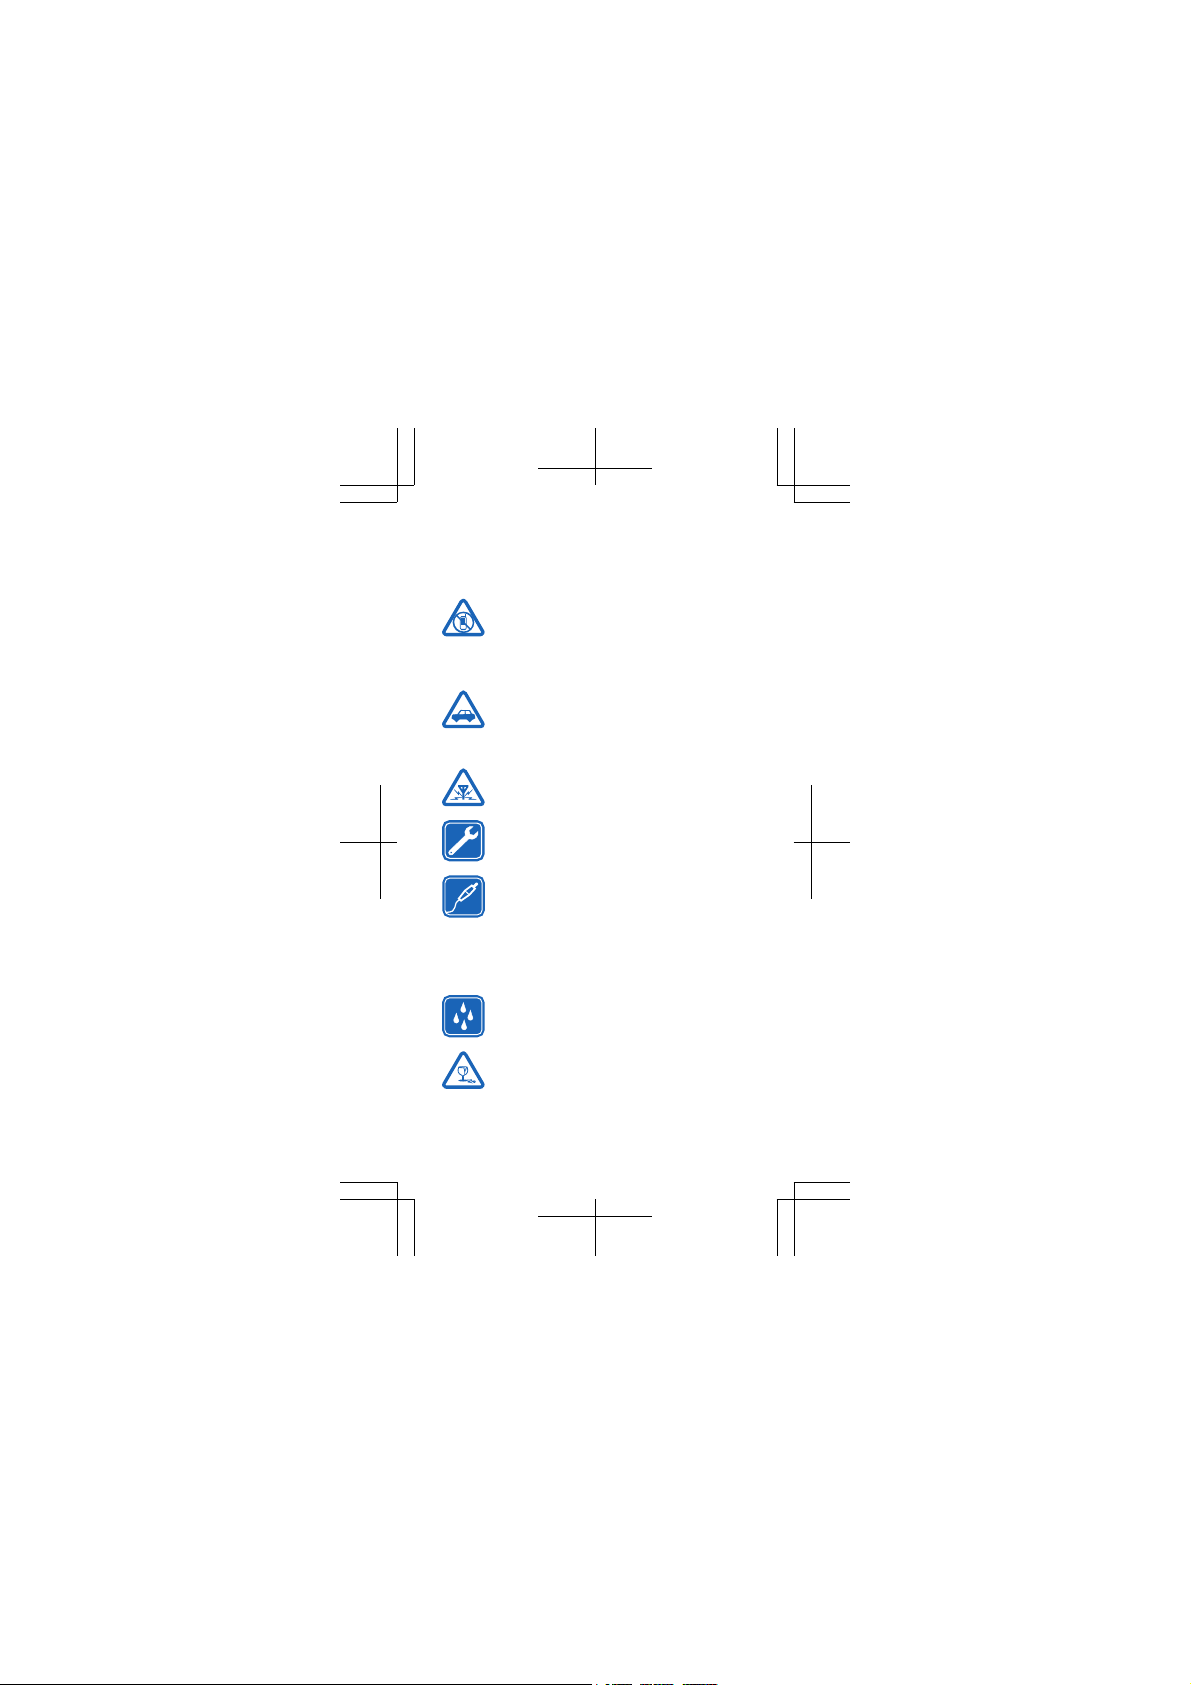
SWITCH OFF IN RESTRICTED AREAS
Switch the device off when mobile phone use is
not allowed or when it may cause interference
or danger, for example, in aircraft, in hospitals
or near medical equipment, fuel, chemicals, or blasting
areas. Obey all instructions in restricted areas.
ROAD SAFETY COMES FIRST
Obey all local laws. Always keep your hands free
to operate the vehicle while driving. Your first
consideration while driving should be road
safety.
INTERFERENCE
All wireless devices may be susceptible to
interference, which could affect performance.
QUALIFIED SERVICE
Only qualified personnel may install or repair
this product.
BATTERIES, CHARGERS, AND OTHER
ACCESSORIES
Use only batteries, chargers, and other
accessories approved by Nokia for use with this
device. Third-party chargers that comply with
the IEC/EN 62684 standard, and that can connect to your
device micro USB connector, may be compatible. Do not
connect incompatible products.
KEEP YOUR DEVICE DRY
Your device is not water-resistant. Keep it dry.
GLASS PARTS
The device screen is made of glass. This glass
can break if the device is dropped on a hard
surface or receives a substantial impact. If the
glass breaks, do not touch the glass parts of th e device or
4
Page 5
attempt to remove the broken glass from the device. Sto p
using the device until the glass is replaced by qualified
service personnel.
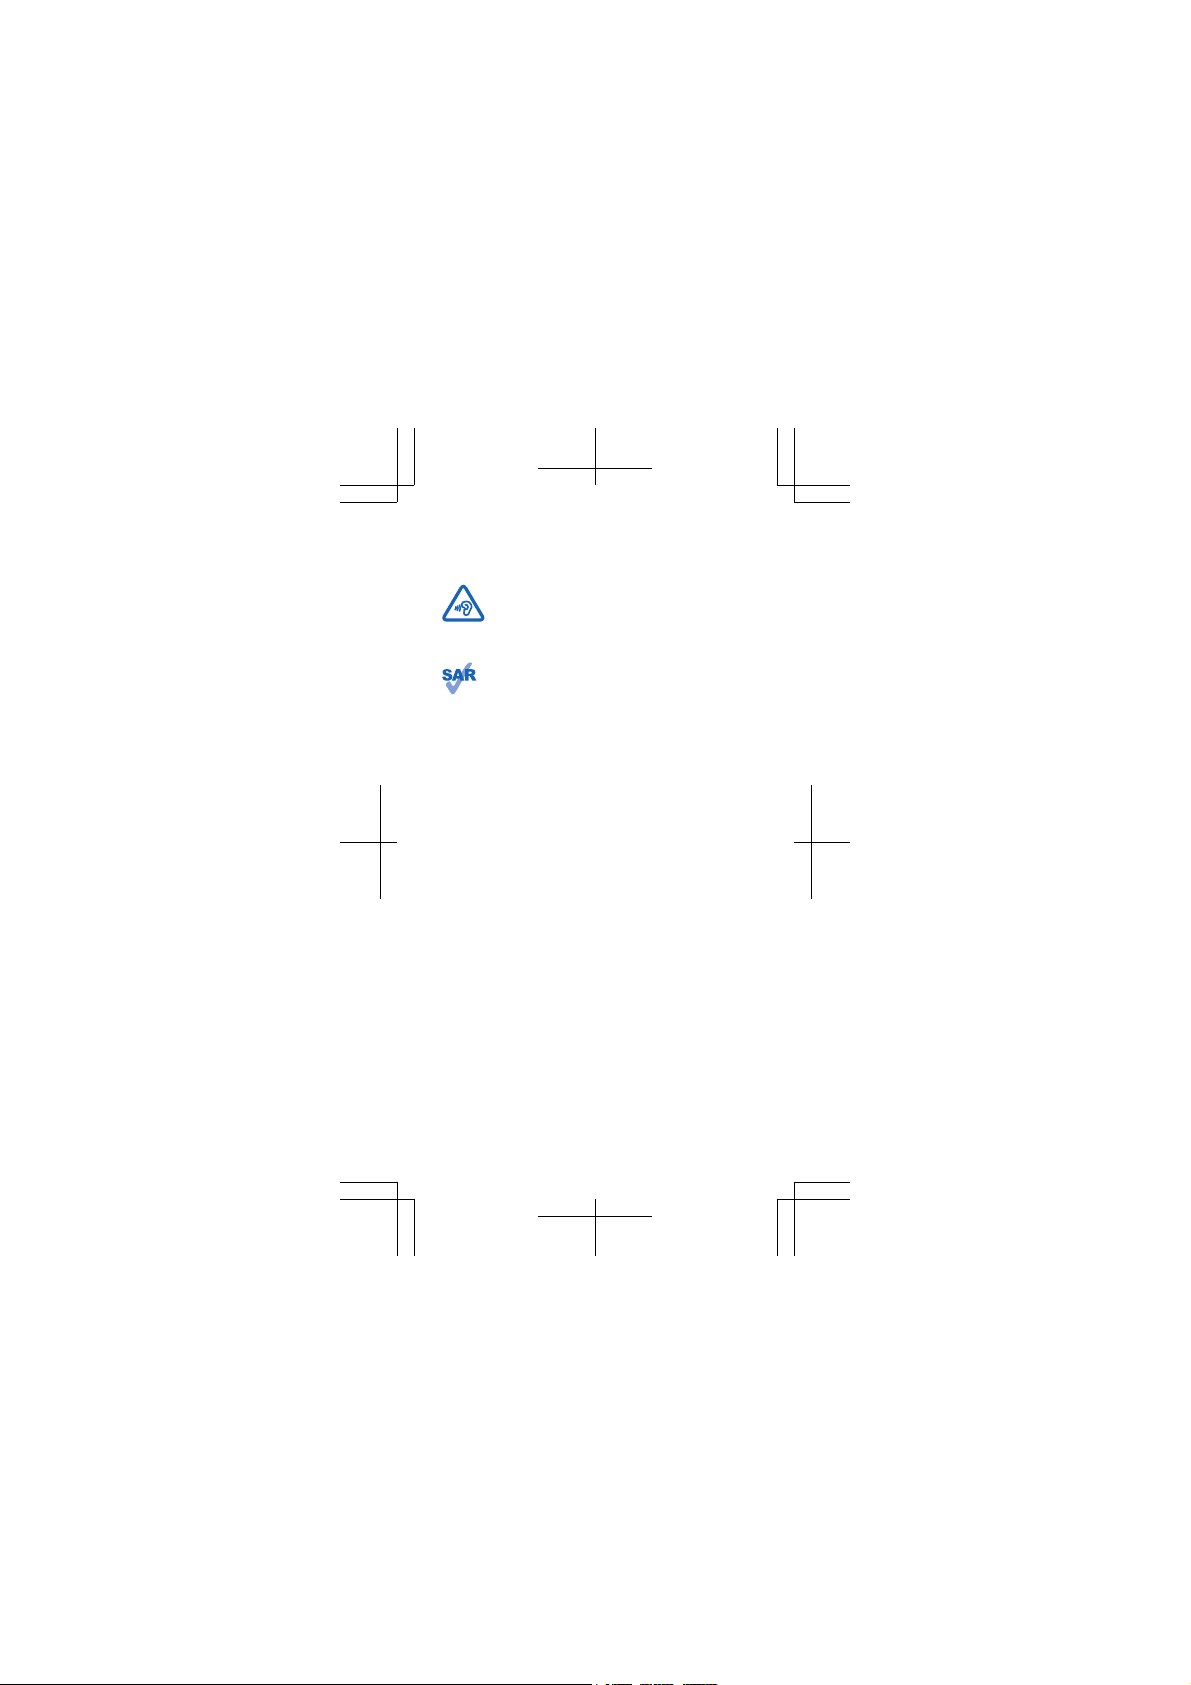
PROTECT YOUR HEARING
To prevent possible hearing damage, do not
listen at high volume levels for long periods.
Exercise caution when holding your device near
your ear while the loudspeaker is in use.
SAR
This device meets RF exposure guidelines when
used either in the normal use position against the
ear or when positioned at least 1.5 centimetres
(5/8 inch) away from the body. The specific maximum SAR
values can be found in the Certification Information (SAR)
section of this user guide. For more info, go to www.sar-
tick.com.
When a carry case, belt clip or other form of device holder
is used for body-worn operation, it should not contain
metal and should provide at least the above-stated
separation distance from the body. Note that mobile
devices may be transmitting even if you are not making a
voice call.
5
Page 6

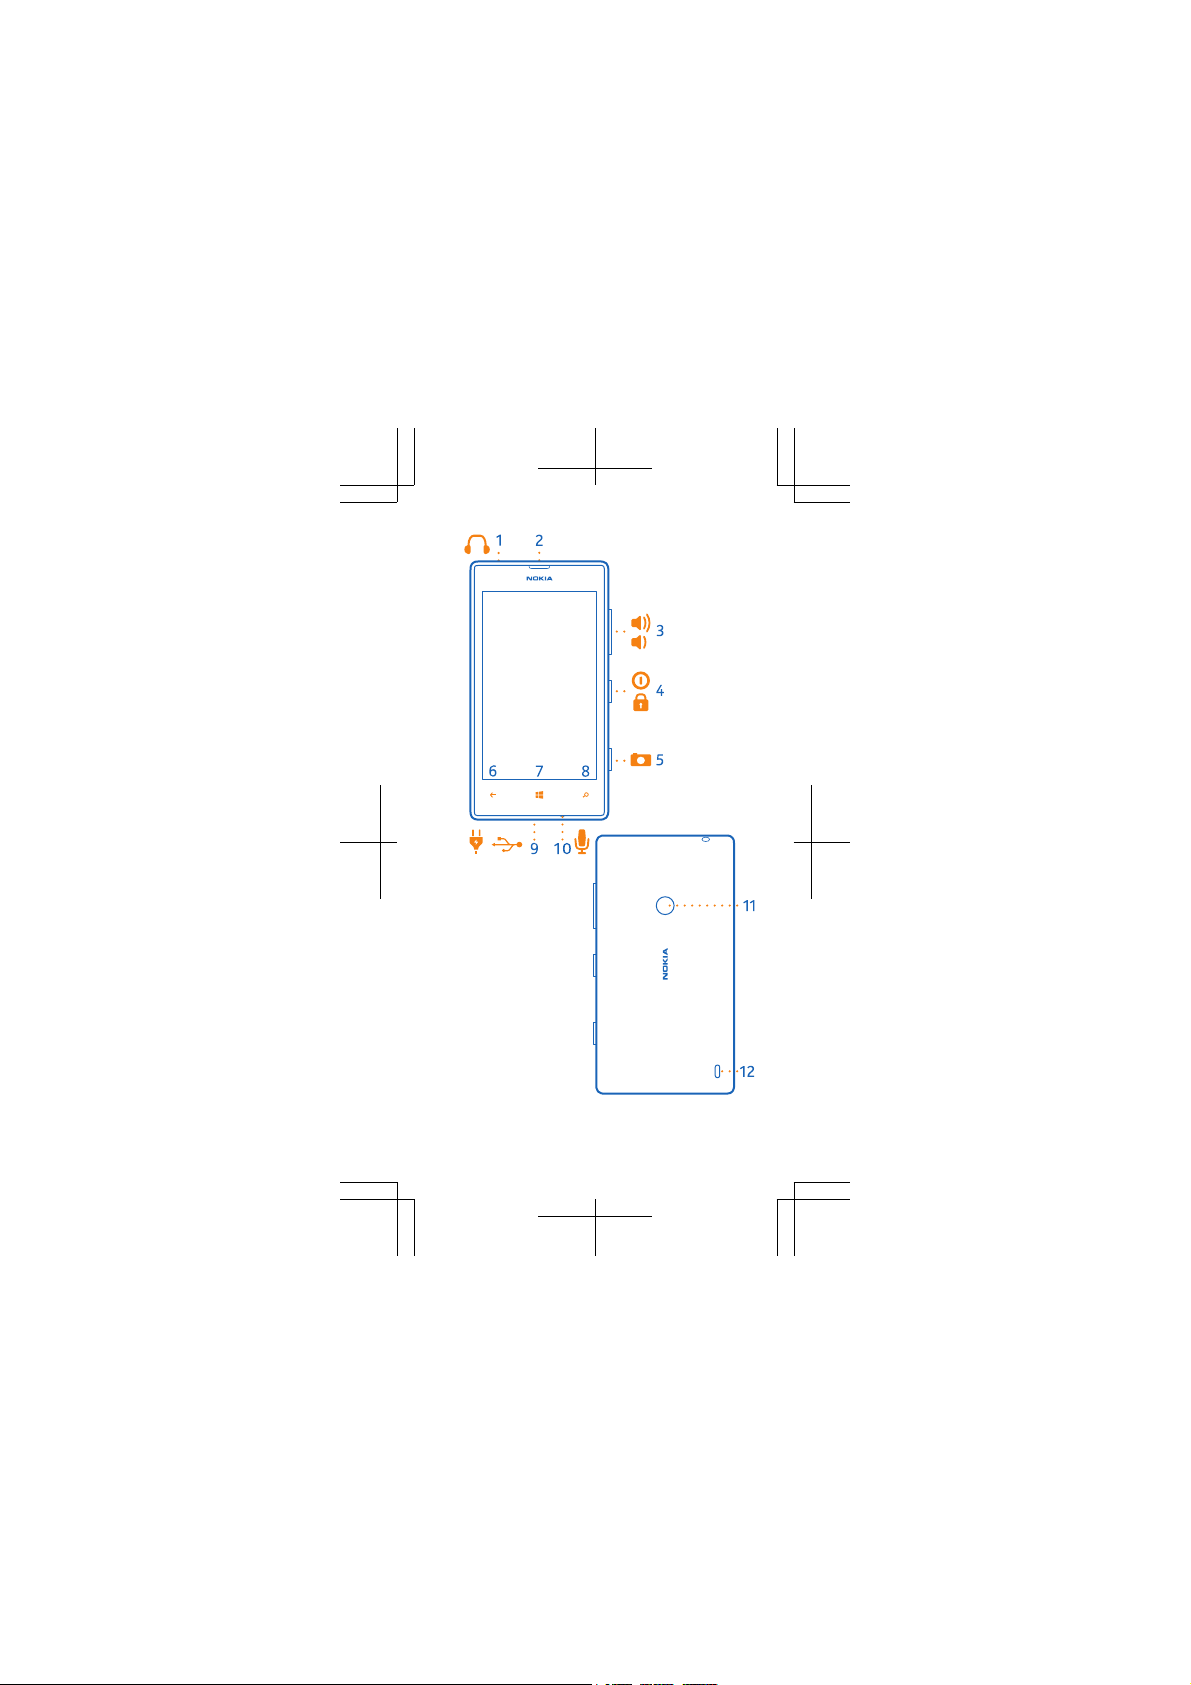
Keys and parts
1 Connector for headphones and
loudspeakers (3.5 mm)
2Earpiece
3Volume keys
4 Power/Lock key
5 Camera key
6 Back key
7Start key
8Search key
9Micro-USB connector
10 Microphone
11 Camera lens
12 Loudspeaker
6
Page 7
7
Page 8

Some of the accessories mentioned in this user
guide may be sold separately.
8
Page 9
Get started
Before you start using your phone, remove the
back cover to insert the micro-SIM card.
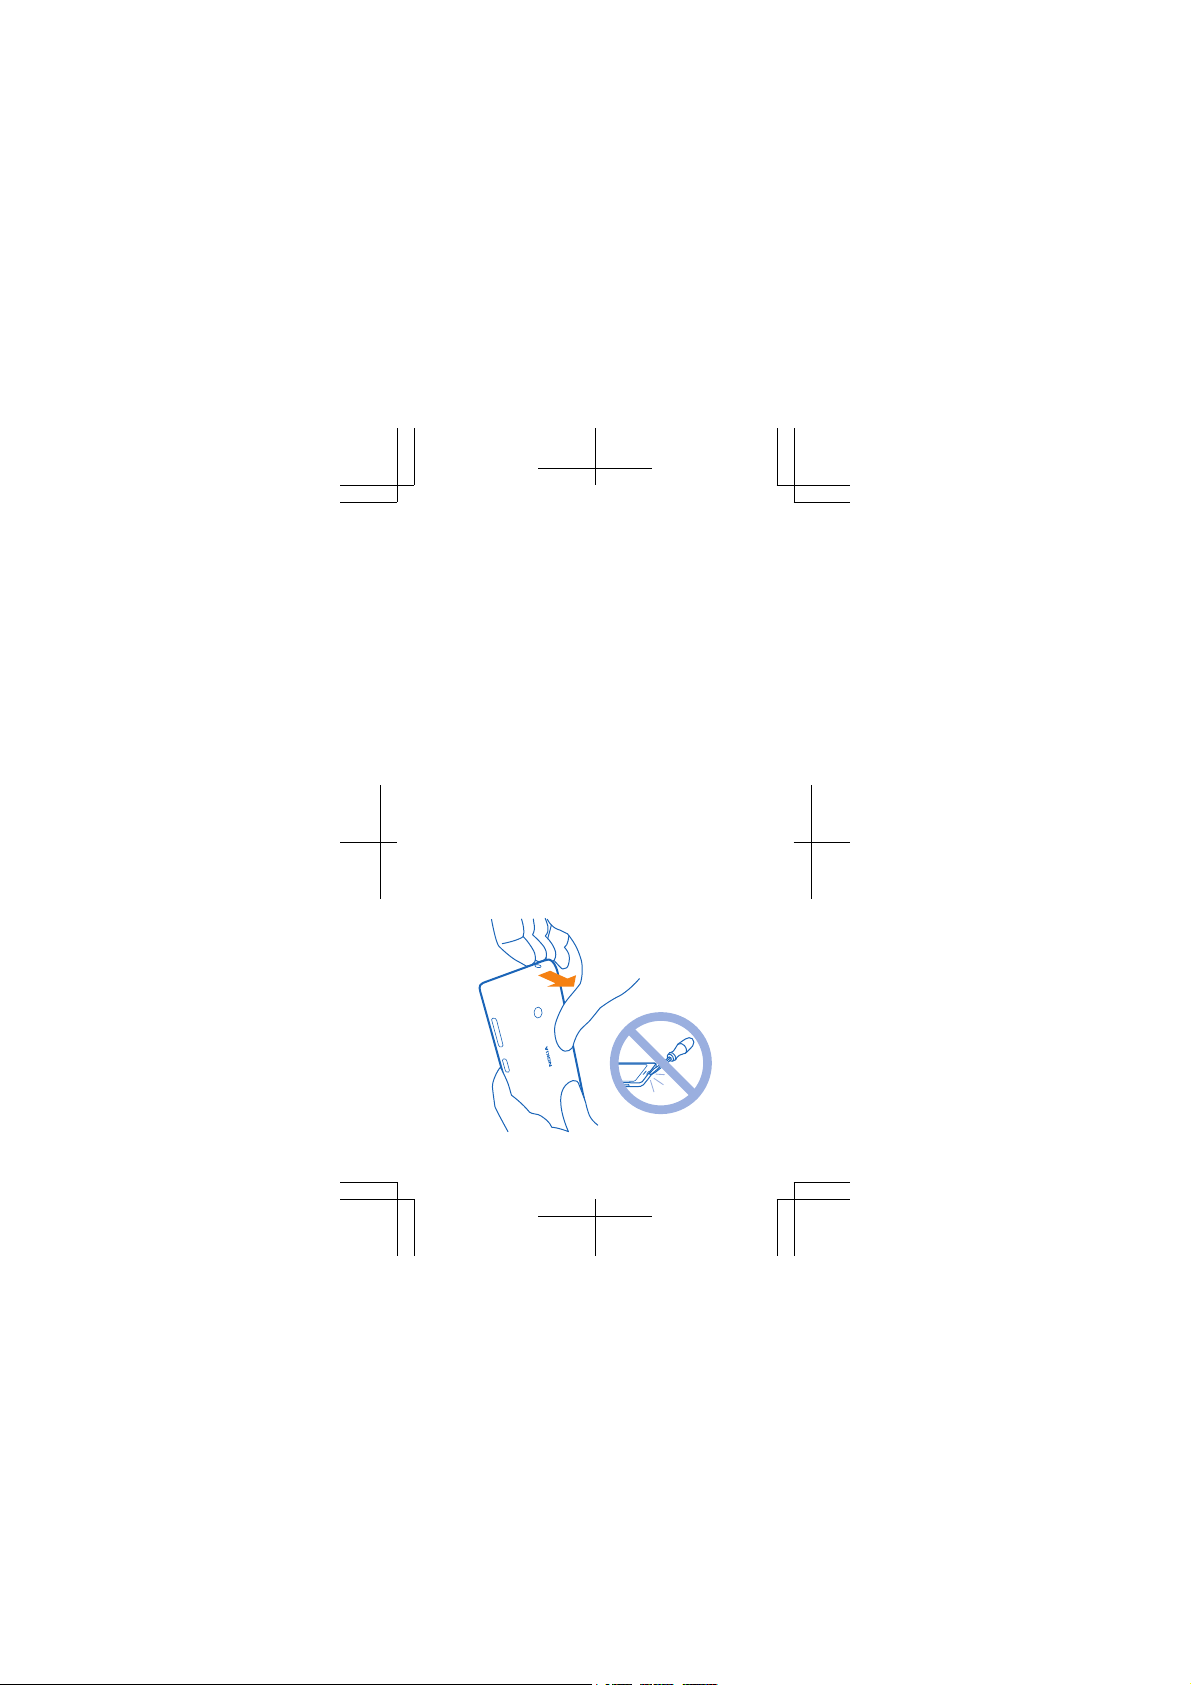
Remove the back cover
Make sure the phone is switched off.
1. At the top corner of the phone, put the nail of
your index finger in the seam between the screen
frame and the back cover. Press the middle of the
back cover, and bend the cover to loosen the top
hooks.
Do not use any sharp tools, as they may damage
the screen.
2. Remove the back cover.
9
Page 10
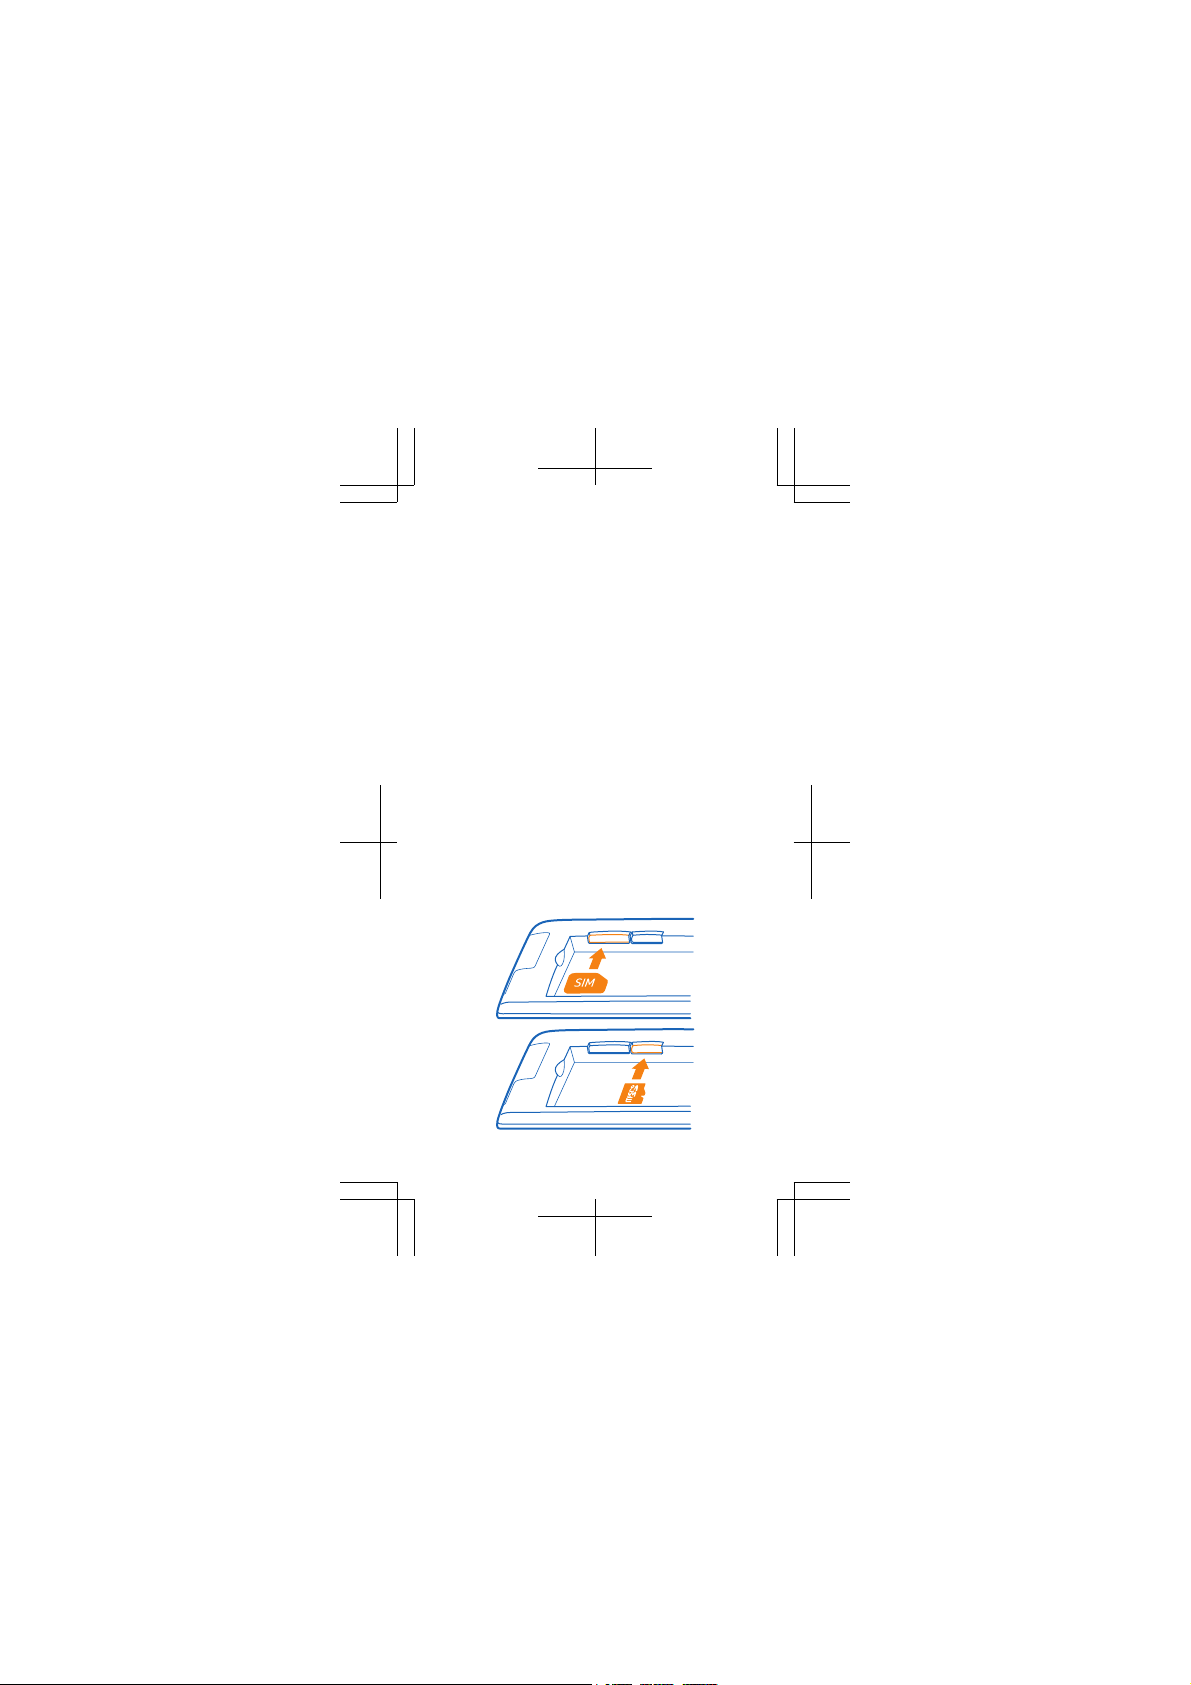
Insert the micro-SIM and memory card
1. If the battery is in, lift it out.
2. Push the SIM into the SIM slot until it is fully
inserted. Make sure the contact area is facedown.
3. If you have a microSD card, push the card into
the memory card slot until it locks into place.
10
Page 11
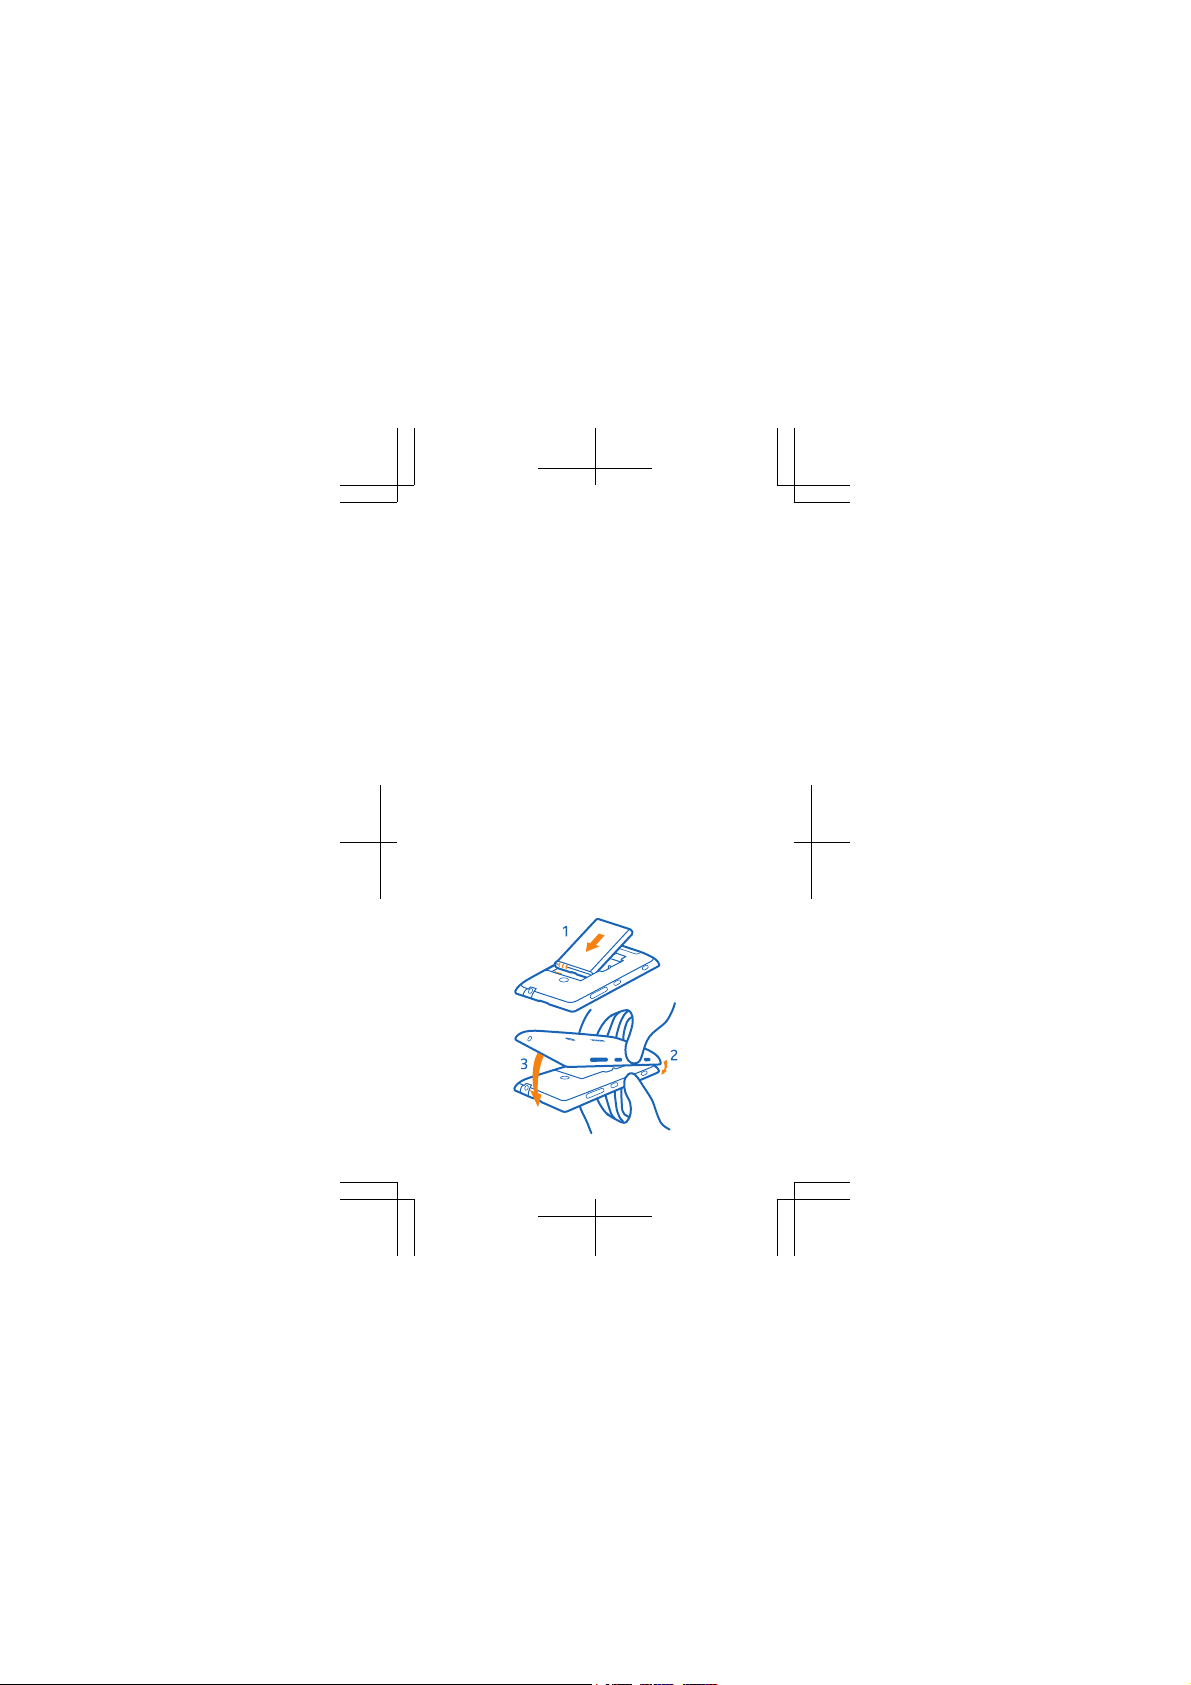
Replace the battery and back cover
1. Line up the battery contacts, and put the
battery in.
2. Press the bottom corner of the back cover
against the bottom corner of your phone.
3. Press the back of the cover until it snaps into
place. Don't press the keys while attaching the
cover.
Charge the battery
Plug the charger into a wall outlet, and connect
the charger to your phone.
If the battery is completely discharged, it may
need to charge for up to 20 minutes before you
can use your phone. The charging indicator may
not be displayed in this time.
11
Page 12

Get the basics
Make a call
> , type in the phone number, and tap
1. Tap
call. To type in the + character, used for
international calls, tap and hold 0.
The + character only works from abroad. The +
character may not work in all regions. In this case,
enter the international access code directly.
2. To end the call, tap end call.
Lock the keys and screen
Press the power key briefly.
To unlock, press the power key, and drag the lock
screen up.
Switch between views and apps
To switch between the start screen and the apps
menu, simply swipe left or right.
To switch between open apps, press and hold
, and choose the app you want.
Personalise the start screen
To move a tile on the start screen, place your
finger on the item for a second or two, and drag
the item to a new location.
12
Page 13

Get to know your phone
Your phone has two views, making it easy for you
to keep up with what's going on.
To switch between the start screen and the apps
menu, simply swipe left or right.
Tip: To switch between open apps, press and
, and choose the app you want.
hold
Tip: To move a tile on the start screen, place
your finger on the item for a second or two, and
drag the item to a new location.
13
Page 14

Take your friends with you
Get in touch with your friends, family, colleagues,
you name it. The People hub is the place to
manage all your contact info.
1. To transfer contacts and text messages from
your old phone, on the start screen, swipe left,
and tap
2. Follow the instructions shown, and tap
continue.
3. Switch Bluetooth on, select your old phone
from the list, and follow the instructions shown
on both phones.
Not all phones may be compatible.
If your old phone is a Windows Phone device, you
can also sync your contacts to your Microsoft
account, and import them straight to your new
phone.
Add a new contact
Tap
Import contacts from a SIM card
Tap
settings > import SIM contacts.
Transfer my Data.
People, swipe to all, and tap .
People, swipe to all, and tap >
14
Page 15

Add a personal touch
Your start screen contains live tiles that show you
what's going on.
Pin your favourite apps, browser bookmarks, and
more to the start screen. To pin, for example, an
app, swipe left to the apps menu, tap and hold the
app, and tap pin to Start.
To resize a tile, tap and hold the tile, and tap the
, , or .
arrow
Tip: To change the look and feel of your phone,
Settings > theme.
tap
15
Page 16

Take photos and share
Shoot photos with your phone camera, and share
them instantly.
1. To switch the camera on, press the camera key.
2. Press the camera key halfway down to lock the
focus. To take the photo, press the camera key
down fully.
3. You can share your photo right after taking it.
Just swipe right, and tap
Need to capture a moment quickly? To switch on
the camera when your phone is locked, press and
hold the camera key for a couple of seconds.
> share....
16
Page 17

Create a Microsoft account
To get apps from Store or access more Microsoft
services, such as SkyDrive or Hotmail, your phone
guides you to create a Microsoft account.
You can also sign in to your existing Microsoft
account, which you use to access, for example,
Hotmail.
Your phone needs to connect to the internet. If
you don't have data plan, the data transmission
costs may pile up quickly. For info about possible
data costs, contact your network service
provider.
17
Page 18

Help and tips
Get the most out of your phone while getting the
battery life you need.
If you want to save battery power, you can:
• Switch battery saver mode on. On the start
screen, swipe left, and tap
saver.
• Close data connections, such as Bluetooth or
wireless networks, when you're not using them.
• Set your phone to check for new mail less
frequently.
• Lower the screen brightne ss, and set the screen
to switch off after a shorter time.
• Mute unnecessary sounds, such as key tones.
If your phone freezes
If your phone isn't responding, take the battery
out for a few seconds. Put the battery back in, and
switch your phone on again. No content, such as
contacts or messages, is deleted.
If your issue remains unsolved, contact your
network service provider or Nokia for repair
options. Before sending your phone for repair,
always back up your data, as all personal data in
your phone may be deleted.
Find the answers to technical questions related to
your phone, and the nearest authorized repair
center addresses at www.nokia.com/support.
For the list of Mexico Repair Centers, see the
leaflet attached to this sales package.
Settings > battery
18
Page 19

Nokia authorized repair centers
Find the answers to technical questions related to
your phone, and the nearest authorized repair
center addresses at www.nokia.com/support.
For the list of Mexico Repair Centers, see the
leaflet attached to this sales package.
For tips and instructions on how to take care of
your phone, see your phone user guide.
19
Page 20

Find your model number and
serial number (IMEI)
If you need to contact Nokia Care or your service
provider, you may need info such as the model
number and the serial number (IMEI). To see the
info, tap
You can also find the info on your phone label,
which is located under the battery.
Settings > about.
20
Page 21

Feature-specific instructions
Using services or downloading content may cause the transfer of
large amounts of data, which may result in data costs.
The availability of payment methods depends on your country of
residence and your network service provider.
Important: This device is designed to be used with a mini-UICC SIM
card, also known as a micro-SIM card only. A micro-SIM card is smaller
than the standard SIM card. Use o f incompatible SIM cards, or use of
SIM card adapters, may damage the card or the device, and may
corrupt data stored on the card.
Note: Switch the device off and disconnect the charger and any
other device before removing any covers. Avoid touching electronic
components while changing any covers. Always store and use the
device with any covers attached.
Use only compatible memory cards approved for use with this device.
Incompatible cards may damage the card and the device and corrupt
data stored on the card.
Do not connect products that create an output signal, as this may
damage the device. Do not connect any voltage source to the audio
connector. If you connect an external device or headset, other than
those approved for use with this device, to the audio connector , pay
special attentio n to volume levels.
You can send text messages that are longer than the character limit
for a single message. Longer messages a re sent as two or more
messages. Your service provider may charge ac cordingly. Characters
with accents, other marks, or some language options, take more
space, and limit the number of characters that can be sent in a single
message.
The list of countries and territories included in the time zone settings
does not imply sovereignty.
The software in this device includes software licensed by Nokia from
Microsoft Corporation or its affiliates. To access the Windows Phone
software license terms, select
terms. Please note that by using the software, you accept the terms.
If you do not accept the terms, do not use the device or software.
Instead contact Nokia or the party from which you purchased the
device to determine its return policy.
Settings > about. Please read the
Product and safety information
Network services and costs
You can only use your device on the WCDMA 900, 2100 and GSM/EDGE
850, 900, 1800, 1900 MHz networks. You need a subscription with a
service provider.
21
Page 22

Using some features and downloading content require a network
connection and may result in data costs. You may also need to
subscribe to some features.
Make an emergency call
1. Make sure the phone is switched on.
2. Check for adequate signal strength.
You may also need to do the following:
• Put a SIM card in the device.
• Switch the call restrictions off in your phone, such as call barring,
fixed dialling, or closed user group.
• Make sure flight mode is not switched on.
• If the phone screen and keys are locked, unlock them.
.
3. Press
.
4. Select
.
5. Select
6. Type in the official emergency number for your present location.
Emergency call numbers vary by location.
7. Select call.
8. Give the necessary info as accurately as possible. Do not end the
call until given permission to do so.
When you switch your phone on for the first time, you are asked to
create your Microsoft account and set up your phone. To make an
emergency call during the account and phone setup, tap emergency
call.
Important: Activate both cellular and internet calls, if your phone
supports internet calls. The phone may attempt to make emergency
calls both through cellular networks and through your internet call
service provider . Connections in all condi tions cannot be guarantee d.
Never rely solely on any wireless phone for essential communications
like medical emergencies.
Take care of your device
See the in-device user guide for important instructions on how to take
care of your device.
Recycle
When this device has reached the end of its working life, all of its
materials can be recovered as materials and energy. For info on how
to recycle your old Nokia products and where to find collection sites,
go to www.nokia-latinoamerica.com/reciclaje, or call the Nokia
Contact Center.
Recycle packaging and user guides at your local recycling scheme.
22
Page 23

When you cooperate and deliv er all these materials to one of the
available collection sites, you contribute in helping the environment
and help to ensure the health of future generations.
All electrical and electronic products and batteries may contain
recycleable metals and other potentially hazardous substances and
must be taken to their respective collection sites at the end of their
working life. Under no circumstances should you break open a battery
or other related materials. Do not dispose of these pro ducts as
unsorted municipal waste, as this may cause contamination of the
environment or risks to human health. All N okia products are in
compliance to the applicable industry international production
standards and to all requirements defined by the competent
government agencies. F or more info on the environmental at tributes
of your device, see www.nokia.com/ecoprofile (in English).
About Digital Rights Management
When using this device, obey all laws and respect local customs,
privacy and legitimate rights of others, including copyrights.
Copyright protection may prevent you from copying, modifying, or
transferring photos, music, and other content.
Battery and charger info
Use your device only with an original BL-5J rechargeable battery.
Charge your device with AC-20AR, AC-20E, or AC-20U charger.
Charger plug type may vary.
Third-party chargers that comply with the IEC/EN 62684 standard,
and that can connect to your device micro USB connector, may also
be compatible.
Nokia may make additional battery or charger models available for
this device.
Battery and charger safety
Always switch the device off and unplug the charger before removing
the battery. To unplug a charger or an accessory, hold and pull the
plug, not the cord.
When your charger is not in use, unplug it. If left unused, a fully
charged battery will lose its charge over time.
Always keep the battery between 15°C and 25°C (59°F and 77°F) for
optimal performance. Extreme temperatures reduce the capacity and
lifetime of the battery. A device with a hot or cold battery may not
work temporarily.
Accidental short-circuiting can happen when a metallic object touches
the metal strips on the battery. This may damage the battery or the
other object.
Do not dispose of batter ies in a fire as they may explode. Obey loc al
regulations. Recycle when possible. Do not dispose as household
waste.
Do not dismantle, cut, crush, bend, puncture, or otherwise damage
the battery in any way. If a battery leaks, do not let liquid touch skin
23
Page 24

or eyes. If this happens, immediatel y flush the affected areas with
water, or seek medical help. Do not modify, attempt to insert foreign
objects into the battery, or immerse or expose it to water or other
liquids. Batteries may explode if damaged.
Use the battery and charger for their intended purposes only.
Improper use, or use of unapproved or incompatible batteries or
chargers may present a risk of fire, explosion, or other hazar d, and
may invalidate any app roval or warranty. If you believe the battery or
charger is damaged, take it to a service centre before continuing to
use it. Never use a damaged battery or charger. Do not charge your
device during a lightning storm. Only use the charger indoors.
Additional safety information
Small children
Your device and its accessories are not toys. They may contain small
parts. Keep them out of the reach of small children.
Medical devices
Operation of radio transmitting equipment, including wireless
phones, may interfere with inadequately shielded medical devices'
function. Consult a physician or the medical device's manufacturer to
determine if it is adequately shielded from external radio energy.
Implanted medical devices
To avoid potential interference, manufacturers of implanted medical
devices recommend a minimum separation of 15.3 centimetres (6
inches) between a wireless device and the medical device. Persons
who have such devices should:
• Always keep the wireless device more than 15.3 centimetres (6
inches) from the medical device.
• Not carry the wireless device in a breast pocket.
• Hold the wireless device to the ear opposite the medical device.
• Switch the wireless device off if there is any reason to suspect that
interference is taking place.
• Follow the manufacturer directions for the implanted medical
device.
If you have any questions about using your wireless device with an
implanted medical device, consult your health care provider.
Accessibility solutions
Nokia is committed to making mobile phones easy to use for all
individuals, including those with disabilities. For more information,
visit the Nokia website at www.nokiaaccessibility.com (in English).
Hearing
Warning: When you use the headset, your ability to hear outside
sounds may be affected. Do not use the headset where it can
endanger your safety.
24
Page 25

Some wireless devices may interfere with some hearing aids.
Nickel
The surface of this device is nickel-free.
Vehicles
Radio signals may affect improperly installed or inadequately
shielded electronic systems in vehicles. For more info, check with the
manufacturer of your vehicle or its equipm ent.
Only qualified personnel should install the device in a vehicle. Faulty
installation may be dangerous and invalidate your warranty. Check
regularly that all wireless device equipment in your vehicle is mounted
and operating properly . Do not store or carry flammable or expl osive
materials in the same comp artment as the device, its parts, or
accessories. Do not place your device or accessories in the air bag
deployment area.
Potentially explosive environments
Switch your device off in potentially explosive environments, such as
near petrol pumps. Sparks may cause an explosion or fire resulting in
injury or death. Note restrictions in areas with fuel; chemical plants;
or where blasting op erations are in progress. Areas wit h a potentially
explosive enviro nment may not be clearly marked. These usually are
areas where you are advi sed to switch your engine off, below d eck on
boats, chemical transfer or storage facilities, and where the air
contains chemicals or particles. Check with the manufacturers of
vehicles using liquefied petroleum gas (such as propane or butane) if
this device can be safely used in their vicinity.
Certification information (SAR)
This mobile device meets international guidelines for expo sure to
radio waves.
Your mobile device is a radio transmitter and receiver. It is designed
not to exceed the limits for exposure to radio waves (radio frequency
electromagnetic fields), recommended by international guidelines
from the independent scientific organization ICNIRP. These
guidelines incorporate substantial safety margins that are intended
to assure the protection of all persons regardless of age and health.
The exposure guidelines are based on the Specific Absorption Rate
(SAR), which is an expression of the amount of radio frequency (RF)
power deposited in the head or body when the device is transmitting.
The ICNIRP SAR limit for mobile devices is 2.0 W/kg averaged over 10
grams of tissue.
SAR tests are carried out with the device in standard operating
positions, transmitting at its highest certified power level, in all its
frequency bands. The maximum recorded SAR values for this device
are:
25
Page 26

Maximum SAR value Frequency bands
When held against
the head
When operated at a
separation distance
of 1.5 centimetres
(5/8 inch) from the
body
Your mobile device is also designed to meet the United States Federal
Communications Commission (FCC) guidelines. FCC ratings for your
device and more information on SAR can be found at
transition.fcc.gov/oet/rfsafety/sar.html.
This device meets RF exposure gui delines when used against the head
or when positioned at least 1.5 centimetres (5/8 inch) away from the
body. When a carry case, belt clip or other form of device holder is
used for body-worn operation, it should not contain metal and should
provide at least the above stat ed separation distance from the body.
To send data or messages, a good connection to the network is
needed. Sending may be delayed until such a connection is available.
Follow the separation distance instructions until the sending is
finished.
During general use, the SAR values are usually well below the values
stated above. This is becau se, for purposes of system efficiency and
to minimise interference on the network, the operating power of your
mobile is automatically decreased when full power is not needed for
the call. The lower the power output, the lower the SAR value.
Device models may have different versions and more than one value.
Component and design changes may occur over time and some
changes could affect SAR values. The latest available SAR information
for this and other Nokia device models can be found at
www.nokia.com.
The World Health Organization (WHO) has stated that c urrent
scientific information does not indicate the need for any special
precautions when using mobile devices. If you are interested in
reducing your exposure, they recommend you limit your usage or use
a hands-free kit to keep the device away from your head and body.
For more information and explanations and discussions on RF
exposure, go to the WHO website at www.who.int/peh-emf/en.
1.09 W/kg over 10g 3-slot GPRS 900 and
0.97 W/kg over 10g 3-slot GPRS 900 and
used when
Maximum SAR value
was recorded
WLAN 2450
WLAN 2450
26
Page 27

Nokia support messages
To help you take maximum advantage of your phone and services,
you may receive messages from Nokia. The messa ges may contain
tips and tricks and support. To provide the service descr ibed above,
your mobile pho ne number, the serial number of your phone, and
some identifiers of the mobile subscription may be sent to Nokia
when you use the phone for the first time. This information may be
used as specified in the privacy policy, available at www.nokia.com.
Nokia Care
For questions regarding your plans, billing or network please contact
your operator. For questions regarding your Nokia product and
warranty, please visit the support pages for yo ur country at
www.nokia.com/support.
Electrical information of the device
This information applies only in Mexico.
Product Mobile phone
Supplier Nokia
Model 520
Charger AC-20U
Input 100-240 Vca, 50-60 Hz, 60-300
Output 5,0 Vcc, 350-1 500 mA
Rechargeable battery supplier Nokia
Phone power c onsumption 3,7 Vcc
Copyrights and other notices
DECLARATION OF CONFORMITY
Hereby, NOKIA CORPORATION declares that this RM-914 product is in
compliance with the essential requirements and other relevant
provisions of Directive 1999/5/EC. A copy of the Declaration of
The following electrical
characteristics apply for NOKIA
U chargers only.
mA
27
Page 28

Conformity can be found at www.nokia.com/global/declaration/
declaration-of-conformit y (in English).
The availability of products, features, apps and services may vary by
region. For more info, contact your Nokia dealer or your service
provider. This device may contain commodities, technology or
software subject to export laws and regulations from the US and other
countries. Diversion contrary to law is prohibited.
The contents of this doc ument are provided "as is". Except as
required by applicable la w, no warranties of any kind, either express
or implied, including, but not limited to, the implied warranties of
merchantability and fitness for a particular purpose, are made in
relation to the accuracy, reliability or contents of this document.
Nokia reserves the right to revise this document or withdraw it at any
time without prior notice.
To the maximum extent permitted by applicable law, under no
circumstances shall Nokia or any of its licensors be responsible fo r
any loss of data or income or any special, incidental, consequential or
indirect damages howsoever caused.
Reproduction, transfer or distribution of part or all of the contents in
this document in any form without the prior written permission of
Nokia is prohibited. Nokia operates a policy of continuous
development. Nokia reserves the right to make changes and
improvements to any of the products described in this document
without prior notice.
Downloading of maps, games, music and videos and uploading of
images and videos may involve transferring large amounts of data.
Your service provider may charge for the data transmission. The
availability of particular products, services and features may vary by
region. Please check with your local Nokia dealer for further details
and availability of language options.
FCC/MEXICO NOTICE
This device complies with part 15 of the FCC rules. Operation is subject
to the following two conditions: (1) This device may not cause harmful
interference, and (2) this device must accept any interference
received, including interference that may cause undesired operation.
For more info, go to transition.fcc.gov/oet/rfsafety/rf-faqs.html.
Any changes or modifications not expressly approved by Nokia could
void the user's authority to operate this equipment.
Note: This equipment h as been tested and found to comply with the
limits for a Class B digital device, pursuant to part 15 of t he FCC Rules.
These limits are designed to provide reasonable protection against
harmful interference in a residential installation. This equipment
generates, uses and can radiate radio frequency energy and, if not
installed and used in accordance with the instructions, may cause
harmful interference to radio communications. However, there is no
guarantee that interference will not occur in a particular installation.
If this equipment does cause harmf ul interference to radio or
television reception, which can be determined by turning the
28
Page 29

equipment off and on, the user is encouraged to try to correct the
interference by one or more of the follow ing measures:
• Reorient or relocate the receiving antenna.
• Increase the separation betw een the equipment and receiver.
• Connect the equipment into an outlet on a circuit different from
that to which the receiver is connected.
• Consult the dealer or an experien ced radio/TV technician for help.
TM & © 2013 Nokia. All rights reserved. Third party products/names
may be TMs of their respective owners.
The Bluetooth word mark and logos are owned by the Bluetooth SIG,
Inc. and any use of such marks by Nokia is under license.
This product is licensed under the MPEG-4 Visual Patent Portfolio
License (i) for personal and noncommercial use in connection with
information which has been encoded in compliance with the MPEG-4
Visual Standard by a consumer engaged in a personal and
noncommercial activity and (ii) for use in connection with MPEG-4
video provided by a licensed video provider. No license is granted or
shall be implied for any other use. Additional information, including
that related to promotional, internal, and commercial uses, may be
obtained from MPEG LA, LLC. See www.mpegla.com (in English).
NOKIA MANUFACTURER'S LIMITED
WARRANTY FOR NOKIA WITH
WINDOWS PHONE
Note: This Manufacturer's Limited Warranty (“Warranty”) is
applicable only for authentic Nokia products with Windows Phone sold
through authorised Nokia Inc. or its affiliated companies and its
authorised channels.
Note: This Warranty does not limit the rights you may have under
any mandatory consumer protection laws of your country.
1. GENERAL
Nokia Corporation, its affiliated companies, in case of Mexico, Nokia
México S.A. de C.V., ("Nokia") pro-vides this Warranty for the No kia
product(s) included in the original sales package ("Product").
Nokia México S.A. de C.V. has its main offices at Guillermo Gonzáles
Camarena No. 1200, Piso 15, Col. Lomas de Santa Fe, Deleg. Alvaro
Obregón, C.P. 01210, México D.F., México. The Warranty m ay be
enforced at the Authorized Service Centres identified herein.
Your Product is a sophistica ted electronic device. Nokia strongly
encourages you to read and follow its user guide. Please also note
that your Product may contain parts, which can be damaged if not
handled very carefully.
During the warranty period, Nokia or a Nokia authorised service centre
will remedy defects in materials and workmanship free of charge and
in a commercially reasonable timeframe not to exceed thirty (30) days
counted as from the date when the Pro duct is delivered by the final
29
Page 30

user to any Nokia Authorized Service Centre by either repairing or
replacing your Product for a new identical product, or by a new
product with similar specifications, at its option.
This Limited Warranty is valid and enforceable solely in the country
where the Product has been purchased for the first time from Nokia
or its authorized channels by an end-user.
2. WARRANTY PERIOD
The warranty period sta rts when the Product is sold to an end-u ser
for the first time. This can be evidenced by the proof of purchase
issued by the first retailer.
Nokia warrants the items in the sales pack as follows:
1 Twelve (12) months for the main device, in which is already included
the legal warranty period when applicable;
2 Six (6) months for the main device battery and accessories;
3 Twelve (12) months for the main device battery if the battery is
integrated within the device and non-removable;
4 Three (3) months* for the CD-ROM and memory cards.
*For the Republic of Argentina the warranty is valid for six (6) months
in accordance with Law 24.240/93).
To the extent permitted by the applicable law, no repair or
replacement will renew or extend the warranty periods. However,
original or replacement parts or replacem ent Products provided
under this Warranty will be covered by this Warranty for the remainder
of the original warranty period or for sixty (60) days from the date of
repair or replacement, whichever is longer.
3. HOW TO OBTAIN YOUR WARRANTY SERVICE
If you suspect that your Product may require service under this
Warranty, please first visit www.nokia.com, select the applicable
region, and follow any instructions on how to troubleshoot the
suspected issue and how to proceed . You can also send an e-mail or,
in certain countries, call a Nokia call centre for assistance (call rates
may apply). You can find information about how to contact Nokia at
www.nokia.com/support. If you call a Nokia call centre or use other
available support, please have the following information readily
available:
• Your name, address, telephone number, Nokia user account details,
and other contact information;
• Your Product type, name, model number, product code, and serial
number, which are available from the sales package of your Product;
• Date and place of purchase, as well as the name of the retailer from
whom your Product was first purchased; and
• A short description of the issue affecting your Product.
If you visit a Nokia authorised service centre for assistance under this
Warranty, please remember to bring along the original proof of
purchase.
You must inform Nokia or a Nokia authorised service centre of the
issue affecting your Product within a reasonable time from noticing
it and always before the applic able warranty period expires (see
section 2 above).
30
Page 31

If available at your region, Nokia recommends that you register your
Product with Nokia or activate a Nokia user account, which may in
some circumstances enable Nokia to provide you a more personalised
warranty service.
In order to enforce this Warranty in México, you must provide (a) the
Product; and (b) this Limited Warranty Policy, duly sealed by the
corresponding sales agent. In order to enforce this Warranty in other
countries, you must provide: (a) the Product; and (b) the original proof
of purchase.
The addresses of Authorized Service Centres can be found at http://
www.nokia-latinoamerica.com/soporte/asistencia-tecnica-yreciclaje/opciones-y-ubicaciones-de-reparacion (in Spanish) or
http://www.nokia-latinoamerica.com/support/repair-and-recycle/
repair/care-points (in English).
4. WHAT THIS WARRAN TY DOES NOT COVER
To the extent permitted by the applicable law, this warranty does not
cover the following:
1 User guides;
2 Any third party software, settings, content, data, or links installed
or downloaded onto your Product at any time;
3 Nokia and third party services or enabling clients (please read the
terms and conditions that may accompany the services to review your
applicable rights and obligations);
4 Normal wear and t ear;
5 Reduced charging capacity of the battery, which is a result of the
natural end of life process of batteries;
6 Defects or damage caused by: (a) misuse, (b) not using your Product
in accordance with the user guide, (c) using your Product with, or
connecting it to, any product, accessory, software, or service not
manufactured or supplied by Nokia, (d) any products combined with
your Product by a third party, or (e) other acts beyond Nokia’s
reasonable contro l;
7 Damage caused by hacking, cracking, viruses, or other malware, or
by unauthorised access to services, accounts, computer systems or
networks;
8 Pixel defects in your Product’s display that are within the scope of
industry standards. For more information on pixel defects and
industry standards, please visit www.nokia.com.
This Warranty is not valid if:
1 Your Product has been (a) opened, modified, or repaired witho ut
Nokia’s authorisation, or (b) repaired with unauthorised spare parts.
2 Your Product's serial number, the mobile acc essory date code, or
the IMEI number has been removed, erased, defaced, altered or if
these are illegible in any way.
3 The software your product runs on has been modified.
For the purposes of this Warranty, all software that Nokia has
preinstalled on the product and which is necessary for its normal
operation is considered Nokia software. Nokia does not warrant that
any Nokia software (including updates and upgrades) provided with,
31
Page 32

in, or for your Product will meet your requirements, work in
combination with any hardware or software not provided by Nokia,
that the operation of Nokia software will be uninterrupted or error
free or that any defects in the software are correctable or will be
corrected. For Nokia software related defects, Nokia or a Nokia
authorised service centre will make available the latest version of the
Nokia software for reinstallation on your Product. Some Nokia
software may be subject to separate licence terms. Please refer to
www.nokia.com or the license term s, which apply to the Nokia
software, for information on support that may be available for it.
5. OTHER IMPORTANT NOTICES
An independent operato r provides the SIM card and the cellular o r
other network or system on which your Product operates. Therefore,
Nokia does not assume any responsibility for the operation,
availability, coverage, data plans, services, or range of the cellular or
other networks or systems.
All parts of your Product that Nokia has replaced become Nokia’s
property. Unless prohibited by the applicable law, when repairing or
replacing your Product, Nokia may use new or re-conditioned parts
or products. In case subject to the local applicable legislation requires
the end user to be made aware of and/or approve the use of
reconditioned parts or products on the repair or replacement
process, this paragraph and the disclaimer included on the service
order or equivale nt document shall be deemed as sufficient evi dence
of the fulfilment of such re quirements. If this Warranty does not cover
your Product or the issue based on which it requires service, you will
be informed and provided with a quotation for out-of-warranty repair
(provided that the requested service is wit hin the scope of the
services provided by the service centre). Nokia and its authorised
service centres reserve the right to charge for the out-of-warranty
repair or replacement of your Product, as well as a handling fee.
Your Product may contain c ountry specific elements, including
software. The warranty services available in a particular country may
be limited to the Products and country specific elements available in
that country. Also, if your Product has been re-exported from its
original destination to another country, your Product may contain
country specific eleme nts that are not considered a defe ct under this
Warranty even if they would not be operational.
If, at any time, any provision hereof is declared invalid or
unenforceable in any aspect by a court of competent jurisdiction, the
validity and enforceability of the remaining provisions shall in no way
be affected or impaired and they shall remain in full force and effect.
6. LIMITATION OF NOKIA'S LIABILITY
To the extent permitted by applicable law(s), Nokia shall not under
any circumstances be liable, either expressly or implicitly, for any
damages or losses of any kind whatsoever resulting from loss of,
damage to, or corruption of, content or data or the recreation or
transfer thereof even if such loss, damage, or corruption was a result
of a defect in your Product. Please note that you should always back
32
Page 33

up all data and content (including, without lim itation, any licence
numbers and activation codes) stored on your Pro duct before taking
your Product in for service since service activities may erase all data
from your Product.
TO THE EXTENT PERMITTED BY APPLICABLE LAW(S) NOKIA SHALL NOT
UNDER ANY CIRCUMSTANCES BE LIABLE FOR ANY LOSS OF PROFIT,
PRODUCTS OR FUNCTIONALITY, BUSINESS, CONTRACTS, REVENUES
OR ANTICIPATED SAVING S, INCREASED COSTS OR EXPENSES, OR FOR
ANY INDIRECT, CONSEQUENTIAL OR SPECIAL LOSS OR DAMAGE.
To the extent permitted by applicable law, Nokia’s liability shall be
limited to the purchase value of your Product, and in case of Mexico,
if applicable, Nokia will support the costs of transportation of the
Product within its network of authorised service centres. The
limitations in this clause 6 shall not apply in case of Nokia’s negligence
or intentional misconduct or in case of death or personal injury
resulting from Nokia’s proven negligence.
33
Page 34

34
 Loading...