

Page 1

Nokia 6111 User Guide
EN 9241565
FCC draft
Page 2

DECLARATION OF CONFORMITY
We, NOKIA CORPORATION declare under our sole responsibility that the product RM-82 is in
conformity with the provisions of the following Council Directive: 1999/5/EC.
A copy of the Declaration of Conformity can be found from
http://www.nokia.com/phones/declaration_of_conformity/.
The crossed-out wheeled bin means that within the European Union the product
must be taken to separate collection at the product end-of life. This applies to
your device but also to any enhancements marked with this symbol. Do not
dispose of thes e products as unsorted municipal waste.
Copyright © 2005 Nokia. All rights reserved.
Reproduction, transfer, distribution or storage of part or all of the contents in this document
in any form without the prior written perm ission of Nokia is prohibited.
Nokia, Visual Radio, Nokia Connecting People, Xpress-on, and Pop-Port are trademarks or
registered trademarks of Nokia Corporation. Other product and company names mentioned
herein may be trademarks or tradenames of their respective owners.
Nokia tune is a sound mark of Nokia Corporation.
Includes RSA BSAFE cryptographic or security protocol software from RSA Security.
Java is a trademark of Sun Microsystems, Inc.
Nokia operates a policy of continuous development. Nokia reserves the right to make
changes and improvements to any of the products described in this document without prior
notice.
This product is licensed under the MPEG-4 Visual Patent Portfolio License (i) for personal and
noncommer cial use in co nnection with information which has been enco ded in compliance
with the MPEG-4 Visual Standard by a consumer engaged in a personal and noncommercial
activity and (ii) for use in connection with MPEG-4 video provided by a licensed video
provider. No license is granted or shall be implied for any other use. Additional information,
including that related to prom otional, internal, an d commercial uses, may be ob tained from
MPEG LA, LLC. See <http://www.mpegla.com>.
Under no circumstances shall Nokia be responsible for any loss of data or income or any
special, incidental, consequential or indirect damages howsoever caused.
The contents of this document are provided "as is". Except as required by applicable law, no
warranties of any kind, either express or implied, including, but not limited to, the implied
warranties o f merchantability an d fitness for a partic ular purpose, are mad e in relation to the
Page 3

accuracy, reliability or contents of this document. Nokia reserves the right to revise this
document or withdraw it at any time without prior notice.
The availability of particular products may vary by region. Please check with the Nokia dealer
nearest to you.
This device may contain commodities, technology or software subject to export laws and
regulations from the US and other countries. Dive rsion contrary to law is pr ohibited.
FCC/INDUSTRY CANADA NOTICE
Your phone may cause TV or radio interference (for example, when using a telephone in close
proximity to receiving equipment). The FCC or Industry Canada can require you to stop using
your telep hone if such interference cannot be elimin ated. If you require assistance, contact
your local service fac ility.
This device complie s with part 15 of the FCC rules. Operation i s subject to the following two
conditions: (1) This device may not cause harmful interference, and (2) th is device must
accept an y interference receiv ed, including interfe rence that may cause undesired operation.
EN 9241565 /Issue 1/FCC draft
Page 4

Contents
For your safety.......................... 6
General information................. 9
Overview of functions........................... 9
Access codes............................................ 9
Configuration settings service ........ 10
Download content and applications 11
Nokia support on the Web ............... 11
1. Get started ......................... 12
Open the slide phone......................... 12
Install SIM card and battery ............ 12
Charge the battery.............................. 14
Switch the phone on and off........... 14
Antenna ................................................. 15
Wrist strap ............................................ 15
2. Your phone......................... 16
Keys and parts...................................... 16
Standby mode ...................................... 17
Keypad lock (keyguard) ..................... 20
3. Call functions..................... 21
Make a call ........................................... 21
Answer or reject a call....................... 21
Options during a call.......................... 22
4. Write text........................... 23
Settings.................................................. 23
Predictive text input .......................... 24
Traditional text input......................... 24
Tips .......................................................... 25
5. Navigate the menus .......... 26
6. Messaging .......................... 27
Text messages (SMS).......................... 27
Multimedia messages (MMS) .......... 29
Nokia Xpress audio messaging........ 31
Memory full .......................................... 32
Folders.................................................... 32
E-mail application .............................. 33
Instant messaging (IM) ..................... 35
Voice messages.................................... 39
Info messages ...................................... 39
Service commands .............................. 40
Delete messages .................................. 40
Message settings................................. 40
7. Contacts.............................. 43
Search for a contact .......................... 43
Save names and phone numbers.... 43
Save details........................................... 43
Copy contacts ...................................... 44
Edit contact details ............................ 44
Delete contacts or contact details. 44
Business cards...................................... 45
My presence ......................................... 45
Subscribed names ............................... 46
Settings.................................................. 47
Groups.................................................... 47
Voice dialing......................................... 48
Speed dials............................................ 49
Info, service, and my numbers ........ 49
8. Log ...................................... 50
Recent calls lists.................................. 50
Counters and timers........................... 50
Positioning information .................... 50
9. Settings ............................. 52
Profiles ................................................... 52
Themes ................................................... 52
Tones....................................................... 52
Display.................................................... 53
Time and date ...................................... 54
My shortcuts ........................................ 54
Connectivity ......................................... 55
Call .......................................................... 61
4
Page 5

Phone ...................................................... 61
Enhancements ...................................... 62
Configuration........................................ 63
Security .................................................. 64
Restore factory settings..................... 65
10. Operator menu ................ 66
11. Gallery.............................. 66
12. Media ............................... 67
Camera ................................................... 67
Media player ......................................... 69
Music player.......................................... 69
Radio ....................................................... 71
Recorder ................................................. 73
Equalizer................................................. 74
13. Push to talk ..................... 75
Push to talk channels......................... 75
Switch PTT on and off ........................ 76
Make and receive a PTT call ............. 77
Callback requests................................. 79
Add a one-to-one contact ................ 80
PTT settings ........................................... 80
Configuration settings ....................... 81
Web ......................................................... 81
14. Organizer.......................... 82
Alarm clock............................................ 82
Calendar ................................................. 82
To-do list................................................ 83
Notes....................................................... 84
Calculator .............................................. 84
Countdown timer ................................ 85
Stopwatch ............................................. 85
15. Applications..................... 86
Games ..................................................... 86
Collection............................................... 86
16. Web................................... 88
Set up browsing ................................... 88
Connect to a service........................... 88
Browse pages........................................ 89
Appearance settings ........................... 90
Cookies ................................................... 90
Scripts over secure connection ....... 91
Bookmarks ............................................. 91
Download files...................................... 91
Service inbox ........................................ 92
Cache memory...................................... 93
Browser security .................................. 93
17. SIM services ..................... 96
18. PC connectivity................ 97
PC Suite.................................................. 97
Packet data, HSCSD, and CSD.......... 97
Data communication applications . 97
19. Battery information......... 98
Charging and discharging ................. 98
Nokia battery authentication
guidelines............................................... 98
20. Technical Information .. 101
Care and maintenance ........ 102
Additional safety
information.......................... 103
APPENDIX ............................ 107
A message from the CTIA ....107
Message from the FDA ........109
Index..................................... 115
5
Page 6

For your safety
For your safety
Read these simple guidelines. Not following them may be dangerous or illegal.
Read the complete user guide for further information.
SWITCH ON SAFELY
Do not switch the phone on when wireless phone use is prohibited or
when it may cause interference or danger.
ROAD SAFETY COMES FIRST
Obey all local laws. Always keep your hands free to operate the
vehicle while driving. Your first consideration while driving should
be road safety.
INTERFERENCE
All wireless phones may be susceptible to interference, which could
affect performance.
SWITCH OFF IN HOSPITALS
Follow any restrictions. Switch the phone off near medical
equipment.
SWITCH OFF IN AIRCRAFT
Follow any restrictions. Wireless devices can cause interference in
aircraft.
SWITCH OFF WHEN REFUELING
Do not use the phone at a refueling point. Do not use near fuel or
chemicals.
SWITCH OFF NEAR BLASTING
Follow any restrictions. Do not use the phone where blasting is in
progress.
USE SENS IBLY
Use only in the normal position as explained in the product
documentation. Do not touch the antenna unnecessarily.
QUALIFIED SERVICE
Only qualified personnel may install or repair this product.
ENHANCEMENTS AND BATTERIES
Use only approved enhancements and batteries. Do not connect
incompatible products.
6
Page 7

For your safety
WATER-RESISTANCE
Your phone is not water-resistant. Keep it dry.
BACK-UP COPIES
Remember to make back-up copies or keep a written record of all
important information stored in your phone.
CONNECTING TO OTHER DEVICES
When connecting to any other device, read its user guide for detailed
safety instructions. Do not connect incompatible products.
EMERGENCY CALLS
Ensure the phone is switched on and in service. Press the end key as
many times as needed to clear the display and return to the start
screen. Enter the emergency number, then press the call key. Give
your location. Do not end the call until given permission to do so.
■ About your device
The wireless device described in this guide is approved for use on the EGSM 900
and GSM 1800 and 1900 networks. Contact your service provider for more
information about networks.
When using the features in this device, obey all laws and respect the privacy and
legitimate rights of others.
Warning: To use any features in this device, other than the alarm clock,
the device must be switched on. Do not switch the device on when
wireless device use may cause interference or danger.
■ Network services
To use the phone you must have service from a wireless service provider. Many of
the features in this device depend on features in the wireless network to
function. These network services may not be available on all networks or you may
have to make specific arrangements with your service provider before you can
utilize network services. Your service provider may need to give you additional
instructions for their use and explain what charges will apply. Some networks
may have limitations that affect how you can use network services. For instance,
some networks may not support all language-dependent characters and services.
Your service provider may have requested that certain features be disabled or not
activated in your device. If so, they will not appear on your device menu. Your
device may also have been specially configured. This configuration may include
7
Page 8

For your safety
changes in menu names, menu order, and icons. Contact your service provider for
more information.
This device supports WAP 2.0 protocols (HTTP and SSL) that run on TCP/IP
protocols. Some features of this device, such as text messages, multimedia
messages, audio messages, instant messaging service, e-mail, presence enhanced
contacts, mobile Internet services, content and application download, and
synchronization with a remote Internet server, require network support for these
technologies.
■ Shared memory
The phone has two memories. The following features may share the first memory:
contacts, text messages, multimedia messages (but no attachments), instant
messaging, groups, voice tags, calendar, and to-do notes. The second shared
memory is used by files stored in Gallery, attachments of multimedia messages,
e-mail, and Java
the memory available for the remaining features sharing memory. For example,
saving many Java applications may use all of the available memory. Your device
may display a message that the memory is full when you try to use a shared
memory feature. In this case, delete some of the information or entries stored in
the shared memory features before continuing. Some of the features, such as text
messages, may have a certain amount of memory specially allotted to them in
addition to the memory shared with other features.
TM
applications. Use of one or more of these features may reduce
■ Enhancements
A few practical rules about accessories and enhancements.
• Keep all accessories and enhancements out of the reach of small children.
• When you disconnect the power cord of any accessory or enhancement, grasp
and pull the plug, not the cord.
• Check regularly that enhancements installed in a vehicle are mounted and
are operating properly.
• Installation of any complex car enhancements must be made by qualified
personnel only.
8
Page 9

General information
General information
■ Overview of functions
Your phone provides many functions that are practical for daily use,
such as a calendar, a clock, an alarm clock, a radio, and a built-in
camera. Your phone also supports the following functions:
• Enhanced data rates for GSM evolution (EDGE). See “Packet data,”
p. 58
• Extensible hypertext markup language (XHTML). See “Web,” p. 88
• Audio messaging. See “Nokia Xpress audio messaging,” p. 31
• Instant messaging. See “Instant messaging (IM),” p. 35
• E-mail application. See “E-mail application,” p. 33
• Voice commands. See “Voice dialing,” p. 48 and “Voice commands,”
p. 55.
• Push to talk. See “Push to talk,” p. 75
• Presence-enhanced contacts. See “My presence,” p. 45
TM
• Java 2 Platform, Micro Edition (J2ME
■ Access codes
). See “Applications,” p. 86
Security code
The security code (5 to 10 digits) helps to protect your phone against
unauthorized use. The preset code is 12345. To change the code, and to
set the phone to request the code, see “Security,” p. 64.
PIN codes
The personal identification number (PIN) code and the universal
personal identification number (UPIN) code (4 to 8 digits) help to
protect your SIM card against unauthorized use. See “Security,” p. 64.
The PIN2 code (4 to 8 digits) may be supplied with the SIM card and is
required for some functions.
9
Page 10

General information
The module PIN is required to access the information in the security
module. See “Security module,” p. 93.
The signing PIN is required for the digital signature. See “Digital
signature,” p. 94.
PUK codes
The personal unblocking key (PUK) code and the universal personal
unblocking key (UPUK) code (8 digits) is required to change a blocked
PIN code and UPIN code, respectively. The PUK2 code (8 digits) is
required to change a blocked PIN2 code. If the codes are not supplied
with the SIM card, contact your local service provider for the codes.
Barring password
The barring password (4 digits) is required when using the Call barring
service. See “Security,” p. 64.
■ Configuration settings service
To use some of the network services, such as mobile Internet services,
MMS, Push to talk, Nokia Xpress audio messaging, or remote Internet
server synchronization, your phone needs the correct configuration
settings. You may be able to receive the settings directly as a
configuration message. After receiving the settings you need to save
them on your phone. The service provider may provide a PIN that is
needed to save the settings. For more information on availability,
contact your network operator, service provider, nearest authorized
Nokia dealer, or visit the support area on the Nokia Web site,
<www.nokia.com/support>.
When you have received a configuration message, Configuration sett.
received is displayed.
To save the settings, select Show > Save. If the phone displays Enter
settings' PIN:, enter the PIN code for the settings, and select OK. To
receive the PIN code, contact the service provider that supplies the
settings. If no settings are saved yet, the received settings are saved and
10
Page 11

General information
set as default configuration settings. Otherwise, the phone asks Activate
saved configuration settings?.
To discard the received settings, select Exit or Show > Discard.
To edit the settings, see “Configuration,” p. 63.
■ Download content and applications
You may be able to download new content (for example, themes) to the
phone (network service). Select the download function (for example, in
the Gallery menu). To access the download function, see the respective
menu descriptions. For the availability of different services, pricing, and
tariffs, contact your service provider.
Important: Use only services that you trust and that offer adequate
security and protection against harmful software.
■ Nokia support on the Web
Check <www.nokia.com/support> or your local Nokia Web site for the
latest version of this guide, additional information, downloads, and
services related to your Nokia product.
On the Web site, you can get information on the use of Nokia product
and services. If you need to contact customer service, check the list of
local Nokia Care contact centers at www.nokia.com/customerservice.
For maintenance services, check your nearest Nokia Care services
location at www.nokia.com/repair.
11
Page 12

Get started
1. Get started
■ Open the slide phone
To open the slide of the phone, push the upper part of the
phone up.
■ Install SIM card and battery
Always switch the device off and disconnect the charger before
removing the battery.
Keep all SIM cards out of the reach of small children.
For availability and information on using SIM card services,
contact your SIM card vendor. This may be the service provider, network operator,
or other vendor.
This device is intended for use with BL-4B battery.
The SIM card and its contacts can easily be damaged by scratches or
bending. Be careful when handling, inserting, or removing the card.
Install SIM card
1. Make sure that the cover of the
connector panel is closed.
2. Slide the phone open.
3. Open the SIM card compartment
(1) on the back of the slide
4. Slide the metal SIM card holder
towards the compartment lid to
release it (2).
5. Open the SIM card holder.
12
Page 13

6. Insert the SIM card in the holder as shown (cut
corner at the upper right).
7. Close the SIM card holder, and press it down
slightly.
8. To lock the SIM card holder, slide it away from
the compartment lid (1).
9. Close the SIM card compartment (2).
Install battery
Important: Always use original Nokia batteries.
See “Nokia battery authentication guidelines,” p. 98.
1. Open the cover of the
connector panel (1).
2. Press the red release
button above the
connector panel (2),
and take off the back
cover of the phone (3).
3. Observe the battery contacts, and place the
battery in the battery compartment.
Get started
13
Page 14

Get started
4. Place the back cover in the double catch of
the phone (1) and press it down slightly (2)
to close the back cover.
■ Charge the battery
Warning: Use only batteries, chargers, and enhancements approved by
Nokia for use with this particular model. The use of any other types may
invalidate any approval or warranty, and may be dangerous.
This device is intended for use when supplied with power from an AC-4 charger.
For availability of approved enhancements, please check with your dealer.
1. Connect the charger to a wall socket.
2. Open the cover of the connector panel (1).
3. Connect the lead from the charger to the
socket on the bottom of your phone (2).
If the battery is completely discharged, it may
take a few minutes before the charging indicator appears on the display
or before any calls can be made.
The charging time depends on the charger and the battery used. For
example, charging a BL-4B battery with the AC-4 charger takes
approximately 1 hour and 10 minutes while the phone is in the standby
mode.
■ Switch the phone on and off
Warning: Do not switch the phone on when wireless phone use is
prohibited or when it may cause interference or danger.
Press the power key.
If the phone asks for a PIN or a UPIN code, enter the
code (displayed as ****), and select OK.
14
Page 15

Get started
Plug and play service
When you switch on your phone for the first time, and the phone is in
the standby mode, you are asked to get the configuration settings from
your service provider (network service). Confirm or decline the query.
See "Connect to service provider support," p. 63, and “Configuration
settings service,” p. 10.
■ Antenna
Your device has an internal antenna.
Note: As with any other radio
transmitting device, do not touch
the antenna unnecessarily when
the device is switched on. Contact with the
antenna affects call quality and may cause
the device to operate at a higher power
level than otherwise needed. Avoiding
contact with the antenna area when
operating the device optimizes the
antenna performance and the battery life.
■ Wrist strap
Apply the strap to the eyelet at the upper right corner
of the phone as shown in the picture.
15
Page 16

Your phone
2. Your phone
■ Keys and parts
1 Left selection key
2 Call key
3 Middle selection key
4 4-way navigation key
5 Right selection key
6 End key
7 Keypad
8 Volume up and PTT key
and zoom in key
9 Volume down key
and zoom out key
10 Camera release key
11 Camera flash
12 Camera lens
13 Mirror for self-portraits
14 Infrared (IR) port
15 Power key
TM
16 Pop-Port
17 Back cover release button
18 Charger connector
connector
16
Page 17

Your phone
■ Standby mode
When the phone is ready for use, and you have not entered any
characters, the phone is in the standby mode.
Display
1 Signal strength of the cellular network at
your current location
2 Battery charge status
3 Indicators
4 Name of the network or the operator logo
5 Clock
6 Display area
7 Left selection key: Go to,
or another function that you selected
8 Middle selection key is Menu
9 Right selection key: Names, or another function that you selected
To set the left and right selection key function, see “My shortcuts,” p. 54.
Operator variants may have an operator-specific name to access an
operator-specific Web site.
Active standby mode
In the standby mode, the main screen shows a list of selected phone
features and information, that can be directly accessed: Short cut icons,
audio functions, calendar and notes. Scroll up or down to activate the
navigation in the list. Select Select to start a feature or View to display
information. Left and right arrows at the beginning and end of a line
indicate that further information is available by scrolling left or right. To
end the active standby navigation mode, press Exit.
To switch off the active standby mode select Options > Acti ve
standby > Off or Menu > Settings > Display > Standby mode
settings >Active standby > Off.
17
Page 18

Your phone
To organize and change the active standby mode, activate the
navigation mode and select Options > Active standby > My active
standby > Options and the following options:
Personalise — to assign or change phone features in the standby mode
Organise — to move the position of features in the standby mode
Enabling standby — select keys to enable the standby navigation mode
Personal shortcut list
To view the functions in the personal shortcut list, select Go to. To
activate a function select it.
To view a list with available functions, select Go to > Options > Select
options. To add a function to the shortcut list, select Mark. To remove a
function from the list, select Unmark.
To rearrange the functions on your personal shortcut list, select Go to >
Options > Organise. Select the desired function, Move, and the place
where you want to move the function.
Shortcuts in the standby mode
• To access the list of dialed numbers, press the call key once. Scroll to
the number or name that you want; to call the number, press the call
key.
• To open the web browser, press and hold 0.
• To call your voice mailbox, press and hold 1 .
• Use the navigation key as a shortcut. See “My shortcuts,” p. 54.
Power saving
The power saving mode is activated, when no function of the phone has
been used for a certain period of time. Only a small area of the display
stays visible and moves down the display. To activate the power saver,
see Power sa ver in “Display,” p. 53. To deactivate the screen saver, open
the slide, or press any key.
18
Page 19

Indicators
You received one or several text or picture messages. See “Read
and reply to a SMS message,” p. 28.
You received one or several multimedia messages. See “Read a
MMS and reply,” p. 30.
The phone registered a missed call. See “Log,” p. 50.
The keypad is locked. See “Keypad lock (keyguard),” p. 20.
The phone does not ring for an incoming call or text message
when Incoming call alert and Message alert tone are set to Off.
See “Tones,” p. 52.
The alarm clock is set to On. See “Alarm clock,” p. 82.
When the packet data connection mode Always online is
selected and the packet data service is available, the indicator is
shown. See “Packet data,” p. 58.
A packet data connection is established. See “Packet data,”
p. 58 and “Browse pages,” p. 89.
The packet data connection is suspended (on hold), for example,
if there is an incoming or outgoing call during a packet data
dial-up connection.
When the infrared connection is activated, the indicator is
shown continuously.
Bluetooth connection indicator. See “Bluetooth wireless
technology,”, p. 55.
Push to talk connection is active or suspended. See “Push to
talk,” p. 75.
Your phone
19
Page 20

Your phone
■ Keypad lock (keyguard)
To prevent the keys from being accidentally pressed, select Menu, and
press * within 3.5 seconds to lock the keypad. In the standby mode close
the slide of the phone, and select Lock to lock the keys.
To unlock the keypad, slide the phone open or select Unlock, and press *
or OK, if slide is closed. If the Security keyguard is set On, enter the
security code if requested.
To answer a call when the keyguard is on, press the call key or slide the
phone open. When you end or reject the call, the keypad automatically
locks.
For Automatic keyguard and Security keyguard, see “Phone,” p. 61.
When the keyguard is on, calls still may be possible to the official emergency
number programmed into your device.
20
Page 21

Call functions
3. Call functions
■ Make a call
1. Enter the phone number, including the area code.
For international calls, press * twice for the international prefix (the
+ character replaces the international access code); then enter the
country code, the area code without the leading 0, if necessary, and
the phone number.
2. To call the number, press the call key.
3. To end the call or to cancel the call attempt, press the end key.
To accept or end a call by opening or closing the slide, see Slide call
handling in “Call,” p. 61.
To make a call using names, search for a name or phone number in
Contacts. See “Search for a contact,” p. 43. Press the call key to call the
number.
To access the list of up to 20 numbers you last called or attempted to
call, press the call key once in the standby mode. To call the number,
select a number or name, and press the call key.
Speed dialing
Assign a phone number to one of the speed-dialing keys, 2 to 9. See
“Speed dials,” p. 49. Call the number in either of the following ways:
• Press the speed-dialing key, then press the call key.
•If Speed dialling is set to On, press and hold a speed-dialing key until
the call begins. See Speed dialling in “Call,” p. 61.
■ Answer or reject a call
To answer an incoming call, press the call key. To end the call, press the
end key, or close the slide. See Slide call handling in “Call,” p. 61.
To reject an incoming call, press the end key, or if the phone is open,
close the phone.
21
Page 22

Call functions
To mute the ringing tone select Silence.
Tip: If Divert if busy is activated to divert the calls (for example,
to your voice mailbox), rejecting an incoming call also diverts the
call. See “Call,” p. 61.
If a compatible headset supplied with a headset key is connected to the
phone, to answer and end a call, press the headset key.
Call waiting
To answer the waiting call (network service) during an active call, press
the call key. The first call is put on hold. To end the active call, press the
end key.
To activate Call waiting, see “Call,” p. 61.
■ Options during a call
Warning: Do not hold the device near your ear when the loudspeaker is
in use, because the volume may be extremely loud.
Many of the options that you can use during a call are network services.
For availability, contact your service provider.
During a call, select Options and from the following options:
Call options are Mute or Unmute, Contacts, Menu, Lock keypad, Record,
Loudspeaker or Handset.
Network services options are Answer or Reject, Hold or Unhold, New
call, Add to conference, End call, End all calls and the following:
Send DTMF — to send tone strings
Swap — to switch between the active call and the call on hold
Transfer — to connect a call on hold to an active call and disconnect
yourself
Conference — to make a conference call that allows up to six persons to
take part in a conference call
Private call —to discuss privately in a conference call
22
Page 23

Write text
4. Write text
You can enter text (for example, when writing messages) using
traditional or predictive text input. When using traditional text input,
press a number key, 1 to 9, repeatedly until the desired character
appears. In predictive text input you can enter a letter with a single key
press.
When you write text, appears at the top of the display, indicating
predictive text input, and appears, indicating traditional text input.
, , or appears next to the text input indicator, indicating the
character case. To change the character case, press #. indicates
number mode. To change from the letter to number mode, press and
hold #, and select Number mode.
Tip: To quickly set predictive text input on or off when writing
text, press # twice, or press and hold Options.
■ Settings
To set the writing language while writing text, select Options > Writing
language.
When writing text, select Options > Prediction sett..
• To set predictive text input on, select Prediction > On.
To revert to traditional text input, select Prediction > Off.
• To select the prediction type, select Prediction type > Normal or
Word suggestions. If you select Normal, the phone tries to predict the
word on the basis of the characters you have entered. If you select
Word suggestions, the phone tries to predict and complete the word
even before you have entered all the characters.
23
Page 24

Write text
■ Predictive text input
Predictive text input allows you to write text quickly using the phone
keypad and a built-in dictionary.
1. Start writing a word using the keys 2 to 9. Press each key only once
for one letter. The phone displays * or the letter if it has a meaning as
a word separately. The entered letters are displayed underlined.
If you select Word suggestions as prediction type, the phone starts to
predict the word you are writing. After you enter a few letters, and if
these entered letters are not a word, the phone tries to predict longer
words. Only the entered letters are displayed underlined.
2. When you finish writing the word and it is correct, to confirm it by
adding a space, press 0.
If the word is not correct, press * repeatedly, or select Options >
Matches. When the word that you want appears, select Select.
If the ? character is displayed after the word, the word you intended
to write is not in the dictionary. To add the word to the dictionary,
select Spell. The phone displays the entered letters. Complete the
word using traditional text input, and select Save.
For more instructions for writing text, see “Tips,” on page 25.
■ Traditional text input
Press a number key, 1 to 9, repeatedly until the desired character
appears. Not all characters available under a number key are printed on
the key. The characters available depend on the selected writing
language. See “Settings,” on page 23.
If the next letter you want is located on the same key as the present one,
wait until the cursor appears, or briefly press any of the navigation keys
and enter the letter.
The most common punctuation marks and special characters are
available under the number key 1.
For more instructions for writing text, see “Tips,” on page 25.
24
Page 25

Write text
■ Tips
The following functions may also be available for writing text:
• To insert a space, press 0.
• To move the cursor to the left, right, down, or up, scroll in the
corresponding direction.
• To insert a number while in letter mode, press and hold the desired
number key.
• To delete a character to the left of the cursor, select Clear. To delete
the characters more quickly, select and hold Clear.
To delete all the characters at once when writing a message, select
Options > Clear field.
• To insert a word when using predictive text input, select Options >
Insert word. Write the word using traditional text input, and select
Save. The word is also added to the dictionary.
• To insert a special character when using traditional text input, press
*; when using predictive text input, press and hold *, or select
Options > Insert symb ol. Scroll to a character, and select Use.
• To insert a smiley when using traditional text input, press * twice;
when using predictive text input, press and hold *, and press * again,
or select Options > Insert smiley. Scroll to a smiley, and select Use.
The following options are available when writing text messages:
• To insert a number while in letter mode, select Options > Insert
number. Enter the phone number or search for it in Contacts, and
select OK.
• To insert a name from Contacts, select Options > Insert contact. To
insert a phone number attached to the name, select Options > Insert
number.
25
Page 26

Navigate the menus
5. Navigate the menus
The phone offers you an extensive range of functions, which are
grouped into menus.
1. To access the menu, select Menu. To change the menu view, select
Options > Main menu view > List or Grid.
2. Scroll through the menu, and select a submenu (for example,
Settings).
3. If the menu contains submenus, select the one that you want (for
example, Call).
4. If the selected menu contains further submenus, select the one that
you want (for example, Anykey answer).
5. Select the setting of your choice.
6. To return to the previous menu level, select Back. To exit the menu,
select Exit.
To rearrange the menu, scroll to the menu you want to move, and select
Options > Organise > Move. Scroll to where you want to move the
menu, and select OK. To save the change, select Done > Yes.
26
Page 27

Messaging
6. Messaging
The message services can only be used if they are supported by your
network or your service provider.
Note: When the phone is sending the message, the animated is
shown. This is an indi catio n that the messa ge h as bee n sent by y our
device to the message center number programmed into your device.
This is not an indication that the message has been received at the
intended destination. For more details about messaging services, check
with your service provider.
Important: Exercise caution when opening messages. Messages may
contain malicious software or otherwise be harmful to your device or
PC.
Only devices that have compatible features can receive and display
messages. The appearance of a message may vary depending on the
receiving device.
■ Text messages (SMS)
Using the short message service (SMS) you can send and receive
multipart messages made of several ordinary text messages (network
service).
Before you can send any text or e-mail message, you must save your
message center number. See “Message settings,” p. 40.
To check SMS e-mail service availability and to subscribe to the service,
contact your service provider.
Your device supports the sending of text messages beyond the character limit for
a single message. Longer messages are sent as a series of two or more messages.
Your service provider may charge accordingly. Characters that use accents or
other marks, and characters from some language options like Chinese, take up
more space limiting the number of characters that can be sent in a single
message.
At the top of the display, you can see the message length indicator
counting backwards from the maximum number of characters
supported by the phone.
27
Page 28

Messaging
Write and send a SMS message
Use the navigation key to jump from one input field or button to the
next.
1. Select Menu > Messaging > Create message > Text message.
2. Enter the recipients phone number in the input field To:, or select
Add to select the phone number from various lists.
3. Enter a message in the Message: input field. See “Write text,” p. 23.
To insert text templates, a contact, or other items into the message,
select Options. Sending a multipart message may cost more than
sending one text message, see “Templates,” p. 29.
4. To send the message select Send.
Read and reply to a SMS message
is shown when you receive an SMS message or an SMS e-mail. The
blinking indicates that the message memory is full. Before you can
receive new messages, delete some of your old messages in the Inbox
folder.
To view a new message, select Show. To view it later, select Exit.
To read the message later, select Menu > Messaging > Inbox. If more
than one message is received, select the message that you want to read.
indicates an unread message.
While reading a message, select Options to delete or forward the
message; edit the message as a text message or an SMS e-mail, or move
it to another folder; or view or extract message details. You can also
copy text from the beginning of the message to your phone calendar as
a reminder note.
To reply to a message, select Reply > Text message, Multimedia, or
Audio message. Enter the reply message. When replying to an e-mail,
first confirm or edit the e-mail address and subject.
To send the message to the displayed number, select Send or press the
call key.
28
Page 29

Messaging
Templates
Your phone has text templates that you can use in text or SMS email messages.
To access the template list, select Menu > Messaging > Saved items >
Templates.
■ Multimedia messages (MMS)
A multimedia message can contain text, sound, a picture, a calendar
note, a business card, or a video clip. If the message is too large, the
phone may not be able to receive it. Some networks allow text messages
that include an Internet address where you can view the multimedia
message.
To set the settings for multimedia messaging, see “Multimedia,” p. 41.
To check availability and to subscribe to the multimedia messaging
service, contact your service provider.
You cannot receive multimedia messages during a call, a game, another
Java application, or an active browsing session over GSM data. Because
delivery of multimedia messages can fail for various reasons, do not rely
solely upon them for essential communications.
Write and send a MMS
1. Select Menu > Messaging > Create message > Multimedia.
2. To compose your message, select an input window and Insert and
from the options.
Text — to write a text
Image, Sound clip or Video clip — to insert a file from Gallery, or to
take a new image or to record a new video or sound clip to be added
to the message
Business card — to insert a contact from Names
Calendar note — to insert a note from Calendar
Slide — to insert a slide to the message. Your phone supports
multimedia messages that contain several pages (slides). Each slide
29
Page 30

Messaging
can contain text, one image, a calendar note, a business card, and
one sound clip. To open a desired slide if the message contains
several slides, select Options > Previous slide or Next slide. To set the
interval between the slides, select Options > Slide timing. To move a
slide component within the message, select Options > Move slide.
3. To send the message, select Send. Enter the recipients phone number
in the input field To: , or select Add to select the phone number from
various lists. Optionally enter a text in the input field Subject:. Select
the field Presentation: and Edit to add or remove multimedia objects.
Select Send to move the message to the Outbox folder for sending.
While the multimedia message is being sent, the animated indicator
is displayed and you can use other functions on the phone. If the
sending fails, the phone tries to resend it a few times. If this fails, the
message remains in the Outbox folder, and you can try to resend it
later.
If you select Save sent messages > Yes, the sent message is saved in
the Sent items folder. See “Multimedia,” p. 41. When the message is
sent, it is not an indication that the message has been received at the
intended destination.
Copyright protections may prevent some images, music (including ringing tones),
and other content from being copied, modified, transferred or forwarded.
Read a MMS and reply
Important: Exercise caution when opening messages. Multimedia
message objects may contain malicious software or otherwise be
harmful to your device or PC.
When a multimedia message has been received, the text Multimedia
message received is shown.
1. To read the message, select Show.
To view it later, select Exit. To read the message later, select Menu >
Messaging > Inbox. In the list of messages, indicates an unread
message. Select the message that you want to view.
2. The function of the middle selection key changes according to the
currently displayed attachment in the message:
30
Page 31

Messaging
To view the whole message if the received message contains a
presentation, a sound clip, or view a video clip, select Play.
To view a business card or calendar note or to open a theme object,
select Open.
3. To reply to the message, select Options > Reply > Text message,
Audio message, or Multimedia. Enter the reply message, and select
Send. You can send the reply message only to the person who sent
you the original message.
Select Options to access available options.
■ Nokia Xpress audio messaging
With this menu, use the multimedia message service to create and send
a voice message in a convenient way. Multimedia messaging service
must be activated before this service can be used.
Create and send an audio message
1. Select Menu > Messaging > Create message > Audio message. The
recorder opens. To use the recorder, see “Recorder,” p. 73.
2. When you have stopped the recording, enter the recipients phone
number in the input field To:, or select Add to select the phone
number from various lists.
3. Scroll down to the message field, and select Play to check the
message before sending.
Select Options > Replace sound clip to repeat the recording, Save
message, Save sound clip to save the recording in Gallery, or Add
subject to insert a subject to the message.
4. To send the message, select Send.
Receive an audio message
When your phone is receiving an audio message, 1 audio message
received is shown. Select Play to open the message or select Show >
Play if there are more than one message received. Select Options to see
the options available. To listen to the message later, select Exit.
31
Page 32

Messaging
To save the message, select Options > Save and the folder in which you
want to save the message.
■ Memory full
When you are receiving a message, and the memory for the messages is
full, Memory full. Unable to receive msgs. is shown. To first delete old
messages, select OK > Yes and the folder. Scroll to the desired message,
and select Delete. If one or more messages are marked, select Mark.
Mark all the messages you want to delete, and select Options > Delete
marked.
■ Folders
The phone saves received text and multimedia messages in the Inbox
folder.
Multimedia messages that have not yet been sent are moved to the
Outbox folder.
If you select Message settings > General settings > Save sent message >
Yes, the sent messages are saved in the Sent items folder.
To save the message that you create and wish to send later in the Saved
items folder, select Options > Save message > Saved messages.
indicates unsent messages.
To organize your text messages, you can add new folders for your
messages. Select Messaging > Saved items.
To add a folder, select Options > Add folder. To delete or rename a
folder, scroll to the desired folder, and select Options > Delete folder or
Rename folder.
To move a file to an other folder, highlight the file, and select Options >
Move.
Delivery reports contains delivery information on messages you have
sent.
32
Page 33

Messaging
■ E-mail application
The e-mail application (network service) allows you to access your
compatible e-mail account from your phone when you are not in the
office or at home. This e-mail application is different from the SMS and
MMS e-mail function.
Your phone supports POP3 and IMAP4 e-mail servers. Before you can
send and retrieve any e-mail, you may need to do the following:
• Obtain a new e-mail account or use the current one. For availability
of your e-mail account contact your e-mail service provider.
• For the settings required for e-mail, contact your e-mail service
provider. You may receive the e-mail configuration settings as a
configuration message. See “Configuration settings service,” p. 10.
You can also enter the settings manually. See “Configuration,” p. 63.
To activate the e-mail settings, select Menu > Messaging > Message
settings > E-mail messages. See “E-mail,” p. 42.
This application does not support keypad tones.
Write and send an e-mail
1. Select Menu > Messaging > E-mail > Create e-mail.
2. Enter the recipient’s e-mail address, a subject, and the e-mail
message.
To attach a file to the e-mail, select Options > Attach and the file in
Gallery.
3. Select Send > Send now.
Download e-mail
1. To access the e-mail application, select Menu > Messaging > E-mail.
2. To download e-mail messages that have been sent to your e-mail
account, select Retrieve.
To download new e-mail messages and to send e-mail that has been
saved in the Outbox folder, select Options > Retrieve and send.
33
Page 34

Messaging
To download first the headings of the new e-mail messages that
have been sent to your e-mail account, select Options > Check new
e-mail. Then, to download the selected e-mail, mark the desired
ones, and select Options > Retrieve.
3. Select the new message in Inbox. To view it later, select Back.
indicates an unread message.
Read and reply to e-mail
Important: Exercise caution when opening messages. E-mail
messages may contain malicious software or otherwise be harmful to
your device or PC.
Select Menu > Messaging > E-mail > Inbox and the desired message.
While reading the message, select Options to view the available options.
To reply to an e-mail, select Reply > Empty screen or Original text. To
reply to many, select Options > Reply to all. Confirm or edit the e-mail
address and subject; then write your reply. To send the message, select
Send > Send now.
Inbox and other folders
Your phone saves e-mail that you have downloaded from your e-mail
account in Inbox folder. Other folders contains the following folders:
Drafts for saving unfinished e-mail, Archive for organizing and saving
your e-mail, Outbox for saving e-mail that has not been sent, and Sent
items for saving e-mail that has been sent.
To manage the folders and their e-mail content, select Options >
Manage folder.
Delete e-mail messages
Select Menu > Messaging > E-mail > Options > Manage folder and the
desired folder. Mark the messages that you want to delete. To delete
them, select Options > Delete.
Deleting an e-mail from your phone does not delete it from the e-mail
server. To set the phone to delete the e-mail also from the e-mail server,
34
Page 35

Messaging
select Menu > Messaging > E-mail > Options > Extra settings > Leave
copy: > Delete retr. msgs.
■ Instant messaging (IM)
Instant messaging (network service) is a way to send short, simple text
messages to online users.
Before you can use instant messaging, you must subscribe to the
service. To check the availability and costs, and to subscribe to the
service, contact your network operator, from whom you also receive
your unique ID, password, and settings.
To set the required settings for the instant messaging service, see
Connect. settings in “Access the IM menu,” p. 35. The icons and texts on
the display may vary, depending on the instant messaging service.
Depending on the network, the active instant messaging conversation
may consume the phone battery faster, and you may need to connect
the phone to a charger.
Access the IM menu
To access the menu while still offline, select Menu > Messaging >
Instant messages. If more than one set of connection settings for the
instant messaging service is available, select the desired one. If there is
only one set defined, it is selected automatically.
The following options are shown:
Login — to connect to the instant messaging service
Saved convers. — to view, erase or rename the instant messaging
conversations that you have saved during the instant messaging session
Connect. settings — to edit the settings needed for messaging and
presence connection
Connect to the IM service
To connect to the instant messaging service, enter the Instant messages
menu, activate an instant messaging service, and select Login. When the
phone has successfully connected, Logged in is displayed.
35
Page 36

Messaging
To disconnect from the instant messaging service, select Logout.
Start an IM session
Open the Instant messages menu, and connect to the service. Start the
service in different ways.
Select Conversations to view the list of new and read instant messages
or invitations for instant messaging during the active instant messaging
session. Scroll to the message or invitation that you want, and select
Open to read the message.
indicates the new and read group messages. indicates the
new and the read instant messages. indicates the invitations.
The icons and texts on the display may vary, depending on the instant
messaging service.
Select IM contacts to view the contacts that you have added. Scroll to
the contact with whom you would like to chat, and select Chat or Open
if a new contact is shown in the list. To add contacts see “Contacts for
IM,” p. 38. indicates the online and the offline contacts in the
phone contacts memory. indicates a blocked contact. indicates
a contact that has been sent a new message.
Select Groups > Public groups to display the list of bookmarks to public
groups provided by the network operator. To start a instant messaging
session with a group, scroll to a group, and select Join. Enter your screen
name that you want to use in the conversation. When you have
successfully joined the group conversation, you can start a group
conversation. To create a private group, see “Groups,” p. 38.
Select Search > Users or Groups to search for other instant messaging
users or public groups on the network by phone number, screen name,
e-mail address, or name. If you select Groups, you can search for a group
by a member in the group or by group name, topic, or ID.
To start the conversation when you have found the user or the group
that you want, select Options > Chat or Join group.
Start a conversation from Contacts, see “View the subscribed names,”
p. 46.
36
Page 37

Messaging
Accept or reject an invitation
In the standby mode, when you are connected to the instant messaging
service and you receive a new invitation, New invitation received is
displayed. To read it, select Read. If more than one invitation is received,
scroll to the invitation you want, and select Open. To join the private
group conversation, select Accept, and enter the screen name; or to
reject or delete the invitation, select Options > Reject or Delete.
Read a received instant message
In the standby mode, when you are connected to the instant messaging
service, and you receive a new message that is not a message associated
with an active conversation, New instant message is displayed. To read
it, select Read. If you receive more than one message, scroll to the
message, and select Open.
New messages received during an active conversation are held in
Instant messages > Conversations. If you receive a message from
someone who is not in IM contacts, the sender ID is displayed. To save a
new contact that is not in the phone memory, select Options > Save
contact.
Participate in a conversation
To join or start an instant messaging session, select Write. Write your
message, and select Send or press the call key to send it. Select Options
to access available options.
Edit your availability status
1. Open the Instant messages menu, and connect to the instant
messaging service.
2. To view and edit your own availability information or screen name,
select My settings.
3. To allow all the other instant messaging users to see you when you
are online, select Availability > Available for all.
37
Page 38

Messaging
To allow only the contacts on your instant messaging contact list to
see you when you are online, select Availability > Avail. for contacts.
To appear as being offline, select Availability > Appear offline.
When you are connected to the instant messaging service, indicates
that you are online, and indicates that you are not visible to others.
Contacts for IM
To add contacts to the instant messaging contacts list, connect to the
instant messaging service, and select IM contacts. To add a contact to
the list, select Options > Add contact or Add (if you have no contacts
added) > Enter ID manually, Search from serv., Copy from server, or By
mobile number.
Scroll to a contact. To start a conversation, select Chat or Options and
from the available options.
Block and unblock messages
To block messages, connect to the instant messaging service, and select
Conversations > IM contacts; or join or start a conversation. Scroll to
the contact from whom you want to block incoming messages, and
select Options > Block contact > OK.
To unblock the messages, connect to the instant messaging service, and
select Blocked list. Scroll to the contact from whom you want to unblock
the messages, and select Unblock.
Groups
You can create your own private groups for an instant messaging
conversation, or use the public groups provided by the service provider.
The private groups exist only during an instant messaging conversation.
The groups are saved on the server of the service provider. If the server
you are logged on to does not support group services, all group-related
menus are dimmed.
38
Page 39

Messaging
Public groups
Groups — You can bookmark public groups that your service provider
may maintain. Connect to the instant messaging service, and select
Public groups. Scroll to a group with which you want to chat, and select
Join. If you are not in the group, enter your screen name as your
nickname for the group. To delete a group from your group list, select
Options > Delete group.
To search for a group, select Groups > Public groups > Search groups.
You can search for a group by a member in the group, by group name,
topic, or ID.
Create a private group
Connect to the instant messaging service, and select Groups > Create
group. Enter the name for the group and the screen name that you want
to use. Mark the private group members in the contacts list, and write
an invitation.
■ Voice messages
The voice mailbox is a network service and you may need to subscribe to
it. For details, contact your service provider.
To call your voice mailbox, select Menu > Messaging > Voice
messages > Listen to voice messages. To enter, search for, or edit your
voice mailbox number, select Voice mailbox number.
If supported by the network, indicates that there are new voice
messages. Select Listen to call your voice mailbox number.
■ Info messages
Select Menu > Messaging > Info messages. With the Info messages
network service, you can receive messages on various topics from your
service provider. To check availability, topics, and the relevant topic
numbers, contact your service provider.
39
Page 40

Messaging
■ Service commands
Select Menu > Messaging > Service commands. Write and send service
requests (also known as USSD commands) to your service provider, such
as activation commands for network services.
■ Delete messages
To delete messages, select Menu > Messaging > Delete messages > By
message to delete single messages, By folder to delete all messages from
a folder, or All messages. If a folder contains unread messages, the
phone asks whether you want to delete them also.
■ Message settings
General settings
Select Menu > Messaging > Message settings > General settings and
from the following options:
Save sent messages > Yes — set the phone to save the sent messages in
the Sent items folder
Overwriting in Sent items > Allowed— to allow overwriting when
messages are sent and the message memory is full
Font size — to change the font size for reading and writing messages
Graphical smileys > Yes — to replace character-based smileys with
graphical ones
Text messages and SMS e-mail
The message settings affect the sending, receiving, and viewing of
messages.
Select Menu > Messaging > Message settings > Text messages and
from the following options:
Delivery reports — to ask the network to send delivery reports about your
messages (network service)
40
Page 41

Messaging
Message centres and E-mail message centres — to edit the name and
number of the message and e-mail delivery centres. The number can be
obtained from the network operator.
Message centre in use or E-mail centre in use— to select the message
centre to be used
Message validity — to select the length of time for which the network
attempts to deliver your message
Messages sent via — to select the format of the messages to be sent:
Text, Paging, or Fax (network service)
Use packet data > Yes — to set GPRS as the preferred SMS bearer
Character support > Full — to select all characters in the messages to be
sent as viewed. If you select Reduced, characters with accents and other
marks may be converted to other characters. When writing a message,
you can check how the message will look to the recipient by previewing
the message. See “Write and send a SMS message,” p. 28.
Reply via same centre > Yes — to allow the recipient of your message to
send you a reply using your message center (network service)
Multimedia
The message settingsaffect the sending, receiving, and viewing of
multimedia messages.
Select Menu > Messaging > Message settings > Multimedia msgs. and
from the following options:
Delivery reports — to ask the network to send delivery reports about your
messages (network service)
Default slide timing — to define the default time between slides in
multimedia messages
Allow multimedia reception > Yes or No — to receive or to block the
multimedia message. If you select In home network, you cannot receive
multimedia messages when outside your home network.
Incoming multimedia messages > Retrieve, Retrieve manually, or Reject
— to allow the reception of multimedia messages automatically,
manually after being prompted, or to reject the reception
41
Page 42

Messaging
Allow adverts — to receive or reject advertisements. This setting is not
shown if Allow multimedia reception is set to No.
Configuration settings > Configuration — Only the configurations that
support multimedia messaging are shown. Select a service provider,
Default, or Personal config. for multimedia messaging. Select Account
and select a multimedia messaging service account contained in the
active configuration settings.
The settings affect the sending, receiving, and viewing of e-mail.
You may receive the configuration settings for the e-mail application as
a configuration message. See “Configuration settings service,” p. 10.
You can also enter the settings manually. See “Configuration,” p. 63.
Select Menu > Messaging > Message settings > E-mail messages and
from the following options:
Configuration — Select the set that you would like to activate.
Account — Select an account provided by the service provider.
My name — Enter your name or nickname.
E-mail address — Enter the e-mail address.
Include signature — Define a signature that is automatically added to
the end of your e-mail when you write your message.
Reply-to address — Enter the e-mail address to which you want the
replies to be sent.
SMTP user name — Enter the name that you want to use for outgoing
mail.
SMTP password — Enter the password that you want to use for outgoing
mail.
Display terminal window > Yes — To perform manual user
authentication for intranet connections.
Incoming server type > POP3 or IMAP4 — Identify the type of e-mail
system that you want to use. If both types are supported, select IMAP4.
Incoming mail settings — Select available options for POP3 or IMAP4.
42
Page 43

Contacts
7. Contacts
You can save names and phone numbers (Contacts) in the phone
memory and in the SIM card memory.
The phone memory may save contacts with numbers and text items. You
can also save an image for a certain number of names.
Names and numbers saved in the SIM card memory, are indicated by
.
■ Search for a contact
Select Menu > Contacts > Names. Scroll through the list of contacts, or
enter the first letter of the name for which you are searching.
■ Save names and phone numbers
Names and numbers are saved in the used memory. Select Menu >
Contacts > Names > Options > Add new contact. Enter the name and
the phone number.
■ Save details
In the phone memory for contacts, you can save different types of phone
numbers and short text items per name.
The first number you save is automatically set as the default number. It
is indicated with a frame around the number type indicator (for
example, ). When you select a name (for example, to make a call),
the default number is used unless you select another number.
1. Make sure that the memory in use is either Phone or Phone and SIM.
See “Settings,” p. 47.
2. Scroll to the name to which you want to add a new number or text
item, and select Details > Options > Add detail.
3. To add a number, select Number and one of the number types.
To add another detail, select a text type or an image from Gallery.
43
Page 44

Contacts
To search for an ID from the server of your service provider if you
have connected to the presence service, select User ID > Search. See
“My presence,” p. 45. If only one ID is found, it is automatically
saved. Otherwise, to save the ID, select Options > Save. To enter the
ID, select Enter ID manually.
To change the number type, scroll to the desired number, and select
Options > Change type. To set the selected number as the default
number, select Set as default.
4. Enter the number or text item; to save it, select Save.
5. To return to the standby mode, select Back > Exit.
■ Copy contacts
Search for the contact you want to copy, and select Options > Copy.
You can copy names and phone numbers from the phone contact
memory to the SIM card memory, or vice versa. The SIM card memory
can save names with one phone number attached to them.
■ Edit contact details
1. Search for the contact you want to edit, select Details, and scroll to
the desired name, number, text item, or image.
2. To edit a name, number, or text item, or to change an image, select
Options > Edit.
You cannot edit an ID when it is on the IM contacts or Subscribed
names list.
■ Delete contacts or contact details
To delete all the contacts and the details attached to them from the
phone or SIM card memory, select Menu > Contacts > Delete all
contacts > From phone mem. or From SIM card. Confirm with the
security code.
To delete a contact, search for the desired contact, and select Options >
Delete contact.
44
Page 45

Contacts
To delete a number, text item, or an image attached to the contact,
search for the contact, and select Details. Scroll to the desired detail,
and select Options > Delete > Delete number, Delete detail, or Delete
image. Deleting an image from contacts does not delete it from Gallery.
■ Business cards
You can send and receive a person’s contact information from a
compatible device that supports the vCard standard as a business card.
To send a business card, search for the contact whose information you
want to send, and select Details > Options > Send bus. card > Via
multimedia, Via text message, Via infrared, or Via Bluetooth.
When you have received a business card, select Show > Save to save the
business card in the phone memory. To discard the business card, select
Exit > Yes.
■ My presence
With the presence service (network service) you can share your presence
status with other users with compatible devices and access to the
service. Presence status includes your availability, status message, and
personal logo. Other users who have access to the service and who
request your information are able to see your status. The requested
information is shown in Subscribed names in the viewers’ Contacts
menu. You can personalize the information that you want to share with
others and control who can see your status.
Before you can use presence, you must subscribe to the service. To check
the availability, and costs, and to subscribe to the service, contact your
network operator, from whom you also receive your unique ID,
password, and the settings for the service. See “Configuration,” p. 63.
While you are connected to the presence service, you can use the other
functions of the phone; the presence service is active in the background.
If you disconnect from the service, your presence status is shown for a
certain amount of time to viewers, depending on the service provider.
Select Menu > Contacts > My presence and select from the following
options:
45
Page 46

Contacts
Connect to 'My presence' service or Disconnect from service — to
connect to or disconnect from the service
View my presence — to view the status in Private pres. and Public
presence
Edit my presence > My availability, My presence message, My presence
logo, or Show to — to change your presence status
My viewers > Current viewers, Private list, or Blocked list
Settings > Show current presence in idle, Synchronise with profiles,
Connection type, or Presence settings
■ Subscribed names
You can create a list of contacts whose presence status information you
want to be aware of. You can view the information if it is allowed by the
contacts and the network. To view these subscribed names, scroll
through the contacts or use the Subscribed names menu.
Make sure that the memory in use is either Phone or Phone and SIM. See
“Settings,” p. 47.
To connect to the Presence service, select Menu > Contacts > My
presence > Connect to 'My presence' service.
Add contacts to the subscribed names
1. Select Menu > Contacts > Subscribed names.
2. If you have no contacts on your list, select Add. Otherwise, select
Options > Subscribe new. The list of your contacts is shown.
3. Select a contact from the list and if the contact has an user ID saved,
the contact is added to the subscribed names list.
View the subscribed names
To view the presence information, see “Search for a contact,” p. 43.
1. Select Menu > Contacts > Subscribed names.
46
Page 47

Contacts
The status information of the first contact on the subscribed names
list is displayed. The information that the person wants to give to the
others may include text and some of the following icons:
, , or indicates that the person is available, discreet, or not
available.
indicates that the person’s presence information is not available.
2. Select Details to view the details of the selected contact; or select
Options > Subscribe new, Chat, Send message, Send bus. card, or
Unsubscribe.
Unsubscribe a contact
To unsubscribe a contact from the Contacts list, select the contact and
Details > the user ID > Options > Unsubscribe > OK.
To unsubscribe, use the Subscribed names menu. See “View the
subscribed names,” p. 46.
■ Settings
Select Menu > Contacts > Settings and from the following options:
Memory in use — to select SIM card or phone memory for your contacts
Contacts view — to select how the names and numbers in contacts are
displayed
Name display — to view the Last name first or the First name first in the
contacts list
Memory status — to view the free and used memory capacity
■ Groups
Select Menu > Contacts > Groups to arrange the names and phone
numbers saved in the memory into caller groups with different ringing
tones and group images.
47
Page 48

Contacts
■ Voice dialing
You can make a phone call by saying a voice tag that has been added to
a phone number. Any spoken words, such as a name, can be a voice tag.
The number of voice tags you can create is limited.
Before using voice tags, note that:
• Voice tags are not language-dependent. They are dependent on the speaker's
voice.
• You must say the name exactly as you said it when you recorded it.
• Voice tags are sensitive to background noise. Record voice tags and use them
in a quiet environment.
• Very short names are not accepted. Use long names and avoid similar names
for different numbers.
Note: Using voice tags may be difficult in a noisy environment or
during an emergency, so you should not rely solely upon voice dialing in
all circumstances.
Add and manage voice tags
Save or copy to the phone memory the contacts for which you want to
add a voice tag. You can also add voice tags to the names in the SIM
card, but if you replace your SIM card with a new one, you first must
delete the old voice tags before you can add new ones.
1. Search for the contact to which you want to add a voice tag.
2. Select Details, scroll to the desired phone number, and select
Options > Add voice tag.
3. Select Start, and say clearly the words you want to record as a voice
tag. After recording, the phone plays the recorded tag.
appears after the phone number with a voice tag in Contacts.
To check the voice tags, select Menu > Contacts > Voice tags. Scroll to
the contact with the voice tag that you want, and select an option to
listen to, delete, or change the recorded voice tag.
48
Page 49

Contacts
Make a call by using a voice tag
If the phone has an application running that is sending or receiving data
using a packet data connection, you must end the application before
voice dialing.
1. In the standby mode, press and hold the volume down key or the
right selection key. A short tone is heard, and Speak now is displayed.
2. Say the voice tag clearly. The phone plays the recognized voice tag,
and dials the phone number of the voice tag after 1.5 seconds.
If you are using a compatible headset with the headset key, press and
hold the headset key to start the voice dialing.
■ Speed dials
To assign a number to a speed-dialing key, select Menu > Contacts >
Speed dials, and scroll to the speed-dialing number that you want.
Select Assign, or if a number has already been assigned to the key, select
Options > Change. Select Search, the name, then the number you want
to assign. If the Speed dialling function is off, the phone asks whether
you want to activate it. See also Speed dialling in “Call,” p. 61.
To make a call using the speed-dialing keys, see “Speed dialing,” p. 21.
■ Info, service, and my numbers
Select Menu > Contacts and from one of these submenus:
Info numbers — to call the information numbers of your service provider
if the numbers are included on your SIM card (network service)
Service numbers — to call the service numbers of your service provider if
the numbers are included on your SIM card (network service)
My numbers — to view the phone numbers assigned to your SIM card, if
the numbers are included on your SIM card
49
Page 50

Log
8. Log
The phone registers the phone numbers of identified missed, received,
and dialed calls; the message recipients; and the approximate length of
your calls.
The phone registers if it is switched on and within the network’s service
area, and the network supports these functions.
■ Recent calls lists
Select Menu > Log > Call log, Missed calls, Received calls, Dialled
numbers, or Message Recipients to view the call lists. Select Options to
view the time of a call; edit, view, or call the registered phone number;
add it to the memory; or delete it from the list. You can also send a text
message. To delete the recent calls lists, select Clear log lists.
■ Counters and timers
Note: The actual invoice for calls and services from your service
provider may vary, depending upon network features, rounding off for
billing, taxes and so forth.
Some timers may be reset during service or software upgrades.
Select Menu > Log > Call duration, Packet data counter, or
Packet data conn. timer for approximate information on your recent
communications.
■ Positioning information
The network may send you a location request. You can ensure that the
network delivers location information of your phone only if you approve
it (network service). Contact your network operator to subscribe and to
agree upon the delivery of location information.
To accept or reject the location request, select Accept or Reject. If you
miss the request, the phone automatically accepts or rejects it
according to what you have agreed with your network operator. The
50
Page 51

Log
phone displays 1 missed position request. To view the missed location
request, select Show.
To view the information on the 10 most recent privacy notifications and
requests or to delete them, select Menu > Log > Positioning > Position
log > Open folder or Delete all.
51
Page 52

Settings
9. Settings
■ Profiles
Your phone has various setting groups, called profiles, for which you can
customize the phone tones for different events and environments.
Select Menu > Settings > Profiles. Scroll to a profile, and select it.
To activate the selected profile, select Activate.
To set the profile to be active until a certain time up to 24 hours, select
Timed, and set the time the profile setting shall end. When the time set
for the profile expires, the previous profile that was not timed, becomes
active.
To personalize the profile, select Personalise. Select the setting you want
to change, and make the changes. To change your presence status
information, select My presence > My availability or My presence
message. The My presence menu is available if you set Synchronise with
profiles to On. See “My presence,” p. 45.
■ Themes
A theme contains many elements for personalizing your phone, such as
wallpaper, screen saver, color scheme, and a ringing tone.
Select Menu > Settings > Themes and from the following options:
Select theme — to set a theme in your phone. A list of folders in Gallery
opens. Open the Themes folder, and select a theme.
Theme downloads — to open a list of links to download more themes.
See “Download files,” p. 91.
■ Tones
You can change the settings of the selected active profile.
Select Menu > Settings > Tones > Incoming call alert, Ringing tone,
Ringing volume, Vibrating alert, Voice options, Notification tone,
Callback tone, Message alert tone, Instant message alert tone, Keypad
52
Page 53

Settings
tones, and Warning tones. You can find the same settings in the Profiles
menu. See “Profiles,” p. 52.
To set the phone to ring only for calls from phone numbers that belong
to a selected caller group, select Alert for. Scroll to the caller group you
want or All calls, and select Mark. Select Save to save the settings or
Cancel to leave the settings unchanged.
If you select the highest ringing tone level, the ringing tone reaches its highest
level after a few seconds.
■ Display
Standby mode settings
Select Menu > Settings > Display > Standby mode settings and from
the following options:
Active standby — to switch the active standby mode on or off and to
organize and personalize the active standby mode. See “Active standby
mode,” p. 17.
Wallpaper — to add the background image to the display in standby
mode. To activate, or deactivate the wallpaper, select On or Off. Select
Image to select an image from the Gallery or Slide set and a folder in the
Gallery to use the images in the folder as a slide set. To download more
images for wallpaper, select Graphic downloads.
Idle state font colour — to select the color for the texts on the display in
the standby mode
Navigation key icons > On — to display the icons of the current
navigation key shortcuts in the standby mode when active standby is off
Operator logo — to set your phone to display or hide the operator logo.
The menu is dimmed, if you have not saved the operator logo. For more
information on availability of an operator logo, contact your network
operator.
Cell info display > On — to display the cell identity, if available from the
network
53
Page 54

Settings
Other display settings
Select Menu > Settings > Display and from the following options:
Screen saver > On — to activate the screen saver for the main display. To
set the time after which the screen saver is activated, select Time-out.
Select Screen savers to choose an Image, a Slide set, or a Video clip from
the Gallery or Digital clock to be used as screensaver. To download more
images for the screen saver, select Graphic downloads.
Powe r sav er > On — to save some battery power. A digital clock is
displayed when no function of the phone is used for a certain time.
Font size > Messaging, Contacts, or Web — to set the font size
■ Time and date
Select Menu > Settings > Time and date and from the following
options:
Clock — to set the phone to show the clock in the standby mode, adjust
the clock, and select the time zone and the time format
Date — to set the phone to show the date in the standby mode, set the
date, and select the date format and date separator
Auto-update of date & time (network service) — to set the phone to
automatically update the time and date according to the current time
zone
■ My shortcuts
With personal shortcuts you get quick access to often used functions of
the phone.
Left and right selection key
To set one phone function from a predefined list to the left or right
selection key, select Menu > Settings > My shortcuts > Left selection
key or Right selection key. See “Standby mode,” p. 17. These menus may
not be shown, depending on your service provider.
54
Page 55

Settings
Navigation key
To assign other phone functions from a predefined list to the navigation
key, select Menu > Settings > My shortcuts > Navigation key.
Enabling standby
To select keys to enable the standby navigation mode, select Menu >
Settings > My shortcuts > Enabling standby.
Voice commands
To activate phone functions by saying a voice tag, select Menu >
Settings > My shortcuts > Voice commands. Select a folder, scroll to a
function to which you want to add a voice tag, and select Add.
indicates a voice tag.
To add a voice command, see “Add and manage voice tags,” p. 48. To
activate a voice command, see “Make a call by using a voice tag,” p. 49.
■ Connectivity
You can connect the phone to a compatible device using an infrared,
Bluetooth wireless technology, or USB data cable connection. You can
also define the settings for packet data dial-up connections.
Bluetooth wireless technology
This device is compliant with Bluetooth Specification 1.1 supporting the
following profiles: SIM access profile, object push profile, file transfer profile,
dial-up networking profile, headset profile, hands-free profile, service discovery
application profile, generic access profile, serial port profile, and generic object
exchange profile. To ensure interoperability between other devices supporting
Bluetooth technology, use Nokia approved enhancements for this model. Check
with the manufacturers of other devices to determine their compatibility with
this device.
There may be restrictions on using Bluetooth technology in some locations.
Check with your local authorities or service provider.
55
Page 56

Settings
Features using Bluetooth technology, or allowing such features to run in the
background while using other features, increase the demand on battery power
and reduces the battery life.
Bluetooth technology allows you to connect the phone to a compatible
Bluetooth device within 10 meters. Since devices using Bluetooth
technology communicate using radio waves, your phone and the other
devices do not need to be in direct line-of-sight, although the
connection can be subject to interference from obstructions such as
walls or from other electronic devices.
Set up a Bluetooth connection
Select Menu > Settings > Connectivity > Bluetooth. Select from the
following options:
Bluetooth > On or Off — to activate or deactivate the Bluetooth
function. indicates an active Bluetooth connection.
Search for audio enhancements — to search for compatible Bluetooth
audio devices. Select the device that you want to connect to the phone.
Paired devices — to search for any Bluetooth device in range. Select New
to list any Bluetooth device in range. Scroll to a device, and select Pair.
Enter the Bluetooth passcode of the device to associate (pair) the device
to your phone. You only must give this passcode when you connect to
the device for the first time. Your phone connects to the device, and you
can start data transfer.
Bluetooth wireless connection
Select Menu > Settings > Connectivity > Bluetooth. To check which
Bluetooth connections are currently active, select Active device. To view
a list of Bluetooth devices that are currently paired with the phone,
select Paired devices.
Select Options to access some of the following functions depending on
the status of the device and the Bluetooth connection. Select Assign
short name or Auto-conn. without confirmation.
56
Page 57

Settings
Bluetooth settings
To define how your phone is shown to other Bluetooth devices, select
Menu > Settings > Connectivity > Bluetooth > Bluetooth settings > My
phone's visibility or My phone's name.
If you are concerned about security, turn off Bluetooth or set My phone's
visibility to Hidden. Always accept only Bluetooth communication from others
with whom you agree.
Infrared
You can set up the phone to send and receive data through its infrared
(IR) port. To use an IR connection, the device with which you want to
establish a connection must be IrDA compliant. You can send or receive
data to or from a compatible phone or data device (for example, a
computer) through the IR port of your phone.
Do not point the IR (infrared) beam at anyone's eyes or allow it to interfere with
other IR devices. Infrared devices are Class 1 laser products.
When sending or receiving data, ensure that the IR ports of the sending
and receiving devices are pointing at each other and that there are no
obstructions between the devices.
To activate the IR port of your phone to receive data using IR, select
Menu > Settings > Connectivity > Infrared.
To deactivate the IR connection, select Menu > Settings >
Connectivity > Infrared. When the phone displays Deactivate infrared?,
select Yes.
If data transfer is not started within 2 minutes after the activation of
the IR port, the connection is cancelled and must be started again.
IR connection indicator
When is shown continuously, the IR connection is activated, and
your phone is ready to send or receive data through its IR port.
When blinks, your phone is trying to connect to the other device, or
a connection has been lost.
57
Page 58

Settings
Packet data
General packet radio service (GPRS) is a network service that allows
mobile phones to send and receive data over an Internet protocol
(IP)-based network. GPRS is a data bearer that enables wireless access
to data networks such as the Internet.
Enhanced GPRS (EGPRS) is similar to GPRS but enables faster
connections. For more information on availability of EGPRS and data
transfer speed, contact your network operator.
The applications that may use EGPRS are MMS, video streaming, Push to
talk, browsing sessions, e-mail, remote SyncML, Java application
downloading, and the PC dial-up.
When you have selected GPRS as a data bearer, the phone uses EGPRS
instead of GPRS if this is available in the network. You cannot select
between EGPRS and GPRS, but for some applications you may be able to
select GPRS or GSM data (circuit switched data, CSD).
Packet data settings
You can connect the phone using Bluetooth wireless technology,
infrared, or USB data cable connection to a compatible PC and use the
phone as a modem to enable EGPRS for packet data connectivity from
the PC.
To define the settings for packet data connections from your PC, select
Menu > Settings > Connectivity > Packet data > Packet data settings >
Active access point, activate the access point you want to use, and
select Edit active access point. Select Alias for access point, enter a name
to change the access point settings, and select OK. Select Active access
point, enter the access point name (APN) to establish a connection to an
packet data network, and select OK.
You can also set the packet data dial-up service settings (access point
name) on your PC using the Nokia Modem Options software. See “PC
Suite,” on page 97. If you have set the settings both on your PC and on
your phone, the PC settings are used.
58
Page 59

Settings
Data transfer and synchronisation
Synchronize your calendar, contacts data, and notes with another
compatible device (for example, a mobile phone, a compatible PC, or a
remote Internet server (network service)).
Partner list
To copy or synchronize data from your phone, the name of the device
and the settings must be in the list of partners in transfer contacts. If
you receive data from another device (for example, a compatible mobile
phone), the partner is automatically added to the list, using the contact
data from the other device. Server sync and PC sync are the original
items in the list.
To add a new partner to the list (for example a new device), select
Menu > Settings > Connectivity > Data transfer > Options > Add
contact > Phone sync or Phone copy, and enter the settings according to
the transfer type.
To edit the copy and synchronize settings, select a contact from the
partner list and Options > Edit.
To delete a partner, select a contact from the partner list and Options >
Delete, and confirm Delete transfer contact?. You cannot delete Server
sync or PC sync.
Data transfer with a compatible device
For synchronization, Bluetooth wireless technology or infrared is used.
The other device is in the standby mode.
To start data transfer, select Menu > Settings > Connectivity > Data
transfer and the transfer partner from the list, other than Server sync or
PC sync. According to the settings, the selected data is copied or
synchronized. The other device also must be activated for receiving data.
Data transfer without SIM card
Your phone allows data transfer when the SIM card is not inserted.
Switch on your phone with no SIM card inserted, and select Transfer
and from the following options:
59
Page 60

Settings
Transfer contacts — to select a contact, other than Server sync and PC
sync, from the partner list to transfer data from your phone. The phone
starts a synchronization or copy session.
Receive data > Via Bluetooth or Via infrared — to receive data from the
other phone
Synchronize from a compatible PC
Before you synchronize data from calendar, notes, and contacts from a
compatible PC, you must install the Nokia PC Suite software of your
phone on the PC. Use Bluetooth wireless technology, infrared, or a USB
data cable for the synchronization, and start the synchronization from
the PC.
Synchronize from a server
To use a remote Internet server, you must subscribe to a synchronization
service. For more information and the settings required for this service,
contact your service provider. You may receive the settings as a
configuration message. See “Configuration settings service,” p. 10 and
“Configuration,” p. 63.
If you have saved data on the remote Internet server, to synchronize
your phone, start the synchronization from your phone.
Select Menu > Settings > Connectivity > Data transfer > Server sync.
Depending on the settings, select Initialising sync or Initialising copy.
Synchronizing for the first time or after an interrupted synchronization
may take up to 30 minutes to complete, if the contacts or calendar are
full.
USB data cable
You can use the USB data cable to transfer data between the phone and
a compatible PC or a printer supporting PictBridge. You can also use the
USB data cable with Nokia PC Suite.
To activate the phone for data transfer or picture printing, connect the
data cable; when the phone displays USB data cable connected. Select
mode., select OK. Select from the following modes:
Default mode — to use the cable for PC Suite
60
Page 61

Settings
Printing — to print pictures directly from the phone using a compatible
printer
To change the USB mode, select Menu > Settings > Connectivity > USB
data cable > Default mode, or Printing.
■ Call
Select Menu > Settings > Call and from the following options:
Call divert (network service) — to divert your incoming calls. You may
not be able to divert your call, if some call barring functions are active.
See Call barring service in “Security,” p. 64.
Anykey answer > On — to answer an incoming call, briefly press any key,
except the end key and the left and right selection keys
Automatic redial > On — to set your phone to make a maximum of 10
attempts to connect the call after an unsuccessful call attempt
Speed dialling > On — to activate speed dialing. To set up speed dialing,
see “Speed dials,”’ p. 49. To dial, press and hold the corresponding
number key.
Call waiting > Activate — to set the network to notify you of an
incoming call while you have a call in progress (network service). See
“Call waiting,” p. 22.
Summary after call > On — to briefly display the approximate duration
and cost (network service) of the call after each call
Send my caller ID > Yes, No, or Set by network (network service)
Line for outgoing calls — to select the phone line 1 or 2 to make calls, if
supported by your SIM card (network service)
Slide call handling — to change the slide opening function to answer
and end a call when the slide is opened or closed
■ Phone
Select Menu > Settings > Phone and from the following options:
Phone language — to set the display and writing language. Select from
the languages available.
61
Page 62

Settings
Memory status — to view the free memory and the used memory in
Gallery, Messaging, Bookmarks, and Applications
Automatic keyguard — to set the keypad of your phone to lock
automatically after a preset time delay when the phone is in the standby
mode and no function of the phone has been used. Select On, and you
can set the time from 5 seconds to 60 minutes.
Security keyguard — to set the phone to ask for the security code when
you unlock the keyguard. Enter the security code, and select On.
When the keyguard is on, calls still may be possible to the official emergency
number programmed into your device.
Cell info display > On — to receive information from the network
operator depending on the network cell used (network service)
Welcome note — to enter a welcome note to be shown briefly when the
phone is switched on
Operator selection > Automatic — to set the phone automatically to
select one of the cellular networks available in your area. With Manual,
you can select a network that has a roaming agreement with your home
network operator.
Confirm SIM service actions — see “SIM services,” p. 96
Help text activation — to select whether the phone shows help texts
Start-up tone — to select whether the phone plays a start-up tone when
the phone is switched on
■ Enhancements
This menu is shown only if the phone is or has been connected to a
compatible mobile enhancement.
Select Menu > Settings > Enhancements. You can select an
enhancement menu if the corresponding enhancement is, or has been,
connected to the phone. Depending on the enhancement, select from
the following options:
Default profile — to select the profile that you want to be automatically
activated when you connect to the selected enhancement
62
Page 63

Settings
Automatic answer — to set the phone to answer an incoming call
automatically after 5 seconds. If Incoming call alert is set to Beep once
or Off, automatic answer is off.
Lights — to set the lights permanently On. Select Automatic to set the
lights on for 15 seconds after a key press.
Text phone > Use text phone > Yes — to use the text phone settings
instead of headset or loopset settings
■ Configuration
You can configure your phone with settings that are required for certain
services to function correctly. The services are browser, multimedia
messaging, remote Internet server synchronization, presence, and
e-mail application. Get the settings from your SIM card, from a service
provider as a configuration message, or enter your personal settings
manually. You can store configuration settings from up to 20 service
providers in the phone and manage them within this menu.
To save the configuration settings received by a configuration message
from a service provider, see “Configuration settings service,” p. 10.
Select Menu > Settings > Configuration and from the following
options:
Default configuration settings — to view the service providers saved in
the phone. Scroll to a service provider, and select Details to view the
applications that the configuration settings of this service provider
support. To set the configuration settings of the service provider as
default settings, select Options > Set as default. To delete configuration
settings, select Options > Delete.
Activate default in all applications — to activate the default
configuration settings for supported applications
Preferred access point — to view the saved access points. Scroll to an
access point, and select Options > Details to view the name of the
service provider, data bearer, and packet data access point or GSM
dial-up number.
Connect to service provider support — to download the configuration
settings from your service provider
63
Page 64

Settings
Personal configuration settings — to add new personal accounts for
various services manually, and to activate or delete them. To add a new
personal account if you have not added any, select Add new; otherwise,
select Options > Add new. Select the service type, and select and enter
each of the required parameters. The parameters differ according to the
selected service type. To delete or activate a personal account, scroll to
it, and select Options > Delete or Activate.
■ Security
When security features that restrict calls are in use (such as call barring, closed
user group and fixed dialing) calls still may be possible to the official emergency
number programmed into your device.
Select Menu > Settings > Security and from the following options:
PIN code request — to set the phone to ask for your PIN or UPIN code
every time the phone is switched on. Some SIM cards do not allow the
code request to be turned off.
Call barring service — to restrict incoming calls to and outgoing calls
from your phone (network service). A barring password is required.
Fixed dialling — to restrict your outgoing calls to selected phone
numbers if this function is supported by your SIM card
Closed user group — to specify a group of people whom you can call and
who can call you (network service)
Security level > Phone — the phone asks for the security code whenever
a new SIM card is inserted into the phone. Select Memory and the phone
asks for the security code when SIM card memory is selected and you
want to change the memory in use.
Access codes — to set the PIN code or UPIN code in use, or to change the
security code, PIN code, UPIN code, PIN2 code, and barring password
Code in use — to select whether the PIN code or UPIN code should be
active
Pin2 code request — to select whether PIN2 code is required when using
a specific phone feature which is covered by the PIN2 code
64
Page 65

Settings
Authority certificates and User certificates — to view the list of the
authority and user certificates downloaded into your phone. See
“Certificates,” p. 94.
Security module settings — See “Security module,” p. 93.
■ Restore factory settings
To reset some of the menu settings to their original values, select
Menu > Settings > Restore factory sett.. Enter the security code. The
data you have entered or downloaded are not deleted, for example, the
names and phone numbers saved in Contacts.
65
Page 66

Operator menu
10. Operator menu
This menu lets you access a portal to services provided by your network
operator. The name and the icon depend on the operator. For more
information contact your network operator. If this menu is not shown
the following menu numbers change accordingly.
The operator can update this menu with a service message. For more
information, see “Service inbox,” p. 92.
11. Gallery
In this menu you can manage graphics, images, recordings,
video clips, themes, and tones. These files are arranged in folders.
Your phone supports an activation key system to protect acquired
content. Always check the delivery terms of any content and activation
key before acquiring them, as they may be subject to a fee.
Copyright protections may prevent some images, music (including ringing tones),
and other content from being copied, modified, transferred or forwarded.
The files stored in Gallery use a memory that may have a capacity of up
to 23 MB depending on the size of the regional software on your phone.
To see the list of folders, select Menu > Gallery.
To see the available options of a folder, select a folder > Options.
To view the list of files in a folder, select a folder > Open.
To see the available options of a file, select a file > Options.
66
Page 67
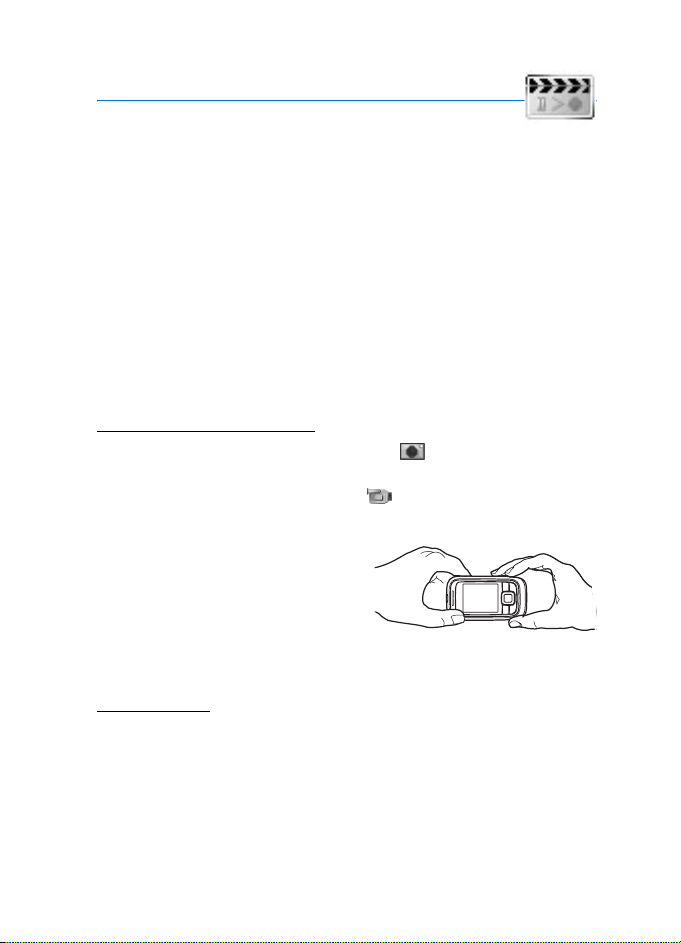
Media
12. Media
Copyright protections may prevent some images, music (including
ringing tones), and other content from being copied, modified, transferred, or
forwarded.
■ Camera
You can take photos or record video clips with the built-in camera. The
camera produces pictures in JPEG format and video clips in 3GP format.
When taking and using images or video clips, obey all laws and respect local
customs as well as privacy and legitimate rights of others.
Keep a safe distance when using the flash. Do not use the flash on people or
animals at close range. Do not cover the flash while taking a picture.
Camera modes and zoom
To start the camera in the still photo mode press the camera
release key or select Menu > Media > Camera.
To start the camera in the video mode press and hold the camera
release key.
To use the camera, hold the phone in a
horizontal position. Press in this
position the navigation key left or right
to change between still photo and
video mode. Press the navigation key
up and down, or the volume keys to zoom in and out.
Take a photo
To take a photo in the select Capture or press the camera release key.
The phone saves the photo in Gallery > Images. To take another photo,
select Back; to send the photo as a multimedia message, select Send.
To take a self-portrait, turn the camera towards yourself, use the small
mirror besides the camera lens as a view finder and press the camera
release key.
67
Page 68

Media
Select Options to set Night mode on if the lighting is dim, Flash on to
activate the camera flash, Self-timer on to activate the selftimer, and
Img. sequence on to take photos in a fast sequence.
Record a video clip
To start the video recording select Record, or press the camera release
key. To pause the recording, select Pause; to resume the recording,
select Continue. To stop the recording, select Stop. The phone saves the
recording in Gallery > Video clips.
When recording, the camera flash is on with a dimmed light as indicator
to others, that a video is recorded.
Select Options > Mute to prevent the recording of sound.
Camera settings
Select
Options>Settings
Image quality - to define the compression rate or quality of the images.
The higher the image quality, the lower the compression rate. Higher
image quality uses more memory space.
Image size - to define the image resolution or size.
Image resolution is expressed by multiplying the number of horizontal
dots (width) by the number of vertical dots (height). The higher the
resolution, the higher the image quality.
Video clip quality - choose high, medium, or low quality. High video clip
quality uses more memory space.
Video clip length - choose Default to restrict the video length to a size
that can be send by MMS, or choose Maximum to allow the available
memory to be used for the video clip.
Camera sounds - when activated, a sound is played when you take a
photo, and when you start the self-timer
Default title - to define the default name for photos or video clips.
Use a predefined title or enter one yourself.
Default mode - Select Still image or Video as default mode when the
Camera is activated.
to define image, video and camera parameters:
68
Page 69

Media
■ Media player
With the media player you can view, play, and download files, such as
images, audio, video, and animated images. You can also view
compatible streaming videos from a network server (network service).
Select Menu > Media > Media player > Open gallery, Bookmarks, Go to
address, or Media downloads.
While streaming audio or video, to rewind (Rew) or fast forward (FF)
scroll left or right. To set the length of a scrolling jump, select FF/Rew
interval.
Set up the phone for a streaming service
You may receive the configuration settings required for streaming as a
configuration message from the network operator. See “Configuration
settings service,” p. 10. You can also enter the settings manually. See
“Configuration,” p. 63.
To activate the settings, do the following:
1. Select Menu > Media > Media player > Streaming sett..
2. Select Configuration. Only the configurations that support
streaming are shown. Select a service provider, Default, or Personal
config. for streaming.
3. Select Account and a streaming service account contained in the
active configuration settings.
■ Music player
Your phone includes a music player for listening to music tracks,
recordings, or other MP3, MP4, or AAC sound files that you have
transferred to the phone with the Nokia Audio Manager application.
MP3 and AAC files are stored in the Gallery folders. Music files stored in
the Music player folder and in another location, such as a folder of the
phone memory, are automatically detected and added to the default
track list.
69
Page 70

Media
Play music tracks
1. Select Menu > Media > Music player. The details of the first track on
the default track list are shown.
To use the graphical keys , , , or on the display, scroll
left or right to the desired key, and select it.
2. To play a track, scroll to the track that you want, and select .
To adjust the volume level, use the volume keys on the side of the
phone.
To skip to the beginning of the next track, select . To skip to the
beginning of the previous track, select twice.
To rewind the current track, select and hold . To fast forward the
current track, select and hold . Release the key at the position
you want.
3. To stop the playing, select .
Warning: Listen to music at a moderate level. Continuous exposure to
high volume may damage your hearing. Do not hold the device near
your ear when the loudspeaker is in use, because the volume may be
extremely loud.
Music player options
Select Music player > Options. Some of following features may be
available:
Play via bluetooth — to make a connection to an audio enhancement
using a Bluetooth connection
Track list — to view all the tracks available on the track list. To play a
track, scroll to the desired track, and select Play.
Select Options > Refresh all tracks or Change track list to refresh the
track list (for example, after adding new tracks to the list) or to change
the track list that is shown when you open the Music player menu, if
several track lists are available in the phone
Play options > Random > On — to play the tracks in the track list in
random order. Select Repeat > Current track or All tracks to play the
current track or the entire track list repeatedly.
70
Page 71

Media
Media equaliser — to open the list of media equalizer sets. See
“Equalizer,” p. 74.
Loudspeaker or Headset — to listen to the music player through the
loudspeaker or a compatible headset connected to the phone
Tip: When using a headset, you can skip to the next track by
pressing the headset key quickly.
Send — to send the selected file using MMS, Bluetooth wireless
technology, or an IR connection
Web page — to connect to a Web address attached to the current file in
the track list
Music downloads — to connect to a browser service related to the
current track. This function is only available when the address of the
service is included in the track.
Memory status — to view the free and used memory capacity
■ Radio
The FM radio depends on an antenna other than the wireless device's antenna. A
compatible headset or enhancement needs to be attached to the device for the
FM radio to function properly.
Warning: Listen to music at a moderate level. Continuous exposure to
high volume may damage your hearing. Do not hold the device near
your ear when the loudspeaker is in use, because the volume may be
extremely loud.
Listen to the radio
1. Select Menu > Media > Radio. The channel location number, the
name of the radio channel (if you have saved the channel), and the
frequency of the radio channel are displayed.
To use the graphical keys , , , or on the display, scroll
left or right to the desired key, and select it.
2. If you have already saved radio channels, select or to scroll to
the channel you would like to listen to.
71
Page 72

Media
Tune a radio channel
1. When the radio is on, select , or to change the radio
frequency in 0.05 MHz steps, or select and hold , or to start
the channel search. Searching stops when a channel is found.
2. To save the channel to a memory location 1 to 9, press and hold the
corresponding number key.
To save the channel in the memory location from 10 to 20, press
briefly 1 or 2, and press and hold the desired number key 0 to 9.
3. Enter the name of the channel, and select OK.
Basic radio functions
When the radio is on, do the following:
To turn off the radio, select Options > Switch off.
To save the radio channel you have found, select Options > Save station.
See “Tune a radio channel,” p. 72. You can save up to 20 radio channels.
To set whether the visual radio application is used, select Options >
Visual radio. Some radio channels may send text or graphical
information that you can view using the visual radio application.
To select the options for visual radio, select Options > Visual radio sett..
To set whether the visual radio application starts automatically when
you turn on the radio, select Enable visual service > Automatically,
Manually, or Ask first.
Select Options > Visual radio sett. > Station directory to access a Web
site with a list of radio stations, and if available, their visual radio ID,
which you can receive in your region.
To select the list of saved channels, select Options > Stations. To delete
or rename a channel, or to enter the ID for a visual radio channel, scroll
to the desired channel, and select Options > Delete station, Rename, or
Visual service ID.
To listen to the radio in monophonic sound or in stereo, select Options >
Mono output or Stereo output.
72
Page 73

Media
To listen to the radio using the loudspeaker or headset, select Options >
Loudspeaker or Headset. Keep the headset connected to the phone. The
lead of the headset functions as the radio antenna.
To enter the frequency of the desired radio channel, select Options >
Set frequency.
You can normally make a call or answer an incoming call while listening
to the radio. During the call, the volume of the radio is muted.
When an application using a packet data connection is sending or
receiving data, it may interfere with the radio.
■ Recorder
You can record pieces of speech, sound, or an active call for up to
60 minutes, depending on available memory space.
The recorder cannot be used when a data call or packet data connection is active.
Record sound
1. Select Menu > Media > Recorder.
To use the graphical keys, , , or , on the display, scroll left or
right to the desired key, and select it.
2. To start the recording, select . To start the recording during a call,
select Options > Record. While recording a call, all parties to the call
hear a faint beeping sound about every 5 seconds. When recording a
call, hold the phone in the normal position near to your ear.
3. To end the recording, select . The recording is saved in Gallery >
Recordings.
Options after recording
To listen to the latest recording, select Options > Play last recorded.
To send the last recording using Bluetooth wireless technology or IR,
select Options > Send last recorded.
Select Menu > Media > Recorder > Options > Recordings list. The list of
folders in the Gallery is shown. Open Recordings to see the list with
73
Page 74

Media
recordings. Select Options to select options for files in the Gallery. See
“Gallery,” p. 66.
■ Equalizer
To control the sound quality when using the music player, amplify or
diminish frequency bands.
Select Menu > Media > Equaliser.
To activate a set, scroll to one of the equalizer sets, and select Activate.
To view, edit, or rename a selected set, select Options > View, Edit, or
Rename. Not all sets can be edited or renamed.
74
Page 75

Push to talk
13. Push to talk
Select Menu > Push to talk.
Push to talk (PTT) over cellular is a two-way radio service available over
a GPRS cellular network (network service).
You can use PTT to have a conversation with one person or with a group
of people having compatible devices. While you are connected to the
PTT service, you can use the other functions of the phone.
To check availability and costs, and to subscribe to the service, contact
your network operator. Roaming services may be more limited than for
normal calls.
Before you can use the PTT service, you must define the required PTT
service settings. See “PTT settings,” p. 80 and “Configuration settings,”
p. 81.
■ Push to talk channels
When you call a channel, all members joined to the channel hear the call
simultaneously.
There are different types of PTT channels:
Public group — every channel member can invite other persons.
Private group — only persons which receive an invitation by the channel
creator can join in.
Provisioned channel — permanent channel created by the service
provider.
You can set the status of each channel to Default, Listened, or Inactive.
Default and Listened are active channels. When you press the volume up
key to make a channel call, the default channel is called if you have not
scrolled to any other channel or contact.
Add a channel
To add a channel, select Menu > Push to talk > Add channel and enter
the settings in the form fields:
75
Page 76

Push to talk
Channel status: — Select Default to connect to this channel when push
to talk is started, Listened to set the channel active, or Inactive to
disable the channel.
Chnl. security: — Select Public group or Private group.
To send an invitation to the channel, select Yes when the phone requests
it. You can send the invitation using a text message or IR.
To add a provisioned channel, select Menu > Push to talk > Add
channel > Options > Edit add. manually. Enter the Channel address:
provided by your service provider.
Receive an invitation
1. When you receive a text message invitation to a channel, Channel
invitation received: is displayed.
2. To view the nickname of the person who sent the invitation and the
channel address if the channel is not a private channel, select View.
3. To add the channel to your phone, select Save.
4. To set the status for the channel, select Default, Listened, or Inactive.
To reject the invitation, select Exit > Yes, or select View > Discard > Yes.
■ Switch PTT on and off
To connect to the PTT service, select Menu > Push to talk > Switch PTT
on or press the PTT (volume up) key. indicates the PTT connection.
indicates that the service is temporarily unavailable. If you have added
channels to the phone, you are automatically joined to the active
(Default and Listened) channels, and the name of the default channel is
displayed in the standby mode.
To disconnect from the PTT service, select Switch PTT off.
76
Page 77

Push to talk
■ Make and receive a PTT call
Warning: Do not hold the device near your ear when the loudspeaker is
in use, because the volume may be extremely loud.
To make a channel call, a one-to-one call, or a call to multiple
recipients, you must hold the PTT (volume up) key as long as you talk. To
listen to the response, release the PTT (volume up) key. Talking is allowed
on a first-come, first-served basis. When you stop talking, the first
person to press the volume up key can talk next.
You may be able to check the login status of your contacts in Menu >
Push to talk > Contacts list. This service depends on your network
operator and is only available for subscribed contacts. To subscribe a
contact, select Options >Subscribe contact, or if one or more contacts
are already marked Subscribe marked.
, or indicate that the person is either available or unknown.
indicates that the person wants not to be disturbed, but can receive
callback requests. indicates that the person has PTT not switched
on.
Make a channel call
To make a call to the default channel, press the volume up key. A tone
indicates that the access is granted, and the phone displays your
nickname and channel name.
To make a call to a nondefault channel, select Channel list in the PTT
menu, scroll to the desired channel, and press the volume up key.
Make a one-to-one call
To start a one-to-one call from the list of contacts to which you have
added the PTT address, select Contacts or Menu > Push to talk >
Contacts list. Scroll to a contact, and press the volume up key.
To start a one-to-one call from the list of PTT channels, select Channel
list, and scroll to the desired channel and select Members. Scroll to the
desired contact, and press the volume up key.
77
Page 78

Push to talk
To start a one-to-one call from the list of callback requests you have
received, select Callback inbox. Scroll to the desired nickname, and press
the volume up key.
Make a PTT call to multiple recipients
You can select multiple PTT contacts from the contact list. The recipients
receive an incoming call and need to accept the call in order to
participate. If supported by your network operator, you also may select
contacts with a phone number but without PTT number. For details,
contact your network operator.
1. Select Menu > Push to talk > Contacts list, and mark the desired
contacts.
2. Press the volume up key briefly to start the call. The participating
contacts are shown on the display, as soon as they join the call.
3. Press and hold the volume up key to talk to them. Release the volume
up key to hear the response.
4. Press the end key to terminate the call.
Receive a PTT call
A short tone notifies you of an incoming PTT call. Informations, such as
the channel, the phone number, or the nickname (network service) of
the caller are displayed.
You can either accept or reject an incoming one-to-one call if you have
set the phone to first notify you of the one-to-one calls.
When you press the volume up key while the caller is talking, you hear a
queuing tone, and Queuing is displayed. Press and hold the volume up
key, and wait for the other person to finish; then you can talk
immediately.
78
Page 79

Push to talk
■ Callback requests
If you make a one-to-one call and do not get a response, you can send a
request for the person to call you back.
Send a callback request
You can send a callback request in the following ways:
To send a callback request from the contacts list in the Push to talk
menu, select Contacts list. Scroll to a contact, and select Options >
Send callback.
To send a callback request from Contacts, search for the desired contact,
and select Details. Scroll to the PTT address, and select Options > Send
callback.
To send a callback request from the channel list in the PTT menu, select
Channel list, and scroll to the desired channel. Select Members, scroll to
the desired contact, and select Options > Send callback.
To send a callback request from the callback request list in the Push to
talk menu, select Callback inbox. Scroll to a contact, and select
Options > Send callback.
Respond to a callback request
When someone sends you a callback request, Callback request received
is displayed in the standby mode.
To open the Callback inbox, select View. The list of nicknames of the
persons who have sent you callback requests is shown.
To make a one-to-one call, select the desired request and press the
volume up key.
To send a call request back to the sender, select Options > Send
callback.
To delete the request, select Delete.
To save a new contact or to add the PTT address to a contact from a
received callback request, select Options > Save as or Add to contact.
79
Page 80

Push to talk
■ Add a one-to-one contact
You can save the names of persons to whom you often make one-to-one
calls in the following ways:
To add a PTT address to a name in Contacts, search for the desired
contact, select Details > Options > Add detail > PTT address. A contact
will only appear in the PTT contact list, if the PTT address is entered.
To add a contact to the PTT contacts list, select Menu > Push to talk >
Contacts list > Options > Add contact.
To add a contact from the channel list, connect to the Push to talk
service, select Channel list, and scroll to the desired channel. Select
Members, scroll to the member whose contact information you want to
save, and select Options. To add a new contact, select Save as. To add a
PTT address to a name in Contacts, select Add to contact.
■ PTT settings
Select Menu >Push to talk > PTT settings.
1 to 1 calls > On — to select the phone to allow the reception of
incoming one-to-one calls. To make but not receive one-to-one calls,
select Off. The service provider may offer some services that override
these settings. To set the phone to first notify you of incoming
one-to-one calls with a ringing tone, select Notify.
Listened channels > On — to activate the listened channels
Show my login status — to enable or disable the sending of the login
status
PTT status in startup > Yes or Ask first— to set the phone to
automatically connect to the PTT service when you switch the phone on
Push to talk when abroad — to switch the Push to talk service on or off
when the phone is used outside of the home network
Send my PTT address > No — to hide your PTT address from channel and
one-to-one calls
80
Page 81

Push to talk
■ Configuration settings
You may receive the settings for connecting to the service from your
service provider. See “Configuration settings service,” p. 10. You can
enter the settings manually. See “Configuration,” p. 63.
To select the settings for connecting to the service, select Menu > Push
to talk > Config. settings. Select from the following options:
Configuration — to select a service provider, Default, or Personal config.
for PTT service. Only the configurations that support the PTT service are
shown.
Account — to select a PTT service account contained in the active
configuration settings
Other parameters are PTT user name, Default nickname, PTT password,
Domain, and Server address.
■ Web
Select Menu > Push to talk > Web to access the Internet site of your
push to talk provider.
81
Page 82

Organizer
14. Organizer
■ Alarm clock
You can set the phone to alarm at a desired time. Select Menu >
Organiser > Alarm clock.
To set the alarm, select Alarm time, and enter the alarm time. To change
the alarm time when the alarm time is set, select On. To set the phone to
alert you on selected days of the week, select Repeat alarm.
To select the alarm tone or set a radio channel as the alarm tone, select
Alarm tone. If you select the radio as an alarm tone, connect the headset
to the phone. The phone uses the last channel you listened to as the
alarm, and the alarm plays through the loudspeaker. If you remove the
headset or switch off the phone, the default alarm tone replaces the
radio.
To set a snooze time-out, select Snooze time-out.
Stop the alarm
The phone sounds an alert tone, and flashes Alarm! and the current time
on the display, even if the phone was switched off. To stop the alarm,
select Stop or open the phone. If you let the phone continue to sound
the alarm for a minute or select Snooze, the alarm stops for the selected
snooze time-out and then resumes.
If the alarm time is reached while the device is switched off, the device switches
itself on and starts sounding the alarm tone. If you select Stop, the device asks
whether you want to activate the device for calls. Select No to switc h off the
device or Yes to make and receive calls. Do not select Yes when wireless phone
use may cause interference or danger.
■ Calendar
Select Menu >Organiser > Calendar.
The current day is indicated by a frame. If there are any notes set for the
day, the day is in bold type. To view the day notes, select View. To view a
82
Page 83

Organizer
week, select Options > Week view. To delete all notes in the calendar,
select the month or week view, and select Options > Delete all notes.
Other options for the day view may be Make a note, Delete, Edit, Move,
or Repeat a note; Copy a note to another day; Send note as text message
or multimedia message, with IR or Bluetooth, or to the calendar of
another compatible phone. In Settings you can set the date and time
settings. In Auto-delete notes you can set the phone to delete old notes
automatically after a specified time.
Make a calendar note
Select Menu > Organiser > Calendar. Scroll to the date you want, and
select Options > Make a note and one of the following note types:
Meeting, Call, Birthday, Memo, or Reminder.
A note alarm
The phone beeps and displays the note. With a call note on the
display, to call the displayed number, press the call key. To stop the
alarm and to view the note, select View. To stop the alarm for
approximately 10 minutes, select Snooze. To stop the alarm without
viewing the note, select Exit.
■ To-do list
To save notes for tasks that you must do, select Menu > Organiser > To-
do list.
To create a note if no note is added, select Add note; otherwise, select
Options > Add. Write the note, and select Save. Select the priority, the
deadline, and the alarm type for the note.
To view a note, scroll to it, and select View.
You can also select an option to delete the selected note and delete all
the notes that you have marked as done. You can sort the notes by
priority or by deadline, send a note to another phone as a text message
or a multimedia message, save a note as a calendar note, or access the
calendar.
83
Page 84

Organizer
While viewing a note, you can also select an option to edit the deadline
or priority for the note or mark the note as done.
■ Notes
To use this application for writing and sending notes, select Menu >
Organiser > Notes. To create a note if no note is added, select Add note;
otherwise, select Options > Make a note. Write a note, and select Save.
Other options for notes include deleting, and editing a note. While
editing a note, you can also exit the text editor without saving the
changes. You can send the note to compatible devices using a text
message, a multimedia message, or IR. If the note is too long to send as
a text message, the phone asks you to delete the appropriate number of
characters from your note.
■ Calculator
The calculator in your phone adds, subtracts, multiplies, divides,
calculates the square and the square root and converts currency values.
Note: This calculator has limited accuracy and is designed for simple
calculations.
Select Menu > Organiser > Calculator. When 0 is displayed on the
screen, enter the first number in the calculation. Press the # key for a
decimal point. Select Options >Add , Subtract, Multiply, Divide, Square,
Square root, or Change sign. Enter the second number. For a total, select
Equals. Repeat this sequence as many times as it is necessary. To start a
new calculation, first select and hold Clear.
To perform a currency conversion, select Menu > Organiser >
Calculator. To save the exchange rate, select Options > Exchange rate.
Select either of the displayed options. Enter the exchange rate, press the
# key for a decimal point, and select OK. The exchange rate remains in
the memory until you replace it with another one. To perform the
currency conversion, enter the amount to be converted, and select
Options > In domestic or In foreign.
Note: When you change base currency, you must enter the new rates
because all previously set exchange rates are set to zero.
84
Page 85

Organizer
■ Countdown timer
Select Menu > Organiser > Timer. Enter the alarm time in hours,
minutes, and seconds, and select OK. If you wish, write your own note
text that is displayed when the time expires. To start the countdown
timer, select Start. To change the countdown time, select Change time.
To stop the timer, select Stop timer.
If the alarm time is reached when the phone is in the standby mode, the
phone sounds a tone and flashes the note text if it is set or Countdown
time up. To stop the alarm, press any key. If no key is pressed, the alarm
automatically stops within 60 seconds. To stop the alarm and to delete
the note text, select Exit. To restart the countdown timer, select Restart.
■ Stopwatch
To measure time, take intermediate times, or take lap times, use the
stopwatch. During timing, the other functions of the phone can be used.
To set the stopwatch timing in the background, press the end key.
Using the stopwatch or allowing it to run in the background when using other
features increases the demand on battery power and reduces the battery life.
Select Menu > Organiser > Stopwatch and from the following options:
Split timing — to take intermediate times. To start the time observation,
select Start. Select Split every time that you want to take an
intermediate time. To stop the time observation, select Stop. To save the
measured time, select Save. To start the time observation again, select
Options > Start. The new time is added to the previous time. To reset the
time without saving it, select Reset. To set the stopwatch timing in the
background, press the end key.
Lap timing — to take lap times. To set the stopwatch timing in the
background, press the end key
Continue — to view the timing that you have set in the background
Show last — to view the most recently measured time if the stopwatch is
not reset
View times or Delete times — to view or delete the saved times
85
Page 86
Applications
15. Applications
■ Games
Your phone software includes some games.
Launch a game
Select Menu > Applications > Games. Scroll to the desired game, and
select Open.
For options related to a game, see “Other application options,” p. 87.
Game downloads
Select Menu > Applications > Options > Downloads > Game
downloads. The list of available bookmarks is shown. To access the list of
bookmarks in the We b menu, see “Bookmarks,” p. 91.
Important: Only install and use applications and other software from
sources that offer adequate security and protection against harmful
software.
Game settings
To set sounds, lights, and shakes for the game, select Menu >
Applications > Options > App. settings.
■ Collection
Your phone software includes some Java applications specially designed
for this Nokia phone.
Launch an application
Select Menu > Applications > Collection. Scroll to an application, and
select Open.
86
Page 87

Applications
Other application options
Delete — to delete the application or application set from the phone
Details — to view additional information about the application
Update version — to check if a new version of the application is available
for download from Web (network service)
App. access — to restrict the application from accessing the network.
Different categories are shown. Select in each category one of the
available permissions.
Web page — to provide further information or additional data for the
application from an Internet page. This feature must be supported by
the network. It is only shown if an Internet address has been provided
with the application.
Download an application
Your phone supports J2METM Java applications. Make sure that the
application is compatible with your phone before downloading it.
Important: Only install and use applications and other software from
sources that offer adequate security and protection against harmful
software.
You can download new Java applications in different ways.
Select Menu > Applications > Options > Downloads > App. downloads.
The list of available bookmarks is shown. Select the appropriate
bookmark to connect to the desired page. For the availability of
different services, pricing, and tariffs, contact your service provider.
Use the game download function. See “Game downloads,” p. 86.
Use the Nokia Application Installer in PC Suite to download the
applications to your phone.
Your device may have some bookmarks loaded for sites not affiliated with Nokia.
Nokia does not warrant or endorse these sites. If you choose to access them, you
should take the same precautions, for security or content, as you would with any
Internet site.
87
Page 88

Web
16. Web
You can access various mobile Internet services with your phone
browser.
Important: Use only services that you trust and that offer adequate
security and protection against harmful software.
Check the availability of these network services, pricing, tariffs, and
instructions with your service provider.
With the phone browser you can view the services that use wireless
markup language (WML) or extensible hypertext markup language
(XHTML) on their pages. Appearance may vary due to screen size. You
may not be able to view all details of the Internet pages.
■ Set up browsing
You may receive the configuration settings required for browsing as a
configuration message from the network operator that offers the
service that you want to use. See “Configuration settings service,” p. 10.
You can also enter all the configuration settings manually. See
“Configuration,” p. 63.
■ Connect to a service
First, verify that the correct configuration settings of the service that
you want to use are activated.
1. To select the settings for connecting to the service, select Menu >
Web > Settings > Configuration settings.
2. Select Configuration. Only the configurations that support browsing
service are shown. Select a service provider, Default, or Personal
config. for browsing. See “Set up browsing,” p. 88.
Select Account and a browsing service account contained in the
active configuration settings.
Select Display terminal window > Yes to perform manual user
authentication for intranet connections.
88
Page 89

Web
To make a connection to the service, select Menu > Web > Home; or in
the standby mode, press and hold 0.
To select a bookmark of the service, select Menu > Web > Bookmarks.
To select the last URL, select Menu > Web > Last web address.
To enter the address of the service, select Menu > Web > Go to address,
enter the address of the service, and select OK.
■ Browse pages
After you make a connection to the service, you can start browsing its
pages. The function of the phone keys may vary in different services.
Follow the text guides on the phone display. For more information,
contact your service provider.
If packet data is selected as the data bearer, is shown on the top left
of the display during browsing. If you receive a call or a text message, or
make a call during a packet data connection, is shown on the top
right of the display to indicate that the packet data connection is
suspended (on hold). After a call the phone tries to reconnect the packet
data connection.
Browse with phone keys
Use the navigation keys to browse through the page.
To select a highlighted item, press the call key, or select Select.
To enter letters and numbers, press the keys, 0 to 9. To enter special
characters, press *.
Options while browsing
In addition to the options available on your device, your service provider
may offer other options.
Direct calling
The browser supports functions that you can access while browsing. You
can make a phone call, and save a name and a phone number from a
page.
89
Page 90

Web
■ Appearance settings
While browsing, select Options > Other options > Appear. settings; or in
the standby mode, select Menu > Web > Settings > Appearance
settings and from the following options:
Text wrapping > On — to set the text to continue on the next line on the
display. If you select Off, the text is abbreviated
Font size to set the font size.
Show images > No — to hide pictures on the page. This can speed up the
browsing of pages that contain a lot of pictures
Alerts > Alert for unsecure connection > Yes — to set the phone to alert
when an encrypted connection changes to unencrypted during browsing
Alerts > Alert for unsecure items > Yes — to set the phone to alert when
an encrypted page contains an unsecure item. These alerts do not
guarantee a secure connection. For more information, see “Browser
security,” p. 93.
Character encoding > Content encoding — to select the encoding for the
browser page content
Character encoding > Unicode (UTF-8) web addresses > On — to set the
phone to send a URL as a UTF-8 encoding. You may need this setting
when you access a Web page created in foreign language.
JavaScript > Enable — to allow the execution of Java scripts by the
browser
■ Cookies
A cookie is data that a site saves in the cache memory of your phone.
Cookies are saved until you clear the cache memory. See “Cache
memory,” p. 93.
While browsing, select Options > Other options > Security > Cookie
settings; or in the standby mode, select Menu > Web > Settings >
Security settings > Cookies. To allow or prevent the phone from
receiving cookies, select Allow or Reject.
90
Page 91

Web
■ Scripts over secure connection
You can select whether to allow the running of scripts from a secure
page. The phone supports WML scripts.
1. While browsing, select Options > Other options > Security settings >
WMLScript sett.; or in the standby mode, select Menu > Web >
Settings > Security settings > WMLScripts over secure connection.
2. To allow the scripts, select Allow.
■ Bookmarks
You can save page addresses as bookmarks in the phone memory.
1. While browsing, select Options > Bookmarks; or in the standby
mode, select Menu > Web > Bookmarks.
2. Select a bookmark; or press the call key to make a connection to the
page associated with the bookmark.
3. Select Options to view, edit, delete, or send the bookmark; create a
new bookmark; or save the bookmark to a folder.
Your device may have some bookmarks loaded for sites not affiliated with Nokia.
Nokia does not warrant or endorse these sites. If you choose to access them, you
should take the same precautions, for security or content, as you would with any
Internet site.
Receive a bookmark
When you have received a bookmark that is sent as a bookmark, 1
bookmark received is displayed. To save the bookmark, select Show >
Save. To view or delete the bookmark, select Options > View or Delete.
To discard the bookmark directly after you have received the bookmark,
select Exit > OK.
■ Download files
To download more tones, images, games, or applications to your phone
(network service), select Menu > Gallery or Applications >
Options >Downloads and from the available downloads.
91
Page 92

Web
Important: Only install and use applications and other software from
sources that offer adequate security and protection against harmful
software.
To save all downloaded files automatically in Gallery, select Menu >
Web > Settings > Downloading settings > Automatic saving > On.
■ Service inbox
The phone is able to receive service messages (pushed messages) sent by
your service provider (network service). Service messages are
notifications of, for example, news headlines, and they may contain a
text message or an address of a service.
To access the Service inbox in the standby mode, when you have
received a service message, select Show. If you select Exit, the message
is moved to the Service inbox. To access the Service inbox later, select
Menu > Web > Service inbox.
To access the Service inbox while browsing, select Options > Other
options > Service inbox. Scroll to the message you want, and to activate
the browser and download the marked content, select Retrieve. To
display detailed information on the service notification or to delete the
message, select Options > Details or Delete.
Service inbox settings
Select Menu > Web > Settings > Service inbox settings.
To set whether you want to receive service message, select Service
messages > On or Off.
To set the phone to receive service messages only from content authors
approved by the service provider, select Message filter > On. To view the
list of the approved content authors, select Trusted channels.
To set the phone to automatically activate the browser from the standby
mode when the phone has received a service message, select Automatic
connection > On. If you select Off, the phone activates the browser only
after you select Retrieve when the phone has received a service
message.
92
Page 93

Web
■ Cache memory
A cache is a memory location that is used to store data temporarily. If you have
tried to access or have accessed confidential information requiring passwords,
empty the cache after each use. The information or services you have accessed is
stored in the cache.
To empty the cache, while browsing, select Options > Other options >
Clear the cache; in the standby mode, select Menu > Web > Clear the
cache.
■ Browser security
Security features may be required for some services, such as online
banking or shopping. For such connections you need security
certificates and possibly a security module, which may be available on
your SIM card. For more information, contact your service provider.
Security module
The security module improves security services for applications
requiring a browser connection, and allows you to use a digital
signature. The security module may contain certificates as well as
private and public keys. The certificates are saved in the security module
by the service provider. See also “Access codes,” p. 9.
Select Menu > Settings > Security > Security module settings and from
the following options:
Security module details — to show the security module title, status,
manufacturer, and serial number
Module PIN request — to set the phone to ask for the module PIN when
using services provided by the security module. Enter the code, and
select On. To disable the module PIN request, select Off.
Change module PIN — to change the module PIN, if allowed by the
security module. Enter the current module PIN code, then the new code
twice.
Change signing PIN — to change the signing PIN code for the digital
signature. Select the signing PIN you want to change. Enter the current
PIN code, then the new code twice.
93
Page 94

Web
Certificates
Important: Even if the use of certificates makes the risks involved in
remote connections and software installation considerably smaller,
they must be used correctly in order to benefit from increased security.
The existence of a certificate does not offer any protection by itself; the
certificate manager must contain correct, authentic, or trusted
certificates for increased security to be available. Certificates have a
restricted lifetime. If Expired certificate or Certificate not valid yet is
shown even if the certificate should be valid, check that the current
date and time in your device are correct.
Before changing any certificate settings, you must make sure that you
really trust the owner of the certificate and that the certificate really
belongs to the listed owner.
There are three kinds of certificates: server certificates, authority
certificates, and user certificates. You may receive these certificates
from your service provider. Authority certificates and user certificates
may also be saved in the security module by the service provider.
To view the list of the authority or user certificates downloaded into
your phone, select Menu > Settings > Security > Authority certificates
or User certificates.
The security indicator is displayed during a connection, if the data
transmission between the phone and the content server is encrypted.
The security icon does not indicate that the data transmission between the
gateway and the content server (or place where the requested resource is stored)
is secure. The service provider secures the data transmission between the
gateway and the content server.
Digital signature
You can make digital signatures with your phone if your SIM card has a
security module. Using the digital signature can be the same as signing
your name to a paper bill, contract, or other document.
To make a digital signature, select a link on a page, for example, the title
of the book you want to buy and its price. The text to sign, which may
include the amount and date, is shown.
94
Page 95

Web
Check that the header text is Read and that the digital signature icon
is shown.
If the digital signature icon does not appear, there is a security breach,
and you should not enter any personal data such as your signing PIN.
To sign the text, read all of the text first, and select Sign.
The text may not fit within a single screen. Therefore, make sure to scroll
through and read all of the text before signing.
Select the user certificate you want to use. Enter the signing PIN (see
“Access codes,” p. 9), and select OK. The digital signature icon
disappears, and the service may display a confirmation of your purchase.
95
Page 96

SIM services
17. SIM services
Your SIM card may provide additional services that you can access. This
menu is shown only if it is supported by your SIM card. The name and
contents of the menu depend on the SIM card.
For availability and information on using SIM card services, contact your SIM
card vendor. This may be the service provider, network operator, or other vendor.
To set the phone to show you the confirmation messages sent between
your phone and the network when you are using the SIM services, select
Menu > Settings > Phone > Confirm SIM service actions >Yes.
Accessing these services may involve sending messages or making a
phone call for which you may be charged.
96
Page 97

PC connectivity
18. PC connectivity
You can send and receive e-mail, and access the Internet when your
phone is connected to a compatible PC through an infrared, Bluetooth
wireless technology, or a USB data cable connection. You can use your
phone with a variety of PC connectivity and data communications
applications.
■ PC Suite
With PC Suite you can synchronize Contacts, Calendar, To-do list, and
Notes between your phone, and the compatible PC, or a remote Internet
server (network service).
You may find more information about PC Suite in the support area on
the Nokia Web site at <www.nokia.com/support>.
■ Packet data, HSCSD, and CSD
With your phone you can use the packet data, high-speed circuit
switched data (HSCSD), and circuit switched data (CSD, GSM data).
For availability and subscription to data services, contact your network
operator.
The use of HSCSD services consumes the phone battery faster than
normal voice or data calls. You may need to connect the phone to a
charger for the duration of data transfer. See “Packet data,” p. 58.
■ Data communication applications
For information on using a data communication application, refer to the
documentation provided with it. Making or answering phone calls
during a computer connection is not recommended, as it might disrupt
the operation. For better performance during data calls, place the phone
on a stationary surface with the keypad facing down. Do not move the
phone by holding it in your hand during a data call.
97
Page 98

Battery information
19. Battery information
■ Charging and discharging
Your device is powered by a rechargeable battery. The full performance of a new
battery is achieved only after two or three complete charge and discharge cycles.
The battery can be charged and discharged hundreds of times but it will
eventually wear out. When the talk and standby times are noticeably shorter
than normal, replace the battery. Use only Nokia approved batteries, and
recharge your battery only with Nokia approved chargers designated for this
device.
Unplug the charger from the electrical plug and the device when not in use. Do
not leave fully charged battery connected to a charger, since overcharging may
shorten its lifetime. If left unused, a fully charged battery will lose its charge over
time.
Use the battery only for its intended purpose. Never use any charger or battery
that is damaged.
Do not short-circuit the battery. Accidental short-circuiting can occur when a
metallic object such as a coin, clip, or pen causes direct connection of the
positive (+) and negative (-) terminals of the battery. (These look like metal strips
on the battery.) This might happen, for example, when you carry a spare battery
in your pocket or purse. Short-circuiting the terminals may damage the battery
or the connecting object.
Leaving the battery in hot or cold places, such as in a closed car in summer or
winter conditions, will reduce the capacity and lifetime of the battery and its
ability to charge. Always try to keep the battery between 15°C and 25°C (59°F
and 77°F). A device with a hot or cold battery may not work temporarily, even
when the battery is fully charged. Battery performance is particularly limited in
temperatures well below freezing.
Do not dispose of batteries in a fire as they may explode. Batteries may also
explode if damaged. Dispose of batteries according to local regulations. Please
recycle when possible. Do not dispose as household waste.
■ Nokia battery authentication guidelines
Always use original Nokia batteries for your safety. To check that you are getting
an original Nokia battery, purchase it from an authorized Nokia dealer, look for
98
Page 99
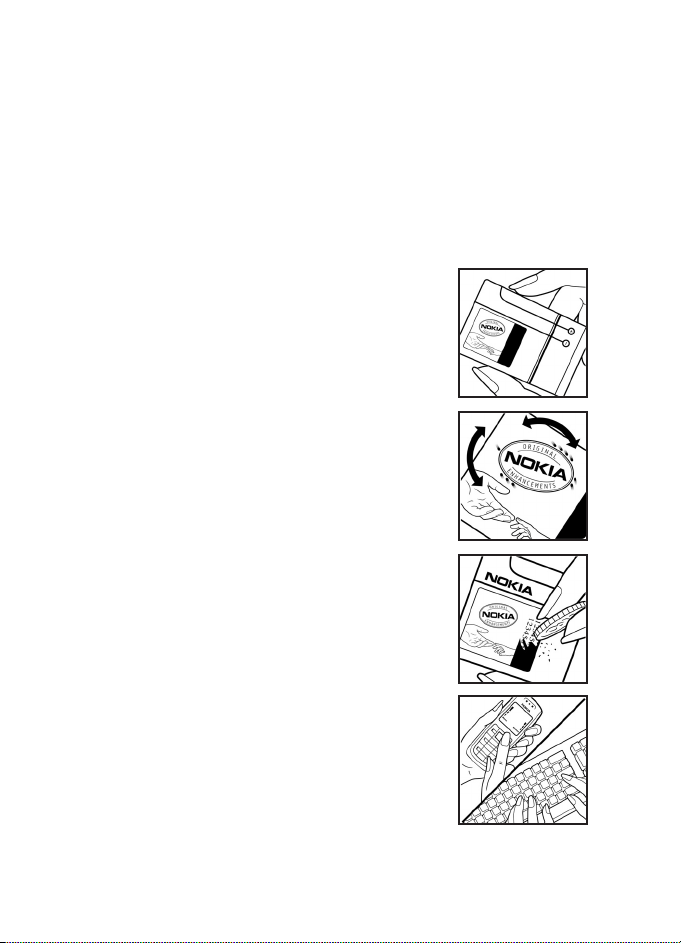
Battery information
the Nokia Original Enhancements logo on the packaging and inspect the
hologram label using the following steps:
Successful completion of the four steps is not a total assurance of the
authenticity of the battery. If you have any reason to believe that your battery is
not an authentic original Nokia battery, you should refrain from using it and take
it to the nearest authorized Nokia service point or dealer for assistance. Your
authorized Nokia service point or dealer will inspect the battery for authenticity.
If authenticity cannot be verified, return the battery to the place of purchase.
Authenticate hologram
1. When looking at the hologram label, you should see
the Nokia connecting hands symbol from one angle
and the Nokia Original Enhancements logo when
looking from another angle.
2. When you angle the hologram left, right, down, and
up, you should see 1, 2, 3, and 4 dots on each side
respectively.
3. Scratch the side of the label to reveal a 20-digit
code, for example, 12345678919876543210. Turn
the battery so that the numbers are facing upwards.
The 20-digit code reads starting from the number at
the top row followed by the bottom row.
4. Confirm that the 20-digit code is valid by following
the instructions at www.nokia.com/batterycheck.
To create a text message, enter the 20-digit code, for
example, 12345678919876543210, and send to
+44 7786 200276. National and international
operator charges will apply.
You should receive a message indicating whether
the code can be authenticated.
99
Page 100

Battery information
What if your battery is not authentic?
If you cannot confirm that your Nokia battery with the hologram on the label is
an authentic Nokia battery, please do not use the battery. Take it to the nearest
authorized Nokia service point or dealer for assistance. The use of a battery that
is not approved by the manufacturer may be dangerous and may result in poor
performance and damage to your device and its enhancements. It may also
invalidate any approval or warranty applying to the device.
To find out more about original Nokia batteries, visit www.nokia.com/battery.
100
 Loading...