

Meyer Sound LINA-RMS-RIG-WP-5, LINA-RMS-RIG-WP-3, LINA-RMS-RIG-ULT-WP, LINA-RIG-WP-3 Installation Guide
Page 1
INSTALLATION INSTRUCTIONS
Do not cross cables
LINE ARRAY
LINA UW Rain Hood and Shield Attachment
PART S L I S T
The Ultra Weather Protection LINA Rain Hood includes the following parts:
• LINA Rain Hood with attached gasket (PN 45.268.035.03)
• LINA UW Rain Hood Shield (PN 64.268.129.01)
• 4 pan head Phillips 6-32 x 0.5-inch stainless-steel screws (PN 101.031)
ULTRA WEATHER PROTECT RAIN HOOD AND UW SHIELD INSTALLATION
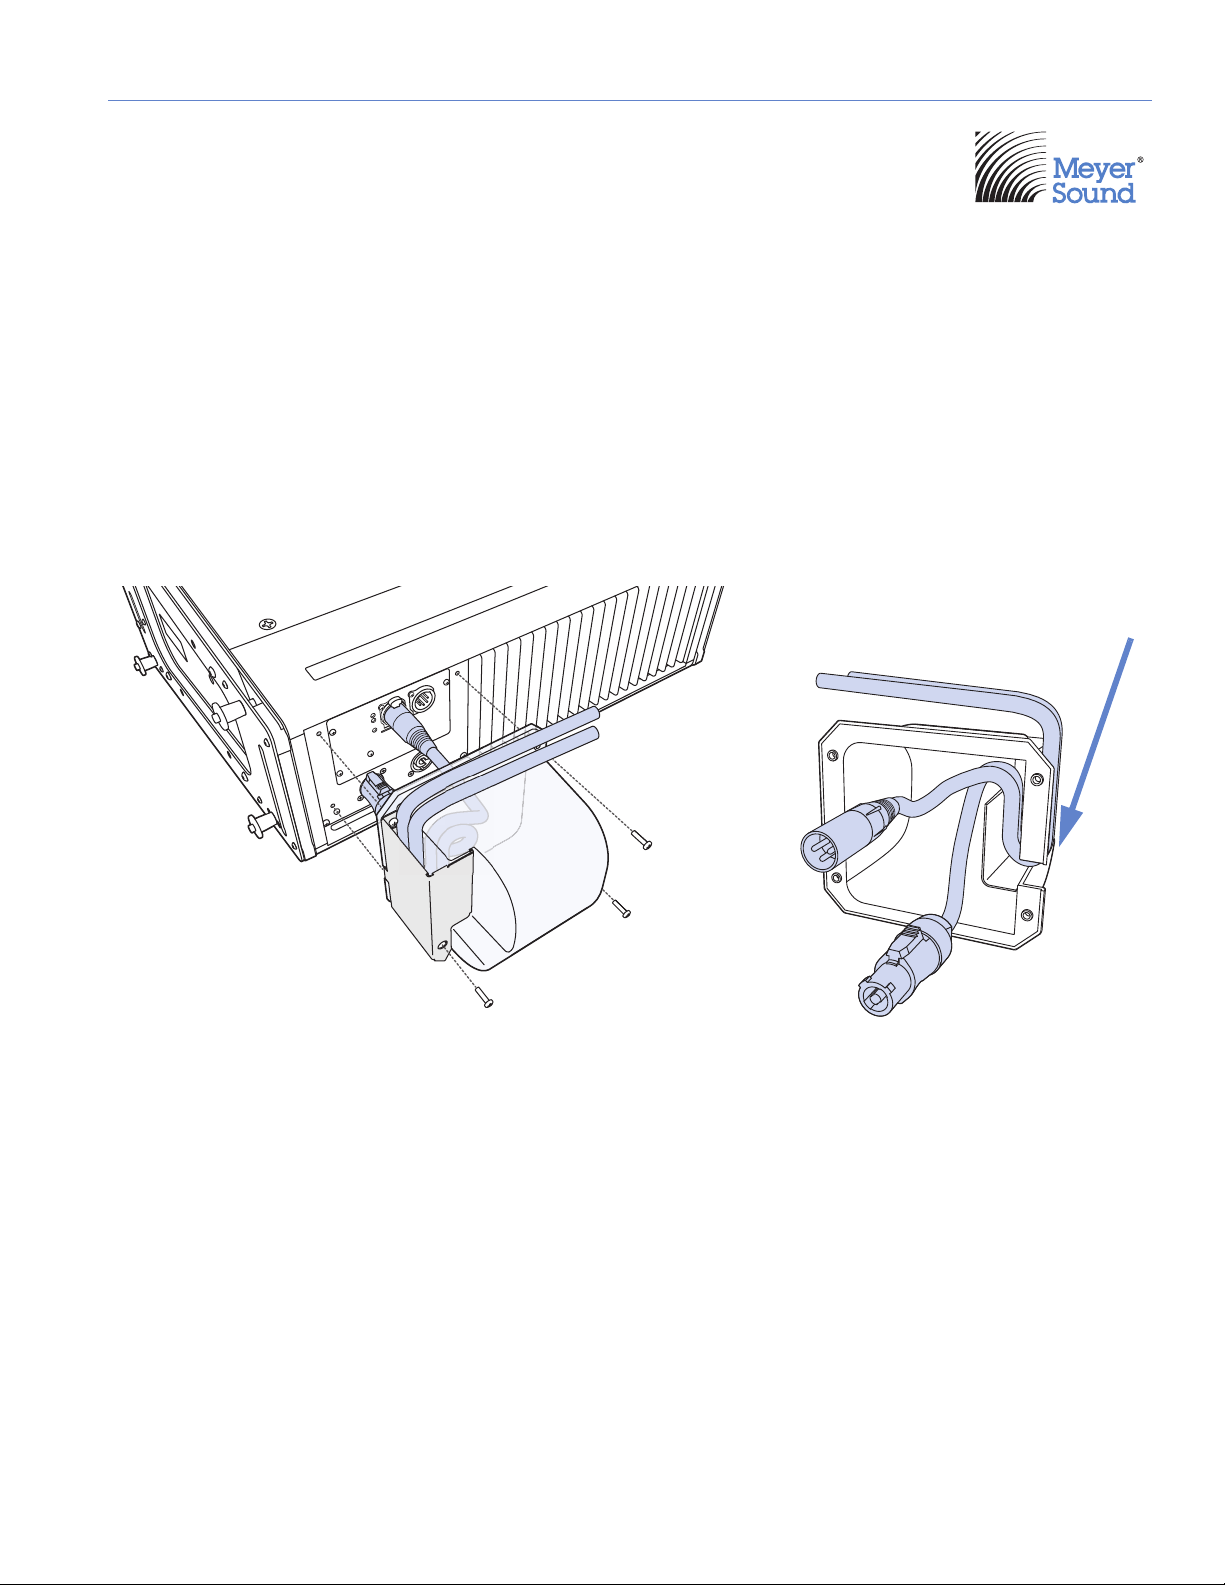
The LINA rigid removable rain hood plus UW rain hood shield are easily attached and removed with the included four screws
(Figure 1).
Figure 1: LINA with Rain Hood and UW Shield (left) and Cable Routing over Inner Wall (right)
1. Attach any required cables to the LINA loudspeaker.
2. Carefully route the cables, so that they wrap over and down the inner rain hood wall (see Figure 1, right), and exit through
the slot.
3. Attach the rain hood to the user panel and loosely secure it to the center of the panel with its four 6-32 x 0.5-inch screws.
4. Engage 2-3 threads on the upper- and lower-left screws. The cables should exit to the left when viewing from the rear of
the loudspeaker. Do not cross the cables at the rain hood opening (see Figure 1, right).
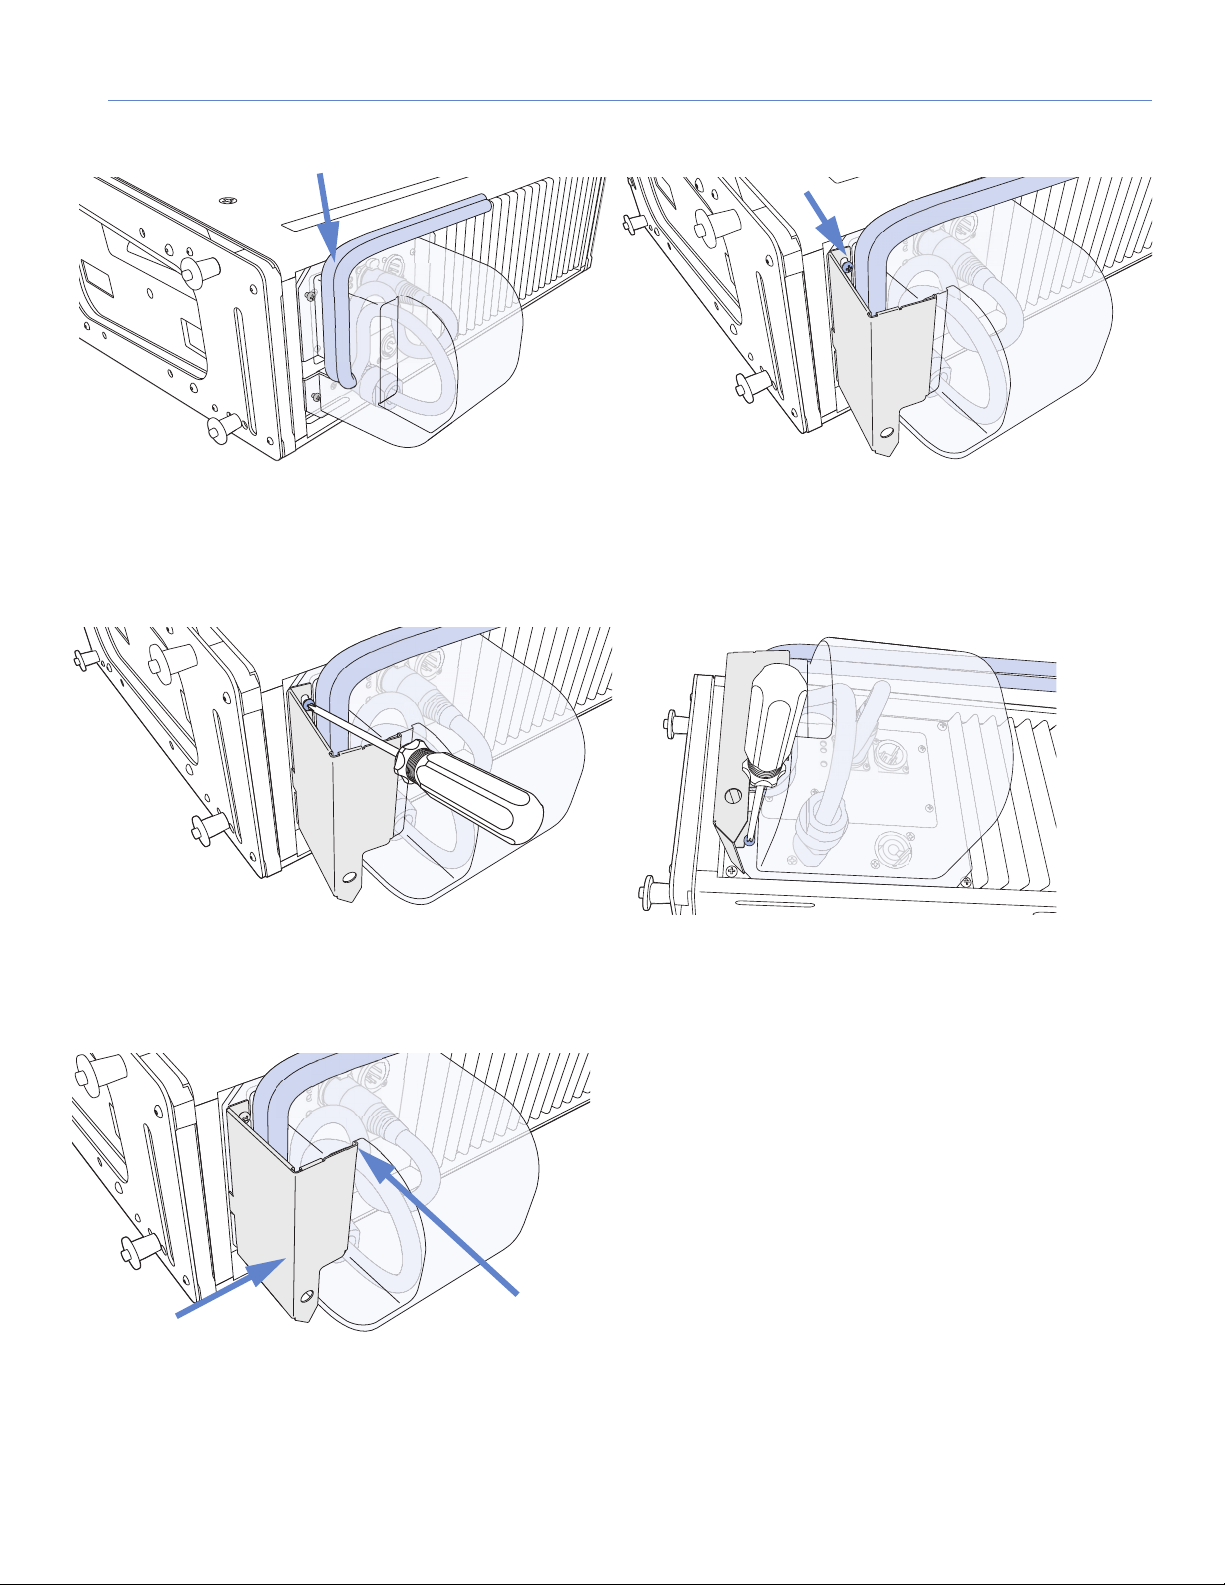
5. Route the cables up and over the top of the rain hood between the shield and the rain hood. Do not cross the cables (see
Figure 2, left).
6. Angle the shield and hook the slots in the L-shaped UW shield over both upper- and lower-left screws (when facing the
rear of the loudspeaker, see Figure 2, right).
Page 2
LINA UW RAIN HOOD AND SHIELD ATTACHMENT
Push here
Rain hood lip
Do not cross cables
Figure 2: Routing Cables over Rain Hood (left) and Hooking Shield over Securing Screws (right)
7. Tighten the upper and lower screws on the left side of the rain hood (Figure 3). The recommended torque value for all four
screws is 10–12 in-lbs (1.1-1.4 N·m).
Figure 3: Tightening Screws on Left Side of Rain Hood
8. Push the shield toward the rain hood until its edge clicks into place over the rain hood lip (Figure 4).
Figure 4: Pushing Shield Toward Rain Hood
2
Page 3

INSTALLATION INSTRUCTIONS
!
!
!
!
9. Tighten the upper and lower screws on the right side of the rain hood (Figure 5).
Figure 5: Tightening Screws on Right Side of Rain Hood
10. To remove the rain hood, reverse the steps.
CAUTION: Make sure cables are not crossed either at the rain hood opening or between the shield and the rain
hood.
CAUTION: Make sure to tighten the screws to the recommended torque value of 10–12 in-lbs (1.1-1.4 N-m) in
order to create a good seal against the user panel.
CAUTION: There is only one proper loudspeaker orientation once the rainhood is installed. See Figure 1.
CAUTION: The weather-protected LINA must be mounted with a 0
° tilt, or preferably with a slight down-tilt. This
angle shields the driver from the elements and does not allow water to accumulate. Do not tilt the cabinet up, as
the drivers and cabinet will accumulate water.
NOTE: Ultra Weather Protected units using the rigid rainhood and shield are rated IPX4 for water intrusion.
3
Page 4

Meyer Sound Laboratories Inc.
2832 San Pablo Avenue
Berkeley, CA 94702
+1 510 486.1166
www.meyersound.com
© 2019
Meyer Sound. All rights reserved.
LINA UW Rain Hood and Shield Attachment
PN 05.270.005.03 A2
 Loading...