

Page 1
ECONOMY COUNTING SCALE OPERATION & SERVICE MANUAL
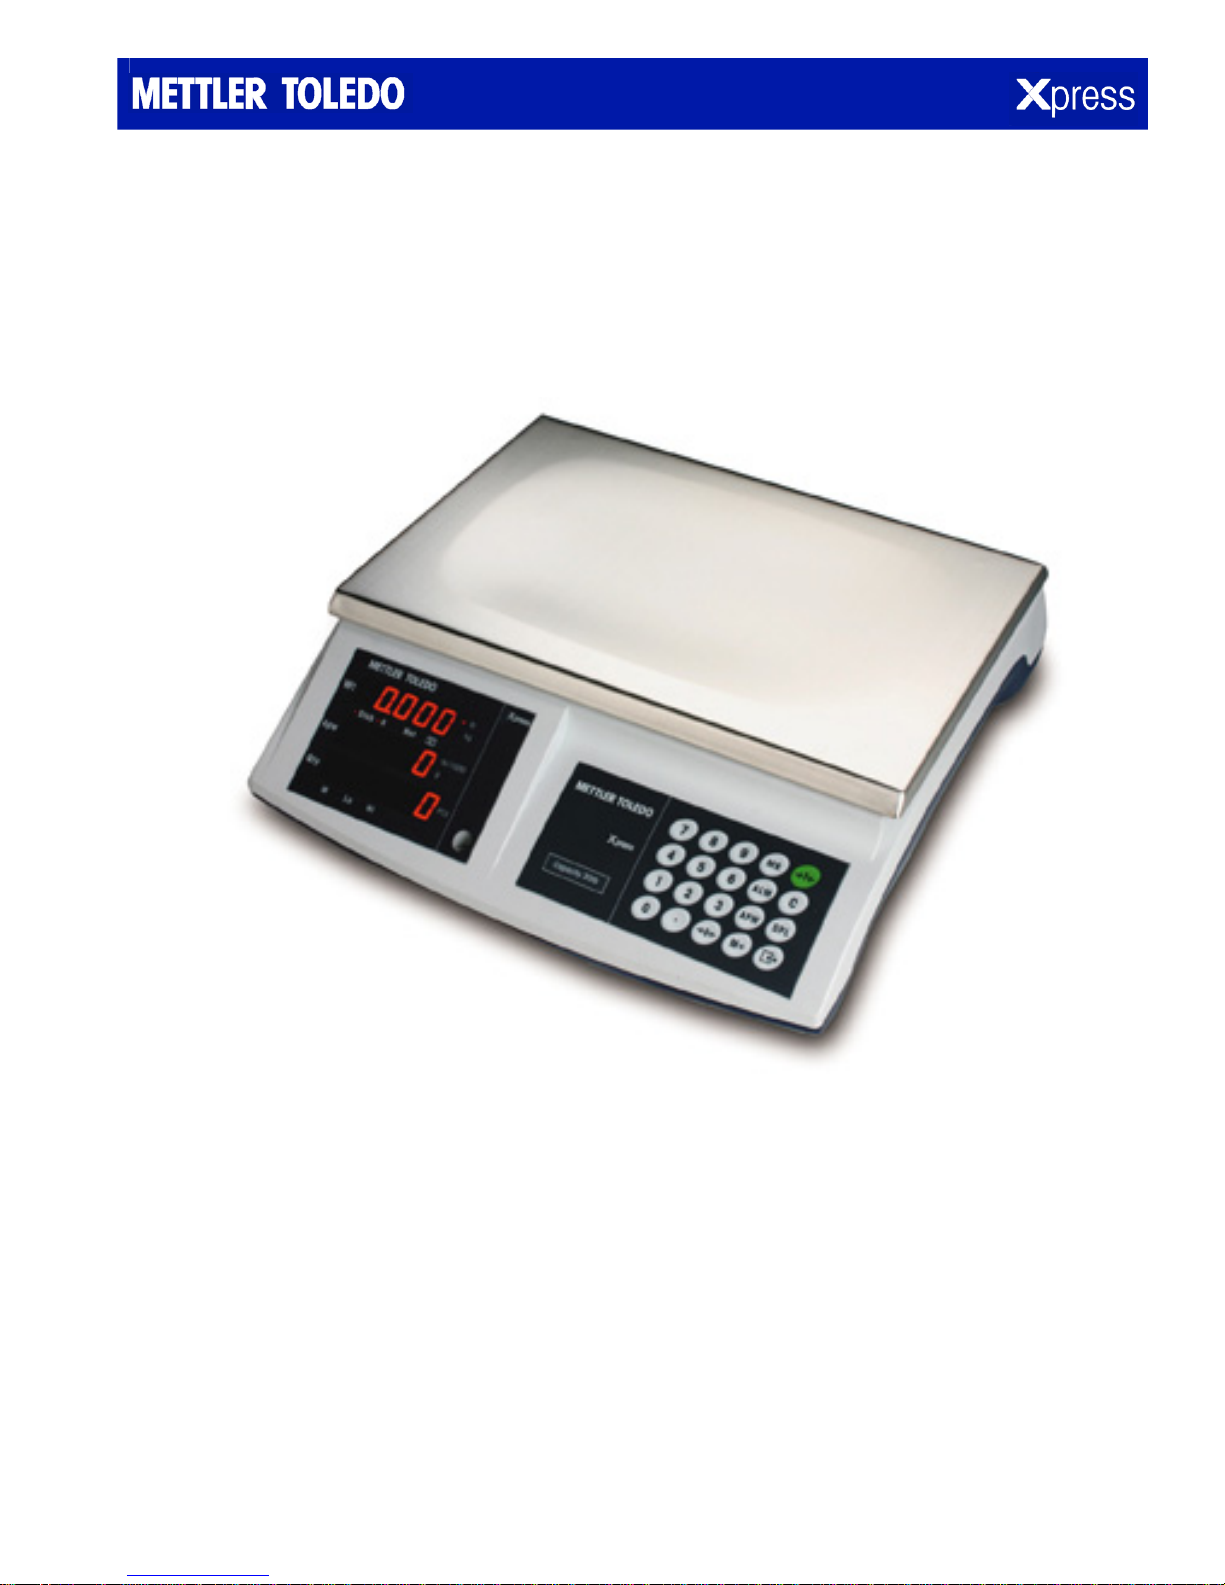
Models XTCII
ECONOMY COUNTING SCALE www.mt.com/xpress
Page 2

2
ECONOMY COUNTING SCALE
ABOUT THIS MANUAL AND MT EXPRESS
Thank you for purchasing an MT Xpress product.
All of our equipment is assembled and packed with great care. If you should find any incorrect item, please
contact your Xpress Dealer immediately.
MT Xpress products are Weights & Measures approved precision weighing instruments. However, you may
want to obtain official certification through your supplier or local Weights & Measures office.
This MT Xpress product was developed, produced, and tested in a METTLER TOLEDO facility that has been
audited and registered according to international ISO 9001 quality standards and ISO 14000 environment
control program. Properly used and maintained, this product will provide years of accurate weighing.
Handle it as you would any piece of fine electronic equipment.
Please READ this manual BEFORE operating or servicing this equipment. Follow the instructions carefully
and save this manual for future reference.
We at MT Xpress want to make sure you received the product you expected. It is important to us that you
are satisfied with your purchase. If there is anything we can help you with, or if you are not satisfied with
either your product or the services received from the Xpress representative, let us know.
How can you reach us?
XPRESS CUSTOMER CARE CENTER, USA
24/7 Information and Support: www.mt.com/xpress
xpress@mt.com
8 AM to 8 PM EST: Toll Free: 1-866-MTXPRESS
Xpress
Mettler-Toledo, Inc.
60 Collegeview
Westerville, OH 43081
Page 3

ECONOMY COUNTING SCALE
FCC APPROVAL
This device complies with part 15 of the FCC Rules. Operation is subject to the following two
conditions: (1) this device may not cause harmful interference, and (2) this device must accept any
interference received, including interference that may cause undesired operation.
3
Page 4

4
ECONOMY COUNTING SCALE
CONTENTS
SAFETY NOTICE............................................................................................................................. 5
PREPARING
YOUR
OPERATING YOUR SCALE................................................................................................................ 9
SPECIAL MODES – SETUP MODE.................................................................................................... 13
CLEANING AND MAINTAINING YOUR SCALE ..................................................................................... 14
SERVICING YOUR SCALE............................................................................................................... 15
APPENDIX.................................................................................................................................. 20
THE SCALE FOR USE ..................................................................................................... 6
ENVIRONMENT .....................................................................................................................6
UNPACKING AND ASSEMBLY.................................................................................................. 6
XPRESS SCALE AT A GLANCE .................................................................................................. 8
DISPLAY .............................................................................................................................. 8
KEYPAD............................................................................................................................... 8
CURSORS (LED) ...................................................................................................................8
ZERO................................................................................................................................... 9
TARE................................................................................................................................... 9
COUNTING ......................................................................................................................... 10
ACCUMULATION AND RECALL............................................................................................... 11
ALARM .............................................................................................................................. 11
ENTERING SETUP MODE...................................................................................................... 13
FUNCTION OF THE KEYS...................................................................................................... 13
CONFIGURATIONS............................................................................................................... 13
CLEANING AND MAINTENANCE............................................................................................. 14
TROUBLESHOOTING............................................................................................................ 14
ENTERING SERVICE MODE ................................................................................................... 15
FUNCTION OF THE KEYS...................................................................................................... 15
CONFIGURATIONS............................................................................................................... 15
GRAVITY ADJUSTMENT ........................................................................................................ 16
CALIBRATION .....................................................................................................................16
BATTERY REPLACEMENT...................................................................................................... 18
ERROR MESSAGES.............................................................................................................. 20
SPECIFICATIONS ................................................................................................................. 21
GEO VALUE TABLE .............................................................................................................. 22
PHYSICAL DIMENSIONS ....................................................................................................... 23
Page 5
ECONOMY COUNTING SCALE
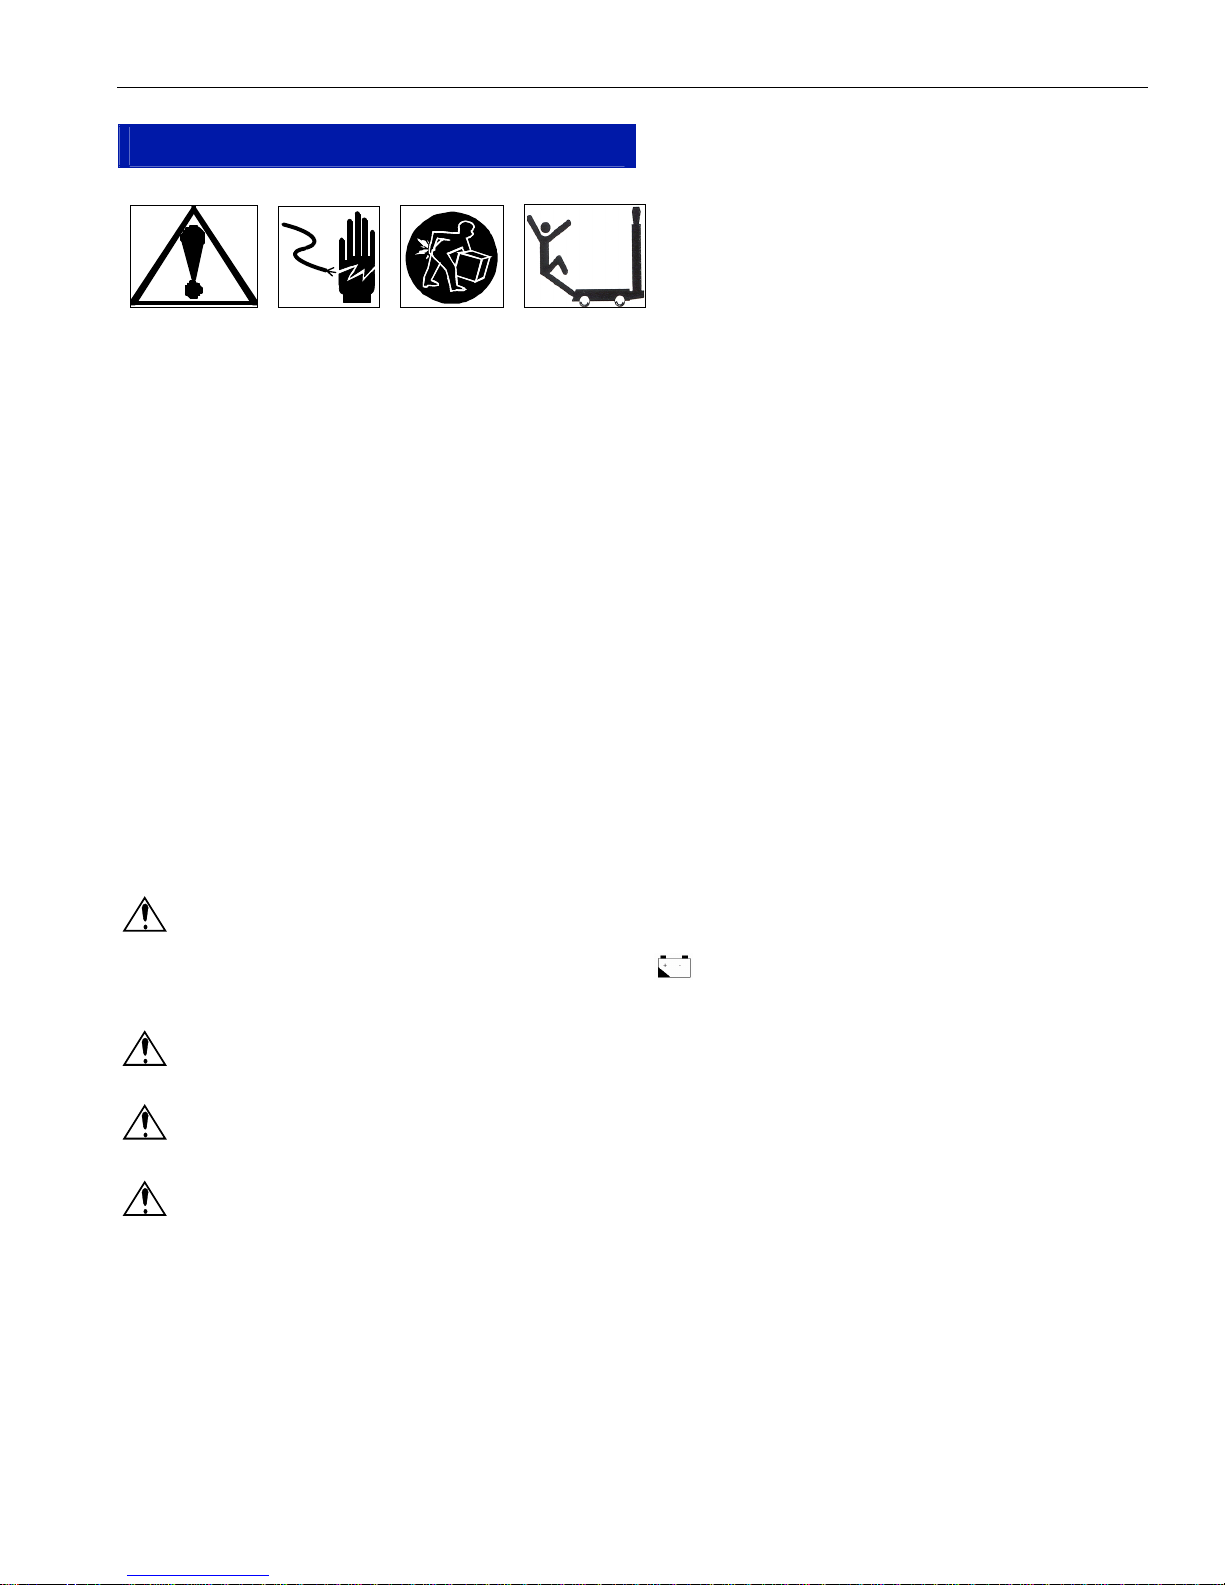
SAFETY NOTICE
Product safety is a fundamental concern at MT Xpress. Use common sense and follow the simple
precautions listed below to ensure your safety and to optimize the use and performance of this product.
− Read this manual before operating or servicing this product. Save this manual for future reference.
− Observe safety warnings located throughout this manual.
− Use caution when lifting or moving heavy equipment.
− This product should only be serviced by qualified personnel. Exercise care when moving, testing, or
adjusting this product.
− Disconnect all power to this product before installing, servicing, or cleaning.
5
− Use only MT Xpress parts for repair.
− Observe electrostatic handling precautions for electronic components. Allow at least 30 seconds after
power is disconnected to allow charges to dissipate before servicing any electronic components.
− Allow the product to adjust to room temperature before connecting the power source.
Battery Notice
When ‘Lo’ appears in the display window, the battery must be recharged or replaced by a new one.
When connecting to an AC power supply, the battery can be automatically recharged. The charging
cursor is “on” above the battery charging symbol . The charging time is usually 12 hours. If the
charging is complete, the cursor will be off.
Never invert the positive and negative poles of battery. The red terminal is for the positive pole ,
the black terminal is for the black plug.
The battery must be taken out when the scale is not used for long periods of time. The battery should be
recharged at least once every three months.
Do not use another type of battery to replace the one supplied with the scale.
FAILURE TO FOLLOW THESE PRECAUTIONS COULD RESULT IN DAMAGE TO OR DESTRUCTION OF THE
EQUIPMENT, OR BODILY HARM.
Page 6

6
ECONOMY COUNTING SCALE
PREPARING THE SCALE FOR USE
The Xpress XTCII is a new generation counting scale. With high internal and display resolution as well as a
unique profile, the XTCII can widely be used in counting applications in the electronics, metals, plastics and
other such industries. The Xpress XTCII is ready to use right out of the box.
This manual provides not only the detailed information on how to operate the scale, but also useful
messages for service and maintenance.
Please read the manual thoroughly and familiarize yourself with all the safety requirements. All service
procedures must only be performed by authorized personnel.
This chapter gives detailed instructions and important information regarding the successful installation of the
Xpress Economy Counting Scale.
ENVIRONMENT
Before you install the scale, identify the best location for the equipment. The proper environment enhances
its operation and longevity. Keep in mind the following factors, which might have a negative influence on
the scale's operation:
Vibration: Vibration diminishes the scale’s ability to measure accurately. Electrical machinery such as
conveyors and drill presses can cause inaccurate and non-repeatable readings. The scale may also read
inaccurately if it is not leveled properly.
Air currents: Moving air can cause the scale to read wind movement as an additional force and cause
inconsistency in the weighing results.
Friction: A scale cannot measure accurately if an object is rubbing or pressing against the scale platform.
UNPACKING AND ASSEMBLY
Please inspect the package immediately upon receipt. If the box is damaged, check for internal damage and
file a freight claim with the carrier if necessary. If the container is undamaged, open the box, remove the
scale and place it on a solid, flat surface. Please keep the packing material and shipping insert in case you
need to return the scale to an MT Xpress representative.
Package contents for all Xpress Economy Counting Scales include:
Product
− XTCII Counting Scale
− Scale Pan
− Adapter 9 V / 500 mA
− Rubber gasket (4 pieces, only for
6 lb and 15 lb scale)
− Lead seal wire and lead
Documents
− Quick Start Guide
− Installation Instructions
CD-ROM
− Operation & Service Manual
Page 7
ECONOMY COUNTING SCALE
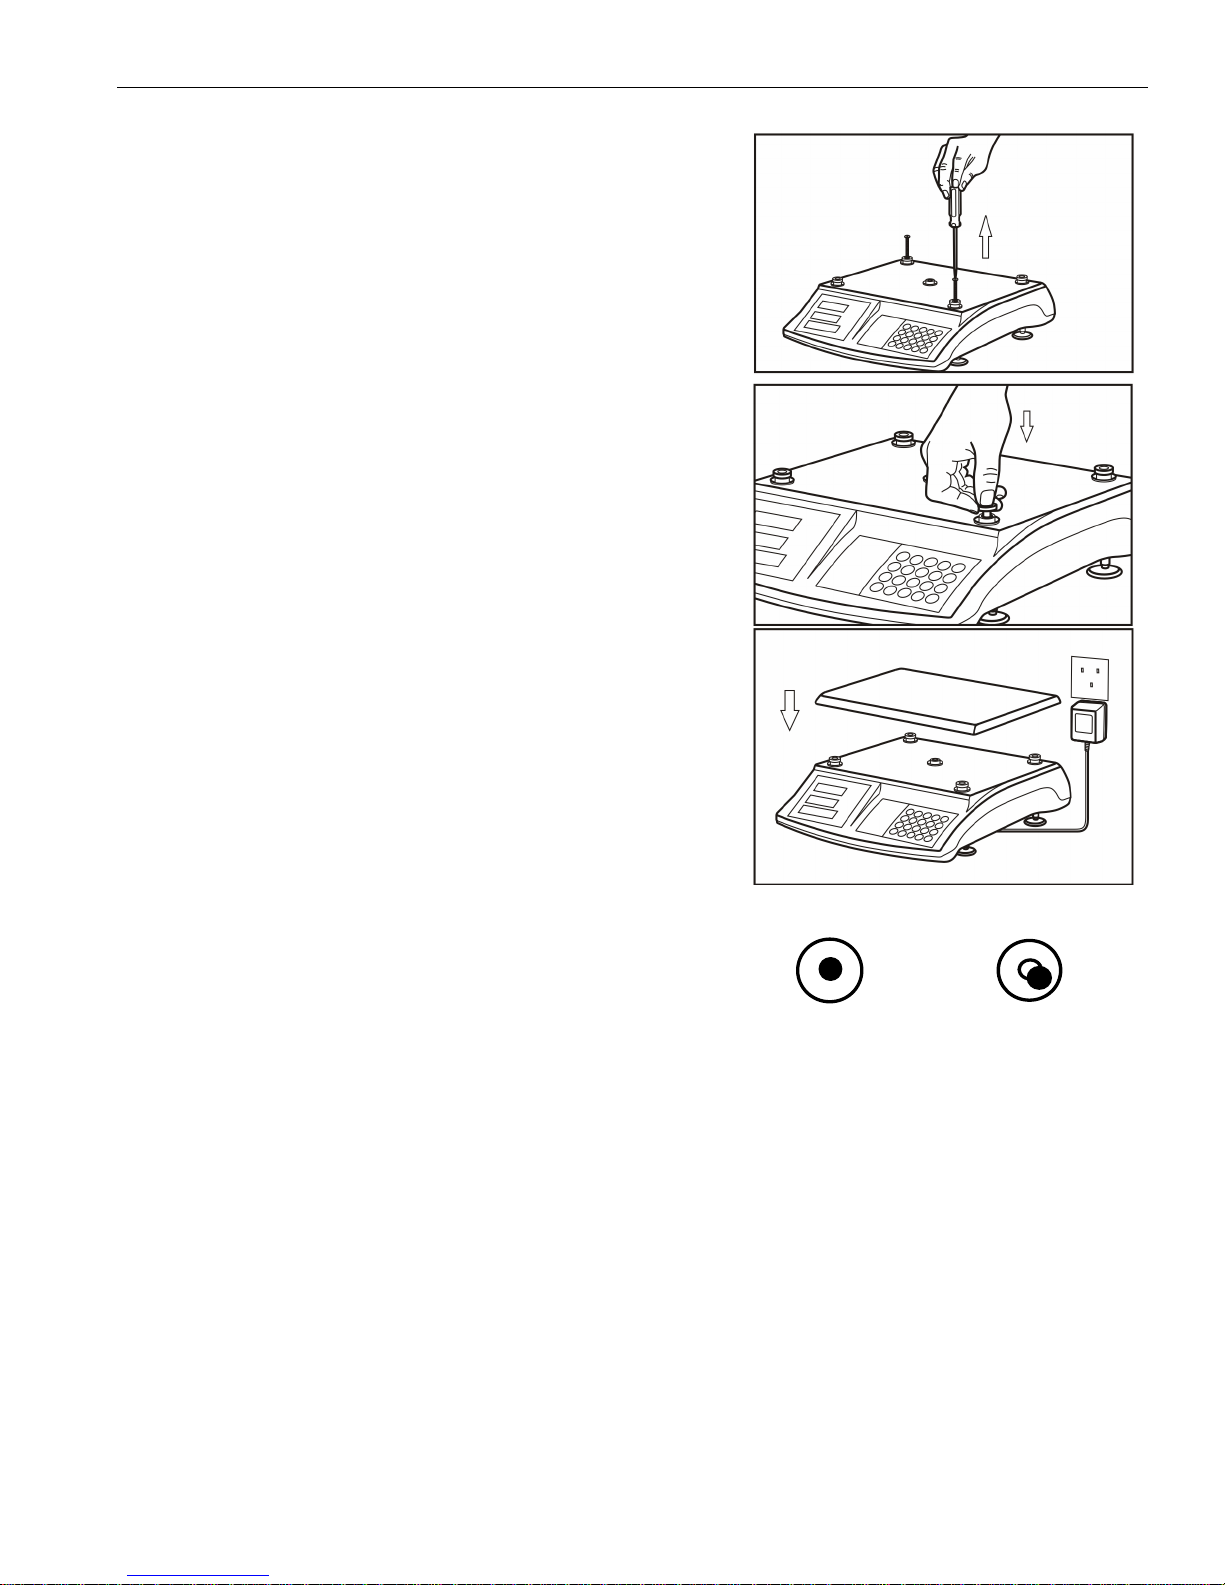
1. Place the scale on a flat surface.
2. Remove the protective screws (only for the 6 lb and 15 lb
scales)
3. Mount four rubber gaskets onto each spider foot (only for
the 6 lb and 15 lb scale).
4. Put the platter on the spider (aluminum plate). Ensure that
the platter is properly aligned.
7
5. Connect the scale to the power outlet using the included
adapter.
6. Level the scale by adjusting the four rubber feet until the
leveling bubble is centered in the level indicator.
7. Turn on the scale.
8. The scale should be running for about fifteen (15) minutes
before operation.
Proper alignment Improper alignment
The windows display from 0-9, the
software version No. and ‘----‘.
The cursors of stab and 0 are on.
Page 8
8
YOUR XPRESS SCALE AT A GLANCE
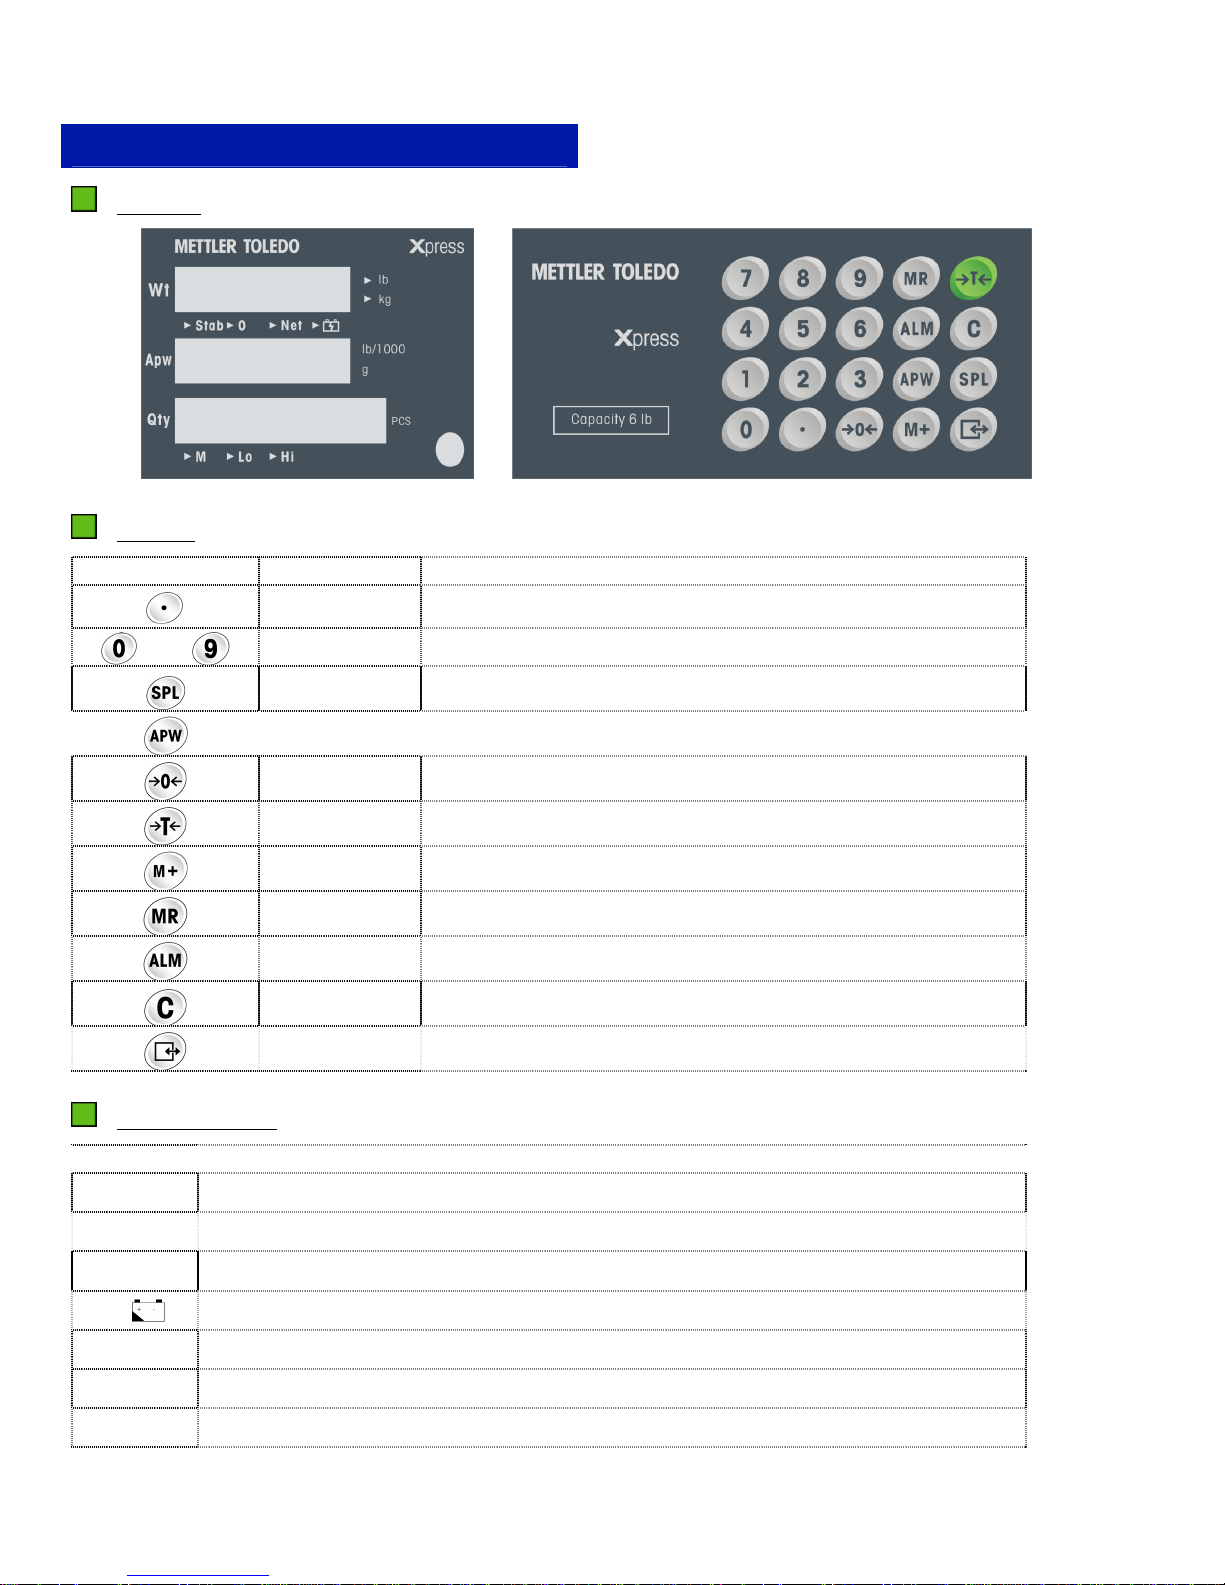
DISPLAY
KEYPAD
Key Name Function
ECONOMY COUNTING SCALE
thru
Decimal Enters a decimal point/Toggles alarm beep
Numeric Data entry (0-9)
Sample Initiates sampling
APW Initiates Average Piece Weight (APW) entry
Zero Zeroes the scale
Tare Subtracts tare value and switches from gross to net mode
Accumulation Adds the accumulator counts or recalls accumulation
Recall Recalls the accumulated quantity and times
Alarm Sets the range for quantity or weight alarms
Clear Clears data from the display
Enter/Setup Confirms an operation or enters Setup Mode
CURSORS (LED)
Key Description
Z
Stab
Is lit when the weighing data is stable
Z
0
Z
Net
Is lit when the scale is at gross zero
Is lit when the scale displays a net weight
Z
Z
M
Z
Lo
Z
Hi
Is lit when the battery is being charged
Is lit when the value in the accumulator is
Is lit when weight/quantity is less than the lower limit of alarm range
Is lit when weight/quantity exceeds the upper limit of alarm range
not
zero
Page 9
ECONOMY COUNTING SCALE
9
OPERATING YOUR SCALE
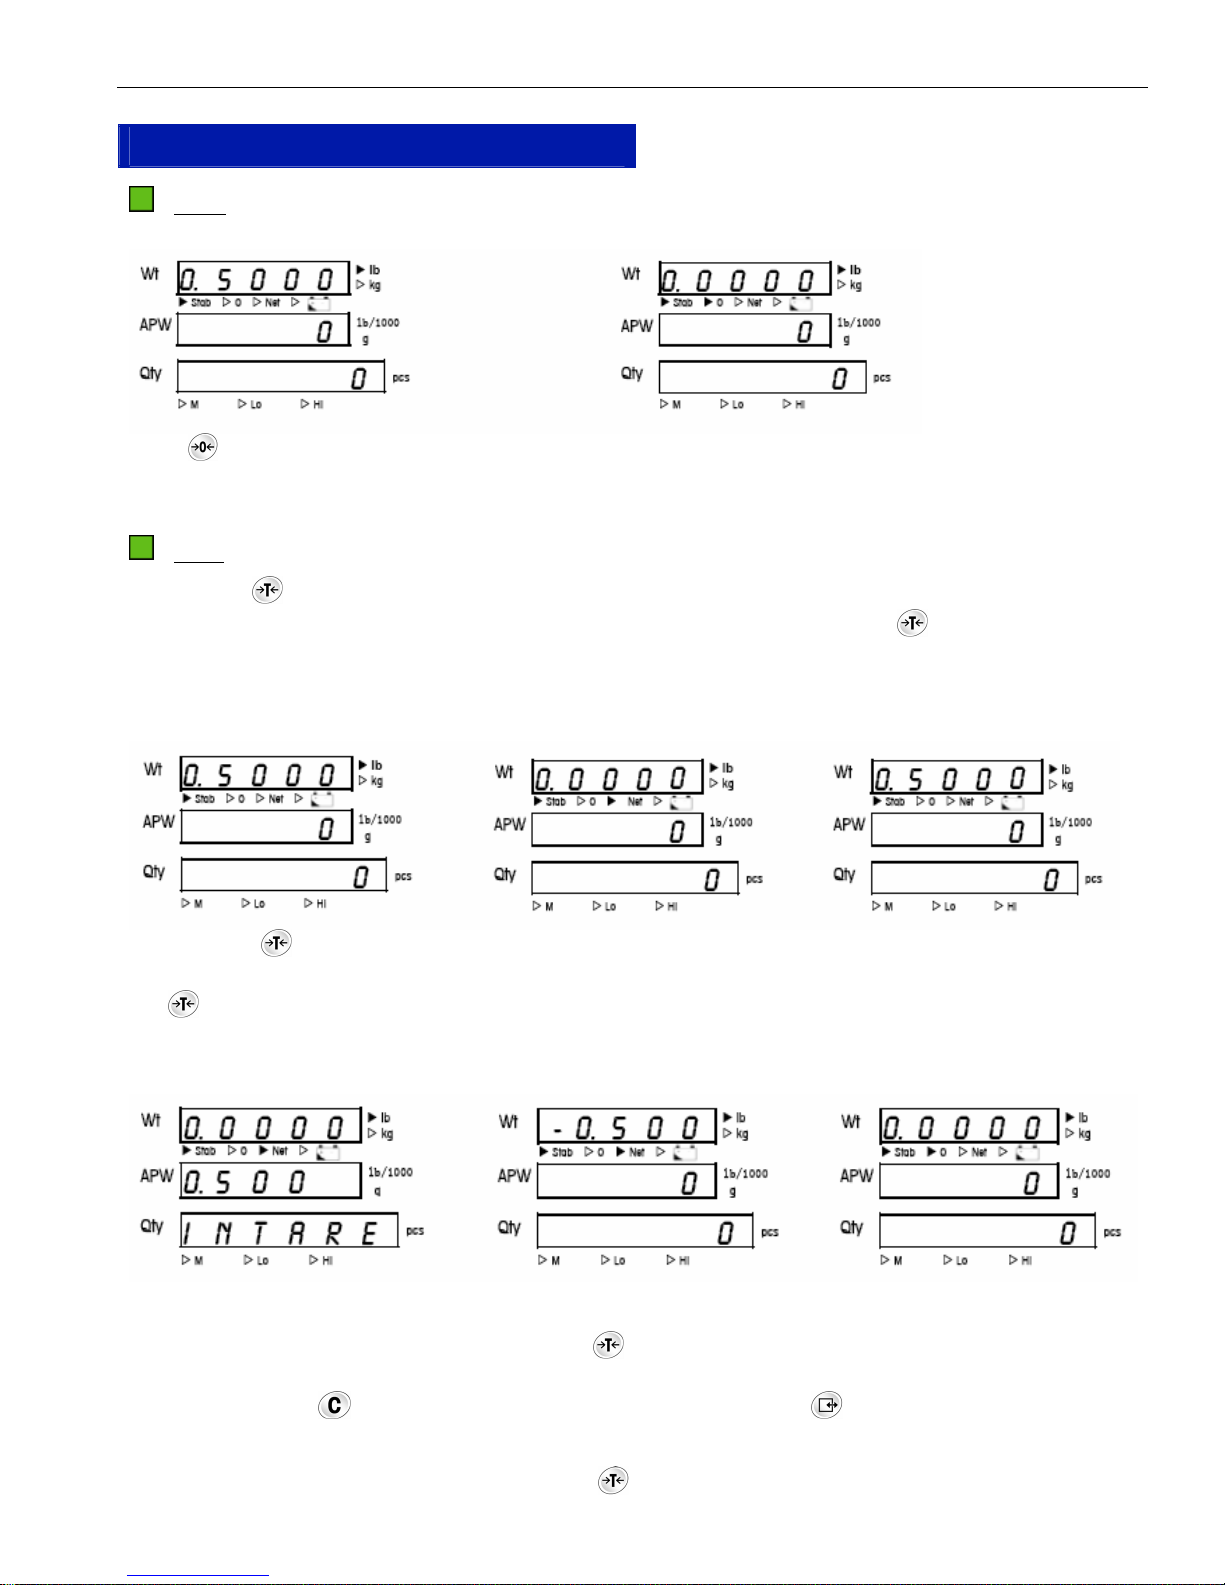
ZERO
Press to capture a new center of zero if the scale is in gross weight mode and the weight on the scale is
stable (e.g. 0.5000 lb, as above shown, the cursor ‘Stab’ is on). The cursor “0” is lit when a new center of
zero is captured.
TARE
Pressing the key subtracts the weight of the object on the scale platform from subsequence indications
of weight. Tare is most often used to subtract the weight an empty container. The key is used as well to
clear a previously entered tare value if the scale is in net mode.
Direct Tare
Press the key in gross weight mode when the weight on the scale is above zero (e.g. 0.5000 lb as
above shown) to tare the scale. If a net center of zero can be captured, the cursor ‘Net’ is on. By pressing the
key
again, the scale will be back in gross weight mode. The tare range is the full capacity of the scale.
Input Tare (Digit Tare)
If the Function F3 in the Setup Mode is set to 1 (F3=1, see Setup Mode), the scale can be tared manually
without weighing-in the tare value. Press the key to enter a tare value. The QTY window displays
“InTare” to remind you to enter the tare. The input tare is displayed in the APW window and can be corrected
by pressing the key
if a wrong figure is entered. By pressing the key , you confirm the input tare
value. The display shows the negative tar value in the weight window with the cursor “Net” on.
The input tare can be cleared by pressing the key again, and the scale is then back to gross weight
mode.
Page 10

10
ECONOMY COUNTING SCALE
COUNTING
Counting by Sampling
Place the samples on the platter (e.g. 20 pieces weights 0.05 lb as shown above). Press the key to
sample. The QTY window displays SPL. Enter the sample quantity 20, and then press the key to
confirm.
Press the key to correct or clear the input figure.
The Wt window displays the sample Weight; the APW window displays Average Piece Weight of samples
and the QTY displays the sample Quantity.
APW Enhancement
The APW (Average Piece Weight) enhancement can be activated in the Setup Mode (F5=1). This
enhancement is used to get a more accurate APW. After a sampling is complete, the scale will
automatically re-calculate the APW. However, the added quantity of pieces should be less than the quantity
on the scale. The scale gives a ‘beep’ after every APW enhancement. The function is always available
unless the added quantity of pieces is more than that the quantity on the scale.
For example:
Sampling with 20 pieces
that weight 0.04 lb and an
APW 0.002 lb.
If you add another 19 pieces
to the scale (≤ 20 pcs), a
beep indicates that the APW
is automatically recalculated
to 0.0020115 lb.
If you add another 39 pieces
to the scale (≤ 39 pcs), again,
a beep indicates that the APW
is automatically recalculated to
0.0020208 lb.
Page 11

ECONOMY COUNTING SCALE
11
If you know the APW. . .
If you know the APW of your goods, the APW can be entered directly instead of sampling.
Place the goods on the scale (e.g. 0.05 lb). Press the key and enter the APW (e.g. 0.002 lb) of one
piece. The QTY window displays “Single” and the entered APW is displayed in the APW window. Press
to confirm. The QTY window displays now the total quantity of pieces (e.g. 25).
You may press the key
to correct or clear the input figure.
ACCUMULATION AND RECALL
The key can be used to keep the quantity in the memory. The cursor ‘M’ is lit when the accumulated
quantity is not zero. The Wt window displays ‘Total’ and the APW window displays accumulation times
(e.g. 3 times). The QTY window displays the accumulated quantity (e.g. 1500 pcs).
Press
to confirm, then the quantity of goods on the scale into memory (e.g. 500 pcs).
To clear the accumulation, press and the cursor “M” will be off.
Press to recall the total quantity and accumulation times (e.g. 2000 pcs, 4 times). Press to exit
recall.
When the accumulated quantity is above 999,999, the QTY window displays “nnnnnn” to indicate that
maximum number of accumulations has been reached.
.
If the weight on the scale hasn’t been changed between two accumulations, the QTY window will display
‘Again’ to refuse the operation.
ALARM
The alarm function includes a weight and a quantity alarm. Both alarms can either be set to sound within a
defined range or over/under a defined range. The alarm function can be activated in the Setup Mode
(F4/F4.1/F4.2/F4.3).
Page 12

12
ECONOMY COUNTING SCALE
Temporarily Disable the Alarm Beep
For all functions, the alarm beep can be deactivated by pressing the key . Pressing again will
reactivate the alarm beep.
Weight Alarm within a Range
If weight alarm within a range is activated in the Setup Mode, press the key to set the alarm range. The
QTY window displays ‘Lo 1’ to remind you to enter the lower limit of the alarm range. The entered lower
range is displayed in the APW window (e.g. 0.500 lb). Press the key to confirm the lower limit. The
QTY window now displays ‘Hi 1’ to remind you to enter the upper limit of the alarm range (e.g. 1.000 lb).
Press to complete the alarm range setting.
If the weight on the scale is within the alarm range (e.g. 0.800 lb on the scale, i.e. ≥ 0.500 lb and ≤
0.1000 lb), the scale will beep continuously, and the cursors “Lo” and ”Hi” will be lit. If the weight on the
scale is less than the lower limit, the cursor ‘Lo’ will be on. The ‘Hi’ is on when the weight is higher than the
upper limit.
Weight Alarm beyond a Range
If weight alarm beyond a range is activated in the Setup Mode, press to set the alarm range. The QTY
window displays ‘Lo 1’ to remind you to enter the lower limit of the alarm range. The entered lower range is
displayed in the APW window (e.g. 0.5 lb). Press to confirm the lower limit. The QTY window now
displays ‘Hi 1’ to remind you to enter the upper limit of alarm range (e.g. 0.1000 lb). Press to
complete the alarm setting. If the weight on the scale is beyond the alarm range (e.g. 1.200 lb on the
scale, i.e. < 0.500 lb or > 0.1000 lb) the scale will beep continuously. The cursor “Lo” will be on if the
weight on the scale is less than the lower limit. The ‘Hi’ cursor is on when the weight is higher than the
upper limit.
Quantity Alarm
The two quantity alarms (within a range/beyond a range) work the same way as the weight alarms. Instead
of “Lo 1” and ‘Hi 1’, “Lo 2” and ‘Lo 2’ are indicated.
Page 13

ECONOMY COUNTING SCALE
SPECIAL MODES – SETUP MODE
ENTERING SETUP MODE
Press and hold for three seconds to enter the Setup Mode. If you change the display resolution in the
Setup Mode, the scale will perform its power-up process after exiting the Setup Mode. If the resolution
remains unchanged, the scale will return to its previous state.
FUNCTION OF THE KEYS
In the Setup Mode, the functions of the keys will be as follows:
Key Function Description
CONFIGURATIONS
Display Parameter Default
F1 Weighing unit
F2 Display resolution
F3 Input an advance tare
F4 Alarm parameter change
F4.1 Alarm function
F4.2 Weight alarm or quantity alarm
F4.3 Alarm mode select
F5 APW enhancement
F6 Automatic sleep
F7 Zero capture range
F8 Push button zero range
E Exit/Save
Select Switches between the parameters of 1 and 0
Next Confirm the choice and move forward
Previous Confirm the choice and steps backward
0 - weighing unit: lb
1 - weighing unit: kg
0 – 3000 (6 lb=3000; 15 lb=3000; 30 lb=3000; 60 lb=3000)
1 – 6000/7500 (6 lb=6000; 15 lb=7500; 30 lb=6000; 60 lb=6000)
2 – 12,000/15,000 (6 lb=12,000; 15 lb=15,000; 30 lb=15,000; 60 lb=12,000)
3 – 30,000 (6 lb=30,000; 15 lb=prohibited; 30 lb=30,000; 60 lb=30,000)
0 - disabled
1 – enable
0 - do not enter the alarm sub-menu
1 - enter the alarm sub-menu
Note: If F4 is set 0, the scale will directly enter F5.
0 - alarm is disabled
1 - alarm is available
0 - weight alarm
1 - quantity alarm
0 - alarm within a range
1 - alarm beyond a range
0 - disabled
1 – activated
0 - disabled
1 - automatic sleep after 5 minutes if the weight on scale is not changed
0 - 0d
1 - 1d
2 - 2d
3 - 3d
4 - 4d
5 - 5d
0 – 20 % FS
1 – 2 % FS
0 - do not save the change
1- save the changes
13
0
2
0
0
0
0
0
0
0
3
0
Page 14

14
ECONOMY COUNTING SCALE
CLEANING AND MAINTAINING YOUR SCALE
WARNING
DISCONNECT ALL POWER TO THIS UNIT
BEFORE INSTALLING, SERVICING,
CLEANING, OR REMOVING THE FUSE.
FAILURE TO DO SO COULD RESULT IN
BODILY HARM AND/OR PROPERTY
DAMAGE.
CLEANING AND MAINTENANCE
− DO NOT allow untrained personnel to operate, clean, inspect, maintain, service, or tamper with this
equipment.
− DO NOT attempt to remove the cover or to perform service/maintenance on the internal parts of the
scale.
− ALWAYS DISCONNECT this equipment from the power source before cleaning or performing
maintenance.
− KEEP the scale clean. Periodically clean the keyboard and cover with a soft clean cloth that has
been dampened with a mild window cleaner or detergent. DO NOT USE ANY TYPE OF INDUSTRIAL
SOLVENT OR CHEMICALS. DO NOT SPRAY CLEANER DIRECTLY ONTO THE UNIT.
− DO NOT put the scale under water. You may use a damp cloth to clean the scale.
TROUBLESHOOTING
If operational difficulties are encountered, first obtain as much information as possible regarding the
problem. Failures and malfunctions can often be traced to simple causes such as loose connections, low
battery power, or improper setup.
Your authorized Xpress representative can perform additional troubleshooting.
Page 15

ECONOMY COUNTING SCALE
15
SERVICING YOUR SCALE
For the following services, please contact your Xpress representative at www.mt.com/xpress.
DISCONNECT ALL POWER TO THIS UNIT
BEFORE INSTALLING, SERVICING, CLEANING,
OR REMOVING THE FUSE. FAILURE TO DO
SO COULD RESULT IN BODILY HARM
AND/OR PROPERTY DAMAGE.
WARNING
BEFORE CONNECTING OR DISCONNECTING ANY INTERNAL
ELECTRONIC COMPONENTS OR INTERCONNECTING WIRING
BETWEEN ELECTRONIC EQUIPMENT, ALWAYS REMOVE POWER AND
WAIT AT LEAST THIRTY (30) SECONDS BEFORE ANY CONNECTIONS
OR DISCONNECTION’S ARE MADE. FAILURE TO OBSERVE THESE
PRECAUTIONS COULD RESULT IN DAMAGE TO OR DESTRUCTION OF
THE EQUIPMENT, OR BODILY HARM.
CAUTION
ENTERING SERVICE MODE
In the Service Mode, calibration and other system parameter settings can be accessed. In order to enter the
Service Mode short the contacts of the switch J3. J3 is located on the upper side of the PCB, where the
keypad cable and the main PCB are connected.
After access of calibration, the Wt window displays S1 0. Then assemble the scale to enter set up as follows.
FUNCTION OF THE KEYS
In the Service Mode, the functions of the keys will be as follows:
Key Function Description
Select
N ext
Previous
Switches between the parameter 1 and 0
Confirms the choice and moves forward
Confirms the choice and steps backward
CONFIGURATIONS
Display Parameter Default
S1 Display mode
0- normal display
1- advanced display
S2 Calibration units
0- lb
1- kg
S3 GEO code setting
0- not setting
1- Resetting
S4 Enter calibration sub-menu
0- no
1- yes
S4.1 Calibration mode select
0- full range calibration
1- linearity calibration
E Save changes
0- exit without saving
1- save changes
0
0
0
0
0
0
Page 16

16
ECONOMY COUNTING SCALE
GRAVITY ADJUSTMENT
This scale has built-in compensation provisions to allow factory calibration, with destination correction
capabilities, to compensate for variances on gravitational forces. If the scale is subjected to a different
gravitational force at its destination location, this can be compensated for electronically by adjusting the geo
value. The GEO value has 32 settings. The GEO value for any world location can be found in the GEO
Value Table in the Appendix of this manual (See page 19.) as long as the geographical coordinates and
elevation above sea level is known.
Select S3=1 and press to enter the GEO sub-menu. The GEO value can be changed as shown below by
pressing .
CALIBRATION
To enter the calibration sub-menu, select S4=1. The scale can be calibrated in two modes, the full range
calibration and the linearity calibration.
Example: 6 lb full range calibration (S4.1=0)
The scale displays SP 6, where 6 means the capacity is 6 lb.
Pressing can select the capacity. Press the key to continue.
The Wt window displays Z 0. Press
scale counts down from 5. Press
to capture zero weight; the
to next step.
The Wt window displays C 6. Put 6lb weight on the scale. Press the
key
to calibrate. The scale counts down from 5.
Display E 0 and press
to switch to E 1. Press to save the
result. The calibration is complete and the scale restarts.
Page 17

ECONOMY COUNTING SCALE
Example: 6 lb linearity calibration (S4.1=1)
17
When the Wt window display S4.1 1, press the key to calibrate
the scale in linearity.
The scale displays SP 6, where 6 means the capacity is 6 lb,
Pressing selects the capacity. Press to continue.
The Wt window displays Z 0. The scale will capture zero weight by
pressing the key . The scale should count down from 5. Press the
key to proceed to the next step.
The Wt window displays L 3. Put 3 lb weight on the scale, press
to calibrate in half range. The scale counts down from 5.
Remove the weight on the scale. The Wt window displays C 6. Put
6 lb weight on the scale. Press
to calibrate in half range. The
scale should count down from 5.
Display E 0. Press to save the result. The calibration is complete
and the scale restarts.
Page 18

18
BATTERY REPLACEMENT
RISK OF EXPLOSION IF BATTERY IS
REPLACED BY AN INCORRECT TYPE OR
CONNECTED IMPROPERLY.
DISPOSE OF USED BATTERIES ACCORDING
TO LOCAL LAWS AND REGULATIONS.
Please replace the battery follow below steps:
1. Switch off the scale.
2. Open and remove the plastic battery cover on
the rear of the XTCII.
CAUTION
ECONOMY COUNTING SCALE
3. Loosen the four M4 x 8 screws and remove
the protective cover.
4 screws
M4 x 8
Page 19

ECONOMY COUNTING SCALE
4. Carefully remove the power harness from the
battery, replace a new battery and connect
the terminal to the plug correctly.
RISK OF EXPLOSION IF BATTERY IS REPLACED WITH WRONG TYPE OR
CONNECTED IMPROPERLY. CONNECT RED WIRE TO POSITIVE (+) BATTERY
TERMINAL AND BLACK WIRE TO NEGATIVE (-) BATTERY TERMINAL!
5. Reinstall the protective cover and the plastic
battery cover.
6. Switch on the scale and test for proper
operation.
CAUTION
19
Page 20

20
ECONOMY COUNTING SCALE
APPENDIX
ERROR MESSAGES
The scale will display an error message if a problem or an incorrect keyboard entry is sensed. The error
codes are:
Display Possible Cause Troubleshooting
The Wt window displays E11 RAM error
The Wt window displays E16 ROM error
The Wt window displays E18/E3 EPROM checksum error
The Wt window displays E7 A/D convert error
1. Restart the scale.
2. Recalibrate the scale.
3. Change the main PCB.
1. Restart the scale.
2. Recalibrate the scale.
3. Change the main PCB.
1. Restart the scale.
2. Recalibrate the scale.
3. Change the main PCB.
Change the main PCB.
The Wt window displays E35 Less weight when calibration
The Wt window displays “nnnnn” Over capacity
The Wt window displays “uuuuu” Under capacity
The QTY window displays
“nnnnnn”
------ Cannot capture zero
Quantity is over 999,999
Recalibrate the scale with a specified weight.
Take away some weight
1. Put the scale pan on.
2. Press the key
Clear the accumulator.
1. Restart the scale with no weight.
2. Recalibrate the scale.
3. Change the load cell or main PCB.
to zero scale.
Page 21

ECONOMY COUNTING SCALE
SPECIFICATIONS
21
Model
XTCII-
1003
XTCII-
1103
XTCII-
2003
XTCII-
2103
XTCII-
3003
XTCII-
3103
XTCII-
4003
XTCII-
4103
Maximum capacity (lb) 6 15 30 60
Verified resolution (lb) 0.002 0.005 0.01 0.02
Display resolution (lb)
Recommend minimum
APW (lb)
0.0002, 0.0005,
0.001, 0.002
0.001, 0.002,
0.005
0.001, 0.002,
0.005, 0.01
0.002, 0.005,
0.01, 0.02
0.0002 0.0004 0.001 0.002
Power supply AC AC/DC AC AC/DC AC AC/DC AC AC/DC
Shipment weight (lb) 11 13.2 11 13.2 11 13.2 11 13.2
Display Red LED
Temperature range
Relative humidity
5°C - 35°C
< 90%
Pan size 13.5” x 9.5” (L x W)
Scale size 13.6” x 14” x 4.5” (L x W x H)
Package size 18.3” x 16.5” x 8.7” (L x W x H)
Power supply DC uses 6V, 5Ah rechargeable battery.
Specifications are subject to change without notice.
Page 22

22
ECONOMY COUNTING SCALE
GEO VALUE TABLE
Use the following geo codes if you relocate your scale to a site other than the original location where it was
calibrated.
Northern
and
Southern
0
325
325
650
650
975
latitude in
degrees and
minutes
0° 0′ — 5° 46′ 5 4 4 3 3 2 2 1 1 0 0
5° 46′ — 9° 52′ 5 5 4 4 3 3 2 2 1 1 0
9° 52′ — 12° 44′ 6 5 5 4 4 3 3 2 2 1 1
12° 44′ — 15° 6′ 6 6 5 5 4 4 3 3 2 2 1
15° 6′ — 17° 10′ 7 6 6 5 5 4 4 3 3 2 2
17° 10′ — 19° 2′ 7 7 6 6 5 5 4 4 3 3 2
19° 2′ — 20° 45′ 8 7 7 6 6 5 5 4 4 3 3
20° 45′ — 22° 22′ 8 8 7 7 6 6 5 5 4 4 3
22° 22′ — 23° 54′ 9 8 8 7 7 6 6 5 5 4 4
23° 54′ — 25° 21′ 9 9 8 8 7 7 6 6 5 5 4
25° 21′ — 26° 45′ 10 9 9 8 8 7 7 6 6 5 5
26° 45′ — 28° 6′ 10 10 9 9 8 8 7 7 6 6 5
28° 6′ — 29° 25′ 11 10 10 9 9 8 8 7 7 6 6
29° 25′ — 30° 41′ 11 11 10 10 9 9 8 8 7 7 6
30° 41′ — 31° 56′ 12 11 11 10 10 9 9 8 8 7 7
31° 56′ — 33° 9′ 12 12 11 11 10 10 9 9 8 8 7
33° 9′ — 34° 21′ 13 12 12 11 11 10 10 9 9 8 8
34° 21′ — 35° 31′ 13 13 12 12 11 11 10 10 9 9 8
35° 31′ — 36° 41′ 14 13 13 12 12 11 11 10 10 9 9
36° 41′ — 37° 50′ 14 14 13 13 12 12 11 11 10 10 9
37° 50′ — 38° 58′ 15 14 14 13 13 12 12 11 11 10 10
38° 58′ — 40° 5′ 15 15 14 14 13 13 12 12 11 11 10
40° 5′ — 41° 12′ 16 15 15 14 14 13 13 12 12 11 11
41° 12′ — 42° 19′ 16 16 15 15 14 14 13 13 12 12 11
42° 19′ — 43° 26′ 17 16 16 15 15 14 14 13 13 12 12
43° 26′ — 44° 32′ 17 17 16 16 15 15 14 14 13 13 12
44° 32′ — 45° 38′ 18 17 17 16 16 15 15 14 14 13 13
45° 38′ — 46° 45′ 18 18 17 17 16 16 15 15 14 14 13
46° 45′ — 47° 51′ 19 18 18 17 17 16 16 15 15 14 14
47° 51′ — 48° 58′ 19 19 18 18 17 17 16 16 15 15 14
48° 58′ — 50° 6′ 20 19 19 18 18 17 17 16 16 15 15
50° 6′ — 51° 13′ 20 20 19 19 18 18 17 17 16 16 15
51° 13′ — 52° 22′ 21 20 20 19 19 18 18 17 17 16 16
52° 22′ — 53° 31′ 21 21 20 20 19 19 18 18 17 17 16
53° 31′ — 54° 41′ 22 21 21 20 20 19 19 18 18 17 17
54° 41′ — 55° 52′ 22 22 21 21 20 20 19 19 18 18 17
55° 52′ — 57° 4′ 23 22 22 21 21 20 20 19 19 18 18
57° 4′ — 58° 17′ 23 23 22 22 21 21 20 20 19 19 18
58° 17′ — 59° 32′ 24 23 23 22 22 21 21 20 20 19 19
59° 32′ — 60° 49′ 24 24 23 23 22 22 21 21 20 20 19
60° 49′ — 62° 9′ 25 24 24 23 23 22 22 21 21 20 20
62° 9′ — 63° 30′ 25 25 24 24 23 23 22 22 21 21 20
63° 30′ — 64° 55′ 26 25 25 24 24 23 23 22 22 21 21
64° 55′ — 66° 24′ 26 26 25 25 24 24 23 23 22 22 21
66° 24′ — 67° 57′ 27 26 26 25 25 24 24 23 23 22 22
67° 57′ — 69° 35′ 27 27 26 26 25 25 24 24 23 23 22
69° 35′ — 71° 21′ 28 27 27 26 26 25 25 24 24 23 23
71° 21′ — 73° 16′ 28 28 27 27 26 26 25 25 24 24 23
73° 16′ — 75° 24′ 29 28 28 27 27 26 26 25 25 24 24
75° 24′ — 77° 52′ 29 29 28 28 27 27 26 26 25 25 24
77° 52′ — 80° 56′ 30 29 29 28 28 27 27 26 26 25 25
80° 56′ — 85° 45′ 30 30 29 29 28 28 27 27 26 26 25
85° 45′ — 90° 00′ 31 30 30 29 29 28 28 27 27 26 26
0
1060
1060
2130
2130
3200
Height above sea-level in meters
975
1300
1300
1625
1625
1950
Height above sea-level in feet
3200
4260
4260
5330
5330
6400
1950
2275
6400
7460
2275
2600
2600
2925
2925
3250
3250
3575
7460
8530
8530
9600
9600
10,660
10,660
11,730
Page 23

ECONOMY COUNTING SCALE
PHYSICAL DIMENSIONS
13.5”
13.6”
23
4.5”
9.5”
14”
Page 24

24
Notes
ECONOMY COUNTING SCALE
Page 25

ECONOMY COUNTING SCALE
Notes
25
Page 26

Xpress
Mettler-Toledo, Inc.
60 Collegeview
Westerville, OH 43081
5/2004
MTX04-OM015.1E
ECONOMY COUNTING SCALE www.mt.com/xpress
Page 27

ECONOMY COUNTING SCALE QUICK START GUIDE
Models XTCII
DISPLAY
KEYPAD
Key Name Function
Decimal Enters a decimal point/Toggles alarm beep
Numeric Data entry (0-9)
Sample Initiates sampling
APW Initiates Average Piece Weight (APW) entry
Zero Zeroes the scale
Tare Subtracts tare value and switches from gross to net mode
Accumulation Adds the accumulator counts or recalls accumulation
Recall Recalls the accumulated quantity and times
Alarm Sets the range for quantity or weight alarms
Clear Clears data from the display
Enter/Setup Confirms an operation or enters Setup Mode
thru
CURSORS (LED)
Key Description
Z
Z
Z
Z
Z
Z
Z
Stab
0
Net
M
Lo
Hi
Is lit when the weighing data is stable
Is lit when the scale is at gross zero
Is lit when the scale displays a net weight
Is lit when the battery is being charged
Is lit when the value in the accumulator is
Is lit when weight/quantity is less than the lower limit of alarm range
Is lit when weight/quantity exceeds the upper limit of alarm range
not
zero
ECONOMY COUNTING SCALE www.mt.com/xpress MTX04-QS016.1E
Page 28

ECONOMY COUNTING SCALE www.mt.com/xpress MTX04-QS016.1E
ECONOMY COUNTING SCALE
QUICK START GUIDE
ZERO
→
0
←
TARE
→
T
←
→
T
←
SAMPLING (20 PIECES)
Add the items
to be counted
SPL
2 0
INPUT AN KNOWN AVERAGE PIECE WEIGHT (APW e.g. 0.002 lb)
Add the items
to be counted
APW
2
Page 29

ECONOMY COUNTING SCALE INSTALLATION INSTRUCTIONS
Models XTCII
UNPACKING
Thank you for purchasing an MT Xpress product. Please inspect the package immediately upon receipt. If
the box is damaged, check for internal damage and file a freight claim with the carrier if necessary.
If the container is undamaged, open the box, remove the scale
and place it on a solid, flat surface.
Please keep the packing material and shipping insert in case
you need to return the scale to an Xpress representative.
Package contents for all Xpress Standard Compact Scales include:
Product
− XTCII Counting Scale
− Scale Pan
− Adapter 9V / 500mA
Documents
− Quick Start Guide
− Installation Instructions
CD-ROM
− Operation & Service Manual
− Rubber gasket (4 pieces, only
for 6 lb and 15 lb scale)
− Lead seal wire and lead
ASSEMBLY
1. Place the scale on a level surface.
2. Remove protective screws (only for 6 lb and 15 lb scale)
3. Mount four rubber gaskets onto each spider foot (only for
6 lb and 15 lb scale)
ECONOMY COUNTING SCALE www.mt.com/xpress MTX04-II014.1E
Page 30

ECONOMY COUNTING SCALE
4. Put the platter on the spider (aluminum plate). Ensure that
the platter is properly aligned.
5. Connect the scale to the power outlet using the included
adapter.
INSTALLATION INSTRUCTIONS
6. Level the scale by adjusting the four rubber feet until the
Proper alignment Improper alignment
leveling bubble is centered in the level indicator.
7. Turn on the scale
8. The scale should be running for about fifteen (15) minutes
before operation.
The windows display from 0-9, the
software version number and ‘----‘.
The cursors of stab and 0 are on.
For detailed product information, please consult the Operation & Service Manual provided on the CD-ROM.
CUSTOMER SERVICE
We at MT Xpress want to make sure you received the product you expected. It is important to us that you
are satisfied with your purchase. If there is anything we can help you with, or if you are not satisfied with
either your product or the services received from the MT Xpress representative, let us know:
24/7 Information and Support:
xpress@mt.com
8 AM to 8 PM EST Toll Free: 1-866-MTXPRESS
Xpress
Mettler-Toledo, Inc.
60 Collegeview
Westerville, OH 43081
ECONOMY COUNTING SCALE www.mt.com/xpress MTX04-II014.1E
www.mt.com/xpress
 Loading...