

Mettler Toledo XBL-XID, Xpress XBL-XID Service Manual
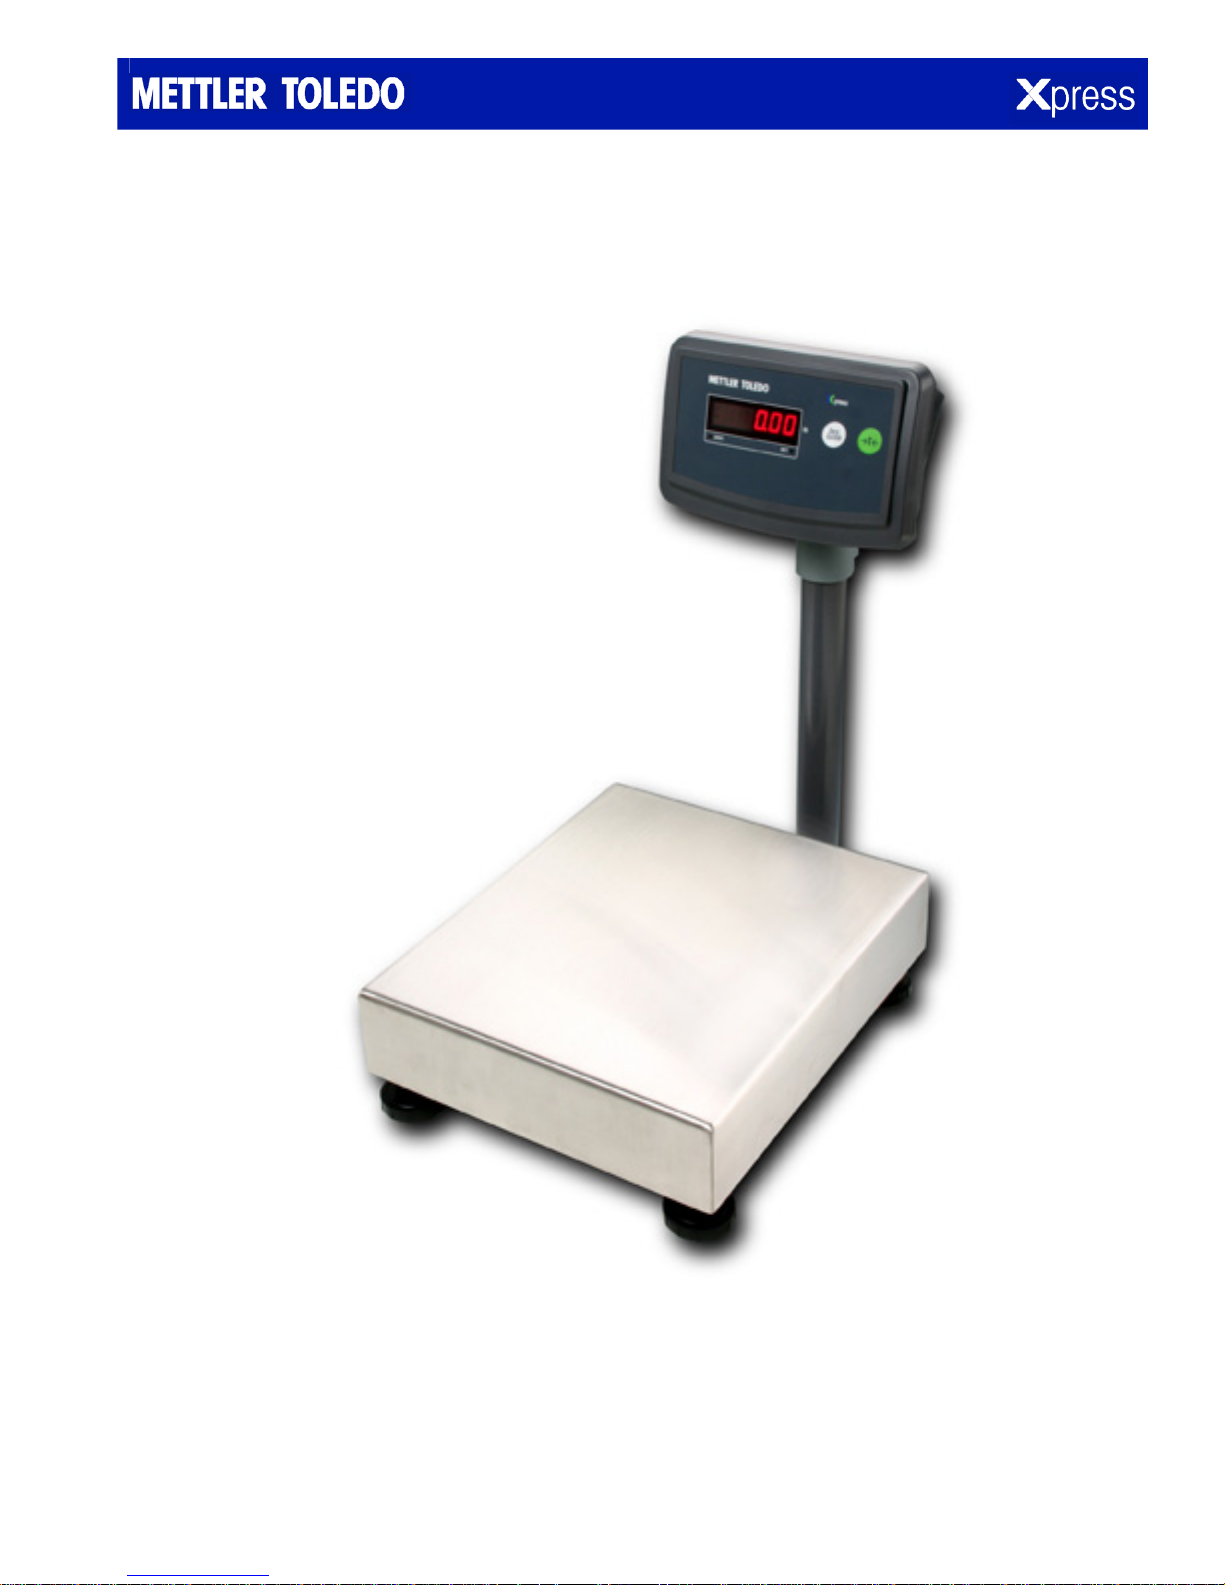
ECONOMY BENCH SCALE OPERATION & SERVICE MANUAL
Models XBL-XID
ECONOMY BENCH SCALE www.mt.com/xpress

2
ECONOMY BENCH SCALE
ABOUT THIS MANUAL AND MT XPRESS
Thank you for purchasing an MT Xpress product.
All of our equipment is assembled and packed with great care. If you should find any incorrect item, please
contact your Xpress dealer immediately.
MT Xpress products are Weights & Measures approved precision weighing instruments. However, you may
want to obtain official certification through your supplier or local Weights & Measures office.
This MT Xpress product was developed, produced, and tested in a METTLER TOLEDO facility that has been
audited and registered according to international ISO 9001 quality standards and ISO 14000 environment
control program. Properly used and maintained, this product will provide years of accurate weighing.
Handle it as you would any piece of fine electronic equipment.
Please READ this manual BEFORE operating or servicing this equipment. Follow the instructions carefully
and save this manual for future reference.
We at MT Xpress want to make sure you received the product you expected. It is important to us that you
are satisfied with your purchase. If there is anything we can help you with, or if you are not satisfied with
either your product or the services received from the Xpress representative, let us know.
How can you reach us?
XPRESS CUSTOMER CARE CENTER, USA
24/7 Information and Support: www.mt.com/xpress
xpress@mt.com
AM to 8 PM EST Toll Free: 1-866-MTXPRESS
8
Xpress
Mettler-Toledo, Inc.
60 Collegeview
Westerville, OH 43081

ECONOMY BENCH SCALE
FCC Approval
This device complies with part 15 of the FCC Rules. Operation is subject to the following two
conditions: (1) this device may not cause harmful interference, and (2) this device must accept
any interference received, including interference that may cause undesired operation.
3

4
ECONOMY BENCH SCALE
CONTENTS
PREPARING THE SCALE FOR USE ....................................................................................................
UNPACKING AND ASSEMBLY................................................................................................ 5
POWERING UP THE INDICATOR ............................................................................................ 6
YOUR XPRESS SCALE AT A GLANCE ............................................................................................... 7
DISPLAY ............................................................................................................................ 7
KEYPAD............................................................................................................................. 7
CURSORS (LED) ................................................................................................................. 7
OPERATING YOUR SCALE ...............................................................................................................
STRAIGHT WEIGHING .......................................................................................................... 8
TARE FUNCTION ................................................................................................................. 8
POWERING UP AND SELF-CHECKING.................................................................................... 8
SPECIAL MODES – SETUP MODE................................................................................................... 9
ACCESSING SETUP MODE .................................................................................................... 9
CLEANING & MAINTAINING YOUR SCALE...........................................................................................
CLEANING AND REGULAR MAINTENANCE............................................................................. 10
BATTERY CHECK............................................................................................................... 10
BATTERY REPLACEMENT.................................................................................................... 11
SERVICING YOUR SCALE ................................................................................................................
ACCESSING THE SERVICE MODE......................................................................................... 12
REMOVING OLD LOAD CELLS ............................................................................................. 14
INSTALLING NEW LOAD CELLS ........................................................................................... 14
SHIFT TEST AND ADJUSTMENT ........................................................................................... 16
SETUP SCALE CAPACITY .................................................................................................... 16
DEFLECTION TEST............................................................................................................. 16
APPENDIX....................................................................................................................................
TROUBLESHOOTING.......................................................................................................... 17
ERROR MESSAGES............................................................................................................ 17
CORRECTIVE STEPS .......................................................................................................... 17
MODEL SPECIFICATIONS.................................................................................................... 18
TECHNICAL DATA.............................................................................................................. 18
WIRING ........................................................................................................................... 18
GEO VALUE TABLE ............................................................................................................ 19
PHYSICAL DIMENSIONS ..................................................................................................... 20

ECONOMY BENCH SCALE
PREPARING THE SCALE FOR USE
UNPACKING AND ASSEMBLY
Thank you for purchasing an MT Xpress product. Please inspect the package immediately upon receipt. If
the box is damaged, check for internal damage and file a freight claim with the carrier if necessary. If the
container is undamaged, open the box, remove the scale and place it on a solid, flat surface. Please keep
the packing material and shipping insert in case you need to return the scale to an MT Xpress
representative.
Package contents for all MT Xpress Economy Bench Scale units include:
Product
− Xpress Economy Bench scale
− Xpress Column indicator
Documents
− Quick Start Guide
− Installation Instructions
CD-ROM
− Operation & Service Manual
− AC-DC power adapter
− Accessory bag (including 4 socket
head screws, 4 flat washers, 4
spring washers, 1 cable clamp, 1
cable protective baffle, 1 Allen key, 1
seal screws, 1 lead seal wire, 1
lead, “kg” sticker)
5
1. Open the box and take out the scale. Remove the packing
material from each side of the scale. Set the unit on a sturdy
workplace.
2. Attach the column bracket beneath the bottom scale frame by
tightening the four socket head screws.
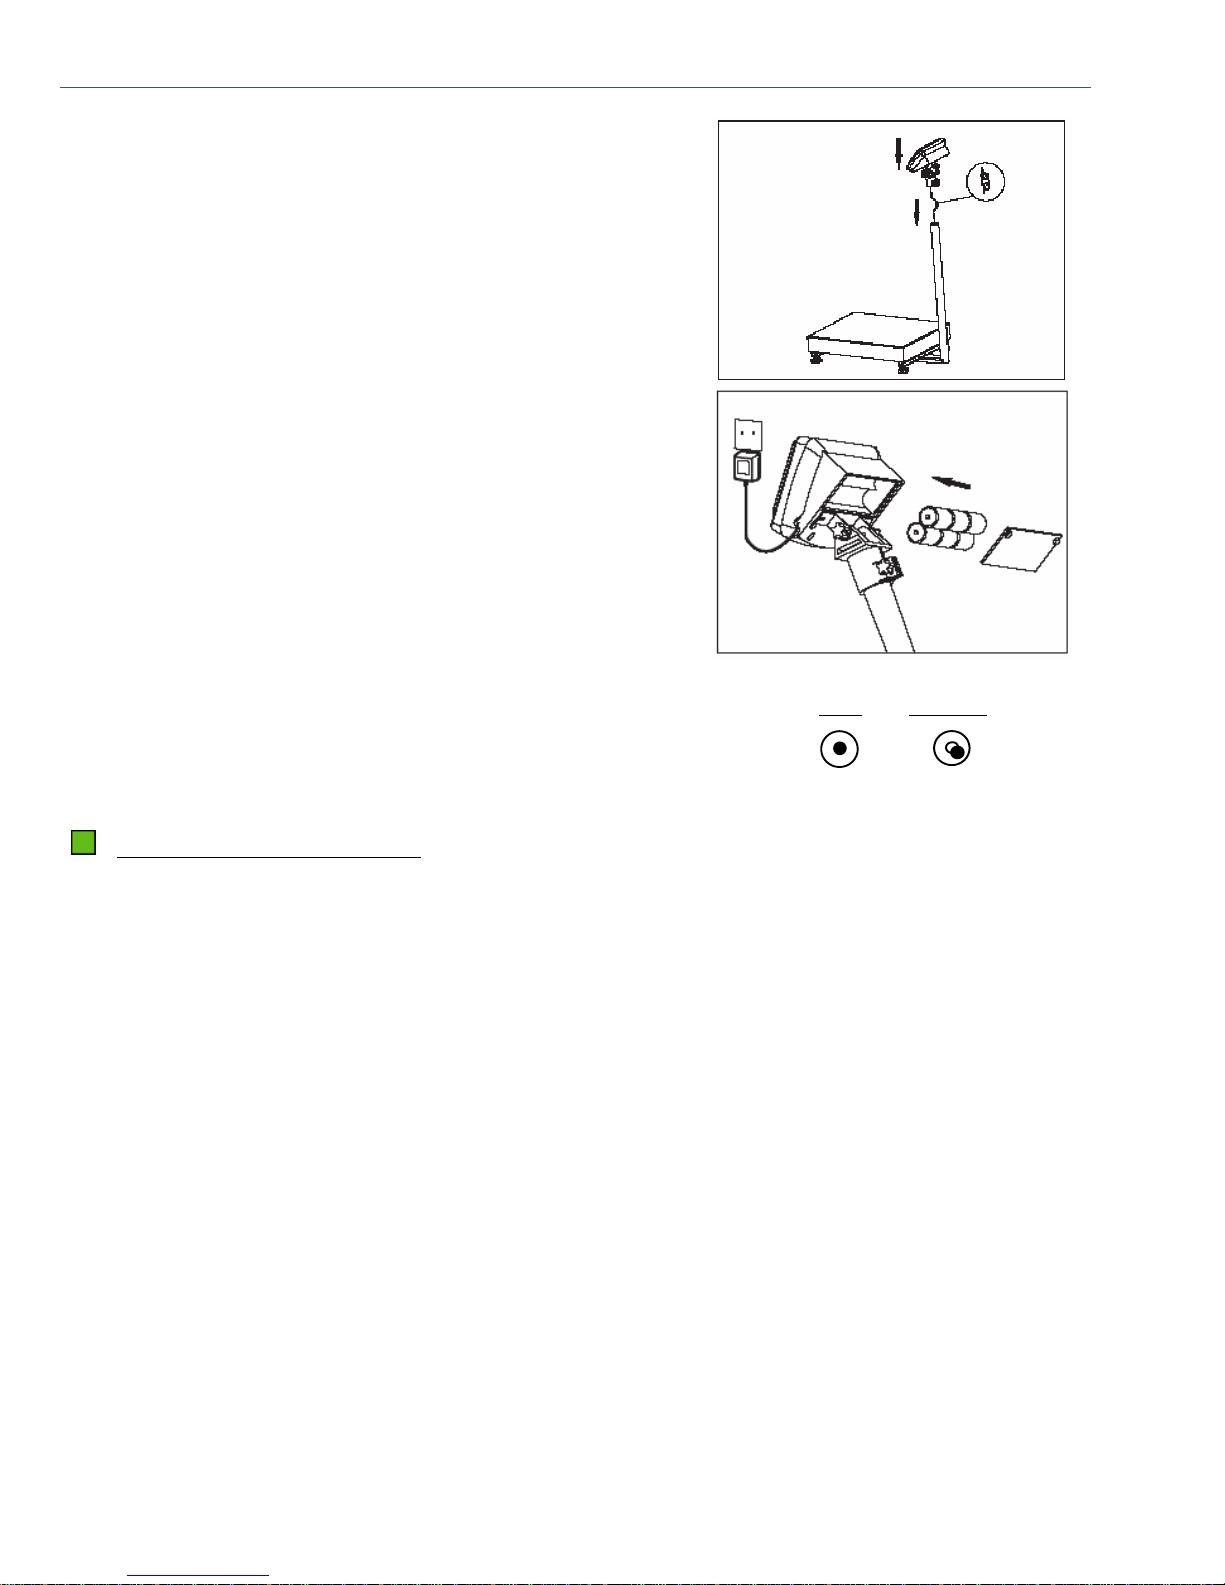
6
3. Coil the excess load cell cable and insert it into the column. A
small length of tape applied to the ends of the coils allows
the cable to slide into the column easier Mount the indicator
onto the column. Adjust the indicator to the proper angle and
fasten the bolt.
ECONOMY BENCH SCALE
4. Apply power to the scale using adapter or six “C” cell
batteries.
5. Level the scale by turning the adjustable feet. It is leveled
correctly when the bubble indicator is in the center of the
circle.
level not level
POWERING UP THE INDICATOR
Plug in the indicator to an electrical outlet. Turn the on/off button gently. The indicator will automatically run
a self-test when powered up.
− All segments of the display will light. Operator should check that the display is lit.
− Detect the memory of the indicator. If an error message is displayed during the powering up process,
refer to the Error Code table in the Appendix.
ECONOMY BENCH SCALE
7
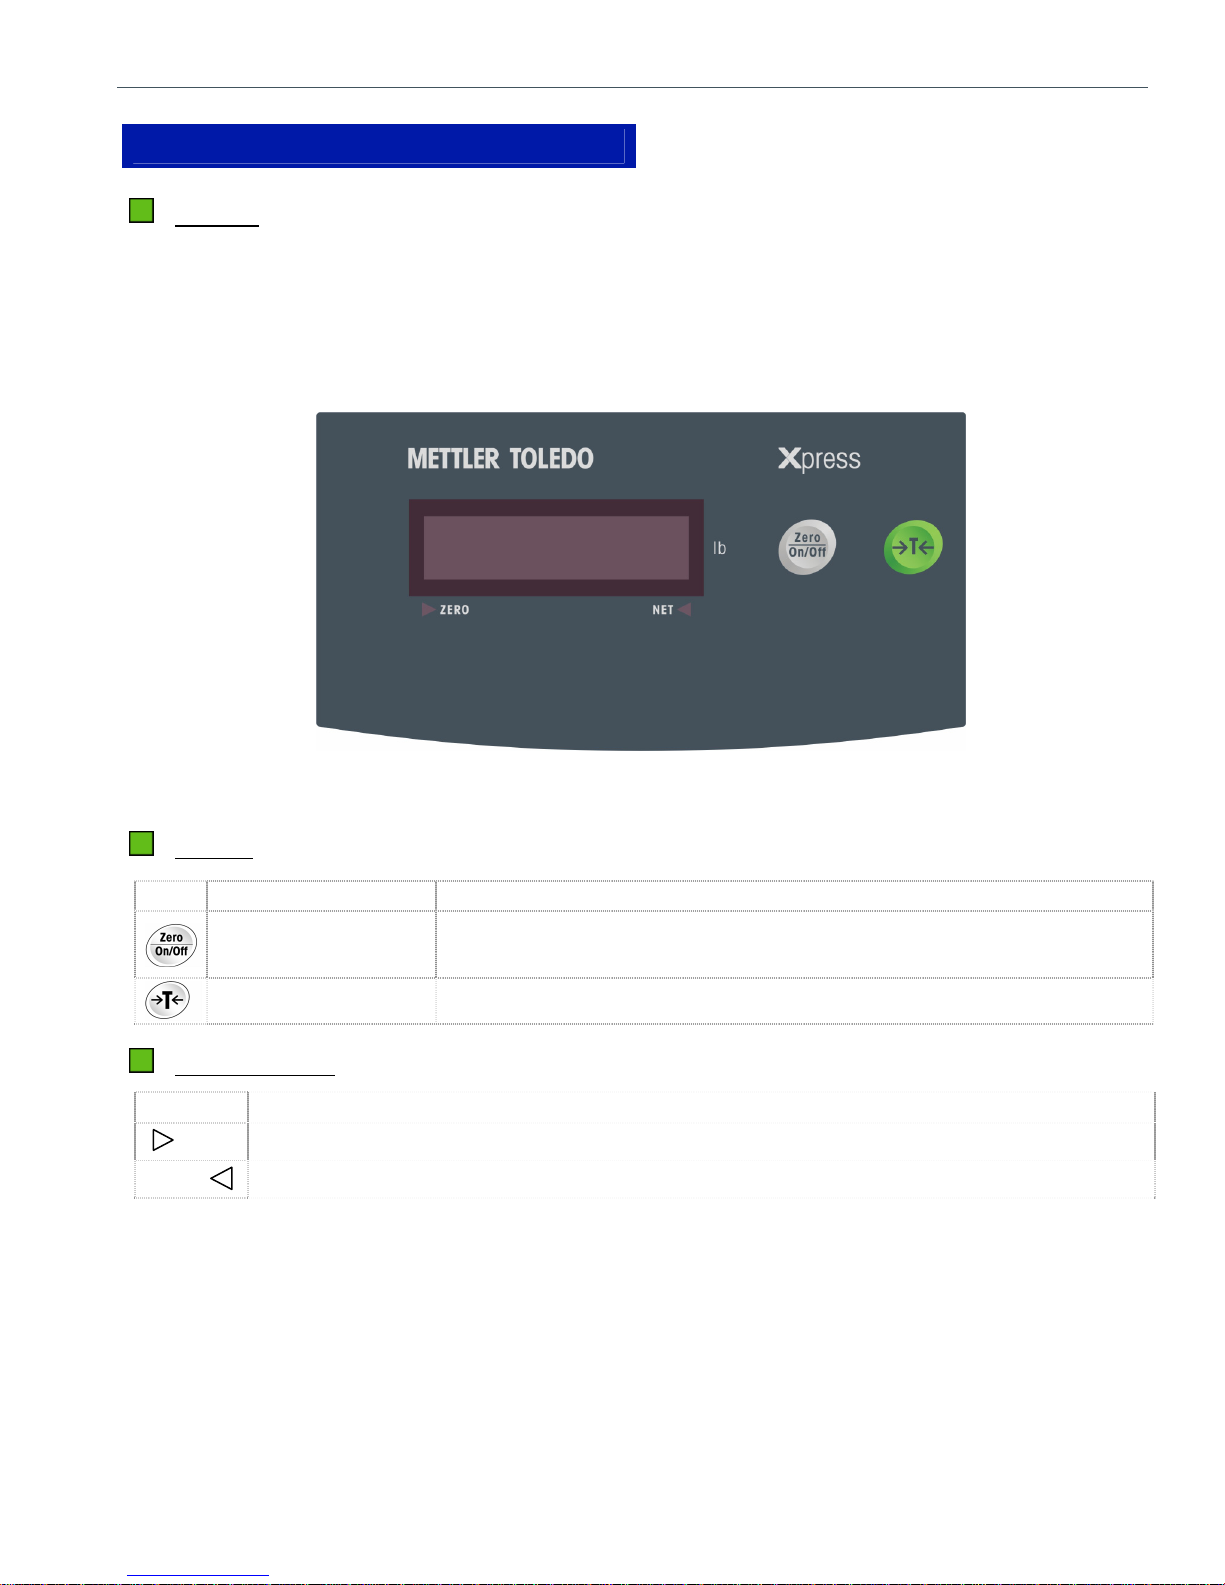
YOUR XPRESS SCALE AT A GLANCE
DISPLAY
The display of the indicator is made up of six red LED, 0.56" digits. Five of the digits are for weight and the
sixth digit is for displaying a negative/minus sign, which indicates motion. Two cursors indicate gross zero
and net weight separately. This display is used for showing weighing data, prompting the operator, and
coding errors. The indicator has two buttons: "Zero/ON-OFF" and "Tare".
KEYPAD
Key Name Function
Zero – On/Off Key On/Off: Turn power on andoff
Zero: Zeroes the scale
Tare Key Tare: Tares the scale and clears the tare value
CURSORS (LED)
Cursor Description
ZERO
NET
Illuminates when weight is gross zero (0)
Illuminates when weight is in net weight.
 Loading...